
Boston - Trampoline AXI - Free user manual and instructions
Find the device manual for free Boston AXI in PDF.

| Product type | Garden trampoline with enclosure net |
| Brand | AXI |
| Model | Boston |
| Usage | Outdoor domestic |
| Maximum user weight | 100 kg |
| Number of simultaneous users | 1 |
| Approximate diameter | 3.66 m (12 feet) |
| Recommended jumping height | Low at start |
| Frame material | Steel |
| Spring type | Coil springs |
| Safety net | Included, replace annually |
| Jumping surface | Polypropylene mat |
| Protective padding | Yes, covers springs |
| Recommended age | From 36 months under adult supervision |
| Assembly | By an adult, follow instructions |
| Maintenance | Check net, springs, bolts before each use; replace worn parts |
| Weather conditions | Do not use in strong wind; store in winter |
| Warranty | 2 years on frame, 1 year on springs, mat, net, and padding |
| Repairability | Spare parts available from manufacturer |
| Cleaning | Mild soapy water, air dry |
Frequently Asked Questions - Boston AXI
User questions about Boston AXI
0 question about this device. Answer the ones you know or ask your own.
Ask a new question about this device
Download the instructions for your Trampoline in PDF format for free! Find your manual Boston - AXI and take your electronic device back in hand. On this page are published all the documents necessary for the use of your device. Boston by AXI.
USER MANUAL Boston AXI
natural_image
Technical line drawing of a circular mechanical device with mesh panel and central pressure gauge (no text or symbols)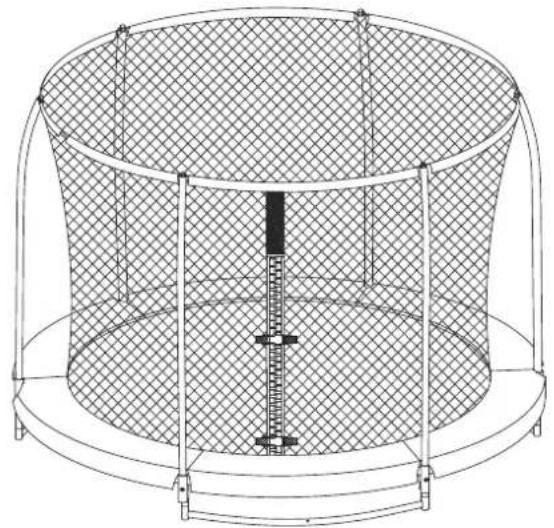
natural_image
Technical line drawing of a cylindrical scientific apparatus with mesh grid and central scale (no text or symbols)C
€
WARNING
Instruction Manual
Gebrauchsanweisung
Gebruikshandleiding
Mode D'emploi
Manual De Usuario
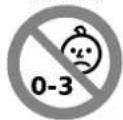
Small parts. Not suitable for children under 36 months.
THE PRODUCT IS TO BE ASSEMBLED BY AN ADULT.
Potential hazard description, e.g. In unassembled state contain potentially hazardous sharp points, so please keep out of baby's reach.
Only for domestic use. Retain for future reference.
- YOU MUST THOROUGHLY READ AND UNDERSTAND THE INSTRUCTIONS IN THIS MANUAL BEFORE ASSEMBLING AND USING THIS TRAMPOLINE.
• SAVE THIS MANUAL FOR FUTURE REFERENCE.
• MAXIMUM WEIGHT OF USER MUST NOT EXCEED 220LB (100KG).
• DO NOT ALLOW MORE THAN ONE PERSON ON THE TRAMPOLINE AT A TIME.
• DO NOT ALLOW YOUNG CHILDREN TO USE UNLESS SUPERVISED BY AN ADULT.
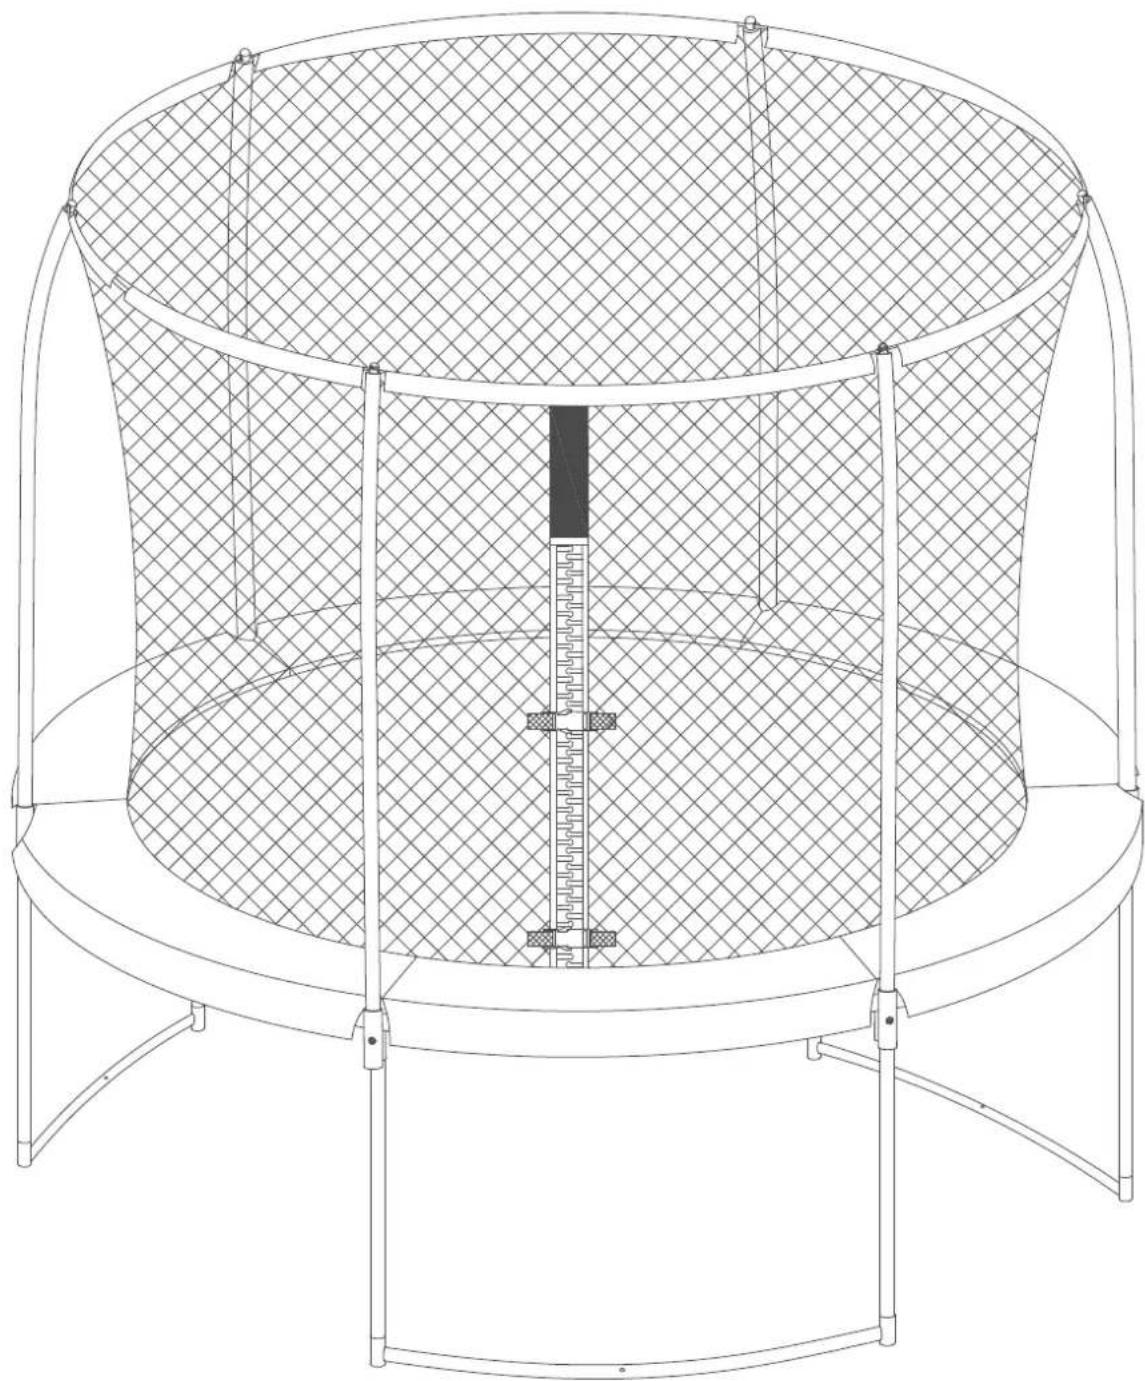
• THE ENCLOSURE FORMS PART OF THE STRUCTURAL INTEGRITY OF THE TRAMPOLINE. - THE TRAMPOLINE MUST NOT BE USED WITHOUT THE ENCLOSURE ERECTED.
• FOR OUTDOOR DOMESTIC USE ONLY
WARNING! MAX 100 KG
TRAMPOLINE ASSEMBLY AND MOVING
Select a location where you want the trampoline permanently prior to assembly.

MOVING THE TRAMPOLINE
If you need to move the trampoline, two or three people are required. When moving, lift the trampoline slightly off the ground and keep it horizontal to the ground. For any type of other movement, you should disassemble the trampoline.

We strongly recommend that you do not use the trampoline without an enclosure. If you find the trampoline is being used without an enclosure, stop the user and immediately purchase and install the enclosure. Lateral clearance is essential. Place the trampoline away from walls, structures, fences and other play areas. Maintain a clear space on all sides of the trampoline.

Do not allow children to play or jump on the trampoline when it's windy or during tornado season. Wind can lift up this trampoline and cause serious injury or death.
INTRODUCTION
Before you begin using this trampoline, be sure to carefully read all the information provided to you in this manual. Just like any other type of physical recreational activity, participants can be injured. To reduce the risk of injury, be sure to follow appropriate safety rules and tips.
- Misuse and abuse of this trampoline is dangerous and can cause serious injury!
- Trampolines, being rebounding devices, propel the performer to unaccustomed heights and into a variety of body movements.
• Always inspect the trampoline before each use for worn mats, loose or missing parts. - Proper assembly, care and maintenance of product, safety tips, warnings, and proper techniques in jumping and bouncing are all included in this manual. All users and supervisors must read and familiarize themselves with these instructions. Anybody who chooses to use this trampoline must be aware of their own limitations in regards to performing various jumps and bounces with this trampoline.
natural_image
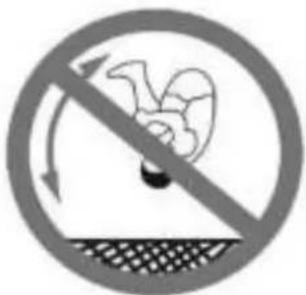
Prohibition sign with a flower inside a circle and diagonal line crossing, no text or symbols present.NO SOMERSAULTS OR FLIPS – PARALYSIS OR DEATH can result if you land on your head or neck!
natural_image
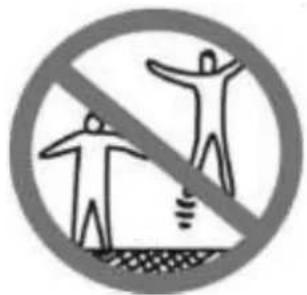
Prohibition sign showing two silhouetted figures without any text or symbolsNo more than ONE user at a time (maximum weight - 100 kg).
FOR Onground Trampoline:
ALWAYS CONSULT A PHYSICIAN BEFORE PERFORMING ANY KIND OF PHYSICAL ACTIVITY
- Warning. Not suitable for children under 36 months. Falling hazard. - Warning. The trampoline must be assembled by an adult in accordance with the assembly instructions and checked before the first use.
- Warning. Maximum weight of the user shall NOT exceed 100kg for this product.
- Warning. Only one user. Collision hazard.
- Adult supervision required.
- Warning. Only for domestic use.
- Warning, Only for outdoor use.
- Warning. No somersaults
- Warning. Always close the net opening before jumping.
- Warning. Jump without shoes.
- Warning. Do not use the mat when it is wet.
- Warning. Empty pockets and hands before jumping.
- Warning, Always jump in the middle of the mat.
- Warning. Do not eat while jumping.
- Warning. Do not exit by a jump.
- Warning. Limit the time of continuous usage (make regular stops).
- Warning. Do not use in strong wind conditions and secure the trampoline.
- Warning. The trampoline is not intended to be buried into the ground.
- Warning. The net should be replaced every year.
- Size of the free spaces around the trampoline: 2x2x8 meter
- Always check your trampoline before use. Paying specific attention to all the bolts, jump mat and pads position.
- Don't use if any parts are missing or look like they show wear and tear.
- Stop exercising immediately should you feel unwell or if you feel dizzy.
- The safety enclosure is there to prevent the user falling off the trampoline, and is not to be jumped into unnecessarily.
FOR Inground Trampoline:
WARNING!
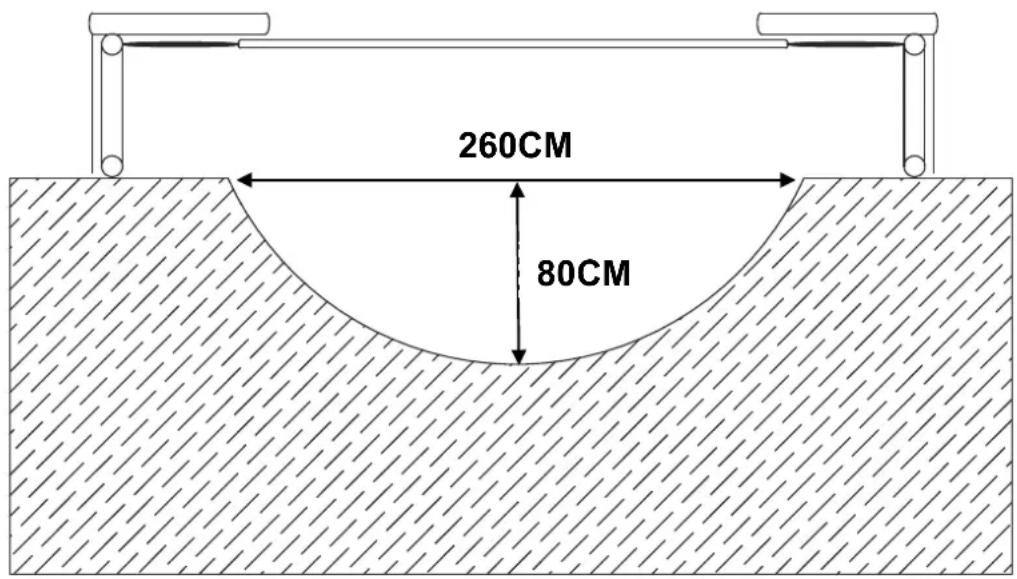
• Installation of the trampoline requires a hole to be dug in the ground.
- If you are not sure about the ground work, please contact a professional.
- The hole should not accumulate water (so drainage is necessary) and it should be possible to clean during maintenance.
- The trampoline is intended to be buried into the ground.
JUMP INSTRUCTIONS
- Refer to and comply with the exercise instructions and always absolutely retain a proper biomechanical position when using the appliance.
- Please be aware of the health risks that incorrect or intensive training may cause.
- Basic principles and recommendations for use Learn the basic body positions and jumps before attempting more advanced techniques. You can vary trampoline routine by performing the basic jumps in different series or combinations, and with or without vertical jumps between tricks.
- To stop bouncing, bend your knees as your feet land on the trampoline's jumping surface.
- Learn this technique first before attempting any others.
- Avoid bouncing too high.
- Stick to small bounces until you can jump and land in the middle of the trampoline under perfect control.
• Control is more important than height. - Never look away from the trampoline. This will help you control your bouncing.
- Avoid bouncing on the trampoline when tired.
- Keep your sessions short
- Only use the trampoline if you are in excellent physical condition.
- For information on learning additional techniques and tricks, contact a professional trampoline instructor.
- Place the trampoline on a level surface at least 2 m from any structure or obstruction such as a fence, garage, house, overhanging branches, laundry lines or electrical wires.
- Trampolines shall neither be installed over concrete, asphalt or any other hard surface nor at proximity of other conflicting installations (e.g. paddling pools, swings, slides, climbing frames).
ASSEMBLY INSTRUCTIONS & INSTRUCTIONS FOR USE
- To ensure that the product is safe, heed the assembly and adjustment instructions, and the instructions for use. Please read carefully and retain for future reference.
- Assembly instructions
This product requires assembly, please be sure to carefully follow the steps set out in these instructions (parts lists and tools supplied, assembly procedure etc.).
IMPORTANT INSTRUCTIONS FOR ENCLOSURE NETTING AND MAT
1. Maintenance of Trampoline Enclosure Net, Mat and Pad
Enclosure nets and padding are prone to wear and tear like tires on a car. Gradual deterioration of the material will occur; the speed of which will depend on the level of exposure to UV rays, airborne pollution and outdoor weather conditions such as rain and wind.
The net and padding needs to be properly maintained and checked by following the Maintenance Schedule set out in these instructions. When the material shows any signs of weakness, you must stop using the trampoline immediately, properly store the trampoline and restrict access by users until a new replacement net or padding is properly installed.
2. Maintenance Requirement for Enclosure Net
Your trampoline enclosure netting is manufactured with UV resistant material. Despite this the netting is exposed to the outdoor elements including sunlight, wind, rain and wildlife. The net surrounding the trampoline must be checked prior to each use. This includes, but is not limited to inspecting the net for cracks, excess wear, brittleness, and stretching. Also inspect all connections and the entire enclosure for overall integrity. The net must be immediately replaced if it shows any signs of wear, damage, stretching, cracking, looseness, brittleness or other losses in integrity. The following Maintenance Schedule must be followed:
| 1 to 3 Months | 3 to 6 Months | 6 to 12 Months |
| Inspect the enclosure (net, net hanger, and straps) prior to every use. | Thorough inspection for UV damage and prior to every use for net, net hanger and straps. | Thorough inspection before every use on net, net hanger, straps, zippers, ties and strings. Replace after 12 months or earlier if necessary. |
IT IS RECOMMENDED THAT THE NET BE REPLACED ON A YEARLY BASIS UNDER NORMAL USE, EVEN IF IT DOES NOT SHOW ANY VISIBLE SIGNS OF DAMAGE.
How to Inspect the Trampoline Net for Proper Use
Always check the enclosure netting for signs of UV damage, deterioration, brittleness, cracking, and tearing every time before using the trampoline and enclosure.
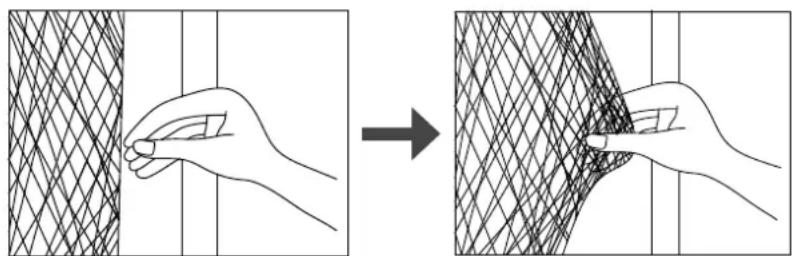
Step 1 - Inspect the enclosure netting before EACH use for wear or tear by pinching and pulling a section of the netting between fingers and pulling downward. Please see diagram below.
natural_image
Diagram showing two hand positions interacting with a textured surface, one holding a pen and the other holding a tool (no text or symbols present)If it produces any tear or cracking or ripping sound, then the net is unsafe and MUST be taken down immediately. STOP USING THE TRAMPOLINE ENCLOSURE IF YOU FIND ANY SIGNS OF WEAR OR TEARING ON THE NETTING.
Step 2 - Walk around the whole perimeter of the trampoline to visually check for material deterioration or other damage.
3. Maintenance Requirement for Trampoline Pad
Walk around the whole perimeter of the trampoline to visually check for material deterioration, tears, looseness, loss of elasticity or other damage in the pad.
MAINTENANCE
It is necessary to carry out checks and maintenance of the main parts (frame, suspension system, bed, padding, and enclosure) at regular intervals, pointing out that if these checks are not carried out, the trampoline could become dangerous.
- Check all nuts and bolts for tightness and tighten when required.
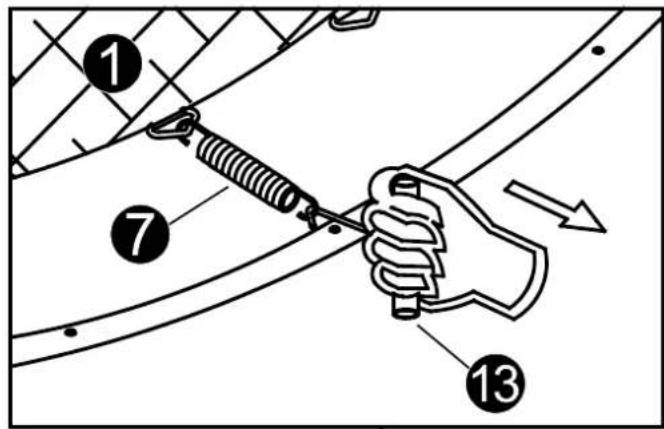
- Check that the springs are intact and cannot come unhooked when jumping.
- Check that the circular protective pad covers the spring.
- Check the cord used to secure the net. Danger of suffocation.
- Check all coverings for bolts and sharp edges and replace when required
- Check that the net, trampoline mat and all protective elements are in good condition a capable of supporting the user's weight. Sun, rain, snow and extreme temperatures may reduce lifespan of trampoline component parts. Replace them, if necessary.
- In strong wind conditions, outdoor trampolines shall be equipped with a device to avoid displacement due to wind (e.g. steel bars in the ground or loads like sand bag or water bags).
- In strong wind conditions, items catching wind like net and mat should be removed.
- In certain countries during winter period, the snow load and the very low temperature can damage the trampoline. It is recommended to remove the snow and store the mat and the enclosure indoor.
- Check that mat, padding and enclosure are without defects. Sunlight, rain, snow and extreme temperatures reduce the strength of these parts over time.
- Make sure that the hook-and-loop fasteners are closed correctly during use of trampoline.
- Replace the net, trampoline at and protective elements every 1 year.
- Any defective parts must be replaced in accordance with the manufacturer's instructions.
- Keep the maintenance instructions
- For details on how to contact the after-sales service team, please consult last page user's guide.
MOVING AND TRANSPORTATION
A minimum of 2 people is required to move the trampoline. Position yourselves around the trampoline, gently lift structure and move to desired location.
The trampoline must be fully dismantled if transported by car. Over a longer distance. Check the assembly instructions and follow each step, starting at the end. Removing springs is a delicate operation which must only be carried out using the tool provided,
WARRANTY
After the date of the purchase invoice, the owner of the AXI trampoline has a:
• 2-year warranty on the breaking of the frame
• 1-year warranty on the springs
- 1-year warranty on the protective surround pad and the jump mat.
• 1 year warranty on the tearing of the net
AXI reserves the right not to provide a guarantee if:
- no original sales receipt can be presented;
- the AXI Trampoline is used for purposes other than those for which it was designed;
- a method of assembly is used other than the method indicated;
- technical repairs have been carried out unprofessionally;
- the AXI Trampoline is used in public places like schools and day-care nurseries;
- the AXI Trampoline is rented to third parties;
- the regular monitoring and where appropriate replacement of parts, screws and joints has been omitted.
LEARNING THE FUNDAMENTAL TRAMPOLINE SKILLS
The following lessons are suggested for you to learn basic steps and bounces. Before using the trampoline, you should read and understand all warnings. A complete discussion and demonstration of body mechanics and trampoline guidelines should occur between the supervisor and student as well. The bounces are diagrammed on the following page.
Lesson 1
A. Mounting and Dismounting – Demonstration of proper techniques
B. The Basic Bounce – Demonstration and practice
C. Braking (Check the Bounce – Demonstration) and practice. Learn to brake on command
D. Hands and Knees Bounce – Demonstration and practice. Stress should be on four-point landing and alignment
Lesson 2
A. Review and practice of techniques learned in Lesson 1
B. Knee Bounce – Demonstration and practice. Learn the basic down to knee and back up before trying half twist to left and right
C. Seat Bounce – Demonstration and practice. Learn basic seat bounce then add a knee bounce, hands and knees repeat
Lesson 3
A. Review and practice skills and techniques learned in previous lessons
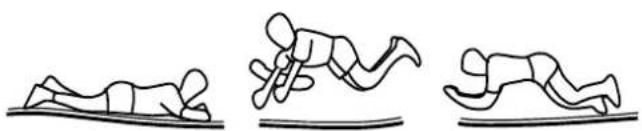
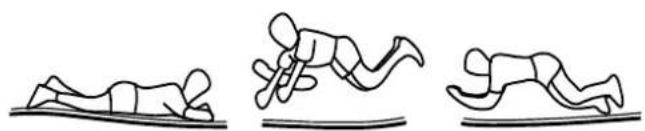
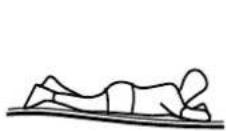
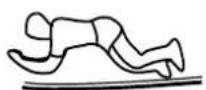
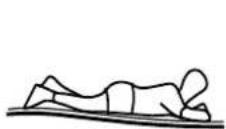
B. Front Drop – To avoid mat burns and teach the front bounce position, all students should be requested to assume the prone position (face down on the ground) while the instructor checks for faulty positions that could cause injury
C. Start with a Hands and Knees bounce and then extend body into prone position and on the mat and return to feet
D. Practice Routine – Hands and Knees Bounce, Front Bounce, return to feet, Seat Bounce, return to feet, Seat Bounce, return to feet
Lesson 4
A. Review and practice skills and techniques learned in previous lessons
B. Half-Turn
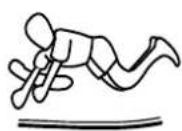
1. Start from front drop position and as you make contact with mat, push off with arms in either the right or left direction and turn head and shoulders in same direction
2. During turn, be sure to keep back parallel to mat and head up
3. After completing turn, land in the Front Drop position
After completing this lesson, the student now has a basic foundation of trampoline bounces. Jumpers should be encouraged to try and develop their own routines with the emphasis on control and form.
A game that can be played in order to encourage students to try developing routines is "BOUNCE". In this game, players count off from 1 to X. Player one starts with a maneuver. Player two has to do Player one's maneuver and add on another. Each player must do the routine properly in the correct sequence. The first person to miss receives the letter "B". This continues until someone spells out the word "BOUNCE". The last remaining contestant is deemed the winner! Even when playing this game, it is important to perform your routines under control and not try difficult or highly skilled bounces that you have not yet mastered.
A certified trampoline instructor should be contacted to further develop your trampoline skills.
TRAMPOLINE & ENCLOSURE COMBO
BASIC TRAMPOLINE BOUNCES
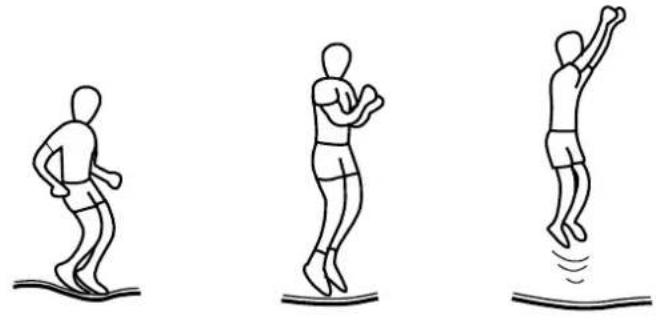
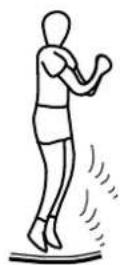
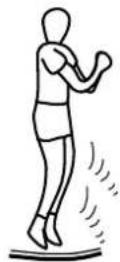
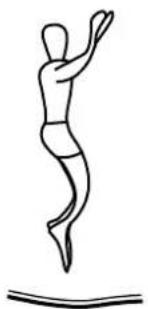
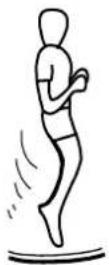
THE BASIC BOUNCE
THE KNEE BOUNCE

natural_image
Line drawing of a human figure in motion, possibly dancing or gesturing (no text or symbols)

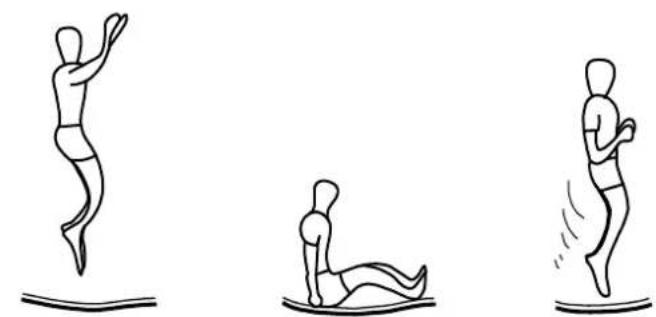
THE SEAT BOUNCE

natural_image
Simple line drawing of a human figure in mid-jump, jumping above water (no text or symbols)

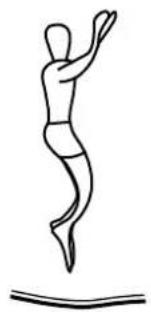
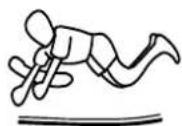
THE 180 DEGREE BOUNCE
natural_image
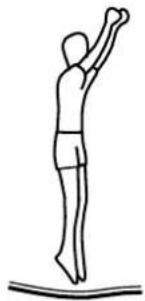
Three sequential line drawings showing a person performing different physical poses on a mat (no text or symbols)- Start from the standing position, with your feet having shoulder width apart and with head up and eyes on mat
- Swing arms forward and up in a circular motion
- Bring feet together while in mid-air and point toes downwards.
-
Keep the feet shoulder width apart when landing on mat
-
Start with the basic bounce and keep it low
- Land on knees while keeping your back straight and body erect while using your arms to maintain balance
-
Bounce back to basic bounce position by swinging arms up
-
Land in a flat sitting position
- Place hands on mat besides hips, but do not lock your elbow
-
Return to erect position by pushing with hands
-
Start with the Front Bounce position
- Push off with left or right hands and arms (depending on which way you wish to turn)
- Maintain head and shoulders in the same direction while keeping your back parallel to the mat and your head up
- Land in the Prone position and return to standing position
TRAMPOLINE & ENCLOSURE COMBO

natural_image
Prohibition sign with a circular arrow and crossed-out floral symbol, no text presentnatural_image
Prohibition sign showing two silhouetted figures with a light bulb inside, crossed out by a diagonal line (no text or symbols)natural_image
Diagram showing two hand-drawn views of a meshed surface before and after transformation (no text or symbols)natural_image
Three stick figure illustrations in motion, showing different poses (walking, stretching, jumping) with motion lines indicating movement (no text or symbols)KNIESPRUNG

natural_image
Three stick figures demonstrating different postures of a physical exercise, one performing a high kick, one kneeling with arms crossed, and one standing with a dynamic leg motion (no text or symbols)SITZSPRUNG
natural_image
Three stick figure illustrations in various poses: jumping, kneeling, and stretching (no text or symbols)DER 180 GRAD SPRUNG
natural_image
Three sequential line drawings of a person performing different physical poses (no text or symbols)WAARSCHUWING! MAX 100 KG
TRAMPOLINE MONTEREN EN VERPLAATSEN
natural_image
Prohibition sign with a flower inside a circle and diagonal line crossing, no text or symbols present.natural_image
Prohibition sign showing two silhouetted figures without any text or symbolsnatural_image
Diagram showing two hands holding a meshed surface before and after processing (no text or symbols)natural_image
Simple line drawing of a person jumping with motion lines indicating movement (no text or symbols)KNIESPRONG

natural_image
Simple line drawing of a human figure in motion, possibly dancing or gesturing (no text or symbols)
ZITSPRONG
natural_image
Simple line drawing of a human figure in mid-jump, jumping with one arm raised (no text or symbols)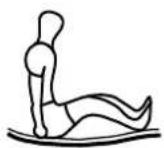

HALVE SCHROEF
natural_image
Prohibition sign with a flower inside a circle and diagonal line crossing, no text or symbols present.natural_image
Prohibition sign showing two silhouetted figures without any text or symbolsnatural_image
Diagram showing two hand gestures interacting with a textured surface, one pointing to a detail (no text or symbols present)natural_image
Line drawing of a human figure in motion, possibly dancing or gesturing (no text or symbols)

LE REBOND ASSIS

natural_image
Simple line drawing of a human figure in mid-jump, jumping above water (no text or symbols)

natural_image
Three sequential line drawings showing a person performing different physical poses (no text or symbols)natural_image
Prohibition sign with a flower inside a circle and diagonal line crossing, no text or symbols present.natural_image
Prohibition sign showing two silhouetted figures without any text or symbolsnatural_image
Diagram showing two hand positions before and after a structural change, with no text or symbols present.natural_image
Three stick figure illustrations in motion, showing different poses (walking, stretching, jumping) with motion lines indicating movement (no text or symbols)SALTO DE RODILLA

natural_image
Three stick figures demonstrating different postures of a physical exercise, one performing a high kick, one kneeling with arms crossed, and one standing with a dynamic leg motion (no text or symbols)ASIENTO BOUNCE

natural_image
Three stick figure illustrations in various poses: jumping, kneeling, and stretching (no text or symbols)180 GRADO BOUNCE

natural_image
Three sequential line drawings of a person performing different physical poses on a mat (no text or symbols)natural_image
Prohibition sign with a flower inside a circle and diagonal line crossing, no text or symbols present.natural_image
Prohibition sign showing two silhouetted figures without any text or symbolsnatural_image
Diagram showing two hand positions interacting with a textured surface, one holding a pen and the other holding a tool (no text or symbols present)natural_image
Simple line drawing of a person jumping with motion lines indicating movement (no text or symbols)BOUNCE DEL GINOCCHIO
natural_image
Simple line drawing of a human figure in motion, possibly performing a martial arts or exercise pose (no text or symbols)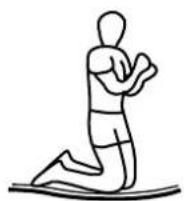
BOZZA DI SEDIA
natural_image
Simple line drawing of a human figure in mid-jump, jumping above water (no text or symbols)
180 BOUCHETTO DI DEGRADO

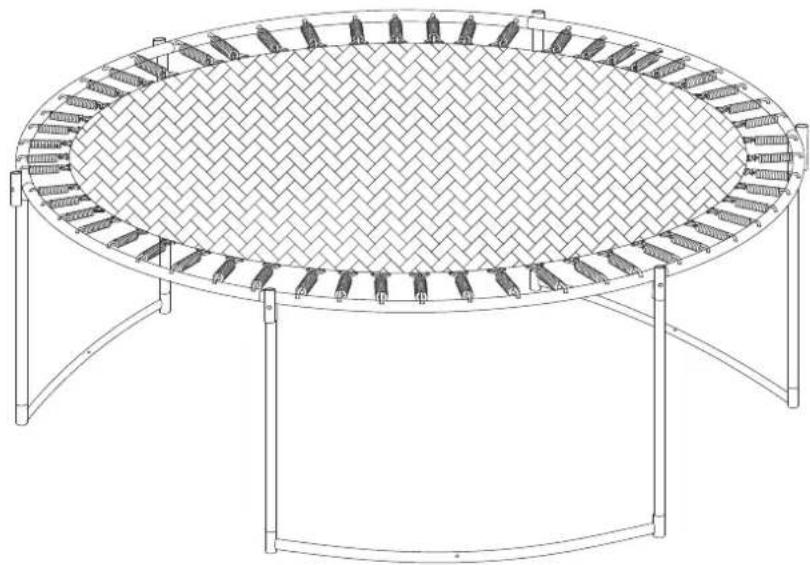
| 1 |  | Trampoline Mat, stitched with Triangle-Rings | 1 |
| 2 | 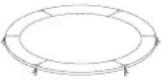 | Frame Pad 1 | |
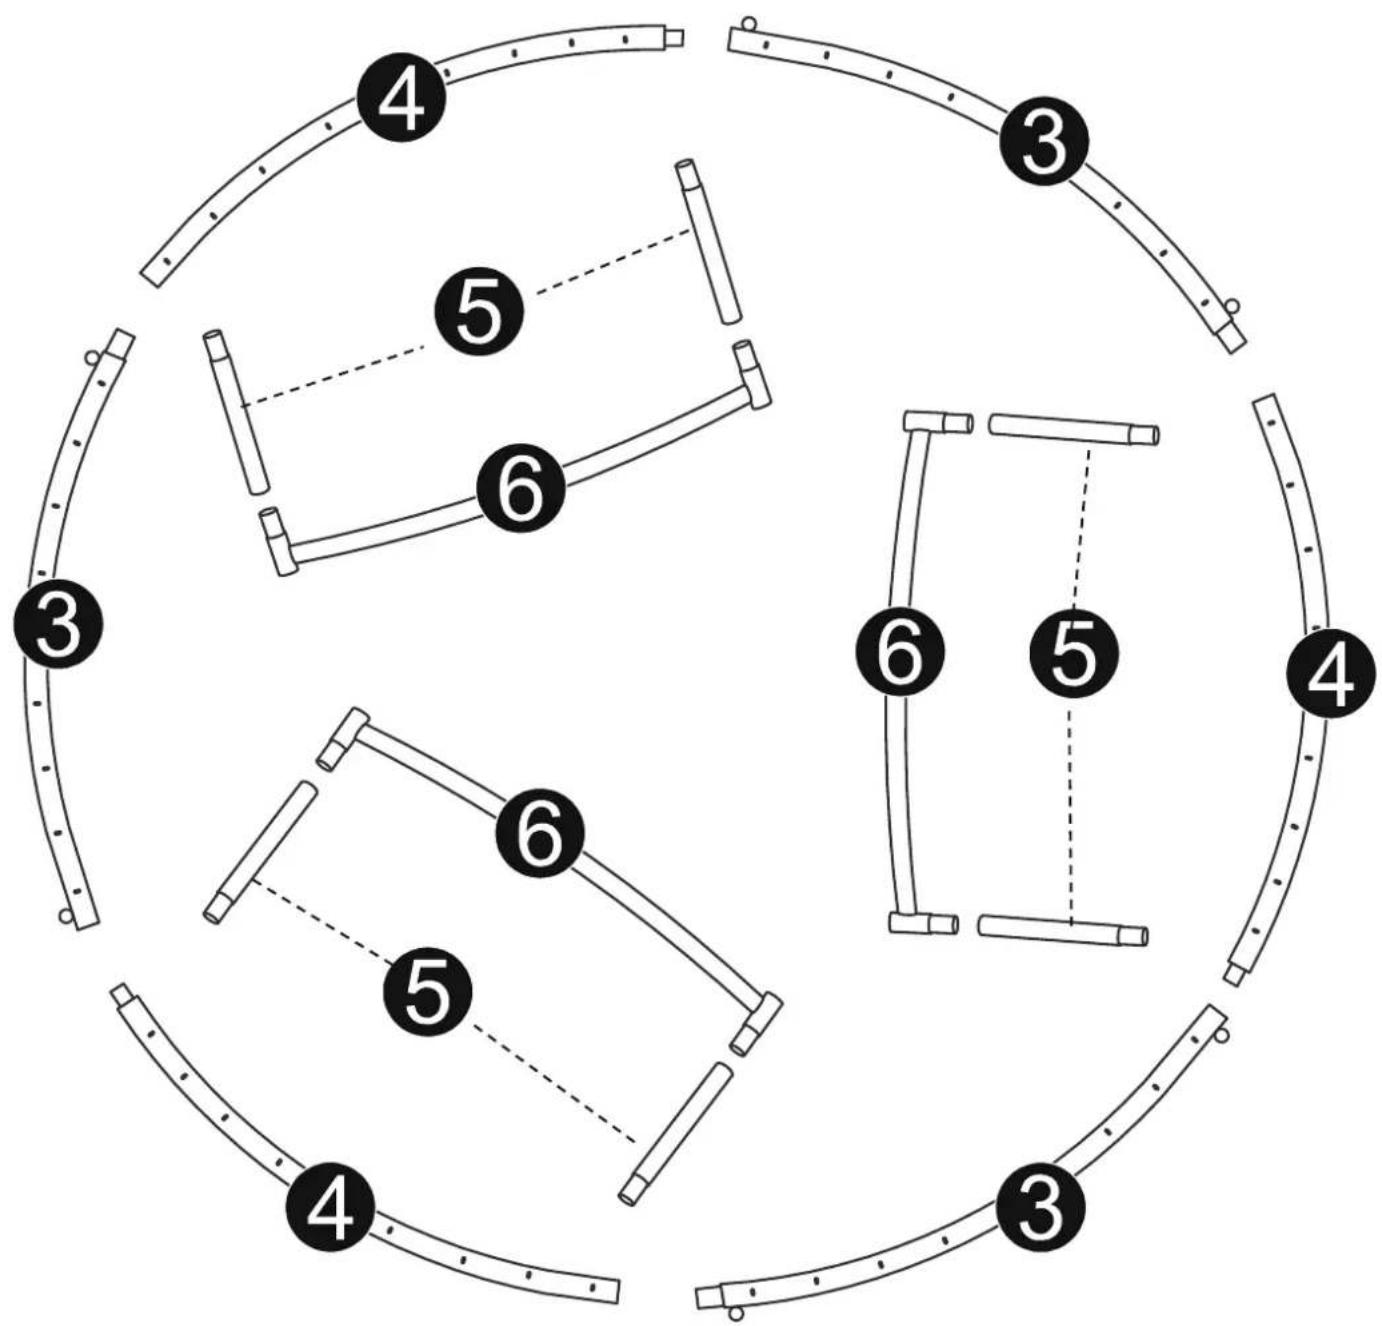
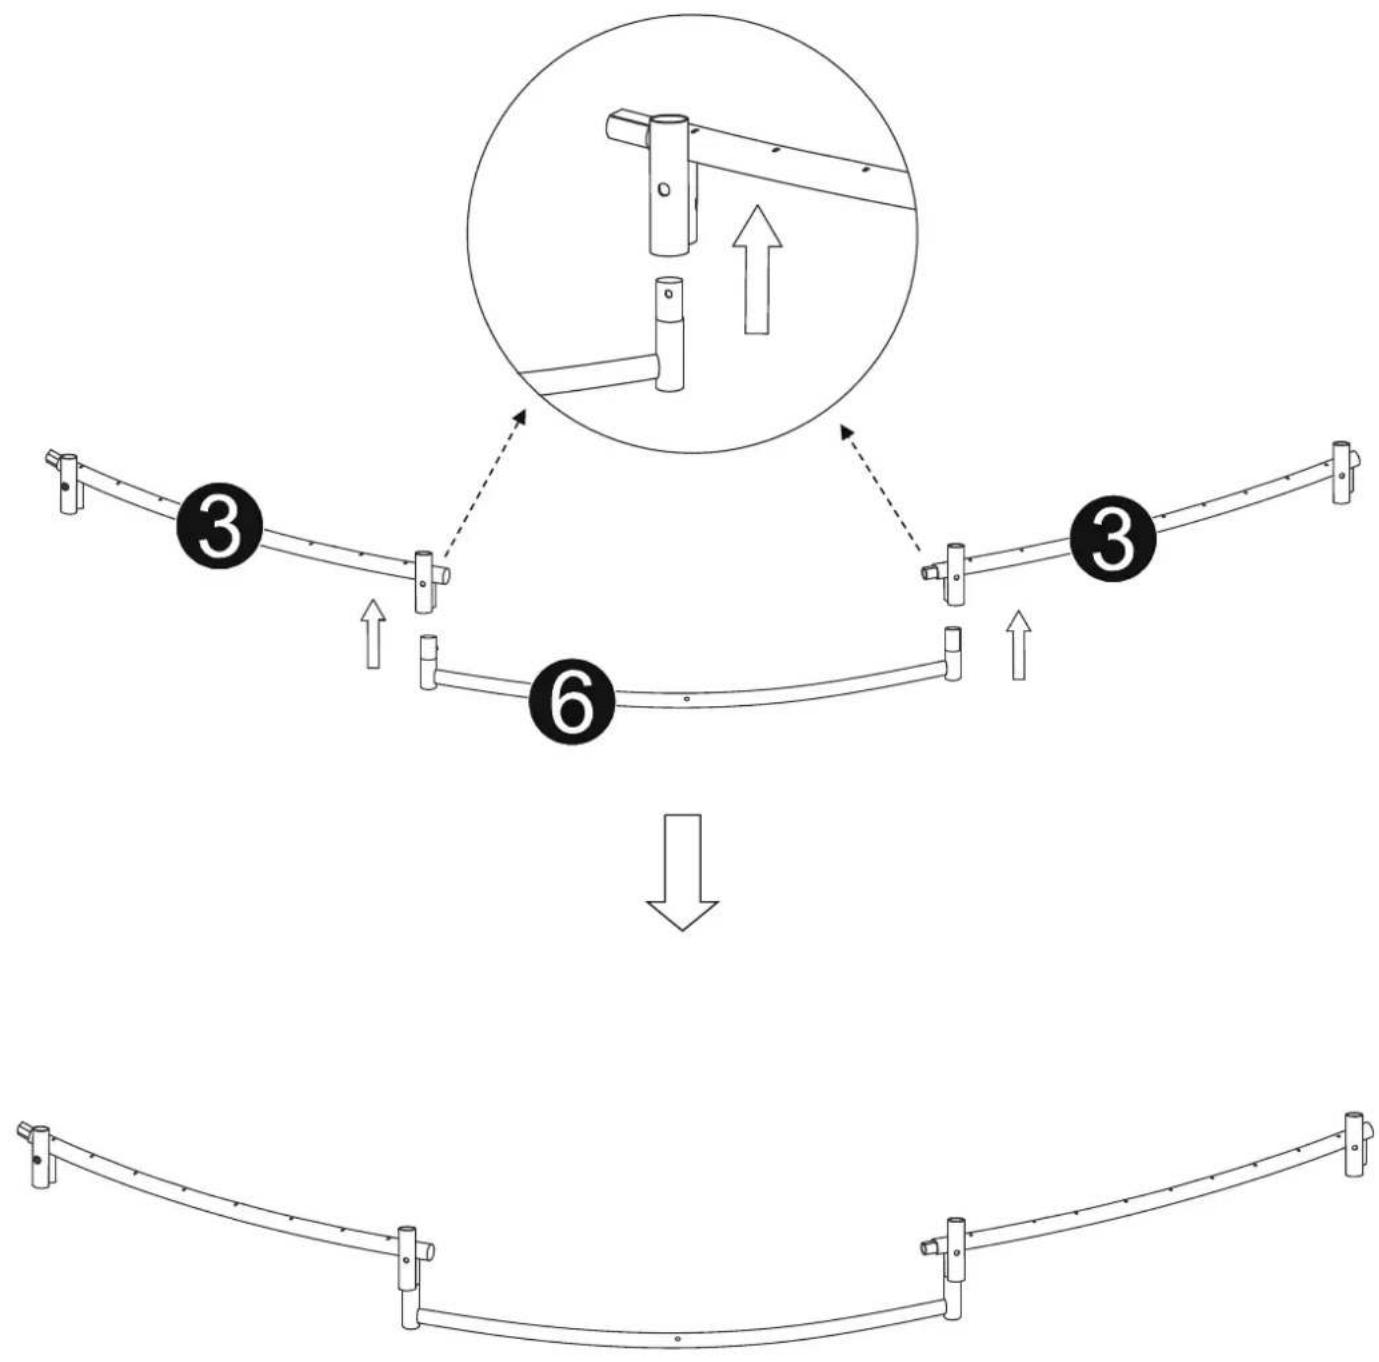
| 3 |  | Top Rail with Leg Sockets 3 | |
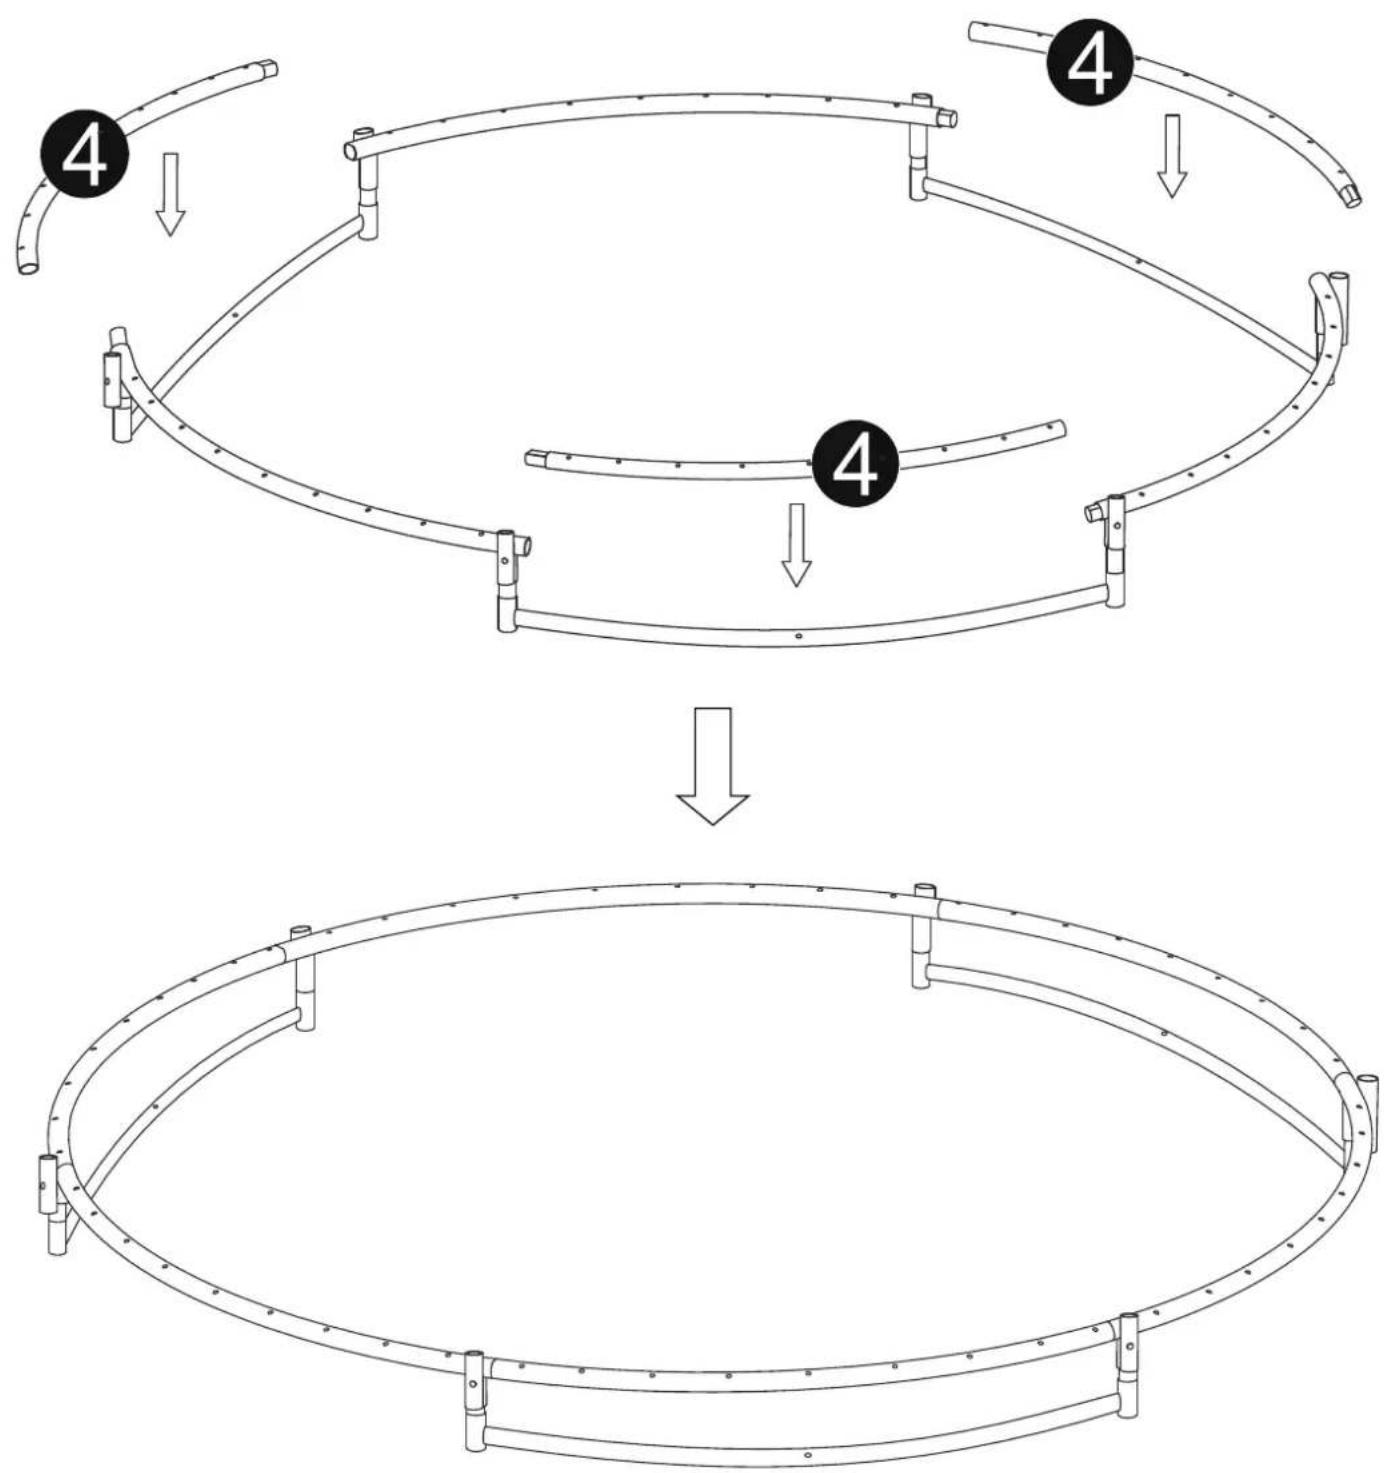
| 4 |  | Top Rail 3 | |
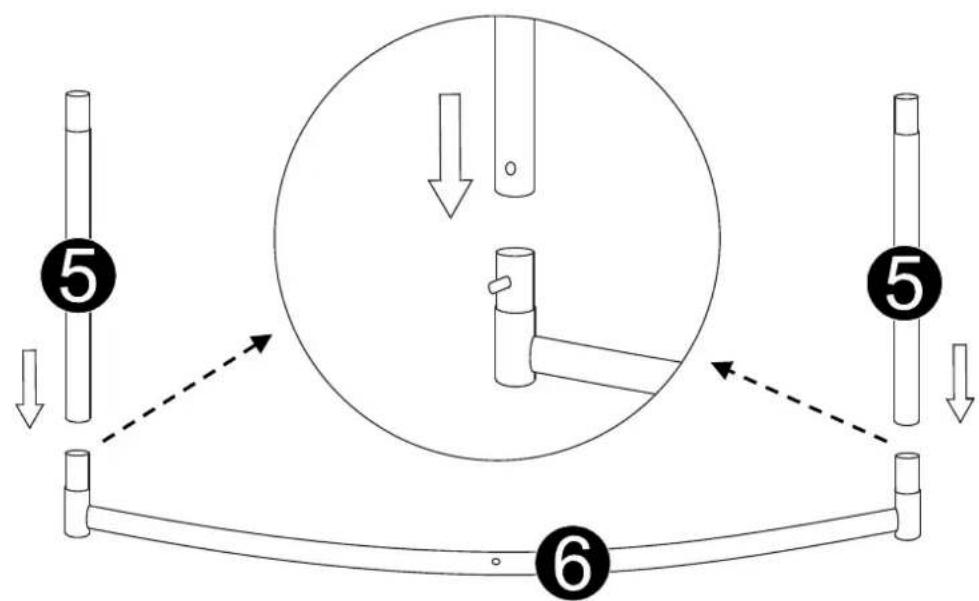
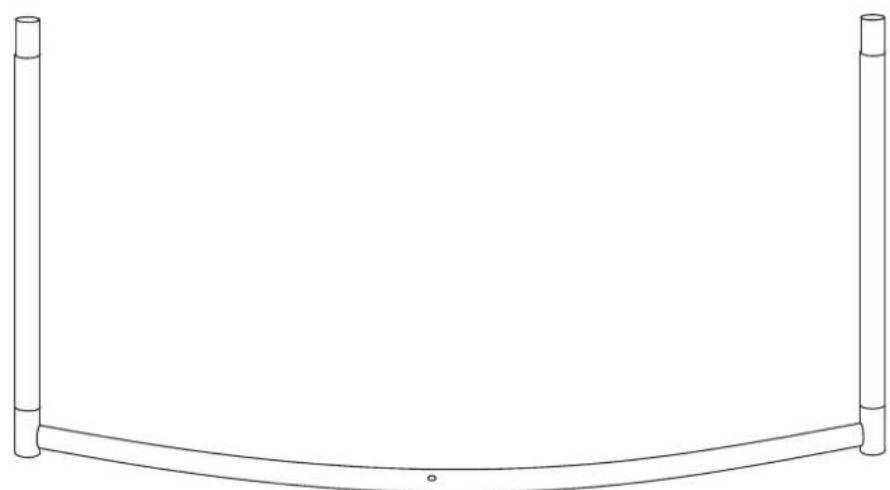
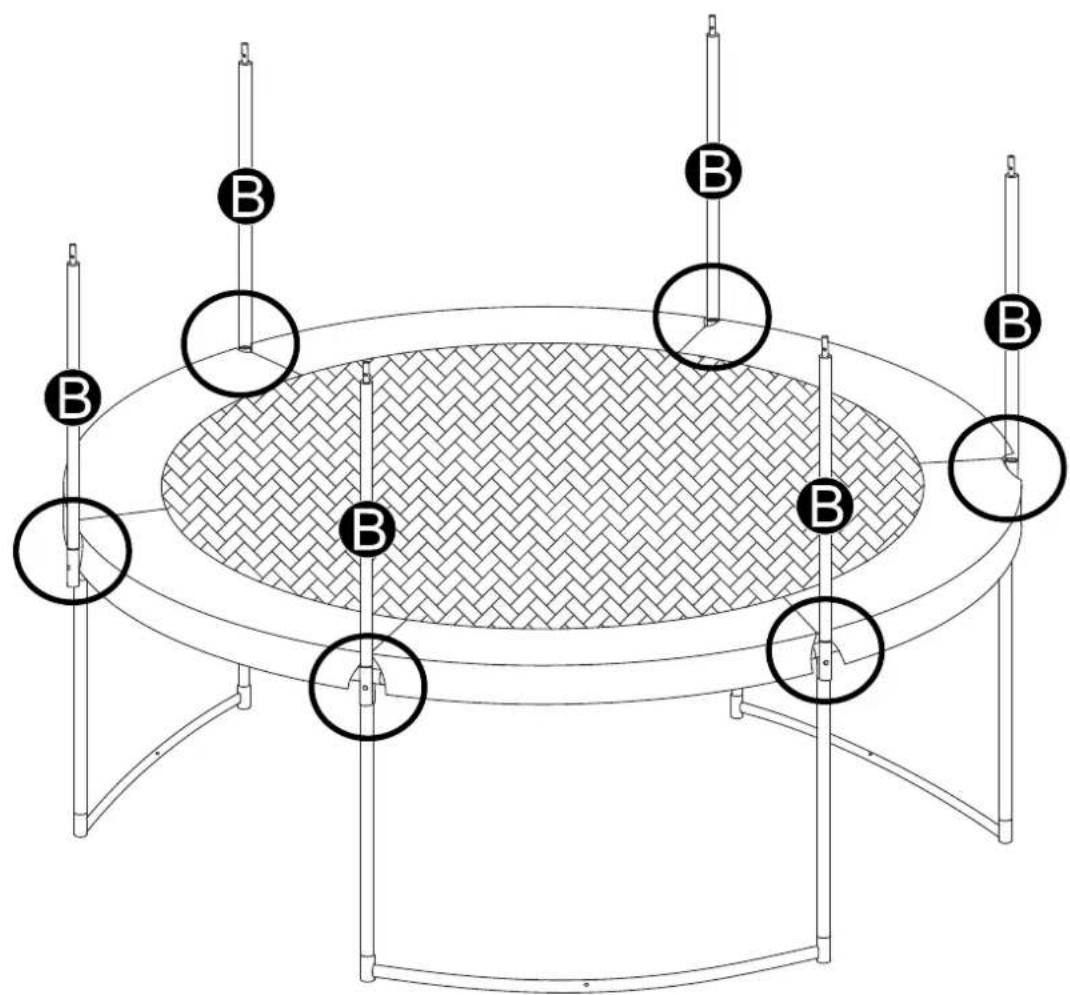
| 5 |  | Vertical Leg Extension 6 | |
| 6 |  | Leg Base 3 | |
| 7 | 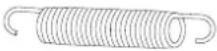 | Galvanized Springs 54 | |
| 8 |  | Bolt 6 | |
| 9 |  | Arc Washer 6 | |
| 10 |  | Spring Washer 6 | |
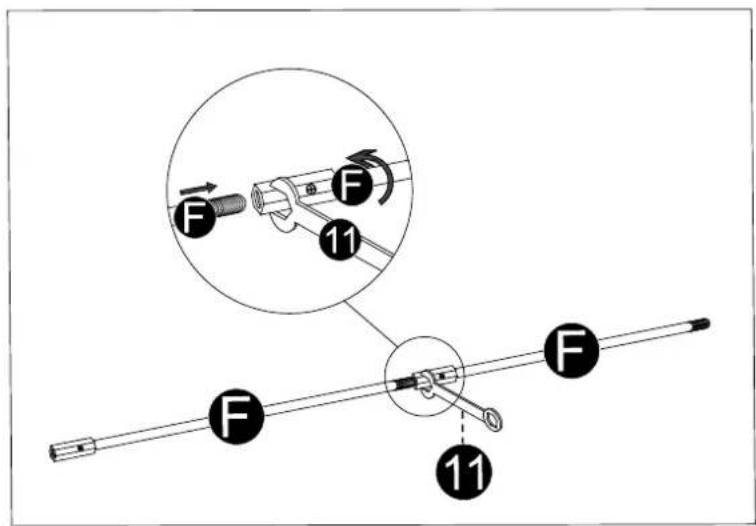
| 11 | 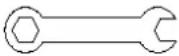 | Wrench 1 | |
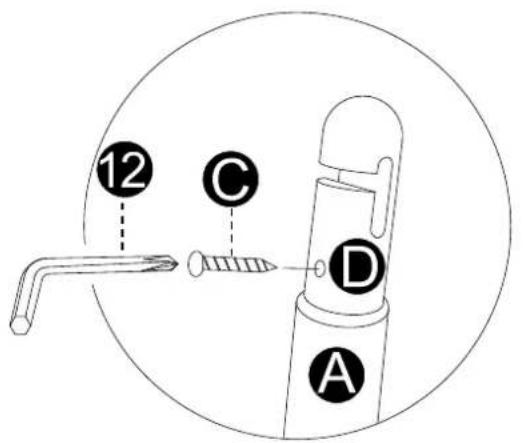
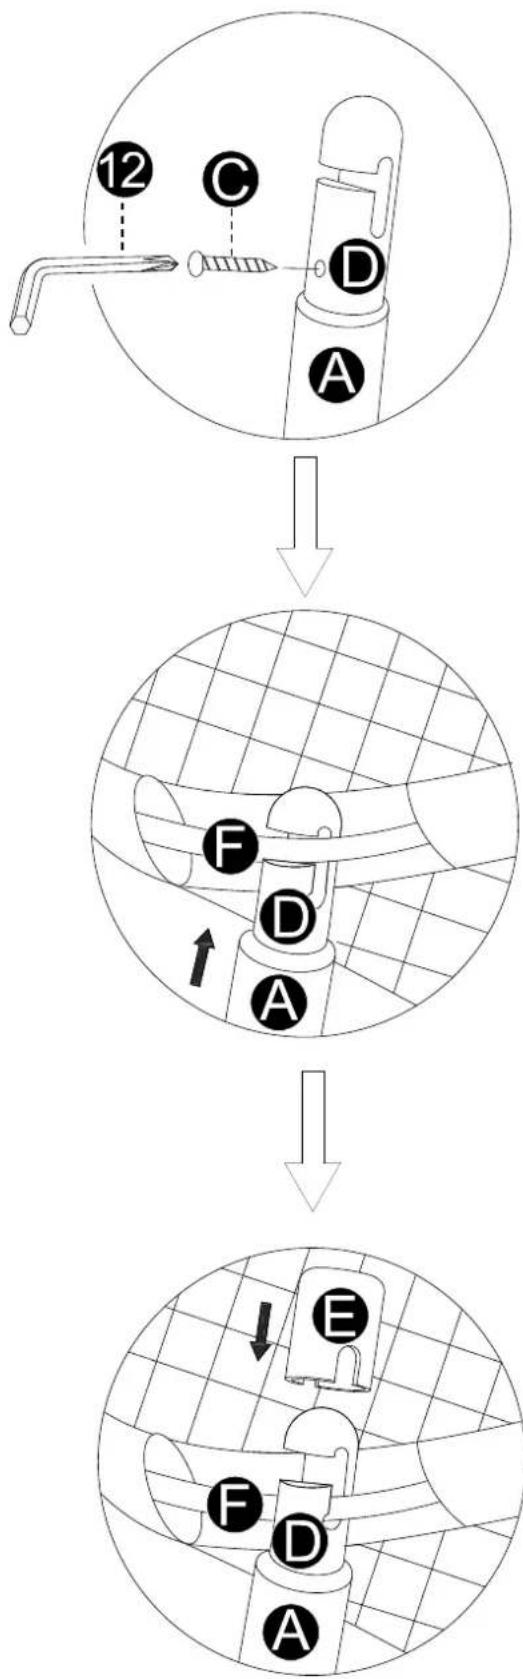
| 12 | 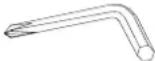 | Allen Wrench 1 | |
| 13 | 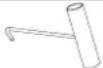 | Spring Loading Tool 1 | |
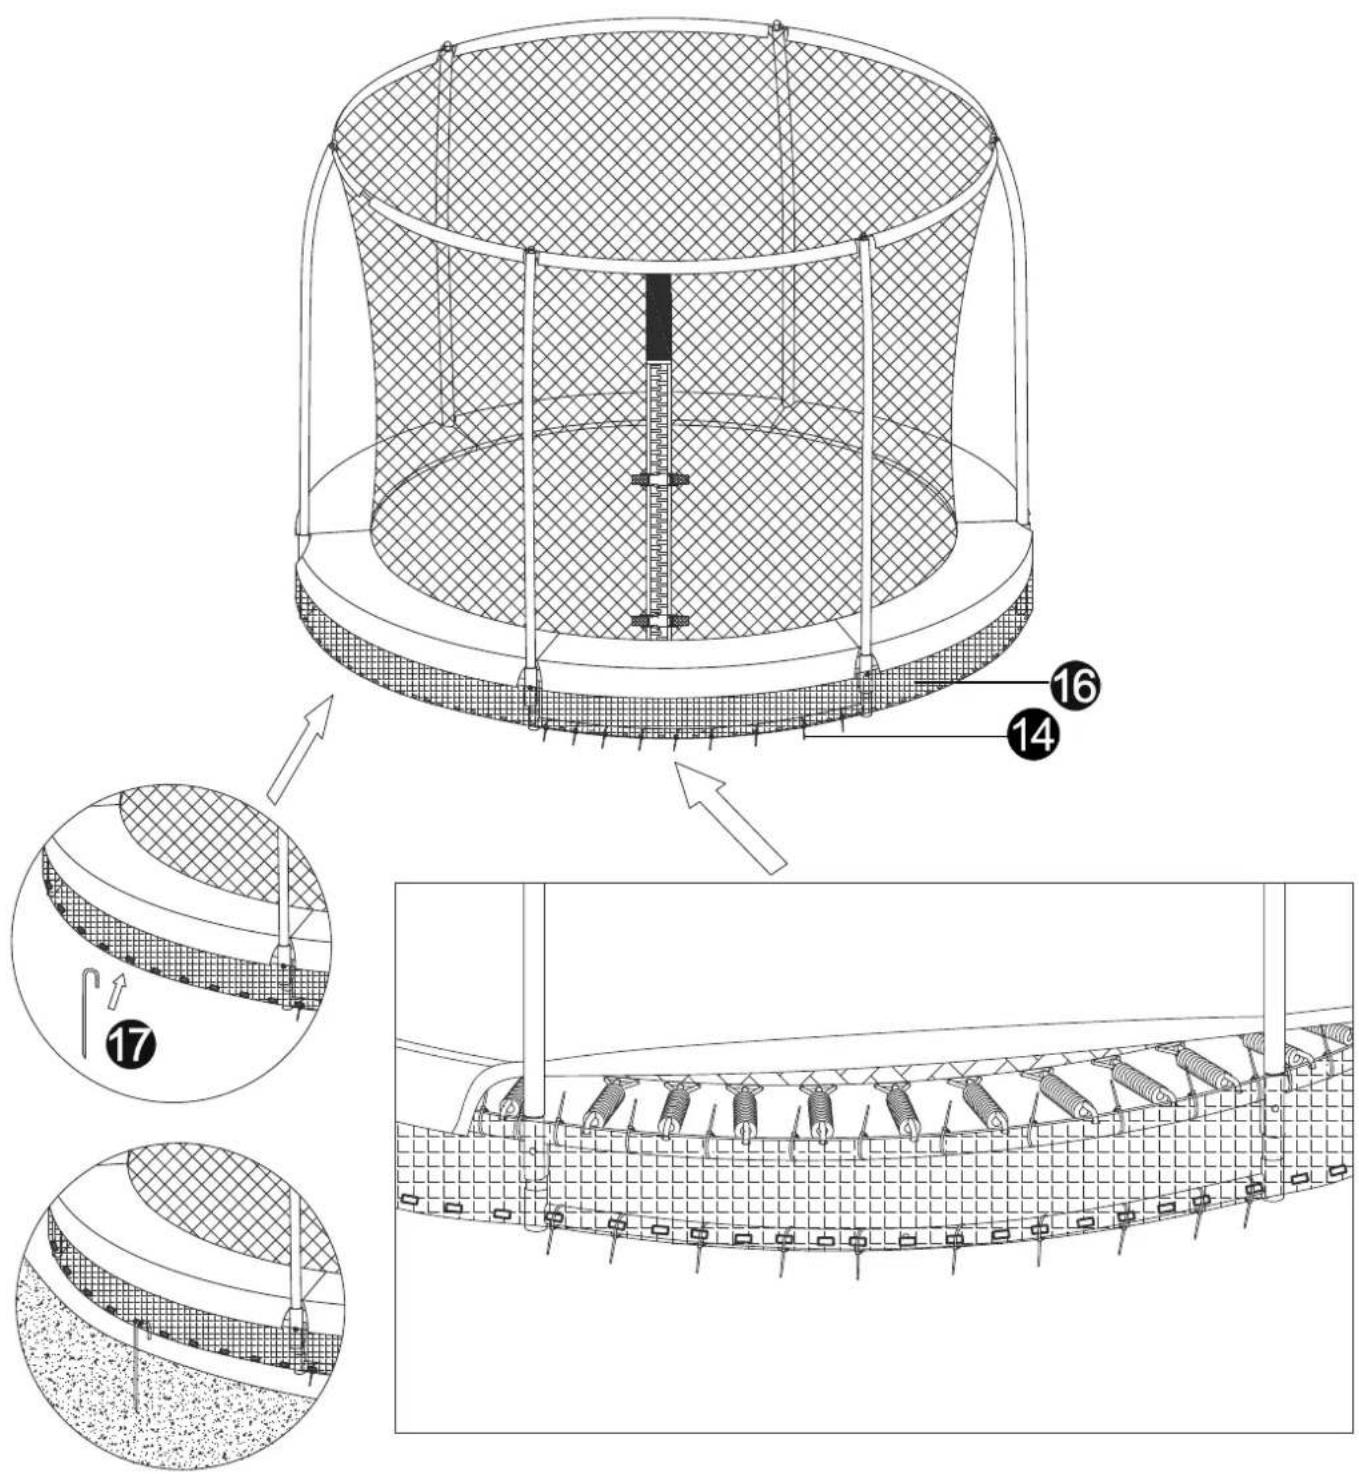
| 14 |  | Zip Tie | 81 |
| 15 |  | Flexible ruler | 1 |
| 16 |  | Bottom Enclosure Netting | 1 |
| 17 |  | Anchor Kit | 3 |
PARTS
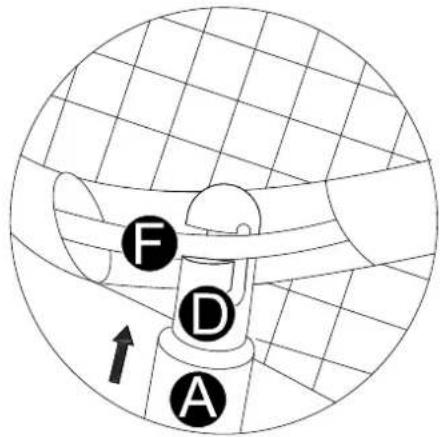
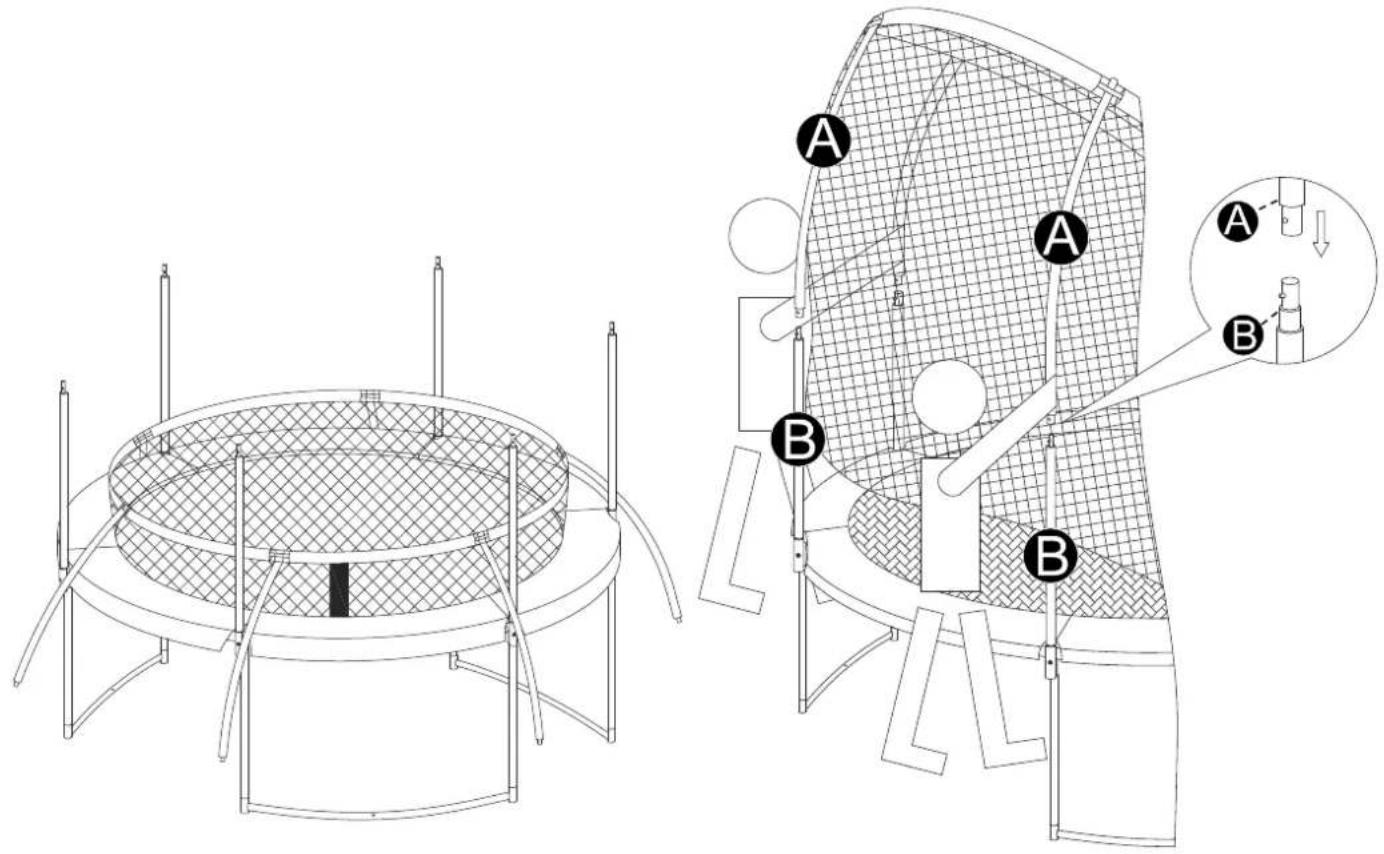
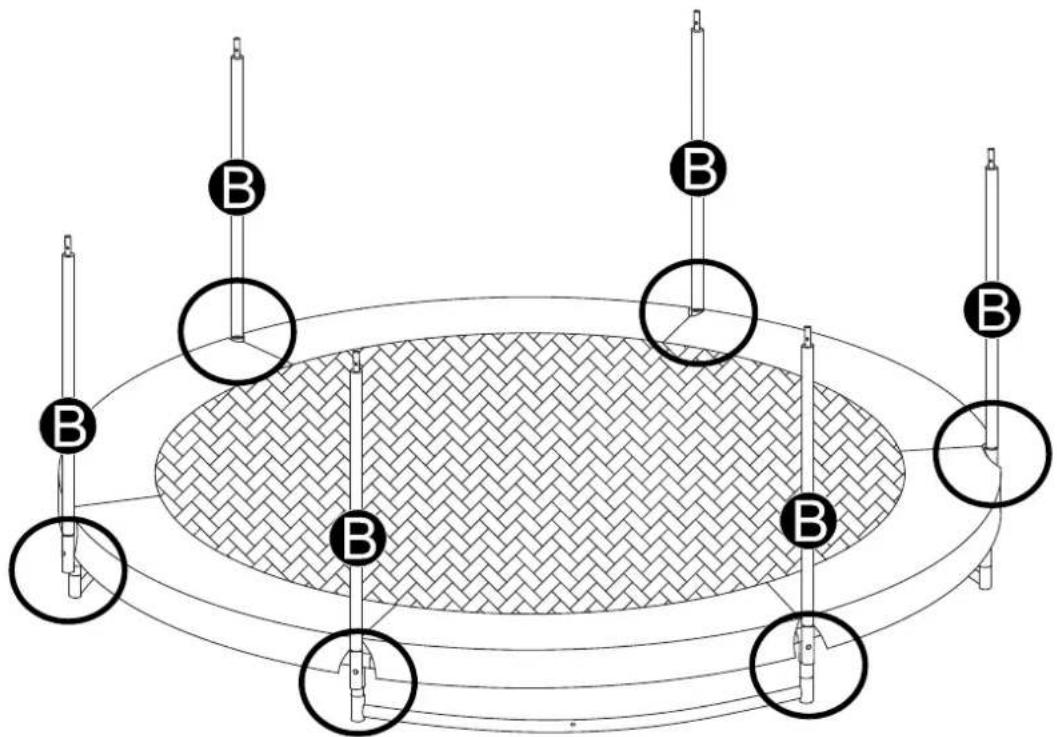
| A Upper Frame Tube with Foam 6 | |||
| B Lower Frame Tube with Foam 6 | |||
| C Self-Locking Screw 6 | |||
D Plastic Cap  | |||
E Cap 6  | |||
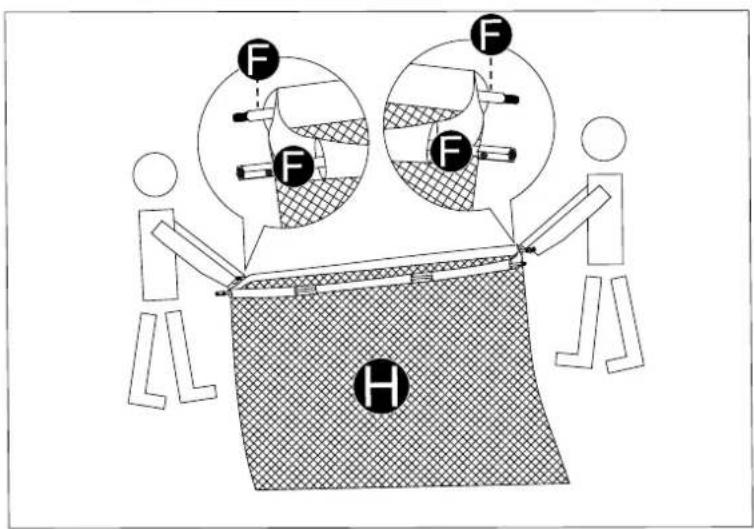
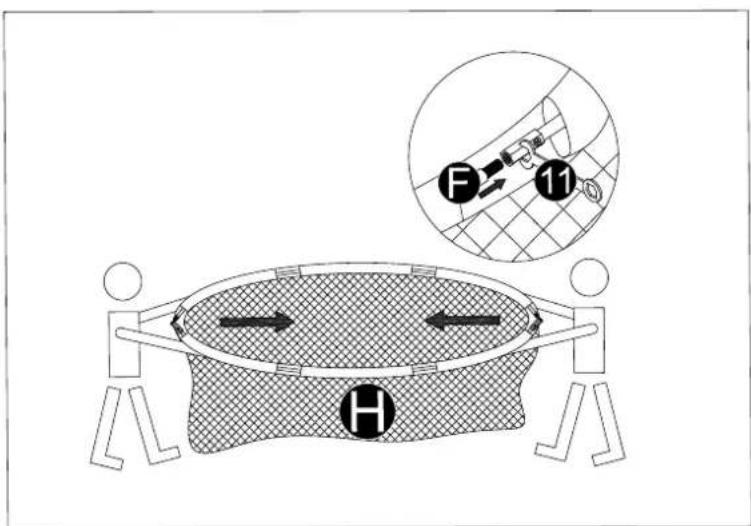
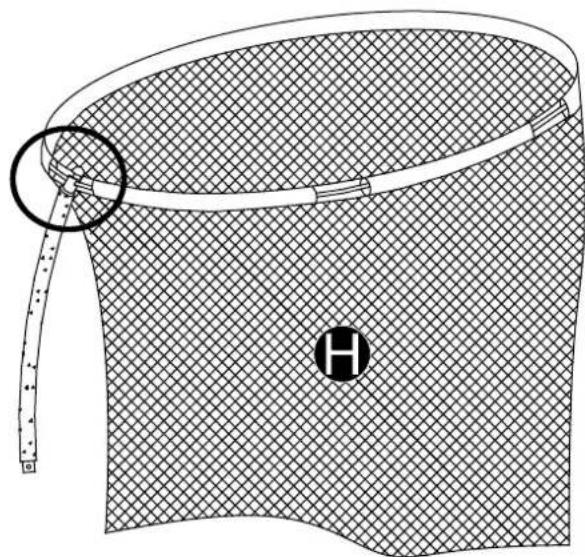
F Cable Wire  | |||
G Cord  | 6 | ||
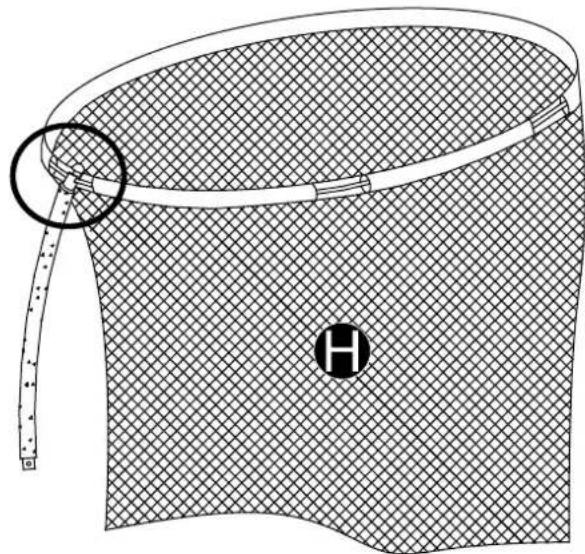
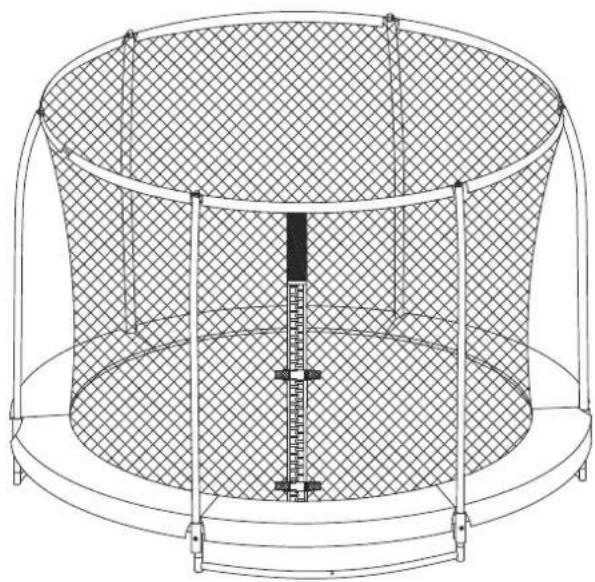
H  | Enclosure Netting | 1 | |
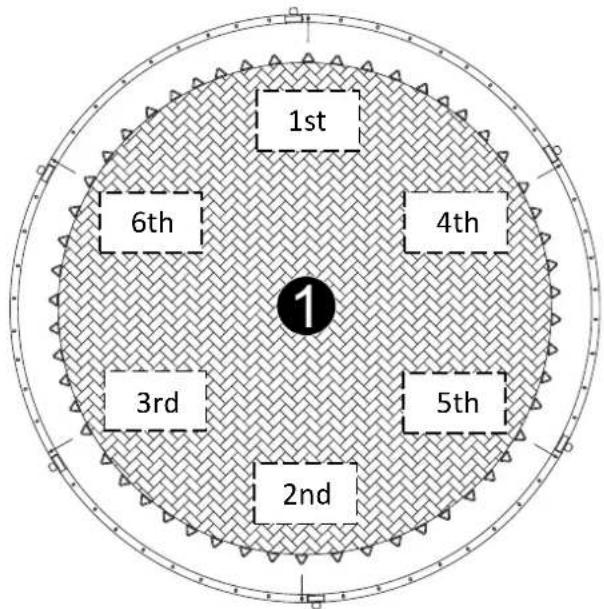
flowchart
graph TD
    A["3"] --> B["4"]
    B --> C["5"]
    C --> D["6"]
    D --> E["3"]
    E --> F["4"]
    F --> G["3"]
    G --> H["4"]
    H --> I["5"]
    I --> J["6"]
    J --> K["5"]
    K --> L["6"]
    L --> M["5"]
    M --> N["6"]
    N --> O["5"]
    O --> P["6"]
    P --> Q["5"]
    Q --> R["6"]
    R --> S["5"]
    S --> T["6"]
    T --> U["5"]
    U --> V["6"]
    V --> W["5"]
    W --> X["6"]
    X --> Y["5"]
    Y --> Z["6"]
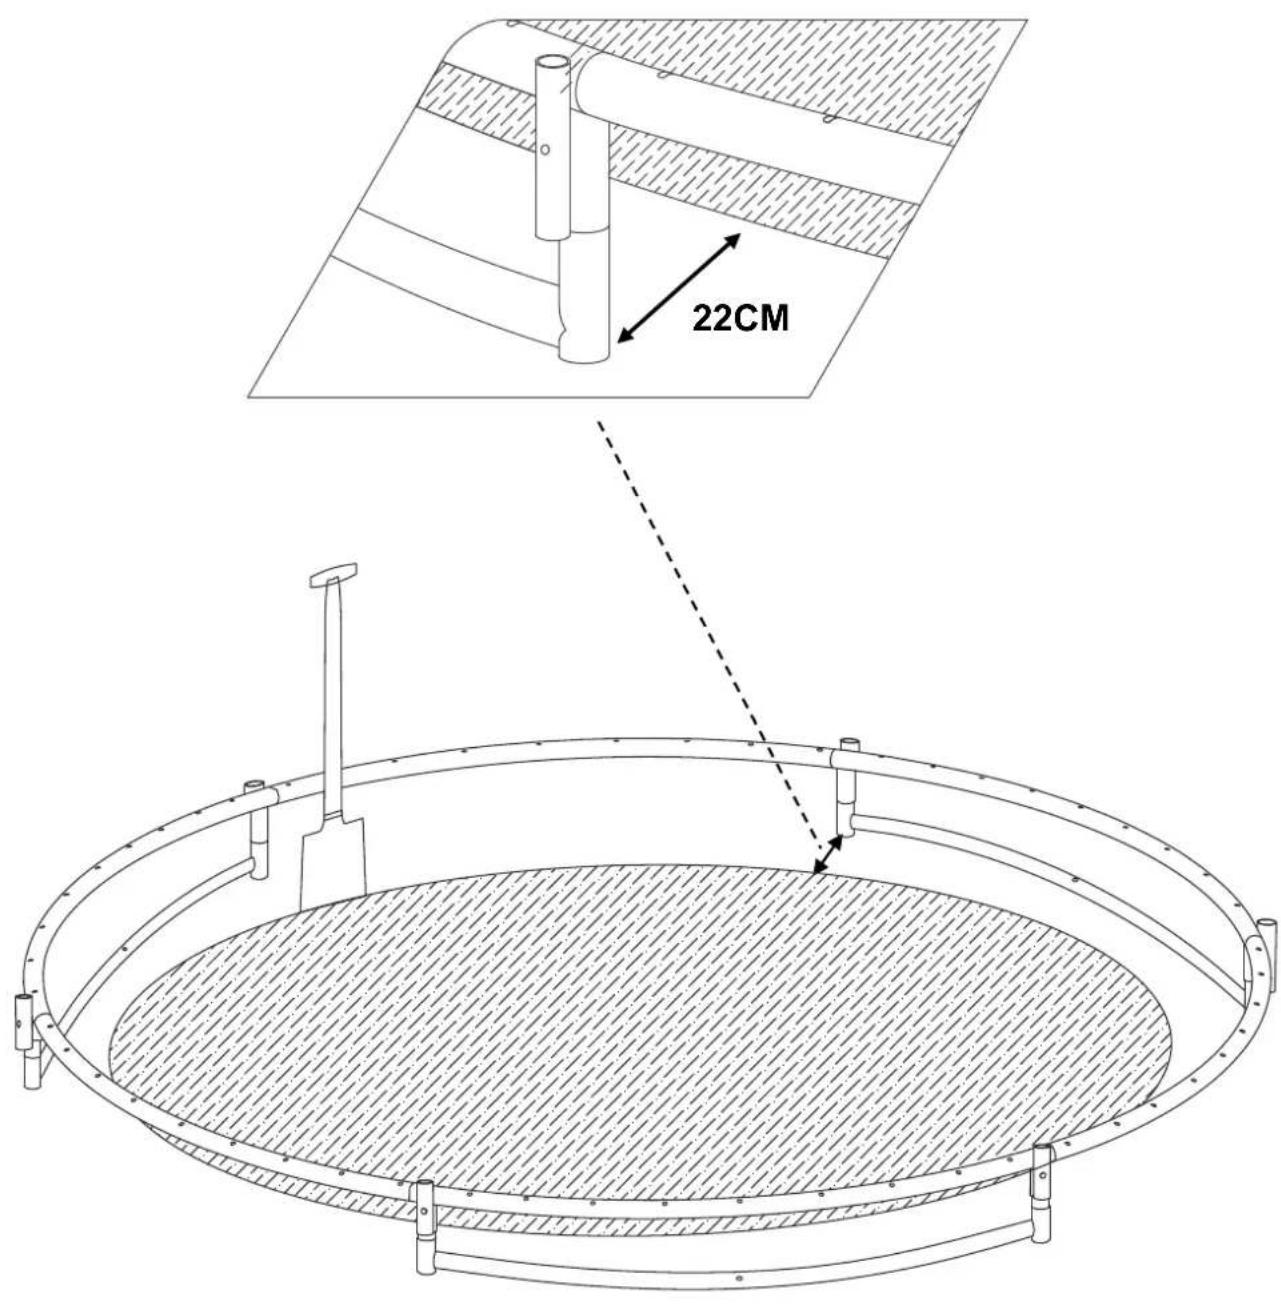
natural_image
Simple line drawing of a curved pipe or support structure with two vertical posts (no text or symbols)
4

flowchart
graph TD
    A["Top-Down: 4"] --> B["Top-Left: Structural Diagram"]
    B --> C["Bottom-Left: Final State"]
    C --> D["Top-Right: Folded Structure"]
    style A fill:#f9f,stroke:#333
    style B fill:#ccf,stroke:#333
    style C fill:#cfc,stroke:#333
    style D fill:#fcc,stroke:#333
5
natural_image
Line drawing of a circular metal grate with woven pattern and support legs (no text or symbols)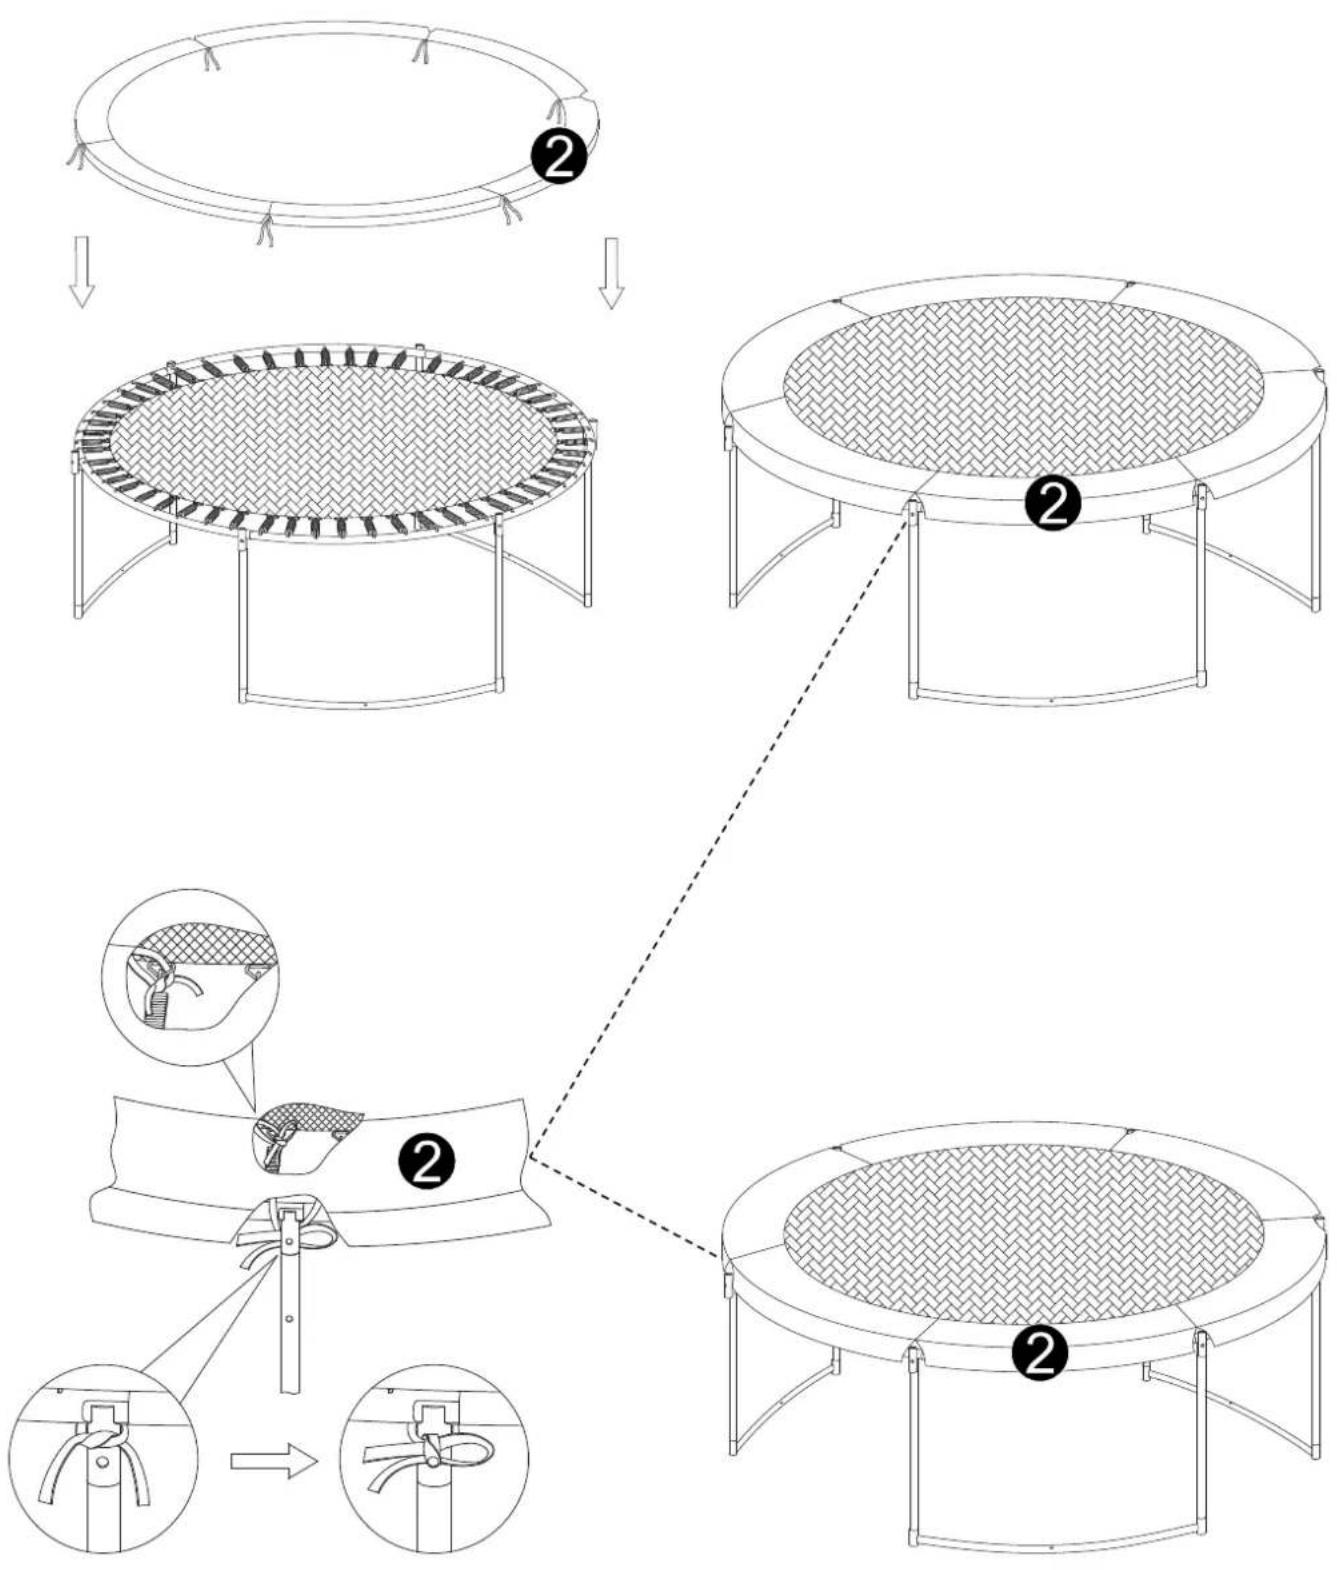
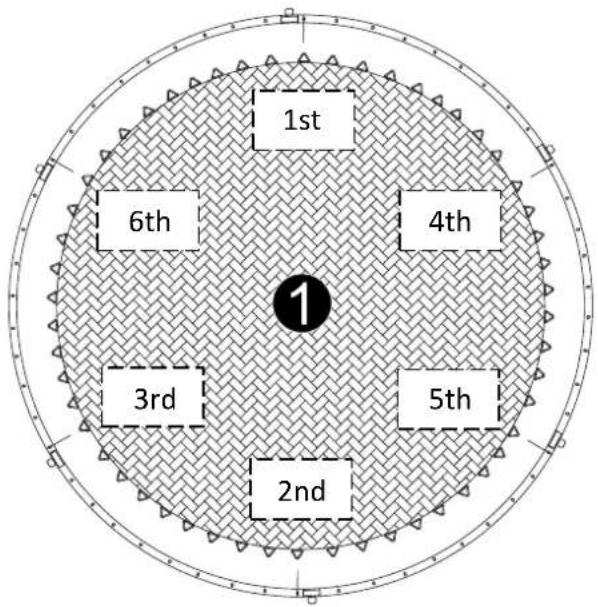
flowchart
graph TD
    A["Trampoline"] --> B["Clamping Setup 1"]
    B --> C["Clamping Setup 2"]
    C --> D["Clamping Setup 3"]
    D --> E["Clamping Setup 4"]
    E --> F["Clamping Setup 5"]
    F --> G["Clamping Setup 6"]
    G --> H["Clamping Setup 7"]
    H --> I["Clamping Setup 8"]
    I --> J["Clamping Setup 9"]
    J --> K["Clamping Setup 10"]
    style A fill:#f9f,stroke:#333
    style K fill:#bbf,stroke:#333

natural_image
Diagram of a garment sleeve with measurement tape and a circular detail, no text or symbols present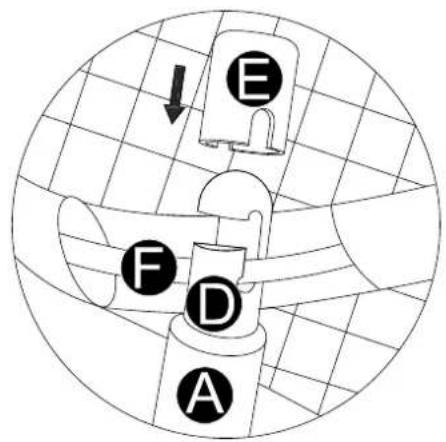
10
natural_image
Technical line drawing of a circular tray with mesh net and measurement scale (no text or symbols)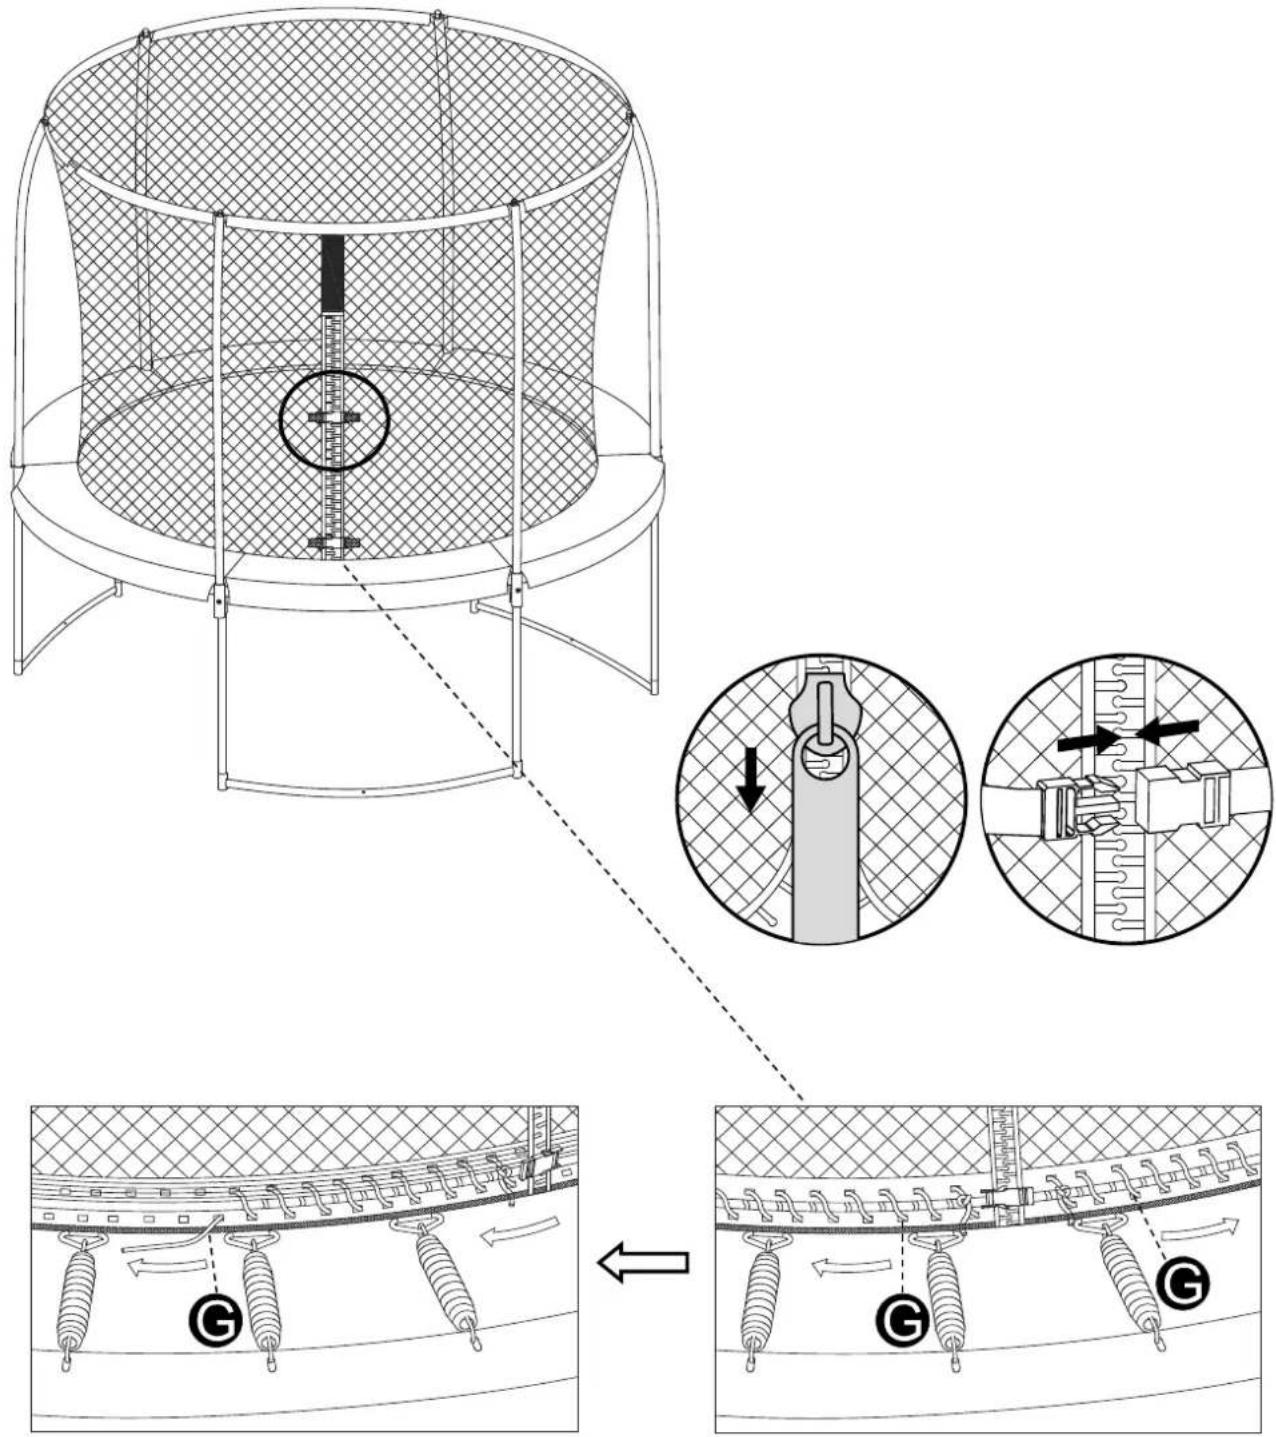
natural_image
Technical line drawing of a circular mechanical device with mesh structure and central vertical component (no text or symbols)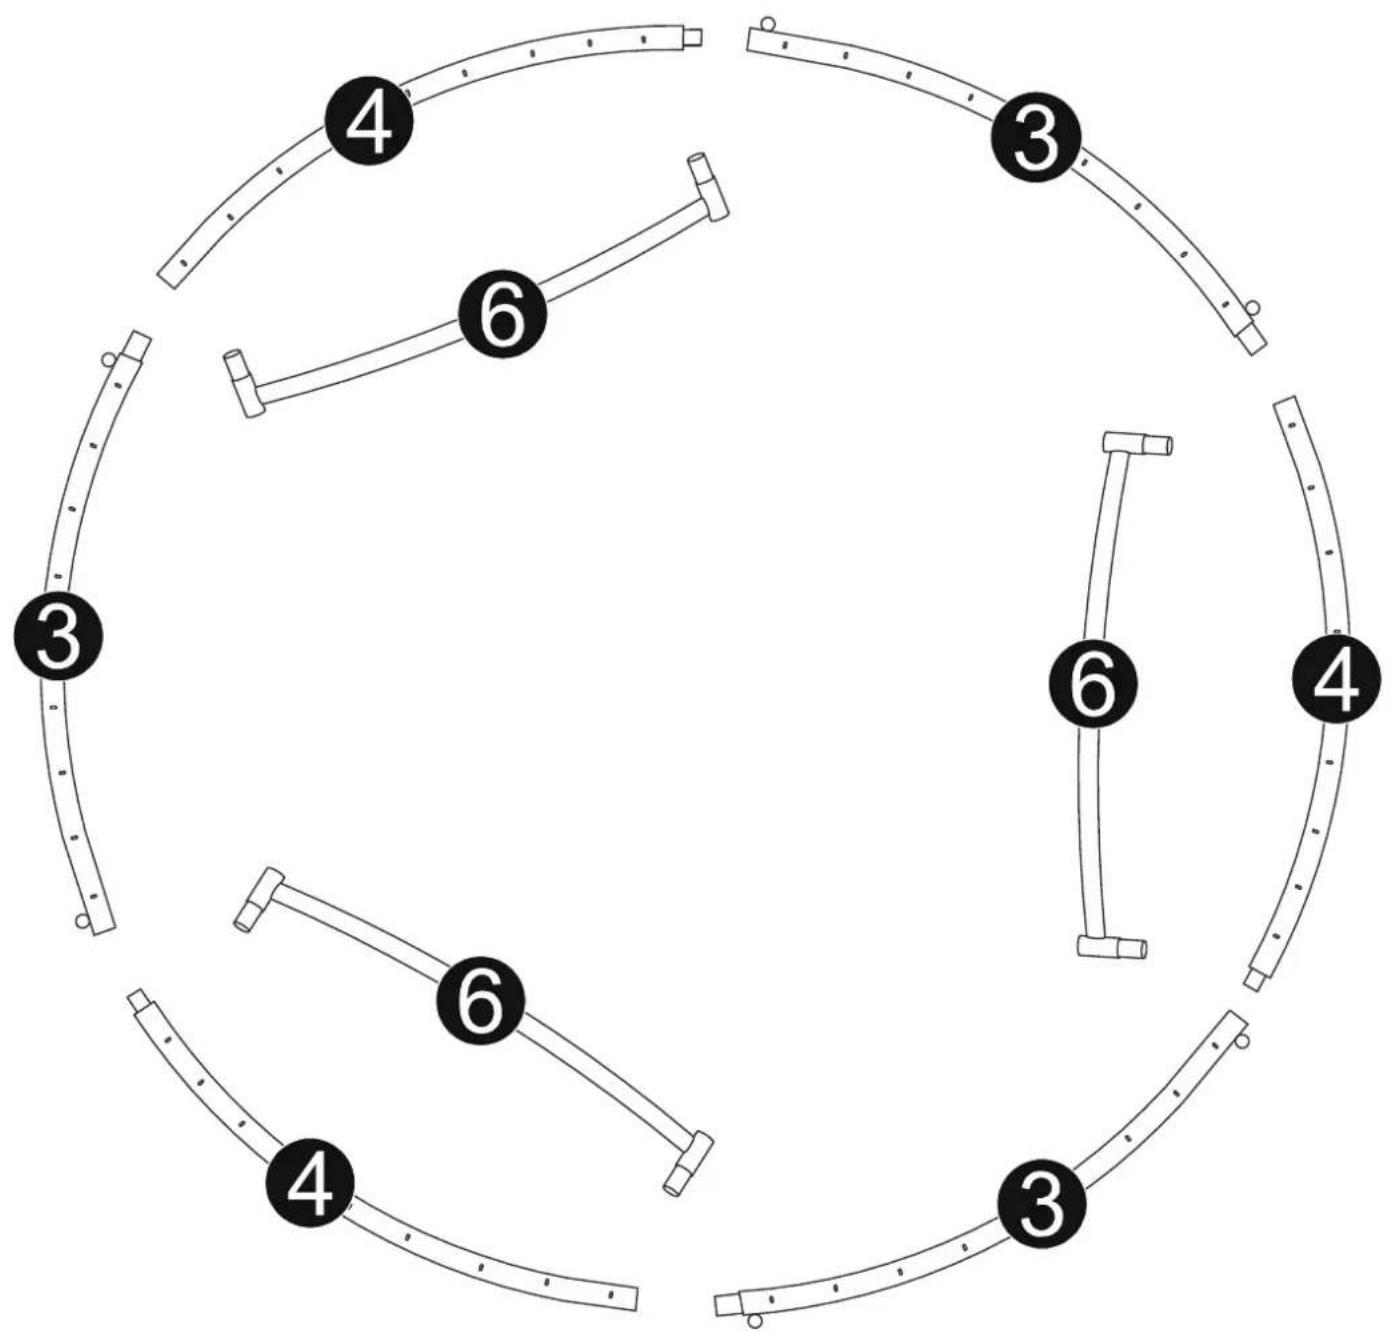
flowchart
graph TD
    A["4"] --> B["3"]
    B --> C["4"]
    C --> D["3"]
    D --> E["6"]
    E --> F["6"]
    F --> G["3"]
    G --> H["4"]
    H --> I["3"]
    I --> J["6"]
    J --> K["4"]
    K --> L["6"]
    L --> M["3"]
    M --> N["4"]
    N --> O["6"]
    O --> P["3"]
    P --> Q["6"]
    Q --> R["4"]
    R --> S["6"]
    S --> T["3"]
    T --> U["6"]
    U --> V["4"]
    V --> W["6"]
    W --> X["3"]
    X --> Y["6"]
    Y --> Z["4"]
flowchart
graph TD
    A["Step 4"] --> B["Step 4"]
    B --> C["Step 4"]
    C --> D["Step 4"]
    D --> E["Final State"]
Tip: Place anti-root cloth in the hole to cover the soil, to prevent weed growing underneath the trampoline.
natural_image
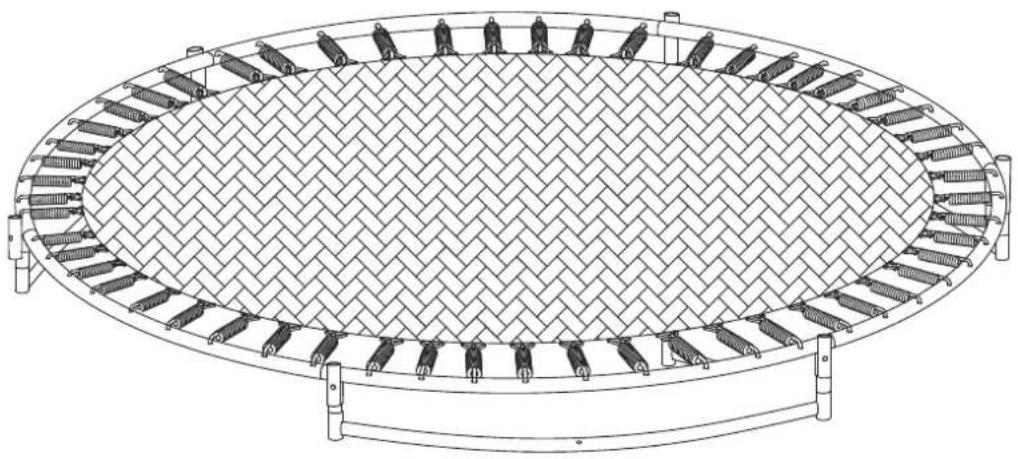
Technical line drawing of an oval-shaped mechanical or electrical component with a woven mat and multiple supports (no text or symbols)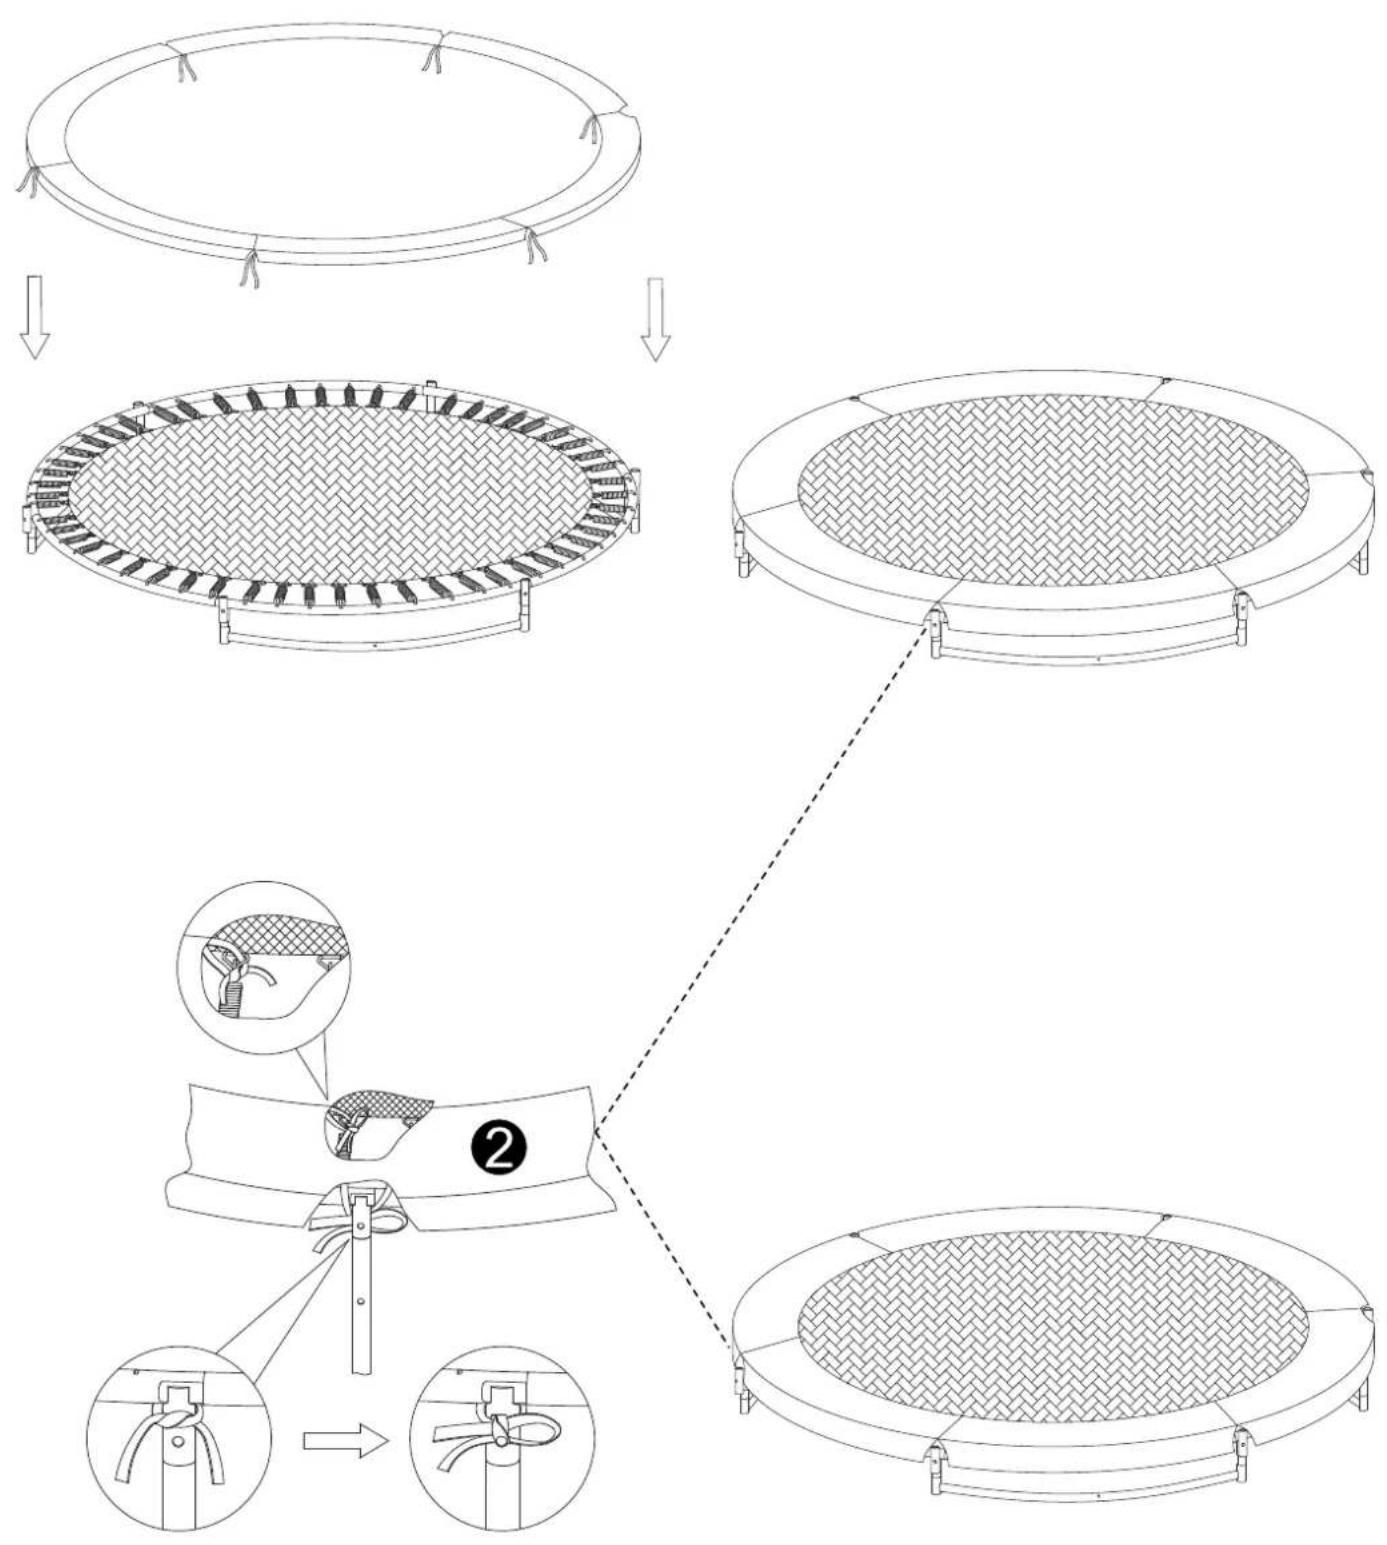
flowchart
graph TD
    A["Trampoline Frame"] --> B["Structural Change"]
    B --> C["Assembly Step ②"]
    C --> D["Final Trampoline Frame"]
20
21


22
flowchart
graph TD
    A["Component A"] --> B["Component B"]
    B --> C["Component C"]
    C --> D["Component D"]
    D --> E["Component E"]
    E --> F["Component F"]
    style A fill:#f9f,stroke:#333
    style B fill:#ccf,stroke:#333
    style C fill:#cfc,stroke:#333
    style D fill:#fcc,stroke:#333
    style E fill:#cff,stroke:#333
    style F fill:#ffc,stroke:#333
natural_image
Diagram of a garment sleeve with measurement tape and a circular detail, no text or symbols present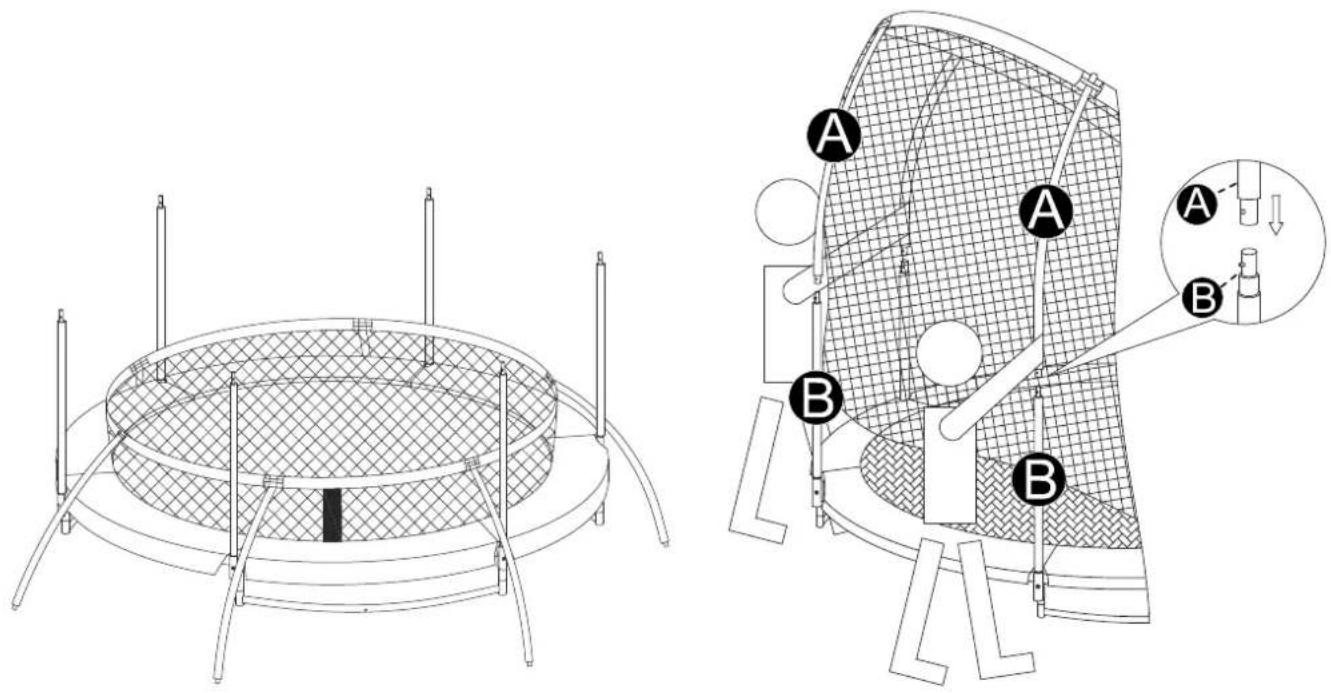
natural_image
Technical line drawing of a cylindrical industrial machine with mesh structure and central vertical scale (no text or symbols)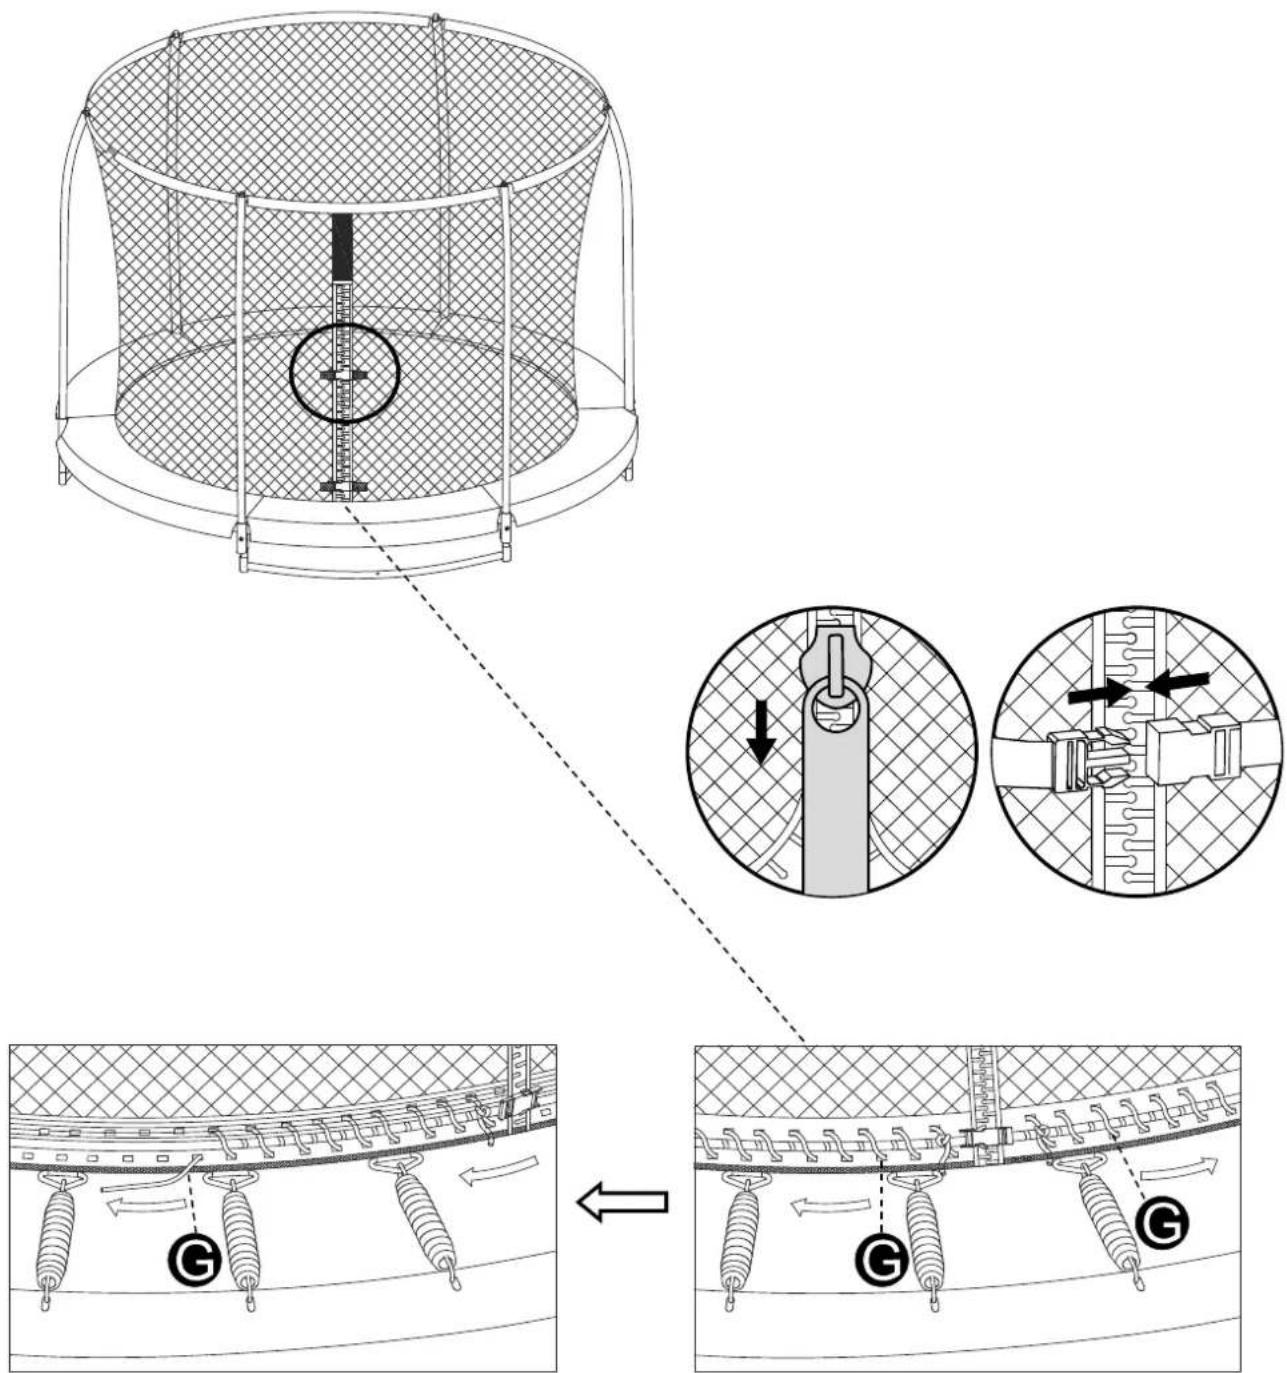

natural_image
Collage of black-and-white photos showing children playing with toys, playgrounds, and children playing in a play area (no visible text or symbols)PRAGMA BRANDS
AXI
Premium brand with high quality wooden playhouses, play sets, swings, furniture, pet houses and sports games.
STEP2
US based market leader in highest quality roto-moulded plastic toys including sand/water tables, playhouses, furniture and creative play.
BACKYARD DISCOVERY
US based market leader in high quality wooden playhouses, play sets, sheds and garden accessories.
SUNNY
Mainstream indoor and outdoor toys such as teepee tents, easels, kitchens and sand pits.
COUGAR
Table games for indoor fun with football tables, air hockey tables, pool tables and multi-purpose tables.
SAFETY SAM
He is known as Safety Sam, Victor Veilig, Benni Brems and Simon Sikker. This brand is specifically directed towards the safety of children playing outside using localized names for more local awareness.


natural_image
Stylized white figure holding a flag, no text or symbols visible
TRAMPOLINE & ENCLOSURE COMBO

the multi-brand company
A Pragma Brand
AXI is one of our brands with awesome products of great quality, that offers hours of active fun!
Pragma
Kruisboog 40
3905 TG Veenendaal
Netherlands
T: +31 (0)318 - 57 88 00
info@pragma-trading.com
www.pragma-trading.com