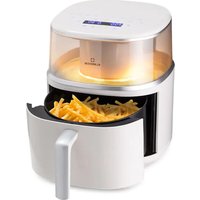
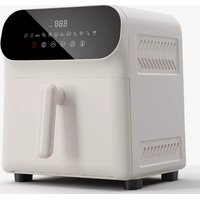
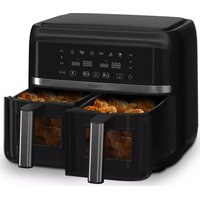
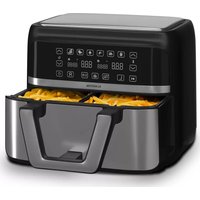
Combo Air - Deep fryer Klarstein - Free user manual and instructions
Find the device manual for free Combo Air Klarstein in PDF.
| Product Type | Hot air fryer and grill |
| Brand | Klarstein |
| Model | Combo Air |
| Power Supply | 220-240 V ~ 50/60 Hz |
| Article Numbers | 10041330, 10041331 |
| Main Functions | Grill, Airfry + Grill, Dehydrate, Bake / Roast, Airfry |
| Adjustable Temperature | 30-200 °C (depending on function) |
| Timer | 1 min - 48 h (depending on function) |
| Capacity | Not specified (inner pot + frying basket) |
| Material | Non-stick inner pot, frying basket |
| Estimated Dimensions | 35 x 30 x 35 cm |
| Estimated Weight | 5.5 kg |
| Care and Cleaning | Accessories washable with warm soapy water; do not immerse the appliance; clean interior walls and oil separator regularly |
| Safety | Automatic shut-off after 5 min pause; cooling fans; preheating required for some functions |
| Use | Indoor household use only |
| Included Accessories | Inner pot, frying basket, oil separator |
Frequently Asked Questions - Combo Air Klarstein
User questions about Combo Air Klarstein
0 question about this device. Answer the ones you know or ask your own.
Ask a new question about this device
Download the instructions for your Deep fryer in PDF format for free! Find your manual Combo Air - Klarstein and take your electronic device back in hand. On this page are published all the documents necessary for the use of your device. Combo Air by Klarstein.
USER MANUAL Combo Air Klarstein
Hot Air Fryer and Grill
text_image
QR code image containing encoded data, no visible human-readable textINHALTSVERZEICHNIS
natural_image
Line drawing of a rectangular tray with internal mesh structure and handle handles (no text or symbols)
natural_image
Line drawing of a rectangular container with slatted side and two small protrusions (no text or symbols)text_image
1 2 3 4 5 6 7 8 TEMP HRS MINS 8:8:8 °F °C LOW MED HIGH MAX TIME Grill | Airfry+Grill | Dehydrate | Bake/Roast | Airfry START/STOP 9 10 11natural_image
Technical line drawing of a device with internal components and highlighted parts (no text or symbols)(5)
natural_image
Mechanical assembly diagram showing interconnected components with no visible text or symbols(6)

Flügelschraube
natural_image
Technical line drawing of a microwave oven with internal components and a highlighted lid (no text or symbols)(7)
Member of Berlin Brands Group
Handwerkerstr. 11
15366 Dahlwitz-Hoppegarten
Deutschland
natural_image
Symbol of a trash bin crossed with a diagonal line, no text or numbers presentBerlin Brands Group UK Ltd
PO Box 1145
Oxford, OX1 9UW
United Kingdom
Dear customer,
Congratulations on your purchase. Please read the following instructions carefully and follow them to prevent potential damage. We accept no liability for damage caused by disregarding the instructions and improper use. Please scan the QR code to access the latest operating instructions and further information about the product.

text_image
QR code image containing encoded data, no visible human-readable textCONTENTS
Safety Instructions 22
Device Overview 24
Control panel 25
Button functions 26
Before first use 28
Use 28
Cleaning and care 34
Disposal Considerations 36
Manufacturer & Importer (UK) 36
TECHNICAL DATA
| Article number 10041330, 10041331 | |
| Power supply 220-240 V ~ 50/60 Hz |
SAFETY INSTRUCTIONS
- Before using for the first time, check that the voltage of your socket corresponds to the voltage specified.
- To avoid electric shock, do not immerse the power cord or the device itself in water or other liquids.
- Keep children and pets away from the device while it is in operation.
- Switch off the device after use and pull the power plug out of the socket.
- The device should be operated on a power circuit separate from other devices. If the electrical circuit is overloaded with other devices, this device may not function properly.
- Use extreme caution when moving a container that contains hot food.
- Do not let the power cord hang over the edge of tables or work surfaces, and make sure that the power cord does not come into contact with the hot surfaces of the device.
• Always place the device securely in the centre of the table or work surface. - Never touch hot device surfaces. Use the handles to move or lift.
• The device may not be used by children. - The use of accessories that are not expressly recommended by the manufacturer can lead to injuries.
- Do not place or use the device on heat-sensitive glass surfaces, wooden surfaces or tablecloths. With these surfaces, it is essential to place a heat-insensitive plate with thermal protection under the device.
- Do not use the device if the power cord is damaged, the device is malfunctioning, or has been damaged in any other way.
- Before cleaning and when not using the device, switch it off and pull the power plug out of the socket. Let the device cool down first before removing or adding device parts.
- Do not place the device in the immediate vicinity of hot gas or electric ovens or in a heated oven.
- If the plug does not fit properly, be sure to consult a qualified electrician to reduce the risk of electric shock. Never attempt to tamper with the power plug in any way.
- Do not clean the device with metallic scouring pads. Small metal parts could break off and short out electrical components in the device, which could result in an electric shock and damage the device.
-
To minimise the risk of electric shock, prepare food only in the coated, non-stick container provided.
-
The device is designed for domestic use only.
- Only use the device for its intended purpose.
- Keep these operating instructions for future reference.
- Children over 8 years as well as mentally, sensory and physically impaired persons may only use the device if they have been informed in detail about the functions and safety precautions by a supervisor responsible for them beforehand and understand the associated risks.

CAUTION
Risk of burns! When hot air frying, hot steam is released through the air outlets. Keep your hands and face a safe distance from steam and air vents. Also watch out for hot steam and air when removing parts of the device from the device.
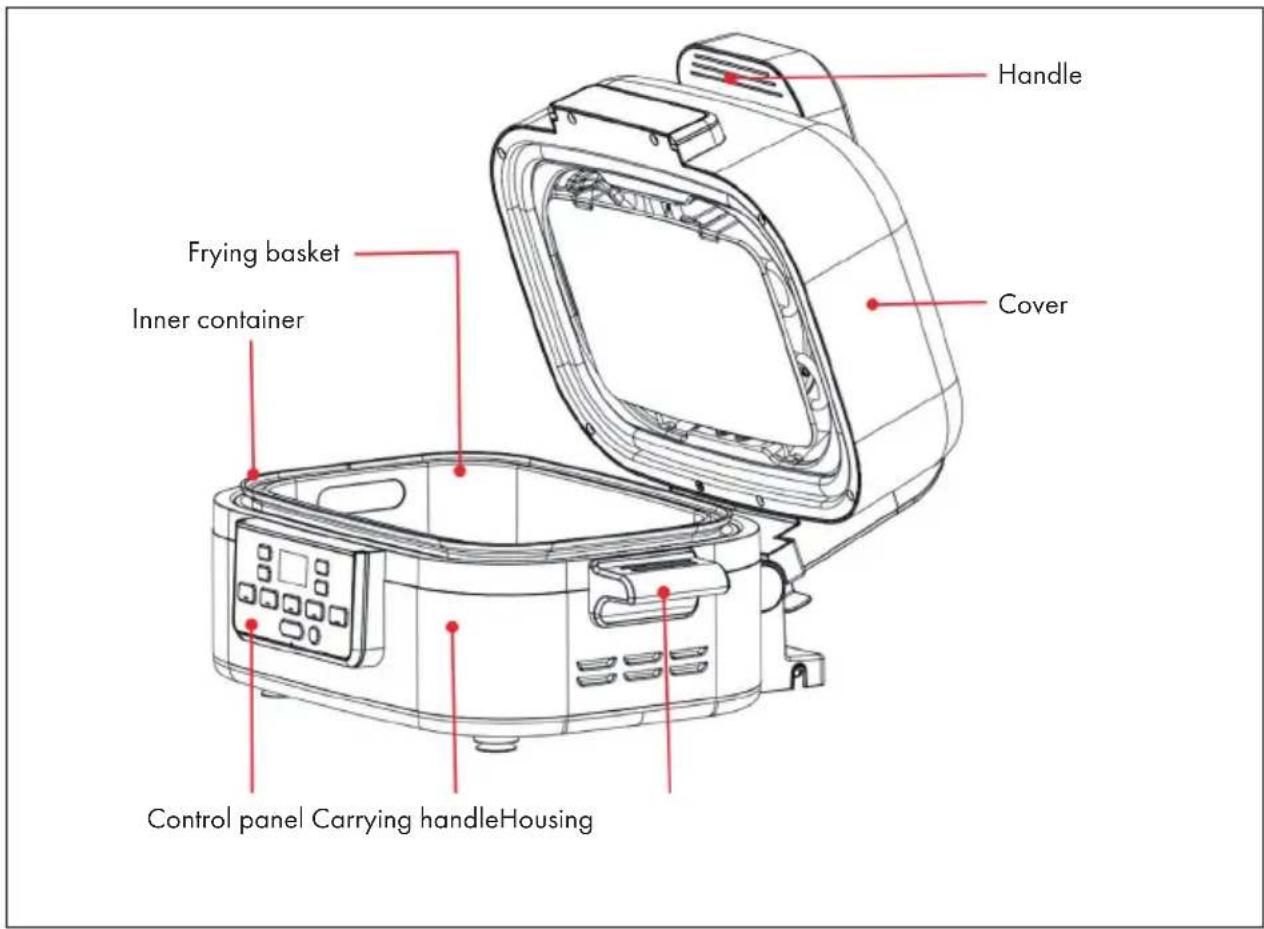
DEVICE OVERVIEW
text_image
Handle Cover Frying basket Inner container Control panel Carrying handleHousing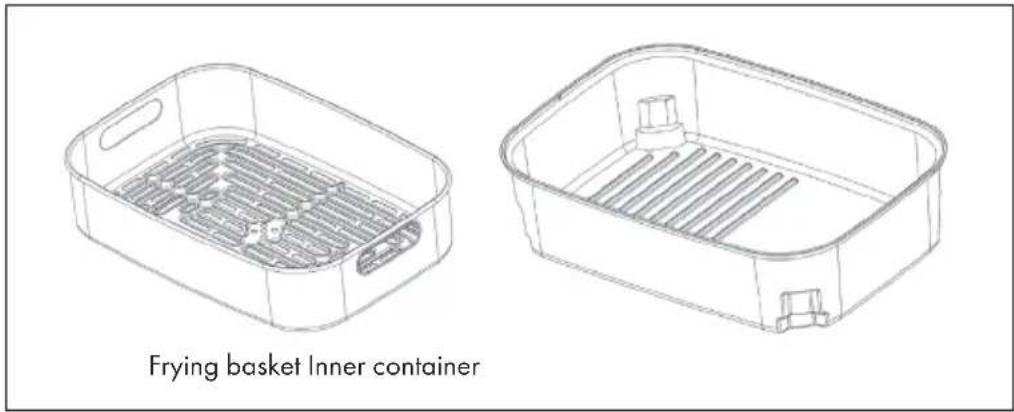
text_image
Frying basket Inner container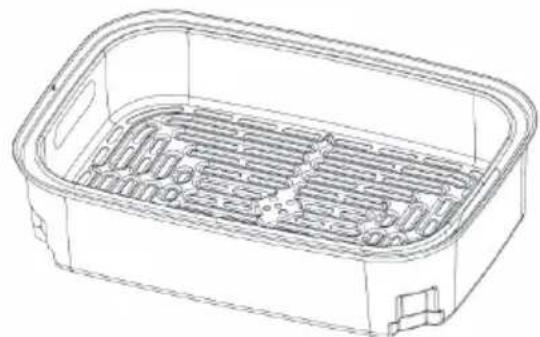
natural_image
Line drawing of a rectangular industrial or laboratory container with internal grating and side handles (no text or symbols)Frying basket + inner container
natural_image
3D wireframe model of a rectangular object with internal cavity and mounting feet (no text or symbols)Oil separator
CONTROL PANEL

text_image
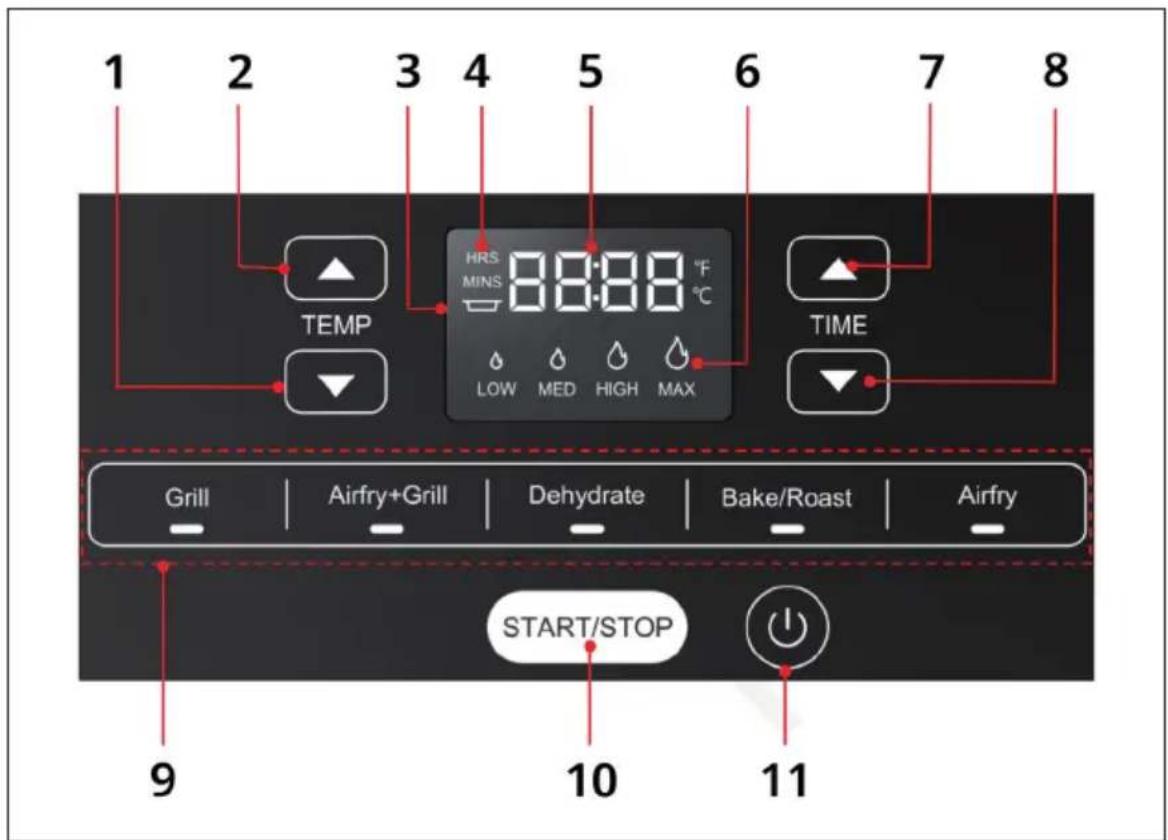
1 2 3 4 5 6 7 8 TEMP HRS MINS 8:8:8 °F °C LOW MED HIGH MAX TIME Grill | Airfry+Grill | Dehydrate | Bake/Roast | Airfry START/STOP 9 10 11| 1 Temperature (-) 7 Time (+) | ||
| 2 Temperature (+) 8 Time (-) | ||
| 3 “No container” display 9 Menus (with indicator) | ||
| 4 Hour/Minute 10 START/STOP | ||
| 5 LED display 10 On/off button | ||
| 6 Preset temperature settings | ||
BUTTON FUNCTIONS
On/off switch:
Switches the unit on/off.
START/STOP button
By pressing the START/STOP button, the unit can be switched on. When the unit is in operating mode, it can be paused by pressing the START/STOP button. Press and hold the START/STOP button to return to the current menu.
Display

The display flashes for all functions, except the grill function, if no container has been inserted or the lid is not closed properly.
Display

There are four power settings including LOW, MED, HIGH and MAX for the Grill and Airfry+Grill functions.
Temperature (+) button

For the Grill and Airfry+Grill functions, one of the four power levels can be selected by pressing the TEMP button ▲. For all other functions, the temperature can be increased by pressing the TEMP ▲ button. Press and hold the TEMP button ▲ to adjust the temperature quickly. When the unit starts operation, the temperature cannot be adjusted.
Temperature (-) button

For the Grill and Airfry+Grill functions, one of the power levels can be reduced by pressing the TEMP button ▼. For all other functions, the temperature can be reduced by pressing the TEMP ▼ button. Press and hold the TEMP button ▼ to adjust the temperature quickly. When the unit starts operation, the temperature cannot be adjusted.
Time (+) button

The operating time can be increased by pressing the TIME button▲Press and hold the button to adjust the time quickly. The time cannot be adjusted once the device starts operation.
Time (-) button

The operating time can be decreased by pressing the TIME button. Press and hold the button to adjust the time quickly. The time cannot be adjusted once the device starts operation.
Function menus
There are 5 function menus to meet the different needs of users. After the desired function menu has been selected, the corresponding indicator lights up.
Time and temperature settings for menus
| Function Set time | Adjustable | time | Set temperature | Adjustable temperature | Preheating Food | |
| Grill 20 minutes | min - 1 h Max Low/ Medium/ | High/ Max | Yes 3 cm beef | steak | ||
| Airfry + Grill 20 minutes | minutes 1 min - 1 h Max Low/ Medium/ | High/ Max | Yes 3 cm beef | steak | ||
| Dehydrate 6 h 30 min | min - 48 h 49 °C (120 °F) 30 - 80 °C | (86 - 176 °F) | No | Sliced apple | ||
| Bake / Roast | 30 minutes 1 min - 1 h 200 °C (392 °F) 100 - 200 °C | (212 - 392 °F) | No | Chicken wings | ||
| Airfry | 18 minutes | 1 min - 45 min | 200 °C (392 °F) | 100 - 200 °C(212 - 392 °F) | Yes 400 g chips |
BEFORE FIRST USE
- Before using the unit for the first time, remove all packaging materials, stickers and labels from the unit.
- Remove all removable parts of the device and clean them in soapy water, then rinse them with clean water and dry them with a clean cloth or paper towel.
- Attach unit parts and place the unit on a suitable surface. To ensure sufficient heat radiation, do not place the device in a cupboard or too close to the wall.
- When the device is used for the first time, there may be a strange smell or smoke caused by burning of the protective film on the heating element. This is normal. It is recommended to run the device in Airfry+Grill mode without food inside for 15 minutes to remove the odour. Open the door and windows to ventilate the room when the device is used for the first time.
USE
Important instructions
- All plastic and packaging material should be removed before adding the food. Food should be defrosted before preparation.
- Do not place the food directly on the heating plate for preparation.
- Do not use the device for boiling water.
- If you want to use the frying basket, the frying basket must be operated together with the inner pot. There are four feet on the underside of the inner pot to support the frying basket installed in the inner pot (see figure 1).
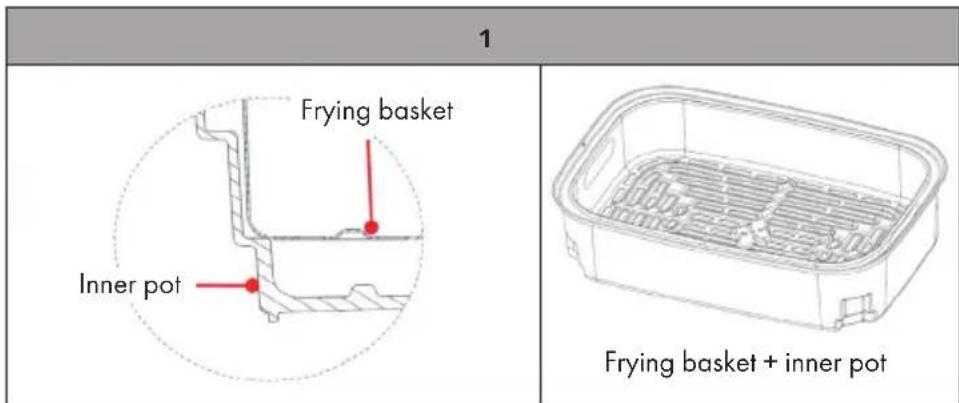
text_image
1 Frying basket Inner pot Frying basket + inner potGrill
Note: For the grill function, only the inner pot may be used for grilling food such as beef steak.
- Open the top cover and place the inner pot in the housing.
- Insert the mains plug into the socket and press the on/off button. The grill indicator light comes on steadily and the preset temperature setting lights up on the LED screen. The preset time MINS 20:00 is also displayed on the LED screen.
- Select the desired temperature with the buttons or there are 4 power settings to choose from: LOW, MED, HIGH and MAX. Adjust the preparation time with the TIME and buttons. For more detailed information on time adjustment, see the section "Time and temperature settings for menus".
Note: The temperature and time cannot be adjusted after the unit has started operation.
-
Press the START/STOP button to start preheating. The symbol [二] is displayed on the LED screen.
-
When the preheating process is complete, a beep is heard. Then place the desired food and seasonings into the inner pot for preparation. The time is displayed on the LED screen and starts counting down.
Note: The top cover must be opened when using the grill function. Otherwise, the unit cannot start operation. If the top cover is closed during preparation, preparation is paused. After 5 minutes, the unit beeps, the unit stops operating and switches off automatically.
- When the countdown is complete, a beep is heard and the unit stops operating automatically.
Note: After food is cooked well, the cooling fans will continue to keep working for 5 minutes and then stop running.
- Remove the food. The food can now be served.
- Remove the inner pot and clean it (see section "Cleaning and care").
Note: To avoid burns, take care when removing the inner pot.
Airfry + Grill
Note: For this function, the inner container or the inner container with deep-frying basket can be used for grilling and deep-frying food.
- Open the top cover and place the inner container in the right position in the housing.
- Plug the device into the mains outlet and press the power button. The "Grill" indicator light will be solid on the screen. The preset temperature setting lights up on the screen and the preset time MINS 20:00 is displayed.
- Press the Airfry + Grill button. The corresponding indicator lights up. The LED screen will show MINS 20:00 and the preset temperature setting
- Select the desired temperature with the buttons or there are 4 power settings to choose from: LOW, MED, HIGH and MAX. Adjust the preparation time with the TIME and buttons. For more detailed information on time adjustment, see the section "Time and temperature settings for menus".
Note: The temperature and time cannot be adjusted after the unit has started operation.
- Press the START/STOP button to start preheating. The symbol [二] is displayed on the LED screen.
- When the preheating process is complete, a beep is heard. "Add Food" is displayed on the LED screen. Open the top cover and put the desired food and seasonings into the inner pot for preparation. Then close the top cover.
- Press the START/STOP button. The unit starts operation. The time is displayed on the LED screen and starts counting down.
Note: The top cover must be closed when using the Airfry + Grill function. Otherwise, the unit cannot start operation. If the top cover is opened during preparation, preparation is paused. After 5 minutes, the unit beeps, the symbol 📋 blinks, the unit stops operating and switches off automatically.
- When the countdown is complete, a beep is heard and the unit stops operating automatically.
Note: After food is cooked well, the cooling fans will continue to keep working for 20 minutes and then stop running.
- Open the top cover. Remove the food. The food can now be served.
- Remove the inner pot and clean it (see section "Cleaning and care")
Note: To avoid burns, take care when removing the inner pot.
Dehydrate
Note: Only the inner container with the frying basket inserted may be used for this function and apple slices, for example, can be dehydrated.
- Open the top cover and place the inner container with the frying basket in the right position in the housing.
- Place the food and the necessary seasonings for preparation in the frying basket.
- Plug the device into the mains outlet and press the power button. The "Grill" indicator light will be solid on the screen. The preset temperature setting lights up on the screen and the preset time MINS 20:00 is displayed.
- Press the Dehydrate button. The corresponding indicator lights up. The preset time for the Dehydrate function is 6 hours and the preset temperature is 49 °C. "49 °C" is displayed on the LED screen.
- Adjust the temperature with the buttons ▲ or ▲ and the time with the buttons ▲ and ▲ For more detailed information on time adjustment, see the section "Time and temperature settings for menus".
Note: If you hold down the buttons and simultaneously for 3 seconds, you can switch between °C and °F. The temperature and time cannot be adjusted after the unit has started operation.
- Press the START/STOP button to start preheating. The LED screen displays the remaining time and the countdown starts.
Note: The top cover must be closed when using the Dehydrate function. Otherwise, the unit cannot start operation. If the top cover is closed during preparation, preparation is paused. After 5 minutes, the unit beeps, the unit stops operating and switches off automatically.
- When the countdown is complete, a beep is heard and the unit stops operating automatically.
- Open the top cover. Remove the food. The food can now be served.
- Remove the inner pot and clean it (see section "Cleaning and care").
Note: To avoid burns, take care when removing the inner pot.
Baking and Roasting
Only the inner container with the frying basket inserted may be used for this function so that for example, potatoes can be roasted or cakes baked.
- Open the top cover and place the inner pot with the frying basket in place in the correct position in the housing.
- Place the food and the necessary seasonings for preparation in the frying basket.
- Plug the device into the mains outlet and press the power button. The "Grill" indicator light will be solid on the screen. The preset temperature setting lights up on the screen and the preset time MINS 20:00 is displayed.
- Press the Bake/Roast button. The preset time for this function is 30 minutes and the preset temperature is 200 °C. "200°C" is displayed on the LED screen.
- Adjust the temperature with the buttons ▲ or □ and the time with the buttons ▲ and □ For more detailed information on time adjustment, see the section "Time and temperature settings for menus".
Note: If you hold down the buttons and simultaneously for 3 seconds, you can switch between °C and °F. The temperature and time cannot be adjusted after the unit has started operation.
- Press the START/STOP button to start preheating. The LED screen displays the remaining time and the countdown starts.
Note: The top cover must be closed when using the Bake/Roast function. Otherwise, the unit cannot start operation. If the top cover is closed during preparation, preparation is paused. After 5 minutes, the unit beeps, the unit stops operating and switches off automatically.
- When the countdown is complete, a beep is heard and the unit stops operating automatically.
Note: After food is cooked well, the cooling fans will continue to keep working for 20 minutes and then stop running.
-
Open the top cover. Remove the food. The food can now be served.
-
Remove the inner pot and clean it (see section "Cleaning and care").
Note: To avoid burns, take care when removing the inner pot.
Airfry
Note: Only the inner container with the frying basket inserted may be used for this function and chips, for example, can be prepared.
- Open the top cover and place the inner pot with the frying basket in place in the correct position in the housing.
- Place the food and the necessary seasonings for preparation in the frying basket.
- Plug the device into the mains outlet and press the power button. The "Grill" indicator light will be solid on the screen. The preset temperature setting lights up on the screen and the preset time MINS 20:00 is displayed.
- Press the Airfry button. The preset time for this function is 18 minutes and the preset temperature is 200 °C. "200°C" is displayed on the LED screen.
- Adjust the temperature with the buttons ▲ or □ and the time with the buttons ▲ and ▲ For more detailed information on time adjustment, see the section "Time and temperature settings for menus".
Note: If you hold down the buttons and simultaneously for
3 seconds, you can switch between °C and °F. The temperature and time cannot be adjusted after the unit has started operation.
- Press the START/STOP button to start preheating. [二] is displayed on the LED screen.
Note: The top cover must be closed when using the Airfry function. Otherwise, the unit cannot start operation. If the top cover is closed during preparation, preparation is paused. After 5 minutes, the unit beeps, the unit stops operating and switches off automatically.
-
As soon as the preheating process is complete, a beep is heard. The time will appear on the LED screen and the countdown will begin.
-
When the countdown is complete, a beep is heard and the unit stops operating automatically.
Note: After food is cooked well, the cooling fans will continue to keep working for 20 minutes and then stop running.
-
Open the top cover. Remove the food. The food can now be served.
-
Remove the inner pot and clean it (see section "Cleaning and care").
Note: To avoid burns, take care when removing the inner pot.
CLEANING AND CARE
- Unplug the power cord and allow the unit to cool down completely before cleaning. Clean all accessories such as the frying basket, the inner container and the oil separator with hot water and washing-up liquid.
- Immerse the frying basket and the inner container completely in water to clean them. Do not use aggressive cleaning agents or scouring pads to clean the appliance. Otherwise, the surfaces may be damaged.
- Clean the inside walls of the appliance regularly. Rub the oil off with a warm cotton cloth and then dry the inside walls with a dry cloth.
- Clean the top cover with a cloth soaked in warm soapy water.
-
Never immerse the device housing in water to clean it.
-
Never clean the device with a brush.
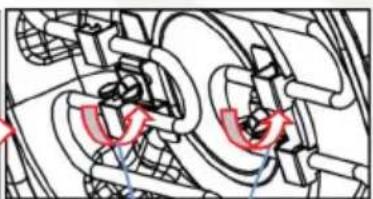
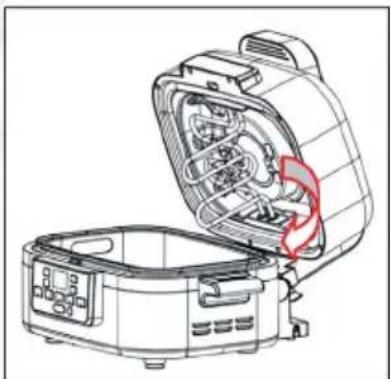
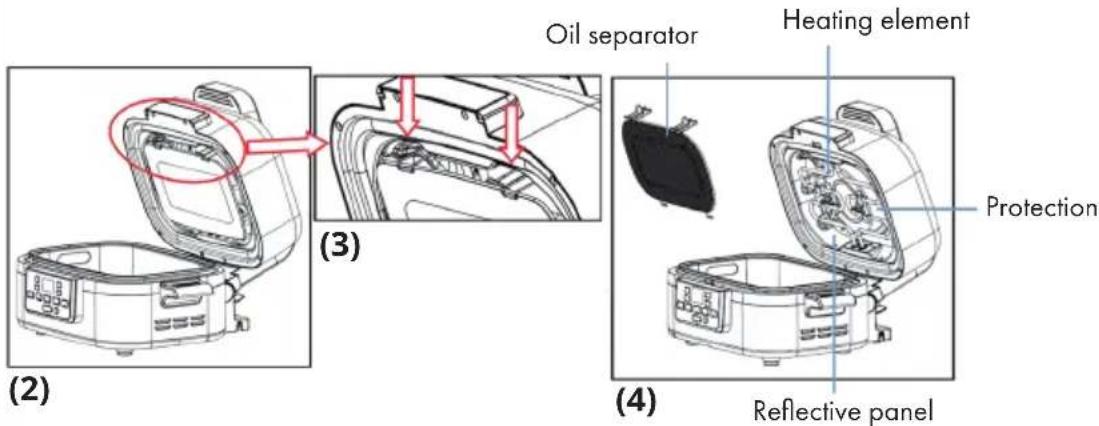
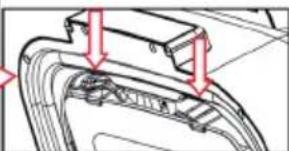
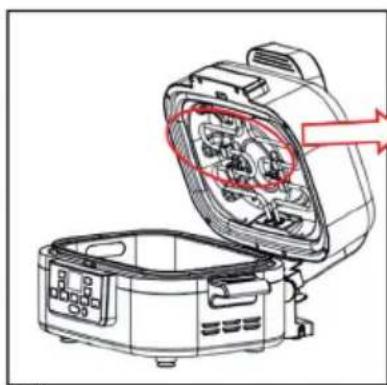
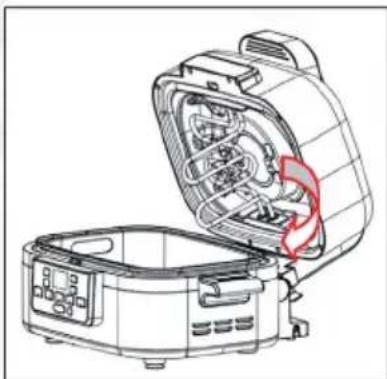
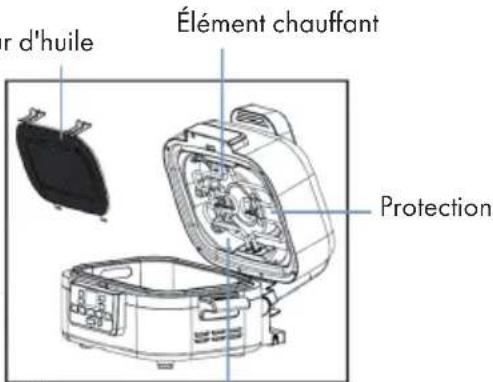
• To avoid damaging the coating, do not clean the device with metal tools. - Clean the oil separator after use. Press the catches of the oil separator to remove it (see figure 2 and 3). The oil separator must be reinserted correctly after cleaning to avoid an insufficient cooking result.
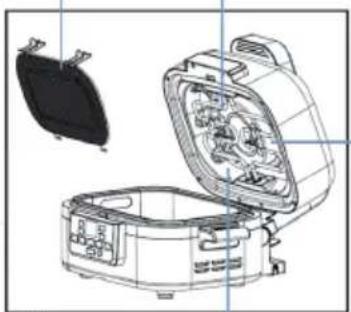
- To clean the reflective plate on the top cover, first open the top cover and remove the oil separator. Turn the wing screw anticlockwise to remove it. Then unlock the upper heating element in the direction of the arrow and clean the reflective plate with a clean and hot cloth. After cleaning, attach the upper heating element to the holder of the protective cover and then turn the wing screw clockwise to attach it to the upper heating element (see figure 4, 5, 6 and 7).
text_image
Oil separator Heating element Protection (2) (3) (4) Reflective panel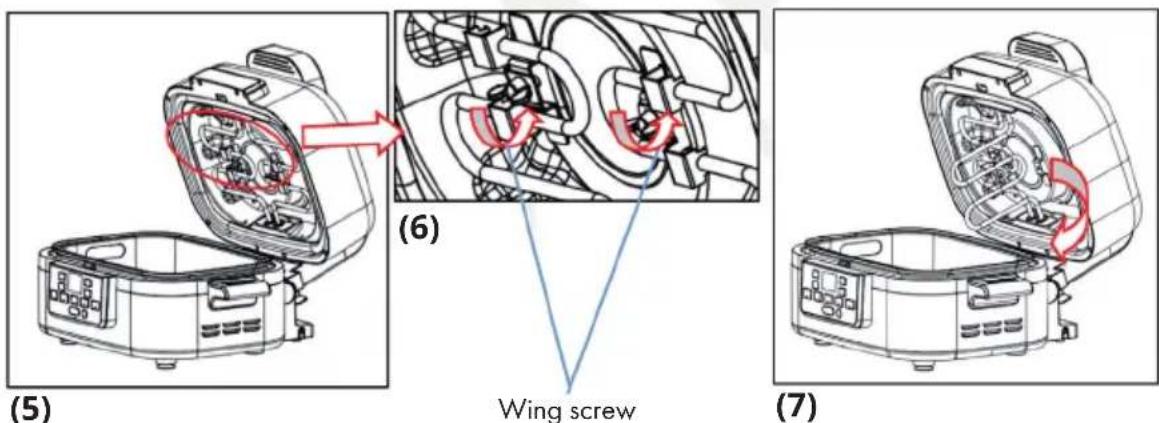
text_image
(5) (6) Wing screw (7)DISPOSAL CONSIDERATIONS

natural_image
Symbol of a trash bin crossed with a diagonal line, no text or labels presentIf there is a legal regulation in your country regarding the disposal of electrical and electronic equipment, this symbol on the product or on the packaging indicates that this product must not be disposed of with household waste. Instead, it must be taken to a collection point for the recycling of electrical and electronic equipment. By disposing of this product in accordance with the regulations, you protect the environment and the health of those around you from negative consequences. For information on recycling and disposal of this product, contact your local government or household waste disposal service.
MANUFACTURER & IMPORTER (UK)
Manufacturer:
Chal-Tec GmbH, Wallstraße 16, 10179 Berlin, Germany.
Importer for Great Britain:
Berlin Brands Group UK Ltd
PO Box 1145
Oxford, OX1 9UW
United Kingdom
Estimado cliente:
text_image
QR code image containing encoded data, no visible human-readable textÍNDICE
natural_image
Line drawing of a rectangular plastic container with internal slots and handles (no text or symbols)natural_image
3D wireframe model of a rectangular object with internal cavity and mounting feet (no text or symbols)Separador de aceite
PANEL DE CONTROL

text_image
1 2 3 4 5 6 7 8 TEMP HRS MINS 8:8:8 °F °C LOW MED HIGH MAX TIME Grill | Airfry+Grill | Dehydrate | Bake/Roast | Airfry START/STOP 9 10 11natural_image
Line drawing of a cooking appliance with an open lid and digital display (no text or symbols)(2)
natural_image
Technical diagram of a mechanical component with red arrows indicating direction (no text or symbols)(3)
natural_image
Technical line drawing of a microwave oven with internal components and a separate closed lid (no text or symbols)(4)
Protección
natural_image
Technical line drawing of a device with internal components and highlighted parts (no text or symbols)(5)

natural_image
Mechanical assembly diagram showing interconnected components with no visible text or symbols(6)
natural_image
Technical line drawing of a microwave oven with internal components and a red arrow indicating a component (no text or symbols present)(7)
Tornillo de mariposa
INDICACIONES SOBRE LA RETIRADA DEL APARATO

natural_image
Symbol of a trash bin crossed with a diagonal line, no text or numbers presentBerlin Brands Group UK Ltd
PO Box 1145
Oxford, OX1 9UW
Reino Unido
Cher client, chère cliente,
text_image
QR code image containing encoded data, no visible human-readable textSOMMAIRE
natural_image
Line drawing of a rectangular stainless steel grater with internal compartments and side handles (no text or symbols)natural_image
3D wireframe model of a rectangular object with internal cavity and mounting feet (no text or symbols)Séparateur d'huile
PANNEAU DE COMMANDE
text_image
1 2 3 4 5 6 7 8 TEMP HRS MINS 8:00:00 °F °C LOW MED HIGH MAX TIME Grill | Airfry+Grill | Dehydrate | Bake/Roast | Airfry START/STOP 9 10 11natural_image
Line drawing of a cooking appliance with an open lid and digital display (no text or symbols)(2)

natural_image
Technical diagram of a mechanical component with red arrows indicating direction (no text or symbols)(3)
natural_image
Technical line drawing of a device with internal components and highlighted parts (no text or symbols)(5)

natural_image
Mechanical assembly diagram showing interconnected components with no visible text or symbols(6)

natural_image
Technical line drawing of a microwave oven with internal components and a highlighted lid (no text or symbols)(7)
INFORMATIONS SUR LE RECYCLAGE

natural_image
Symbol of a trash bin crossed with a diagonal line, no text or numbers presentBerlin Brands Group UK Ltd
PO Box 1145
Oxford, OX1 9UW
United Kingdom
Gentile cliente,
text_image
QR code image containing encoded data, no visible human-readable textINDICE
natural_image
Line drawing of a rectangular tray with internal mesh structure and handle handles (no text or symbols)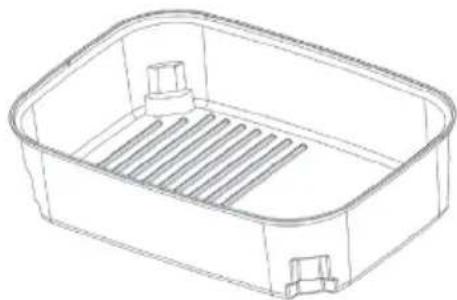
natural_image
Line drawing of a rectangular container with slatted side and two small protrusions (no text or symbols)text_image
1 2 3 4 5 6 7 8 TEMP HRS MINS 8:8:8 °F °C LOW MED HIGH MAX TIME Grill | Airfry+Grill | Dehydrate | Bake/Roast | Airfry START/STOP 9 10 11| 1 Temperatura (-) 7 Tempo (+) | ||
| 2 Temperatura (+) 8 Tempo (-) | ||
| 3 Indicazione„Nessun contenitore“ | 9 Menu (con display) | |
| 4 Ora/minuto 10 START/STOP | ||
| 5 Display a LED 10 Tasto ON/OFF | ||
| 6 Livelli di temperaturapreimpostati | ||
TASTI FUNZIONE
natural_image
Symbol of a trash bin crossed with a diagonal line, no text or numbers presentPRODUTTORE E IMPORTATORE (UK)
Produttore:
Chal-Tec GmbH, Wallstraße 16, 10179 Berlino, Germania.
Berlin Brands Group UK Ltd
PO Box 1145
Oxford, OX1 9UW
United Kingdom

area
| Category | Value | |---|---| | 1 | 100 | | 2 | 100 | | 3 | 100 | | 4 | 100 | | 5 | 100 | | 6 | 100 | | 7 | 100 | | 8 | 100 | | 9 | 100 | | 10 | 100 | | 11 | 100 | | 12 | 100 | | 13 | 100 | | 14 | 100 | | 15 | 100 | | 16 | 100 | | 17 | 100 | | 18 | 100 | | 19 | 100 | | 20 | 100 | | 21 | 100 | | 22 | 100 | | 23 | 100 | | 24 | 100 | | 25 | 100 | | 26 | 100 | | 27 | 100 | | 28 | 100 | | 29 | 100 | | 30 | 100 | | 31 | 100 | | 32 | 100 | | 33 | 100 | | 34 | 100 | | 35 | 100 | | 36 | 100 | | 37 | 100 | | 38 | 100 | | 39 | 100 | | 40 | 100 | | 41 | 100 | | 42 | 100 | | 43 | 100 | | 44 | 100 | | 45 | 100 | | 46 | 100 | | 47 | 100 | | 48 | 100 | | 49 | 100 | | 50 | 100 | | 51 | 100 | | 52 | 100 | | 53 | 100 | | 54 | 100 | | 55 | 100 | | 56 | 100 | | 57 | 100 | | 58 | 100 | | 59 | 100 | | 60 | 100 | | 61 | 100 | | 62 | 100 | | 63 | 100 | | 64 | 100 | | 65 | 100 | | 66 | 100 | | 67 | 100 | | 68 | 100 | | 69 | 100 | | 70 | 100 | | 71 | 100 | | 72 | 100 | | 73 | 100 | | 74 | 100 | | 75 | 100 | | 76 | 100 | | 77 | 100 | | 78 | 100 | | 79 | 100 | | 80 | 100 | | 81 | 100 | | 82 | 100 | | 83 | 100 | | 84 | 100 | | 85 | 100 | | 86 | 100 | | 87 | 100 | | 88 | 100 | | 89 | 100 | | 90 | 100 | | 91 | 100 | | 92 | 100 | | 93 | 100 | | 94 | 100 | | 95 | 100 | | 96 | 100 | | 97 | 100 | | 98 | 100 | | 99 | 100 | | Note: The actual values in the 'Value' column are not provided in the code. I have used the label 'The Region' to represent the 'Region'. The values are estimated based on the provided code.