BM 7017 - Blender AMICA - Free user manual and instructions
Find the device manual for free BM 7017 AMICA in PDF.
| Brand | Amica |
| Model | BM 7017 |
| Category | Blender |
| Product type | Immersion blender with accessories |
| Rated voltage | 220-240V~, 50/60Hz |
| Rated power | 1000 W |
| Power cord length | 120 cm |
| Max. mixing bowl capacity | 600 ml |
| Included accessories | Blending foot, whisk, chopper, potato masher, blender with grating and slicing discs, mixing bowl |
| Adjustable speed | Yes, continuous |
| Turbo button | Yes |
| Usage | Blend, chop, whisk, mash, grate, slice |
| Blade material | Stainless steel (S blade, discs) |
| Safety | Do not immerse motor, sharp blades, auto shut-off after overload |
| Cleaning | Motor: damp cloth; accessories: washable with water (except motor) |
| Protection class | Class II (double insulation) |
| Intended use | Household only |
Frequently Asked Questions - BM 7017 AMICA
User questions about BM 7017 AMICA
0 question about this device. Answer the ones you know or ask your own.
Ask a new question about this device
Download the instructions for your Blender in PDF format for free! Find your manual BM 7017 - AMICA and take your electronic device back in hand. On this page are published all the documents necessary for the use of your device. BM 7017 by AMICA.
USER MANUAL BM 7017 AMICA
natural_image
Assorted kitchen utensils including a blender, spatula, and cleaning tool (no visible text or labels)PL INSTRUKCJA OBSŁUGI 6
EN USER MANUAL 9
CS NÁVOD K OBSLUZE 12
SK NÁVOD NA OBSLUHU 15
natural_image
Illustration of hands pouring coins into a glass with a lid (no text or symbols)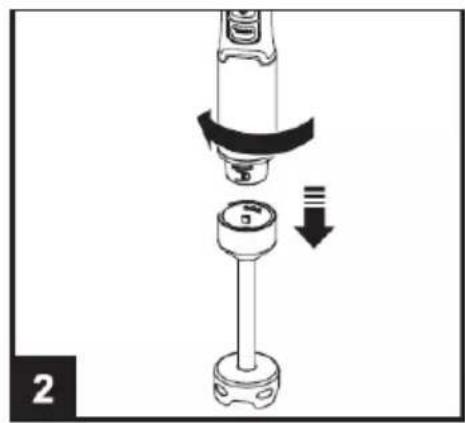
natural_image
Mechanical assembly diagram showing a piston and cylinder with a downward arrow indicating motion (no text or symbols)
natural_image
Illustration of a plug being inserted into an electrical socket (no text or symbols)
natural_image
Illustration of a hand using a pipette to lift liquid into a container (no text or symbols)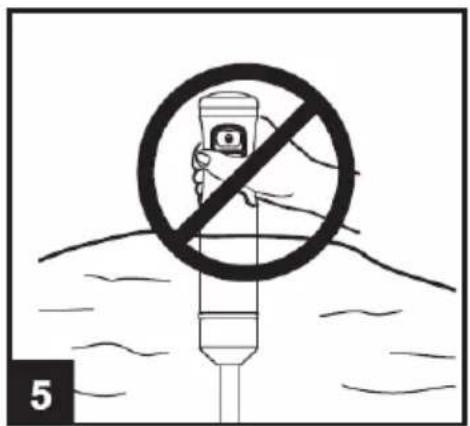
text_image
5
natural_image
Diagram showing a plug inserted into an electrical outlet with a magnified inset (no text or symbols)
natural_image
Simple line drawing of a bucket with a downward arrow indicating liquid level (no text or symbols)
natural_image
Diagram showing a lid being inserted into a container with granular material, alongside a side view of the lid (no text or symbols)
text_image
3
natural_image
Illustration of a plug inserted into an electrical outlet with two outlets, showing a black arrow pointing to the outlet (no text or symbols present)
natural_image
Diagram showing a container with granular material being compressed by an arrow, with a small container above it (no text or symbols)
natural_image
Diagram showing a plug inserted into an electrical outlet with a black arrow indicating the insertion direction (no text or symbols present)

natural_image
Diagram of a mechanical device with internal components and a tool, no visible text or symbols
natural_image
Diagram of a mechanical press or valve assembly with a rotating shaft and base, no text or symbols present.
natural_image
Diagram of a mechanical device with a rotating shaft and base, showing motion arrows (no text or symbols)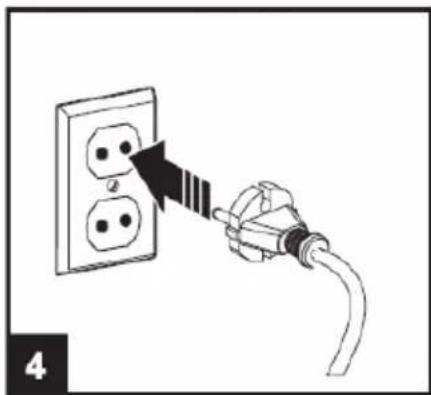
natural_image
Hand inserting a plug into an electrical outlet socket (no text or symbols visible)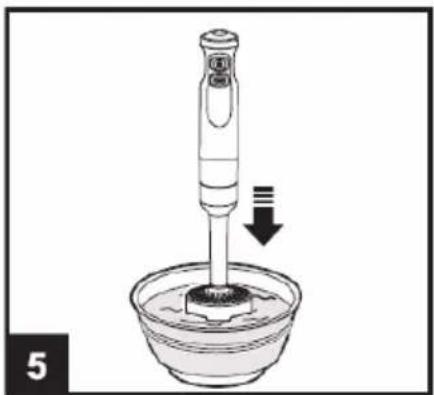
natural_image
Diagram of a pipette dispensing liquid into a bowl with a downward arrow indicating flow (no text or symbols)
natural_image
Illustration of a hand inserting a plug into an electrical outlet (no text or symbols)4

natural_image
Line drawing of a bucket with a faucet and a downward arrow indicating flow or direction (no text or symbols)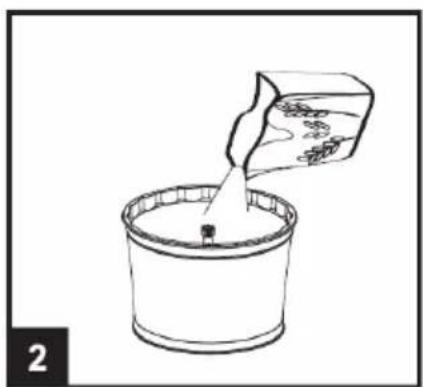
natural_image
Simple line drawing of a bucket pouring liquid into a container (no text or symbols)
natural_image
Diagram of a mechanical press or press device with a downward arrow indicating compression or disassembly (no text or symbols present)
natural_image
Diagram of a mechanical device with a downward arrow indicating force or movement (no text or symbols present)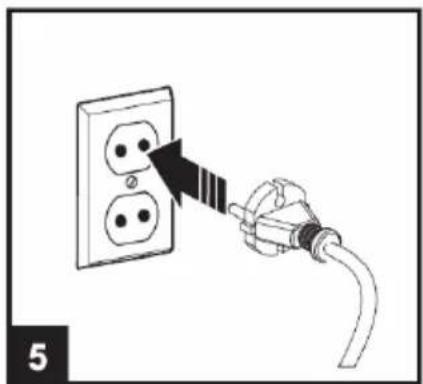
natural_image
Illustration of a hand inserting a plug into an electrical outlet (no text or symbols)
natural_image
Line drawing of a mechanical device with a left-pointing arrow indicating direction (no text or symbols)5

natural_image
Simple line drawing of a bucket with a bottle and arrow indicating downward motion (no text or symbols)
natural_image
Diagram showing a container with three circular compartments and a downward arrow indicating a process or transformation (no text or symbols)
natural_image
Diagram of a mechanical device with a lid and base, showing a downward arrow indicating a process or operation (no text or symbols present)
natural_image
Diagram of a mechanical device with a downward arrow indicating force or movement (no text or symbols present)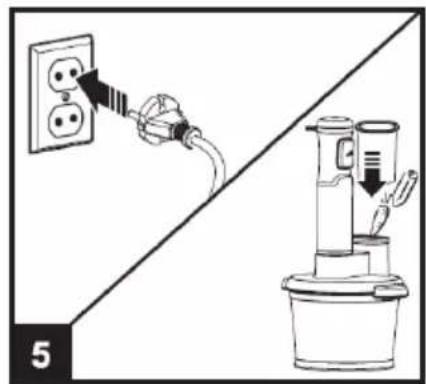
text_image
5
natural_image
Line drawing of a vertical cylindrical device with a left-pointing arrow, no text or symbols present6
 |  | |
 |  | |
 |  | |
 |  |
7
WSKAZÓWKI DÓTYCZĄCE BEZ-PIECZEŃSTWA UŻYTKOWANIA
SAFETY INSTRUCTIONS FOR USE
To avoid the risk of serious injury when using the appliance, follow basic safety rules, including the following. BEFORE OPERATING THE APPLIANCE, CAREFULLY REVIEW THE INSTRUCTIONS, NOTES, AND WARNINGS.
- Children do not realize the dangers that can arise when using electrical appliances; therefore keep the appliance out of reach of children.
- Do not immerse the body of the appliance in water or other liquids. Immersing in water may cause an electric shock.
- If water spills on the external components of the appliance, dry it thoroughly before switching back on. Do not touch wet surfaces in contact with the appliance connected to power supply, immediately disconnect it from the mains.
- Do not use the appliance if it shows any signs of damage to the power cord, or if the appliance has been dropped on the floor.
- After use, always pull out the plug from the socket, and also in case of any malfunction, before cleaning or before changing accessories.
- When removing the plug from the wall outlet, always pull on the plug, not the cord, while holding
the socket with your other hand.
- The appliance is Class II fire protection electrical equipment.
- Do not attempt to remove any parts of the housing.
- To prevent damage to the power cord, do not place it over sharp edges or close to hot surfaces.
- Do not expose the appliance to rain or humidity, and do not use it outdoors. Do not operate the appliance with wet hands.
- If the power cord or plug is damaged, it should be replaced by a professional repair shop in order to avoid hazard.
- Using attachments that were not supplied with the product may cause damage to the appliance.
- Never place the appliance on hot surfaces.
• Take caution when cleaning the attachments. - Never leave the appliance plugged in to power without supervision.
- Pull the plug from the wall outlet before replacing accessories.
- This appliance can be used by children aged 8 years and older or by persons with physical, mental or sensory handicaps, or by those who are inexperienced or unfamiliar with the appliance, provided they are supervised or have been instructed how to safely use the appliance
and are familiar with risks associated with the use of the appliance. Ensure that children do not play with the appliance. Do not allow children to clean and maintain the appliance unless they are 8 years or older and are supervised by a competent person.
- Ensure that the appliance is used on a clean, dry and level surface.
- Do not blend boiling food.
- If blades get jammed pull the plug out of the socket before attempting to clean the attachment. Exercise caution. Blades are very sharp.
- During operation do not touch the blades and pay special attention to the long hair and garments.
- Some attachments are equipped with sharp blades. Be cautious when using them.
- Do not exceed the operating time and the quantity of blended products listed in the table.
- Do not blend continuously more than three servings. Wait until the motor unit cools down to room temperature.
- During operation, do not touch any components except the motor unit and/or container. Other components may cause danger to health and / or life during operation.
- The appliance is designed for blending / mixing food,
do not use it for other purposes.
- SAVE THESE INSTRUCTIONS, THIS APPLIANCE IS FOR HOUSEHOLD USE ONLY.
Electrical requirements: Make sure that the voltage indicated on the nameplate corresponds to that of your home electrical mains. Alternating current must be used, typically marked \~.

In accordance with European Directive 2012/19/EU and Polish legislation regarding used electrical and electronic goods, this appliance is marked with the symbol of the crossed-out waste container. This marking indicates that the appliance must not be disposed of together with other household waste after it has been used.
The user is obliged to hand it over to waste collection centre collecting used electrical and electronic goods. The collectors, including local collection points, shops and local authority departments provide recycling schemes.
Proper handling of used electrical and electronic goods helps avoid environmental and health hazards resulting from the presence of dangerous components and the inappropriate storage and processing of such goods.
SPECIFICATION:
Model - BM 7017
Rated voltage - 220-240V\~, 50/60Hz
Rated power - 1000 W
Power cord - 120 cm
FEATURES AND COMPONENTS (Figure 1):
- Smooth speed adjustment
- On/Off
- Turbo button
- Motor unit
- Blender shaft attachment
- Whisk gear unit
- Whisk
- Puree attachment
- Shredder gear unit
- Shredder
- Chopping blade
- Connecting shaft
- Shredding disc
- Slicing disc
- Compact food processor gear unit
- Compact food processor
- 600 ml mixing container/cup
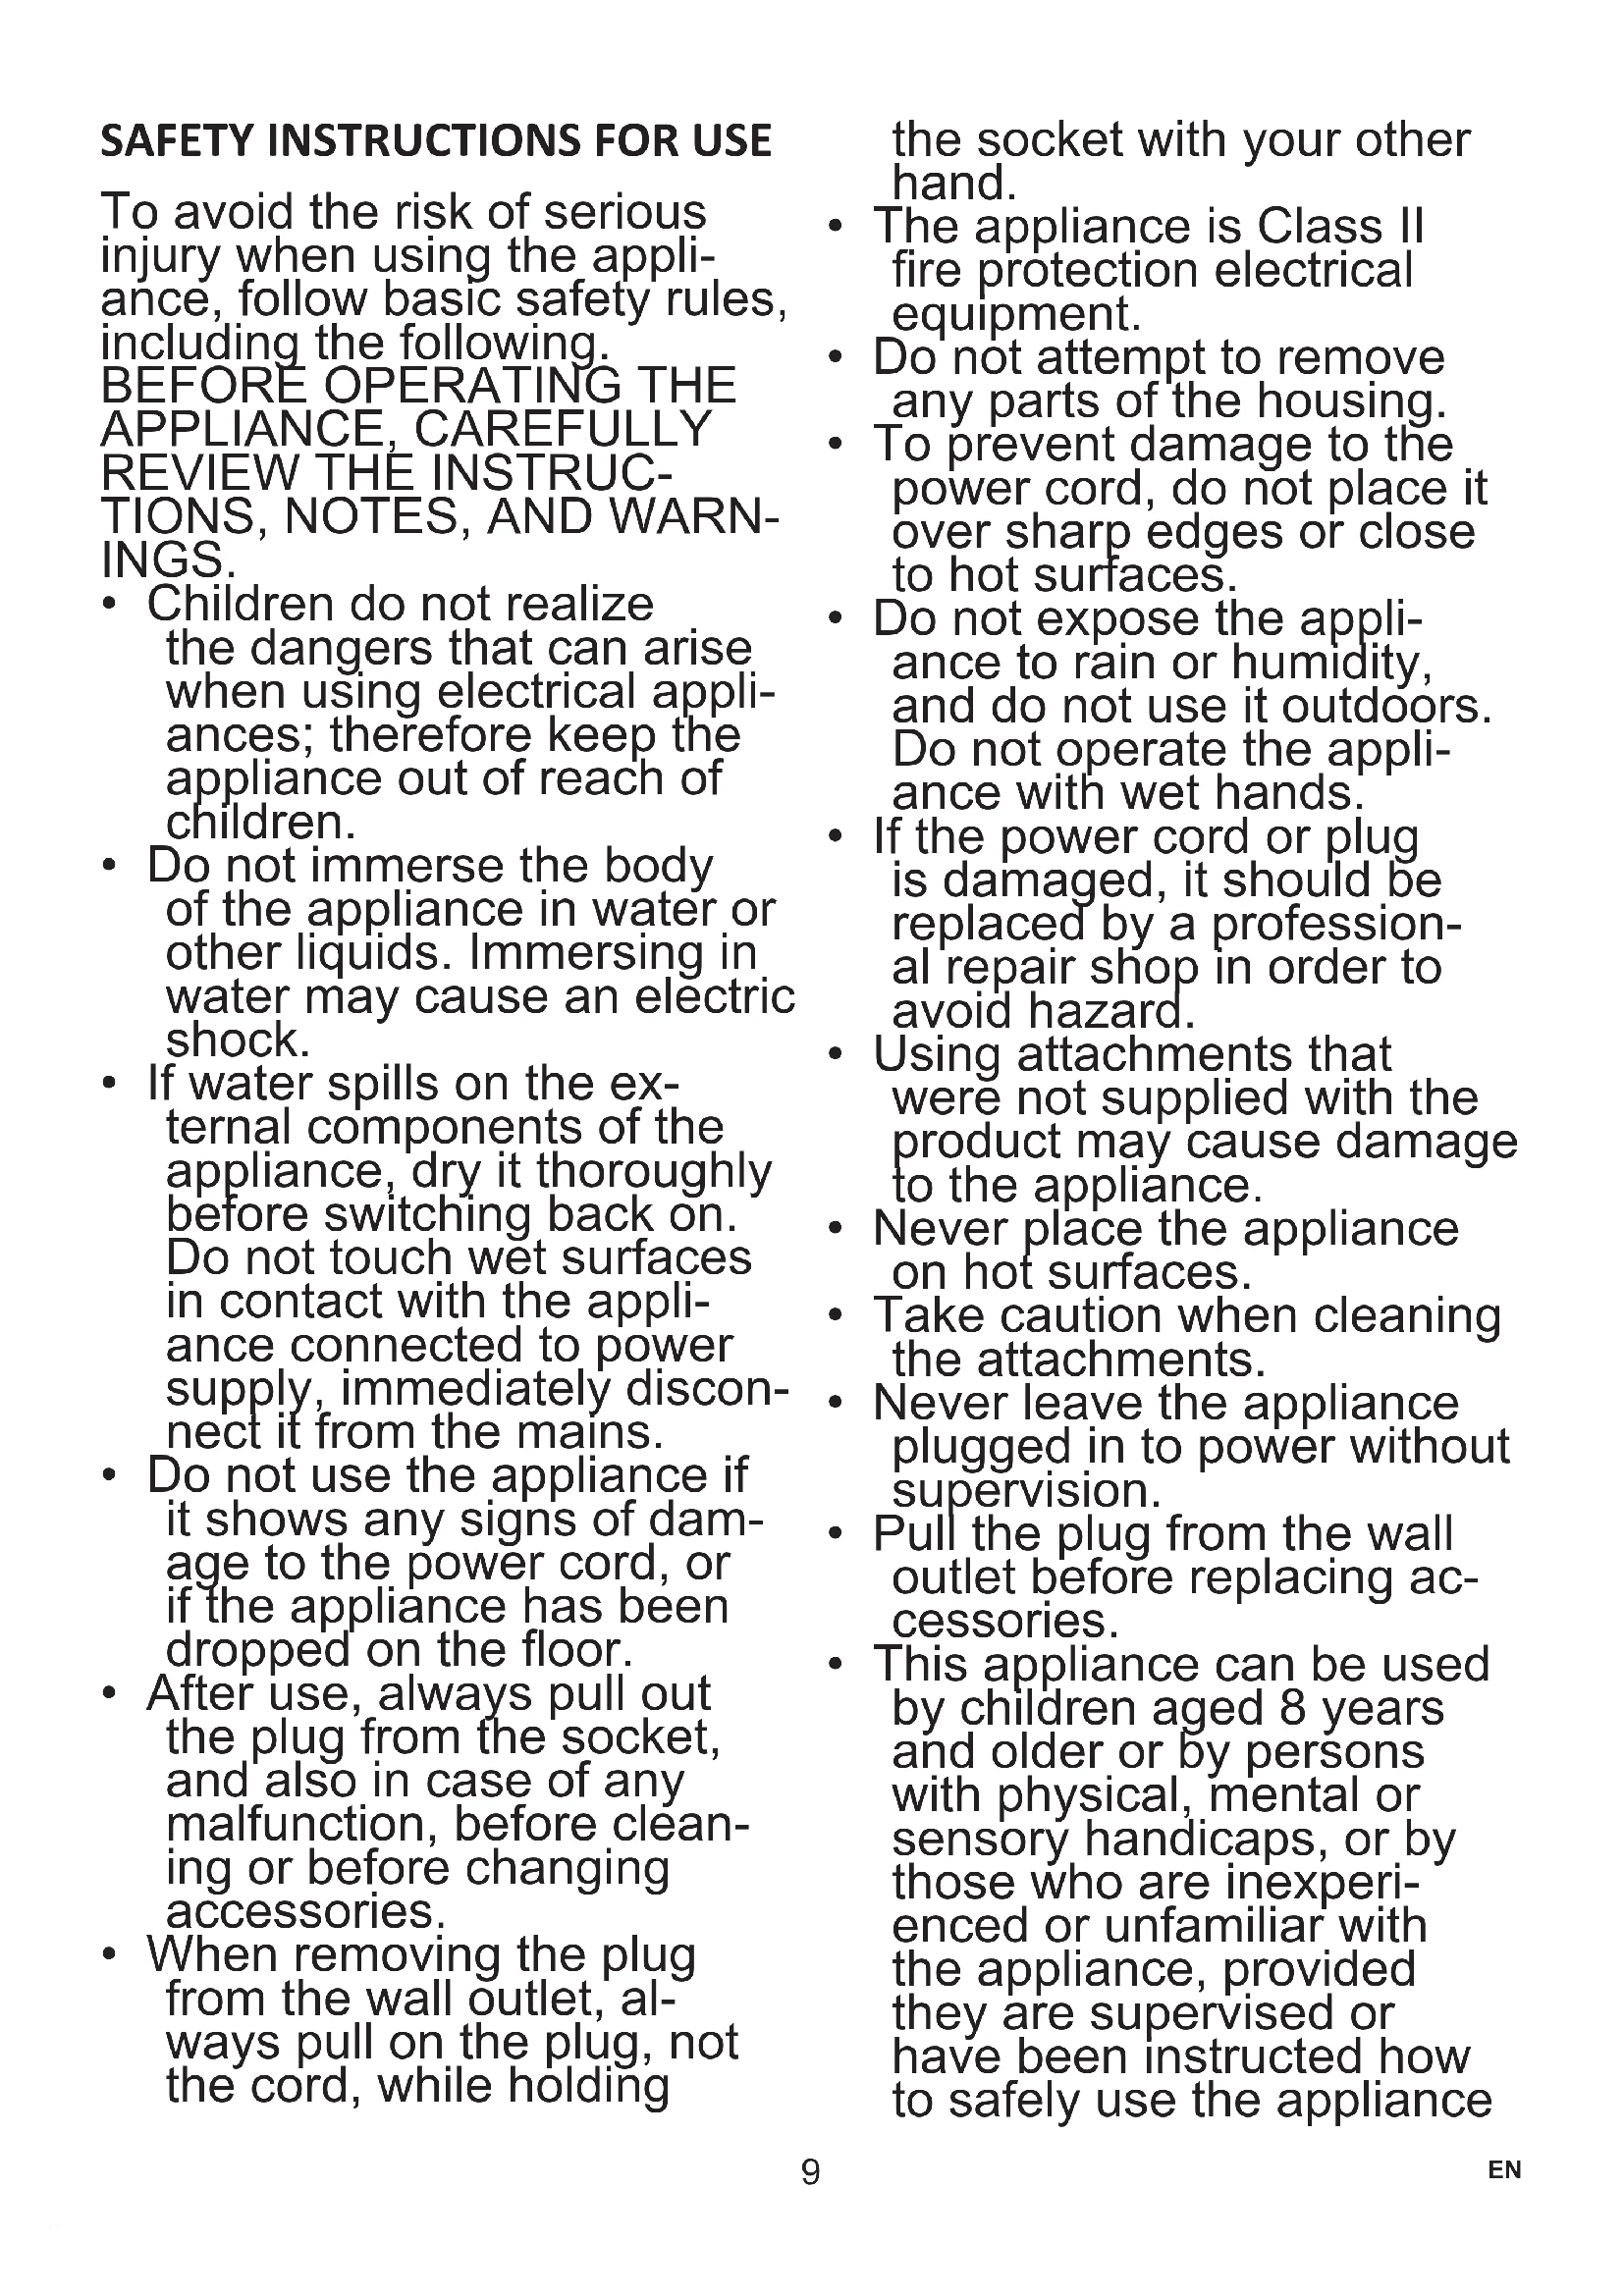
HOW TO USE YOUR HAND BLENDER (Fig. 2):
The hand blender is perfect for preparing dips, sauces, soups, mayonnaises and baby food, as well as for blending and preparing cocktails.
- Before using the food blender, make sure that the attachment is working properly.
- Place the container/cup on the counter and add no more than 600 ml of food or liquid.
- Install and lock the blender shaft attachment on the motor unit.
- Plug the appliance into a power socket.
- Hold the motor unit firmly; You can easily operate the speed control button with your thumb.
-
Insert the blender shaft attachment into the bowl, then use the speed control to adjust speed as needed.
-
Make slow moves up and down, right and left until the food is well blended.
- Release the speed control button, allow the blade to stop and turn the appliance off. When you have finished blending, unplug the appliance from the wall outlet.
- To avoid splashing, immerse the blade in the food before turning on the appliance. Hold the bowl firmly still and then press the speed control button.
- Do not allow liquid to reach above the gear unit.
- Move the blade around in the food and hold it steadily.
- If the blender becomes clogged, unplug it before cleaning.
- Detach and disassemble after use.
Note!
- To thoroughly blend, move the blender shaft up and down until a smooth consistency is obtained.
- For best blending results and to minimize splashing, use deep, tall bowls.
- Do not use the blender shaft for products other than food.
- Do not use the blender for more than 1 minute.
- Do not immerse the motor unit in water!
- Always check attachments before each use. Do not use cracked, bent or damaged attachments.
- Be careful as the blades are very sharp.
- Do not blend products without any liquid!
• This appliance is not designed to crush ice.
HOW TO USE THE WHISK?
The whisk should only be used for whipping cream, egg whites and biscuits and ready-made dessert mixes.
- Push the wire whisk onto the gear unit and attach to the motor unit by twisting and locking
- Plug in the appliance.
- Put the whisk in the bowl and only then start the motor unit with the on/off button. To avoid splashing, start at minimum speed.
- Detach and disassemble after use.
- Do not beat more than four egg whites or 400 ml of cream.
- Do not allow the liquid to reach above the whisk wires.
- After use, detach the gear unit from the motor unit. Then remove the whisk from gear unit.
Note!
- Do not use for thicker mixtures such as margarine and sugar as the whisk may be damaged.
- Do not use the whisk for more than 2 minutes.
HOW TO USE THE CHOPPING BLADE? (Rys. 3):
Do not chop very hard products such as ice cubes, nutmeg, coffee beans and grains.
- Carefully remove the plastic cover from the blade.
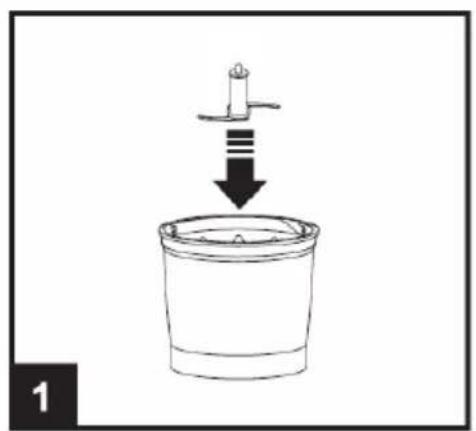
- Place the blade on the centre pin of the chopping bowl. Push the blade down and lock the bowl.
- Always place the chopping bowl on a non-slip surface.
- Place food in the chopping bowl.
- Place the lid gear unit on the chopping bowl.
- Insert the motor unit into lid gear unit and turn until it locks
- Plug in the appliance.
- Press the on/off button to start chopping. When chopping hold the motor unit with one hand and the chopping bowl with the other.
-
Unplug the appliance after use.
-
Remove the motor unit from the lid gear unit.
-
Then remove the lid gear unit from the chopper bowl.
- Carefully remove the blade.
- Scoop the processed food out of the chopper bowl.
Note!
- The blade is very sharp! Always hold the blade unit by its upper plastic part.
- Do not chop hard food for more than 15 seconds.
HOW TO USE THE PUREE ATTACHMENT? (Fig. 4):
- Install the mixer in the puree attachment.
- Connect the puree attachment to the gear unit.
- Install by turning the motor unit on the gear unit.
- Plug in the appliance.
- Place the puree attachment in the cooked potatoes and press the on/off switch button.
- When you have finished unplug the appliance and take it apart.
HOW TO USE THE FOOD PROCESSOR? (Fig. 5 and 6):
- Place the shaft in the centre of the food processor bowl.
- Place the disc on the shaft holder.
- Put the gear unit on the bowl.
- Insert the motor unit into lid gear unit and turn until it locks
- Plug in the appliance.
- Add food to be processed through the opening.
- Press the on/off button to start the food processor. When processing hold the motor unit with one hand and the bowl with the other.
- Unplug the appliance after use.
- Remove the motor unit from the lid gear unit.
- Then remove the gear unit. Carefully remove the disc.
- Remove processed food from the bowl.
Note!
- Do not use the blender for more than 1 minute or for more than 15 seconds when fragmenting hard food products. Leave the appliance to cool down to room temperature for about 5 minutes after each use.
CLEANING AND CARE:
For instructions how to clean appliance parts, please refer to the table in Fig. 7.
- Clean the motor unit and the lid gear unit with a damp cloth only.
- Unplug the appliance from power before cleaning.
- Do not immerse the motor unit in water!
- After preparing very salty food, rinse the blades with water right away.
- Certain food products may cause discolouration of plastic parts. Use a cloth dipped in vegetable oil to remove discolouration.
• Exercise caution when cleaning as the blades are very sharp.