IR 200 - Radio Telestar - Free user manual and instructions
Find the device manual for free IR 200 Telestar in PDF.
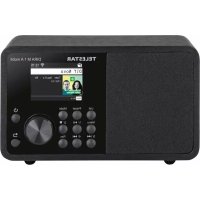
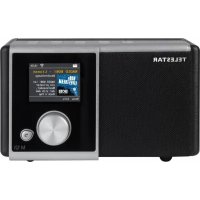
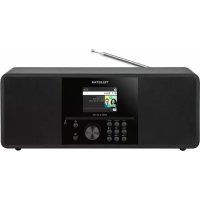
| Product Type | DAB+/FM/Internet Radio |
| Brand | Telestar |
| Model | IR 200 |
| Reception | DAB+ (band III 174-240 MHz), FM (74-108.1 MHz), Internet radio (Wi-Fi/LAN) |
| Number of Internet stations | Approximately 10,000 stations |
| Display | 2.8-inch color TFT screen (240x320 pixels) |
| Audio power | 2 x 10 W (STMicroelectronics amplifier) |
| Speakers | 2 x 3 inches, 4 ohms, 10 W |
| Network connectivity | Wi-Fi IEEE 802.11b/g (WPA/WPA2/WEP), LAN RJ45 10/100 Mbps |
| Wireless connectivity | Wi-Fi, UPnP/DLNA compatible, AirMusic Control app (iOS/Android) |
| Inputs | AUX In (3.5 mm stereo), USB (for playback/recording) |
| Outputs | Line Out (3.5 mm stereo), Headphone (3.5 mm stereo) |
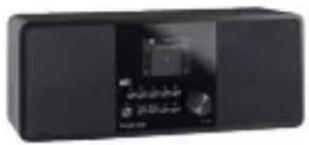
| Remote control | Yes, with CR2025 battery |
| Special functions | Alarm, timer, equalizer (Normal, Flat, Pop, Jazz, Rock, Classic), weather and finance display |
| Playable audio formats | MP3, AAC/AAC+, WMA (up to 320 kbps) |
| Power supply | Mains 220-240 V AC, 50/60 Hz via 12 V DC / 3 A adapter |
| Software update | Via USB flash drive (download from www.telestar.de) |
| Menu languages | French, English, German, Spanish, etc. |
| Box contents | Radio, remote control, power adapter, user manual, warranty card |
| Cleaning | Dry and soft cloth, unplug before cleaning, do not use liquid |
| Safety | Adjustable auto-off (5, 15, 30 min), short-circuit and overheating protection |
| After-sales service | Phone support +49 2676 9520101, email service@telestar.de |
Frequently Asked Questions - IR 200 Telestar
User questions about IR 200 Telestar
0 question about this device. Answer the ones you know or ask your own.
Ask a new question about this device
Download the instructions for your Radio in PDF format for free! Find your manual IR 200 - Telestar and take your electronic device back in hand. On this page are published all the documents necessary for the use of your device. IR 200 by Telestar.
USER MANUAL IR 200 Telestar
TELESTAR Service Center,
Am Weiher 14,
56766 Ulmen
e-mail: service@telestar.de

Anzahl Erklärung
text_image
⑨ ⑩ ⑪ DC:IN3M USB SY:1A LUN AUX IN LUE OUT ⑮ ⑯ ⑰ ⑱ ⑲ ⑳ ⑴ ⑵ ⑶ ⑭ ⑮ ⑯ ⑰ ⑱ ⑲ ⑳ ⑴ ⑫4. ÜBERSICHT DER BEDIENELEMENTE
text_image
Yellow triangular warning sign with black exclamation mark symbol6. INSTALLATION
text_image
Evos Evosonic Radio ● Moby ● Why Does My He art Feel So Bad (natural_image
Icon showing headphones with a blue 'U' inside, next to a red square and a gray play button (no text or symbols)Air Music Control®
text_image
QR code image containing encoded data, no visible human-readable textApp für iOS® Geräte

text_image
QR code image containing encoded data, no visible human-readable text10. APP STEUERUNG
Bitte beachten Sie:
text_image
FM 92.40 MHz
DAB
text_image
Absolut relax Widergate DAB11. FEHLERBEHEBUNG

natural_image
Simple line drawing of a recycling symbol (three chasing arrows) with no text or labelstext_image
Diagram of a trash bin with crossed diagonals and a blank rectangular base, indicating no waste or discharge.natural_image
Symbol of a trash bin crossed out by two diagonal lines, representing no waste or discharge (no text or labels)
Thank you for purchasing the TELESTAR IR 200. When you use the TELESTAR IR 200 for the first time, please read these instructions carefully, and retain them for reference in future. You will be able to fully enjoy the many functions of the radio only if you follow the instructions.

This operating manual will assist you with the
- correct
- safe
- optimal
use of the TELESTAR TELESTAR IR 200. We assume the user of the radio has general knowledge related to the operation of consumer electronics products.
Any person
- installing
- connecting
- operating
- cleaning
- disposing of
this radio must first have taken notice of the entire contents of this operating manual. Always keep this operating manual close to the radio.
1. Preface
1.2. Intended use
This product is a consumer electronics device.
This device serves as a receiver of DAB+, FM and internet radio signals and plays audio files from
a USB data carrier, Bluetooth device or network drive as well as recording audio files onto a USB data carrier.
Any other operation or use of he device is considered improper and can lead to personal injury or property damage.
Do not use this device for any other purpose.
Only use the device indoors.
The device is intended for private, non-commercial use only.
We assume that the user has some general knowledge about using electronic entertainment equipment. Liability is excluded in the event of improper use.
2. SAFETY NOTICES
2.1. Explanation of symbols
SYMBOL MEANING

DANGER!
This signal indicates a hazard with a high level of risk which, if the instruction is not observed, will result in death or serious injury.

WARNING!
This signal indicates a hazard with a medium level of risk which, if the instruction is not observed, may result in death or serious injury.

CAUTION!
This signal indicates a hazard with a low level of risk which, if the instruction is not observed, may result in minor or moderate injury.
NOTE!
This signal warns the user of possible material damage and references special descriptions for the operation of the device.

This symbol indicates danger.
2. SAFETY NOTICES
SYMBOL MEANING


Protection class II
Electrical devices that fall under protection class II have reinforced or double insulation to the amount of the rated insulation voltage between active and accessible parts (VDE 0100 part 410, 412.1). They usually have no connection to the protective conductor. Even if they have conductive surfaces, they are protected from contact with other live parts by reinforced or double insulation

Products labelled with this symbol meet the requirements of the guidelines of the European Community.
Abb. 1

Abb. 2

These symbols indicate the polarity of the plug for devices with hollow plugs.
A distinction is made between 2 variants Fig. 1: Outside plus / inside minus Fig. 2: Inside plus / outside minus

Devices with this symbol may only be operated indoors in a dry environment.
2. SAFETY NOTICES
2.2. Safety instructions

WARNING!
Check the device before use.
The device must not be used if it is defective or damaged.
Risk of injury
Risk of injury to children and people with reduced physical, sensory or mental ability (e.g. disabled people, elderly people with limited physical and mental ability) or a lack of experience and knowledge.
Always keep the device out of the reach of children.
This device can be used by children aged 8 years and above and persons with reduced physical, sensory or mental ability or lack of experience and/or knowledge if they are supervised or have been given instruction concerning safe use of the device and understand the hazards involved.Never let children use the device unsupervised.
Danger of suffocation!
Packaging material is not a toy!
Do not store the packaging material used (bags, polystyrene pieces etc.) within the reach of children.
Children must not play with the packaging. There is a risk of suffocation, especially with packaging films.
2. SAFETY NOTICES
2.3. Operational safety

DANGER!

Risk of injury!
Risk of injury from electric shock from live parts.
There is a risk of electric shock or fire due to accidental short circuits.
Check the device for damage before each use.
If you notice visible damage or if the device shows visible damage, do not use it anymore.
If you discover a technical or mechanical problem, please contact TELESTAR Service.
Only use the power adapter provided! Never use any other power adapter.
Never open the device casing.
Immediately disconnect the device from the power in the event of any malfunction. To do so, immediately unplug the device.
Only use replacement parts and accessories that have been supplied and approved by us.
Do not physically alter the device and do not use any spare parts or additional devices that were not explicitly approved or provided by us.
Do not use the device in potentially explosive environments. These include, for example, fuel storage areas, petrol stations, or areas in which solvents are stored or processed.
2. SAFETY NOTICES
Do not use the device in areas where the air is contami nated with particles (e.g. flour or wood-chip dust) Operation errors may appear in the form of the device becoming hot or smoke developing from the device or the power unit. Loud or unusual noises can also be a sign of a malfunction. In this case, pull the power adapter out of the power socket immediately.
Only handle the power adapter by the casing.
Never pull the power adapter out of the socket by the cable.
After a malfunction, the device must not be used until it has been checked or repaired by a qualified person.
If you bring the device from a cold to a warm environ ment, moisture can form inside the device.
In this case, wait about an hour before using it.
Unplug the device from the power socket if you are absent for a longer period and during thunderstorms.
Make sure that contact with moisture, water or spray is avoided and that no objects filled with liquids - e.g. vases - are placed on or near the device or its power adapter.
If foreign bodies or liquids get into the device or the power adapter, pull the power adapter out of the socket immediately. Have the device checked by qualified personnel before you use it again. Otherwise, there is a risk of electric shock.
Make sure that the device and the power adapter are not exposed to dripping or splashing water
and that there are no naked flames (e.g. burning candles) near the device or the power supply.
2. SAFETY NOTICES
2.4. Connecting the device
Only connect the device to a properly installed, earthed and electrically protected socket.
Please ensure that the power source (socket) is easily accessible.
Do not kink or crush any cable connections.
Before using the device, check whether the voltage specification on the device corresponds to local mains voltage. The information on the power adapter must correspond to the local mains supply.
Only connect the radio to a properly installed socket with 220-240 V AC at 50-60 Hz.
Place the radio on a firm, level surface.
The device consumes power in standby mode. To completely disconnect the device from the mains, the power adapter must be unplugged from the socket.
2.5. Protect the device from damage
NOTE!
Unfavourable environmental conditions such as moisture, excessive heat or lack of ventilation can damage the device.
Only use the device in dry rooms.
Avoid the direct vicinity of: heat sources such as radiators, naked flames such as candles, and devices with strong magnetic fields such as speakers.
2. SAFETY NOTICES
Do not expose the device to extreme conditions, e.g. direct sunlight, high humidity, moisture, extremely high or low temperatures or naked flames.
Ensure that there is sufficient distance from other objects so that the device is not covered and adequate ventilation is always guaranteed.
Avoid direct sunlight and unusually dusty locations.
Do not place any heavy objects on the device or the power adapter.
Do not use the device in potentially explosive environments. These include, for example, fuel storage areas, tank facilities, or areas in which solvents are stored or processed.
Do not use the device in areas where the air is contaminated with particles (e.g. flour or wood-chip dust)
2.6. Risk of injury

WARNING!
Excessive sound pressure when using earphones or headphones can cause hearing damage or loss.
Using earphones or headphones at a high volume for a long period of time can cause injury to the user.
Please check the volume before putting the earphones or headphones in or onto your ears.
Set the volume to low and only increase the volume enough that you still find it comfortable.
2. SAFETY NOTICES
2.7. Information on the radio interface
The device generates an electromagnetic field.
Please pay attention to notices in your area that prohibit or restrict the operation of electronic devices.
This may be the case, for example, in hospitals, at petrol stations and tank facilities or at airports.
If corresponding warnings apply, disconnect the device from the power immediately.
The components contained in the device generate electromagnetic energy and magnetic fields.
These can affect medical devices such as pacemakers or defibrillators. Therefore, please maintain sufficient and safe distance between the radio and medical devices.
If you have reason to believe that the radio is causing interference with a medical device, immediately turn off or unplug the radio.
2. SAFETY NOTICES
2.8. Handling batteries
In principle, only use the type of battery included in the delivery.

DANGER!
Risk of injury!
Improper handling of batteries poses a risk of injury!
Never open batteries, short-circuit them or throw them into flames.
Never charge batteries. Attempting to charge batteries can create a risk of explosion.
The polarity must be correct! Make sure that the plus (+) and minus (-) poles are inserted correctly to avoid a short circuit.
Only use batteries specified for this product.
Remove the batteries from the device if it is not going to be used for a long time.
Remove exhausted or leaking batteries from the device immediately.
If batteries have leaked, there is a risk of burns if the liquid comes into contact with the skin.
Keep both new and used batteries out of the reach of children.
There is a risk of internal injury if batteries are swallowed. The battery acid in the batteries can cause injuries if it comes into contact with the skin.
In the event of accidental ingestion or if there are signs of skin burns, rinse the affected areas with plenty of clean water and seek medical attention immediately.
Batteries are not toys!

2. SAFETY NOTICES
Always keep new and used batteries away from children.
Remove leaking batteries from the device immediately and clean the contacts before inserting new batteries.


WARNING!

There is a risk of explosion if batteries are used improperly!
Only use new batteries of the same type.
Please never use new and old batteries together in one device.
Pay attention to the correct polarity when inserting the batteries.
Never charge batteries.
Batteries should be stored in a cool and dry place.
Never throw batteries into fire.
If the device is not used for a long time, please remove the batteries from the device.
Never expose batteries to extreme heat or direct sunlight.
2. SAFETY NOTICES
Batteries must not be deformed or opened.
Stop using the remote control if the battery compartment cover no longer closes properly.
2.9. Cleaning the device
Unplug the device prior to cleaning.
Use a soft, dry cloth to clean the device. Please do not use any liquids to clean the device.
Do not use any solvents or cleaning agents, as these may damage the surface or labelling.
Children should not clean the device.
2.10. Legal information
The device is intended for use in all European Union member states as well as Switzerland, Norway, Liechtenstein and Iceland. The radio reception range meets the legal requirements for these countries.
If the device is to be operated in another country, the laws of the country of use must be observed.
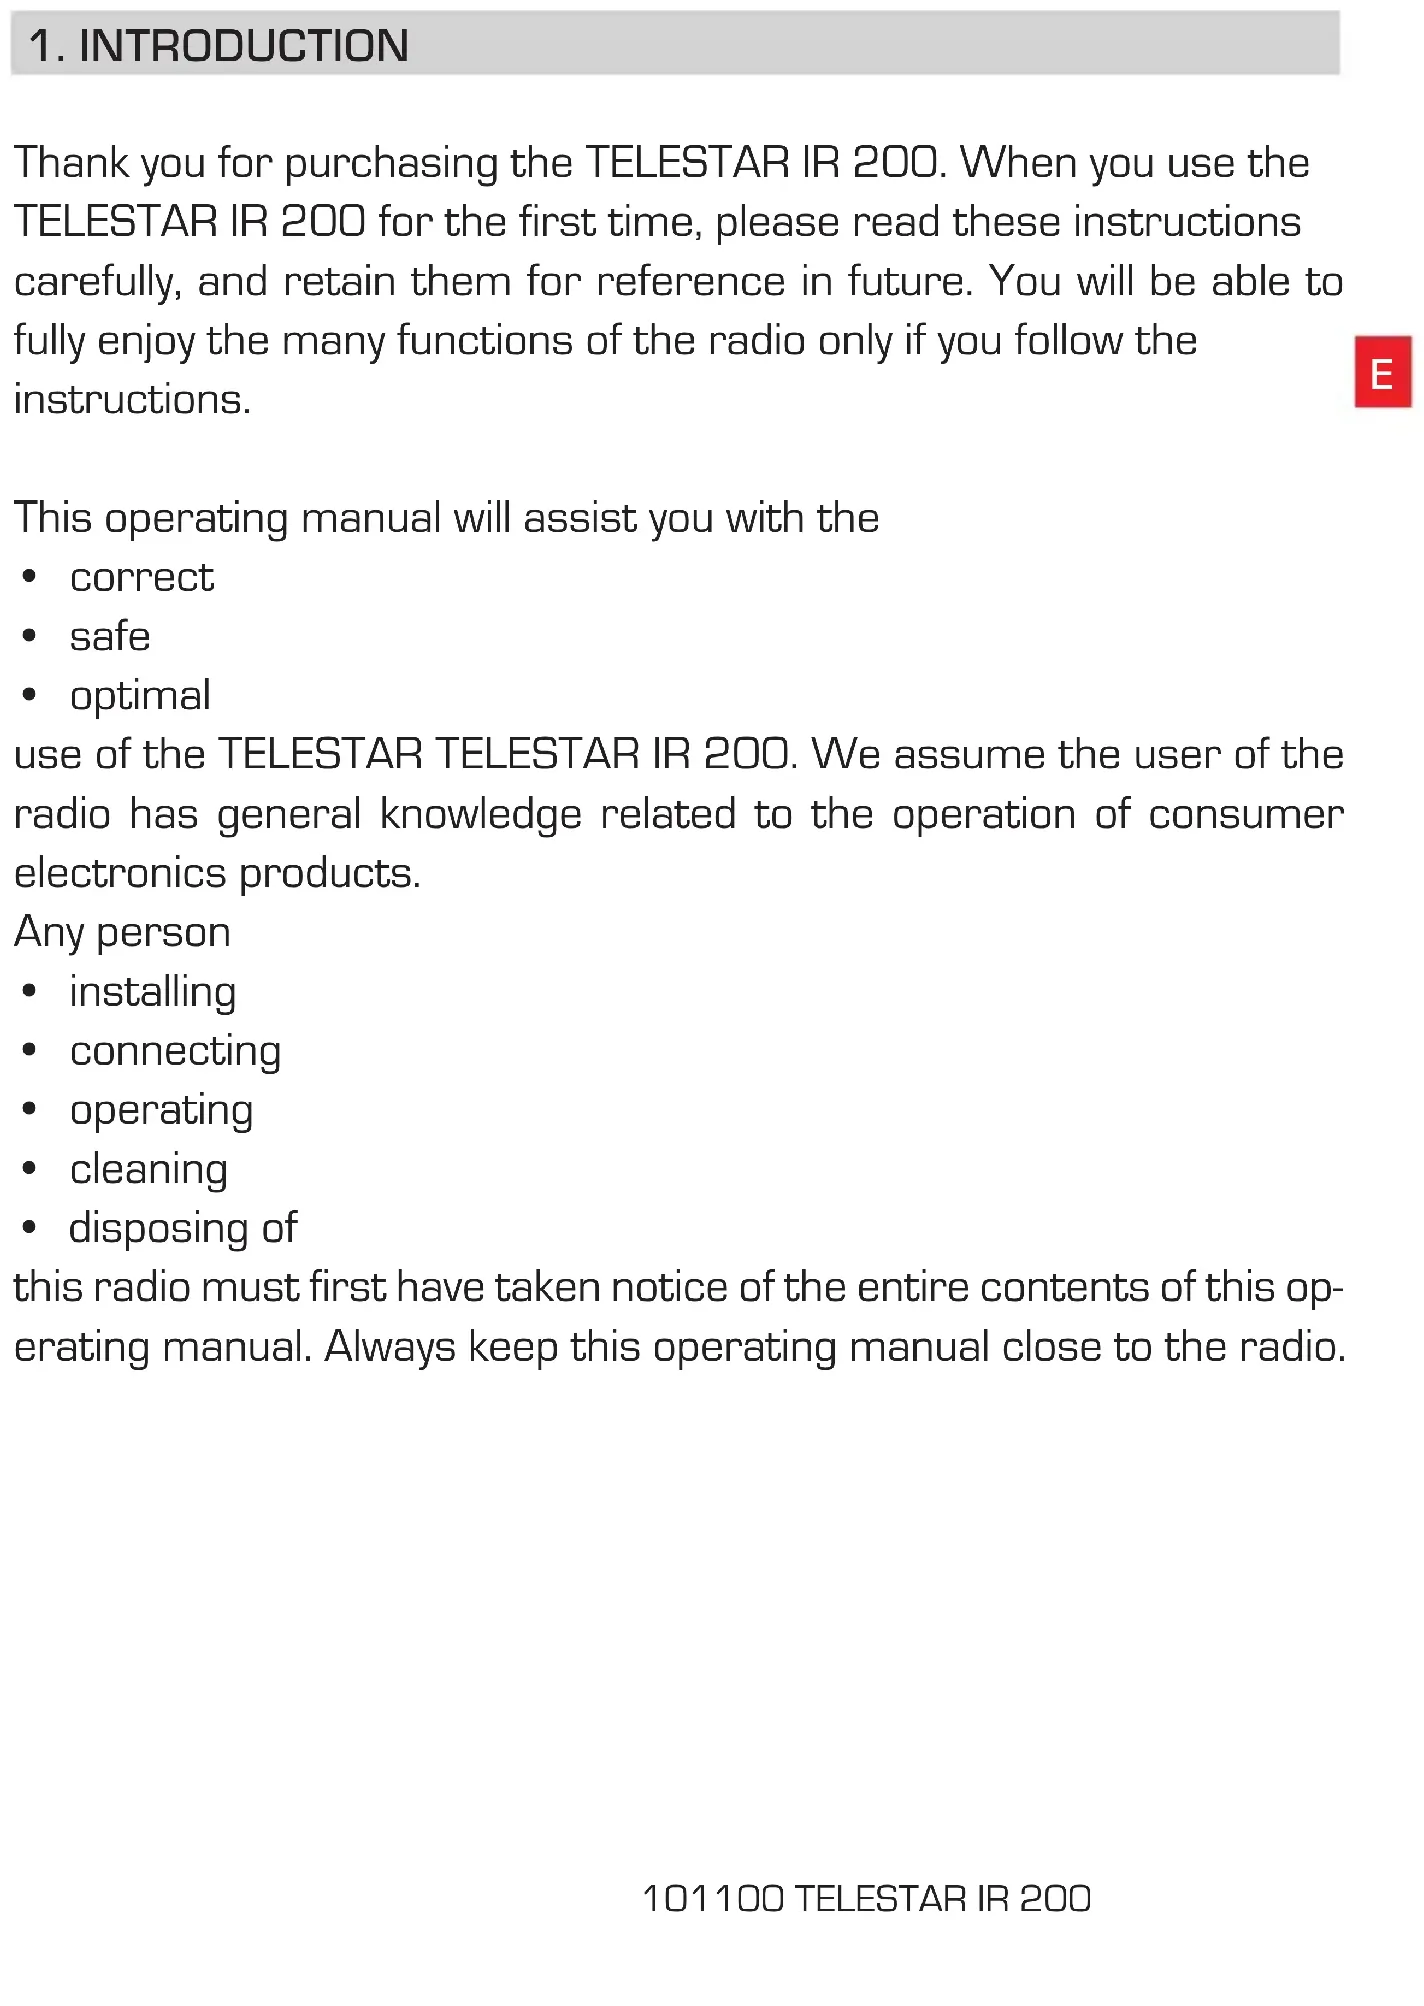
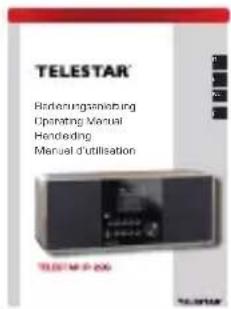
3. ITEMS SUPPLIED
E
natural_image
Black rectangular electronic device with two speakers and a display screen (no visible text or symbols)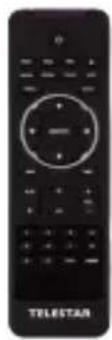
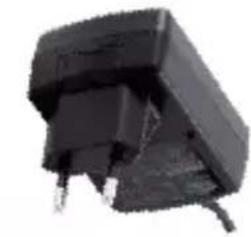
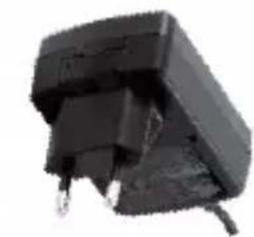
natural_image
Black electronic device with attached cables (no visible text or symbols)
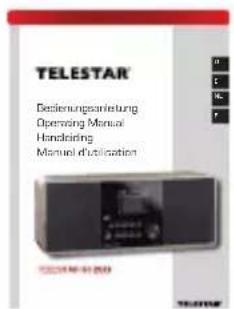
text_image
TELESTAR Becklenungsanleitung Operating Manual Handovering Manual duplication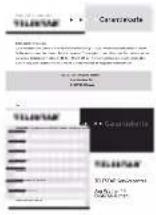
- Station memory keys 1-5
- Power key on/off
Use this key to switch the radio on or to standby.
- Menu key
Calls up the menu of the radio.
- Mode
Here you can select the operating mode of the unit, between Internet radio, DAB+, FM, uPnP, AUX and USB.
5./6. Navigation/ station selection
Use these keys to navigate in the menu, or to select the next station in the station list.
- Volume control, confirmation key
Use the rotary dial to adjust the volume, or confirm menu entries by pressing the key.
- Display
- Power switch
Here you can switch the radio on or off. The radio will be disconnected from the power supply in position 0.
- Mains adapter connection
Use this socket to connect the radio with the mains adapter (supplied)
- USB connection
Here you can connect the radio with a USB storage device like USB HDD drive, USB Stick or USB CD/DVD drive in order to reproduce music files from this.
- LAN connection
Here you can connect the radio via a network cable with an existing network in order to use the Internet radio function.
Alternatively the radio can also be connected via WiFi
4. ILLUSTRATIONS
13. AUX IN
Here you can connect an external audio source such as an MP3 player, smartphone or tablet, using the 3.5 mm AUX cinch cable.
14. LINE OUT
Here you can connect the radio with a hi-fi amplifier or with active loudspeakers in order to process the music received through the radio via a sound system.
15. Headphone socket
Here you can connect a headphone, in order to listen to music played on the radio via headphones. When headphones are connected, music reproduction via the radio loudspeakers will be interrupted.
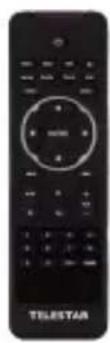
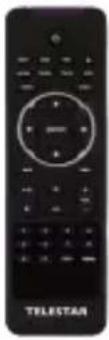
5. REMOTE CONTROL
E
text_image
1 2 3 4 5 6 7 8 9 10 ENTER 11 12 13 14 15 16 17 18 19 20 21 22 23 24 TELESTAR5. REMOTE CONTROL
1. Standby button
Use this button to turn the device on or off.
2. Sleep
Use this button to turn the sleep timer of the unit on or off.
3. WPS button
With this button you can establish a W-LAN connection in your home network.
4. Alarm
Use this button to activate the alarm clock function
5. Display dimmer
Adjusts the brightness of display
6. Local radio
7. UPnP
Enables the device's UPnP function.
8. Repeat
Use this button to repeat playback of one or more tracks
9. Shuffle
This activates random playback
10. Menu
Use this button to activate the device's menu
11. Mode
Switches between the various modes, FM Radio, Internet Radio, My Music, DAB Radio
12. ENTER
This button is used to confirm an entry
13. Navigation up/down - left/right
Use these buttons to navigate through the menu
14. Select previous track / rewind
Use this button to select the previous track or to rewind.
5. REMOTE CONTROL
15. Select next track / fast forward
Use this button to select the next track or to fast forward.
16. Play
Starts or pauses playback
17. Mute
Mutes the device's volume to silent.
18. Stop
Stops playback
19. V+ volume
Increases the volume
20. Numerical keypad
21. V-volume
Decreases the volume
22. EQ equalizer function
You can activate the equalizer function and configure custom sound settings using this button.
23. Language
You can change the menu language with this button.
24. Favourites button
Turns on one of the individually stored favourite channels.
6. INSTALLATION
Please remove the parts carefully from the packaging. Check whether all parts are present.
Note: the radio can be controlled both by the keys on the radio as well as via the remote control. The operation via the remote control is more convenient and easy method of playing the TELESTAR IR 200. For this reason, this operating manual will focus of setting up and operating the radio via the remote control supplied.
If the radio is connected to a network, it can also be controlled via the application AirMusicControl App. This application is available for Android and IOS operating systems. For more details see Chapter 8.
6.1. Power supply
First, connect the mains adapter supplied with the corresponding socket on the rear panel of the TELESTAR IR 200. Now connect the mains adapter to a 220V outlet. Then extend the telescopic antenna on the rear panel of the radio to its full extent, this will ensure the best possible reception, if you wish to receive terrestrially broadcast stations via the antenna.
6.2. Network connection
To use the Internet functions of the radio, it must be connected to a network. You can establish the connection via a cable (LAN) or via the integrated W-LAN receiver. If you are using a LAN cable, connect this with the LAN socket (Point 12, page 11)
6. INSTALLATION
6.3 Language selection
Switch on the power switch on the rear panel of the radio. The radio will be switched on.
E Use the Up/down keys of the remote control to select the menu language. Confirm the menu language selected by pressing the ENTER key on the remote control.
6.4. Checking the network
If you wish to connect the radio with your home network, confirm the question displayed by pressing Yes. If this setting is selected, the radio will check for available networks each time it is switched on.
6.5. Network configuration
To connect your radio with the network, confirm the question displayed by pressing Yes. If you do not wish to connect the radio with a network, you can bypass this menu item by selecting No.
6.5.1 Network selection
Select the type of connection to be used to connect the radio with a network. If you have connected a LAN cable, select Cable Network, and if you wish to establish a wifi connection (W-LAN) select Wireless Network.
When selecting a connection via W-LAN (wireless network) all available networks will be displayed. Select the network with which the connection is to be established
ENTER the W-LAN key. Use the ▼▲ keys to select a symbol, continue by pressing the ▶ key.
Confirm the entry by pressing ENTER.
7. OPERATION
Press the Menu key on the radio or on the remote control to go to the main menu of the radio. The radio will automatically close the menu after 10 seconds, and will revert to the radio mode previously selected, a display in the bottom right-hand corner will show the seconds, counting backwards.
You can navigate around the menu using the ▼▲▶◀ keys.
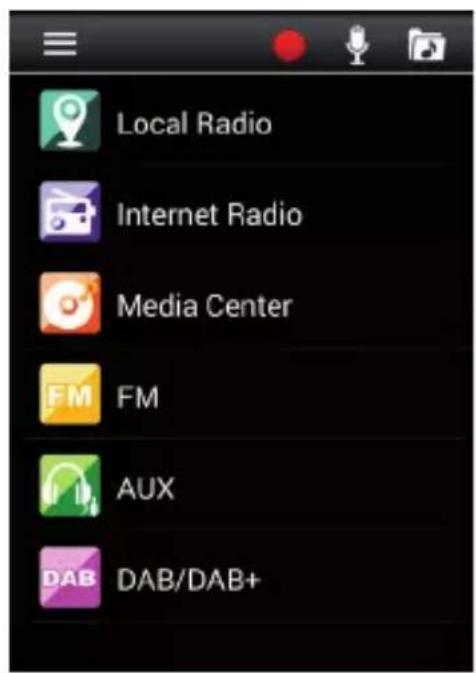
The main menu of the radio consists of the following menu items:


text_image
Row of app icons including gear, location pin, camera, FM, DAB, and audio headphonesYou can select the individual menu items using the ▶◀ arrow keys. Confirm your selection by pressing the ENTER key.
7.1. Configuration

text_image
Row of app icons including gear, camera, CD, FM, DAB, and audio headphonesPress the Menu key on the radio or on the remote control, and use the ▶◀ keys to select Settings.
You can make individual settings for the radio under this menu item.
7. OPERATION
7.1.1 Mode
Select the operating mode of the radio.
If you select the mode Radio Alarm, the radio will switch to a digital clock on the display. Go to the menu item ALARM to configure the radio as a radio alarm.
7.1.2 My MediaU Management
Here you can activate or deactivate the Mediau Management function.
The MediaU Management function allows you to save an individual station list, and to play these stations.
To set up and activate your station list, you will require a login on the following Internet page: http://www.mediayou.net/
If your log-in is successful, you can register your radio.
To do this, please enter the MAC address of the radio as a serial number. The MAC address of the radio can be found under the item Information Center.

Whenever you have updated the web page, on which you can manage and update your personal radio stations, please navigate your radio to My MediaU Management to synchronize the changes.
7. OPERATION
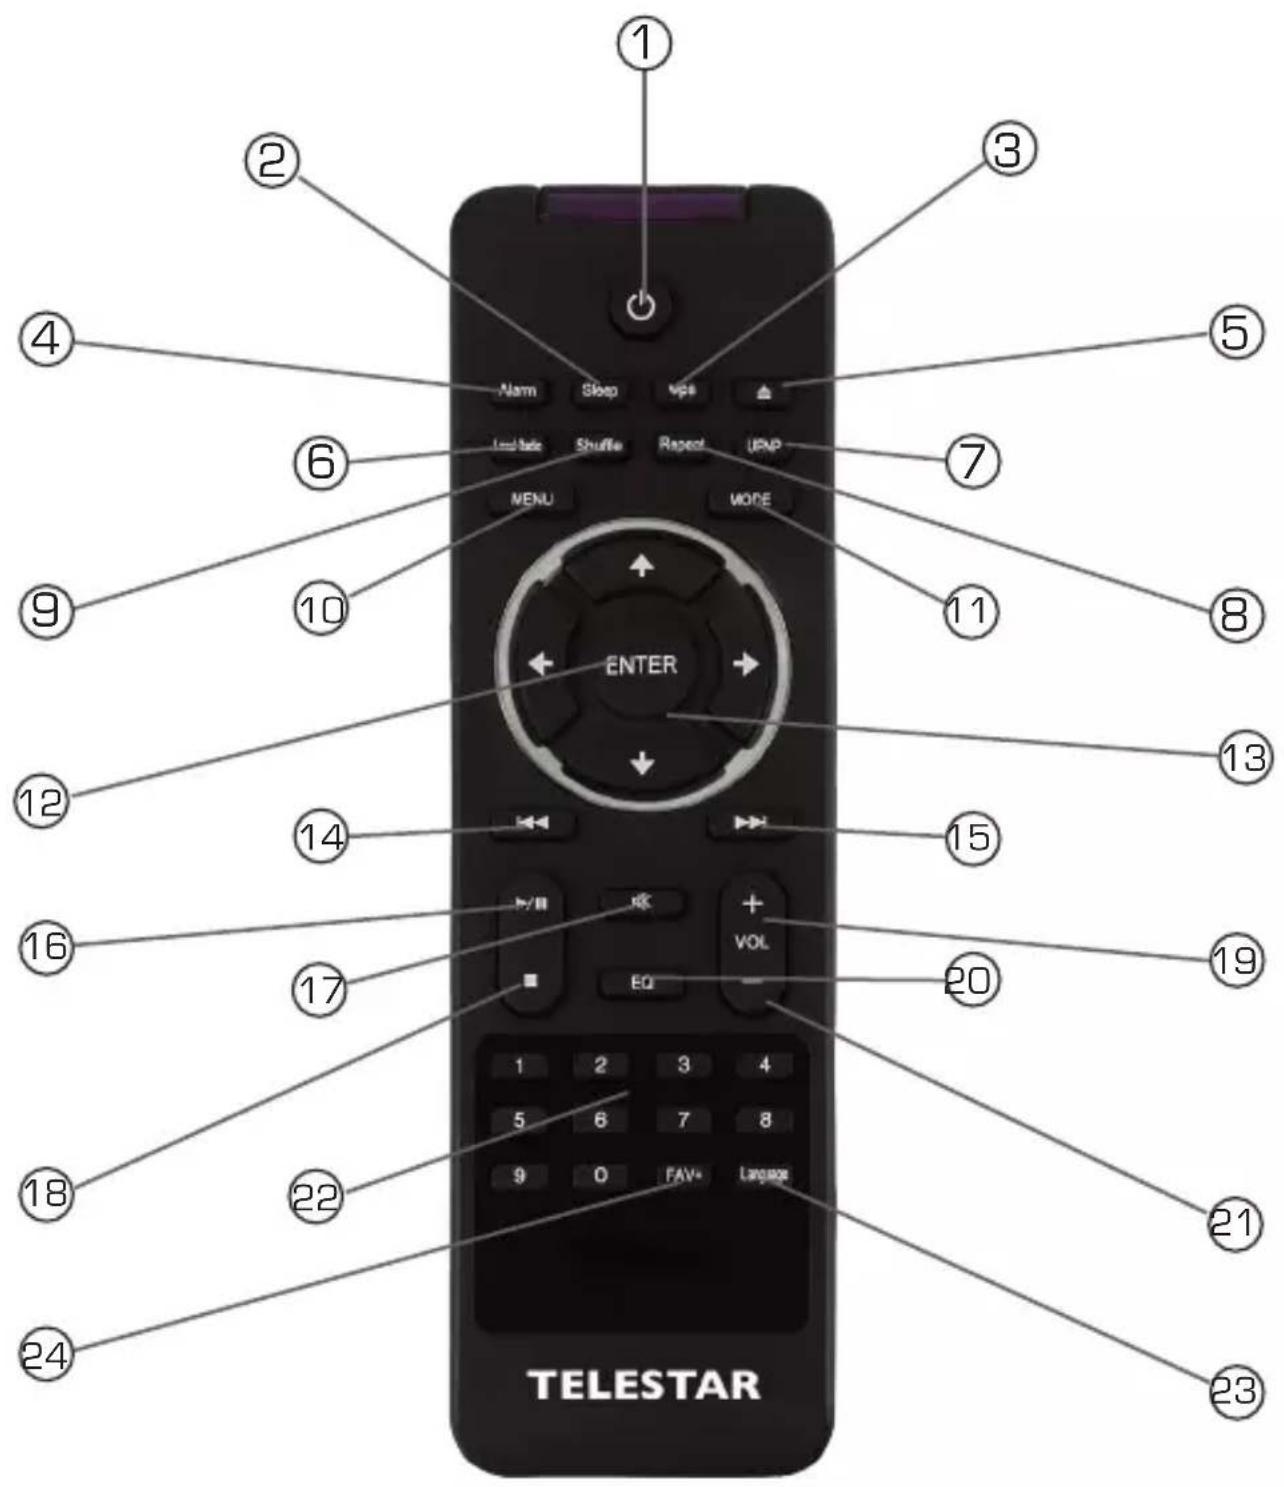
7.1.3. Network
Here you can configure your network settings.
text_image
15:21 Wired Network Configuration Wireless Network Configuration Wireless Network (WPS PBC) Manual Configuration 2/5
Use the ▼▲ keys to select the desired menu item, and confirm by pressing ENTER.
The network will be configures as described under Point 6.4.
7.1.4. Date & Time
Here you can set the time and date.
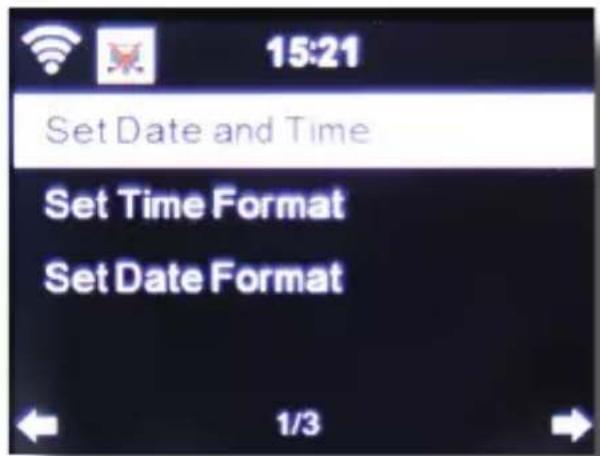
text_image
15:21 Set Date and Time Set Time Format Set Date Format 1/37. OPERATION
The radio is set to automatic time setting at the factory. When the radio is connected to the Internet via a network, the time and date will be synchronized automatically. In this case it is not necessary to set the time.

7.1.5. Alarm
The radio can be used as a radio alarm.
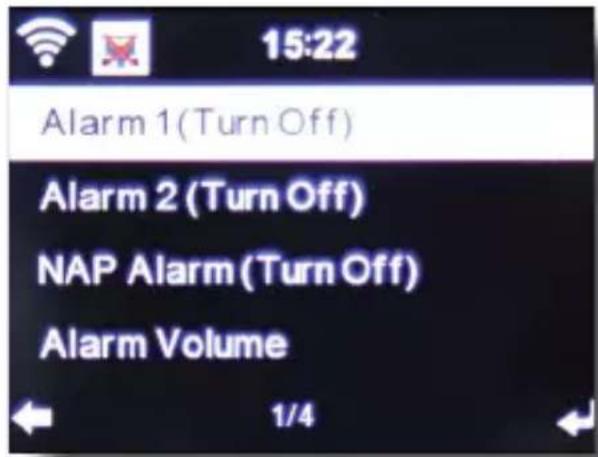
text_image
15:22 Alarm 1 (Turn Off) Alarm 2 (Turn Off) NAP Alarm (Turn Off) Alarm Volume 1/4This menu item allows you to set 2 wake-up times if desired. Also, you can set whether the alarm is to go off at the set time with a note, a melody, an Internet radio station, a DAB+ radio station or an FM station.
When you have entered the alarm time, activate the radio alarm function in the menu.
To stop the alarm, press the ENTER key on the remote control, or key 7 on the radio.
To do this, go to Settings and select the menu item Mode, and switch the operating mode to radio alarm here. (Chapter 7.1.1.)
7. OPERATION
7.1.6. Timer
The timer allows you to set a time at the end of which the radio will sound an alarm.
To do this, use the ▶◀ keys to enter the time in minutes and seconds. Pressing the key repeatedly will increase or decrease the time in one-second steps, hold the ▶ or ◀ key down for longer to scan forward or backward through time.
Confirm your entry by pressing ENTER.

7.1.7. Language
Here you can set the menu language of the radio.
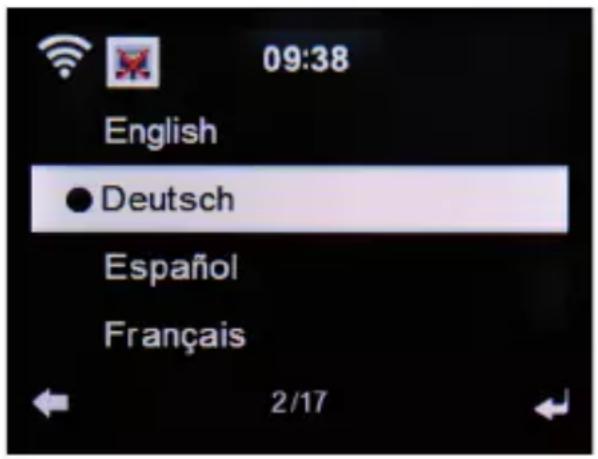
text_image
09:38 English ● Deutsch Español Français 2/177.1.8. Dimmer
The dimmer function allows you to adjust the brightness of the display. The radio is set to the highest level of brightness at the factory. Use this menu item to adjust the brightness individually.
7. OPERATION
7.1.9. Display
Here you can change the multi-colour display to black and white, if required.
E 7.1.10. Energy management
Here you can determine whether resp. after what interval the radio should switch automatically from the operating to stand-by mode. You can select from 5, 15 and 30 minutes.
If the radio does not switch off automatically, go to the line Switch Off, and confirm the command with ENTER.
7.1.11. Weather
If the radio is connected with the Internet, you can also show weather information on the radio display. This menu item allows you to select the place for which weather information is to be shown. You can also specify the temperature units.
Weather information is displayed in stand-by mode. The radio will alternate the display automatically between weather data and the current time.
7.1.12. FM Settings
Here you can switch between stereo and mono reproduction of FM radio reception.
This setting can be useful if you are tuned to an FM station with a weak and distorted signal. In this case, change the setting to Mono to improve the quality.
7. OPERATION
7.1.13. Setting for local stations
To facilitate the search for stations in your area while in Internet radio mode, you can search specifically for radio stations in your region using the menu.
To do this, you must inform the radio of your location.
Here you can enter your location manually, or activate an automatic location search.
7.1.14. Play/reproduction settings
Here you can set the play/reproduction settings applicable when playing audio files via an external USB data medium.
7.1.15. DLNA setting
The radio is capable of communicating with DLNA-enabled equipment. For example, it is possible to reproduce audio files on a DLNA-enabled cell phone via the radio. Here you can change the name of the equipment used to indicate the radio on a DLNA unit.
7.1.16. Equalizer
Here you can select certain pre-selected sound settings. Alternatively, you can also press the EQ key on the remote control while the unit is in operation.
7.1.17. Software Update
It may be necessary to update the operating software in order to improve the functions of the radio.
The USB interface allows you to update the operating system of your radio, provided you have the requisite software, which is available for downloading on www.telestar.de.
7. OPERATION
The software provided on the Internet page must be unpacked. The unpacked files can then be saved on a suitable storage medium, and connect this with the radio via the USB connection [11] .
E 7.1.18. Factory default settings
In this menu item you can reset the radio to the condition it was in when supplied by the factory. The radio will then commence with a setup as per initial operation.
7.2. Local Station

text_image
Row of app icons including gear, location pin, camera, FM, DAB, and audio headphonesPress the Menu key on the radio or on the remote control, and use the ▶◀ keys to select Local Station.
Under this menu item, the most popular Internet radio stations as well as DAB+ radio stations are sorted by geographic region, and can thus be found more easily.
In this menu item, you can use the ▼▲ keys to select the desired program list. Confirm your selection by pressing ENTER.
If you wish to call up radio stations broadcast via DAB+, select DAB. All other radio selection options refer to the reception of Internet radio
7. OPERATION
7.3. Internet Radio

text_image
Row of app icons including gear, location pin, radio, FM, DAB, and audio headphonesE
Press the Menu key on the radio or on the remote control, and use the ▶◀ keys to select Internet Radio.
In the Internet radio menu you can select and manage all Internet radio stations. As many as 10,000 radio stations may be available, provided your radio is connected to a network that is in turn connected to the Internet.
7.3.1. My Favourites
You can use this menu to select one of the 5 favourite stations you have saved via the station saving keys on the radio.
Alternatively, the radio stations can also be called up via the station saving keys on the radio, or by directly entering the number on the remote control.
7.3.2. Radio stations / Music
Here you can select between different radio station lists. Use the ▼▲ and confirm by pressing ENTER.
7.3.2. Local Stations
Under this menu item you will find the most popular Internet radio stations and DAB+ stations sorted by geographic region, and can thus be called up more easily. See also Chapter 7.2.
7. OPERATION
7.3.3. Last station selected
This menu item will show you a list of the Internet radio stations you have selected most recently.
Note: a precondition for the contents of the menu sub-item „last selected“ is that you must have used the Internet radio mode previously. When you switch to this mode for the first time, the list will not yet reflect any entries.
7.3.4. Service
This menu item allows you to search specifically for a radio station in the Internet. To do this, you must enter the name of the station.
Go to the menu Service and select Scan for station, then confirm by pressing ENTER.
Use the keys on the remote control to enter the name of the radio station in the search field. Use the ▶ key to move on by one character. Confirm the entry by pressing ENTER.
The radio will now scan for all stations corresponding with this entry.
Select a station by using the ▼▲ keys, and confirm by pressing ENTER.
Alternatively you can also add new radio stations if you know their Internet address.
To do this, enter the Internet address of the radio provider.
7. OPERATION
7.4. Media Center

text_image
Row of app icons including gear, location pin, music note, FM, DAB, and audio headphones
Press the Menu key on the remote control or on the radio, and use the ▶◀ keys to select Media Center. If the IR 200 is connected to a wireless network, the radio can also be used as a media player in order to reproduce music data from PCs or smartphones connected to the same home network via UPnP or DLNA, and given that the appropriate media contents have been released for distribution in this network. To select the media player option, proceed as follows:
Use the ▼▲ keys to select the area from which you wish to play music.
You have the choice of selecting either USB (USB data source connected to the USB socket of the radio) or UPnP (music data via the UPnP protocol, if these are available in the same network as the radio).
You can also connect a CD USB Drive on USB port, to playback Audio CDs as well as audio files from a Compact Disc
Select a title you wish to play, and confirm by pressing ENTER.
Use the ▶▶ to go to the next title. Use the ◀◀ key to go back one title.
Use the ▶▶ll key to pause during play, press again to continue playing.
7. OPERATION
7.5.FM

text_image
E FM DABPress the Menu key on the remote control or on the radio, and use the ▶◀ keys to select FM.
In this menu you will find all the relevant settings to receive radio stations via the FM band.
7.5.1. FM station scan
When the IR 200 is switched to the FM mode for the first time, a station scan must be performed. To do this, both an automatic and a manual scan function are available.
Automatic FM scan
When you have switched to FM, press the ENTER key.
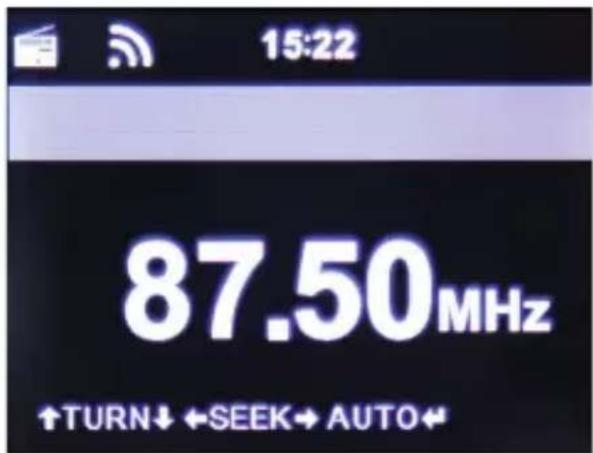
text_image
15:22 87.50MHz ↑TURN↓ ←SEEK→ AUTO←The radio will start the automatic station scan and will save all stations found.
The radio can store up to 20 FM radio stations.
7. OPERATION
7.5.2. FM radio operation
To call up the radio stations saved, press the ▶▶ or ◀◀ key.
Alternatively, you can also call up the first 5 stations saved via the station keys 1-5 on the radio.
If you wish to change the allocation of the station saving keys, press the station selection key 6 (see page 10) to perform a scan to the next station that can be received. If necessary, repeat this step until you have found the desired station. Then press the desired station selection key 1-5 (see page 10) for approx. 2 seconds. The station will now be saved on this key.

7.6. DAB

text_image
Row of app icons including gear, location pin, camera, FM, DAB, and headphones, with a highlighted purple square containing the word 'DAB'.Press the Menu key on the radio or on the remote control, and use the ▶◀ keys to select DAB.
7.6.1. DAB station scan
In addition to FM stations, the radio can also receive DAB+ radio, digital radio broadcast via terrestrial antenna.
When the radio is switched on to DAB mode for the first time, it will start an automatic station scan in order to scan for all stations that can be received at that location.
The station scan will begin, and the display will show a scan progress bar. As soon as the scan has been completed, the radio will begin playing the station most recently selected.
7. OPERATION
Station selection
Navigate in DAB mode using the ◀▶ keys to scroll through the DAB+ stations that have been found.
To change channels, press the ENTER key.

The radio has a favourites memory, in which you can save your favourite stations.
To save a station go to the desired station as described above. Now hold down the FAV button on the remote control for about 5 seconds. Use the ▼▲ to move the station to the desired place in the favourites memory and press the OK button to save the station to this place.
Alternatively, you can choose up to 5 stations using the station-save buttons 1-5 on the device. To do this switch to a desired station and keep one of the station-save buttons pressed for about 5 seconds. The program is then stored at the corresponding position.
7.6.2. DAB Radio Operation
You can open the favourites list using either the FAV button or by pressing the desired number key on the remote control.
The first 5 stations of the favourites list can also be selected using the station memory buttons on the device.
7. OPERATION
7.7. Information Center

text_image
Row of app icons including gear, location pin, camera, FM, DAB, and i buttonE
7.7.1. Weather and Finances
Press the Menu key on the remote control or on the radion, and use the ▶◀ keys to select Information Center.
In this area you will have access to current weather and financial information.
Under the heading Weather Information select the country and city for which you would like the weather forecast to be displayed.
Confirm your selection by pressing ENTER. Navigate through the menu using the ▼▲ keys.
Weather information can also be displayed in stand-by mode.
Use the ▶ key to add the weather information selected to the stand-by weather display. The weather display for stand-by mode can be activated as described in Chapter 7.2.1.
Similar to the procedure for the weather forecast, you can also have financial services and stock market figures from around the world displayed.
7.7.2. Systeminformation
In this menu you can monitor the details of the network connected. The information includes, among others, the MAC address, which is necessary to register you radio for mymediaU.
(See also Chapter 7.1.2)
7. OPERATION
7.8. AUX

text_image
E FM DABIf you connect an external device (e.g. MP3 player) with the IR 200IR 200 via cable with the AUX In socket, this can be used as an option to reproduce audio files. To do this, proceed as follows: Use a suitable cable (3.5 mm cinch, obtainable separately, may vary from one device to the next) to connect an external device with the TELESTAR IR 200 (AUX In page 10) and switch on this device.
While in operation, press the Mode key on the remote control, if necessary repeatedly until the display shows „AUX“ below the time, or press the Menu key, and use the ▶ to select the menu item AUX.
You can now play music from the external device. The control (title backward/forward, Stop, Play) is effected via the external device connected, the sound volume can be adjusted via the V+/V- keys resp. the volume control (see page 10) of the TELESTAR IR 200 or via the external device.
8. AIR MUSIC CONTROL
The radio can be controlled via an smartphone or a tablet and an appropriate app. The application AIR Music Control can be downloaded for Android and Apple iOS. The app also allows you to reproduce local music files on your smartphone via the radio.
Note;

This description applies to the app, valid as per 09.2015. Functions as well as the appearance may change within the scope of software updates!!
To use the function, download the app from the Google Play Store for Android operating systems, or via I- tunes for IOS operating systems, and install the app on your smartphone.
Ensure that the radio and your mobile tablet are logged into the same network.
Start the application.
When starting the app, this will automatically recognize the IR 200, provided this is logged into the same network.
The main menu of the app is structured along the same lines as the menu of the radio.
8. AIR MUSIC CONTROL
Main menu
Start the desired function by tapping on the appropriate symbol

text_image
Local Radio Internet Radio Media Center FM FM AUX DAB DAB/DAB+Internetradio
In this mode, too, all the familiar functions in Internet radio operation can be selected.
In the lower section you can select the station saving spaces 1-5.
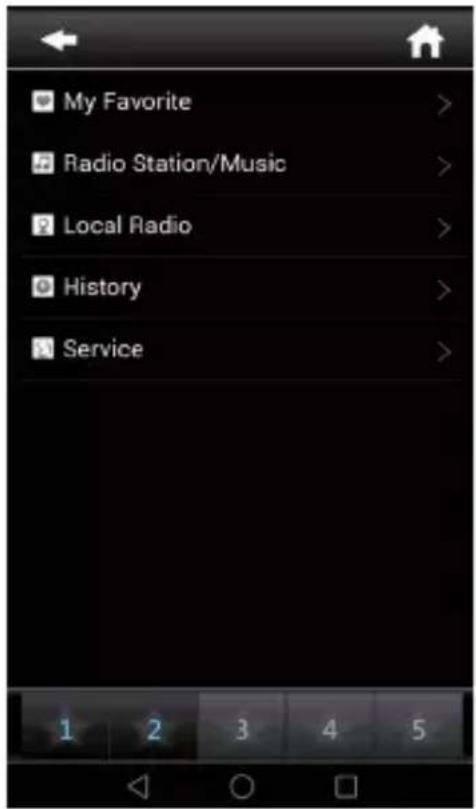
text_image
My Favorite Radio Station/Music Local Radio History Service8. AIR MUSIC CONTROL
Media Center
In this area you can connect with media servers in your network. In addition, you have the facility to access music files stored on a USB storage device connected with the system.
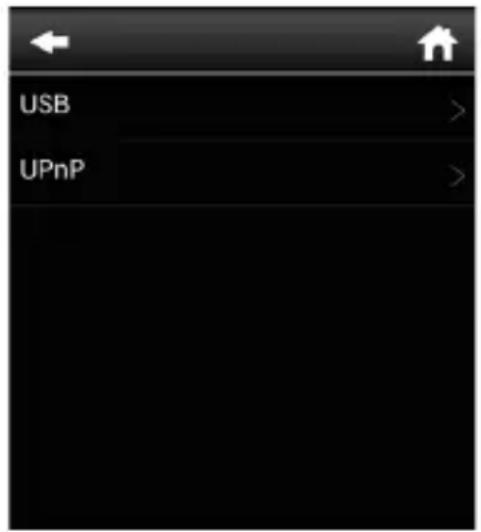
text_image
USB UPnP
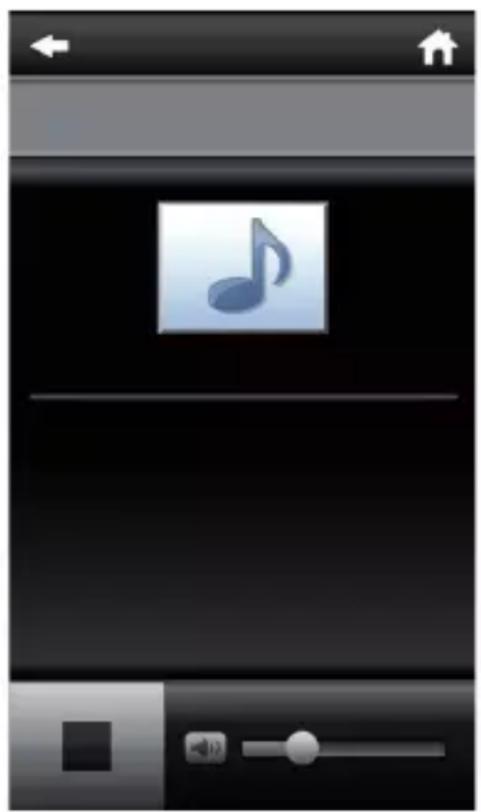
text_image
Mobile app interface screenshot showing a music note icon with playback controls8. AIR MUSIC CONTROL
FM Radio
In this mode you can operate the FM radio.

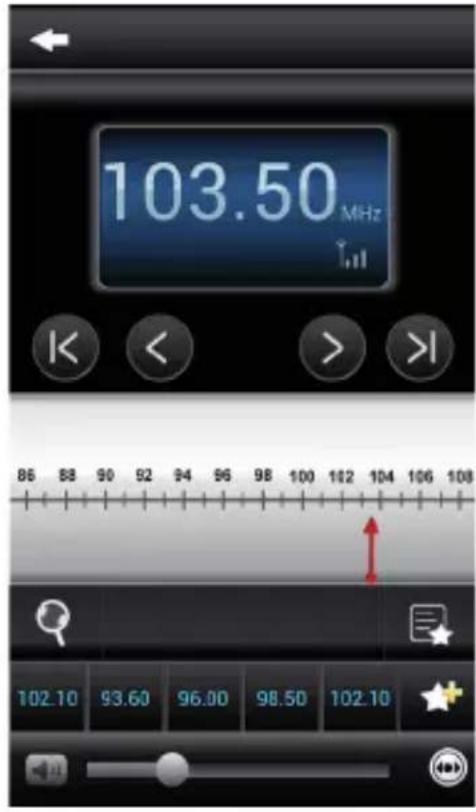
text_image
103.50MHz 86 88 90 92 94 96 98 100 102 104 106 108 102.10 93.60 96.00 98.50 102.10DAB
In this mode you can operate the DAB+ radio.
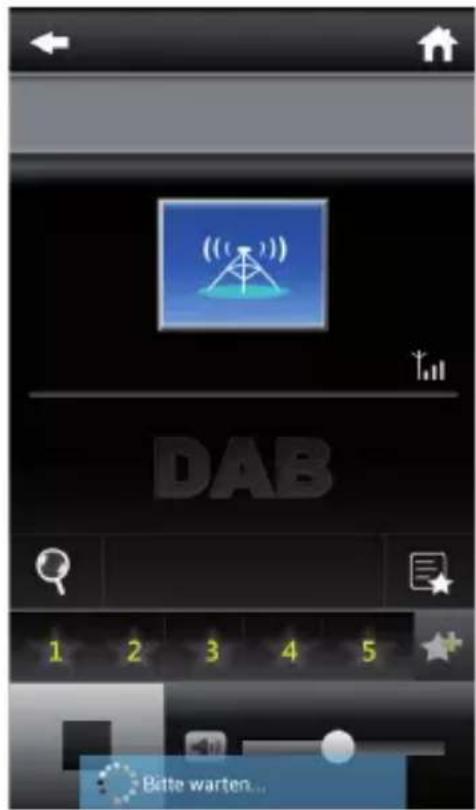
text_image
DAB 1 2 3 4 5 Bite warten...9. TROUBLESHOOTING
| Symptom | Possible cause and solution |
| No display indication, radio does not respond to operation | Set up power supply via mains adapter supplied |
| No operation via remote control possible | Batteries discharged or incorrectly inserted. Please check whether batteries inserted in correct direction. |
| DAB+ reception poor No stations found, perform a station scan (see Chapter 7.6.1.) Antenna not fully extended.Change the location of the radio (e.g. closer to window), Repeat station scan | |
| FM reception poor Antenna not fully extended, extend the FM antenna to its full length.Change the location of the radio (e.g. closer to window), Repeat station scan | |

9. TROUBLESHOOTING

| Symptom | Possible cause and solution |
| AUX function not working | TELESTAR IR 200 is set to incorrect mode. Switch to “AUX” mode. Cable may be faulty. Check cable connection between TELESTAR IR 200 and external device |
| Poor audio quality when playing music | File with low bit rate. Check the audio file. Tip: For MP3 files, bit rate should be 192Kbit/s or higher |
| Volume too low Check volume setting on IR 200. Check volume setting of attached device from which music is being played. | |
| Network connection cannot be established | Check the wi-fi function. Activate the DhCP function of the router on which the radio is to be logged in.A firewall may be active in the network. |
9. TROUBLESHOOTING
| Symptom | Possible cause and solution |
| Wi-fi (W-LAN) connection cannot be established | Check the availability of wi-fi networks. Reduce distance between wi-fi router and radio.Ensure you use the correct WEP/WPA password when logging on to a wi-fi router. |
| No Internet radio stations available | Check the access points of the network. The radio station may be currently unavailable. The station link may have been changed, or it is no longer broadcasting. |

10. DISPOSAL INSTRUCTIONS
The packaging of your product consists exclusively of recyclable materials. Please return these materials, appropriately sorted, to the „Dual System“ or appropriate recycling system in your country. At the end of its lifetime, this product may not be disposed of in your normal household waste, it must be handed in at a collection point for the recycling of electrical and electronic equipment.

The symbol on the product, packaging or operating manual indicates this requirement.
The materials used are recyclable as indicated by their markings. By recycling or otherwise re-using old products or their components you are making an important contribution to the protection of our environment. Please enquire from your local authorities where the appropriate recycling centre is located. Please ensure that spent batteries as well as electronic waste are not disposed of in your domestic waste, and are professionally recycled.
natural_image
Simple line drawing of a trash bin with no text or symbols11. FEATURES AND TECHNICAL DATA
| Internetradio | |
| Chip set | Magic M6 internet radio solutionca. 10.000 Internetradiostationenavailable |
| Audiocodecs | MP3 (Bitrate bis 320 Kbits/s, sample rate bis zu 48 KHz)AAC/AAC+ (Bitrate bis 320 Kbits/s, sample rate bis zu 48 KHz)WMA (Bitrate bis 320 Kbits/s, sample rate bis zu 48 KHz)UPnP/ DLNA komatibel |
| Wi-Fi | IEEE 802.11b/gWPA/WPA2/WEP (64/128 bit key) |
| DAB/DAB+/FM | |
| DAB | Sensitivity to -100dBm |
| DAB+ | Sensitivity to -101dBm |
| FM | Sensitivity to -100dBm |
| Decoding | |
| Reception range | DAB Band III 174 MHz- 240 MHzFM 74 MHz - 108.1 Mhz |
11. FEATURES AND TECHNICAL DATA
| Display | |
| TFT Color Display 2.8 inch LCD 240 x 320 pixels | |
| SOUND Index | |
| STMicroelectronicsBRIDGE AMPLIFIER | (10W+10W Output Music Power)3" loudspeaker max. 4Ω10WSupports multi sound effect EQ to set IC.NORMAL,FLAT,POP,JAZZ,ROCKCLASSIC) |
| Connection | |
| Line OutHeadphoneAUX INLANPower supplyMains adapter | 3,5 mm Stereo3,5 mm Stereo3,5 mm Stereo10/100 Mbps (RJ45)12 Volt DC 3 A10-240 V AC 50 /60 Hz |
| Battery Remote Control | |
| Typ CR 2025 / 3 V | |
12. SERVICE AND SUPPORT
Dear customer!
Thank you for choosing a product from our range. Our product complies with all legal requirements, and has been manufactured subject to constant quality controls. The technical data correspond with the current status at the time of printing. Subject to change without notice.

The warranty period for the TELESTAR IR 200 corresponds with the legal requirements at the time of purchasing.
In addition, we provide our telephonic Hotline service, offering professional assistance.
Professional, trained experts are available in our service area to answer your queries. Here you can pose any questions you may have with regard to TELESTAR products, and obtain hints on finding possible causes of problems.
Our technicians are available from Monday-Friday, from 08h00 to 16h45 (CET) at the following telephone number:
+49(0)2676 / 95 20 101
or per E-Mail at: service@telestar.de
If the service hotline is unable to assist you, please send your TELESTAR IR 200, if possible in the original packaging, and definitely securely packed, to the following address:
12. SERVICE AND SUPPORT
TELESTAR - DIGITAL GmbH
Service Center
Am Weiher 14 (Industrial zone)
D-56766 Ulmen/Germany
E
13. CE MARKING

text_image
C€Your radio bears the CE mark, and complies with all required EU standards.
CE mark for European markets
The CE mark on the product TELESTAR IR 200 gives you the assurance that the product complies with the regulations of directive for the electromagnetic compatibility directive (2014/30/CE), with the RoHS directive (2011/65/EC), with the LVD directive (2006/95/EC), the R&TTE directive (1999/5/EC) and the directive ErP (1275/2008/EC).
The conformity declaration for this product can be obtained at:
7.2. Local Station 190
7.3. Internet Radio 191
7.4. Media-Center 193
7.5.FM 194
7.6. DAB 195
7.7. Informatie....197

INHOUD
- AIR MUSIC CONTROL APP.... 199
- PROBLEEMOPLOSSING....203
- AFVAL INSTRUCTIES ..... 206
- FUNCTIES EN TECHNISCHE GEGEVENS ....207

- SERVICE EN SUPPORT 209
- CE MARKERING ....210
1. INTRODUCTIE
natural_image
Simple geometric diagram of two concentric squares (no text or symbols)natural_image
Black electronic device with front panel and control buttons (no visible text or symbols)1
2
natural_image
Close-up of a black electronic device with two leads (no visible text or symbols)3
4
text_image
TELESTAR® Redenungsanleistung Operating Manual Handling Manual d'utilisation5
Aantal Verklaring
text_image
Row of app icons including gear, location pin, camera, FM, DAB, and audio headphonestext_image
Row of app icons including gear, camera, FM, DAB, and audio headphonestext_image
Row of eight colored app icons including gear, location pin, camera, FM, DAB, and audio headphonestext_image
Row of app icons including gear, location pin, radio, FM, DAB, and ear with a 'NL' labeltext_image
Row of app icons including gear, location pin, email, CD, FM, DAB, i, and ear with a 'NL' labeltext_image
Row of app icons including gear, location pin, camera, FM video, and audio headphones with Chinese labelstext_image
Row of app icons including gear, location pin, camera, FM, DAB, and headphones, likely representing a website or app interface.text_image
Row of app icons including gear, location pin, camera, FM, DAB, and i with a 'NL' label on the right.text_image
Row of eight colored app icons with labels: gear, location pin, camera, FM, DAB, and audio headphonesnatural_image
Mobile app interface showing a music note icon with playback controls (no text or symbols on the main screen)8. AIR MUSIC CONTROL APP
FM Radio
9. PROBLEEMOPLOSSING
9. PROBLEEMOPLOSSING

9. PROBLEEMOPLOSSING
2.1. Explanation of symbols
SYMBOL MEANING

DANGER!
text_image
Black electronic device with Arabic and English text labels on its front panel1
2
natural_image
Black electronic device with attached cables and connectors (no visible text or symbols)3
4
text_image
TELESTAR Bestenungsanleitung Operating Manual Handwriting Manual d'utilisation5
N° Qté Description
text_image
Row of app icons including gear, location pin, radio, music note, FM, DAB, and audio headphonestext_image
Row of app icons including gear, camera, film, DAB, and headphones with Chinese labelstext_image
Row of app icons including gear, location pin, camera, FM, DAB, and audio headphonestext_image
Row of app icons including gear, location pin, radio, FM, DAB, info, and headphones with a red 'F' buttontext_image
Row of app icons including gear, location pin, music CD, DAB, and headphones with a black square highlighting the CD.F
text_image
Row of app icons including gear, location pin, camera, FM, DAB, and headphones, with a black square highlighting the DAB.text_image
Row of app icons including gear, location pin, camera, FM, DAB, and information symbol with a red square labeled 'F'text_image
Row of colorful app icons including gear, location pin, camera, FM, DAB, and headphonesnatural_image
Mobile app interface showing a music note icon with playback controls (no text or symbols on the main screen)8. AIR MUSIC CONTROL APP
FM Radio (Radio FM)
| Symptom | Possible cause and solution |
| No display indication, radio does not re-spond to operation | Set up power supply via mains adapter supplied |
| No operation via re-mote control possible | Batteries discharged or incorrectly inserted. Please check whether batteries inserted in correct direction. |
| DAB+ reception poor No stations found, perform a station scan (see Chapter 7.6.1.) Antenna not fully extended. Change the location of the radio (e.g. closer to window), Repeat station scan | |
| fM reception poor Antenna not fully extended, extend the fM antenna to its full length. Change the location of the radio (e.g. closer to window), Repeat station scan | |

9. DÉPANNAGE

| Symptom | Possible cause and solution |
| AuX function not working | TELESTAR IR 200 is set to incorrect mode.Switch to “AUX” mode. Cable may be faulty. Check cable connection between TELESTAR IR 200 and external device |
| Poor audio quality when playing music | File with low bit rate. Check the audio file. Tip: For MP3 files, bit rate should be 192Kbit/s or higher |
| Volume too low Check volume setting on IR 200. Check volume setting of attached device from which music is being played. | |
| Network connection cannot be established | Check the wi-fi function. Activate the DhCP function of the router on which the radio is to be logged in.A firewall may be active in the network. |
9. DÉPANNAGE
| Symptom | Possible cause and solution |
| Wi-fi (W-LAN) connection cannot be established | Check the availability of wi-fi networks. Reduce distance between wi-fi router and radio. Ensure you use the correct WEP/WPA password when logging on to a wi-fi router. |
| No Internet radio stations available | Check the access points of the network. The radio station may be currently unavailable. The station link may have been changed, or it is no longer broadcasting. |

10. INSTRUCTIONS D'ÉLIMINATION
Please note that all technical data or any described functions are subject to change without notice.
Copy and reproduction only with authorization of the publisher TELESTAR Digital GmbH is not responsible for printing errors.
Correct as at: 02_2023