E8647 - Weather Station Emos - Free user manual and instructions
Find the device manual for free E8647 Emos in PDF.
User questions about E8647 Emos
0 question about this device. Answer the ones you know or ask your own.
Ask a new question about this device
Download the instructions for your Weather Station in PDF format for free! Find your manual E8647 - Emos and take your electronic device back in hand. On this page are published all the documents necessary for the use of your device. E8647 by Emos.
USER MANUAL E8647 Emos
natural_image
Technical line drawing of a rectangular device with internal components and a vertical dimension labeled '16' (no text or symbols beyond the number)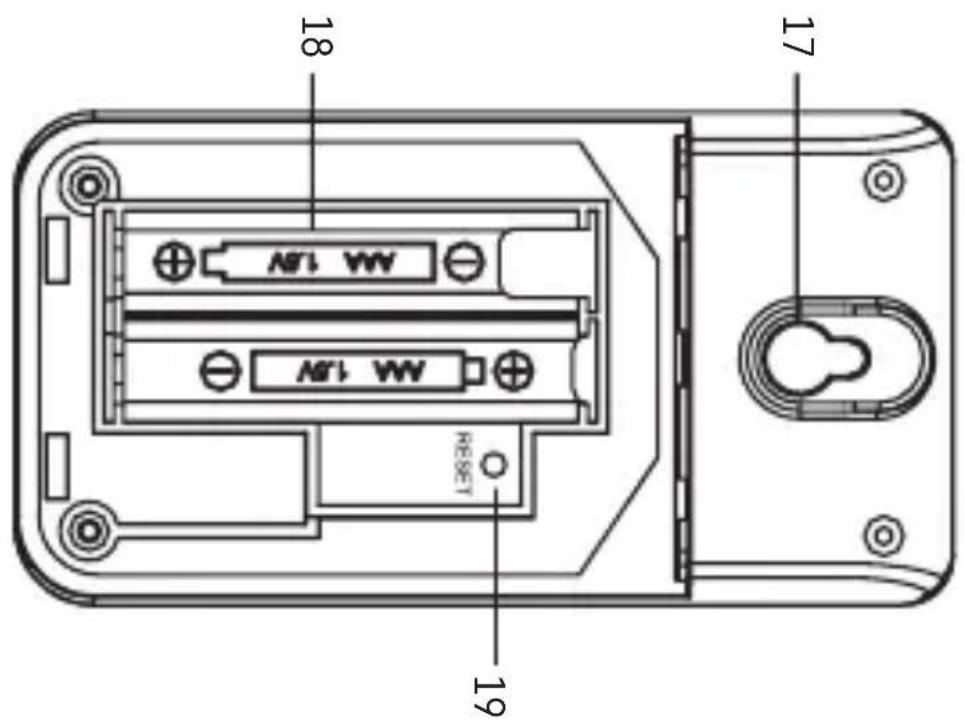
text_image
18 17 19 N1 WW N1 WW RESETGB | Wireless Weather Station
Read this manual carefully before using the product.
Specifications
Quartz clock
time format: 12/24 h
indoor temperature: -10 °C to +50 °C, 0.1 °C resolution
outdoor temperature: -50 °C to +70 °C, 0.1 °C resolution
temperature measurement accuracy: ±1 °C for 0 °C to +50 °C
range, ±2 °C for -20 °C to 0 °C, ±4 °C for -40 °C to -20 °C,
over ±4 °C for other ranges
indoor and outdoor humidity: 20 % to 95 % RH, 1 % resolution
humidity measurement accuracy: ±5 % for 30 % to 50 % RH range,
±10 % for 20 % to 29 % and for 51 % to 95 % RH
radio signal range: up to 50 m in open area
transmission frequency: 433 MHz, 10 mW e.r.p. max.
number of sensors: max. 1
power supply:
main station: 2× 1.5 V AAA batteries (not included)
5 V/1 A micro USB port (1.5 m cable included)
sensor: 2× 1.5 V AAA batteries (not included)
size:
main station: 20 × 85 × 96 mm
sensor: 25 × 50 × 95 mm
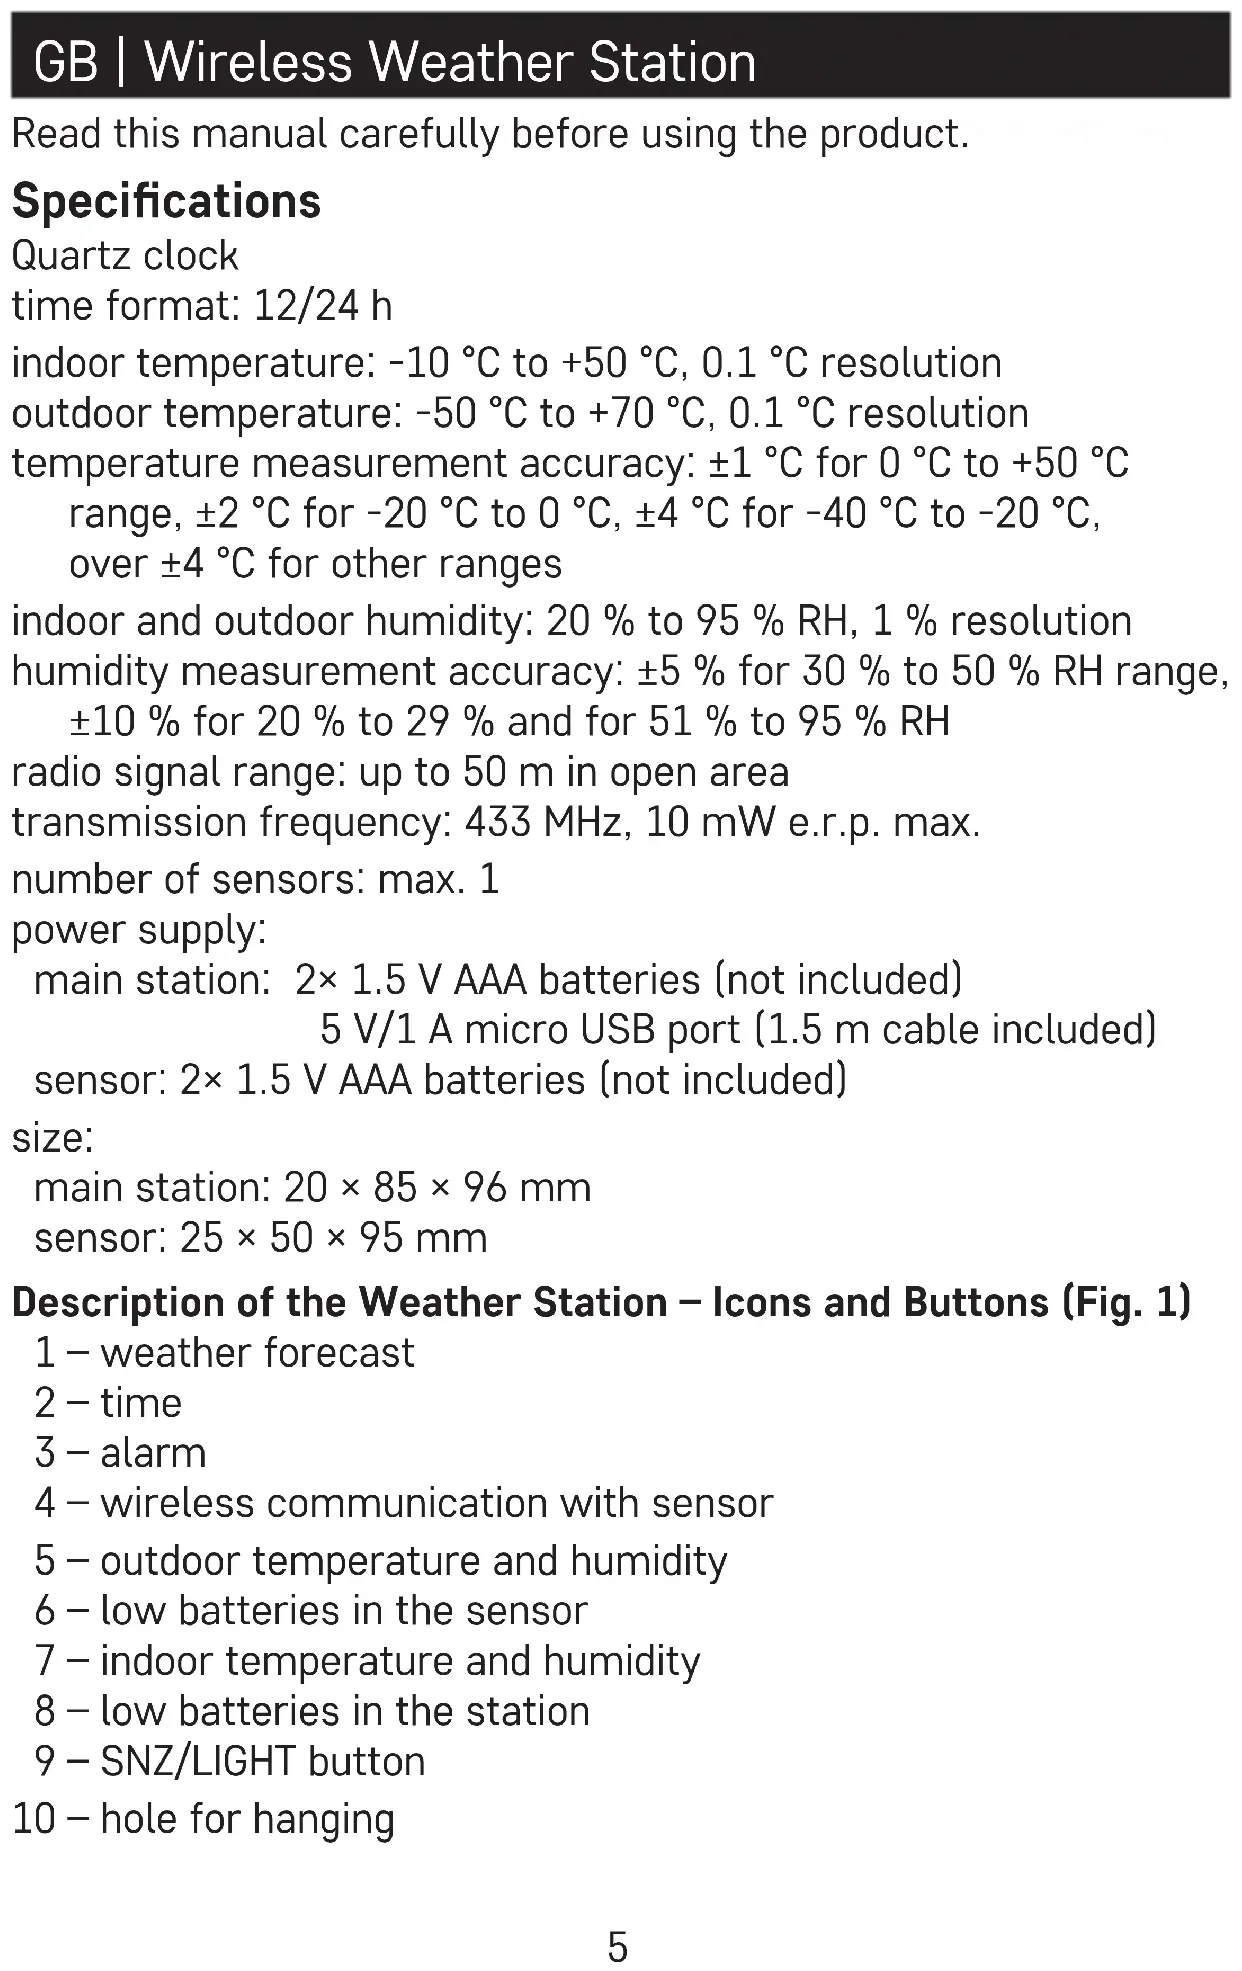
Description of the Weather Station – Icons and Buttons (Fig. 1)
1 – weather forecast
2 - time
3 - alarm
4 - wireless communication with sensor
5 – outdoor temperature and humidity
6 - low batteries in the sensor
7 – indoor temperature and humidity
8 – low batteries in the station
9 - SNZ/LIGHT button
10 – hole for hanging
11 - down arrow button
12 - up arrow button
13 - settings button
14 – battery compartment
15 - micro USB port
Description of the Sensor (Fig. 2)
16 - LED
17 – hole for hanging
18 – battery compartment
19 - RESET button
Attention
Only use 1.5 V alkaline batteries of the same type; do not use rechargeable 1.2 V batteries.
The lower voltage may cause both of the units to not function.
Getting Started
-
Insert batteries first into the weather station (2× 1.5 V AAA), connect the micro USB cable (included) to a USB power adapter (not included) and the station, then plug the adapter into a socket.
-
Then insert batteries into the wireless sensor (2× 1.5 V AAA). Make sure the polarity is correct when inserting the batteries to avoid damaging the weather station or sensor.
-
Place the two units next to each other. The 📤 icon will be flashing on the screen; the weather station will detect the remote sensor signal within 3 minutes. If sensor signal is not detected, proceed again from step 1 or use a thin object (e.g. a pencil or a paper clip) to press the RESET button on the back of the sensor.
-
If the outdoor temperature reading disappears from the screen, long press the ▼button on the station. The station will start searching for the sensor signal. If the station loses the signal from the sensor for a period longer than 1 hour, the outdoor temperature and humidity value will start flashing on the screen. Long-press the ▼button on the station so that the station starts searching for the sensor signal again.
-
We recommend placing the sensor on the north side of the house. The range of the sensor may decrease substantially in
areas with a large number of obstacles. The sensor is resistant to dripping water; however, it should not be exposed to sustained rain. Do not place the sensor on metal objects as these would reduce transmission range. Use the sensor in vertical position only. If the weather station screen shows the low battery icon in the outdoor temperature field, replace the batteries in the sensor.
- If the weather station screen shows the low battery icon, the indoor temperature field, replace the batteries in the station.
Manual Time Setting
-
Long press the button.
-
Use the ▼/▲ buttons to set the following parameters: 12 h/24 h time format – hours – minutes.
Confirm each set value by pressing the ⚙️ button; holding ▼ ▲ speeds up value adjustment.
If no button is pressed within 20 seconds, the unit will return to the main screen.
Setting °C/°F Temperature Unit
Repeatedly pressing the ▼button will switch temperature units between °C/°F.
Screen Illumination
Always power the station using the micro USB cable. Otherwise, screen illumination will not function!
The batteries are intended only for data backup.
The screen illumination setting can be adjusted by repeatedly pressing the SNZ/LIGHT – off/on.
Setting an Alarm
Short-press the button; AL will appear on the screen.
Then, long-press the button again; the time setting will start flashing.
Use ▼ to set the hours and minutes for the alarm; holding the arrow buttons speeds up adjustment.
Confirm set values by pressing 📄
To activate the alarm, short-press the button; AL will appear on the screen.
Pressing ▼/▲activates (the screen) or deactivates (disappears) the alarm.

Snooze Function
You can postpone an active alarm by 5 minutes by pressing the SNZ/LIGHT button located on the top of the station.
Press the button when the alarm starts ringing. The 📄on will be displayed and Zz will be flashing.
To cancel the SNOOZE function, press any other button while the alarm is ringing – the Zz icon will stop flashing and the 📄 icon will remain on the screen.
The alarm will trigger again the next day.
If you do not press any button while the alarm is ringing, the ringing will stop automatically after 2 minutes.
Displaying Maximum and Minimum Temperature and Humidity Readings
Press the ▲button repeatedly to gradually display the maximum and minimum readings of indoor and outdoor temperature and humidity. The memory of measured values is automatically erased every day at 00:00.
To manually erase the memory of measured values, long-press the ▲ button while in the max/min value display mode.
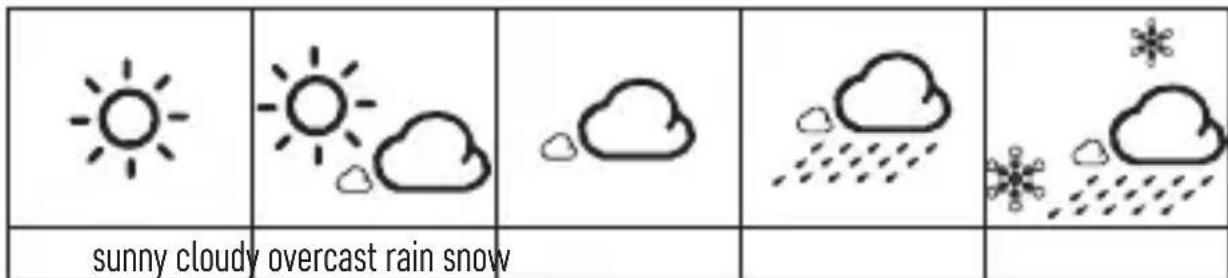
Weather Forecast
text_image
sunny cloudy overcast rain snowThe station uses changes in temperature and humidity to forecast weather for the next 12–24 hours for an area within the range of 15–20 km.
The accuracy of the weather forecast is approximately 50%. As the weather forecast may not be 100% accurate, neither the manufacturer nor the seller can be held responsible for any loss caused by an incorrect forecast. When you first set or reset the weather station, it
takes approximately 12 hours before the weather station begins forecasting correctly. The weather station shows 5 weather forecast icons.
Note: The currently displayed icon indicates the forecast for the next 12–24 hours. It may not reflect the current state of the weather.
Safety Instructions and Warnings
Read the user manual before using the device.
Follow the safety instructions stated in the manual.
The product is designed to serve reliably for many years if used properly.
- Read the manual carefully before using this product.
- Do not expose the product to direct sunlight, extreme cold or humidity and sudden changes in temperature.
- Do not place the product in locations prone to vibration and shocks – may cause damage.
- Do not subject the product to excessive force, impacts, dust, high temperatures or humidity – doing so may cause malfunction, shorten battery life, damage the batteries or deform the plastic parts.
- Do not expose the product to rain or moisture if it is not designed for outdoor use.
- Do not place any open flame sources on the product, e.g. a lit candle, etc.
- Do not put the product in places with inadequate air flow.
- Do not insert any objects in the product's vents.
- Do not tamper with the internal electric circuits of the product – doing so may damage the product and will automatically void the warranty.
- To clean the product, use a slightly moistened soft cloth. Do not use solvents or cleaning agents – they could scratch the plastic parts and cause corrosion of the electric circuits.
- Do not submerse the product in water or other liquids or expose it to dripping or splashing water.
- If the product becomes damaged or defective, do not perform any repairs yourself; bring it for repair to the store where you bought it.
- This device is not intended for use by persons (including children) whose physical, sensory or mental disability or lack of experience and expertise prevents safe use, unless they are supervised or instructed in the use of the appliance by a person responsible for their safety.
Do not dispose with domestic waste. Use special collection points for sorted waste. Contact local authorities for information about collection points. If the electronic devices would be disposed on landfill, dangerous substances may reach groundwater and subsequently food chain, where it could affect human health.
Hereby, EMOS spol. s r. o. declares that the radio equipment type E8647 is in compliance with Directive 2014/53/EU. The full text of the EU declaration of conformity is available at the following internet address: http://www.emos.eu/download.
urni format: 12/24 h
notranja temperatura: -10 °C do +50 °C z ločljivostjo 0,1 °C
Sensors: 25 × 50 × 95 mm
station principale: 20 × 85 × 96 mm