GTL2872 - Switch LEVELONE - Free user manual and instructions
Find the device manual for free GTL2872 LEVELONE in PDF.
User questions about GTL2872 LEVELONE
0 question about this device. Answer the ones you know or ask your own.
Ask a new question about this device
Download the instructions for your Switch in PDF format for free! Find your manual GTL2872 - LEVELONE and take your electronic device back in hand. On this page are published all the documents necessary for the use of your device. GTL2872 by LEVELONE.
USER MANUAL GTL2872 LEVELONE
text_image
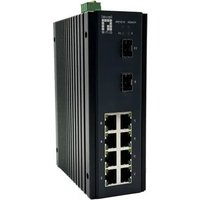
level® oneGTL-2872
28-Port L3 Lite Managed Gigabit Fiber Switch
Quick Installation Guide
English
Deutsch
Français
Español
Italiano
Português
Table of Content
English....2
Deutsch 6
Français....10
Español....14
Italiano....18
Português....22
This Quick Installation Guide only describes the most basic situations and settings. All detailed information is described in the user manual.
English
Package Contents
This product is provided with the following accessories in the box; please check them carefully. If any of the accessories is missing or damaged, please contact with your local dealer timely.
| Serial Number | Name | Quantity | Note |
| 1 | Master unit | 1 | Required |
| 2 | Power cord | 1 | Required |
| 3 | Quick Installation Guide | 1 | Required |
| 4 | L-shaped bracket and other | 1 | Required |
| 5 | CD-ROM with Manual and QIG | 1 | Required |
| 6 | Console Cable | 1 | Required |
1. Preparing for Installation
For smooth installation, please prepare the following items:
● Installation tools, including: Phillips screwdriver, anti-static wrist strap, etc.
- Connecting cables, such as network cable, optical fiber, optical fiber module, etc.
- Related devices, such as electrical outlets, HUB, switch, router, etc.

The installation environment for the switch must meet the following requirements:
- The switch must avoid direct sunlight, away from heat and sources of strong electromagnetic interference.
- The switch must be placed in a cool, dry place, and there should be enough gap for heat dissipation all around for the purpose of ventilation and heat dissipation.
- The switch must work in the indoor environment with a temperature of 0 ^ 50 ^ and humidity of 10%90% without condensation.
2. Equipment Installation
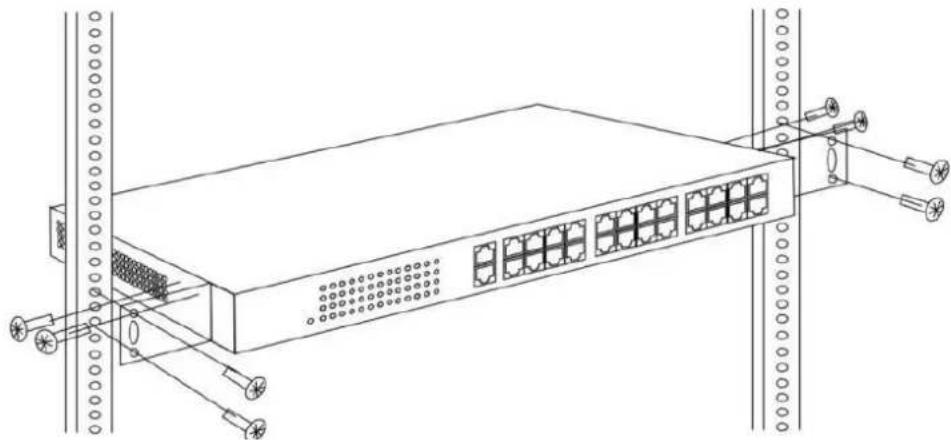
■ Installing the Switch in a Rack
Install the switch on a 19-inch standard rack, and the installation steps are as follows:
- Check the grounding and stability of the rack;
- Install the two L-shaped brackets in the accessories on both sides of the switch panel, and fix them with the screws in the accessories;
- Place the switch in the appropriate location of the rack, and support it using a tray;
- Secure the L-shaped brackets on the guide slots fixed at both ends of the rack, to ensure that the switch can be mounted on the rack in a stable, horizontal manner;
- Use a power cord to connect the switch power connector with the power socket.
natural_image
Line drawing of a server rack with multiple ports and connectors (no text or symbols)■ Installing the Switch on a Desktop
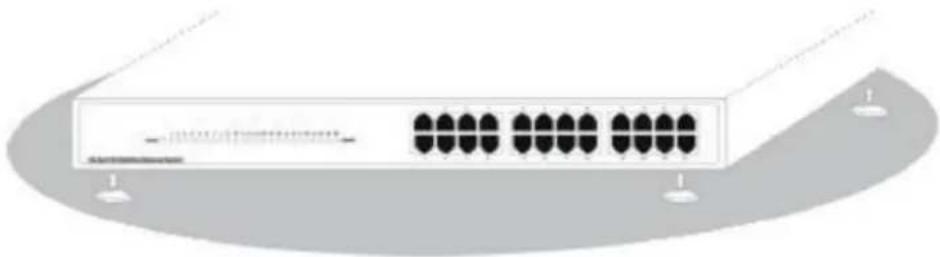
Install the switch on a desktop, and the installation steps are as follows:
- Place the switch with its bottom up on a sufficiently large, stable and properly-grounded working table;
- Remove the adhesive protective paper from the foot pad, and stick the 4 pads in the 4 round slots at the bottom of the casing respectively;
- Flip over the switch, and place it on the working table stably;
- Use a power cord to connect the switch power connector with the power socket.
natural_image
Illustration of a network switch device with multiple ports and ventilation slots (no text or symbols)
- The switch uses 100-240V, 50/60Hz AC, and make sure that both power supply and grounding are normal before power on.
- After power on, please check the switch's power indicator (Power) is on, and if so, it indicates that the power supply is connected properly.
- Do not place heavy objects on the top of the switch.
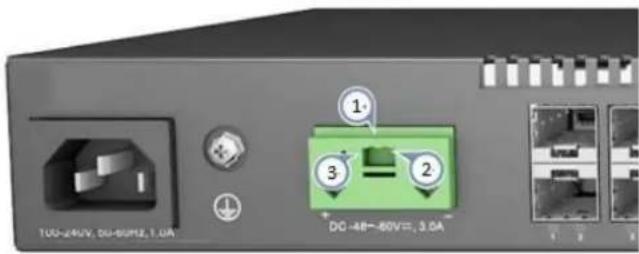
DC Power
text_image
TDD-240V, DC-50Hz, 1.0A DC-48~60V=, 3.0A
Warning: Before wiring the DC plug or connecting power to the switch, ensure that power to the feed lines are turned off at the supply circuit breaker or disconnected from the power bus.
Warning: This unit is intended to be supplied by a IEC/UL listed DC power source suitable for whose input is rated DC -48 to -60V, 3.0 A.
- The GTL-2872 switch supports the option of connecting an external -48 to -60 VDC power source to its DC terminal block.
- Connect the -48 VDC power feed wire to the DC plug “-” pin.
- Connect the ground/return wire to the DC plug "+" pin.
3. Logging on to the equipment

- Connect the RJ-45 interface cable of a switch with a computer using a network cable.
- Set the TCP/IP properties of the computer, see the Appendix: Setting up your computer.
- Logging on to the equipment: Open a browser and type 192.168.1.1 in the address bar, and then press Enter; in the pop-up login interface, enter the factory logon username "admin", password "admin" and click OK.

text_image
Switch Web Management (1366X768 is recommended) - Windows Internet Explorer http://192.168.1.1/ File Edit View Favorites Tools Help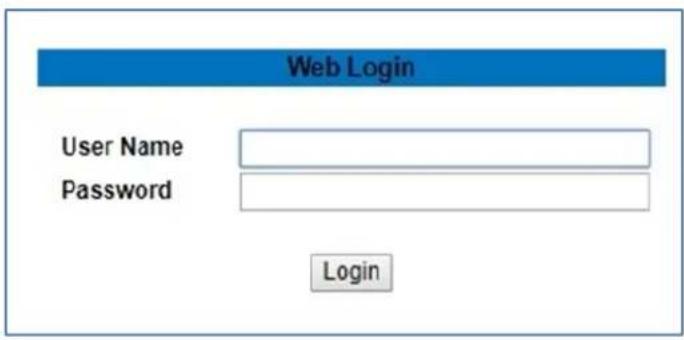
text_image
Web Login User Name Password LoginAppendix: Setting up your computer
Windows
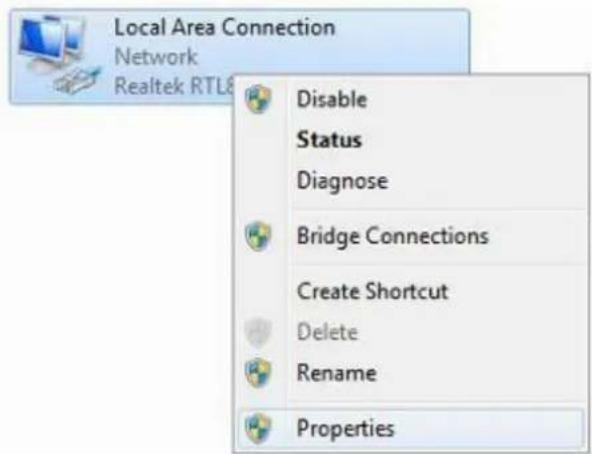
- Click Start→ Control Panel→ Network and Internet→ Network and Sharing Center→ Change adapter settings, right click Local connection and select Properties;
text_image
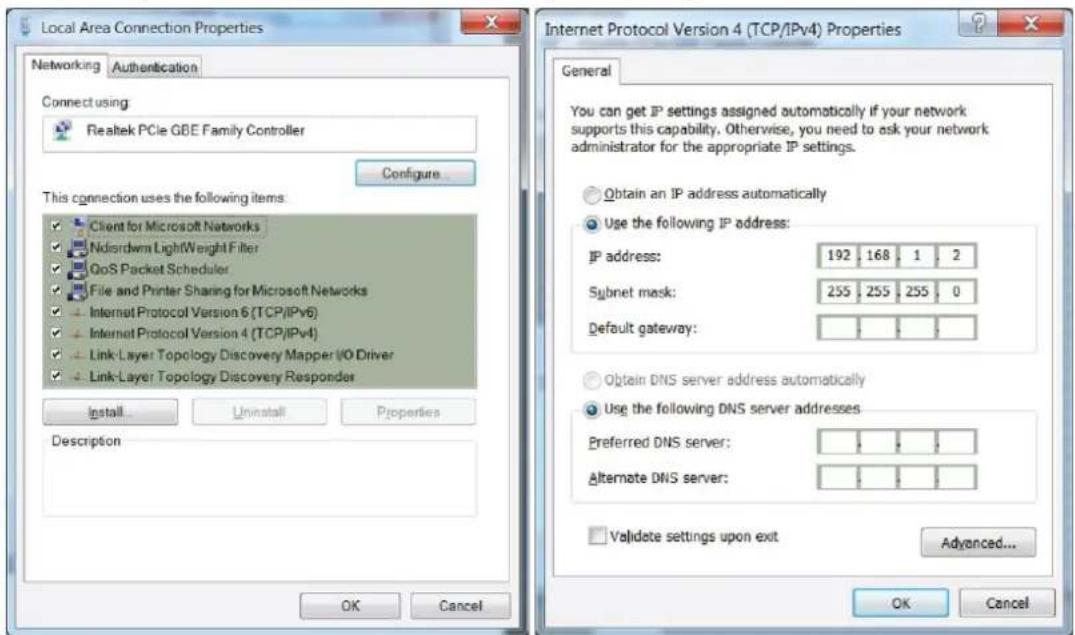
Local Area Connection Network Realtek RTL8 Disable Status Diagnose Bridge Connections Create Shortcut Delete Rename Properties- Double click Internet Protocol 4 (TCP/IPv4);

text_image
Local Area Connection Properties Networking Authentication Connect using: Realtek PCIe GBE Family Controller Configure... This connection uses the following items: Client for Microsoft Networks Nordwidth Lightweight Filter QoS Packet Scheduler File and Printer Sharing for Microsoft Networks Internet Protocol Version 6 (TCP/IPv6) Internet Protocol Version 4 (TCP/IPv4) Link-Layer Topology Discovery Mapper I/O Driver Link-Layer Topology Discovery Responder Install... Uninstall Properties Description Internet Protocol Version 4 (TCP/IPv4) Properties General You can get IP settings assigned automatically if your network supports this capability. Otherwise, you need to ask your network administrator for the appropriate IP settings. Obtain an IP address automatically Use the following IP address: IP address: 192 168 1 2 Subnet mask: 255 255 255 0 Default gateway: Obtain DNS server address automatically Use the following DNS server addresses: Preferred DNS server: Alternate DNS server: Validate settings upon exit Advanced... OK Cancel OK Cancel- Set the computer's IP address: The computer's IP address should be any one of the following free IP addresses 192.168.1.2 \~ 192.168.1.254, and then click OK, to return to the previous page, click OK.
Deutsch
Lieferumfang
natural_image
Line drawing of a server rack with multiple ports and connections (no text or symbols)natural_image
Illustration of a network switch device with multiple ports and ventilation slots (no text or symbols)
text_image
Switch Web Management (1366X768 is recommended) - Windows Internet Explorer http://192.168.1.1/ File Edit View Favorites Tools Help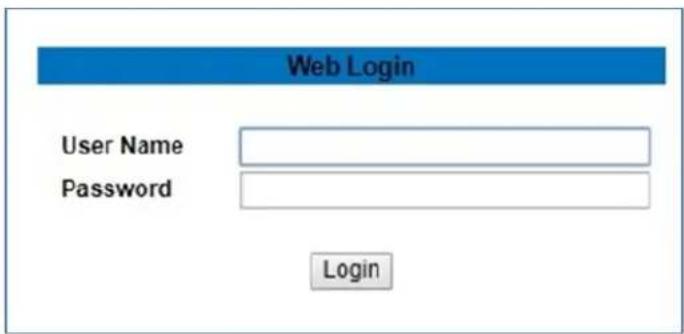
text_image
Web Login User Name Password Logintext_image
Local Area Connection Network Realtek RTL8 Disable Status Diagnose Bridge Connections Create Shortcut Delete Rename Propertiestext_image
Local Area Connection Properties Networking Authentication Connect using: Realtek PCIe GBE Family Controller Configure... This connection uses the following items: Client for Microsoft Networks Ndisrdwms Lightweight Filter QoS Packet Scheduler File and Printer Sharing for Microsoft Networks Internet Protocol Version 6 (TCP/IPv6) Internet Protocol Version 4 (TCP/IPv4) Link-Layer Topology Discovery Mapper I/O Driver Link-Layer Topology Discovery Responder Install... Uninstall Properties Description Internet Protocol Version 4 (TCP/IPv4) Properties General You can get IP settings assigned automatically if your network supports this capability. Otherwise, you need to ask your network administrator for the appropriate IP settings. Obtain an IP address automatically Use the following IP address: IP address: 192 168 1 2 Subnet mask: 255 255 255 0 Default gateway: Obtain DNS server address automatically Use the following DNS server addresses Preferred DNS server: Alternate DNS server: Validate settings upon exit Advanced... OK Cancel OK Cancelnatural_image
Line drawing of a server rack with multiple ports and connectors (no text or symbols)natural_image
Illustration of a network switch device with multiple ports and ventilation slots (no text or symbols)
text_image
Switch Web Management (1366X768 is recommended) - Windows Internet Explorer http://192.168.1.1/ File Edit View Favorites Tools Help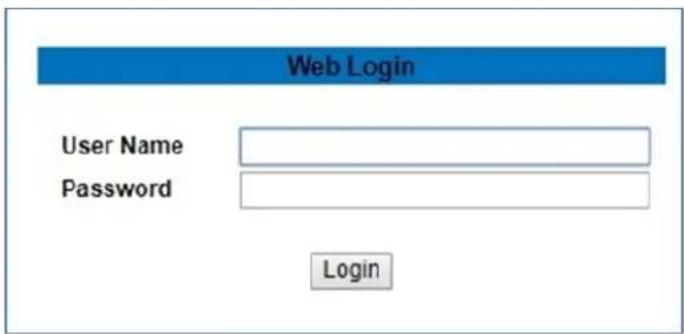
text_image
Web Login User Name Password Logintext_image
Local Area Connection Network Realtek RTL8 Disable Status Diagnose Bridge Connections Create Shortcut Delete Rename Properties- Double-cliquez sur Internet Protocol 4 (TCP/IPv4);
text_image
Local Area Connection Properties Networking Authentication Connect using: Realtek PCIe GBE Family Controller Configure... This connection uses the following items: Client for Microsoft Networks Ndisordwn LightWeight Filter QoS Packet Scheduler File and Printer Sharing for Microsoft Networks Internet Protocol Version 6 (TCP/IPv6) Internet Protocol Version 4 (TCP/IPv4) Link-Layer Topology Discovery Mapper I/O Driver Link-Layer Topology Discovery Responder Install... Uninstall Properties Description OK Cancel Internet Protocol Version 4 (TCP/IPv4) Properties General You can get IP settings assigned automatically if your network supports this capability. Otherwise, you need to ask your network administrator for the appropriate IP settings. Obtain an IP address automatically Use the following IP address: IP address: 192 168 1 2 Subnet mask: 255 255 255 0 Default gateway: Obtain DNS server address automatically Use the following DNS server addresses: Preferred DNS server: Alternate DNS server: Validate settings upon exit Advanced... OK Cancelnatural_image
Line drawing of a server rack with multiple ports and connectors (no text or symbols)natural_image
Illustration of a network switch device with multiple ports and ventilation slots (no text or symbols visible)
text_image
Switch Web Management (1366X768 is recommended) - Windows Internet Explorer http://192.168.1.1/ File Edit View Favorites Tools Help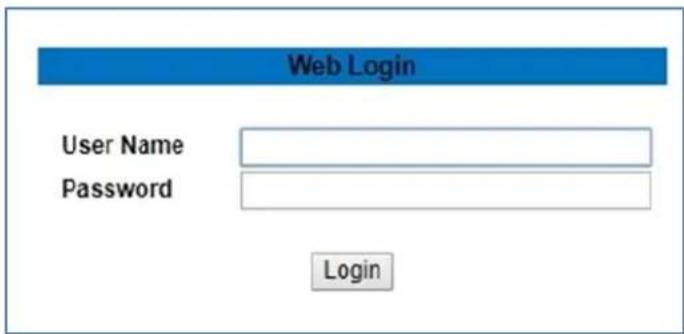
text_image
Web Login User Name Password Logintext_image
Local Area Connection Network Realtek RTL8 Disable Status Diagnose Bridge Connections Create Shortcut Delete Rename Properties- Haga doble clic en Protocolo de Internet 4 (TCP/IPv4);

text_image
Local Area Connection Properties Networking Authentication Connect using: Realtek PCIe GBE Family Controller Configure... This connection uses the following items: Client for Microsoft Networks Nordown Lightweight Filter QoS Packet Scheduler File and Printer Sharing for Microsoft Networks Internet Protocol Version 6 (TCP/IPv6) Internet Protocol Version 4 (TCP/IPv4) Link-Layer Topology Discovery Mapper I/O Driver Link-Layer Topology Discovery Responder Install... Uninstall Properties Description Internet Protocol Version 4 (TCP/IPv4) Properties General You can get IP settings assigned automatically if your network supports this capability. Otherwise, you need to ask your network administrator for the appropriate IP settings. Obtain an IP address automatically Use the following IP address: IP address: 192 168 1 2 Subnet mask: 255 255 255 0 Default gateway: Obtain DNS server address automatically Use the following DNS server addresses Preferred DNS server: Alternate DNS server: Validate settings upon exit Advanced... OK Cancel OK Cancelnatural_image
Line drawing of a server rack with multiple ports and connectors, no text or symbols presentnatural_image
Illustration of a network switch device with multiple ports and ventilation slots (no text or symbols)
text_image
Switch Web Management (1366X768 is recommended) - Windows Internet Explorer http://192.168.1.1/ File Edit View Favorites Tools Help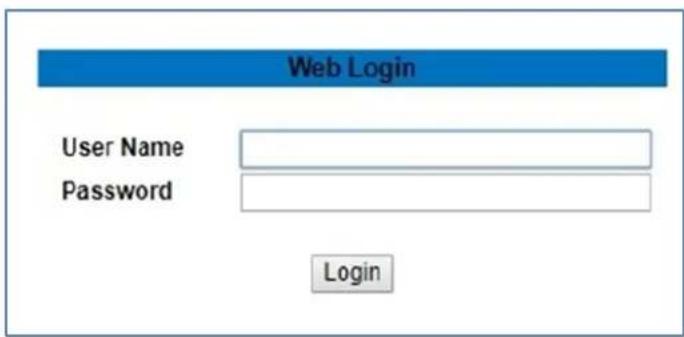
text_image
Web Login User Name Password Logintext_image
Local Area Connection Network Realtek RTL8 Disable Status Diagnose Bridge Connections Create Shortcut Delete Rename Propertiestext_image
Local Area Connection Properties Networking Authentication Connect using: Realtek PCIe GBE Family Controller Configure... This connection uses the following items: Client for Microsoft Networks Ndisordwn Lightweight Filter QoS Packet Scheduler File and Printer Sharing for Microsoft Networks Internet Protocol Version 6 (TCP/IPv6) Internet Protocol Version 4 (TCP/IPv4) Link-Layer Topology Discovery Mapper I/O Driver Link-Layer Topology Discovery Responder Install... Uninstall Properties Description Internet Protocol Version 4 (TCP/IPv4) Properties General You can get IP settings assigned automatically if your network supports this capability. Otherwise, you need to ask your network administrator for the appropriate IP settings. Obtain an IP address automatically Use the following IP address: IP address: 192 168 1 2 Subnet mask: 255 255 255 0 Default gateway: Obtain DNS server address automatically Use the following DNS server addresses Preferred DNS server: Alternate DNS server: Validate settings upon exit Advanced... OK Cancel OK Cancelnatural_image
Line drawing of a server rack with multiple ports and connectors, no text or symbols presentnatural_image
Illustration of a network switch device with multiple ports and indicator lights (no text or symbols)
text_image
Switch Web Management (1366X768 is recommended) - Windows Internet Explorer http://192.168.1.1/ File Edit View Favorites Tools Help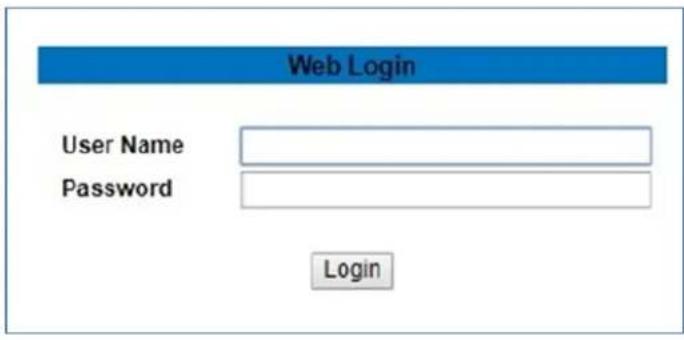
text_image
Web Login User Name Password Logintext_image
Local Area Connection Network Realtek RTL8 Disable Status Diagnose Bridge Connections Create Shortcut Delete Rename Propertiestext_image
Local Area Connection Properties Networking Authentication Connect using: Realtek PCIe GBE Family Controller Configure... This connection uses the following items: Client for Microsoft Networks Ndisrdwm Lightweight Filter GoS Packet Scheduler File and Printer Sharing for Microsoft Networks Internet Protocol Version 6 (TCP/IPv5) Internet Protocol Version 4 (TCP/IPv4) Link-Layer Topology Discovery Mapper I/O Driver Link-Layer Topology Discovery Responder Install... Uninstall Properties Description Internet Protocol Version 4 (TCP/IPv4) Properties General You can get IP settings assigned automatically if your network supports this capability. Otherwise, you need to ask your network administrator for the appropriate IP settings. Obtain an IP address automatically Use the following IP address: IP address: 192 168 1 2 Subnet mask: 255 255 255 0 Default gateway: Obtain DNS server address automatically Use the following DNS server addresses Preferred DNS server: Alternate DNS server: Validate settings upon exit Advanced... OK Cancel OK CancelDeclaration of Conformity
We, the undersigned, Digital Data Communications GmbH
Address Hohe Straße 1, 44139 Dortmund, Germany
Certify and declare under our sole responsibility that the following apparatus
Type Ethemet switch
Brandname LevelOne
Product GTL-2872
Conforms with the essential requirements of the EMC Directive 2014/30/EC, based on the following specifications applied:
EU harmonised standards
■ EN55032:2015 +AC:2016, Class A
■ EN 61000-3-2:2014, Class A
■ EN 61000-3-3:2013
■ EN 55024:2010+A1:2015
■ EN 61000-4-2:2009 / IEC 61000-4-2:2008 ED. 2.0
■ EN 61000-4-3:2006 + A1:2008 +A2:2010 / IEC 61000-4-3:2010 ED. 3.2
■ EN 61000-4-4:2012 / IEC 61000-4-4:2012 ED. 3.0
■ EN 61000-4-5:2014 / IEC 61000-4-5:2014 ED. 3.0
■ EN 61000-4-6:2014 / IEC 61000-4-6:2013 ED. 4.0
■ EN 61000-4-8:2010 / IEC 61000-4-8:2009 ED. 2.0
■ EN 61000-4-11:2004 / IEC 61000-4-11:2004 ED. 2.0
■ AS/NZS CISPR 32:2015,Class A
■ CISPR 32:2015 + COR1 :2016,Class A
and therefore complies with the essential requirements and provisions of the EMC Directive.
CE
The symbol confirms that this product conforms to the above named standards and regulations.
Amanda(Shu-Wen) Chen
Name (Full Name)
2017/11/7
Date
Geschäftsführerin
Title/Department
Legal Signature
CE
| Amanda(Shu-Wen) Chen |
| Name (Full Name) |
| 2017/11/7 |
| Date |