
MPWL200BK - Microphone NEDIS - Free user manual and instructions
Find the device manual for free MPWL200BK NEDIS in PDF.

| Brand | Nedis |
| Model | MPWL200BK |
| Product type | Wireless microphone with receiver |
| Operating frequency | 640.5 - 659.5 MHz |
| Maximum transmission power | 14 dBm |
| Signal range (line of sight) | Up to 50 m |
| Ideal signal range | Up to 30 m |
| Signal type | UHF |
| Channels | 20 |
| Volume levels | 0 - 6 |
| Frequency response | 70 Hz - 13 kHz |
| Polar pattern | Cardioid |
| Sensitivity | -95 dB |
| Impedance | 1000 Ω |
| Maximum battery life (volume at 50%) | Up to 10 hours |
| Microphone power supply | 2 x 1.5 V AA (not included) |
| Receiver power supply | 2 x 1.5 V AA (not included) |
| Display | Yes (LCD) |
| Receiver connector | 6.35 mm (AUX plug) |
| On/off switch | Yes (on microphone and receiver) |
| LED status indicator | Yes |
| Included accessories | Foam cover, anti-roll ring |
| Use | Indoor only |
| Main functions | UHF wireless microphone, volume and channel control, ID lock, automatic pairing |
| Maintenance and cleaning | Wipe with a clean, dry cloth. Do not expose to water or moisture. |
| Safety | Do not use if damaged. Keep out of reach of children. Use only recommended batteries. |
| Spare parts and repairability | Repair by qualified technician only. Batteries replaceable. |
| General information | RED 2014/53/EU declaration of conformity available at nedis.fr/mpwl200bk#support |
Frequently Asked Questions - MPWL200BK NEDIS
User questions about MPWL200BK NEDIS
0 question about this device. Answer the ones you know or ask your own.
Ask a new question about this device
Download the instructions for your Microphone in PDF format for free! Find your manual MPWL200BK - NEDIS and take your electronic device back in hand. On this page are published all the documents necessary for the use of your device. MPWL200BK by NEDIS.
USER MANUAL MPWL200BK NEDIS
natural_image
Line drawing of a handheld device with a speaker and control buttons (no text or symbols)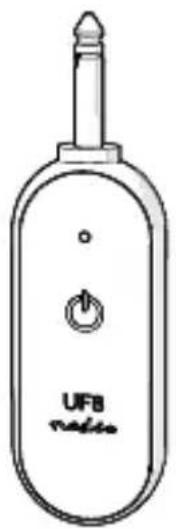
EN Quick start guide 5
DE Kurzanleitung 9
natural_image
Diagram showing battery assembly process: adding one to a cylindrical battery and then into a device casing (no text or symbols)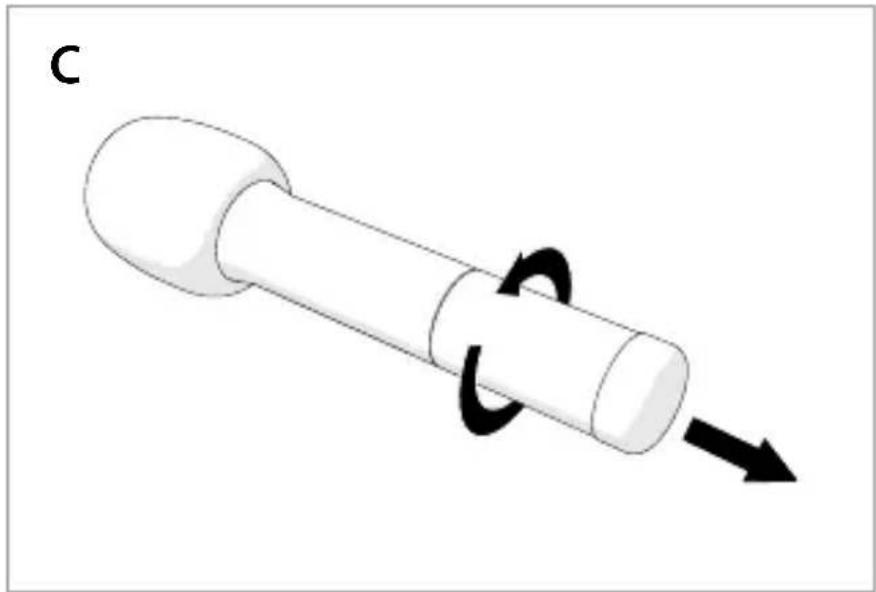
natural_image
Diagram of a mechanical component with a curved arrow indicating rotational motion (no text or symbols)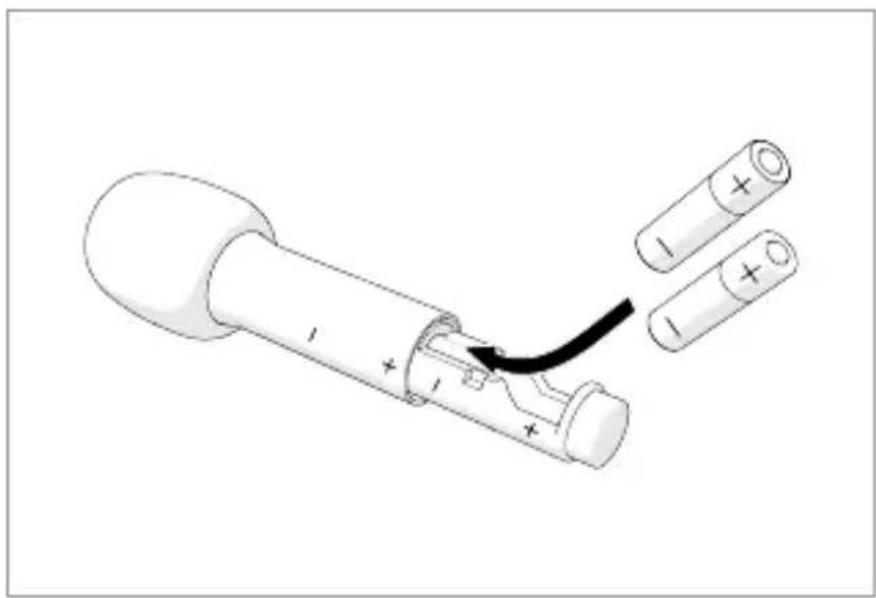
natural_image
Diagram of a battery with two cylindrical cells and one open, showing internal structure and an arrow indicating a process (no text or symbols present)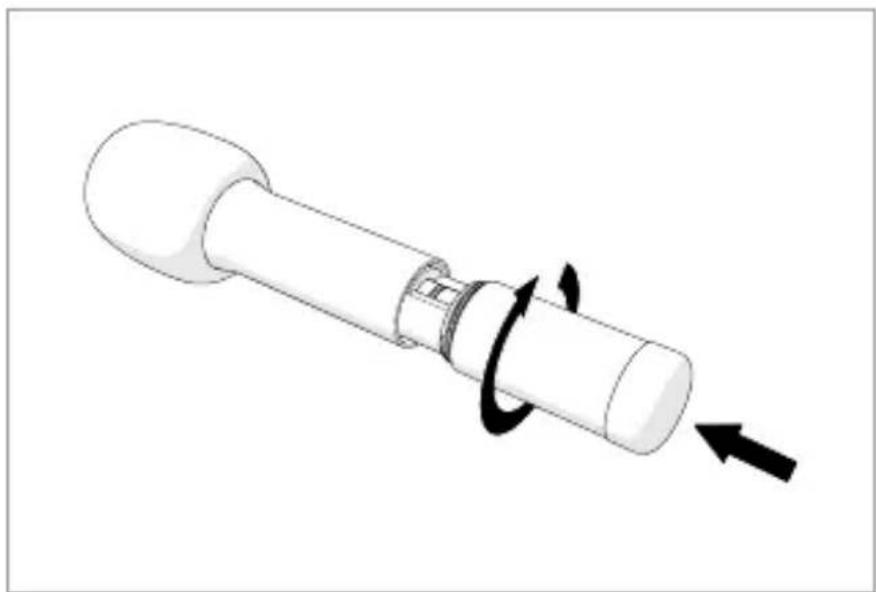
natural_image
Diagram of a mechanical device with rotating shaft and curved arrow indicating rotation (no text or symbols)Wireless Microphone MPWL200BK

For more information see the extended manual online: ned.is/mpwl200bk
Intended use
The Nedis MPWL200BK is a wireless microphone equipped with a receiver and a display.
This product is not intended for use by persons (including children) with a reduced physical, sensory or mental capabilities or lack of experience and knowledge, unless they have been given supervision or instruction concerning the use of the product by a person responsible for their safety.
The product is intended for indoor use only.
The product is not intended for professional use.
Any modification of the product may have consequences for safety, warranty and proper functioning.
Specifications
| Product Wireless Microphone | |
| Article number MPWL200BK | |
| Operating frequency 640.5 - 659.5 MHz | |
| Maximum transmit power 14 dBm | |
| Signal range (line of sight) Up to 50 m | |
| Ideal signal range Up to 30 m | |
| Signal type UHF | |
| Channels 20 | |
| Volume levels 0 - 6 | |
| Frequency response 70 Hz - 13 KHz | |
| Polar pattern Cardioid | |
| Sensitivity -95 dB | |
| Impedance 1000 Ω | |
| Max. battery play time (at 50 % volume) | Up to 10 hours |
| On/off switch Yes | |
| Display | Yes |
| Receiver connection 6.35 mm | |
| Battery microphone | 2 x 1.5 V AA (not included) |
| Battery receiver | 2 x 1.5 V AA (not included) |
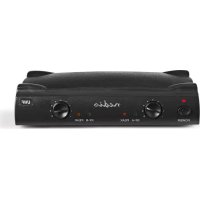
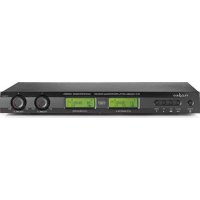
Main parts (image A)
1 Microphone
2 LCD display
3 On / off button
4 Volume+ button
5 Volume-button
6 Microphone battery compartment
7 Foam cover
8 Anti-roll ring
9 AUX plug
10 Status indicator LED
11 On / off button
12 Receiver battery compartment
13 Receiver
14 Battery level indicator
15 Channel level
(CH00 - CH19)
16 Volume level (V00 - V06)
17 Signal strength
Safety instructions
WARNING
- Ensure you have fully read and understood the instructions in this document before you install or use the product. Keep this document for future reference.
- Only use the product as described in this document.
- Do not use the product if a part is damaged or defective. Replace a damaged or defective product immediately.
- Do not drop the product and avoid bumping.
- Disconnect the product from the power outlet and other equipment if problems occur.
- Do not expose the product to water or moisture.
- Do not expose the product to direct sunlight, naked flames or heat.
- Keep distance from flammable objects.
- This product may only be serviced by a qualified technician for maintenance to reduce the risk of electric shock.
- Do not dismantle, open or shred secondary cells or batteries.
- Do not expose cells or batteries to heat or fire. Avoid storage in direct sunlight.
- Do not short-circuit a cell or a battery.
- Do not store cells or batteries haphazardly in a box or drawer where they may short-circuit each other or be short-circuited by other metal objects.
- Do not subject cells or batteries to mechanical shock.
- In the event of a cell leaking, do not allow the liquid to come in contact with the skin or eyes. If contact has been made, wash the affected area with copious amounts of water and seek medical advice.
-
Always purchase the battery recommended by the product manufacturer for the product.
-
Do not remove a cell or battery from its original packaging until required for use.
- Do not use any cell or battery which is not designed for use with the equipment.
- Use only the cell or battery in the application for which it was intended.
- Do not mix cells of different manufacture, capacity, size or type within a product.
- Wipe the cell or battery terminals with a clean dry cloth if they become dirty.
- Battery usage by children should be supervised.
- Observe the plus (+) and minus (−) marks on the cell, battery and equipment and ensure correct use.
- When possible, remove the battery from the product when not in use.
• Properly dispose of the empty battery. - Seek medical advice immediately if a cell or a battery has been swallowed.
- Some wireless products may interfere with implantable medical devices and other medical equipment, such as pacemakers, cochlear implants and hearing aids. Consult the manufacturer of your medical equipment for more information.
Inserting the batteries (image B + C)
Receiver
Use only size AA batteries for this product.
-
Open the battery compartment A ⑫.
-
Place 2 size AA batteries (not included) into A ⑫.
Make sure to match the (+) and (-) polarity markings.
- Close A ⑫.
Microphone
Use only size AA batteries for this product.
-
Rotate and pull A ⑥ from the microphone.
-
Place 2 size AA batteries (not included) into A ⑥.
Make sure to match the (+) and (-) polarity markings.
-
Place and rotate A ⑥ back onto the microphone.
-
Place the foam cover A⑦ over the microphone A①.
Switch on the microphone
- Press and hold the on / off button A ③ for 2 seconds to switch on the product.
- Press and hold A ③ for 3 seconds to switch off the product.
Switch on the receiver
- Press and hold the on / off button A ⑪ for 2 seconds to switch on the product.
- The status indicator LED A ⑩ lights up blue to indicate pairing is successful.
- Connect the AUX plug A ⑨ to an audio output device.
- Speak into the microphone A ① to amplify your voice.
• A⑩ flashes slowly to indicate pairing is unsuccessful.
• A⑩ flashes fast to indicate that the battery is low. - Tap and hold A ⑪ for 3 seconds to switch off the product.
Volume controlling
- Press the volume+ button A ④ to increase the volume level.
- Press the volume– button A ⑤ to decrease the volume level.
Channel controlling
- Press the channel button A ③ to enter the channel control mode.
- "CH00" A ⑮ flashes to indicate channel control mode is active. Press A ④ or A ⑤ to select a channel.
Lock / Unlock ID
Lock the microphone and receiver to avoid interference by another microphone or receiver nearby.
- Press A ④ and A⑤ for 3 seconds to lock or unlock the ID.
• A② flashes slowly to indicate that the ID will be unlocked.
• A② flashes fast to indicate that the ID will be locked.
Declaration of Conformity
We, Nedis B.V. declare as manufacturer that the product MPWL200BK from our brand Nedis ^® produced in China, has been tested according to all relevant CE standards and regulations and that all tests have been passed successfully. This includes, but is not limited to the RED 2014/53/EU regulation.
The complete Declaration of Conformity (and the safety datasheet if applicable) can be found and downloaded via: nedis.com/mpwl200bk#support
For additional information regarding the compliance, contact the customer service:
Web: www.nedis.com

Kurzanleitung
Kabelloses Mikrofon MPWL200BK

5215 MC 's-Hertogenbosch, the Netherlands

5215 MC 's-Hertogenbosch, the Netherlands


- Wireless Microphone MPWL200BK
- Intended use
- Main parts (image A)
- Safety instructions
- WARNING
- Inserting the batteries (image B + C)
- Receiver
- Microphone
- Switch on the microphone
- Switch on the receiver
- Volume controlling
- Channel controlling
- Lock / Unlock ID
- Declaration of Conformity
- Kurzanleitung
- Kabelloses Mikrofon MPWL200BK
Brand : NEDIS
Model : MPWL200BK
Category : Microphone