Koen - High chair Lionelo - Free user manual and instructions
Find the device manual for free Koen Lionelo in PDF.

User questions about Koen Lionelo
0 question about this device. Answer the ones you know or ask your own.
Ask a new question about this device
Download the instructions for your High chair in PDF format for free! Find your manual Koen - Lionelo and take your electronic device back in hand. On this page are published all the documents necessary for the use of your device. Koen by Lionelo.
USER MANUAL Koen Lionelo
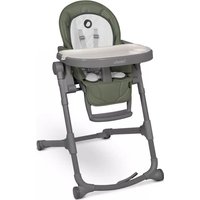
natural_image
White baby stool with patterned bedding and accessories, no visible text or symbols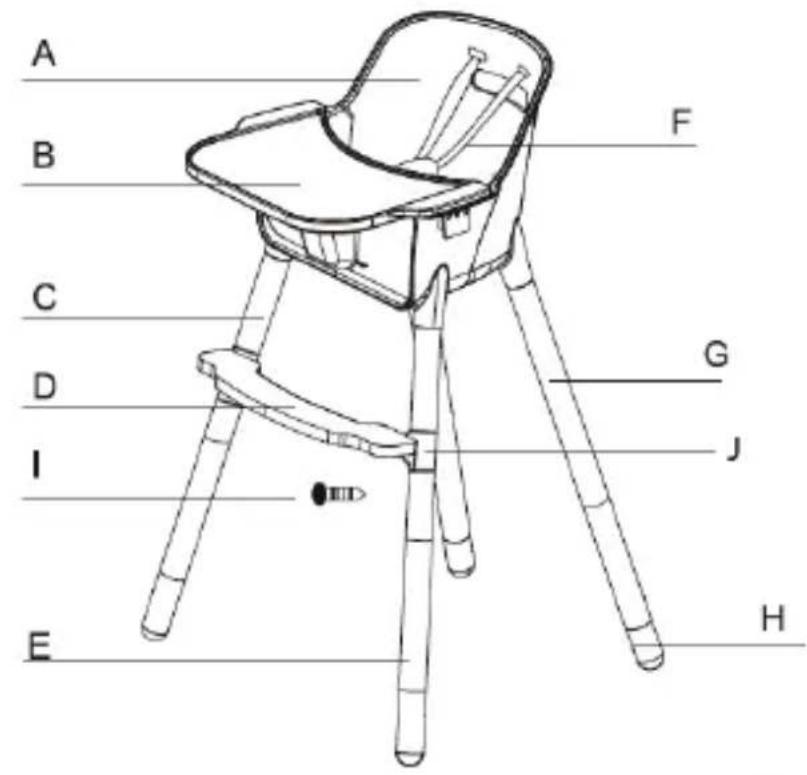
1
natural_image
Line drawing of two baby chair designs with legs and legs, showing motion changes (no text or symbols)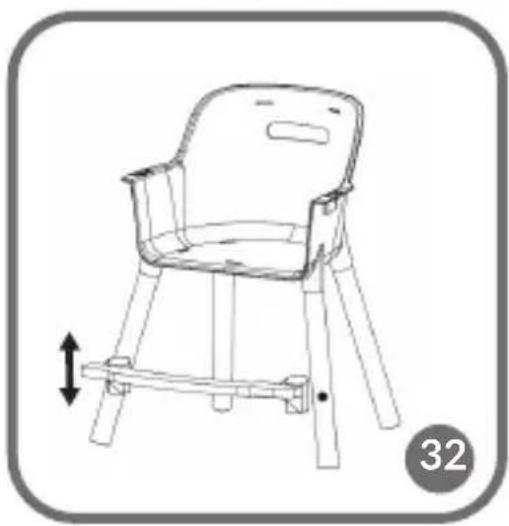
natural_image
Line drawing of a small wooden chair with a side-mounted base, showing a vertical offset (no text or symbols)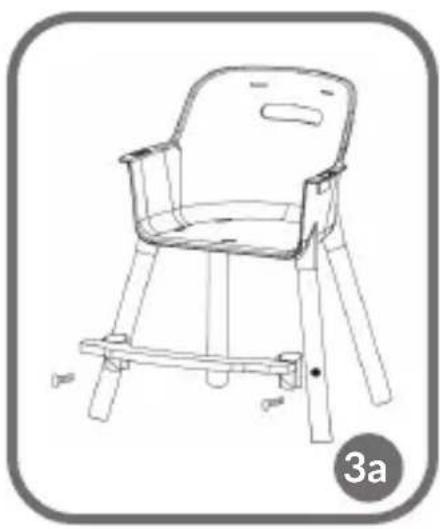
natural_image
Line drawing of a small wooden chair with a seat and legs, labeled '3a' in the corner (no text or symbols on the chair itself)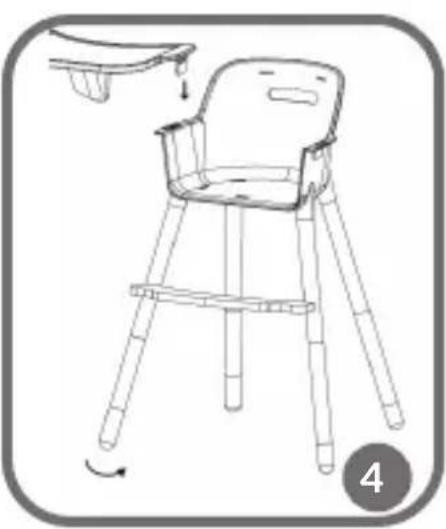
natural_image
Line drawing of a baby's height chair with a seat, showing body positioning and adjustment arrows (no text or symbols)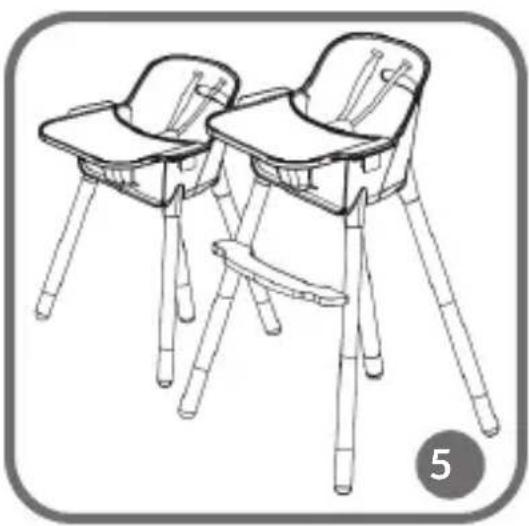
natural_image
Line drawing of two baby boomshelves with wooden legs and seat covers, no text or symbols present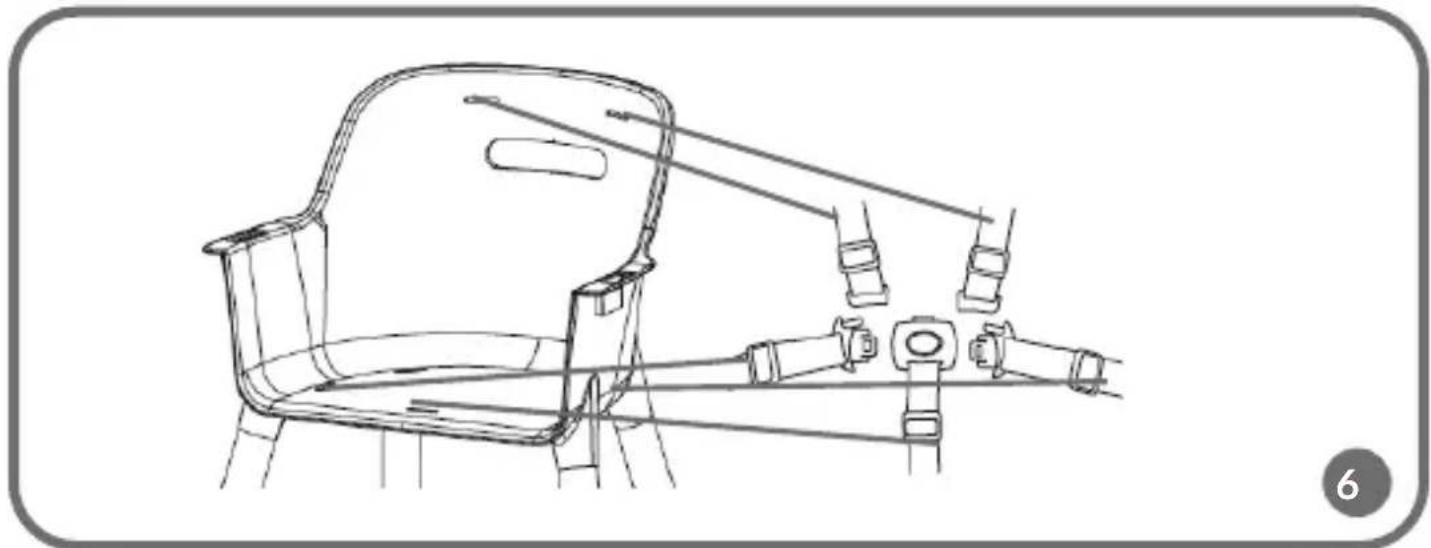
natural_image
Line drawing of a car interior frame with attached seatbelt and belt (no text or symbols)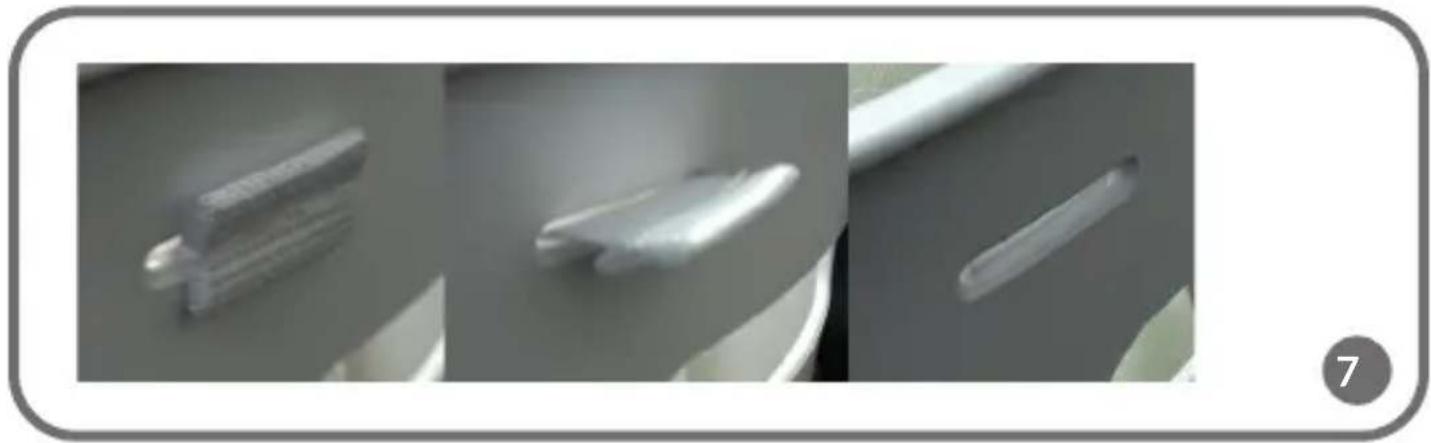
natural_image
Three close-up photos of plastic cylindrical objects on a surface, no visible text or symbols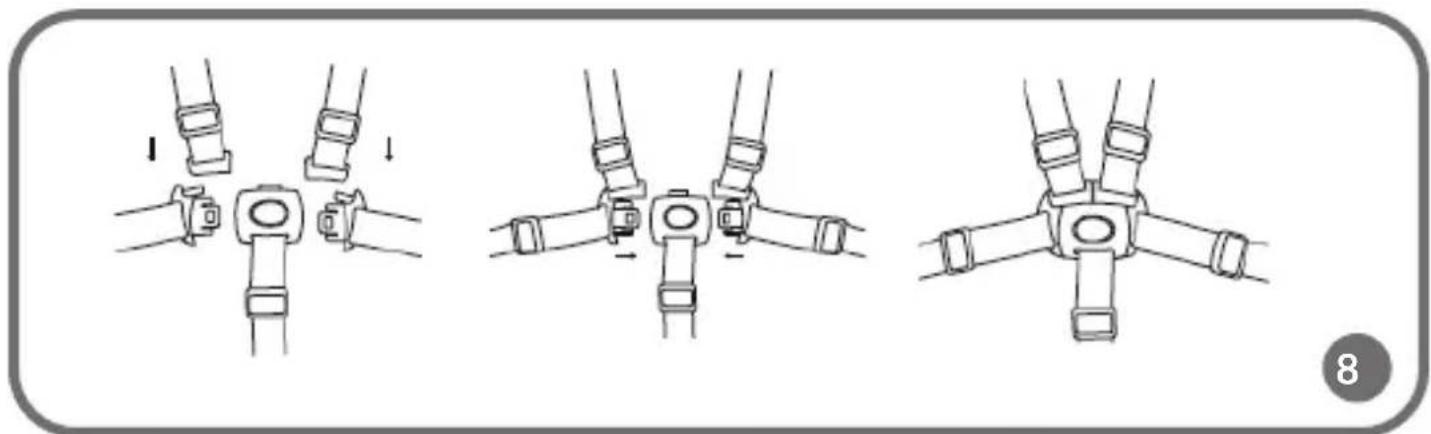
Dear customer!
Should you have any remarks or questions concerning the product, please do not hesitate to contact us: help@lionelo.com
The product has been tested and complies with:
EN 14988:2017+A1:2020, EN 17191:2021 standard.
Producer:
BrandLine Group Sp. z o. o.
Warnings for highchair:
IMPORTANT! READ CAREFULLY AND KEEP FOR FUTURE REFERENCE
WARNING
- Never leave the child unattended
- Always use the restraint system.
- Falling hazard: Prevent your child from climbing on the product.
- Do not use the product unless all components are correctly fitted and adjusted.
- Be aware of the risk of open fire and other sources of strong heat in the vicinity of the product.
- Be aware of the risk of tilting when your child can push its feet against a table or any other structure.
- Do not use the product until the child can sit up unaided.
- Do not use the product if any part is broken, torn or missing.
- Keep children away when unfolding and folding the product to avoid injury.
- The product is intended for children able to sit up unaided and up to 3 years or a maximum weight of 15 kg.
Warnings for the child seat:
IMPORTANT! READ CAREFULLY AND KEEP FOR FUTURE REFERENCE
WARNING
- DO NOT place this product near a window as it can be used as a step by the child and cause the child to fall out of the window.
- Be aware of the risk of open fires and other sources of strong heat in the vicinity of the product.
- DO NOT place this product near a window where cords from blinds or curtains could strangle a child.
- Product intended for children from three years.
- All assembly fittings should always be tightened properly.
- Do not use the seating if any part is broken, torn or missing and use only spare parts approved by the manufacturer.
- Restraint system shall be removed when the product is used as a seating.
PRODUCT OUTLINE
see fig. 1
A. Seat
B. Tray
C. Upper front leg (with a footrest screw hole)
D. Footrest
E. Lower leg
F. Safety belt
G. Upper rear leg (without a footrest screw hole)
H. Adjustment foot
I. Footrest mounting screw
J. Mounting connectors
HOW TO ASSEMBLE CHAIR
Before you start assembling, make sure you have all parts and that they are not damaged.
-
Screw two upper front legs (with a screw hole) and two rear legs (without holes) to the seat. Tighten front legs up so that footrest screw holes are positioned to the front (fig. 2).
-
Put the footrest on the front legs, previously screwed into the seat (above the
screw holes) (fig. 3).
- Screw lower legs to upper legs. You can adjust the level with feet.
- Insert the tray into the seat until you can hear a distinctive click (fig. 4). Correct high chair tray assembly requires the use of the safety cap (fig. 10). Do not install the safety cap if you do not use the tray.
-
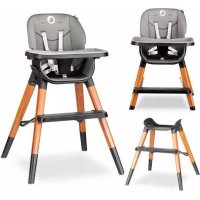
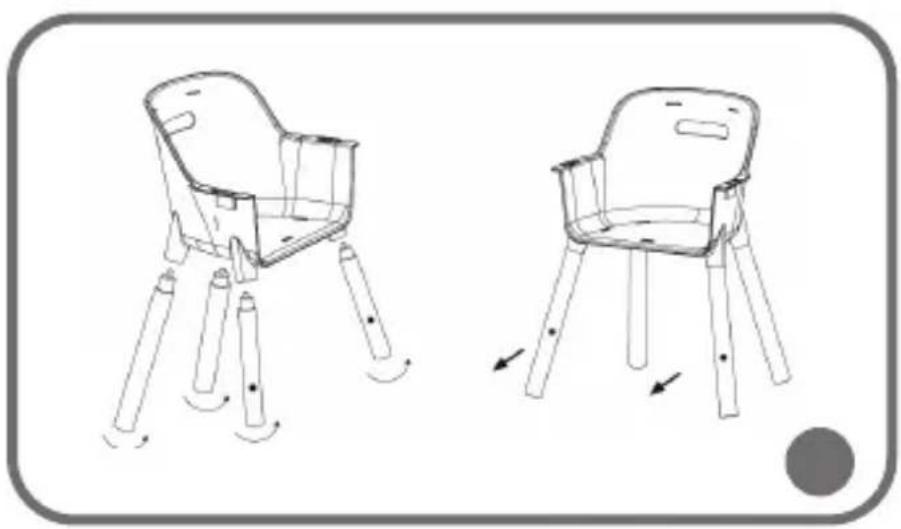
To have a lower chair variant (fig. 5):
-
remove the footrest (D, fig. 1),
- unscrew lower legs,
- unscrew adjustment feet from lower legs,
- screw feet to upper legs on.
SAFETY BELTS
How to assemble and disassemble belts
NOTE! If you use a high chair, always fasten safety belts!
- To fix belts, carry belts through relevant holes in the seat (fig. 6).
- Pull the belt and make sure it has been properly locked in the seat.
- To dismount the belt, straighten the belt lock and gently push through the hole in the seat (fig. 7).
How to fasten belts
To make sure your child is safe and does not fall from the chair, fasten safety belts, as showed in the picture below (fig. 8).
- Put upper belt buckles on the side belt buckle.
- Insert buckles into the fastening.
- Make sure the belt has been fastened properly.
- To undo the belt, press the button in the fastening.
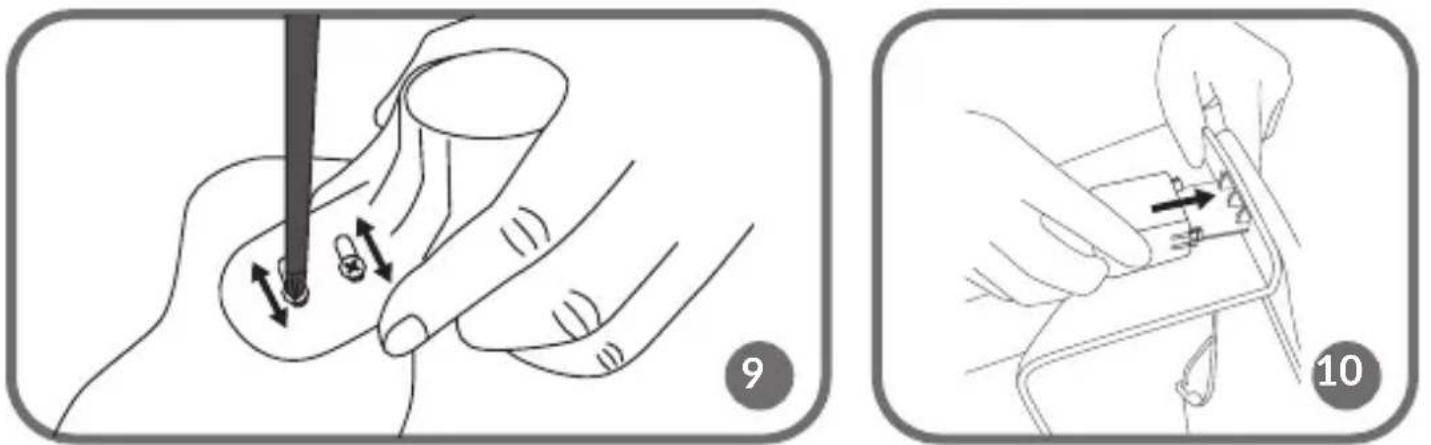
Footrest adjustment
You can choose 2 heights of the footrest. Install the screws with a screwdriver.
- Remove the footrest from the product. Next loosen screws which connect plastic connectors (J) to the wooden footrest. See fig. 9.
- To install in a higher position, slide plastic connectors to the center and tighten the screws up. To install in a lower position, slide plastic connectors to the outside and tighten the screws up. Attach the footrest on the product.
- Screw in the screws. Slide the footrest over the screws that support it (fig. 3a).
CLEANING AND MAINTENANCE
Keep the chair clean and take care of it to prevent your child against accidental injuries.
- To clean the product, use a wet cloth. You can use a soft detergent.
- Regularly check if all elements have been tightened up properly and there are no loose parts.
-
Regularly check operation of the safety belt mechanism.
-
If you do not use the chair, keep it in a clean and ventilated place. Avoid direct sunlight.
-
Never use strong detergents, polishing materials, bleaches and alcohol-rich products.
The pictures are for reference only. The real design of the products may differ from the pictures presented.
PL
Drogi Kliencie!
TOEKOMST ALS REFERENTIE
WAARSCHUWING
Detailed warranty conditions are available on the website:
Thank you for purchasing our product