Zanna - High chair Lionelo - Free user manual and instructions
Find the device manual for free Zanna Lionelo in PDF.

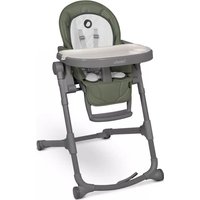
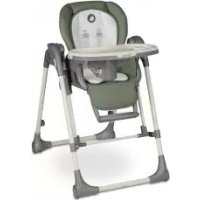
| Product type | High chair for children |
| Brand | Lionelo |
| Model | Zanna |
| Recommended age | 6 months to 3 years |
| Maximum supported weight | 15 kg |
| Materials | Metal and plastic frame, fabric seat |
| Adjustable seat height | Yes, multiple positions with adjustment buttons |
| Reclining backrest | Yes, 4 positions (lever at the back) |
| Adjustable footrest | Yes, angle and length (specific buttons) |
| Removable tray | Yes, 3 positions, attaches to guides |
| Safety harness | 5-point, height adjustable (2 heights) |
| Folding | Yes, semi-automatic, with transport wheels |
| Wheels | 4 wheels for easy movement when folded |
| Locking mechanism | Buttons and safety levers (confirmation click) |
| Care | Damp cloth, mild detergent; tray dishwasher safe |
| Spare parts | Use only original parts |
| Safety | Never leave unattended, always use harness |
| Semi-automatic folding system | Works on smooth surfaces (tiles, etc.) |
Frequently Asked Questions - Zanna Lionelo
User questions about Zanna Lionelo
0 question about this device. Answer the ones you know or ask your own.
Ask a new question about this device
Download the instructions for your High chair in PDF format for free! Find your manual Zanna - Lionelo and take your electronic device back in hand. On this page are published all the documents necessary for the use of your device. Zanna by Lionelo.
USER MANUAL Zanna Lionelo
natural_image
Gray plastic cushion or clip with a small circular hole, isolated on white background (no text or symbols)1
natural_image
3D model of a gray ergonomic chair with seat, armrests, and vent slots (no text or symbols visible)
3
natural_image
Two black plastic contactor packages with visible internal slots and mounting holes (no text or symbols)4
5
natural_image
3D rendered image of a gray ergonomic device with two vertical legs and a handle (no text or symbols visible)6
natural_image
3D rendered image of a black mechanical component with two vertical posts (no text or symbols)7
natural_image
Simple line drawing of a four-way connector with four arms (no text or symbols)8
A
natural_image
3D rendered image of a gray plastic electronic device with a black handle and mounting bracket (no text or symbols visible)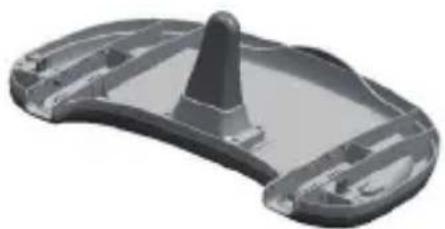
natural_image
3D rendered model of a gray plastic mechanical component with a conical top and side grooves (no text or symbols)1
natural_image
3D rendered image of a baby seat with adjustable arms and legs, shown in grayscale (no text or symbols)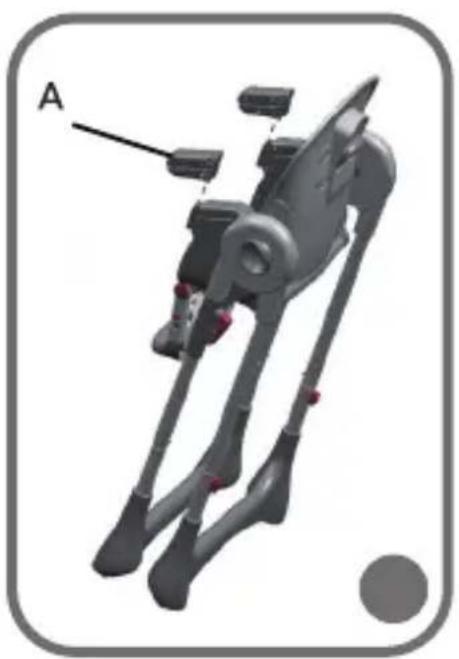
natural_image
3D rendered mechanical device with labeled component A, showing articulated arms and legs (no text or symbols beyond label)
natural_image
Technical illustration of a baby seat with side-mounted legs and a close-up view showing the front panel and base (no text or symbols)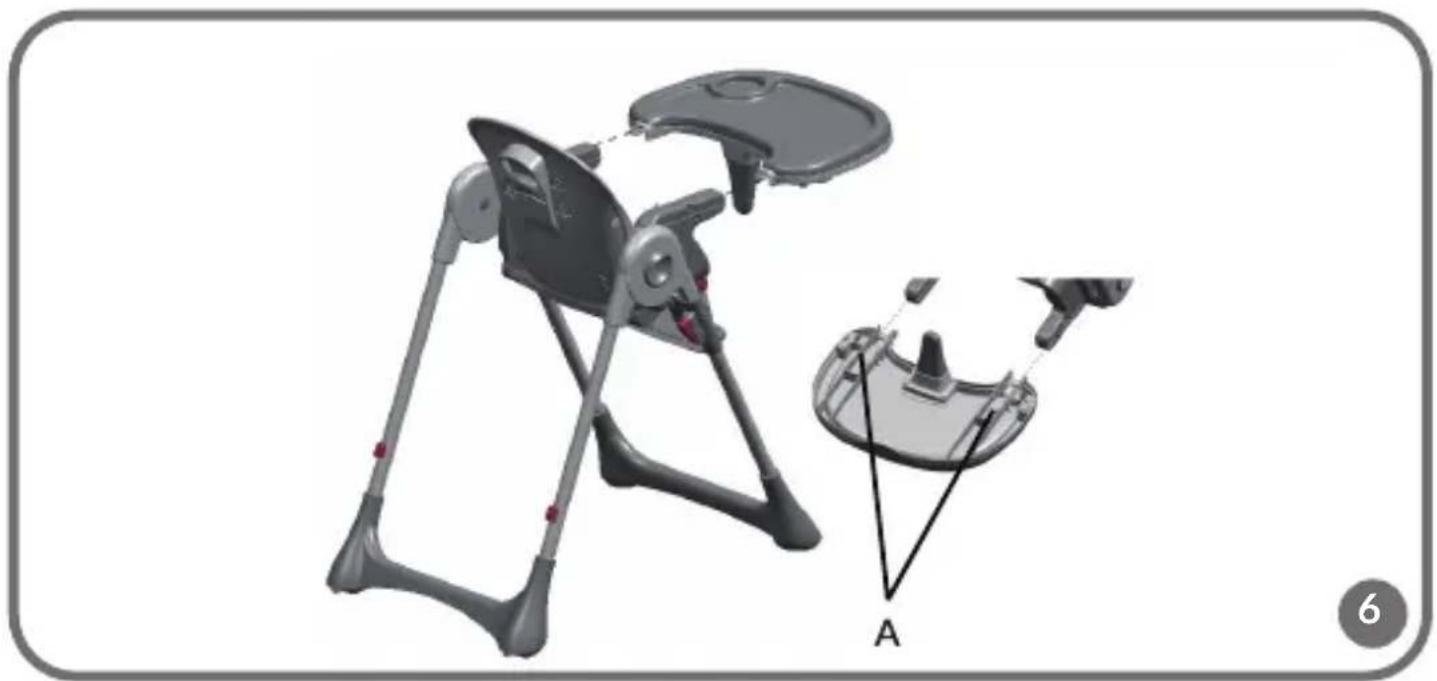
natural_image
Illustration of a folding chair with a seat and armrest, labeled 'A' (no text or symbols on the diagram itself)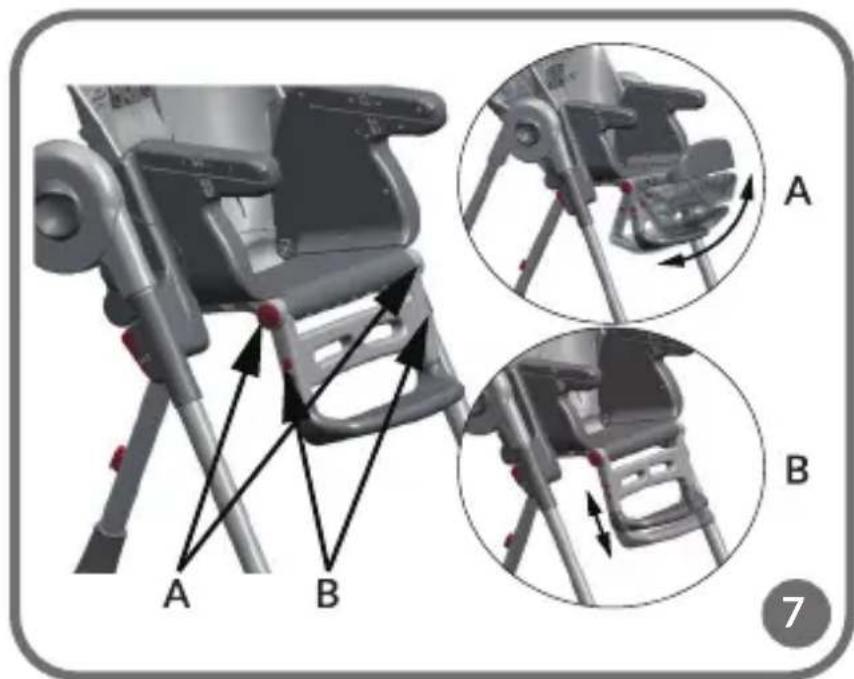
natural_image
3D rendered image of a bipod-like mechanical device with red joints and metallic legs (no text or symbols visible)
natural_image
Line drawing of a car seat with directional arrows indicating movement or force (no text or symbols)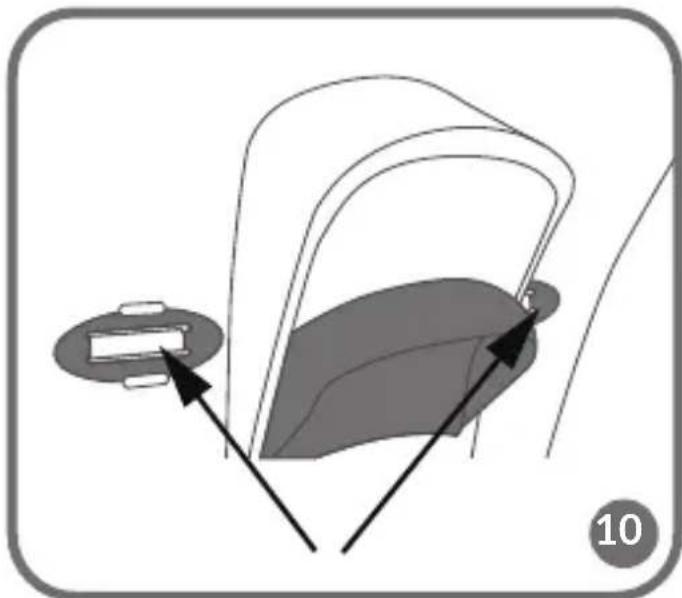
natural_image
Diagram showing a mechanical component with arrows indicating direction, no text or symbols present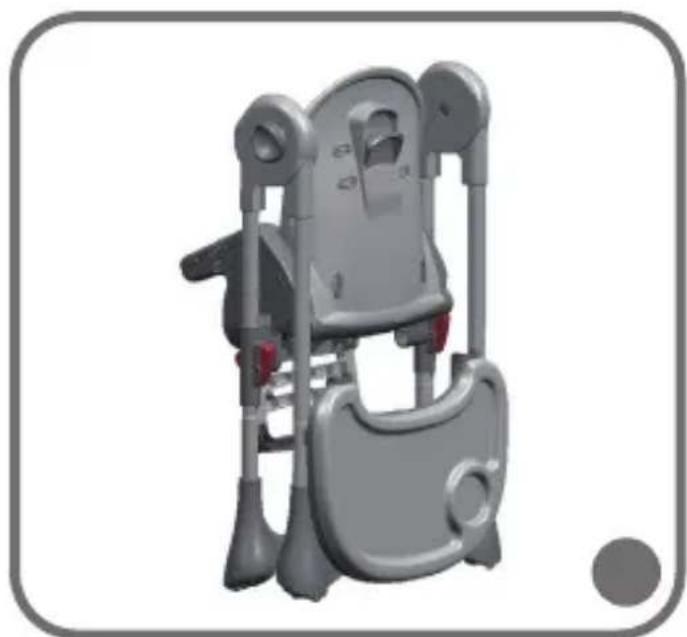
natural_image
3D rendered model of a small mechanical device with no visible text or symbols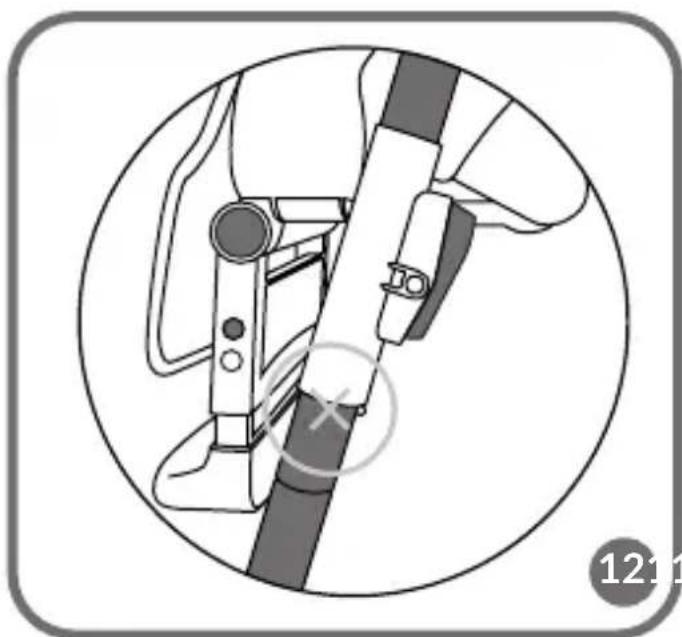
natural_image
Technical illustration of a mechanical device with a circular frame and a cross symbol (no text or labels)Dear Customer!
In case of any questions or comments on the purchased product, please contact us:
help@lionelo.com
Producer:
BrandLine Group Sp. z o. o.
IMPORTANT! READ CAREFULLY AND KEEP FOR FUTURE REFERENCE
WARNING
- Never leave the child unattended.
- Always use the restraint system.
- Falling hazard: prevent your child from climbing on the product.
- Do not use the product unless all components are correctly fitted and adjusted.
- Be aware of the risk of open fire and other sources of strong heat in the vicinity of the product.
- Be aware of the risk of tilting when your child can push its feet against a table or any other structure.
- Do not use the product until the child is ready to sit on its own.
- Do not use the product if any of its parts is missing or any of its components is broken or torn.
- Do not let the child get close when you are assembling or disassembling this product to avoid injuries.
-
The product is intended for children who can sit on their own.
-
The product can be used by children aged 0,5 to 3, whose weight does not exceed 15 kg.
- Use original spare parts only.
- Before use, make sure the product has been completely unfolded – wheels must not touch the floor.
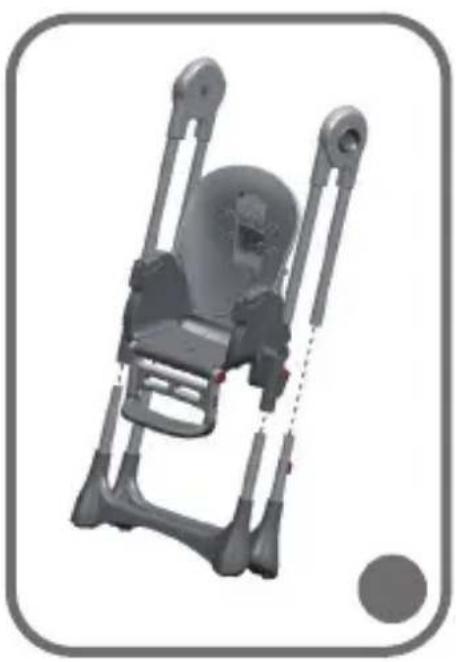
List of parts (fig. A)
- Tray
- Seat
- Crotch guard
- Tray guides
- Upper part of chair frame
- Frontal lower part of chair frame
- Rear lower part of chair frame
- Safety belts
How to assemble
- Put the crotch guard in the tray (fig. 1).
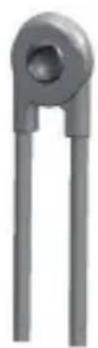
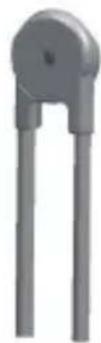
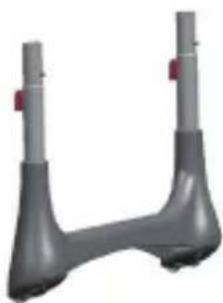
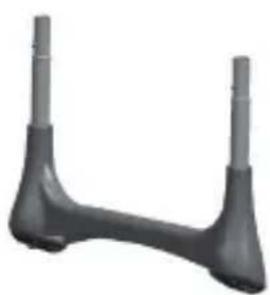
- Put the upper part of the frame in holes in the seat, and then connect it to lower part of the frame (fig. 2). Locking keys should be outside. If you can hear a click, the installation is correct.
- Put tray guides (A, fig. 3) on seat connectors. Pay attention to marking on the left and right side: functional keys should be located on the outer side of the product.
- To remove guides, slide the key on their outer side and remove guides.
- T unfold the chair, slide levers at the top of the frame (A, fig. 4) and spread the product. If you can a hear a distinctive click, the chair has been unfolded correctly.
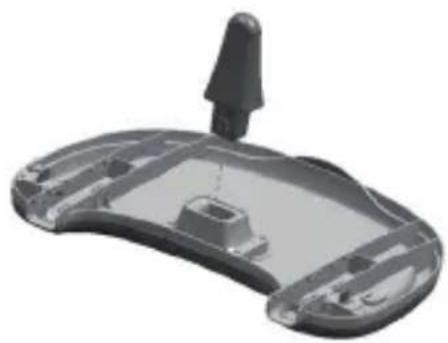
- Slip the tray onto guides, keeping adjustment keys pressed (A, fig. 6). You can set the tray in one of three positions. Make sure the tray is stable.
- The semi-automatic unfolding system activates when you pull the lever in the upper part of the frame and start unfolding the product. The system is effective on slippery surfaces, such as tiles, panels, etc. The system remains ineffective on such surfaces as carpets, sheet flooring, etc.
How to adjust the seat
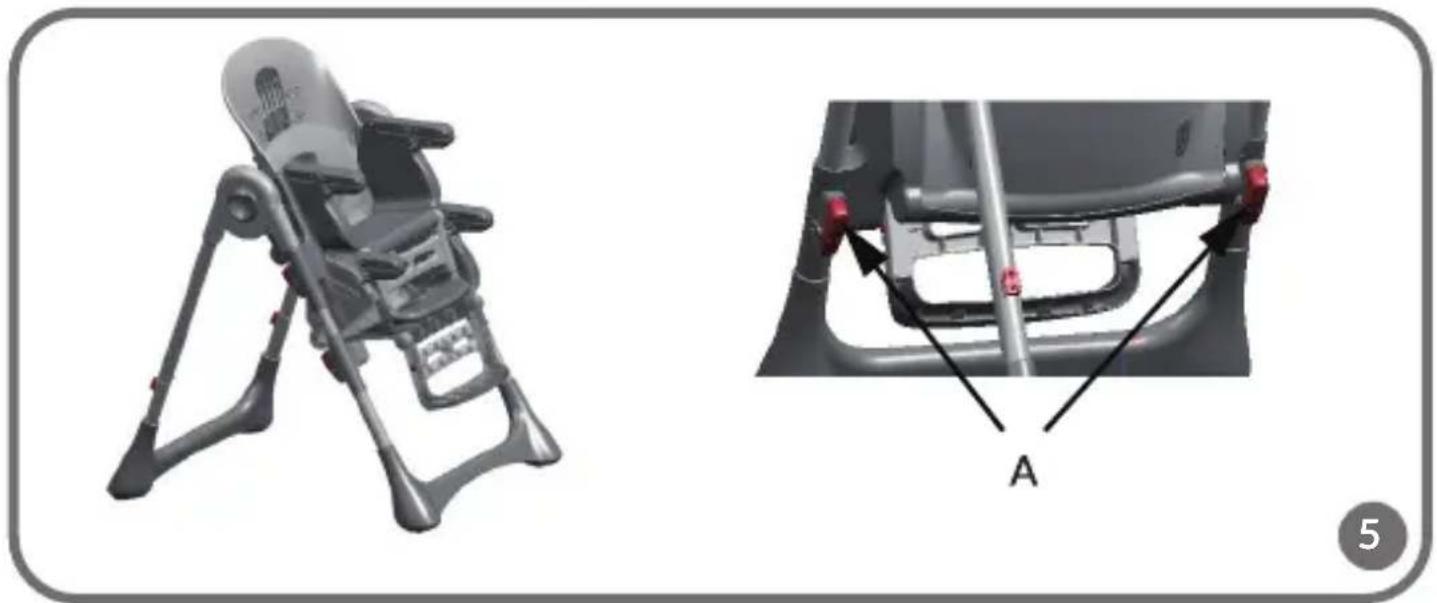
- To raise or lower the chair seat, press height adjustment keys (A, fig. 5) and set the desired height of the seat.
- If you release the keys, you can secure the seat at the desired height.
- The seat in the lowest position must not rest on leg locking elements (fig. 12). Set the seat in the lowest position and then gently lift it. You will hear a distinctive click indicating the seat has locked.
How to adjust the footrest
- There are two ways you can adjust the footrest – inclination angle adjustment and footrest length adjustment.
- Lift the footrest to secure it in a higher position.
- To lower the footrest, press inclination angle adjustment keys (A, fig. 7) and set the footrest in a desired position.
- To change the footrest length, press length adjustment keys (B, fig. 7) and set the desired length.
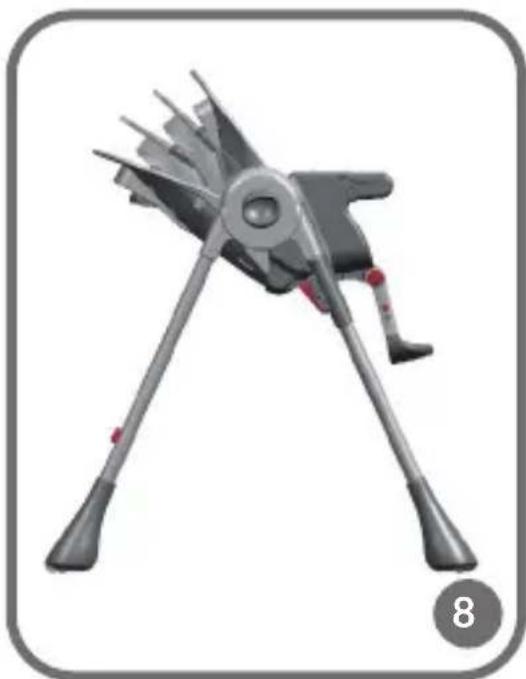
How to adjust the backrest
To adjust the chair backrest angle, pull the lever at the back of the seat and set the backrest in a desired position (fig. 8). There are four backrest positions you can choose.
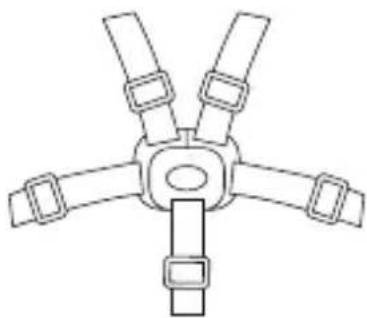
How to assemble and disassemble safety belts
- To assemble the belts, pull them through relevant holes in the fabric covering and in the seat (fig. 9). You can choose two heights of belts.
- Place the plastic guard in relevant holes (fig. 10). Pull the belt and make sure it has been properly locked in the seat.
- To fasten the belts, put them into the buckle. To undo the belts, press the key in the center of the buckle.
- To disassemble belts, remove the protection (fig. 10) and pull the belts through holes in the seat.
How to fold the chair
-
Pull levers in the upper part of the frame (A, fig. 4). When you raise the chair, frontal and rear legs will fold automatically.
-
You can remove and suspend the tray on rear legs of the chair (fig. 11).
- Note! The chair is equipped with four wheels for easier transportation of the folded product. To move the chair elsewhere, lift and incline it so that wheels contact the floor.
How to clean and maintain
- For cleaning, use a wet cloth. You can use a soft detergent.
- You can wash the upper part of the tray in the dishwasher.
- Never use strong detergents to clean the chair.
- Regularly check all elements for proper tightness and loose parts.
- Regularly make sure the safety belts mechanism is operational.
The pictures are for reference only. The real design of the products may differ from the pictures presented.
PL
Drogi Kliencie!
Detailed warranty conditions are available on the website:
Thank you for purchasing our product