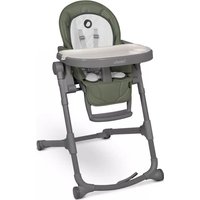
Cora Plus - High chair Lionelo - Free user manual and instructions
Find the device manual for free Cora Plus Lionelo in PDF.


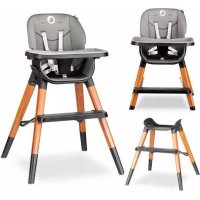
| Product Type | Evolutive High Chair |
| Brand | Lionelo |
| Model | Cora Plus |
| Recommended Age | From 6 months to 3 years (sitting without assistance) |
| Maximum Child Weight | 15 kg |
| Dimensions (L × W × H) | Not specified in the manual, standard high chair dimensions |
| Product Weight | Not specified |
| Power Supply | None (non-electric product) |
| Materials | Metal frame, fabric upholstery, plastic tray |
| Safety Harness | 5-point height-adjustable harness |
| Backrest Positions | Multiple reclining positions (lever at the back) |
| Seat Height | 4 adjustable levels |
| Footrest | 3 adjustable positions |
| Tray | Removable, 2 positions, dishwasher-safe top layer |
| Wheels | Rear wheels with brake on front wheels |
| Folding Function | Yes, compact fold with vertical support stand |
| Toy Bar | Included (Cora Plus model), removable |
| Care and Cleaning | Upholstery wash with soapy water, top tray dishwasher-safe, do not dry mechanically |
| Safety | Crotch strap, 5-point harness, brake, enhanced stability |
| Standards | Compliant with Directive 2009/48/EC (toy safety) |
| Package Contents | High chair, tray, toy bar (depending on model), manual |
Frequently Asked Questions - Cora Plus Lionelo
User questions about Cora Plus Lionelo
0 question about this device. Answer the ones you know or ask your own.
Ask a new question about this device
Download the instructions for your High chair in PDF format for free! Find your manual Cora Plus - Lionelo and take your electronic device back in hand. On this page are published all the documents necessary for the use of your device. Cora Plus by Lionelo.
USER MANUAL Cora Plus Lionelo
natural_image
Exterior view of a baby boom chair with turquoise seat and silver frame (no signage)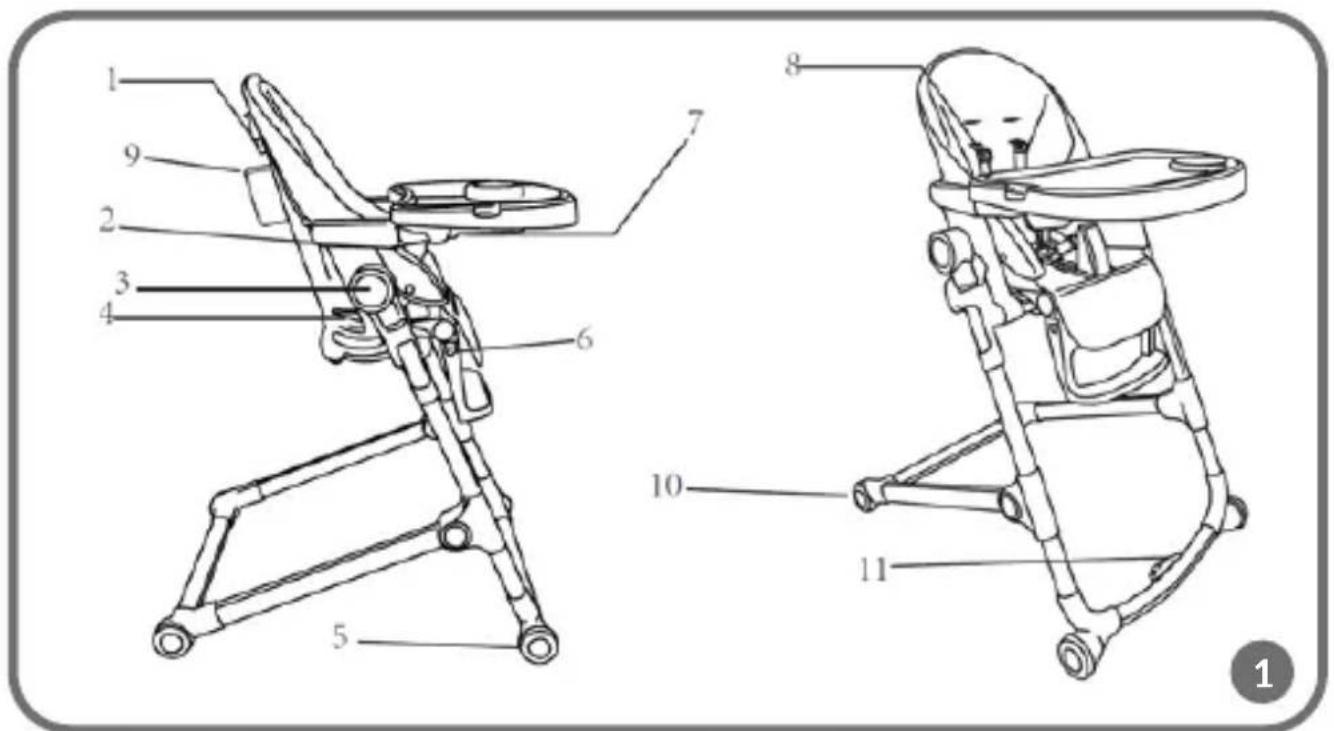
natural_image
Technical line drawing of a three-part mechanical device with no visible text or symbols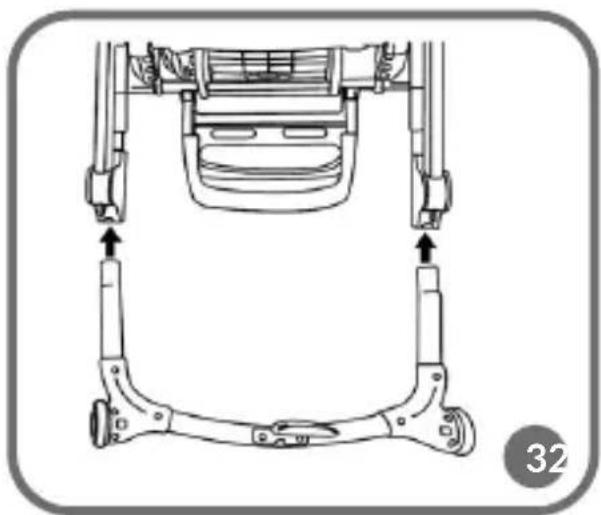
natural_image
Technical line drawing of a mechanical assembly with two vertical supports and a central component (no text or symbols)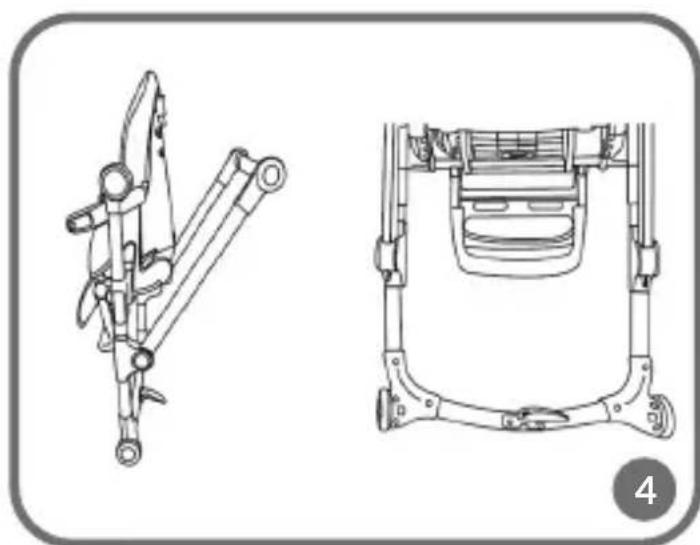
natural_image
Technical line drawings of mechanical components, one showing a pin-like mechanism and the other a bracket assembly (no text or symbols)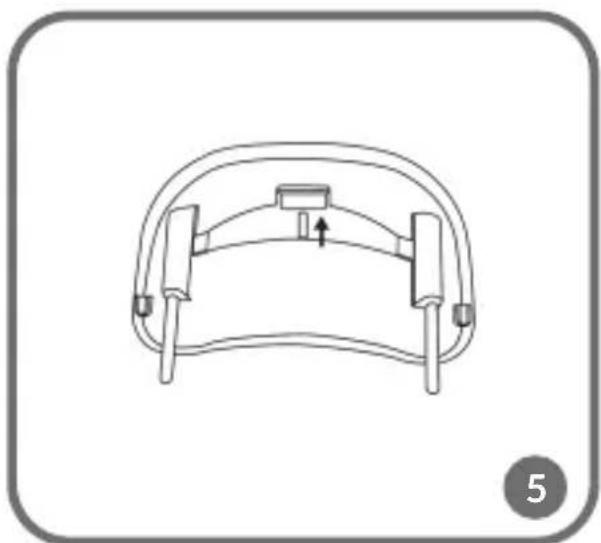
natural_image
Diagram of a mechanical component with a curved base and two vertical supports, no text or symbols present.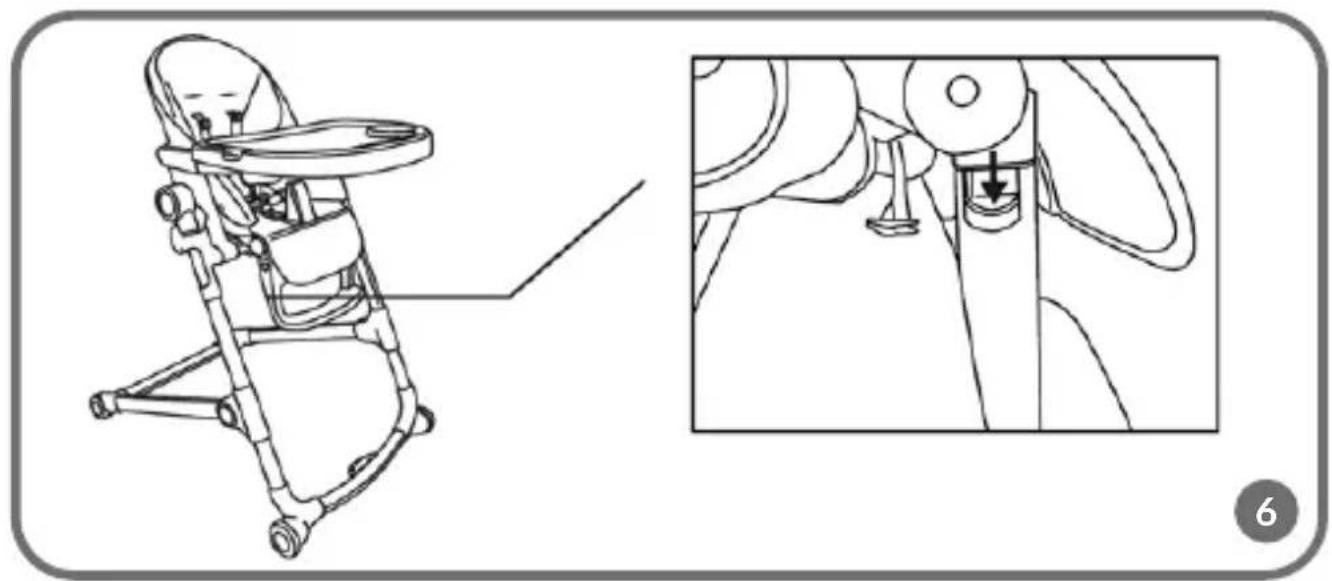
natural_image
Technical line drawings of mechanical components, one showing a bracket and part with labeled parts (7 and 8), the other showing a light bulb inside a housing (no text or symbols present)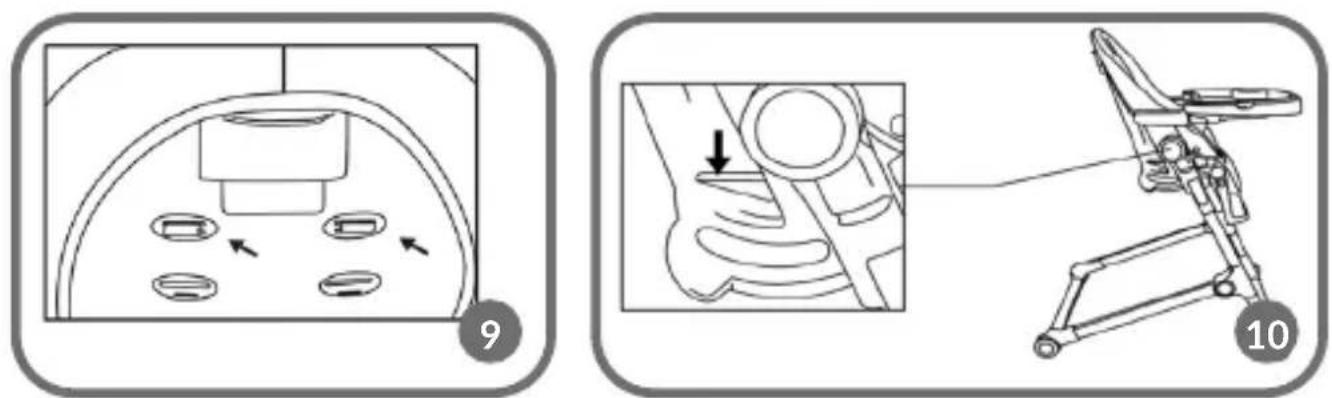
natural_image
Technical line drawing of a mechanical component with a highlighted section and arrow indicator (no text or symbols)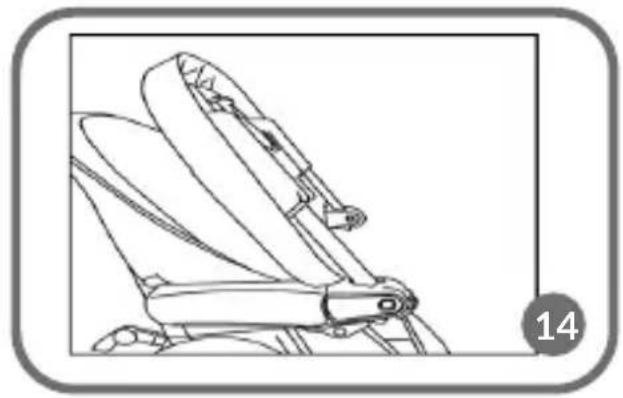
natural_image
Line drawing of a car seat assembly (no text or symbols)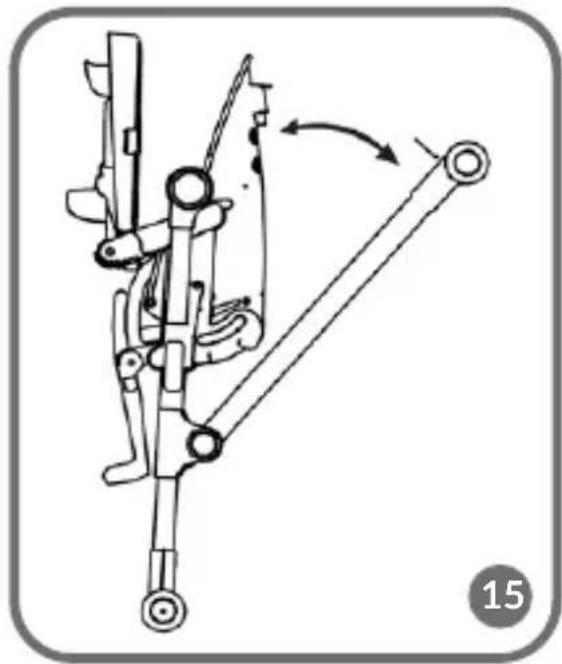
natural_image
Mechanical linkage diagram showing a lever system with joints and links, no text or symbols present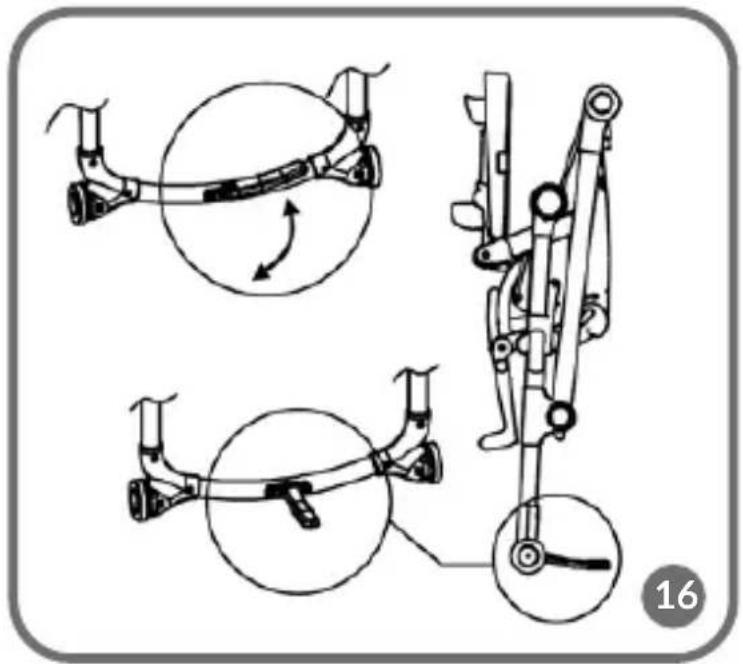
natural_image
Technical illustration of a mechanical linkage system with three views showing different configurations (no text or symbols present)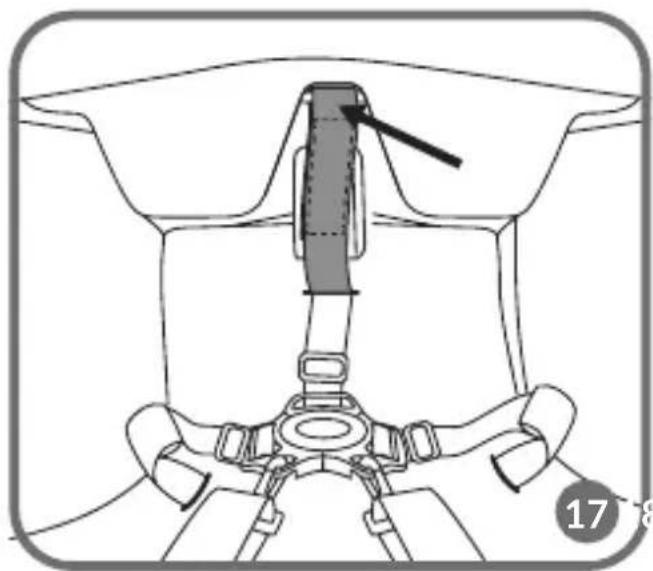
natural_image
Technical line drawing of a mechanical assembly with a central component and surrounding gears (no text or symbols)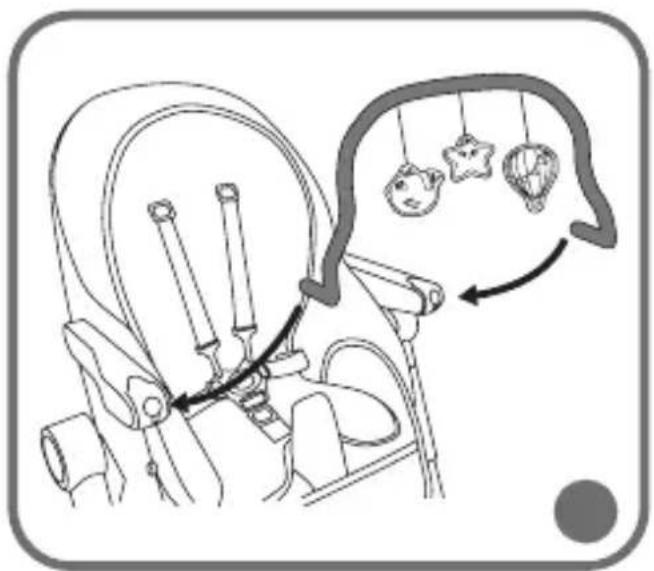
Dear Customer!
In case of any questions or comments on the purchased product, please contact us:
help@lionelo.com
Producer:
BrandLine Group Sp. z o. o.
IMPORTANT! READ CAREFULLY AND KEEP FOR FUTURE REFERENCE WARNING
- Never leave the child unattended.
- Always use the restraint system.
- Falling hazard: Prevent your child from climbing on the product.
- Do not use the product unless all components are correctly fitted and adjusted.
- Be aware of the risk of open fire and other sources of strong heat in the vicinity of the product.
- Be aware of the risk of tilting when your child can push its feet against a table or any other structure.
- Do not use the product until the child can sit up unaided.
- Do not use the product if any part is broken, torn, or missing.
- Keep children away when unfolding and folding the product to avoid injury.
- The product is intended for children able to sit up unaided and up to 3 years or a maximum weight of 15 kg.
- Always apply the parking device when the product is not being moved.
- Always use a safety crotch strap and regularly check the durability of its connection to the tray.
Product description (fig. 1)
- Backrest adjustment lever
- Tray folding key
- Main chair folding key
- Seat height adjustment levers
- Front wheel brakes
-
Footrest inclination adjustment key
-
Tray adjustment lever
- Five-point safety belts
- Tissue pocket
- Rear wheels
- Supporting leg
How to use How to assemble the high chair
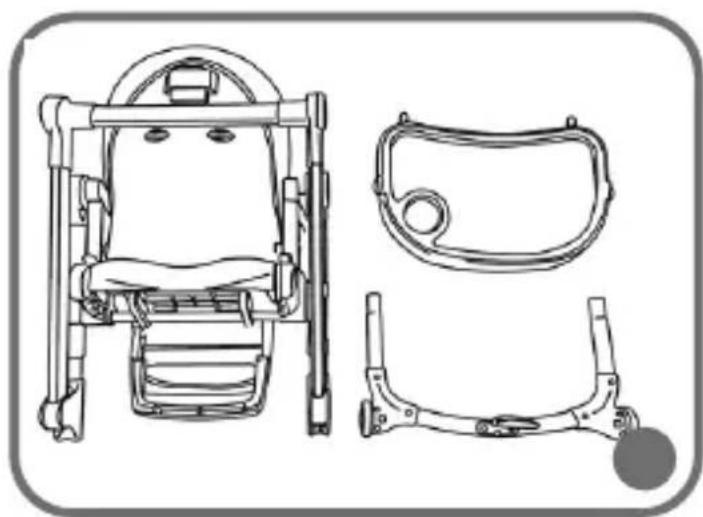
- Take the chair out of the box. Keep the wrapping out of reach of children (fig. 2).
- Insert legs in the corresponding spot on the chair frame. If you can hear a „click“, it means the assembly has been successful (fig. 3).
- Keep the chair with one hand, and push the frame with rear wheels with the other hand. If you can hear a „click”, it means the assembly has been successful (fig. 4).
How to assemble and disassemble the tray
Assembly: Pull the adjustment lever (7) and then insert the tray into the chair frame holes (fig. 5). Release the adjustment lever. Check if the tray has been fixed securely and does not pull out. Connect the tray to the seat with an additional strap that acts as a safety crotch strap (fig. 17).
Disassembly: Pull the adjustment lever (7) and pull the tray out. Unfasten the safety crotch strap.
How to adjust the product
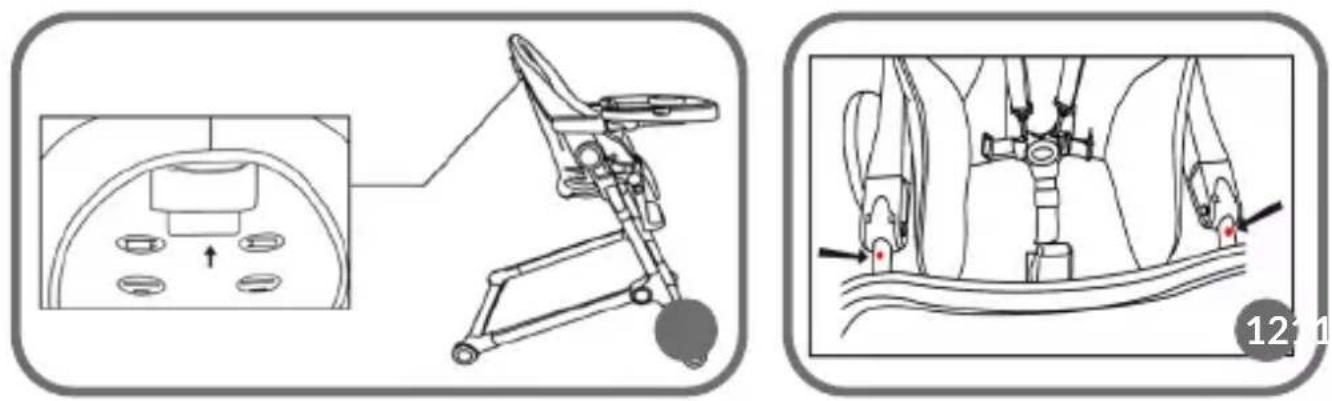
- Tray: Pull the adjustment lever (7) and set the tray in one of two positions. Make sure there are no red indicators on the frame (visible in fig. 12) - this position is for folding the tray only.
- Footrest: To set the top position, lift the footrest only. If you can hear a „click”, it means the higher position has been secured properly. To lower the footrest, slide both footrest adjustment keys (6) and set it in one of three available positions (fig. 6).
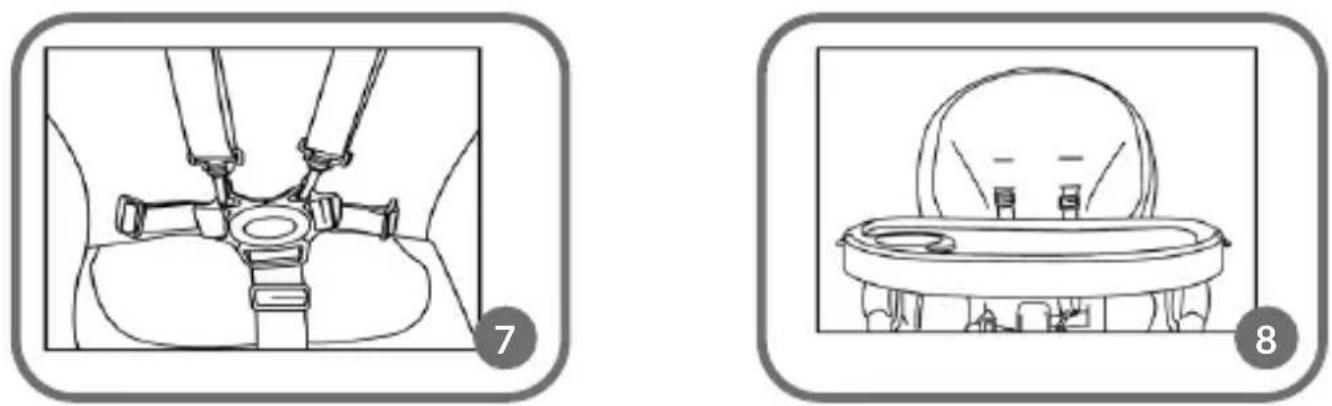
- Five-point safety belts: connect shoulder belts to hip belts as showed in the fig. 7. When combined, insert the belts into the belt buckle. If you can hear a „click”, it means the belts have been fastened properly. To undo the belts, press the button on the buckle. Shoulder belts must be adapted to child's height. There are two height levels available (fig. 8). To
change it, pull the belts with a fastener out, they are located at the back of the backrest (see arrow in fig. 9). Next pull them through holes in the chair and covering and insert in the corresponding place.
Note! The child must always be secured with chair safety belts!
Note! After you have fastened the chair safety belts, adjust them. The belts must fit tight the child's body but must not restrict its movements.
- Seat height: there are four seat height levels available. To change it, press height adjustment keys on both sides of the chair (4) and set the desired height (fig. 10). After you have released the height adjustment, make sure the seat is properly secured at the desired height.
Note! Do not adjust the product if the child is inside.
- Seat backrest: to change the backrest level, pull the lever at the back of the backrest (1) and set as desired (fig. 11).
Note! The child should not sleep in the product, even if you set the lowest position of the backrest. If your child needs to sleep, move it to a suitable place, e.g. crib.
Easy stand feature - folding the chair
Installation of a toy headband (applies to Cora Plus set):
Remove the tray (7) and insert the handles of the toy headband into the holes (fig. 18). To dismantle, push in the handles and slide out the headband.
To fold the product:
- Apply interlocks on front wheels (5).
- Change the seat height, set the lowest position (see: How to adjust the product -> Seat height).
- Change the seat backrest inclination angle, set the vertical position (see: How to adjust the product -> Seat backrest).
- Grab the tray adjustment lever (7). Pull the tray out as far as possible - until red marking is visible on the frame (fig. 12).
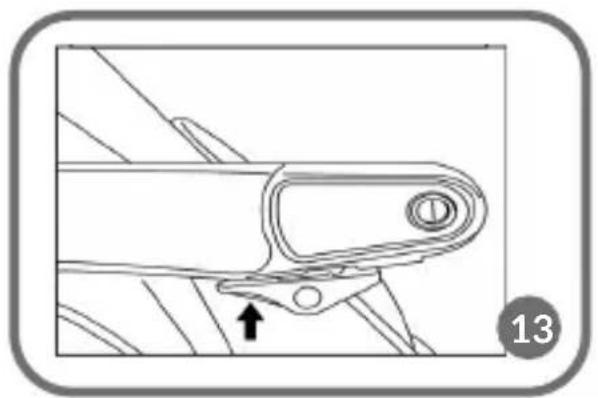
- Press the tray folding key (2) (fig. 13) and lift it until you can hear a „click“ (fig. 14).
- Press both folding keys (3) at a time and fold the chair (fig. 15).
- Pull the support (11) out (fig. 16) so that the chair can remain vertical.
How to clean and maintain
Do not expose the product to sunlight for a long time. The seat covering must not be dried
mechanically, ironed or washed in the washing machine. You must clean it with warm water and soap. CVC cover can be washed manually at the temperature of up to 30 degrees. A two-layer tray is detachable. Its top layer can be washed in the dish washer.
Toys (applies to Cora Plus set):
CE This product complies with the requirements of the Toy Safety Directive (2009/48 / EC), therefore the CE mark has been affixed and a declaration of compliance with European standards has been issued.
The pictures are for reference only. The real design of the products may differ from the pictures presented.
PL
Drogi Kliencie!
- Dear Customer!
- Producer:
- IMPORTANT! READ CAREFULLY AND KEEP FOR FUTURE REFERENCE WARNING
- Product description (fig. 1)
- How to use How to assemble the high chair
- How to assemble and disassemble the tray
- How to adjust the product
- Installation of a toy headband (applies to Cora Plus set):
- To fold the product:
- How to clean and maintain
- Toys (applies to Cora Plus set):
- PL
- Drogi Kliencie!
Brand : Lionelo
Model : Cora Plus
Category : High chair