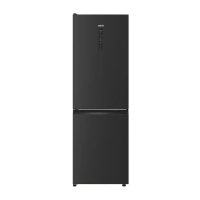
HDW3618DNPB - Refrigerator HAIER - Free user manual and instructions

Find the device manual for free HDW3618DNPB HAIER in PDF.

HAIER HDW3618DNPB - Refrigerator
📄 260 pages English EN Download 💬 AI Question 13 questions ⚙️ Specs
Notice HAIER HDW3618DNPB - page 4
Pick your language and provide your email: we'll send you a specifically translated version.
Product TypeRefrigerator Freezer
BrandHaier
ModelHDW3618DNPB
Cooling TechnologyTotal No Frost
DefrostAutomatic
Control DisplayLED Touch Panel
ConnectivityBuilt-in Wi-Fi, hOn app
Special FunctionsSuper Cool, Super Freeze, Eco Mode, Vacation Mode
HCS FilterIntelligent Humidity Management
Door ReversibilityYes
Minimum Required Width920 mm
Minimum Required Depth1137 mm
Refrigerator Temperature Range2 °C to 8 °C (adjustable in 1 °C steps)
Freezer Temperature Range-16 °C to -24 °C (adjustable in 1 °C steps)
Default Refrigerator Temperature4 °C
Default Freezer Temperature-18 °C
Maximum Super Cool Duration30 hours
Maximum Super Freeze Duration50 hours
MaintenanceAutomatic defrost, periodic cleaning
Mobile ApphOn (iOS and Android)

Frequently Asked Questions - HDW3618DNPB HAIER

How to set the refrigerator and freezer temperature?
Press the TEMP key for 5 seconds to select the desired compartment. Once the compartment is selected, press TEMP quickly to change the temperature. The LEDs indicate the chosen temperature. After 5 seconds, the setting is confirmed.
How to activate the Super Cool function?
First select the refrigerator compartment by long-pressing TEMP, then press TEMP quickly until the Super Cool icon lights up. The function deactivates automatically after 30 hours or manually by pressing TEMP.
What to do if error codes appear on the screen?
If the freezer LEDs [-16°C;-18°C;-20°C;-22°C;-24°C] light up one after the other, this indicates a communication error. If they all flash simultaneously, the fan is defective. In both cases, contact technical support.
How to set up Wi-Fi on the refrigerator?
Download the hOn app and create an account. The refrigerator automatically enters Wi-Fi setup mode when powered on (the Wi-Fi icon flashes). Follow the instructions in the app to pair.
Is it possible to change the door opening direction?
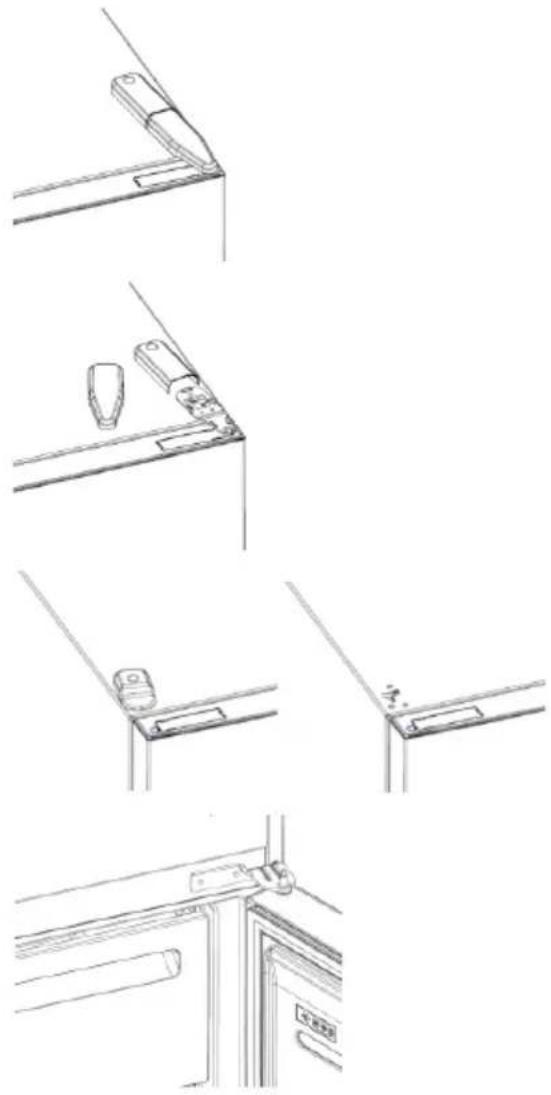
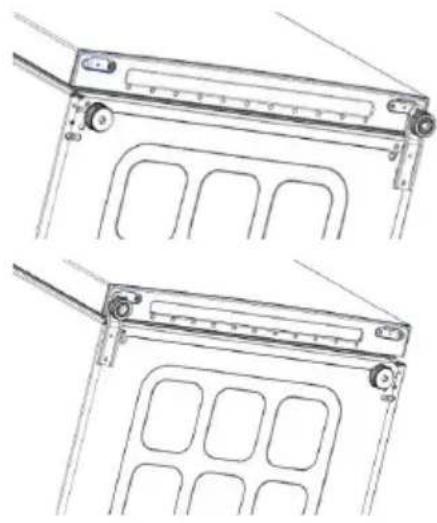
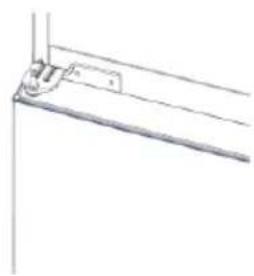
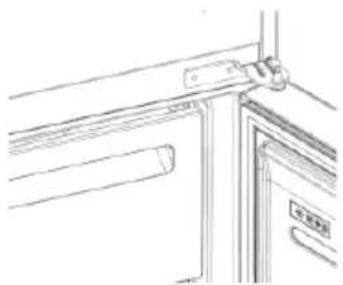
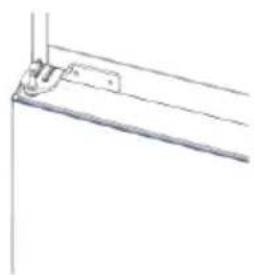
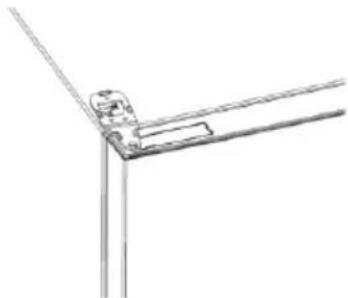
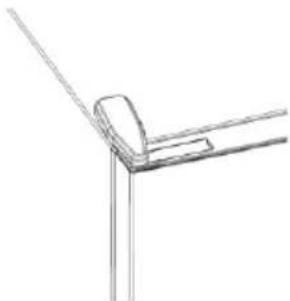
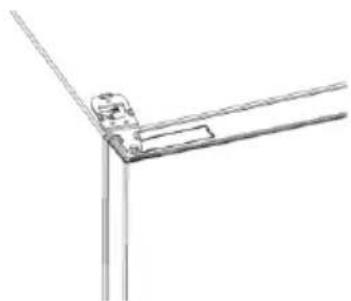
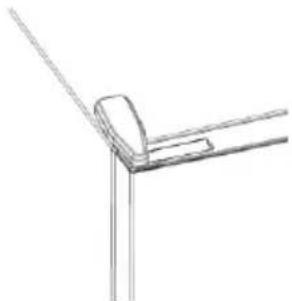
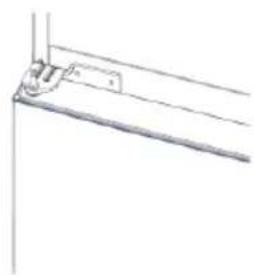
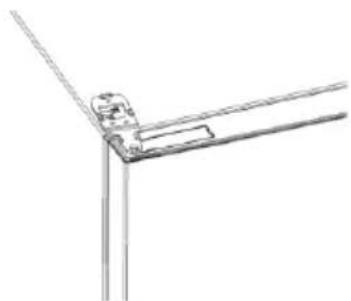
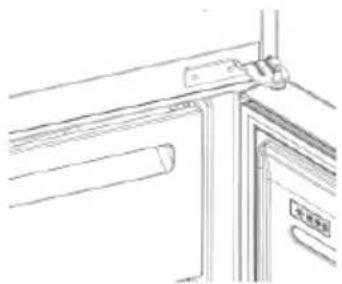
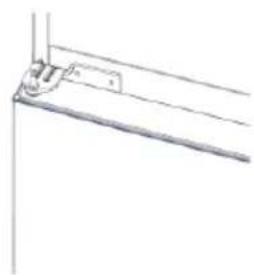
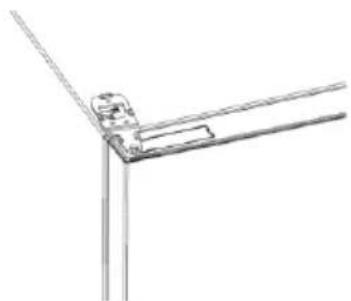
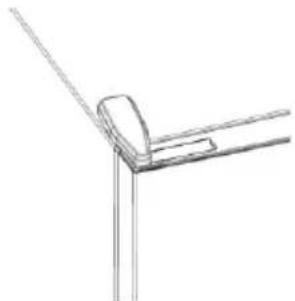
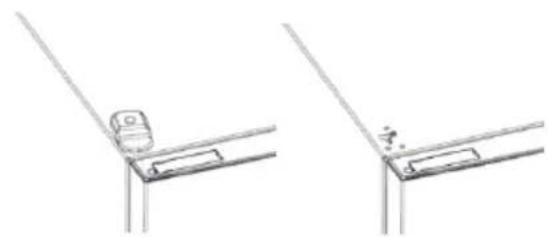
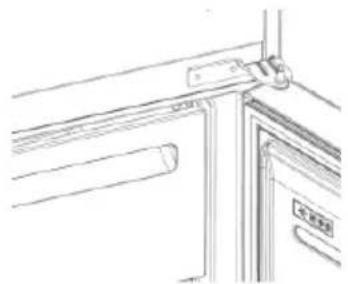
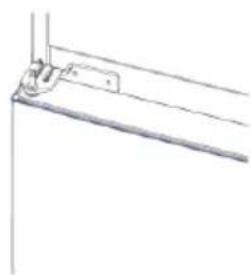
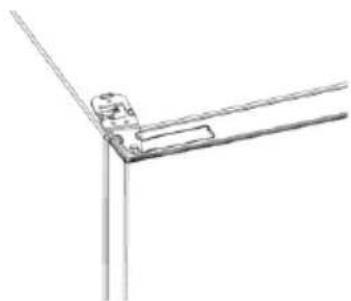
Yes, the door is reversible. Use an electric screwdriver to disassemble the upper, middle, and lower hinges, then reassemble them on the other side. Refer to the "Door Reversibility" section of the manual.
What temperature is recommended in summer?
In summer, it is recommended to set the refrigerator temperature between 6 °C and 8 °C to avoid continuous operation and ensure good preservation.
How to activate the Vacation function?
Press the MODE key until the Vacation icon lights up. This function turns off the refrigerator compartment while keeping the freezer running, thus reducing energy consumption.
What is the maximum duration of the Super Freeze function?
The Super Freeze function ends automatically after 50 hours. It can also be turned off manually via the TEMP key or the app.
How to reset the refrigerator to factory settings?
To restore default settings, long-press the TEMP key and click the Power button 5 times within 5 seconds.
What does the Temp-by-app icon on the screen mean?
The Temp-by-app icon indicates that the temperature of the corresponding compartment has been customized via the hOn app. In this case, the temperature LEDs are off for that compartment.

User questions about HDW3618DNPB HAIER

3 questions about this device. Answer the ones you know or ask your own.

Ask a new question about this device

Your email remains private: it is only used to notify you if someone answers your question.

How do I defrost (unclog) my HAIER HDW3618DNPB refrigerator?
Frequently Asked Questions - 06/11/2026
Response Notice-Facile

Your HAIER HDW3618DNPB refrigerator features an automatic defrosting system, but regular manual cleaning and defrosting are still necessary to maintain optimal efficiency.

Defrosting Procedure

  1. Turn off the appliance
  2. Open the door and let the ice and frost dissolve naturally
  3. Do not use sharp tools to remove ice (risk of damage)
  4. Place absorbent towels on the floor to catch the defrost water

Recommended Frequency

Perform a manual defrost at least once or twice a month, depending on the humidity level of your environment. Ice buildup on the walls and air vents reduces cooling efficiency, hence the importance of this regular maintenance.

Preventive Maintenance

To minimize frost buildup:

  • Regularly check that the cold air vents are not blocked
  • Clean the door seals
  • Avoid overloading the appliance to allow for good air circulation
Respond (be the first)
Why are the foods in my HAIER HDW3618DNPB refrigerator freezing at 5 degrees Celsius?
Frequently Asked Questions - 04/27/2026
Response Notice-Facile

If the foods in your HAIER HDW3618DNPB are freezing while the thermostat shows 5 °C, it generally indicates that the actual temperature is lower than the displayed setting, or that the cold air is poorly distributed within the appliance. Although 5 °C is close to the recommended temperature (4 °C in normal mode), several factors can explain this freezing issue.

Start by checking and adjusting the temperature. For a HAIER refrigerator, the optimal range is between 3 °C and 5 °C. If you are in Eco mode (which automatically sets to 5 °C), try switching to 4 °C or 5 °C in manual mode. In summer, with a high ambient temperature, you can increase it to 6-8 °C. In winter, a setting of 3-4 °C is sufficient. Adjust gradually and wait 24 hours for the temperature to stabilize before fully loading the refrigerator.

Next, check the cold air circulation. The HDW3618DNPB model operates with a static cooling system, which distributes cold air unevenly. To optimize it, ensure that you do not block the cold air outlets (usually at the top or on the walls of the refrigerator), do not overfill the appliance, and leave enough space between foods to allow for air circulation. Also, avoid placing foods directly against the side or back walls, especially sensitive products (soft cheeses, creams, delicate vegetables), which freeze more quickly in the coldest spots.

For a static cooling system like yours, regular cleaning and defrosting are essential. Ice buildup on the walls and air outlets reduces cooling efficiency and creates overly cold zones. The manual recommends regular manual defrosting (at least once or twice a month depending on humidity). To defrost: turn off the appliance, open the door, and let the ice melt naturally. You can place absorbent towels on the floor to catch the water.

Then inspect the door seals. Worn or improperly positioned seals allow warm air to enter, forcing the refrigerator to compensate by cooling more, creating areas of over-freezing. Check that the seals adhere well along their entire length by closing the door on a sheet of paper: if the sheet slides easily, the seal needs to be cleaned or replaced.

If the problem persists after these checks (temperature increase, frost cleaning, seal inspection), contact an authorized Haier technician. Your refrigerator comes with a 2-year warranty, and a defective thermostat, improperly calibrated temperature sensor, or faulty fan (if present) require professional intervention for diagnosis and repair.

Respond (be the first)
How to configure the 'My Zone' function on the HAIER HDW3618DNPB refrigerator?
Frequently Asked Questions - 04/27/2026
Response Notice-Facile

The My Zone function of the HAIER HDW3618DNPB refrigerator allows you to customize the temperature of a specific zone to better preserve certain foods.

Steps to configure the My Zone function:

  1. Locate the control panel: It is usually found on the front door of the refrigerator, at the top.
  2. Activate the My Zone function: Press the button or icon labeled 'My Zone' to activate this mode.
  3. Set the temperature: Use the + or - buttons to adjust the temperature of this zone according to your specific needs.
  4. Confirm the settings: Check that the displayed temperature matches what you want, and wait for the refrigerator to adjust the temperature.

This function is particularly useful for preserving foods that require a different temperature than the rest of the refrigerator, such as meats, cheeses, or beverages.

Respond (be the first)

Download the instructions for your Refrigerator in PDF format for free! Find your manual HDW3618DNPB - HAIER and take your electronic device back in hand. On this page are published all the documents necessary for the use of your device. HDW3618DNPB by HAIER.

USER MANUAL HDW3618DNPB HAIER

Space requirements .... 2

USE....3

Use 3

Customized temperature 4

Super Cool function 4

Super Freeze function 5

Eco mode 5

Holiday function 5

Defrosting 5

Demo mode 6

Error Codes 6

WI-FI USE 7

Step 1 7

Step 2 7

Step 3 7

Wi-Fi Use....8

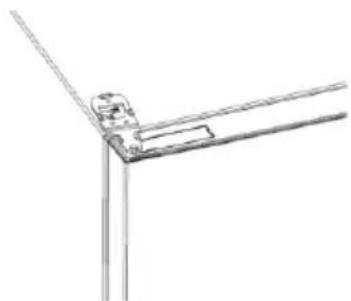
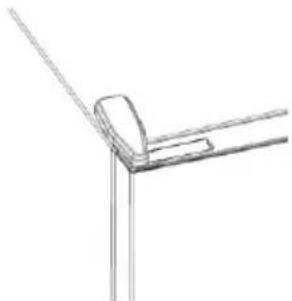
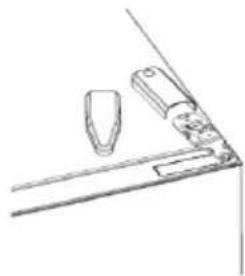
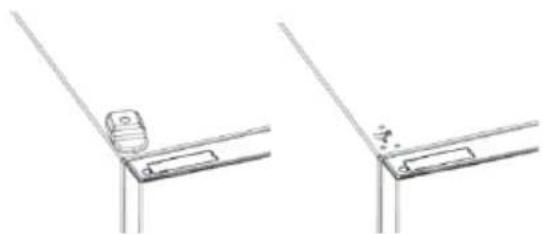
DOOR REVERSIBILITY......9

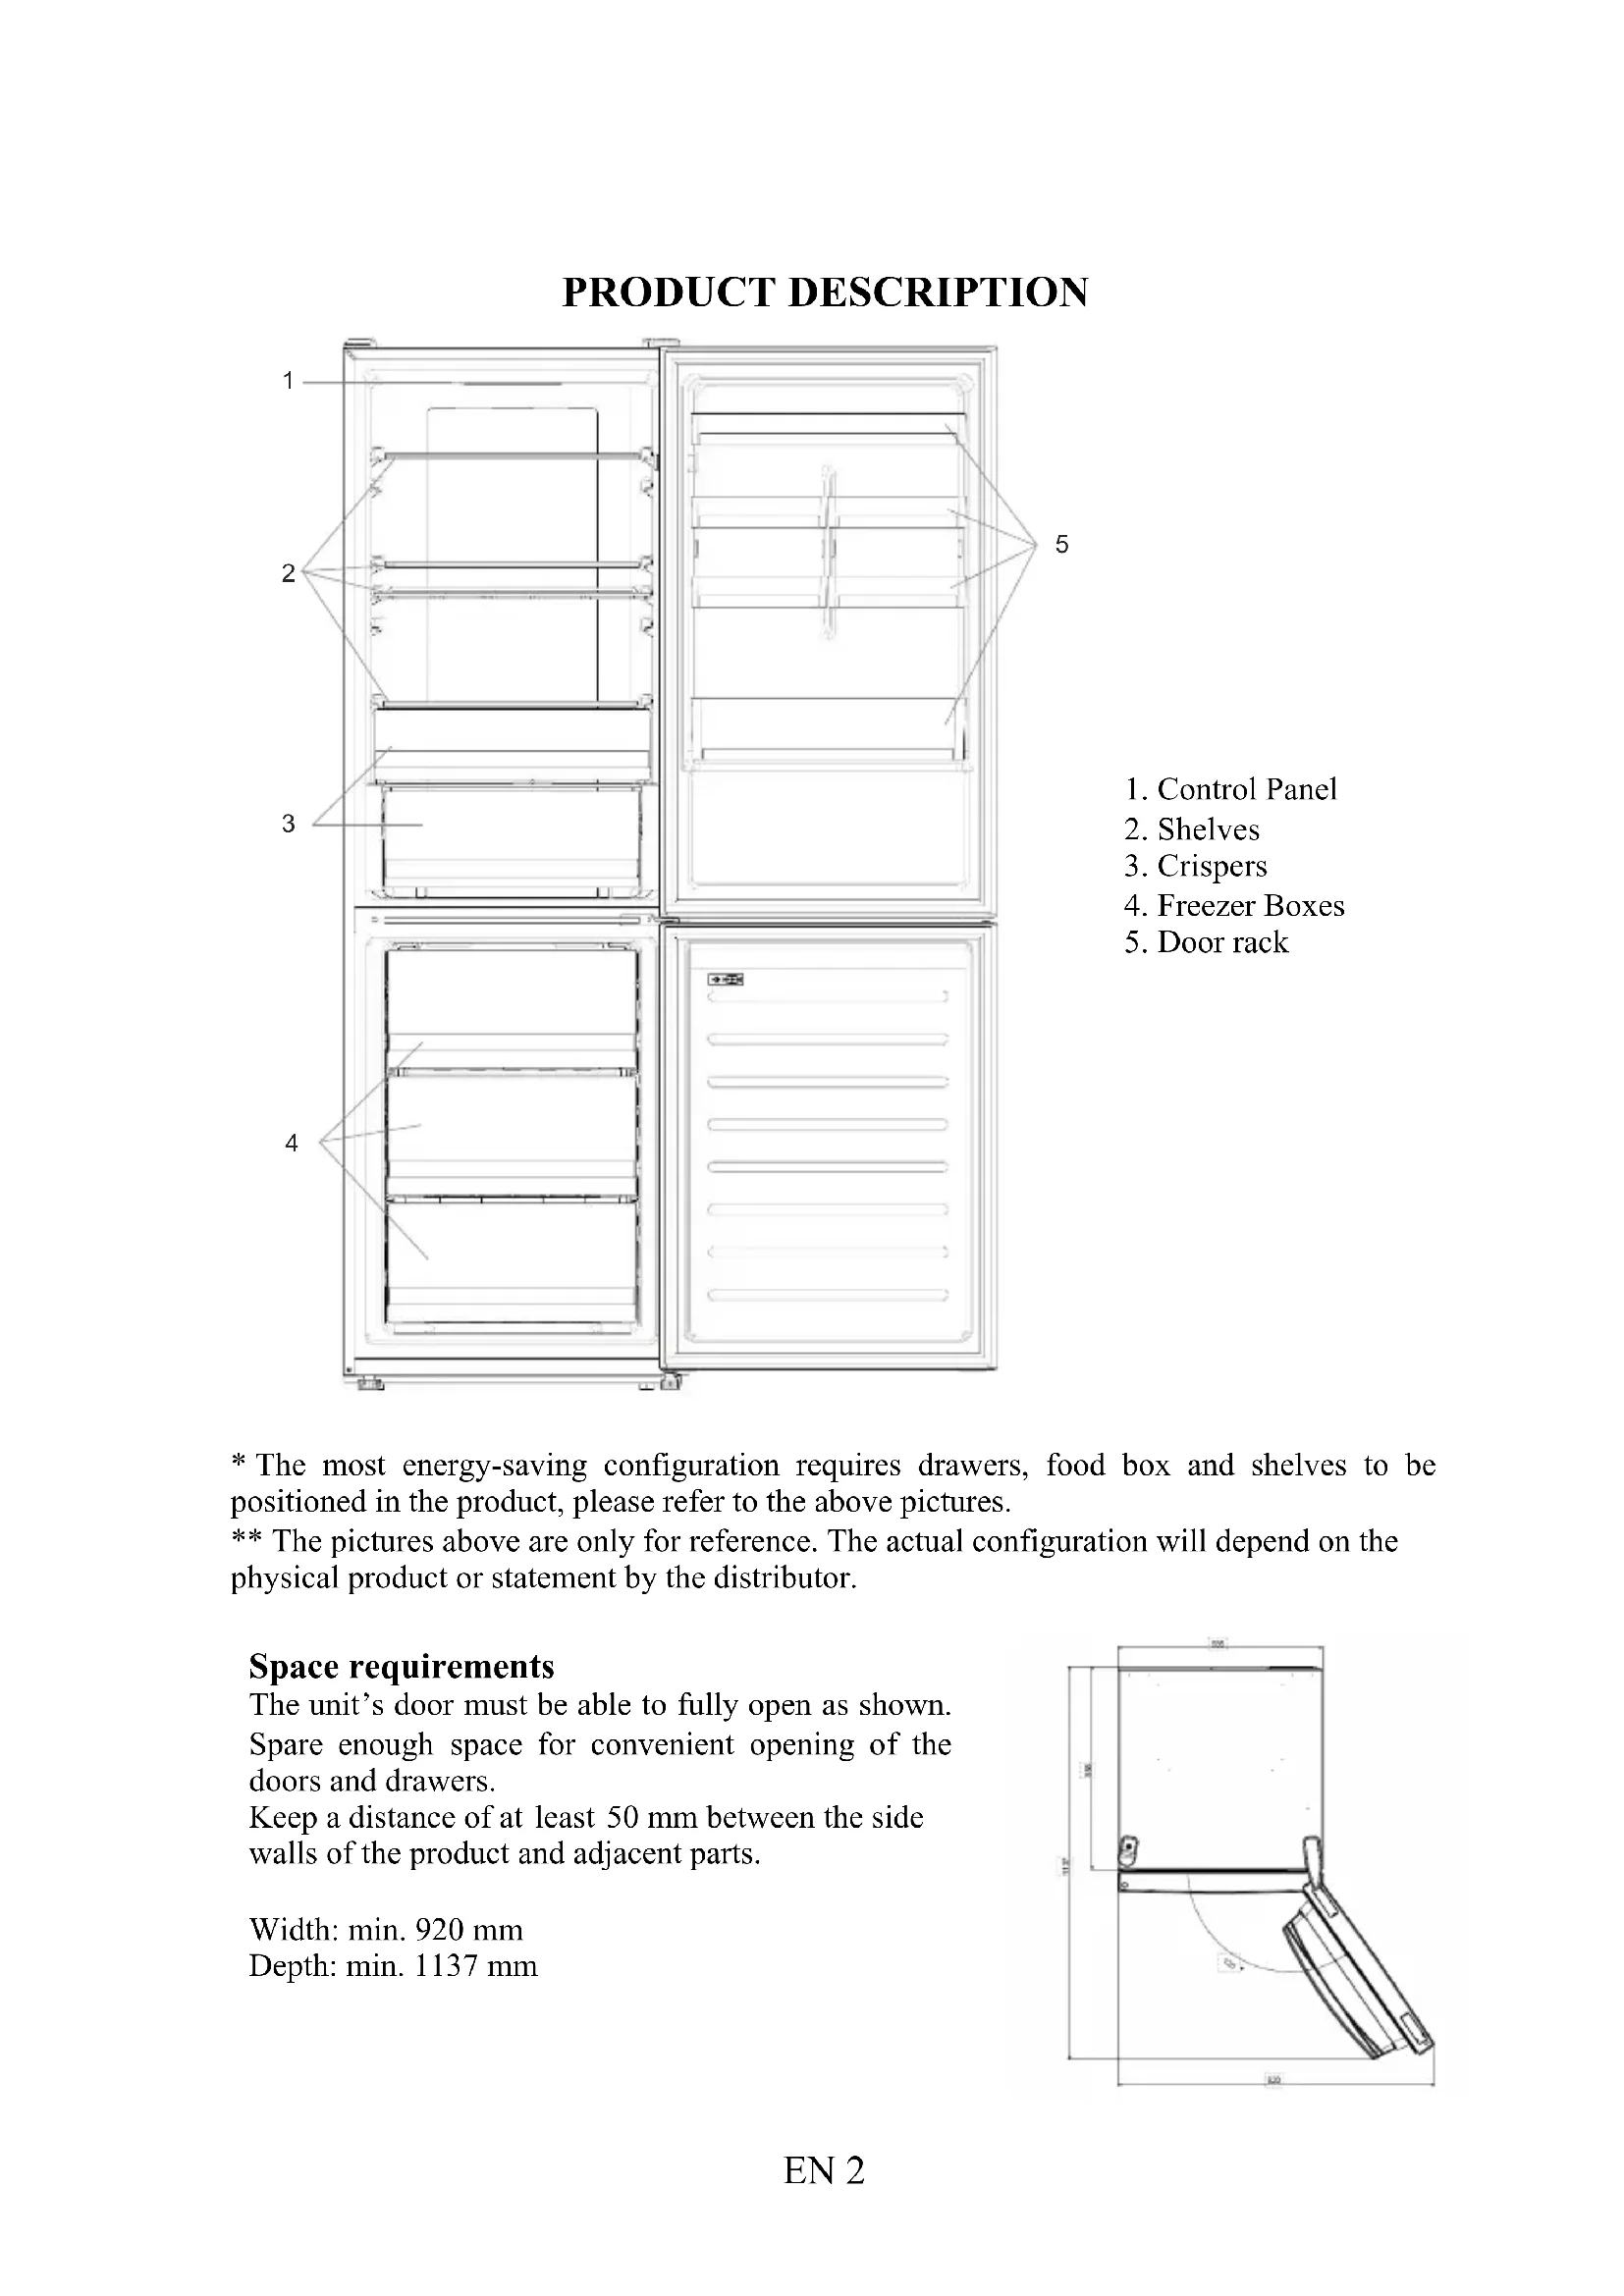
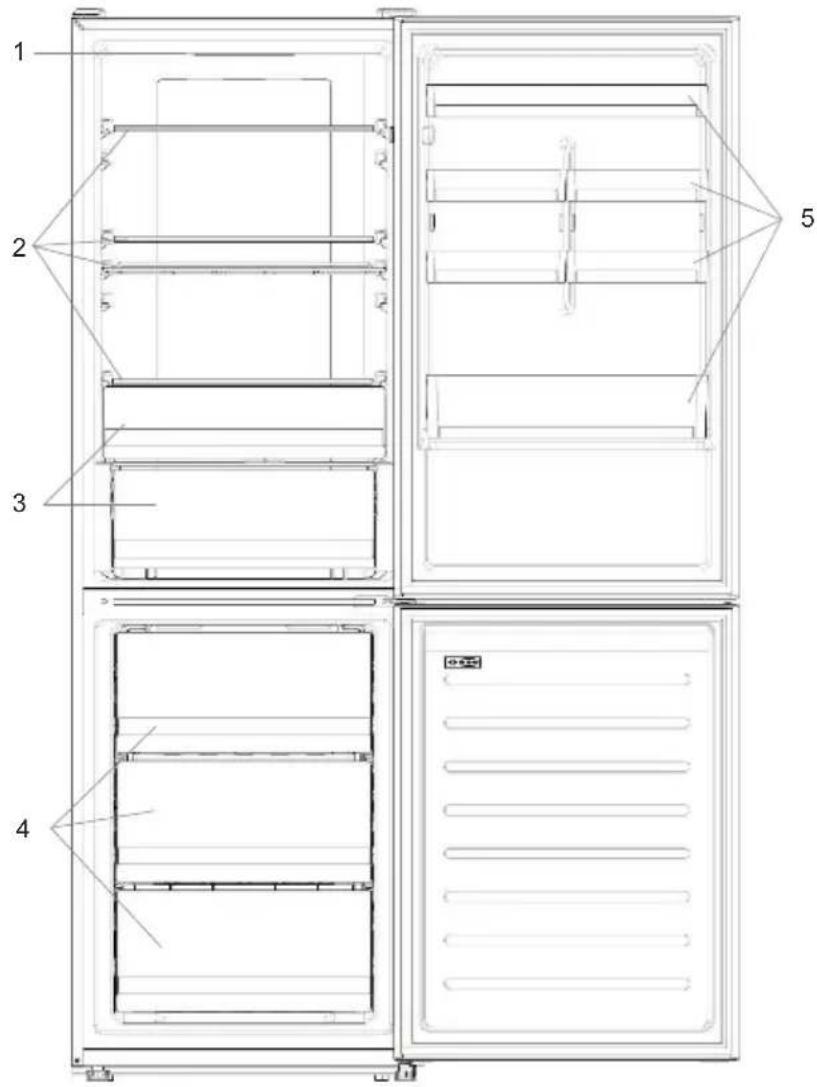
PRODUCT DESCRIPTION1 2 3 4 5
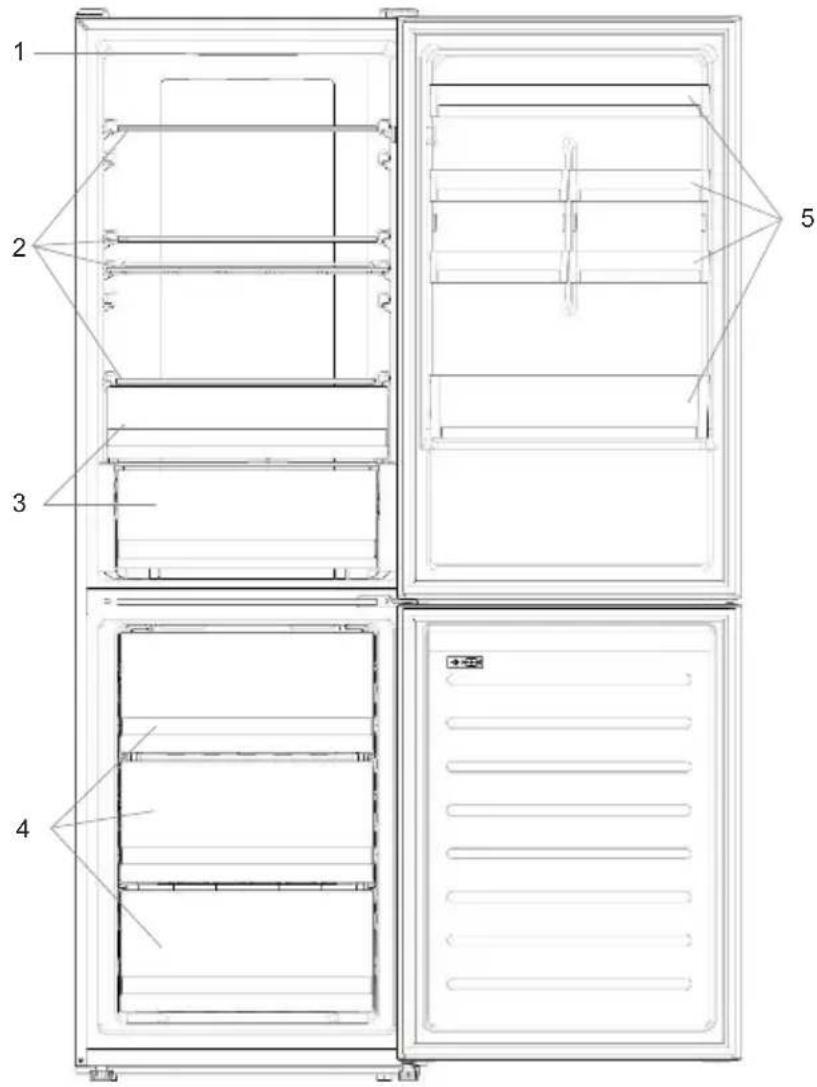
  1. Control Panel
  2. Shelves
  3. Crispers
  4. Freezer Boxes
  5. Door rack

* The most energy-saving configuration requires drawers, food box and shelves to be positioned in the product, please refer to the above pictures. ** The pictures above are only for reference. The actual configuration will depend on the physical product or statement by the distributor.

Space requirements

The unit's door must be able to fully open as shown. Spare enough space for convenient opening of the doors and drawers.

Keep a distance of at least 50 mm between the side walls of the product and adjacent parts.

Width: min. 920 mm

Depth: min. 1137 mm
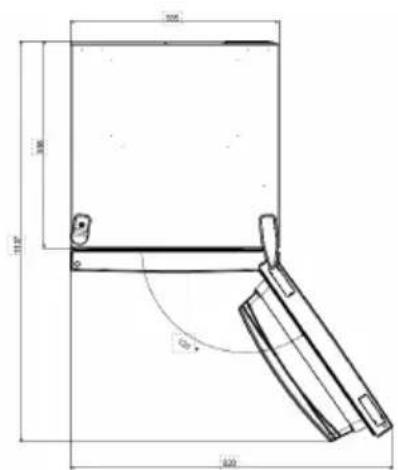
100 300 110 600

USE

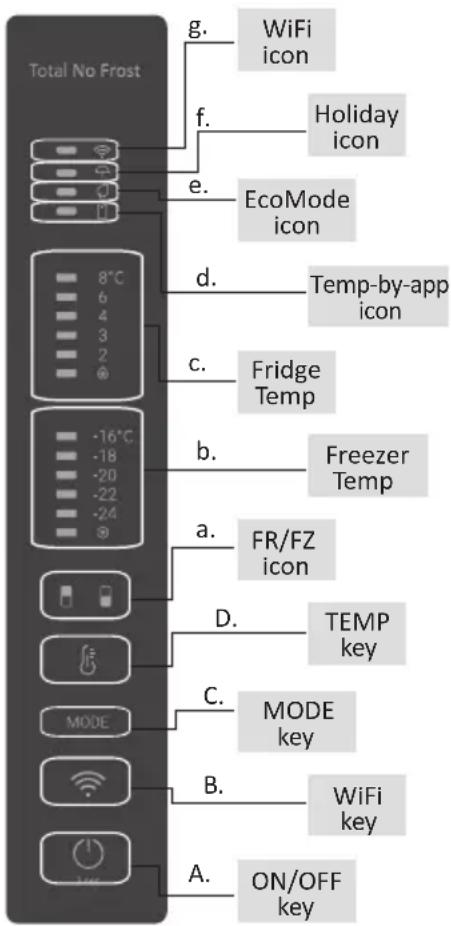
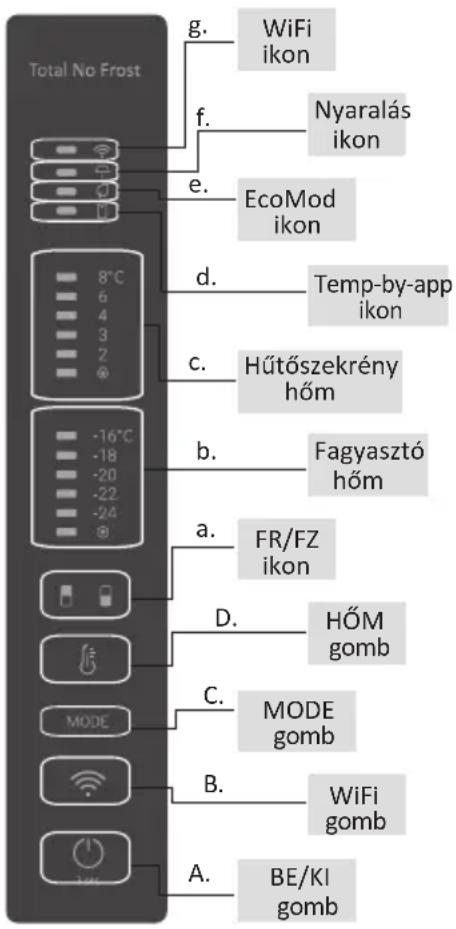
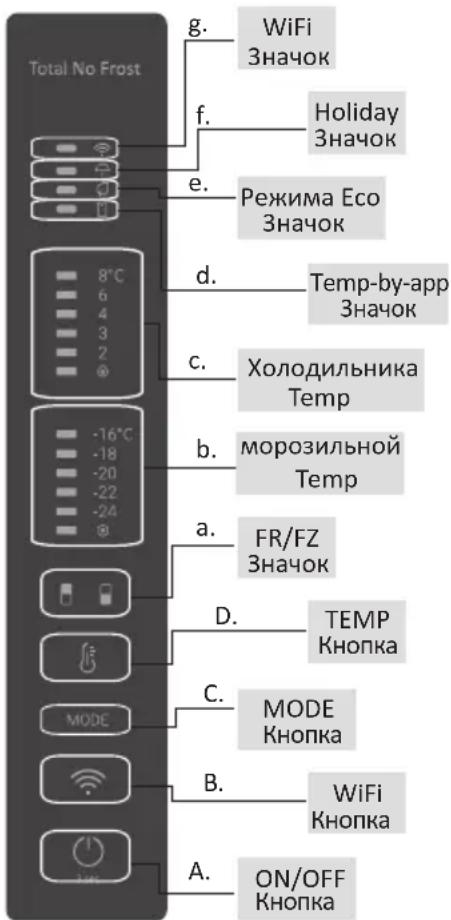
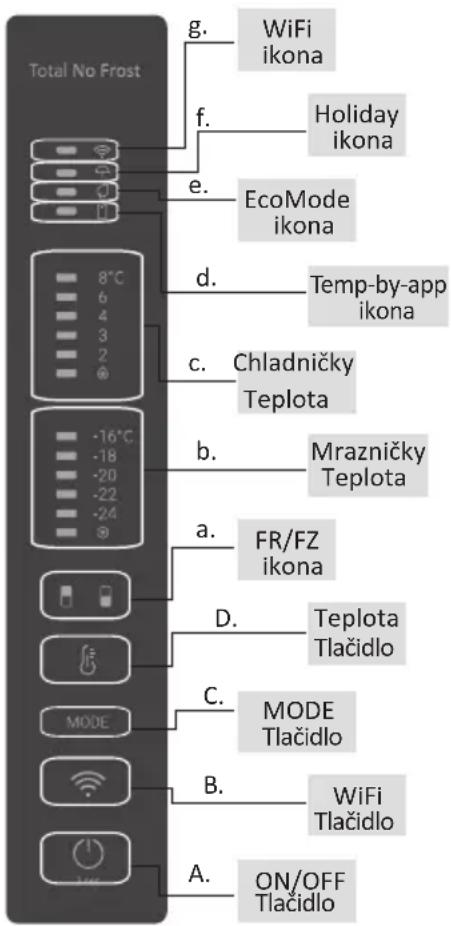
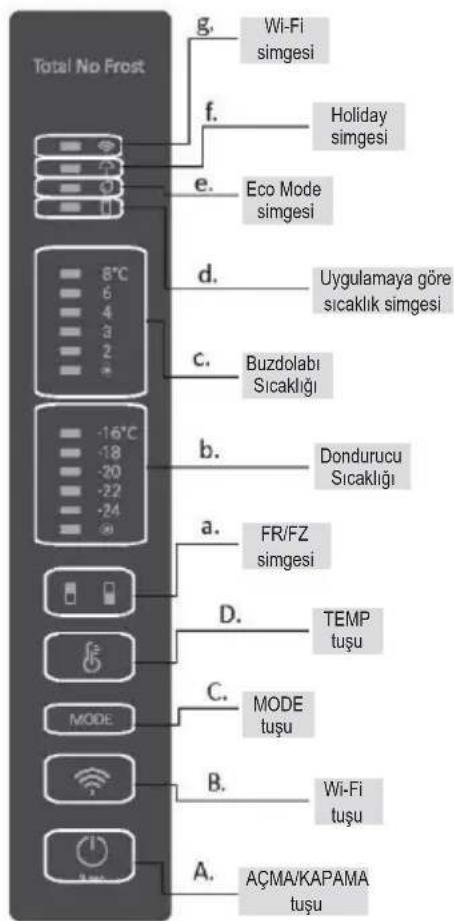
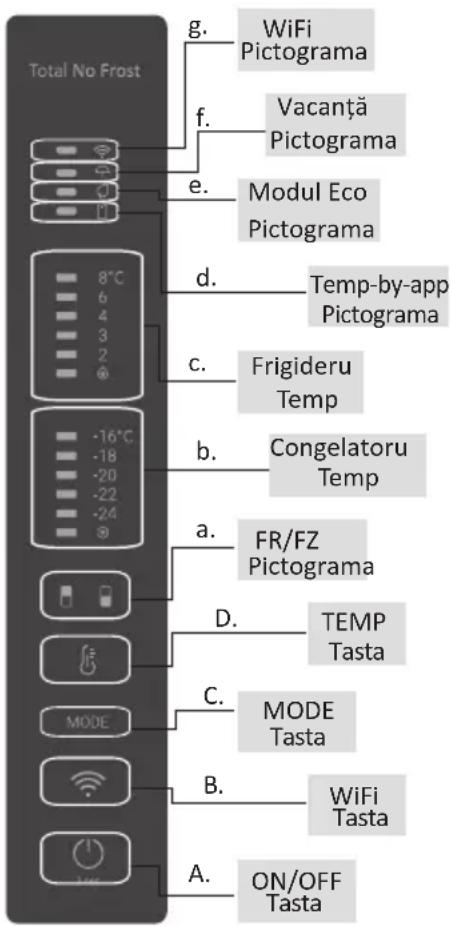
Total No Frost icon g. WiFi icon f. Holiday icon e. EcoMode icon d. Temp-by-app icon c. Fridge Temp b. Freezer Temp a. FR/FZ icon D. TEMP key C. MODE key B. WiFi key A. ON/OFF key

A. ON/OFF key, used to switch on/off the appliance. B. Wi-Fi key, used to switch on/off the Wi-Fi. C. Mode key, used to select the desired function. D. TEMP key, used to select the fridge and freezer temperature.

a. Fridge/freezer area icon, shows which compartment of the appliance is selected. b. Freezer temperature levels, show which is the selected temperature in the freezer. c. Fridge temperature levels, show which is the selected temperature. d. Customized temperature icon, shows if the temperature has been selected by app. e. Eco mode icon, shows whether the eco mode is activated. f. Holiday function icon, shows whether the holiday function is activated. g. Wi-Fi icon, shows whether the Wi-Fi is working and the appliance is connected.

Use

  • Plug in the appliance, it automatically turns on. The temperature will automatically be set at 4 °C in the fridge and -18 °C in the freezer.
  • To change the temperature, press the TEMP key for 5 seconds. An acoustic signal is made and the icon of the selected compartment (fridge or freezer) as well as all the temperature LEDs of the corresponding compartment turn on for 2 seconds. After 2 seconds, the selection of the compartment is confirmed. With the selected compartment icon on, quickly press the TEMP key to change the temperature. When the setting increases, the corresponding LED light will turn on. An acoustic signal is made every time the TEMP key is pressed and the temperature is changed. After 5 seconds, the selection is confirmed. After 30 seconds without operation, the fridge/freezer icon area turns off, while the LEDs of the selected temperatures stay on. When the TEMP key is touched again, the icon of the last selected area (fridge or freezer) turns on.

• In case of power loss, the last cooling level set will be restored.

- To restore the default setting, long press the TEMP key button and click the ON/OFF key button 5 times (within 5 seconds).

- Under normal operating conditions (in spring and autumn), it is recommended to set the temperature at 4 °C. In summer, when the ambient temperature is high, it is recommended to set the temperature at 6~8 °C, so as to guarantee the fridge and freezer temperatures and reduce the refrigerator's continuous running time. In winter, when the ambient temperature is low, it is recommended to set the temperature at 3~4 °C to avoid frequent start/stop of the refrigerator.

Customized temperature

From the app, it is possible to customize the temperature for both fridge and freezer. The temperature can be set with 1 °C sensitivity. It is possible to select a temperature from 2 °C to 8 °C in the fridge, and from -16 °C to -24 °C in the freezer.

When the temperature is selected by the app, the customized temperature icon turns on, while all the temperature LED lights of the affected compartment are turned off (i.e., if the refrigerator temperature is selected from the app, LEDs from 2 °C to 8 °C are turned off. If the freezer temperature is selected from the app, LEDs from -16 °C to -24 °C are turned off). If only a single area (freezer or fridge) has the customized temperature, the temperature selection of the other area is not changed and the LED light of the selected temperature of that area remains on. An acoustic signal is made every time the temperature is changed.

Super Cool function

It is suggested to switch on the Super Cool function if a large quantity of food should be stored (for example after the purchase). The Super Cool function accelerates the cooling of fresh food and protects the goods already stored from undesirable warming. When the function is activated, the temperature of the fridge is automatically set at 2 °C.

How to use the Super Cool function:

  • The function can be activated by long pressing the TEMP key to select the fridge compartment, and then quickly pressing the TEMP key until the Super Cool icon LED is turned on, or it can be turned on from the app. When the function is activated, the Super Cool LED is always ON.
  • To exit the Super Cool function, press the TEMP key or turn it off from the app.
  • The Super Cool function automatically ends when the function has lasted for more than 30 hours.
  • When the Super Cool ends, the icon of the control panel is switched off and the previously set cooling level is restored.

Note: Super Cool and Super Freeze functions cannot be activated simultaneously.

Super Freeze function

The super freezing function accelerates the freezing of fresh food and protects the goods already stored from undesirable warming. If a large amount of food has to be frozen, it is recommended to set the Super Freeze function on 24 hours before the usage. When the function is activated, the temperature is automatically set at -24 °C.

How to use the Super Freeze function:

  • The function can be launched by long pressing the TEMP key to select the freezer compartment, and then quickly pressing the TEMP key until the Super Freeze icon LED is turned on, or it can be turned on from the app. When the function is activated, the Super Freeze LED is always ON.
  • To exit the Super Freeze function, press the TEMP key or turn it off from the app.
  • The Super Freeze function automatically ends when the function has lasted for more than 50 hours.
  • When the Super Freeze ends, the icon of the control panel is switched off and the previously set freezing level is restored.

Note: Super Cool and Super Freeze functions cannot be activated simultaneously.

Eco mode

The Eco mode can be activated to optimize the performance of the appliance, while obtaining the best food storage. The Eco mode will automatically set the temperature at 5 °C in the fridge and at -18 °C in the freezer.

How to use the Eco mode:

  • The function can be activated from the control panel by pressing the “mode” key until the Eco mode icon turns on (an acoustic signal confirms the selection), or by selecting the function from the app. When the function is activated, the Eco mode icon is always ON.
  • To exit the Eco mode, turn it off from the app or choose another function from the control panel.
  • When the Eco mode ends, the icon of the control panel is switched off and the previously set cooling levels are restored.

Holiday function

The Holiday function can be used to reduce the energy consumption of the appliance when it is not used regularly. When the function is on, the LED lights are off (even if the door is open) and the fridge is turned off, whereas the freezer will keep working normally.

How to use the Holiday function:

  • The function can be activated from the control panel by pressing the “mode” key until the Holiday icon turns on (an acoustic signal confirms the selection), or by selecting the function from the app. When the function is activated, the Holiday icon is always ON.
  • To exit the Holiday function, turn it off from the app or choose another function from the control panel.
  • When the Holiday function ends, the icon of the control panel is switched off and the previously set cooling levels are restored.

Defrosting

The defrosting of the refrigerator and freezer compartments is done automatically: no manual operation is needed.

HCS

When a certain moisture level is reached, the HCS filter fibers open, causing moisture to decrease, and then close again.

Demo mode

To enter demo mode, with the display unlocked, keep the SET key pressed and press the WiFi key 5 times within 5 seconds. To exit demo mode, perform the same operation or power off the refrigerator.

Error Codes

- Communication error

If the [-16°C;-18°C;-20°C;-22°C;-24°C] lights in the freezer turn on sequentially, it means there has been a communication error between the main control board and the display board. Please contact technical assistance to help solve the problem.

- Fan

If the [-16°C;-20°C;-22°C;-24°C] lights in the freezer flash simultaneously, it means the fan is not working properly. Please contact technical assistance to help solve the problem.

WI-FI USE

Step 1

• Download the hOn app from the app stores.

QR code image containing encoded data, no visible human-readable text

GET IT ON Google Play Download on the App Store EXPLORE IT ON AppGallery

Step 2

- Create your account on the hOn App or log in if you already have an account.
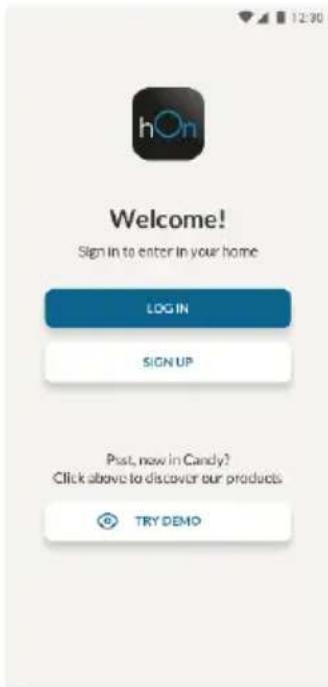
12:30 hOn Welcome! Sign In to enter in your home LOG IN SIGN UP Past, now in Candy? Click above to discover our products. TRY DEMO

Step 3

- Follow the pairing instructions in the hOn App

Wi-Fi Use

If the Wi-Fi has not been configured yet, when the refrigerator turns on, it will automatically enter configuration mode and remain in this state for 30 minutes. The Wi-Fi icon blinks and product enrollment can begin.

  • Follow the in-app instructions to configure the Wi-Fi (see above)
  • Once the Wi-Fi is configured and the connection is established, the Wi-Fi icon is on and fixed.
  • After 30 minutes without any operation, the Wi-Fi will automatically exit configuration mode.
  • If the Wi-Fi has already been configured, it will automatically reconnect according to the configuration information.

To reset the Wi-Fi, press the Wi-Fi key and the SET key for 2 seconds.

To turn off the Wi-Fi, press the Wi-Fi key for 3 seconds.

Radio-module - Technical data

Frequency rate (OFR)2400 MHz-2843.5 MHz
Channel frequencies2412...2472 MHz(step size 5 MHz)
Maximum power(EIRP)100 mW

The radio equipment type complies with Directive 2014/53/EU.

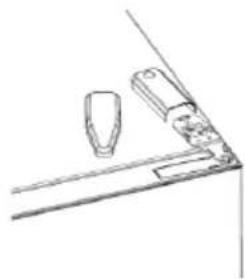
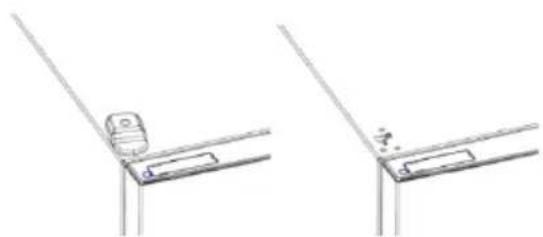
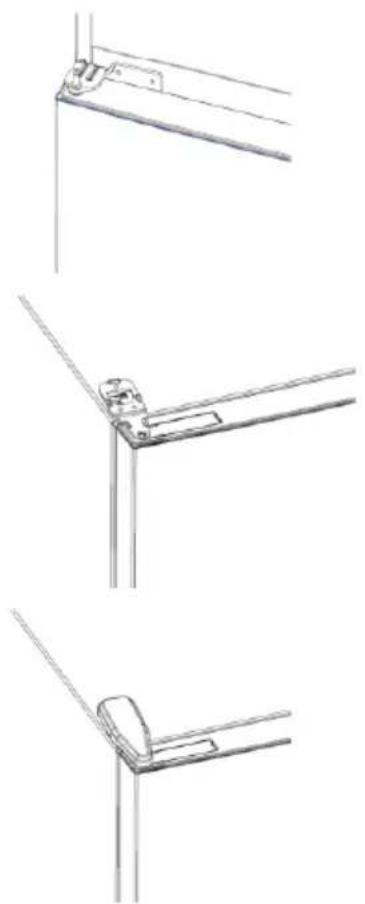
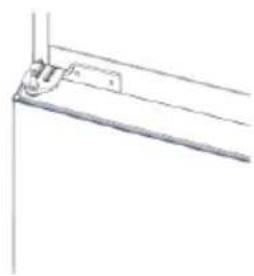
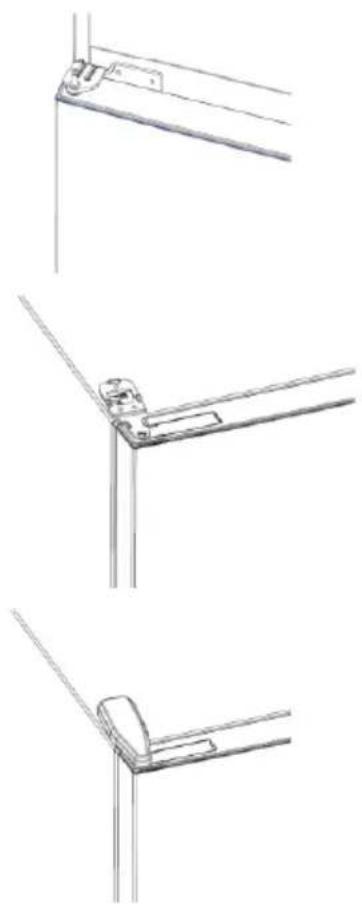
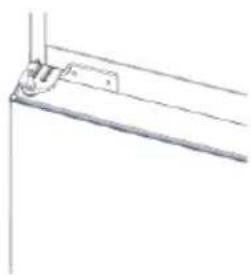
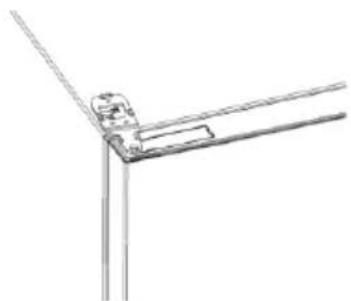
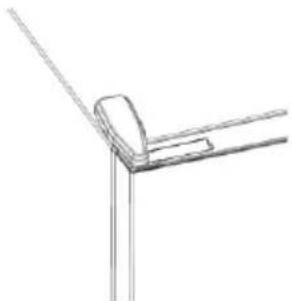
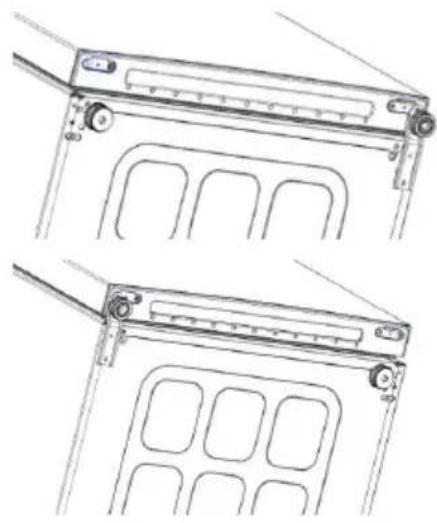
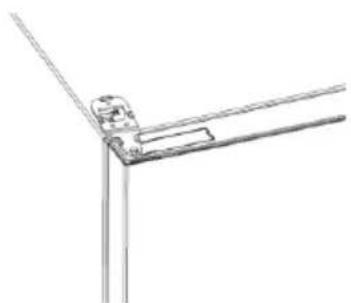
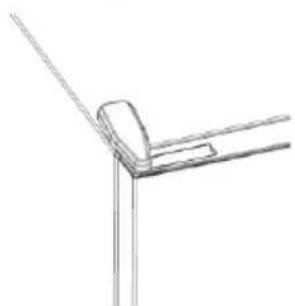
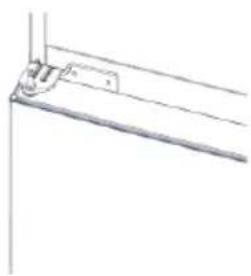
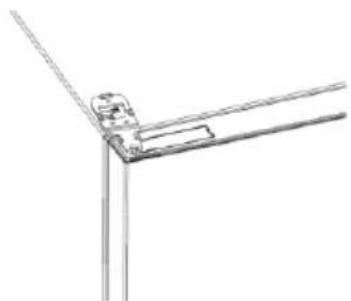
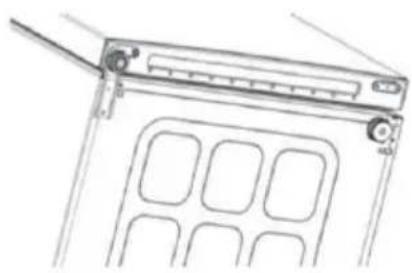
DOOR REVERSIBILITY

Tools needed: Electric screwdriver

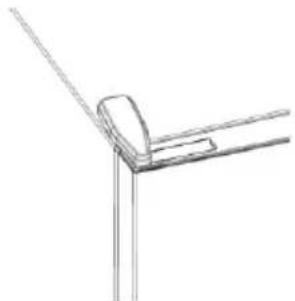
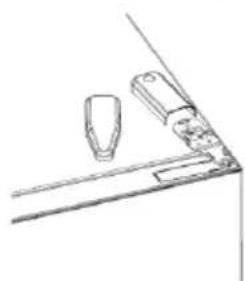
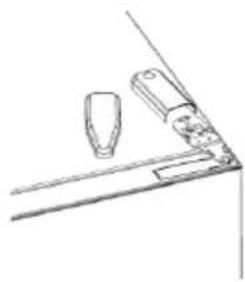
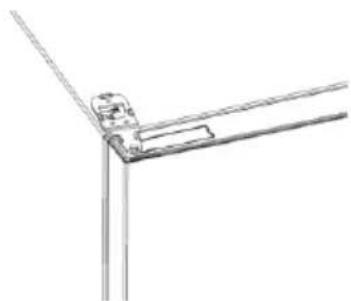
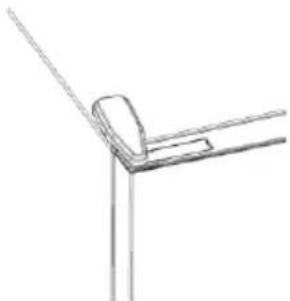
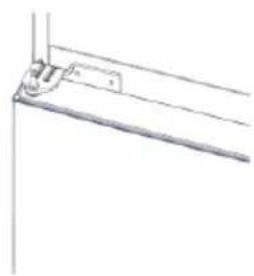
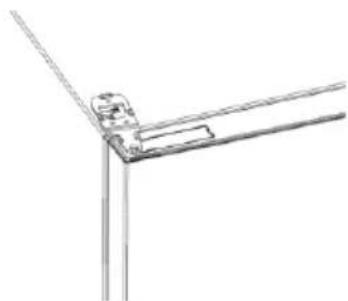
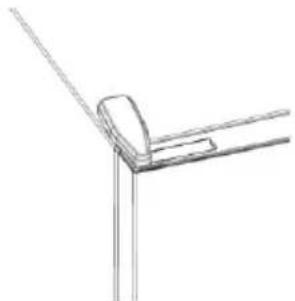
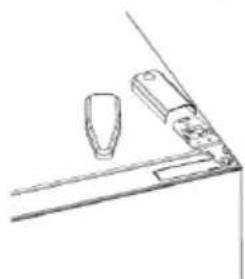
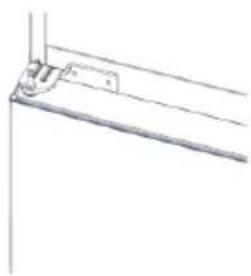
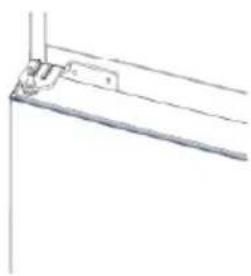
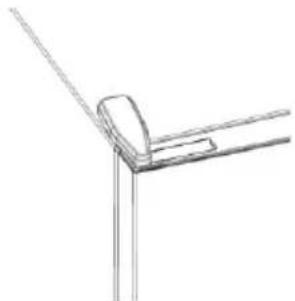
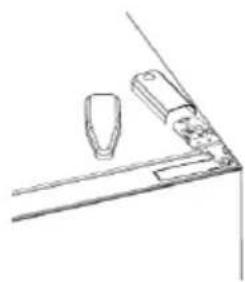
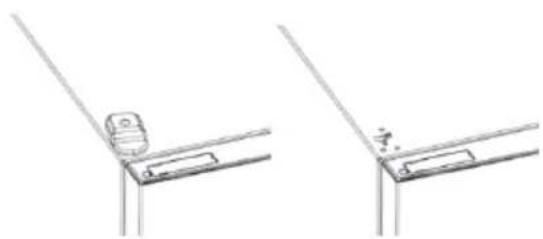
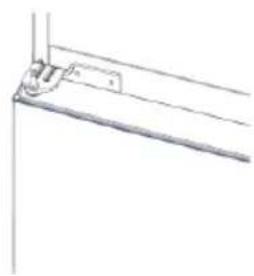
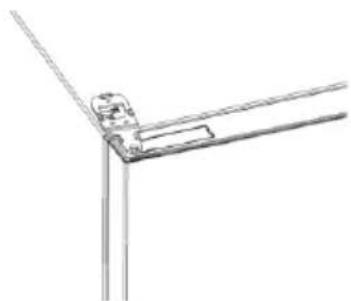
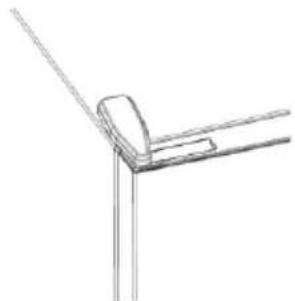
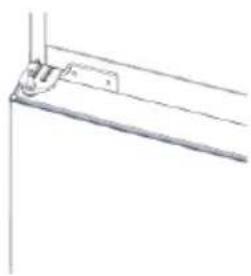
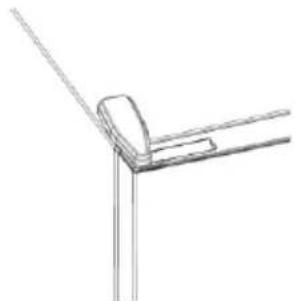
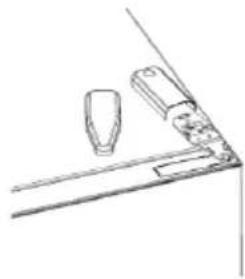
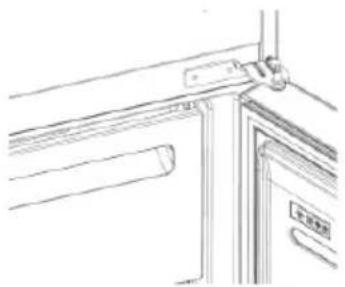
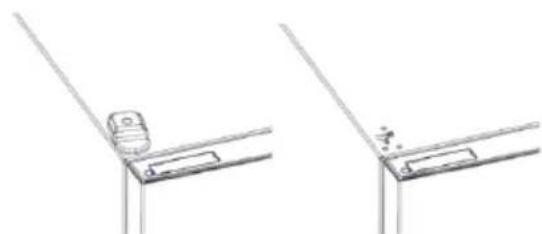
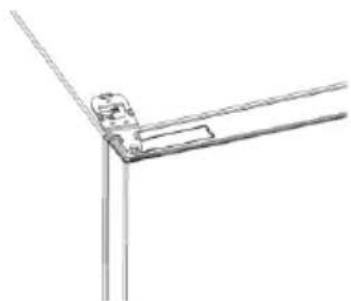
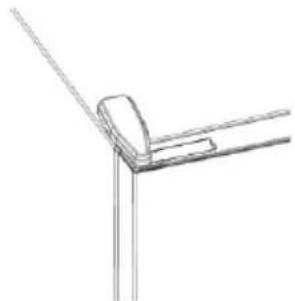
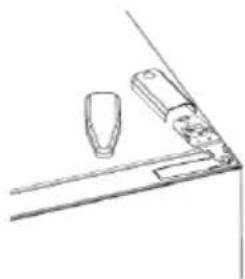
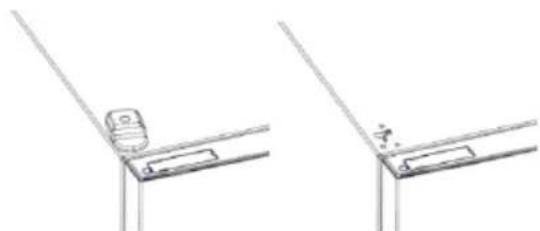
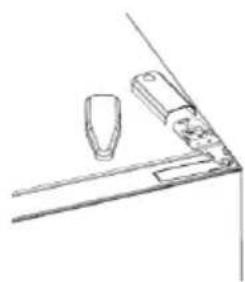
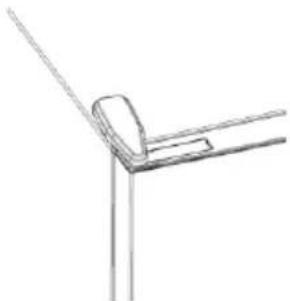
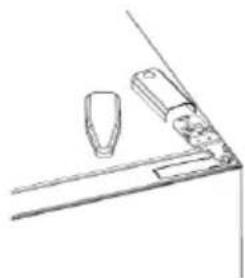
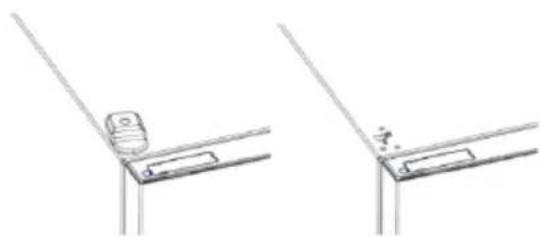
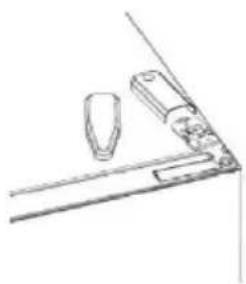
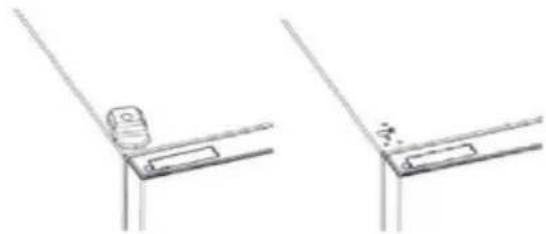
  1. Remove the top hinge cover
  2. Unscrew the top hinge
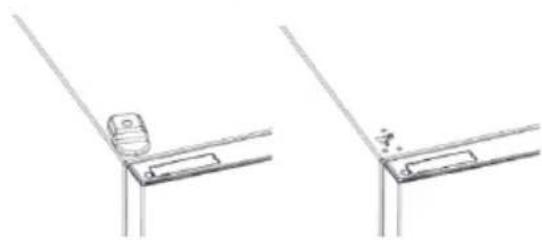
  3. Remove the top hinge cover (left)
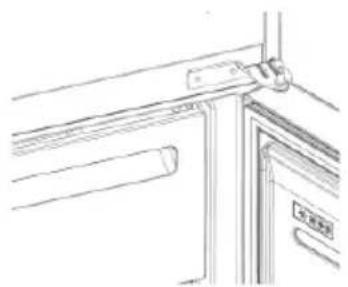
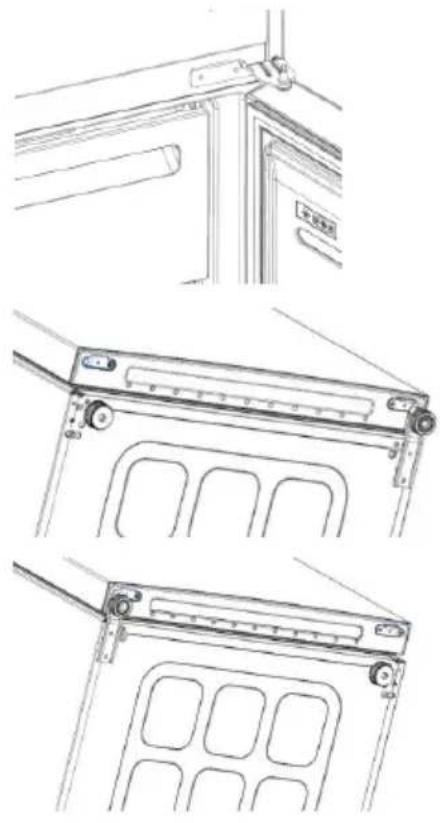
  4. Remove middle hinge

Line drawings of a door frame assembly with bracket, handle, and door lock (no text or symbols)

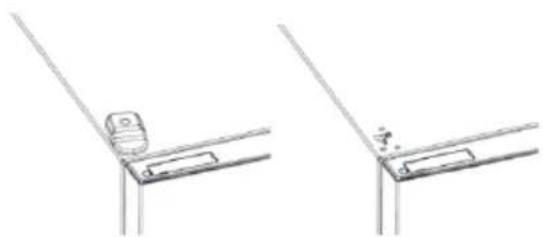
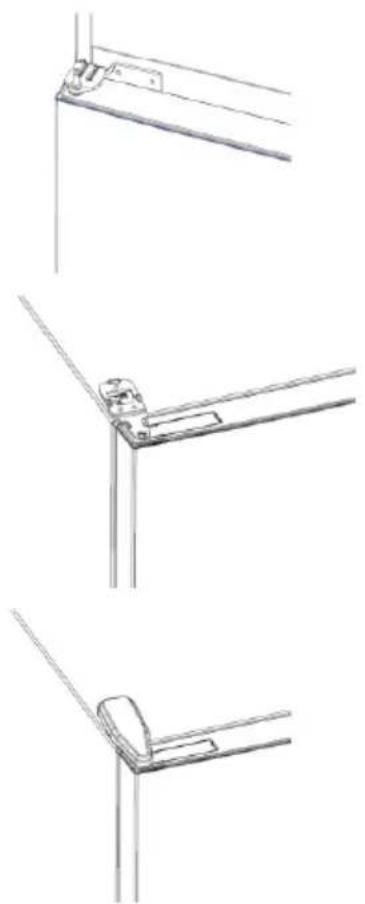
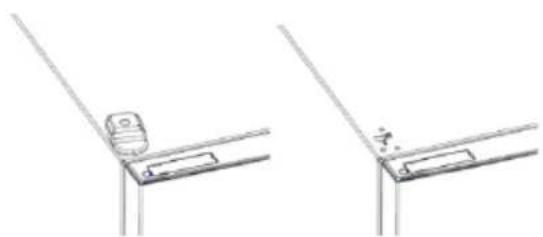
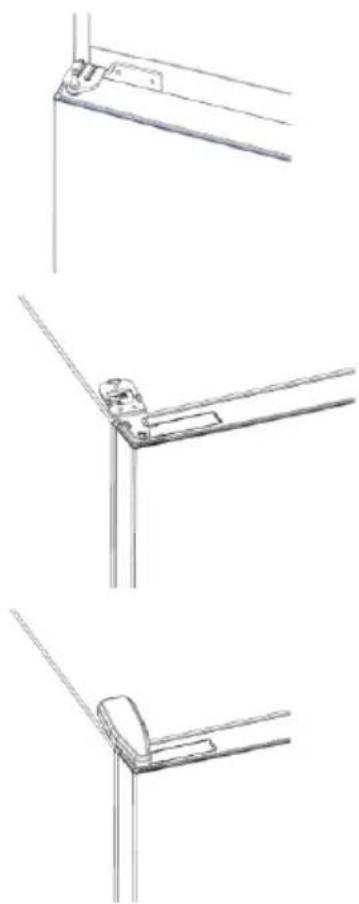
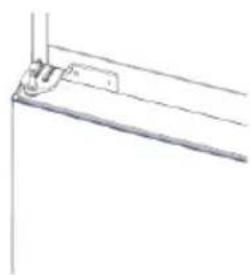
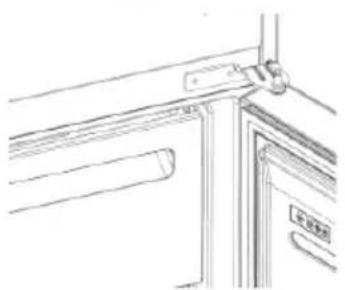
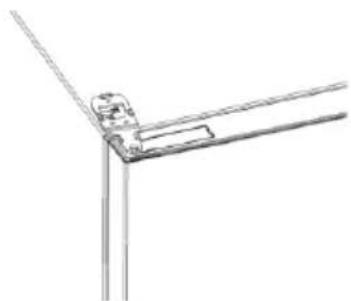
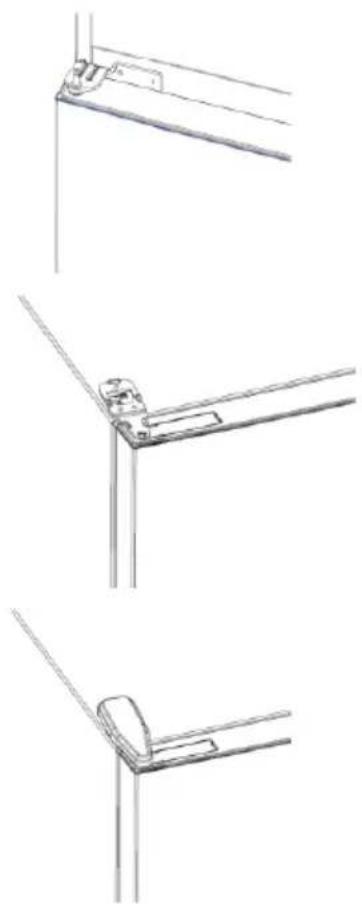
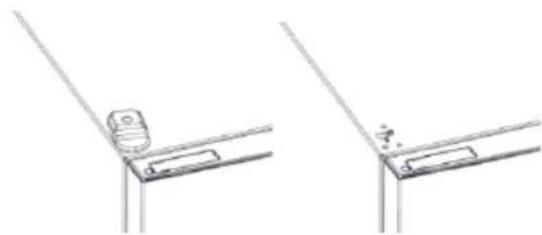
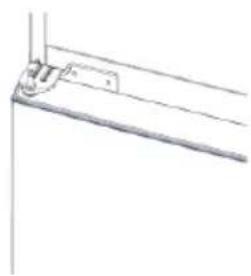
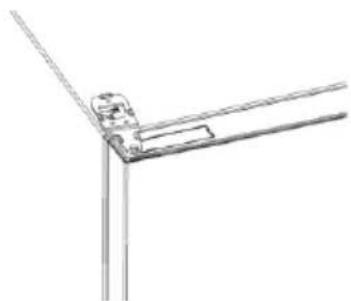
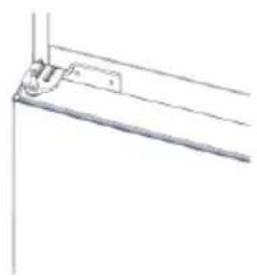
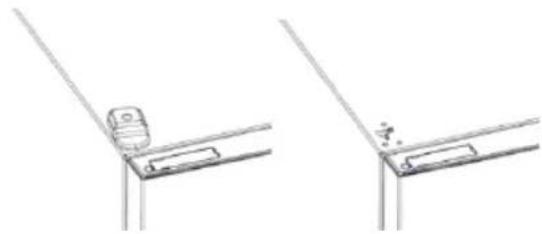
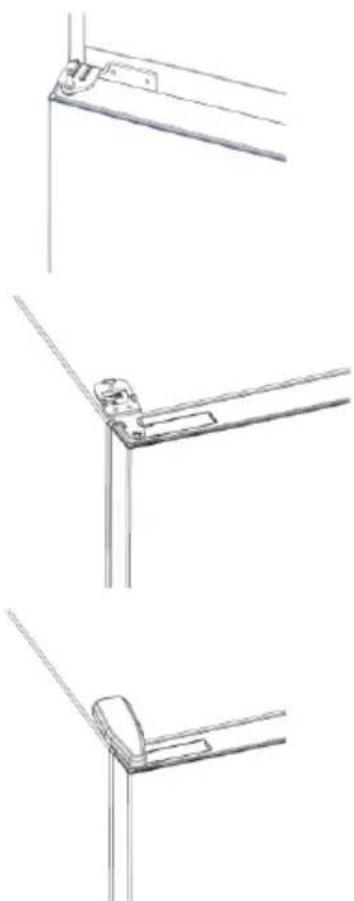
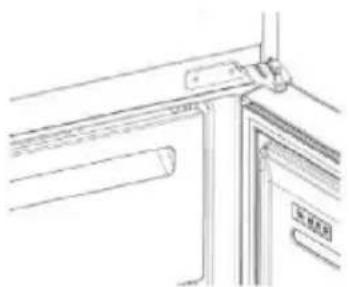
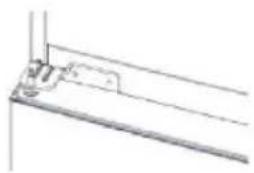
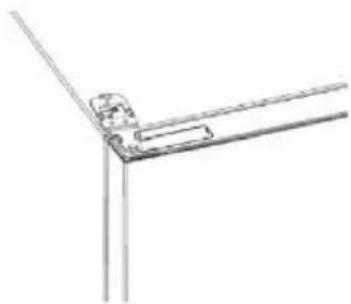
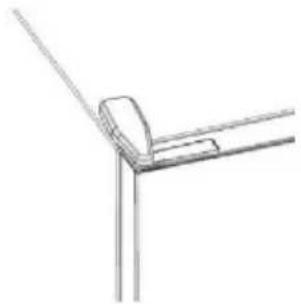
  1. Remove lower hinge
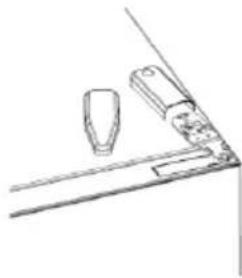
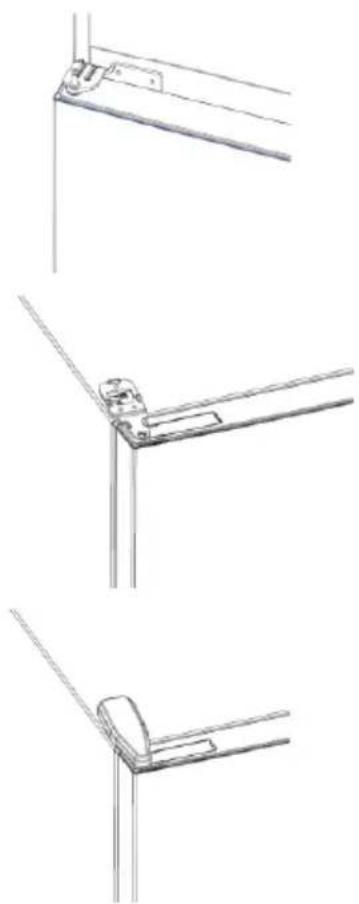
  2. Mount hinge foot
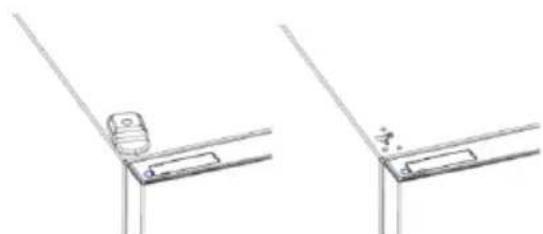
  3. Mount middle hinge
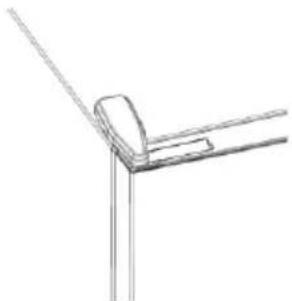
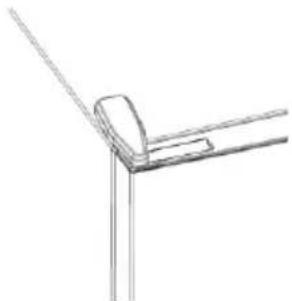
  4. Mount the upper hinge plate
  5. Mount the upper hinge cover

Technical line drawing of two mechanical components with mounting brackets and internal compartments (no text or symbols)

Pure technical line drawing of a mechanical bracket or support structure without any text, numbers, or symbols

Pure technical line drawing of a corner joint or bracket (no text or symbols)

Pure technical line drawing of a corner joint or bracket (no text or symbols)

Summary

PRODUCT DESCRIPTION 12

Space requirements 13

USE 14

Use 14

Custom temperature 15

GET IT ON Google Play Download on the App Store EXPLORE IT ON AppGallery

Step 2

Step 3

Simple line drawing of a mechanical component or bracket with two protruding parts (no text or symbols)

Technical line drawing showing two views of a bracket or hinge with a small object on the left side (no text or symbols)

Technical line drawings of three different metal bracket mounting configurations (no text or symbols)

Summary

PRODUCT DESCRIPTION 23

GET IT ON Google Play Download on the App Store EXPLORE IT ON AppGallery

Step 2

Step 3

Simple line drawing of a kitchen counter with two items on a shelf (no text or symbols)

Technical line drawing showing two views of a bracket or mounting structure with no visible text or symbols

Technical line drawings of three different metal bracket mounting configurations (no text or symbols)

Overview

PRODUCT DESCRIPTION....34

Space requirements....34

USE....35

Use 35

Adjusted temperature ....36

Super Cool function....36

GET IT ON Google Play Download on the App Store EXPLORE IT ON AppGallery

Step 2

Step 3

Pure technical line drawing of a mechanical bracket or support structure without any text, numbers, or symbols

Pure technical line drawing of a mechanical joint or bracket (no text or symbols)

Simple line drawing of a corner bracket with diagonal lines (no text or symbols)

Summary

GET IT ON Google Play Download on the App Store EXPLORE IT ON AppGallery

Step 2

Step 3

Simple line drawing of a mechanical or architectural component with two protrusions mounted on a base (no text or symbols)

Technical line drawing showing two mechanical bracket assembly steps (no text or symbols)

Line drawing of a door frame with handle and door, no text or symbols present

Pure technical line drawing of a mechanical bracket or mounting detail (no text or symbols)

Pure technical line drawing of a mechanical joint or bracket (no text or symbols)

Pure technical line drawing of a corner joint or bracket (no text or symbols)

Summary

GET IT ON Google Play Download on the App Store EXPLORE IT ON AppGallery

Step 2

Step 3

Simple line drawing of a mechanical or architectural component with no text or symbols

Technical line drawing showing two mechanical bracket assembly configurations (no text or symbols)

Technical line drawings of three different metal bracket mounting configurations (no text or symbols)

Summary

GET IT ON Google Play Download on the App Store EXPLORE IT ON AppGallery

Step 2

Step 3

Pure technical line drawing of a mechanical bracket or mounting detail (no text or symbols)

Technical line drawing of a mechanical joint or bracket, no text or symbols.

Technical line drawing of a corner joint or bracket, no text or symbols.

Summary

PRODUCT DESCRIPTION....76

Space requirement 77

USE....78

Use 78

GET IT ON Google Play, Download on the App Store, EXPLORE IT ON AppGallery

Step 2

Step 3

Simple line drawing of a mechanical or architectural component, no text or symbols.

Technical line drawing showing two views of a bracket or mounting detail with a small component, no text or symbols.

Technical line drawings of three different metal bracket mounting configurations, no text or symbols.

Table of Contents

PRODUCT DESCRIPTION 87

Space required ....87

USE 88

Use 88

GET IT ON Google Play, Download on the App Store, EXPLORE IT ON AppGallery

Step 2

Step 3

Pure technical line drawing of a mechanical bracket or support structure without any text, numbers, or symbols.

Pure technical line drawing of a mechanical joint or bracket (no text or symbols).

Pure technical line drawing of a corner joint or bracket (no text or symbols).

Summary

PRODUCT DESCRIPTION 97

Space requirements ....97

USE....98

Use....98

Adjusted temperature 99

Supercooling function 99

Superfreezing function....99

Eco mode.... 100

USING THE WI-FI NETWORK 102

Step 1 ....102

Step 2 102

Step 3 ....102

Using the Wi-Fi network.... 103

REVERSIBLE DOORS....104

PRODUCT DESCRIPTION1 2 3 4 5
GET IT ON Google Play Download on the App Store EXPLORE IT ON AppGallery

Step 2

Step 3

- Follow the pairing instructions in the hOn app

Using the Wi-Fi network

If the Wi-Fi network has not been configured when the refrigerator is turned on, it automatically enters configuration mode and remains in this status for 30 minutes. The Wi-Fi icon blinks and the product connection can begin.

  • Follow the instructions in the app to configure the Wi-Fi network (see above).
  • Once the Wi-Fi network is configured and the connection is established, the Wi-Fi icon turns on and remains fixed.
  • After 30 minutes without any action, the Wi-Fi network automatically exits configuration mode.
  • If the Wi-Fi network has already been configured, it automatically reconnects according to the configuration information.

To reset the Wi-Fi network, press the Wi-Fi button and the SET button for two seconds.

To turn off the Wi-Fi network, press the Wi-Fi button for three seconds.

Radio module - Technical data

Učestalost (OFR)2400 MHz-2843.5 MHz
Frekvencije kanala2412...2472 MHz(veličina koraka 5 MHz)
Maksimalna snaga(EIRP)100 mW
  1. Remove the lower hinge
  2. Install the hinge base
  3. Install the middle hinge
  4. Install the upper hinge plate
  5. Install the upper hinge cover

Technical line drawing of two mechanical components with mounting brackets and internal compartments (no text or symbols).

Pure technical line drawing of a mechanical bracket or support structure without any text, numbers, or symbols.

Pure technical line drawing of a mechanical joint or bracket (no text or symbols).

Pure technical line drawing of a corner joint or bracket (no text or symbols).

USE

Total No Frost g. WiFi icon f. Vacation icon e. EcoMod icon d. Temp-by-app icon c. Refrigerator temp b. Freezer temp a. FR/FZ icon D. TEMP button C. MODE button B. WiFi button A. ON/OFF button

GET IT ON Google Play Download on the App Store EXPLORE IT ON AppGallery

Step 2

Step 3

Simple line drawing of a mechanical component or bracket with no text or symbols

Technical line drawing showing two views of a mechanical bracket or bracket with a small object on the side (no text or symbols present)

Line drawing of a door frame with handle and door, no text or symbols present

Pure technical line drawing of a mechanical bracket or support structure without any text, numbers, or symbols

Pure technical line drawing of a mechanical joint or bracket (no text or symbols)

Pure technical line drawing of a corner joint or bracket (no text or symbols)

Index

GET IT ON Google Play Download on the App Store EXPLORE IT ON AppGallery

Phase 2

Phase 3

Pure technical line drawing of a mechanical bracket or mounting detail (no text or symbols)

Pure technical line drawing of a mechanical joint or bracket (no text or symbols)

Pure technical line drawing of a corner joint or bracket (no text or symbols)

Summary

PRODUCT DESCRIPTION....127

GET IT ON Google Play Download on the App Store EXPLORE IT ON AppGallery

Step 2

Step 3

Pure technical line drawing of a mechanical bracket or support structure without any text, numbers, or symbols

Pure technical line drawing of a mechanical joint or bracket (no text or symbols)

Pure technical line drawing of a corner joint or bracket (no text or symbols)

Summary

PRODUCT DESCRIPTION....137

Space requirements....137

USE....138

Use....138

Custom temperature....139

GET IT ON Google Play Download on the App Store EXPLORE IT ON AppGallery

Step 2

- Create your account on the hOn app, or log in if you already have an account
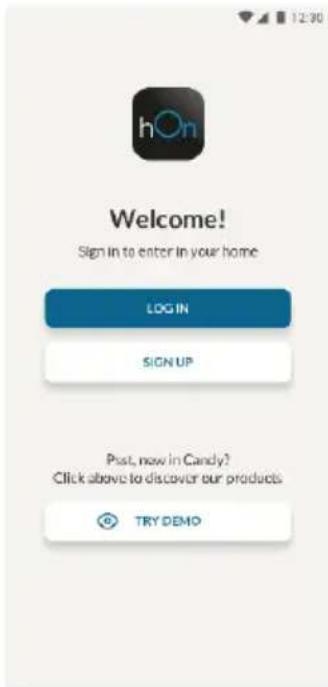
12:30 hOn Welcome! Sign In to enter in your home LOG IN SIGN UP Past, now in Candy? Click above to discover our products. TRY DEMO

Step 3

Simple line drawing of a mechanical or architectural component with no text or symbols.

Technical line drawing showing two views of a bracket or hinge with a small object on the left side. No text or symbols.

Three technical line drawings of a metal bracket or hinge assembly, showing different mounting configurations. No text or symbols present.

Summary

PRODUCT DESCRIPTION....147

GET IT ON Google Play Download on the App Store EXPLORE IT ON AppGallery

Step 2

Step 3

Pure technical line drawing of a mechanical bracket or mounting detail. No text or symbols.

Pure technical line drawing of a mechanical joint or bracket. No text or symbols.

Pure technical line drawing of a corner joint or bracket. No text or symbols.

Summary

GET IT ON Google Play Download on the App Store EXPLORE IT ON AppGallery

Step 2

Step 3

Pure technical line drawing of a mechanical bracket or support structure without any text, numbers, or symbols

Pure technical line drawing of a mechanical joint or bracket (no text or symbols)

Pure technical line drawing of a corner joint or bracket (no text or symbols)

Table of contents

PRODUCT DESCRIPTION ....167

USE
Total No Frost WiFi Pictogram Vacation Pictogram Eco Mode Pictogram Temp-by-app Pictogram Fridge Temp Freezer Temp FR/FZ Pictogram D. TEMP Key C. MODE Key B. WiFi Key A. ON/OFF Key

GET IT ON Google Play Download on the App Store EXPLORE IT ON AppGallery

Step 2

Step 3

Pure technical line drawing of a mechanical bracket or mounting detail (no text or symbols)

Pure technical line drawing of a mechanical joint or bracket (no text or symbols)

Pure technical line drawing of a corner joint or bracket (no text or symbols)

Table of contents

QR code image containing encoded data, no visible human-readable text.

GET IT ON Google Play. Download on the App Store. EXPLORE IT ON AppGallery.

War 2

War 3

Simple line drawing of a mechanical or architectural component with two cylindrical parts and a base (no text or symbols).

Technical line drawing showing two views of a bracket or support structure with no visible text or symbols.

Pure technical line drawing of a door frame with no text or symbols.

Pure technical line drawing of a mechanical bracket or support structure without any text, numbers, or symbols.

Pure technical line drawing of a mechanical joint or bracket (no text or symbols).

Pure technical line drawing of a corner joint or bracket (no text or symbols).

Summary

PRODUCT DESCRIPTION 189

Total No Frost. g. WiFi icon. f. Holiday icon. e. EcoMode icon. d. Temp-by-app icon. c. Fridge Temperature. b. Freezer Temperature. a. FR/FZ icon. D. Temperature Button. C. MODE Button. B. WiFi Button. A. ON/OFF Button.

USE

GET IT ON Google Play Download on the App Store EXPLORE IT ON AppGallery

Step 2

Step 3

- Follow the pairing instructions in the hOn app

Using Wi-Fi
Simple line drawing of a mechanical component or bracket with two cylindrical parts and a base (no text or symbols)

Technical line drawing showing two views of a bracket or support structure with no visible text or symbols

Line drawing of a door handle assembly with no visible text or symbols

Pure technical line drawing of a mechanical bracket or support structure without any text, numbers, or symbols

Pure technical line drawing of a mechanical joint or bracket (no text or symbols)

Pure technical line drawing of a corner joint or bracket (no text or symbols)

Summary

PRODUCT DESCRIPTION 199

Space requirements....199

USE....200

Use....200

Custom temperature....201

Super Cool function....201

Super Freeze function....202

ECO mode....202

Holiday function....202

Defrosting....202

Demo mode 203

Error codes ....203

USING THE WI-FI NETWORK....204

Step 1 204

Step 2 ....204

Step 3 204

Using the WI-FI network....205

REVERSIBLE DOOR....206

PRODUCT DESCRIPTION1 2 3 4 5
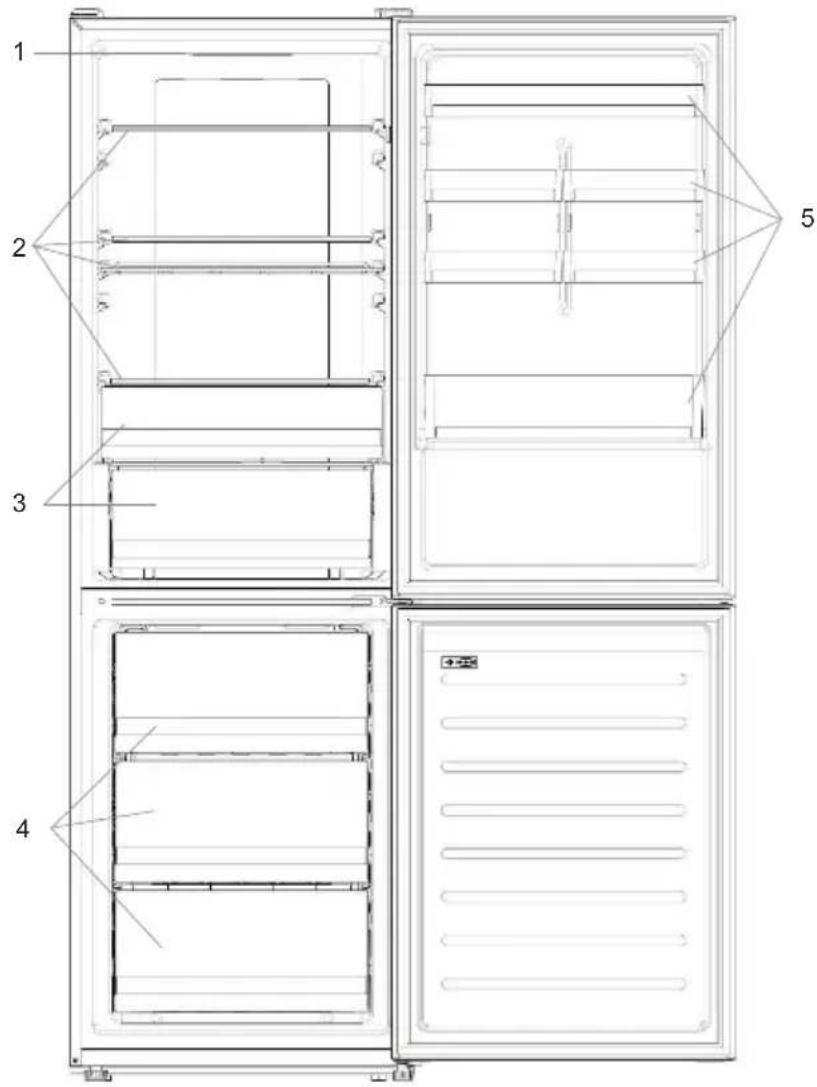
  1. Control panel
  2. Shelves
  3. Vegetable drawer
  4. Freezer drawers
  5. Door bin

USING THE WI-FI NETWORK

Step 1

GET IT ON Google Play Download on the App Store EXPLORE IT ON AppGallery

Step 2

Step 3

Simple line drawing of a mechanical or architectural component with no text or symbols.

Technical line drawing showing two views of a mechanical bracket or bracket assembly, with no text or symbols.

Line drawing of a door frame with handle and door, with no text or symbols present.

Pure technical line drawing of a mechanical bracket or support structure without any text, numbers, or symbols.

Pure technical line drawing of a mechanical joint or bracket, with no text or symbols.

Pure technical line drawing of a corner joint or bracket, with no text or symbols.

Summary

PRODUCT DESCRIPTION 209

Space requirements ....209

USE 210

Use....210

Adjusted temperature 211

Super Cool function....211

Super Freeze function....212

Eco mode 212

Holiday function 212

Defrosting 212

Demonstration mode....213

Error codes 213

USING THE "WI-FI" NETWORK ......214

Step 1 214

Step 2 214

Step 3 214

GET IT ON Google Play Download on the App Store EXPLORE IT ON AppGallery

Step 2

Step 3

• Follow the pairing instructions in the hOn app

Using the "Wi-Fi" network
Simple line drawing of a mechanical bracket or bracket with two protruding components, with no text or symbols.

Technical line drawing showing two views of a mechanical bracket or bracket assembly, with no text or symbols.

  1. Remove the middle hinge
  2. Remove the bottom hinge
  3. Place the hinge foot
  4. Place the middle hinge
  5. Place the top hinge plate
  6. Place the top hinge cover

Technical line drawings of three different mechanical or architectural components, with no text or symbols.

Technical line drawings of three different metal bracket mounting configurations, with no text or symbols.

Summary

PRODUCT DESCRIPTION 219

GET IT ON Google Play. Download on the App Store. EXPLORE IT ON AppGallery.

Step 2

Step 3

Simple line drawing of a mechanical or architectural component with two protrusions and a base (no text or symbols).

Technical line drawing showing two mechanical bracket assembly steps (no text or symbols).

Line drawing of a door with a handle and door panel, no text or symbols present.

Pure technical line drawing of a mechanical bracket or support structure without any text, numbers, or symbols.

Pure technical line drawing of a mechanical joint or bracket (no text or symbols).

Simple line drawing of a corner bracket with diagonal lines (no text or symbols).

Summary

DEVICE DESCRIPTION 229

GET IT ON Google Play. Download on the App Store. EXPLORE IT ON AppGallery.

Step 2

Step 3

Simple line drawing of a mechanical or architectural component with no text or symbols.

Technical line drawing showing two views of a mechanical bracket or bracket assembly (no text or symbols).

Technical line drawings of three different metal bracket mounting brackets (no text or symbols).

  1. Product Description

Space Requirements

QR code image containing encoded data, no visible human-readable text.

Step 2

Step 3

USAGE

GET IT ON Google Play Download on the App Store EXPLORE IT ON AppGallery

Step 2

Step 3

Simple line drawing of a mechanical or architectural component with no text or symbols.

Technical line drawing showing two views of a mechanical bracket or bracket (no text or symbols).

Pure technical line drawing of a door frame with no text or symbols.

Technical line drawing of a mechanical device with internal compartments and a mounting bracket (no text or symbols).

Pure technical line drawing of a mechanical bracket or mounting detail (no text or symbols).

Pure technical line drawing of a corner joint or bracket (no text or symbols).

Pure technical line drawing of a corner joint or bracket (no text or symbols).

Manual assistant
Powered by Anthropic
Waiting for your message
Product information

Brand : HAIER

Model : HDW3618DNPB

Category : Refrigerator