JB2H - Oven Vollrath - Free user manual and instructions
Find the device manual for free JB2H Vollrath in PDF.
| Product Type | Conveyor oven for commercial use |
| Brand | Vollrath |
| Model | JB2H |
| Material | Stainless steel |
| Power Supply | 208-240 V, 50/60 Hz, single phase |
| Functions | Toasting sandwiches, reheating pizzas, melting cheese, toasting bread. Motorized conveyor. |
| Thermostats | Upper and lower separately adjustable |
| Conveyor Speed | Adjustable (positions 1 to 7) |
| Power | Full power and standby mode |
| Capacity | Suitable for small restaurants and sandwich shops |
| Cleaning | Daily cleaning with soft cloth and soapy water. Removable crumb tray. |
| Safety | Reset button, overheat protection, automatic fan shutdown |
| Warranty | Parts: 2 years, Labor: 1 year; Heating tubes: 1 year (parts and labor) |
| Usage | Commercial only, not domestic |
| Ambient Conditions | Do not place near combustible materials, requires clearance |
| Ventless Operation | Allowed for pre-cooked foods (pizza, sandwiches, cheese) |
| Included Accessories | Exit tray, crumb tray, mounting screws |
| Options | Adjustable heat shield |
Frequently Asked Questions - JB2H Vollrath
User questions about JB2H Vollrath
0 question about this device. Answer the ones you know or ask your own.
Ask a new question about this device
Download the instructions for your Oven in PDF format for free! Find your manual JB2H - Vollrath and take your electronic device back in hand. On this page are published all the documents necessary for the use of your device. JB2H by Vollrath.
USER MANUAL JB2H Vollrath
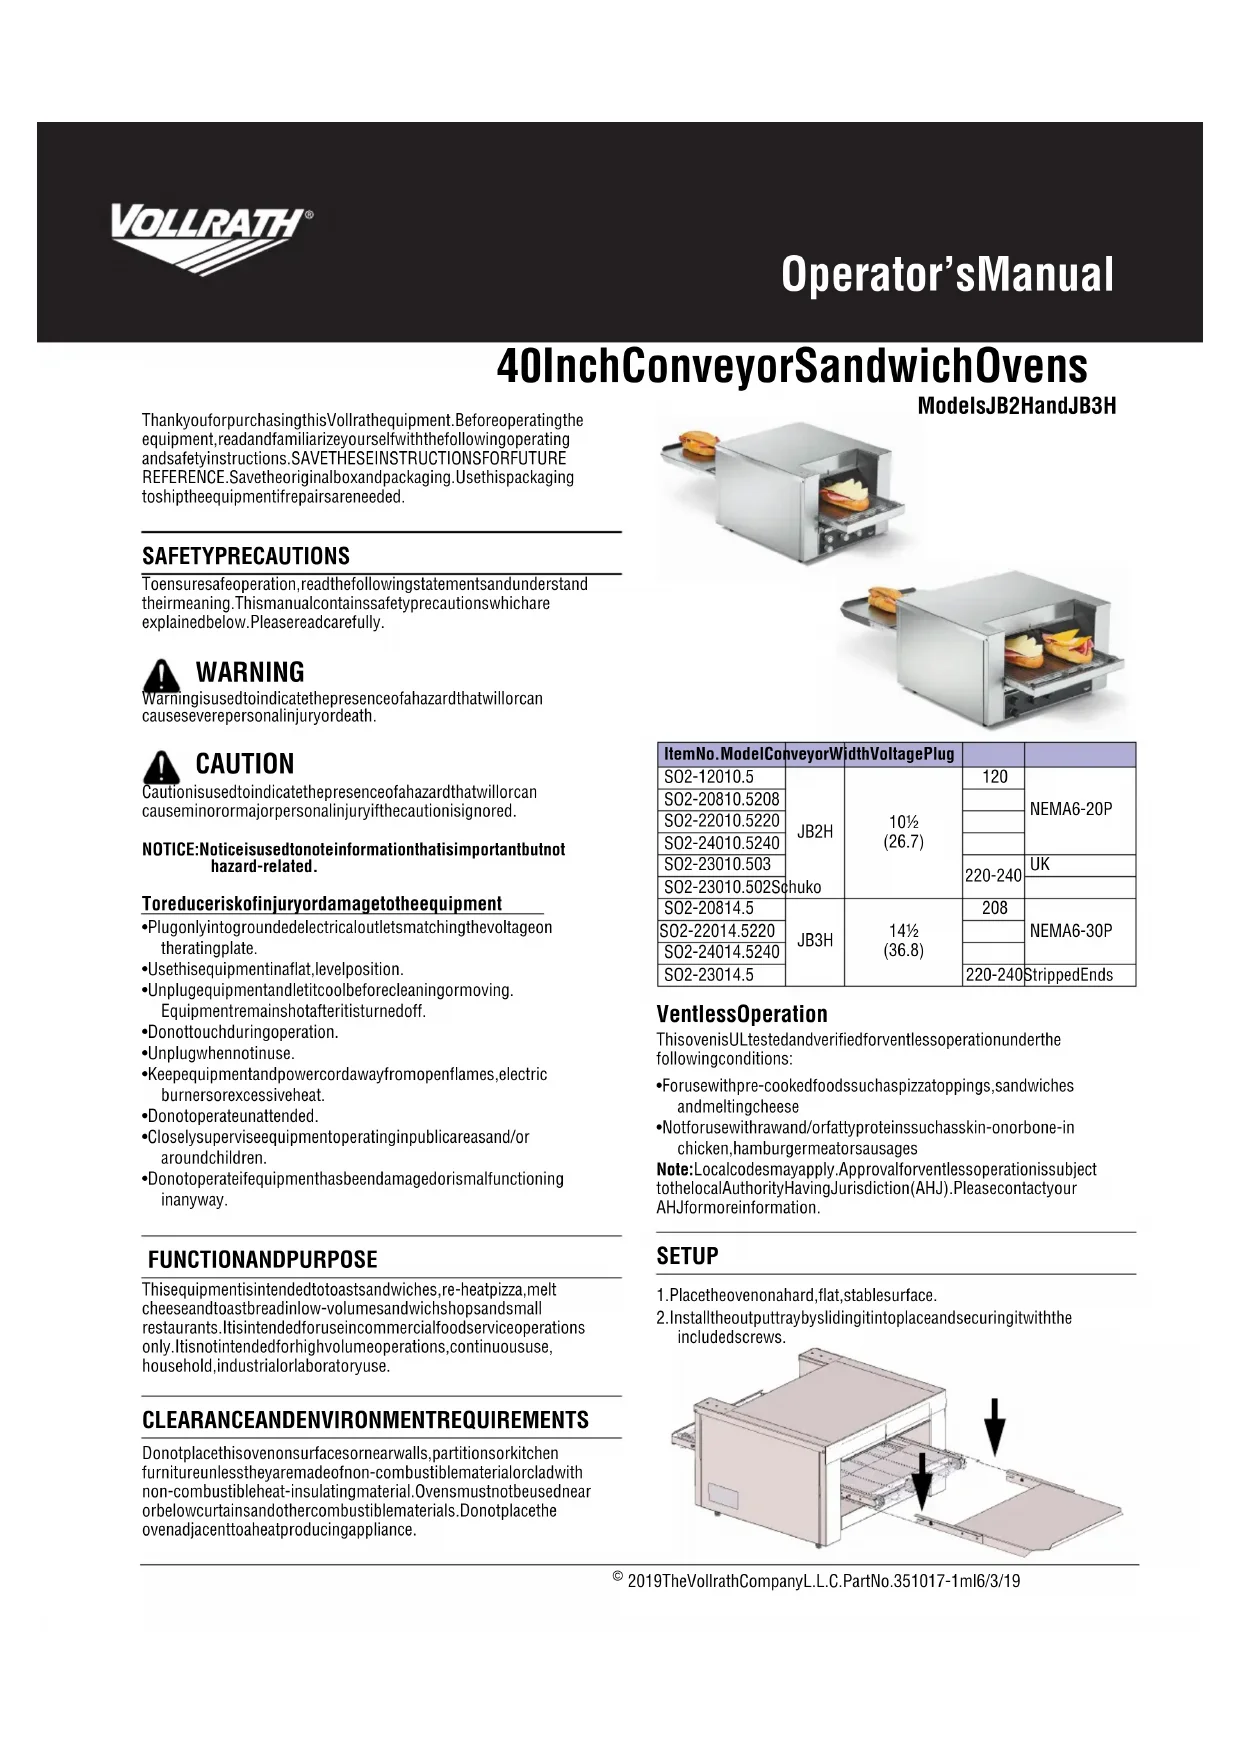
40InchConveyorSandwichOvens
ModelsJB2HandJB3H
ThankyouforpurchasingthisVollrathequipment.Beforeoperatingthe equipment,readandfamiliarizeyourselfwiththefollowingoperating andsafetyinstructions.SAVETHESEINSTRUCTIONSFORFUTURE REFERENCE.Savetheoriginalboxandpackaging.Usethispackaging toshiptheequipmentifrepairsareneeded.
SAFETYPRECAUTIONS
Toensuresafeoperation,readthefollowingstatementsandunderstand theirmeaning.Thismanualcontainssafetyprecautionswhichare explainedbelow.Pleasereadcarefully.

WARNING
Warningisusedtoindicatethepresenceofahazardthatwillorcan causeseverepersonalinjuryordeath.

CAUTION
Cautionisusedtoindicatethepresenceofahazardthatwillorcan causeminorormajorpersonalinjuryifthecautionisignored.
NOTICE: Notice is used to note information that is important but not hazard-related.
Toreduceriskofinjuryordamagetotheequipment
- Plugonlyintogroundedelectricaloutletsmatchingthevoltageon theratingplate.
•Usethisequipmentinaflat,levelposition. - Unplugequipmentandletitcoolbeforecleaningormoving. Equipmentremainshotafteritisturnedoff.
- Donottouchduringoperation.
- Unplugwhennotinuse.
- Keepequipmentandpowercordawayfromopenflames,electric burnersorexcessiveheat.
•Donotoperateunattended.
• Closelysupervise equipment operating in public areas and/or around children. - Donotoperateifequipmenthasbeendamagedorismalfunctioning inanyway.
FUNCTIONANDPURPOSE
This equipment is intended to podcasts and sandwiches, re-heat pizza, melt cheese and toast bread in low-volumes and which shops and small restaurants. It is intended for use in commercial food service operations only. It is not intended for high volume operations, continuous use, household, industrial or laboratory use.
CLEARANCEANDENVIRONMENTREQUIREMENTS
Donotplacethisovenonsurfacesornearwalls,partitionsorkitchen furnitureunlesstheyaremadeofnon-combustiblematerialorcladwith non-combustibleheat-insulatingmaterial.Ovensmustnotbeusednear orbelowcurtainsandothercombustiblematerials.Donotplacethe ovenadjacenttoaheatproducingappliance.
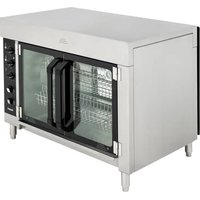
natural_image
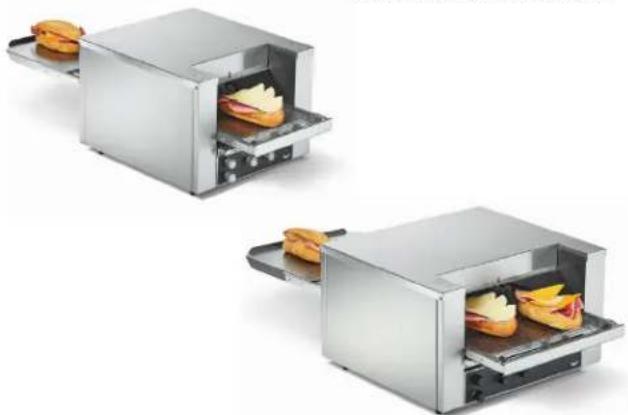
Two identical stainless steel cutting machines each containing a sandwich, shown from different angles (no text or symbols visible)| ItemNo.ModelConveyorWidthVoltagePlug | ||||
| SO2-12010.5 | JB2H | 1012 (26.7) | 120 | NEMA6-20P |
| SO2-20810.5208 | ||||
| SO2-22010.5220 | ||||
| SO2-24010.5240 | ||||
| SO2-23010.503 | 220-240 | UK | ||
| SO2-23010.502Schuko | ||||
| SO2-20814.5 | JB3H | 1412 (36.8) | 208 | NEMA6-30P |
| SO2-22014.5220 | ||||
| SO2-24014.5240 | ||||
| SO2-23014.5 | 220-240 | StrippedEnds | ||
VentlessOperation
ThisovenisULtestedandverifiedforventlessoperationunderthe followingconditions:
- Forusewithpre-cookedfoodssuchaspizzatoppings, sandwiches andmeltingcheese
- Notforusewithrawand/orfattyproteinssuchasskin-onorbone-in chicken, hamburgermeatorsausages
Note: Localcodes may apply. Approval for ventless operation is subject to the local authority having jurisdiction (AHJ). Please contact your AHJ form more information.
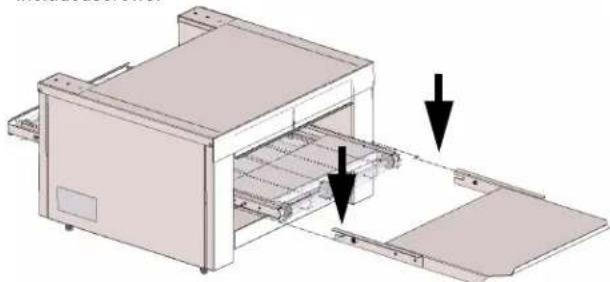
SETUP
- Placetheovenonahard, flat, stablesurface.
- Install the output tray by sliding it into place and securing it with the included screws.
natural_image
3D diagram of a printer or scanner with two arrows pointing to internal components (no text or symbols present)FEATURES
text_image
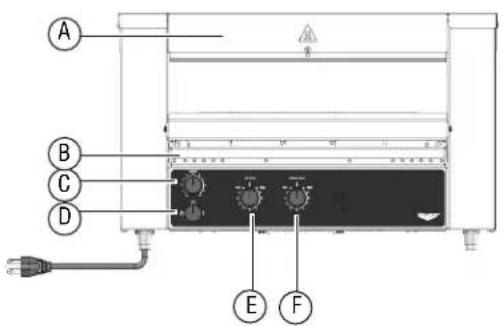
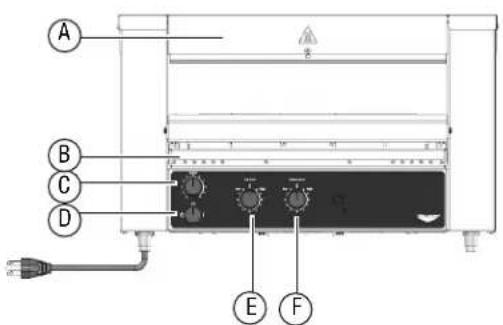
A B C D E FFrontView
text_image
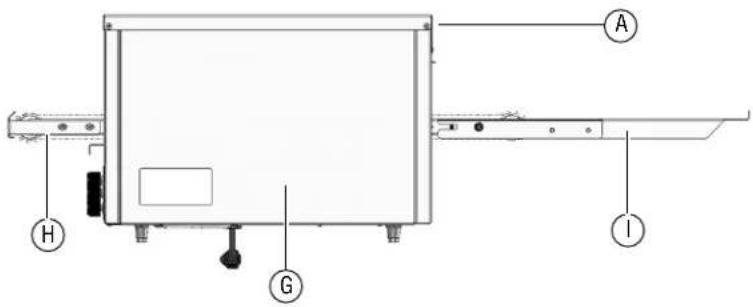
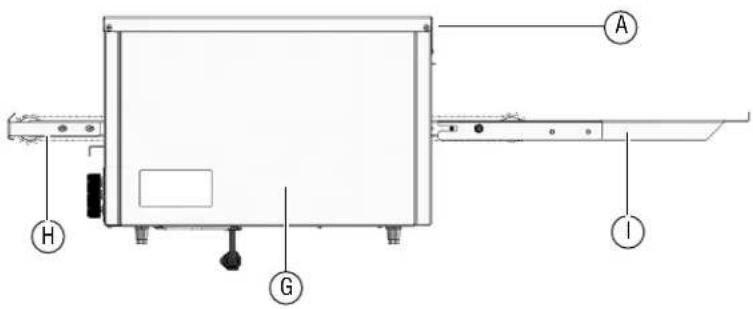
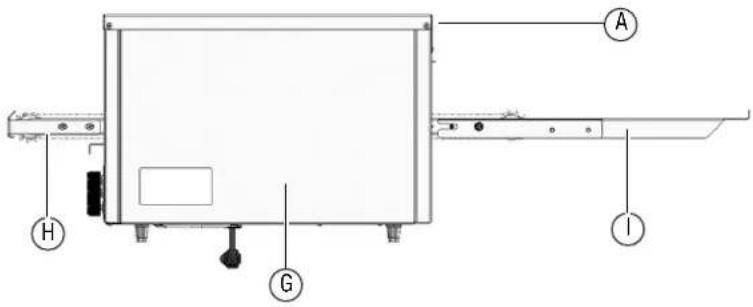
Technical diagram of a device with labeled components including A, H, G, and ISideView
AAdjustableHeatShields(frontandback)
BCrumbTray
CConveyorSpeedKnob
DOn/OffKnob

FullPower-maximumheat

Off

Standby-reduceselectricalconsumptionby75%.
ETopHeatControlKnob
FBottomHeatControlKnob
GResetButton(Referenceonly.Accessfromtheback.Seepage3.)
HConveyor(loadside)
IUnloadTray
BEFOREFIRSTUSE
- Cleantheoven. See "DailyCleaning" on page 3.
- Insertthecrumbtray.Features
OPERATION


CAUTION
BurnHazard
Donottouchtheequipmentwhileitisheatingoroperating. Hotsurfacescanburnskin.
NOTICE: The crumb tray must be installed in the oven during operation. Failure to install the crumb tray will cause the over to over heat.
AdjusttheHeatShield
Excessspaceabovetheproductwillcreateheatlossandmayreduce performance.
- Whentheequipmentiscooltothetouch, useascrewdriverto loosenthescrewontheheatshield.
- Grasptheshieldandpullitupordowntoadjusttheopeningsothetallestproductscanpassthrough.Re-tightenthescrew.
Preheat
- Plugtheovenintoagroundedelectricaloutletthatmatchestheratingonthenameplatefoundonthesideoftheoven.
NOTICE: Usingavoltageotherthanthenameplateratedvoltage willcausedamagetotheunit.Incorrectvoltage, modificationtothepowercordorelectricalcomponents candamageunitandwillvoidthewarranty.
- Rotatethepowerknobtothefullpowerposition(I).
- Settheconveyorspeedcontrolknobto7.
-
Rotatethetopandbottomheatcontrolknobstohigh.
-
Wait5minutesfortheoventopreheat.
Test
- Testthesettingsbyplacingasandwichintotheoven.Sandwiches canbeplaceddirectlyontotheconveyororonapizzascreen.
NOTICE:Pans,especiallyshinypans,andaluminumfoilwill reflectheatawayfromthesandwichandreduce browning.
- Monitorthetoasting process and adjust the temperatures and conveyorspeed to prevent the sandwich from burning.
- Evaluatetheresults.
ToastSandwiches
- Adjust the top and bottom heat control and conveyor settings as needed to achieve desired results.
- Allow time for the event to adjust tonewheat settings before replacing sandwiches onto the conveyor.
- Allow space between the sandwiches on the conveyor and time in between toasting for theoventorecover.
IfanItemBecomesStuck
- RotatethepowerknobtotheOFFposition(O)andunplugthe equipment.
- Lettheequipmentcoolcompletely. Usetongstoremovetheitem. Takecaretonotbumptheheatingelementsaboveandbelowthe conveyor.
CLEANING


WARNING
ElectricalShockHazard
Donotspraywaterorcleaningproducts.Liquidcouldcontact theelectricalcomponentsandcauseashortcircuitoran electricalshock.


CAUTION
BurnHazard
Allowequipmenttocoolbeforemovingorcleaning.
NOTICE: Donotuseabrasivematerials, scratchingcleansersor scouringpadstocleantheexterioroftheequipment. Thesecandamagethefinish.
NOTICE: Heatingelementsdonotneedtobecleaned. Crumbsand fooddebriswillburnoff. Overtimetheheatingelements maydevelopachalkyappearance, but this will not impact performance.
DailyCleaning
Contactanauthorized service agent for a professional cleaning of the components.
- Before turning off the equipment and with the conveyor rotating, watch the conveyor belt for food debris.
- Whenthefooddebrisreachesthefrontoftheconveyor, rotatethe powerknobtotheOFFposition.
- Waitforthefantostoprunning.Unplugtheequipment.
- Let the equipment cool completely.
- Whentheequipmentiscool, useabrushorscrubpadtoremovethe fooddebris.
- Tocleanthe exterior, use as soft cloth dipped in hot soapy waterto wipethe exterior and fan air intake under the equipment. If needed, wipethe fan intake area with degree asertoprevent long term build up.
- Empty and clean the crumb tray(s).
SpecialInstructionsforVentlessOperation
Cleantheadjacentsurfacesandkitchenequipmentatleasteveryother monthormorefrequentlyasneeded.
Preventative Maintenance
TROUBLESHOOTING
| ProblemMightbeCausedByCourseofAction | ||
| Ovendoesnotheatandthe conveyorbeltdoesnotmove. | Ovenisnotpluggedin.Plugintheoven. | |
| Powerknobsettingisincorrect.RotatethepowerknobtotheON(())position. | ||
| Thewallbreakermaybetripped. | 1.Inspectfortrippedbreaker.2.Resetthebreaker.3.Ifthebreakerwasnottripped,inspecttheovenforbrokenheater tubes.Forbrokentubes,contactVollrathTechnicalServices. | |
Theresetmaybetripped.Lookundertheoventoseeifanobjectispreventingthefanblades fromturning.1.Rotatetheheatcontrolknobstothelowestsetting.2.RotatethepowerknobtotheOFF(0)position.3.Unplugtheoven.4.Wait30minutesfortheoventocool.5.Removetheobject.6.Plugintheoven.7.RotatethepowerknobtotheON(())position.8.Presstheresetbutton.Seebelow. 9.IftheproblempersistscallVollrathTechnicalServices. 9.IftheproblempersistscallVollrathTechnicalServices. | ||
| Ovendoesnotheatandthe conveyorbeltdoesnotmove. | Theresetmaybetripped.Inspectthefanbladestoseeiftheyaredirty.1.Rotatetheheatcontrolknobstothelowestsetting.2.RotatethepowerknobtotheOFF(O)position.3.Unplugtheoven.4.Wait30minutesfortheovencool.5.Cleanthefanblades.6.Plugintheoven.7.RotatethepowerknobtotheON(I)position.8.Presstheresetbutton.9.IftheproblempersistscallVollrathTechnicalServices. | |
| Ovenheatsandtheconveyorbelt doesnotmove. | Theremaybeaproblemwiththemotor/speedcontrolordrivechain. | ContactVollrathTechnicalServices. |
| Toporbottomheatertubesdonot heat. | Oneormoreheatertubesmayhave burnedout. | ContactVollrathTechnicalServices. |
| Theremaybeaproblemwiththetopor bottomheatswitch. | ||
| Ovenrepeatedlyoverheats.Thecrumbtraymaynotbeinstalled.Verifythecrumbtrayisinstalled. | ||
| Thefanisnotrunning.Theremaybeaproblemwiththefanor fanswitch. | Runtheovenfor10minutes.Ifthefandoesnotrun,contact VollrathTechnicalServices. | |
| Theovenisturnedoffandthefanis running. | Normaloperation.Thefanturnsonas neededtocooltheoven. | - |
SERVICEANDREPAIR
Whenunderwarranty,repairisavailableforthisproduct.Tobegintheprocess:
- Contact Vollrath Technical Services at 1-800-309-2250. Please be ready with the item number, model number and serial number. You can find this information on the nameplate located on the side or back of the equipment. Also please provide a proof of purchase indicating the date the equipment was purchased.
- A technical services representativewill helpyoutroubleshoottheproblemoverthephone.
- If the representative determines the issue requires professional service, he or she will help you locate an authorized service center.
- Contact the authorized service center to make arrangements for the repair. Vollrath will cover the cost to repair and/or replace defective parts withintheequipmentwarrantyperiod.
WARRANTYSTATEMENTFORTHEVOLLRATHCO.L.L.C.
The Vollrath Company LLC warrants the products it manufactures or distributes against defects in materials and workmanship as specifically described in our full warranty statement. In all cases, the warranty runs from the date of the end user's original purchase date found on the receipt. Any damages from improper use, abuse, modification or damage resulting from improper packaging during return shipment for warranty repair will not be recovered under warranty.
The warranty does not apply to products purchased for personal, family or household use, and The Vollrath Company LLC does not offer a written warranty top purchasers for such uses.
WarrantiedParts: The warranty period is 2 years parts, 1 year labor.
HeaterTubes: The warranty period is 1 year, including labor. Heatertubeglass damage is not covered by this warranty.
Forcompletewarrantyinformation,productregistrationandnewproductannouncements,visitwww.vollrath.com.
| TheVollrathCompany,L.L.C.Headquarters1236North18thStreetSheboygan,Wisconsin53081-3201USAMainTel:800-624-2051or920-457-4851MainFax:800-752-5620or920-459-6573CanadaCustomerService:800-695-8560TechServices:techservicereps@vollrathco.comwww.vollrath.com | PujadasCtra.deCastanyet,132P.O.Box12117430SantaColomadeFarners(Girona)-SpainTel.+34972843201info@pujadas.es | VollrathofChinaVollrathShanghaiTradingLimitedRoom201,BuildingAXinYiPlaza1618YiShanRoadShanghai,201103China,P.R.C.Tel:+86-21-5058-9580 | VollrathdeMexicoS.deR.L.deC.V.PerifericoSurNo.7980Edificio4-ECol.SantaMariaTequepexpan45600Tlaquepaque.Jalisco|MexicoTel:(52)333-133-6767Tel:(52)333-133-6769Fax:(52)333-133-6768 |
Foursàsandwichsconvoyeurs40pouces(1m)
ModèlesJB2HetJB3H
natural_image
Modern stainless steel toaster with two side dishes, one open showing a sandwich (no text or symbols visible)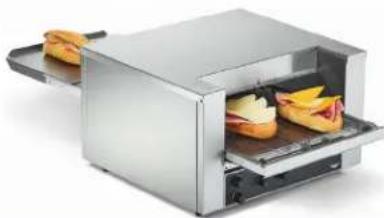
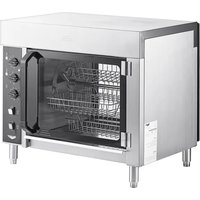
natural_image
Modern stainless steel toaster with open lid showing two slices of cheese (no text or symbols visible)| Num.d'art.Modèle | Largeurdu convoyeur | Tension | Fiche | |
| S02-12010.5 | JB2H | 1012 (26,7) | 120 | NEMA6-20P |
| S02-20810.5208 | ||||
| S02-22010.5220 | ||||
| S02-24010.5240 | ||||
| S02-23010.503 | R.-U | |||
| S02-23010.502Schuko | 220-240 | |||
| S02-20814.5 | JB3H | 1412 (36,8) | 208 | NEMA6-30PS02-2201 |
| S02-24014.5240 | ||||
| S02-23014.5 | 220-240 | Extrémitésdénudées |
4.5220
natural_image
3D diagram of a printer or printer with internal components and two arrows indicating flow direction (no text or symbols present)CARACTÉRISTIQUES
text_image
A B C D E FVueavant
text_image
Technical diagram of a device with labeled components including A, H, G, and IVuedecôté
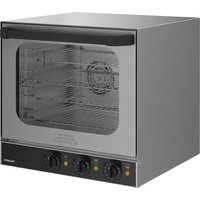
natural_image
Modern stainless steel toaster with two sandwiches inside (no text or symbols visible)
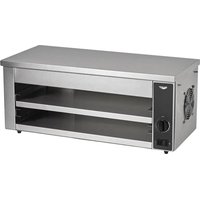
natural_image
Modern stainless steel toaster with open lid showing two slices of bananas (no text or symbols visible)| Núm.art. | Modelo | Anchodelacorreatransportadora | VoltajeEnchufe | |
| S02-12010.5 | JB2H | 1012 (26,7) | 120 | NEMA6-20P |
| S02-20810.5208 | ||||
| S02-22010.5220 | ||||
| S02-24010.5240 | ||||
| S02-23010.503 | 220-240 | ReinoUnido | ||
| S02-23010.502Schuko | ||||
| S02-20814.5 | JB3H | 1412 (36,8) | 208 | NEMA6-30P |
| S02-22014.5220 | ||||
| S02-24014.5240 | ||||
| S02-23014.5 | 220-240 | Extremosdescubiertos | ||
natural_image
3D diagram of a mechanical device with two arrows indicating assembly or process (no text or symbols present)CARACTERÍSTICAS

text_image
A B C D E FVistadelantera
text_image
Technical diagram of a device with labeled components A, H, G, and IVistalateral