
HLB 8550 SC - Oven TEKA - Free user manual and instructions
Find the device manual for free HLB 8550 SC TEKA in PDF.
| Product type | Built-in oven |
| Brand | Teka |
| Model | HLB 8550 SC |
| Capacity | Approximately 70 L |
| Power supply | 220-240 V / 50-60 Hz |
| Maximum power | Approximately 3.5 kW |
| Dimensions (W x H x D) | Standard built-in (approx. 60 x 60 x 55 cm) |
| Materials | Stainless steel, enamel |
| Control panel | Touch electronic screen, rotary selectors |
| Cooking functions | Traditional cooking, Grill, Turbo, Pizza, ECO, 100% Steam, Combined steam cooking, Regeneration, Hydroclean |
| Temperature range | 30 °C - 250 °C (depending on function) |
| Rapid preheat | Yes, automatic on some functions (can be deactivated) |
| Timer | Programming duration and end of cooking, alarm |
| Child lock | Yes, via long press on OK button |
| Cleaning | Hydroclean (low temperature steam) and automatic descaling |
| Water tank | Capacity 0.8 L, recharge during cooking possible |
| Interior lighting | Bulb, touch control |
| Door | Inner glass, hinges, assisted opening of front panel |
| Included accessories | Grid, perforated tray, pan, pan support |
| Repairability index | Not specified (estimated: 7/10) |
Frequently Asked Questions - HLB 8550 SC TEKA
User questions about HLB 8550 SC TEKA
0 question about this device. Answer the ones you know or ask your own.
Ask a new question about this device
Download the instructions for your Oven in PDF format for free! Find your manual HLB 8550 SC - TEKA and take your electronic device back in hand. On this page are published all the documents necessary for the use of your device. HLB 8550 SC by TEKA.
USER MANUAL HLB 8550 SC TEKA
natural_image
Modern kitchen interior with black cabinets and wood flooring, featuring a 'TEKA' logo in the top right corner (no other text or symbols visible)User Manual
HLB SC
ES PT EN
FR DE NL
EL
ESPAÑOL

Before using your oven for the first time, please carefully read the installation and maintenance instructions that come with it.
Depending on the model, the accessories included in your oven may vary from those shown in the pictures.
FRANÇAIS

natural_image
Technical line drawing of a structural beam with multiple support beams (no text or symbols)natural_image
3D architectural rendering of a modern building facade with diagonal metalwork and horizontal white railings (no text or symbols visible)Descalcificación
natural_image
Close-up of a metal cup pouring liquid onto a flat surface, with no visible text or symbols.natural_image
Technical line drawing of a structural beam with multiple support columns (no text or symbols)natural_image
3D architectural rendering of a building facade with diagonal metal framing and horizontal white railings (no text or symbols)Descalcificação
PROGRAMAR A FUNÇÃO TEKA HYDROCLEAN®

ATENÇÃO
natural_image
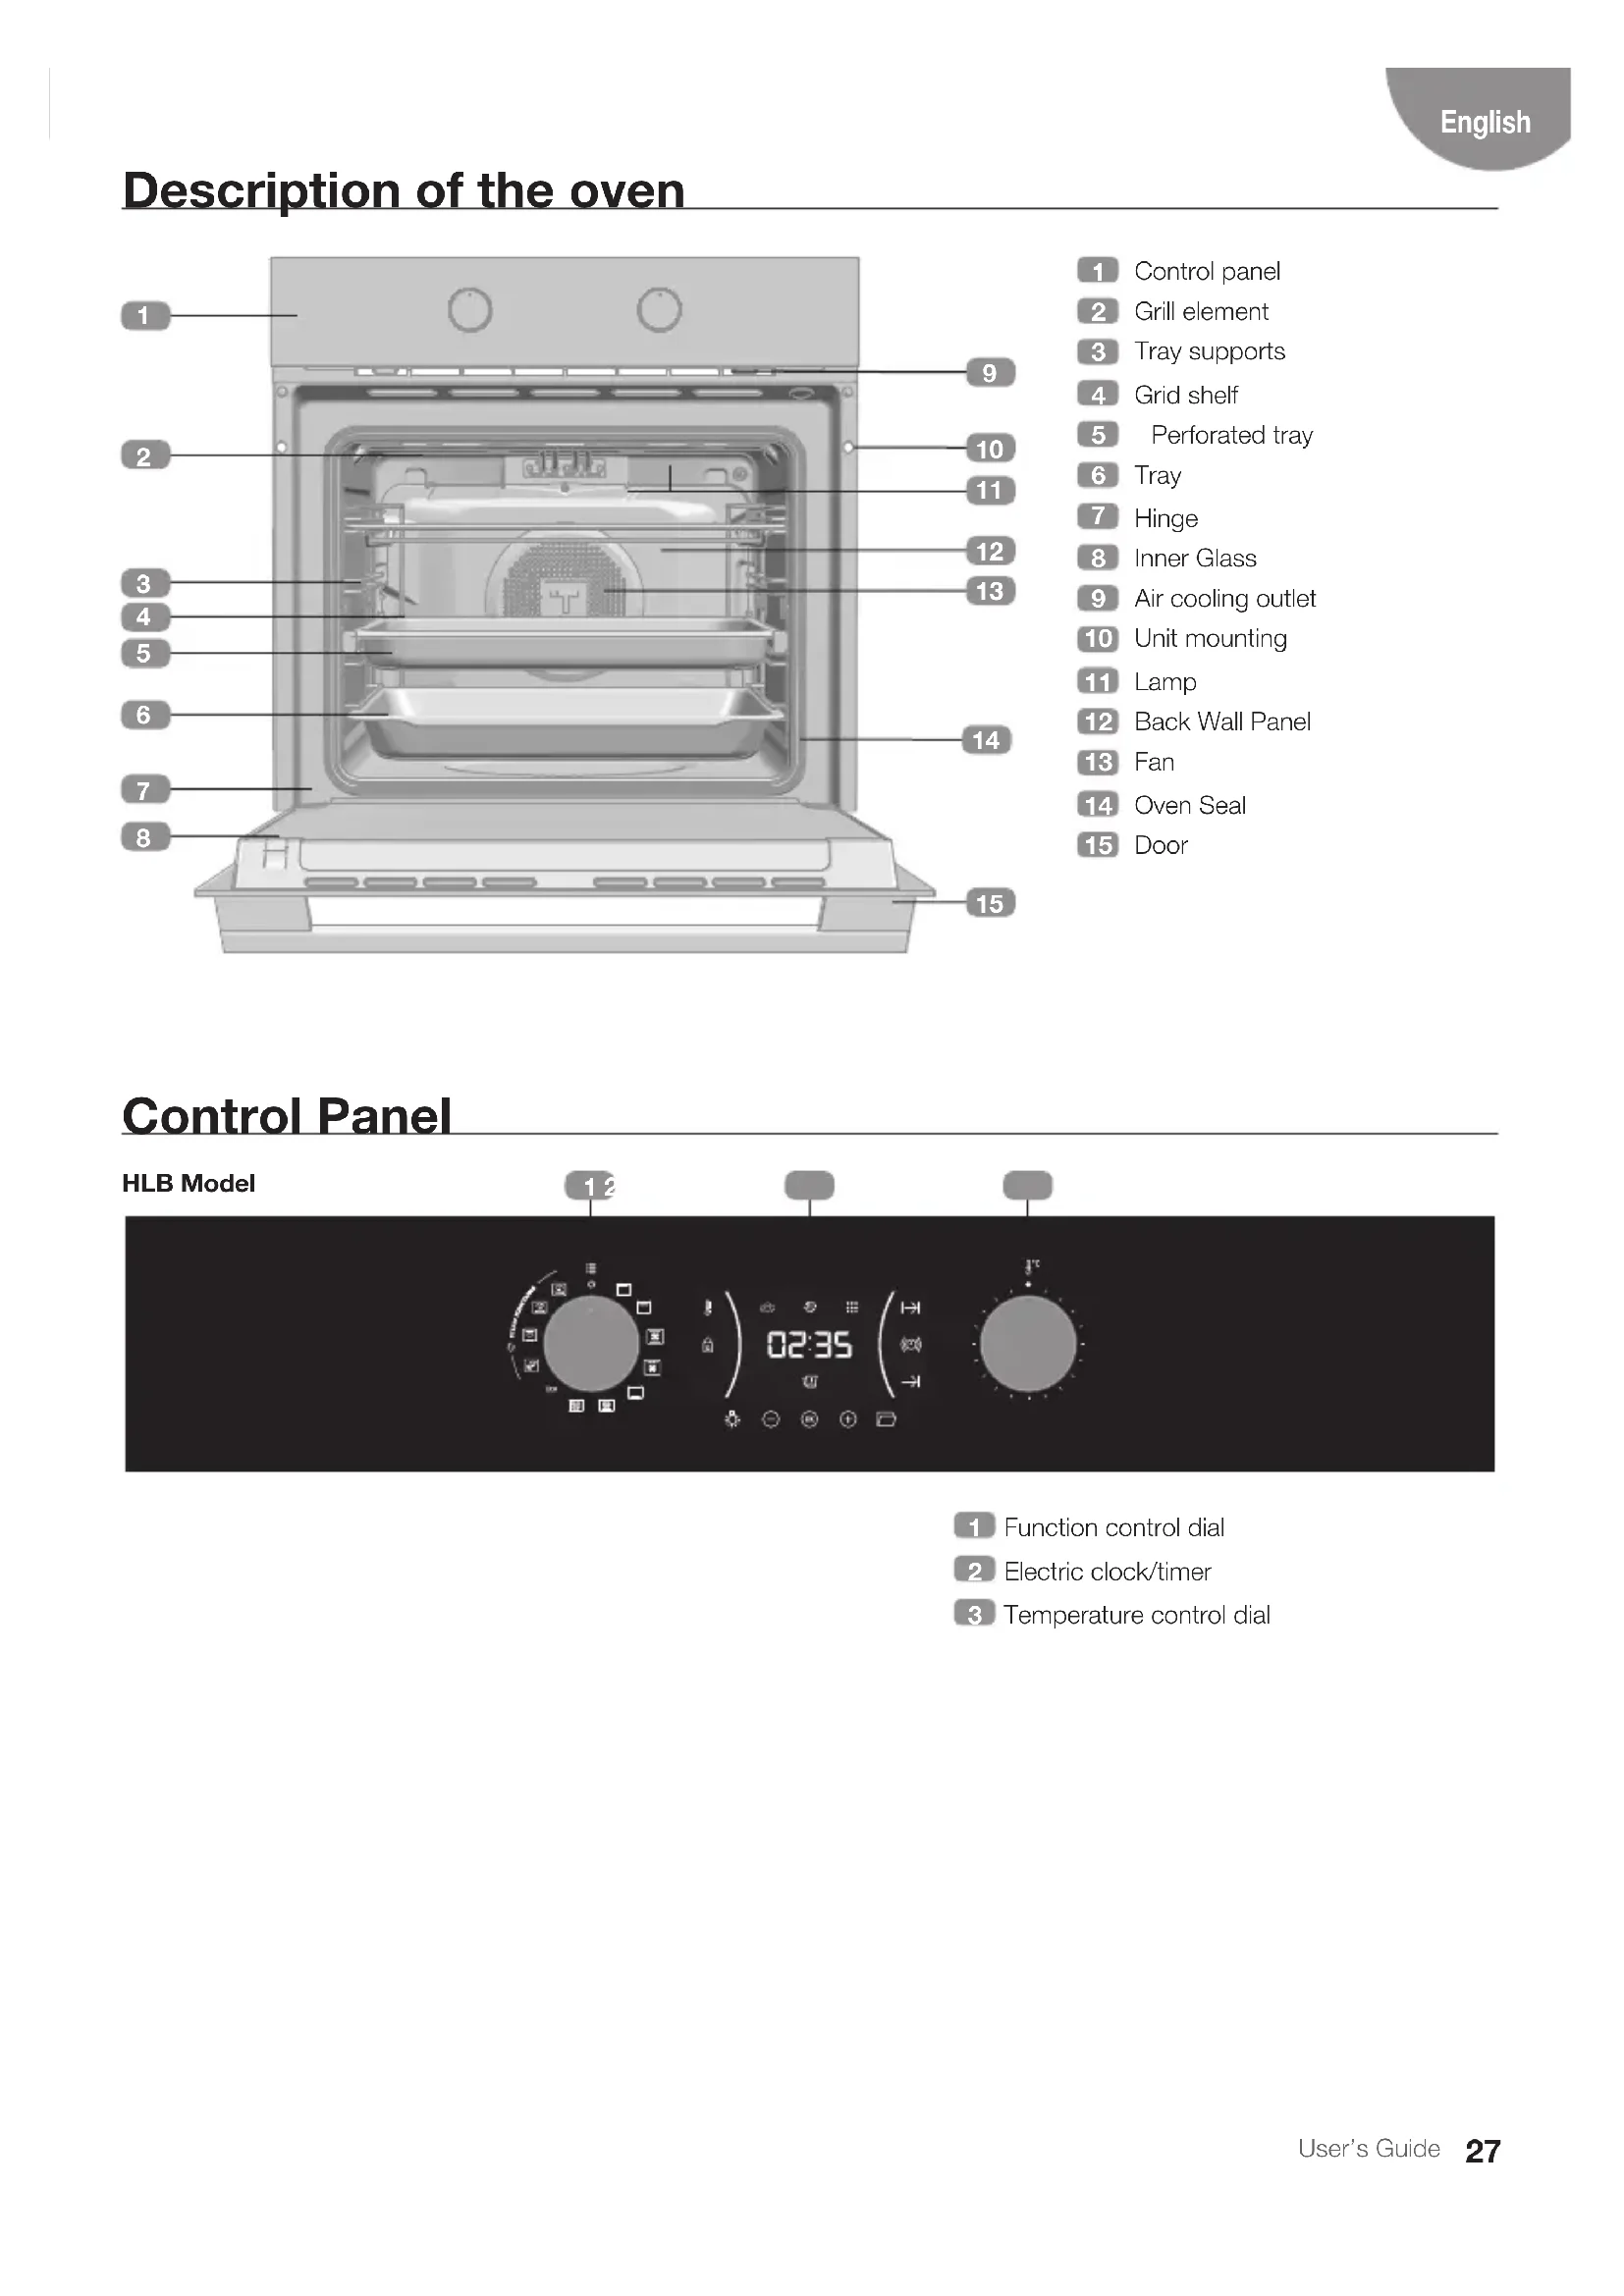
Close-up of a metal cup pouring liquid onto a flat surface in a kitchen setting (no text or symbols visible)Description of the oven

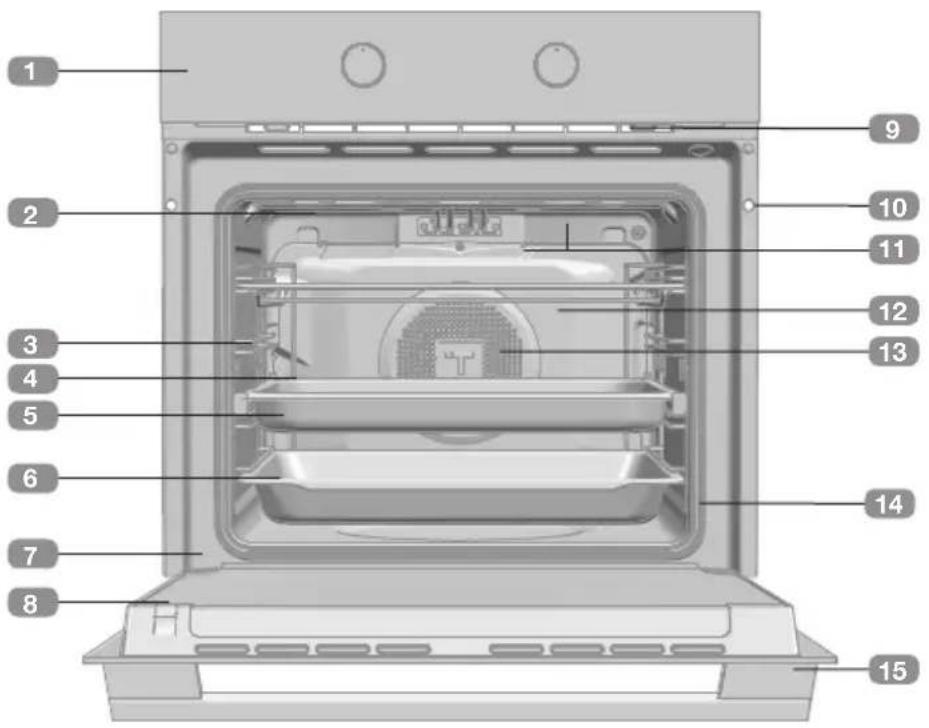
1 Control panel
2 Grill element
3 Tray supports
4 Grid shelf
5 Perforated tray
6 Tray
7 Hinge
8 Inner Glass
9 Air cooling outlet
10 Unit mounting
11 Lamp
12 Back Wall Panel
13 Fan
14 Oven Seal
15 Door
Control Panel

1 Function control dial
2 Electric clock/timer
3 Temperature control dial
Function selector symbols

HLB 8550 SC BK Model

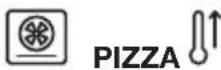
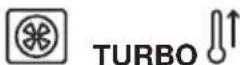
Oven functions

ORMATION
For a description of how to use each of the features, see the cooking guide that comes with your oven.
OVEN SWITCH-OFF


ECO ECO
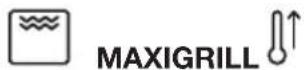
STEAM FUNCTIONS

100% STEAM
COMBINED FUNCTIONS

REGENERATION

CONVENTIONAL WITH STEAM

TURBO WITH STEAM

Settings with fast preheating
AUTOMATIC FAST PREHEATING
The functions marked with the symbol ⚪↑ include automatic fast preheating by default. To disable this default setting go to the edit menu, with the control dial in position ○, touch ⊙ or + until the message PrE is displayed on the screen.
Press OK to display the current state.
To change the state, turn the temperature dial and confirm selection with OK.
When the temperature setting is reached, a buzzer sounds.
Electronic clock/timer description

1 KEYS
-, and : Enable you to programme the electronic clock/timer functions, and ac-and cess special functions.
Switches over interior light on and off Hold down to activate the interior light for a maximum of 2h until the door is opened and closed again or this button is pressed again.
Allows the opening of the front panel.
2 SYMBOLS
Clock Settings
(©) AVISADOR: Lights up when the clock/timer is selected. Generates an acoustic signal when the time is up. The oven does not turn off at the end of the timer period. This function can also be used while the oven is cooking.
|→| and →PROGRAMMING: Light up to indicate that the oven is programmed (cooking time, stop time or total).
- |→| Cooking Time: This function allows you to programme the cooking time, after which the oven will turn off automatically.
- →| Cooking Stop Time: This setting allows you to programme the time for cooking to stop, after which the oven will turn off automatically.
- |→| and →Cooking Time and Cooking Stop Time: This setting allows you to programme the cooking time and cooking stop time. The oven switches on automatically at the set time and operates for the selected cooking time (Cooking Time). It then switches off automatically at the indicated actime (Cooking Stop Time).
CLOCK/TIMER LOCK: Indicates that the touch keys for the clock/timer are locked, preventing modifications by small children.
Other functions
HEATING: Indicates that the oven is transmitting heat to the food.
HYDROCLEAN: Lights up while the Teka Hydroclean® function is in progress.
STEAM FUNCTION: Indicates cooking with steam.
DESCALING: Remains lit throughout the descaling process.
WATER HARDNESS: Remains lit during the definition of the water hardness.
SHORTAGE OF WATER: Remains lit when the water tank needs topping up.

WARNING
The sensitivity of the touch keys adapts continually to environmental conditions. Make sure the surface of the control panel is clean and free of obstacles when plugging in the oven.
If the clock does not respond correctly when you touch the keys, unplug the oven for a few seconds and then plug it in again. Doing this causes the sensors to adjust automatically so that they will react once more to fingertip control.
SHOWROOM MODE
With the DEMO mode activated, you can control the oven without heating. This mode must be activated before setting the time on the clock if it is to be installed in an exhibition with a mains power connection.
Activating DEMO mode
Press the buttons ⏻ and OK simultaneously on the programing mode, until SHO appears on the screen.
Then, set the time on the oven.
The letters SHO are displayed for a few seconds every minute to indicate the state of the appliance.
The oven can be used as normal but it will not heat up.
To switch off the DEMO Mode, disconnect the appliance from the mains power supply.
SETTING THE TIME
- To set the time on the oven, the function and temperature dials must be in the ○ position.
- When you plug in the oven, you will see the clock flashing 12:00.
- Touch ⊙ or ⊕ to adjust the hours and then the minutes. You will hear a double beep confirming the time is set.
- If you wish to modify the time, touch ☑ or ☑ until the time starts flashing. Touch OK and and follow the instructions in the previous point.

NOTE
The clock light has a night mode so the display light will dim between 00:00 and 6:00 hours.

WARNING
In the event of a power failure, your electronic clock/timer settings will be erased.
If this happens, turn the function and temperature dials to the ○ position.
The indication 12:00 will show, and you will then be able to set the time as described above.
If the oven door was locked before the power cut, the locked symbol will show until it is unlocked.
This may take several minutes, depending on the temperature inside the oven, and during this time you cannot reset the time.
Once the door is unlocked, you can set the time as described above.
WATER HARDNESS
- After setting the clock, you need to set the water hardness.
- The Water Hardness option appears on the display.
• To change the option rotate the right control. - Press OK to confirm the option.
- To modify the water hardness, touch⊖ or + until the function symbol flashes.
- Press ^OK to confirm the option.
- Rotate the right control to select the desired water hardness.
- Press OK to confirm.
| Type | Water hardness | |||
| Ca + Mg (ppm) | English deg. [°eH] | French deg. [°fH] | German deg. [°dH] | |
| SOFT | 0 to 150 | 0 to 11 | 0 to 15 | 0 to 8 |
| MED | 151 to 350 | 12 to 25 | 16 to 35 | 9 to 20 |
| HARD | 501 to 500 | 26 to 35 | 36 to 50 | 21 to 28 |
Oven use
MANUAL OPERATION
- After setting the clock, the oven is for use. On turning the control dial, the pre-0 defined temperature is shown for each function. Turn the temperature dial to select a new temperature and press OK to confirm selection.

INFORMATION
While cooking, when the selector switch is turned, the clock display will show the temperature and it is possible to change the oven cooking temperature by turning the temperature dial again and pressing OK to confirm.
- You will notice that the 🔊 symbol lights up during cooking to indicate that heat is being

WARNING
In the event of power failure, the water hardness settings will be erased. Reset it and program again after power restore.
transmitted to the food. This symbol disappears when the selected temperature has been reached, the control dial, the pre-
- Set the controls too to turn off the oven.

INFORMATION
When you start cooking, your oven will show the time the oven has been cooking.

INFORMATION
If you have selected the steam cooking function, remember to fill the water tank before starting to cook.
The 🔗 symbol remains lit on the clock display throughout the cooking process.
Programming the Buzzer
- Touch ☑ or ⓣ until the symbol on the display starts flashing, then press Ⓞ. The indication '00:00' will appear on the display.
- Select the time after which you want the alarm to sound by pressing ⊙ or ⊕You will hear 2 beeps to confirm that the time has been set and the clock will start counting down from the selected time. The (○) symbol will flash slowly.
- Once the time has expired, an acoustic signal will sound for 90 seconds and the (②) symbol will flash quickly.

NOTE
With the Buzzer function, the oven will not turn off when the time expires.
- Touch any key to stop the alarm. The (○) symbol will then disappear.
If you wish to modify the time on the buzzer, repeat the steps shown. Upon entering the timer control, the time currently remaining will appear, which you will be able to adjust.

NOTE
With the Buzzer function, the remaining time will show permanently on the display. With this programmed function, it is not possible to view the time or the total programmed cooking time.
Programming Cooking Time
- Touch ⊙ or ⓣ until the symbol on the display starts flashing, then press Ⓞ. The indication '00:00' will appear on the display.
- Select the time after which you want the alarm to sound by pressing ⊖ or ⊕You will hear 2 beeps to confirm that the time has been set and the clock will start counting
down from the selected time. The | | symbol will flash slowly.
- Select a function and a cooking temperature using the oven commands.
- Once the cooking time is up, the oven will turn off, an alarm will sound and the I I symbol will flash quickly.
- Touch any key to stop the alarm and turn off the symbol. The oven will switch on again.
- Set the controls to the ○ position to turn off the oven.
You can change the remaining cooking time at any time by touching ⏻ or Ⓐ until the I→I symbol starts to flash quickly. Now press Ⓤ to change the time.

NOTE
With the Cooking Time function, the remaining time will show permanently on the display. You cannot see the current time on the display when this function is set.
Programming the Cooking Stop Time
- Touch ⊙ or ⓣ until the symbol on the display starts to flash and press OK You will see the current time on the timer display.
- Select the time after which you want the alarm to sound by pressing ⊖ or ⊕You will hear 2 beeps to confirm that the time has been set and the clock will start counting down from the selected time. The symbol will flash slowly.
- Select a cooking function and temperature.
- When the cycle is finished, the oven will turn itself off, a buzzer will sound and symbol will flash quickly.
- Touch any sensor to stop the alarm and to turn off the 1, symbol. The oven will switch on again.
- Set the controls to the ○ position to turn off the oven.
You can change the remaining cooking time at any time by touching ⏻ or Ⓐ until the → symbol starts to flash quickly. Now press OK to change the time.
Programming Cooking Time and Cooking Stop Time
-
Touch ⊙ or ⓣ until the symbol on the display starts flashing, then press OK. The indication '00:00' will appear on the display.
-
Select the cooking time by touching ⊙ or ⊕. Next, a double beep will sound, the remaining time will appear on the display and the symbol will flash slowly.
-
Touch ⊙ or ⓣ until the symbol on the display starts flashing, then press OK. You will see the expected completion time on the timer display.
-
Select the cooking end time by touching ⊖ or ⊕. Next, a double beep will sound and the current time will be displayed on the display.
-
Select a cooking function and temperature. The oven will remain disconnected with the and symbols lit up. The oven is now programmed.
-
When it is time to start cooking, the oven will turn on and will operate for the programmed cooking time.
-
While cooking, the cooking time remaining will be displayed and the symbol will flash slowly.
-
When the cooking time is up, the oven will turn off, a buzzer will sound, and the I I symbol will flash quickly.
- Touch any sensor to stop the buzzer and turn off the symbol. The oven will switch on again.
- Set the controls to the ○ position to turn off the oven.
You can change the remaining cooking time at any time by touching ⏻ or Ⓗ until the ⪰ symbol starts to flash quickly. Now press ⓄK to change the time.
SAFETY CHILD LOCK
This function can be selected at any time while using the oven.
To activate the function, touch and hold OK key for several seconds until you hear a beep and the symbol appears on the display. The clock/timer is locked.
If the oven is off and you activate the child safety function, the oven will not work even if a cooking function is selected.
If this function is activated while you are cooking, it will only lock the electronic clock/timer settings.
To disable the function, press OK key for seven- for several seconds until you hear a beep.
Filling the water tank
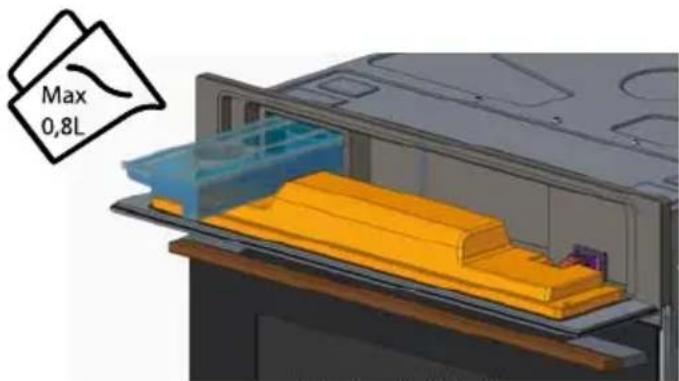
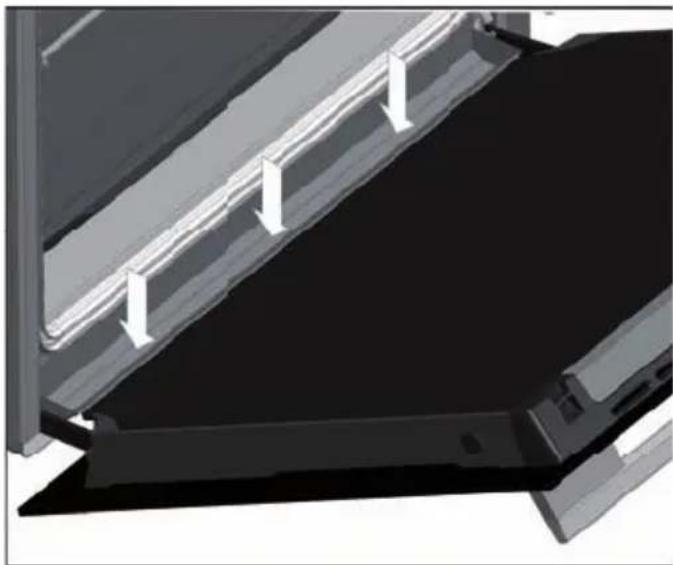
OPENING THE FRONT PANEL
- Press the ☐ key for a few seconds.
- The front panel slightly opens ( ≈15^ ). This process is slow.
- Complete the panel opening manually.

NOTE
The panel can be opened during the oven operation.
FILLING THE WATER TANK
All functions require the water tank to be full.
Fill the water tank up to the "MAX" mark with cold, fresh drinking water and introduce it into the slot located behind the front panel (maximum 0,8L).

NOTE
Do not use sterilized or distilled water for cooking with the steam oven. The minerals in the water are essential for the cooking process to work.

NOTE
When filling the water tank, the top section of the tank does NOT fully seal. Overfilling the tank will potentially cause the tank to leak when moved.
REFILLING THE WATER
The contents of the water tank normally suffice for one cooking session of 50-60 minutes.
If, however, the water tank needs to be refilled, the Water refill message shows.
Only fill the water tank up to a maximum of 0,5l to ensure that the water does not overflow when it is pumped back to the water tank. RISK OF OVERFLOW.
EMPTYING THE WATER TANK
When the appliance is switched off, the residual water is pumped back into the water tank.

WARNING
The water in the tank may be hot. Danger of burns!
Depending on the temperature setting and length of the steam cooking functions, this can take up to 1 hour to complete. Always wait until the 🚗 appear on the display before removing the water tank, attempting to run a second steam function or switching off the power to the steam oven. If interrupted before finishing, the pumping will reset, which can cause the internal water pump to run dry and make a loud vibrating noise while it runs. Over time, this can cause damage to the pump.
After the water is pumped back to the water tank, the display will show symbol requiring the following actions:
- Remove and empty the water tank.
- Dry the water tank and introduce it back into the slot located above the cavity. Clean and dry the cooking space.
- Leave the appliance door open so that the cooking space can cool down and dry completely.

INFORMATION
It is advisable to remove the water tank and empty it after a cooking cycle. This prevents the formation of bacteria and limestone inside the appliance.
If the water tank has not been removed from the oven and a new cooking cycle is startedl.
Steam operation

WARNING
When opening the door during or upon completion of the cooking cycle, be careful of the flow of heat and/or steam coming out of the cooking chamber. Step back or to the side to avoid burns. Keep hands on the oven door until the door is fully opened to avoid being scalded.
At this point:
• The steam generation is paused.
- The cavity walls and the water tank are still very hot. Danger of burning!
- The timer stops and the display shows the remaining operating time (if this has been set).
END OF A COOKING CYCLE
At the end of the programmed cooking time, you will hear three beeps and the display will show the word "END", the oven starts the steam-reduction function.
This function gradually releases the steam from the cavity, so that there is less steam to flow out of the oven when the appliance door is opened.
The cooling fan can continue to run for a certain length of time after the appliance has been switched off. This is a normal function that is meant to reduce the temperature inside the oven.
When the display shows the DEPO symbol, this means that the water was pumped and that the water tank can be removed.
Remove the water tank and dry it thoroughly. Let the cooking space cool down for a moment and then clean and dry it with a cloth. The door should be left open for some time so that the appliance can dry completely.
STEAM FLOW
It is normal to have an intermittent steam flow, coming out from the oven front.
This is especially noticeable in winter time or in high moisture environments.
natural_image
Technical line drawing of a structural beam with multiple support beams (no text or symbols)RESIDUAL WATER IN THE OVEN
To reduce the residual water inside the oven, we recommend inserting a tray in the bottom position (position 1). The remaining moisture can be easily wiped off with a cloth or cleaning wipe. The water that condenses on the door collects in the lower part of the front of the oven. Excessive accumulation of liquid could overflow and cause damage to the kitchen unit. Remember to dry this area after cooking. You can access this part with the door open.
natural_image
3D architectural rendering of a building facade with diagonal metalwork and horizontal white lines (no text or symbols)Descale
DESCALING PROCEDURE
-
Touch ⏻ or Ⓤ until the descaling symbol ⚙ flashes on the screen.
-
Press the OK to start the descaling function.
-
When the display shows "0,5", remove the water tank.
-
Pour 0.5 liters of an adequate descaling solution into the water tank and put the water tank back.
-
Press OK. The Descale cycle is initiated and takes about 30 minutes.
-
The descaling process is silent and during this process, the display shows the percentage of the process and the descaling symbol 📄.
-
When the display shows 0.5 and the oven emits a beep, remove and empty the water tank.
-
Fill the water tank with 0,5 liters of fresh water and put the water tank back.
-
Close the panel The first rinsing cycle starts.
-
When the display shows again and the oven emits a new beep, remove and empty the water tank.
- Fill the water tank with 0.5l of cold water and put the water tank back.
- Close the panel. The second rinsing cycle starts.
- When the rinsing cycle has finished the display shows the symbol and emits a beep, until the water tank is removed.
- Remove, empty and dry the water tank.
CANCEL DESCALING
It is possible to cancel the descaling process before removing the water tank for the first time (point 4).
- Press ⊖ and STOP is displayed.
- Confirm with OK.
Teka Hydroclean® function
This function makes it easy to remove grease and other food debris that may have stuck to the sides of the oven.
For easier cleaning, do not allow dirt to accumulate. Clean the oven frequently.
PROGRAMMING THE TEKA HYDROCLEAN® FUNCTION

WARNING
Do not pour water into a hot oven as this can damage the enamel of the oven.
Always run the cycle on a cold oven. The result could be affected and the varnish damaged if it is run when the oven is too hot.
First remove the trays and all accessories from the oven interior, including the tray supports and telescopic guide rails.
To do this, follow the instructions in the installation and maintenance guide accompanying the oven.
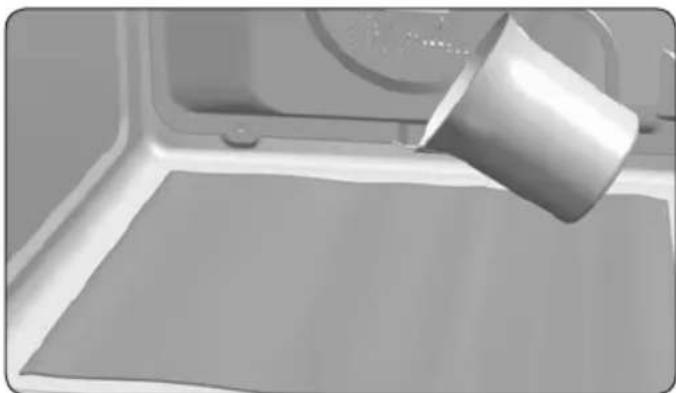
- With the oven cold, spread a cloth out on the bottom of the oven.
natural_image
Close-up of a metallic cup pouring liquid onto a flat surface, with no visible text or symbols.- Gently pour 200 ml of water into the bottom of the oven cavity.

INFORMATION
For best results, add a teaspoon of mild washing up detergent to the glass of water before pouring onto the cloth.
-
The control dial in position ○, touch or + until the message HYCL is displayed on screen.
-
Press OK to start the Hydroclean@ function.
-
You will hear a beep indicating that the Teka Hydroclean® cycle has started. The symbol will flash slowly and the time remaining to complete the cycle will appear on the display.

IMPORTANT
The duration of this cycle cannot be changed. To stop the cycle before it is finished, touch ⏻ and the word STOP is displayed on screen. Press OK and the function will stop..
- When the cycle is finished, the oven will turn itself off, an alarm will sound and the symbol will flash quickly.

IMPORTANT
Do not open the oven door until the Hydroclean® function is complete.
The cooling cycle is necessary for the function to work properly.
-
Touch any sensor with your fingertip to stop the alarm and turn off the 🔒 symbol.
-
Any traces of dirt and excess water can now be removed from the oven with the damp cloth.
The Hydroclean ^® function takes place at a low temperature. However, cooling times can vary depending on the room temperature.

WARNING
Before touching the inside surface of the oven, make sure that it has cooled properly.
If a deeper clean is required after using the Hydroclean® function, use neutral detergents and non-abrasive sponges.
Oven messages and warnings
| Display Descriptiún | |
| Descaling | |
| SOFT | Soft water. |
| MED | Medium water. |
| HARD | Hard water. |
 C AL C AL | Appliance must be descaled. |
| Flashing – descaling starts. | |
| 0,5L | Feed 0,5l descaling solution/fresh water into the water tank. |
| 0,8L | Feed 0,8l cold water into the water tank for rinsing. |
| Water tank | |
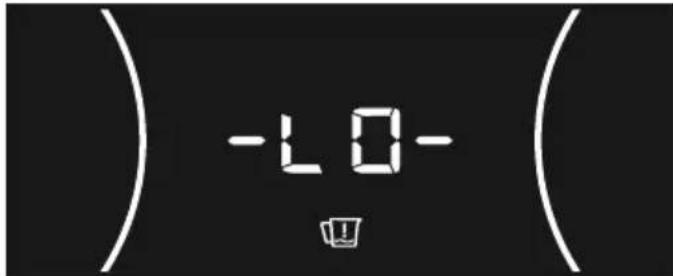
 -LO- -LO- | Tank is empty, please fill with 0,5l of water. |
| dEPO | The water tank must be removed, emptied and reinserted. |
| rES | Indication that water tank is missing. |
| Other messages | |
| SHO | Showroom mode. |
| END | End of function. |
| PrE | Allows the rapid preheating of the conventional functions to be switched on or off. |
| HYCL | Allows the Hydroclean function to be activated. |
Description du four
FONCTIONNEMENT MANUEL
natural_image
Technical line drawing of a structural beam with multiple support columns (no text or symbols)EAU RESIDUELLE DANS LE FOUR
natural_image
3D architectural rendering of a building facade with diagonal metalwork and vertical supports (no text or symbols visible)Détartrage
PROCÉDURE DE DÉTARTRAGE
natural_image
Close-up of a metal cup pouring liquid onto a flat surface in a kitchen setting (no text or symbols visible)natural_image
Technical line drawing of a structural beam with multiple support columns (no text or symbols)RESTWASSERMENGE IM GARRAUM
natural_image
3D architectural rendering of a modern building facade with diagonal metal framing and horizontal white railings (no text or symbols visible)Entkalken
ENTKALKUNGSVORGANG
natural_image
Close-up of a metallic cup pouring liquid into a white rectangular container (no text or symbols visible)STOOMFUNCTIES

100% STOOM
GECOMBINEERDE FUNCTIES

REGENERATIE

CONVENTIONEEL MET STOOM

TURBO MET STOOM
