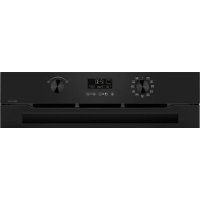
FE210WN1 - Electric oven BRANDT - Free user manual and instructions
Find the device manual for free FE210WN1 BRANDT in PDF.

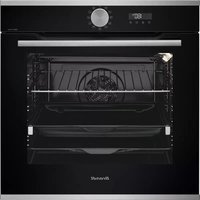
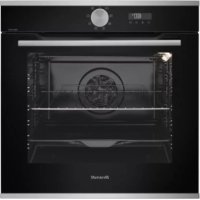
| Product type | Built-in electric oven |
| Brand | BRANDT |
| Model | FE210WN1 |
| Dimensions (H x W x D) | 595 x 595 x 568 mm |
| Interior volume | 66 L |
| Net weight | 30 kg |
| Power supply | 230 V / 50 Hz, 3000 W |
| Energy class | A |
| Conventional consumption | 0.85 kWh |
| Fan-assisted consumption | 0.65 kWh |
| Cooking functions | Fan-assisted, Grill, Bottom heat, Top heat, Defrost, Light |
| Cleaning type | Pyrolytic |
| Safety | Door lock, Automatic shut-off |
| Repairability index | 7.2 / 10 |
| Included accessories | Rack, drip tray, rotisserie spit |
| Warranty | 2 years parts and labor |
Frequently Asked Questions - FE210WN1 BRANDT
User questions about FE210WN1 BRANDT
0 question about this device. Answer the ones you know or ask your own.
Ask a new question about this device
Download the instructions for your Electric oven in PDF format for free! Find your manual FE210WN1 - BRANDT and take your electronic device back in hand. On this page are published all the documents necessary for the use of your device. FE210WN1 by BRANDT.
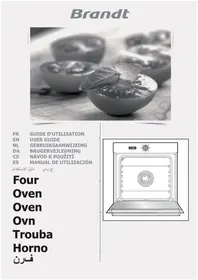
USER MANUAL FE210WN1 BRANDT
Sikker ovnrist, der/DD
BRANDT APPLIANCES SAS
BRANDT APPLIANCES SAS
7 rue Henri Becquerel 92500 RUEL MALMAISON

N° SER.
REF.
TYPE
CONS.N°214
99625352.qxd 14/10/02 11:47 Page 29
Innhold
ndsoppvarming for retten settes inn i
es i 5 minute.
dype langpannen pà nederste trinn.
Anbefalinger
BRANDT APPLIANCES SAS
Safety recommendations P.48
Child safety P.48
How to install your oven
Electrical connections P.49-50
Dimensions for installation use P.51
Looking after your oven P.52
Changing a bulb P.53
How to use your oven
How to cook straightaway P.53
Cooking methods P.54-55
Troubleshooting P.56
Throughout this manual,

indicates safety recommendations,

indicates advice to help you make the best use of your oven
Introduction
Dear Customer,
Thank you for buying a BRANDT oven.
Our design staff have produced a new generation of kitchen equipment, to make everyday cooking a pleasure.
You will find that the clean lines and modern look of your Brandt oven blends in perfectly with your kitchen décor. It is easy to use and performs to a high standard.
Brandt also makes a range of products that will enhance your kitchen such as hobs, extractor hoods, built-in dishwashers and refrigerators. There are models to complement your new Brandt oven.
Of course, we make every effort to ensure that our products meet all your requirements, and our Customer Relations department is at your disposal, to answer all your questions and to listen to all your suggestions (see back cover of manual).
Brandt has always been a leader in the development of new products, thus enhancing the quality of everyday life by providing increasingly efficient products, that are easy to use, respect the environment, and are attractive and reliable.
The BRANDT name.
Your oven
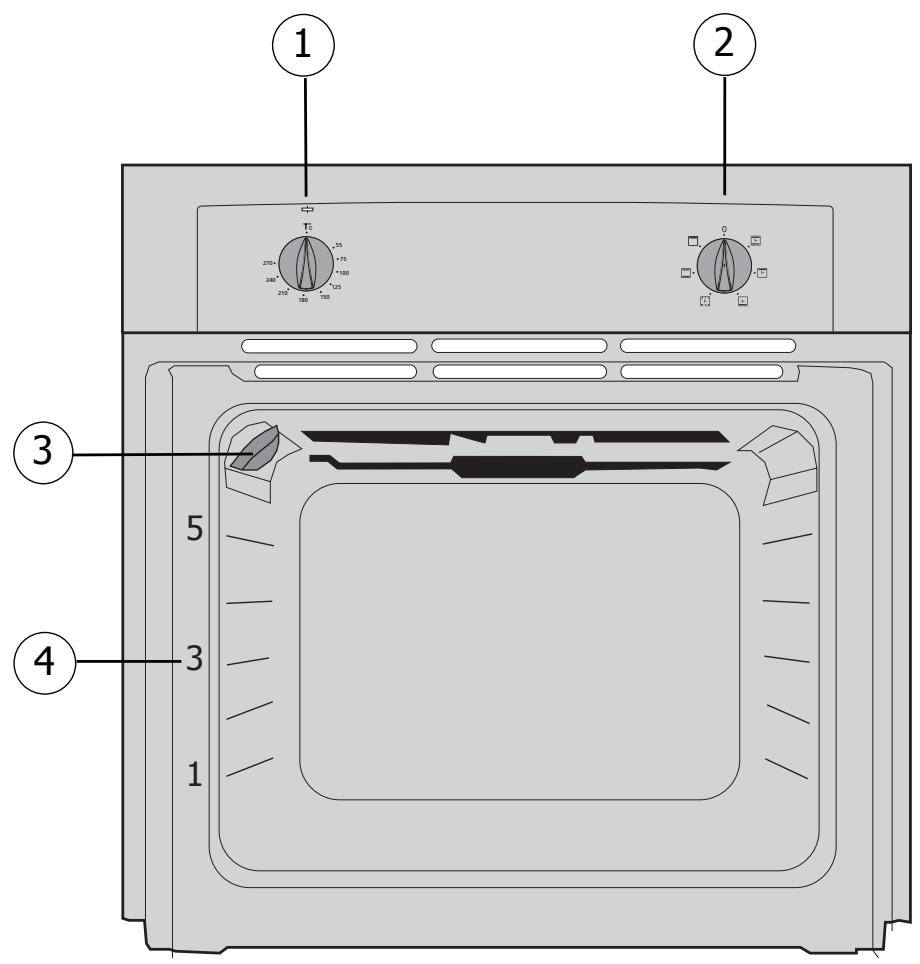
OVEN FEATURES
1 Temperature control
3 Light
2 Feature selector
4 Rail positions
Accessories
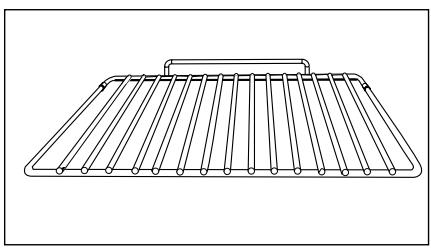
Anti-tip safety shelf
Food can either be placed on the shelf in a dish or cake tin for cooking or browning, or may be placed directly on the shelf itself.
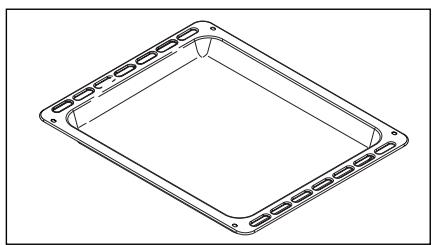
Multi-purpose baking tray
This tray has a raised edge and can be used for baking pastries (choux buns, meringues, small cakes, flaky pasties, etc).
Joints should not be cooked in this tray
uncovered because fat could spit all over the oven sides.
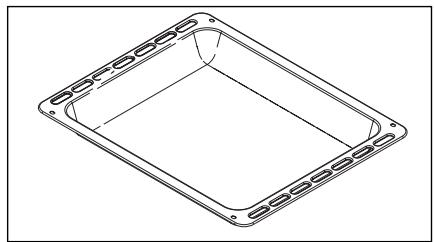
Multi-purpose baking tray (grill pan)
GB
This is used to collect the juices and fat when cooking with the full grill or with a pulsed grill. It can be used to cook dishes of a suitable size (for instance a chicken surrounded by vegetables),
at a moderate temperature. Place in on the rails beneath the grill to catch the drips from grilled food. You can also use it as a bain-marie and half fill it with water.

Safety recommendations
Please read these instructions before installing and using your oven. The oven has been designed for domestic use only for cooking food. No asbestos has been used in its construction.
USING FOR THE FIRST TIME:
Before you use your oven for the first time, leave it empty and, with the door closed, turn it on to maximum temperature and let it heat up for 15 minutes. This "runs the oven in". During this time there may be some smell from the mineral wool that insulates the oven and there could be some smoke. This is perfectly normal.
NORMALUSE:
- Always close the door properly. The oven is fitted with a seal designed to work with a closed door.
- Never lean or let anyone sit on the oven door when it is open.
-
The oven parts and accessories can become hot when the door is left partially open and the grill on. Always keep children at a safe distance.
-
When the oven is on it will get hot. Take care not to touch the heating elements inside the oven.
-
Always protect your hands with oven gloves or something similar when removing food, accessories or containers from the oven.
- Do not line your oven with kitchen foil. The metal will increase the heat produced and could ruin the food and damage the enamel.
- Never use a spray or a high-pressure washer to clean the oven.
- During self-cleaning, surfaces can become hotter than in normal use. Children must be kept at a distance.
Child safety
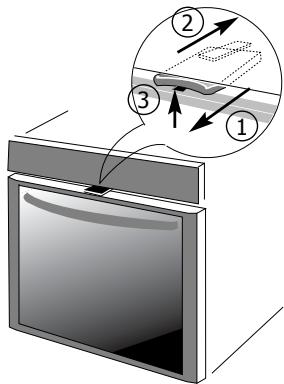
SAFETY MODE
① To activate safety mode: Pull the catch towards you.
(2) To deactivate safety mode: Push the catch back.
USING IN SAFETY MODE
③When the security catch is in use: open the door and lift the catch at the same time
When the safety mode is not activated: the door opens normally.
How to install your oven
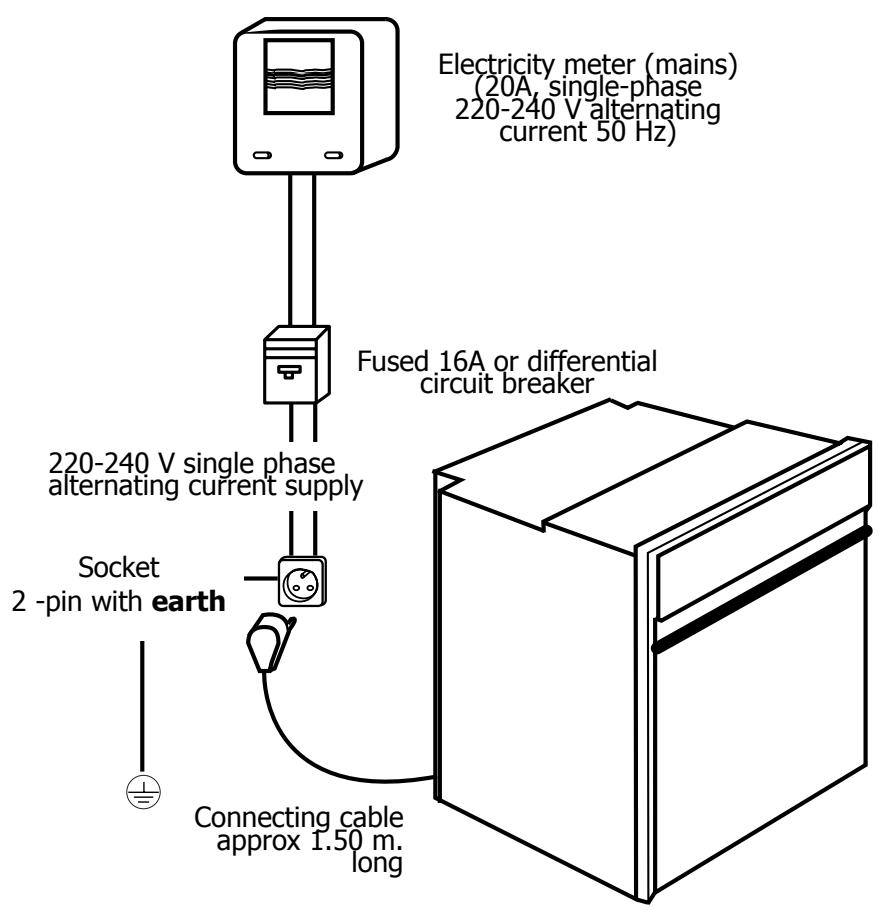
Electrical connections
- Before connecting your oven, make sure you are using the correct size cable. The cross-section should be the same as the cable connected to the oven. Use a 16-amp fuse.
How to insta
The electrical connections are made before the oven is installed in its housing.
-
The oven must be connected using an approved 3-core cable (live, neutral and earth ± 一 ) with 1.5 ~mm square conductors. This should be connected via a 3- pin-socket (live, neutral, and earth ± 一 to the main supply which should be should be a 220 - 240 ~V, alternating single-phase current. If the oven is not connected using a plug and socket, it must be connected to a multi-pole switch with a minimum gap of 3 ~mm between contacts. The earth wire (green and yellow) should be connected to the terminal marked with the earth symbol ± 一 on the appliance and to the earth in the switch.
-
Where the oven is connected using a separate plug and socket this must be accessible after the oven has been installed.
- The neutral wire (blue) of the oven must be connected to the neutral in the main supply.
Fitting new wiring and/or changing cables.
- The supply cable (H05 RR-F, H05 RN-F or H05 W-F) must be long enough to allow the oven to rest on the floor in front of its housing.
With the oven sitting on the floor and disconnected: - Open the trapdoor at the bottom right hand side at the back of the oven by removing the 2 screws and swinging the door away.
- Remove the sheath from each wire in the new cable up to 12mm .
- Twist the ends carefully together.
- Unscrew the terminal screws and remove the wires that need changing.
- Pass the new cable through the wire clamp to the right of the terminals.
- Connect the wires up in accordance with the markings on the terminals.
- Make sure all wires are trapped under the screws.
- The brown wire (live) going to terminal marked L.
- The green and yellow wire (earth) going to the one marked 12 .
- The blue wire (neutral) going to the terminal marked N.
- Tighten the screws and check, by tugging on each wire, that they are firmly connected.
- Tighten the clamp to hold the cable.
- Close the trapdoor using the two screws.

We cannot accept any liability in the event of an accident resulting from non-existent or faulty earthing.
all your oven
Dimensions for installation use

The oven may be housed either under a work surface or built into a column that is open* or closed with a suitable opening.
Your oven works at its best and produces excellent results when cooking and cleaning itself, if its air circulation is not compromised:
- The oven must be centred in the unit so that there is a minimum distance of 5 mm between it and the surrounding unit.
- The housing unit or its outer surface must be capable of withstanding heat.
- To ensure the oven rests firmly in the housing, screw it to the housing unit using the holes on the side uprights provided (see diagram).
To do this:
1) Remove the rubber stoppers masking the fixing holes.
2) To prevent the housing unit splintering, drill two holes 3mm in diameter in the wall of the housing unit opposite the fixing holes.
3) Attach the oven using the two screws.
4) Conceal the hole using the rubber stoppers. (These also help to cushion the closing of the oven door).
(*) If the housing unit is open at the back, the gap must not be more than 70 mm.

If you are unsure about fitting this oven yourself please use a qualified electrician.
Looking after your oven
Cleaning the inside
Before cleaning your oven let it cool down and make sure all switches are off.
General advice:
- Never spray water into the oven.
- Never use scouring pastes or scourers on the oven.
POLISHED METAL SURFACES
Only used materials recommended for polished metal.
GLASS IN OVEN DOOR
If the food cooked produces lots of splashes, wipe the glass on the inside with soapy water.
Your oven is easily cleaned. Here is a guide to help you:
| Type of marks | What to use | Treatment |
| Lightly soiled | Soak the area well with warm water | Washing-up sponge |
| Built up deposits | Leave for 30 mins in a warm oven or overnight in a cold one | Aerosol specially designed for ovens. Follow advice on the container |
| Powder | Abrasive sponge | Special sponge for delicate items |

Always check that the oven is off before you clean the inside.
Changing a bulb
- The light bulb is housed in the ceiling of your oven.
Warning! Switch off the power at the main switch before attempting to change the bulb. Leave the oven to cool if necessary.
a) Unscrew the protective shade (see diagram).
b) Unscrew the bulb in the same direction. The bulb used is a:
- 15 W
- 220-240 V
- 300^
- E 14 screw-fitting bulb
c) Change the bulb, replace the shade and switch your oven back on at the mains.
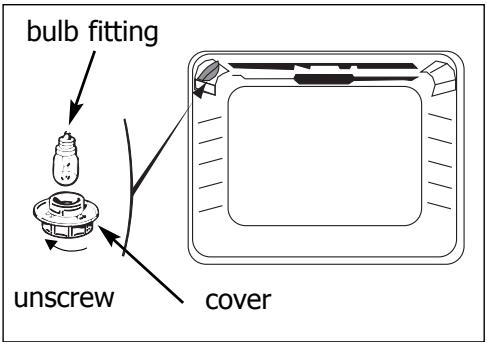

It is easier to unscrew the shade and bulb if you wear a rubber glove.
How to use your oven
How to cook straightaway
The timer display only shows the time of day. It should not be blinking.
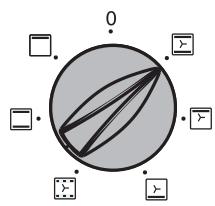
- Choose how you want to cook your food: Turn the dial until it is indicating your choice. The example chosen is " > ".
- Choose the temperature you want to cook at: Turn the dial (thermostat) to the temperature recommended for the food you are cooking. The example shows 210^ .
- After this, the oven heats up, the thermostat light glows on and off as the oven temperature adjusts.


After cooking, the fan continues to operate for a while in order to cool the elements right down.
Cooking
Symbol

Fan oven
A heater element at the back of the oven and the fan help cook the food.

No pre-heating relatively short on several sh

Pulsed grill
Cooking is done alternately by the top element and by the fan.

No need to pr succulent join appearanceLa placing direct multi-purpose catch the juic

Pulsed bottom oven
The bottom element heats up and the fan move the hot air around to cook the food.

Food is cookPlace the wire

Warming oven
Upper element at a control temperature, warm air is circulated.

Stays warm

Conventional oven
Food is cooked by a top and bottom element. No fan.

Pre-heating n temperature.

Grill
Only the top element heats up. The fan is not used.

Warm up for
▶ Slide the grill
methods
Description
ng necessary except for food with a.
ort cooking time (e.g. small biscuits
elves).
Recommendations
Recommended to prevent meat drying out, and for cooking vegetables and fish and food placed on up to 3 shelves.
re-heat.Suitable for poultry andnts that have a spit-roastedarge joints can be accommodated bytly on the shelf and using thee baking tray on the bottom rail toces.
Recommended for all poultry and roast joints. For sealing and
thoroughly cooking gigot lamb chops, and sides of beef. Also good for cooking fish in breadcrumbs.
ed from underneath.
re shelf on the lower rail
Recommended for dishes with a lot of liquid (quiches and fruit pies) as the
pastry base is cooked through. Use also for food that rises (bread and cakes) and uncovered soufflés.
needed to reach the required
Recommended for leaving breads to rise (keeping temperature below 40^ ), keeping dishes warm and thawing food.
5 minutes.
I pan onto the rail beneath the grill.
Recommended for food requiring slow, careful cooking such as game and braising joints. Ideal for sealing red meat joints and simmering lidded casseroles whose contents have been partially cooked on the hob first.
Recommended for grilling chops,
sausages, and large prawns and for making toast.
Troubleshooting
If you're not sure that your oven is working properly, it doesn't necessarily mean that there's a problem. In all cases, check the following points:
If you realize that..
Possible causes
What should you do?
The oven isn't heating.
- The oven isn't connected to the power supply.
The fuse has blown. - The temperature selected is too low.
-
The thermostat is faulty.
-
Connect to power supply.
- Change the fuse, checking that it is 16A.
- Increase the temperature selected.
- Contact the After-Sales Service.
The temperature light does not go out.
-
Faulty thermostat.
-
Contact the After-Sales Service.
The light inside the oven isn't working.
-
The lamp is unusable.
-
The oven isn't connected to the power supply or the fuse has blown.
-
Change the bulb.
- Connect to power supply or change fuse.
The cooling fan keeps working after the oven is turned off.
- The fan is still working an hour after cooking has stopped,
-
If it has not stopped after 1 hour
-
Open the door to help the oven cool down more quickly.
- Contact the After-Sales Service.
Copy here the details that are on your oven manufacturer's plate:
Brandt
MADE IN FRANCE
220 - 240V 50 Hz
BRANDT APPLIANCES SAS