E8PS2 - Electric rotisserie BARTSCHER - Free user manual and instructions
Find the device manual for free E8PS2 BARTSCHER in PDF.



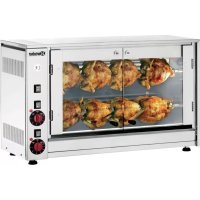
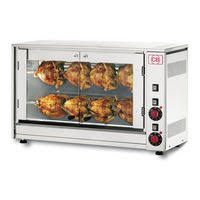
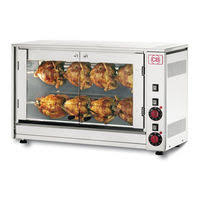
| Product type | Vertical electric rotisserie with independent skewers |
| Brand | Bartscher |
| Model | E8PS2 |
| Number of skewers | 2 |
| Capacity (chickens) | 8 |
| Dimensions (W x D x H) | 880 x 470 x 530 mm |
| Power supply | 230 V~, 50/60 Hz |
| Power | 3500 W |
| Material | Stainless steel |
| Interior lighting | Yes, lamp switch (A) |
| Skewer rotation | Gear motors controlled by switches (B) |
| Heat regulation | Energy regulators (infinite control) per skewer, adjustment from 0 to 10 and Max position |
| Safety | Device preventing operation of heating elements without skewer rotation |
| Power cable | Type H07 RN-F, section 3 x 2.5 mm² (230 V~) |
| Connection | Requires an omnipolar switch with contact opening of at least 3 mm |
| Safety distance | Minimum 15 cm from flammable walls |
| Indicative cooking time | 75 to 90 minutes for chickens of about 1 kg |
| Cleaning | Clean with a damp cloth and mild detergent, do not use water jets |
| Glass maintenance | Clean when cold with a soft cloth, avoid thermal shock |
| Grease collection tray | Empty and clean after each use |
| Lamp replacement | Lamp with same specifications, glass protection |
| Repairs | Reserved for qualified personnel |
Frequently Asked Questions - E8PS2 BARTSCHER
User questions about E8PS2 BARTSCHER
0 question about this device. Answer the ones you know or ask your own.
Ask a new question about this device
Download the instructions for your Electric rotisserie in PDF format for free! Find your manual E8PS2 - BARTSCHER and take your electronic device back in hand. On this page are published all the documents necessary for the use of your device. E8PS2 by BARTSCHER.
USER MANUAL E8PS2 BARTSCHER
natural_image
Exterior view of a Bartscher commercial kitchen appliance with multiple cutlery and control knobs (no visible text or symbols)215.035 / 215.036 / 215.037
Bedienungsanleitung
Electric chicken-spits
from page 7 to 11
GB/UK
Mode d'emploi
natural_image
Diagram showing a sequence of aircraft flying in formation with no text or symbolsAbb. 4
natural_image
Pure electrical circuit lines without any symbolsElectrical chicken-spits
with superposed single spits movement
Mod. E-6P
Mod. E-8P-S2
Mod. E-12P-S3
CE
INSTRUCTIONS FOR INSTALLATION, USE AND MAINTENANCE
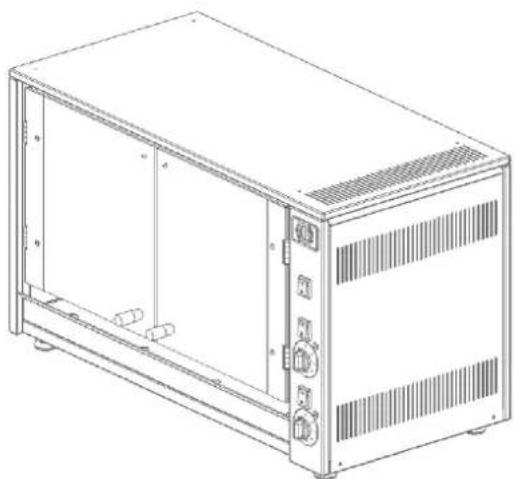
■ DRAWING OF THE EQUIPMENT
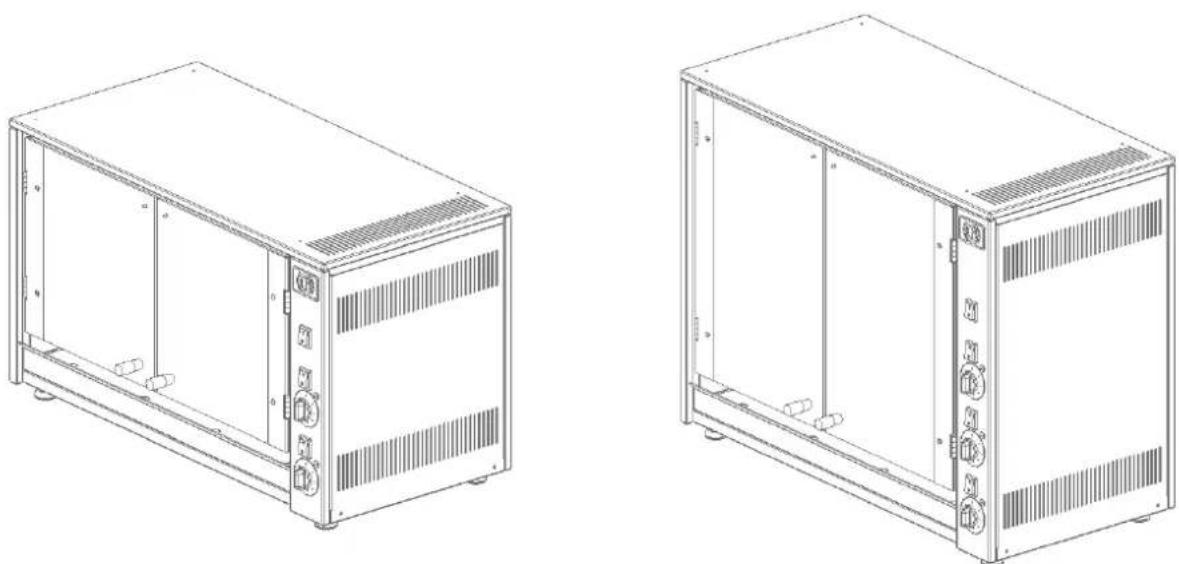
Fig. 1
- CHARACTERISTICS
| Model | Spits | Chickens | Width | Depth | Height | Voltage | Power |
| E-6P 2 6 | 700 mm 36 | 0 mm 530 mm | 230V~ 280 | 0 W | |||
| E-8P-S2 2 | 8 880 mm | 470 mm 530 mm | 230V~ 3500 W | ||||
| E-12P-S3 3 | 12 | 880 mm | 470 mm | 710 mm | 230V 3~400V 3N~ | 5000 W |
- INSTALLATION
Installation, commissioning and repairs must only be carried out by a qualified and approved service engineer, and with careful reference to the following instructions:
- Take the appliance out of its packaging.
- Remove the protection film; in case of any residues of adhesive, use an appropriate solvent and then dry.
The serial number label is set on the rear of the appliance and indicates if the machine can be supplied with the available tension. The electrical connection must be in accordance with the stated requirements on the data plate fixed to the rear panel of the appliance. - When the appliance is in operation ensure that the voltage does not vary from the fixed value by more then +/-10%.
- According to the rules in force the equipment installation must be done by an Omni polar switch between power grid and equipment with a contacts opening of at least 3 mm. for each pole. The switch must be easily accessible.
- Make sure that the appliance is in a perfectly level position by regulating the feet, if necessary.
- Use an appropriate lagging by setting the appliance near inflammable walls and furniture; fire prevention prescriptions must be followed very strictly. Leave a free space of at least 15 cm from inflammable side walls and back.
- The equipment installation must be done in the respect of local prescriptions and according to the European rules in force.
- INSTRUCTIONS FOR USE
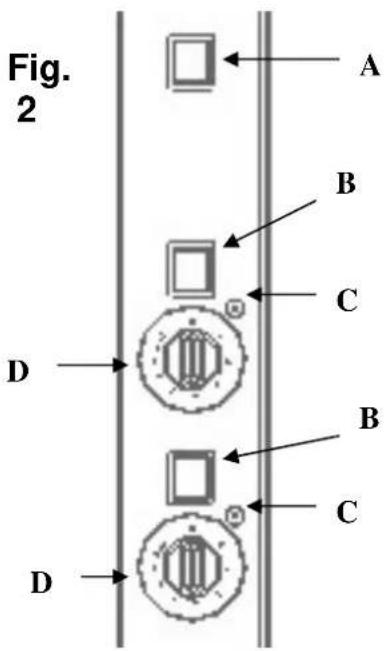
Fig. 3
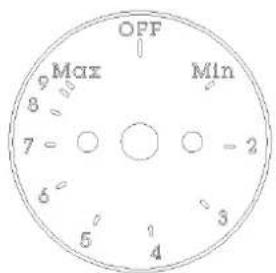
It is advisable that the initial installation and setting up of the chicken-spit is carried out by a reliable engineer. It is important to follow the setting up procedure exactly :
- Press switch A to light the cooking chamber.
- Press the gear-motors switches (B) to start them for the spits rotation.
-
Regulate the working of the resistances using the hand grip D. The regulators of the resistances (Infinit control) have the function to change the starting time of the resistances used for the heating of the oven. Every value corresponds to one unity, until the 10 unities are reached. If at this value the hand grip is turned ulteriorly, we return to 0 (resistances off). Every unity corresponds to a certain number of seconds in which the resistances remain on; for the rest of the unities the resistances remain off. The value corresponding to the starting times of the resistances can be changed at any moment.. Working is signalized by the relative pilot lamps) D.
-
Positioning the regulators on the MAX position the heating elements work continuously.
- Turning again the handle you return to 0 (heating elements are off).
- Each energy regulator corresponds to a cooking spit. The regulators position is in sequence with the spits position.
The chicken-spit is provided with an appliance which does not allow the working of the heating elements when gear-motors are off, in order to avoid the chickens burning.
- LOADING
Proceed as follows to load the Spit :
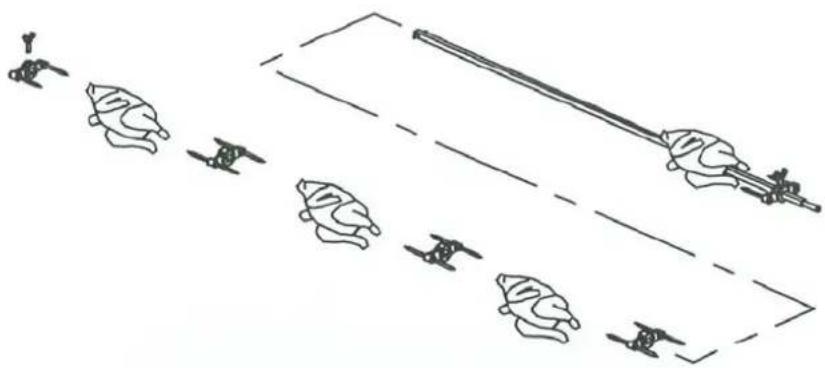
Take out the cold rods with hands, insert the chicken as shown in figure 4 and put the rods in the spit.
natural_image
Diagram showing a hand holding a long object with multiple small figures below, possibly representing a scientific or technical concept (no text or symbols present)Fig. 4
At the end of the cooking time take off the spits, using a kitchen glove.
Never put hands or something else in the spit when working.
rev. 2 - 09/06/2009
■ COOKING TIMES INDICATIVE
The cooking time of chickens of approximately 1kg each varies between 75 and 90 minutes; the cooking time depends on the following points:
- preheating of the chicken-spit
- meat features (lean or fat)
- weight and form of the product
- initial temperature of the product to be cooked and the desired meat browning.
■ CLEANING AND MAINTENANCE
ATTENTION: Never use direct or pressure water jets for cleaning.
Cleaning the equipment is extremely important. It ensures perfect operating conditions and longer use of the machine. Furthermore, a clean and well maintained chicken-spit gives a good impression to the client.
Clean the equipment as follows :
- Before any intervention, disconnect the machine from the power source.
- Unplug the appliance by removing the set upwards Omni polar switch or by unplugging. In case of plug pay attention that it is not wet.
- Cleaning can be effected only when the machine is cold.
- Wash stainless steel parts with water and an appropriate detergent. Never use abrasive or corrosive substances, they could damage the surfaces.
- Instrument board, handles, glasses and switches have to be cleaned with a wet soft cloth.
- It is advisable, especially in case of continual use, to clean the glasses periodically with a cloth dipped in lukewarm water. A cloth dipped in cold water could cause a thermal shock and break the glasses. The glasses can easily be removed to allow better cleaning.
- Empty the drip tray after each cooking cycle.
- Should any anomalies in the working be noted, switch off the machine, disconnect it and call the assistance service.
- For any technical assistance call only qualified staff.
■ FEEDING CABLE REPLACEMENT
In case of the damage of the feeding cable it must be replaced with a properly one having the following features :
- it must not be lighter than the type H07 RN-F
- it must have a conductors section of at least :
| Model 230V~ 230V 3~ 400V 3N~ | |||
| E-6P | 3 × 1,5^2 | /mm | |
| E-8P-S2 | 3 × 2,5^2 | mm | |
| E-12P-S3 | / | 4x4 | 5 × 2,5^2 mm |
mm
During the connection pay attention that the round wire must be longer than the other ones; in fact, in case of strong wire traction or rupture of cable connection it must be disconnected after the live conductors.
- LIGHT REPLACEMENT
- Unplug the appliance.
- Remove the glass protection.
- Unscrew the bulb and replace the light with a new one having the same features; plug the protection back on.
- ELECTRICAL CONNECTION
See enclosed wiring diagrams.
- WARNING
- Get rid of the machine in a proper way following the national disposal rules.
- Always protect the machine from the intervention of not authorized persons.
The manufacturer shall not be held responsible if the instructions contained in the booklet are not followed.
natural_image
Line drawing of a rectangular electronic device with ventilation grilles and control panels (no text or symbols)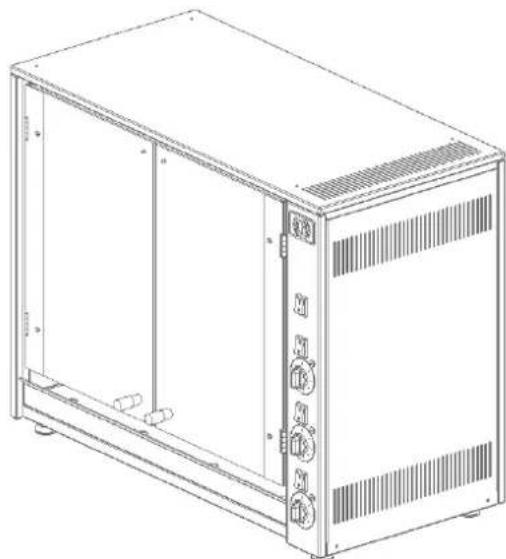
natural_image
Line drawing of a technical enclosure with ventilation grilles and control panel (no text or symbols)Fig. 1
- CARACTERISTIQUES
natural_image
Diagram showing a hand holding a long object with multiple small figures below, possibly representing a scientific or technical concept (no text or symbols present)Fig. 4
natural_image
Pure electrical circuit lines without any symbolsLE FABRICANT DECLINE TOUTE RESPONSABILITE SI LES NORMES CONTENUES DANS CES INSTRUCTIONS NE SONT PAS STRICTEMENT RESPECTEES.
■ AFBEELDING VAN HET APPARAAT
natural_image
Line drawing of a rectangular industrial microwave oven with ventilation grilles and control panel (no text or labels)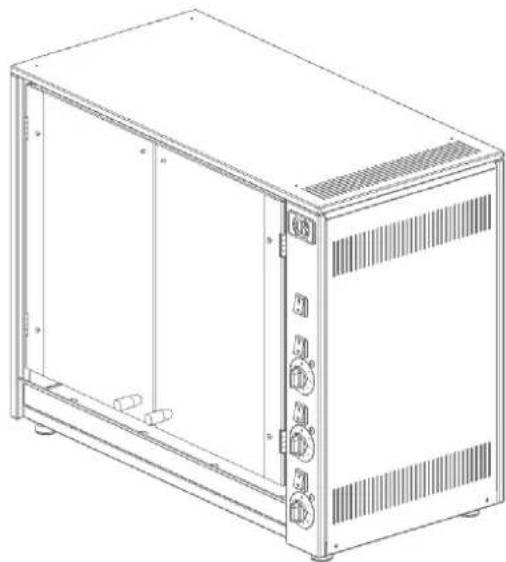
natural_image
Line drawing of a rectangular electronic device with ventilation grilles and control knobs (no text or symbols)Afb. 1
EIGENSCHAPPEN
| Model | spiesen | Kippen | Breedte | Diepte | Hoogte | Spanning | Vermogen |
| E-6P | 2 | 6 | 700 mm | 360 mm | 530 mm | 230V~ | 2800 W |
| E-8P-S2 | 2 | 8 | 880 mm | 470 mm | 530 mm | 230V~ | 3500 W |
| E-12P-S3 | 3 | 12 | 880 mm | 470 mm | 710 mm | 230V 3~400V 3N~ | 5000 W |
- INSTALLATIE
flowchart
graph TD
    A["Input Stage 1"] --> B["Process Step 1"]
    B --> C["Process Step 2"]
    C --> D["Output Stage 3"]
    D --> E["Output Stage 4"]
Afb. 4
natural_image
Pure cross symbol of a trash bin with no text or labelsDE PRODUCENT KAN NOOIT AANSPRAKELIJK WORDEN GESTELD INDIEN DE AANWIJZINGEN UIT DEZE HANDLEIDING NIET NAUWGEZET ZIJN OPGEVOLGD.
natural_image
Line drawing of a rectangular electronic device with ventilation grilles and mounting brackets (no text or symbols)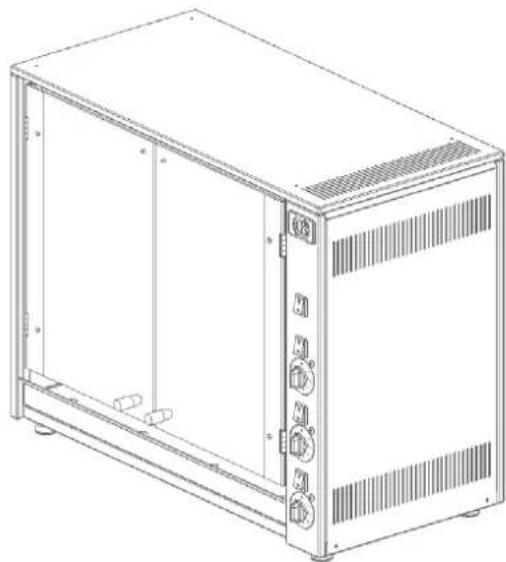
natural_image
Line drawing of a rectangular electronic device with ventilation grilles and control knobs (no text or symbols)il. 1
CECHY
il. 4
natural_image
Pure cross symbol of a trash bin with no text or labels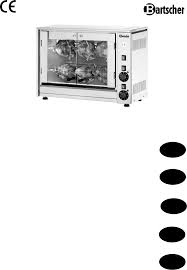
- Bedienungsanleitung
- Mode d'emploi
- Electrical chicken-spits
- with superposed single spits movement
- - INSTALLATION
- - INSTRUCTIONS FOR USE
- - LOADING
- ■ COOKING TIMES INDICATIVE
- ■ CLEANING AND MAINTENANCE
- ■ FEEDING CABLE REPLACEMENT
- - LIGHT REPLACEMENT
- - ELECTRICAL CONNECTION
- - WARNING
- The manufacturer shall not be held responsible if the instructions contained in the booklet are not followed.
- LE FABRICANT DECLINE TOUTE RESPONSABILITE SI LES NORMES CONTENUES DANS CES INSTRUCTIONS NE SONT PAS STRICTEMENT RESPECTEES.
- - INSTALLATIE
- DE PRODUCENT KAN NOOIT AANSPRAKELIJK WORDEN GESTELD INDIEN DE AANWIJZINGEN UIT DEZE HANDLEIDING NIET NAUWGEZET ZIJN OPGEVOLGD.
- CECHY
Brand : BARTSCHER
Model : E8PS2
Category : Electric rotisserie