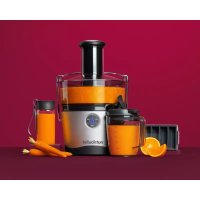
Slow Juicer - Juicer NUTRIBULLET - Free user manual and instructions
Find the device manual for free Slow Juicer NUTRIBULLET in PDF.
| Brand | NutriBullet |
| Model | Slow Juicer |
| Appliance Type | Horizontal Screw Juicer |
| Motor Power | 150 watts |
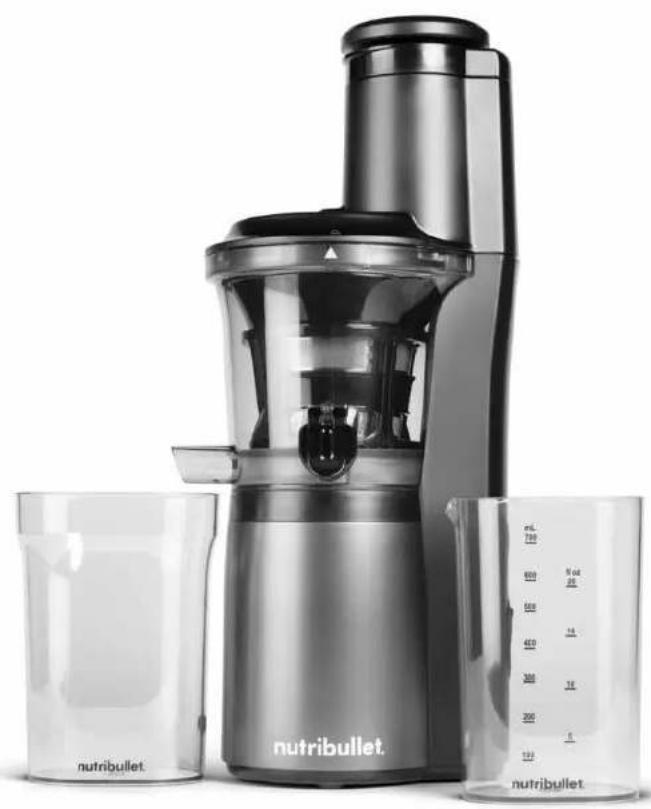
| Juice Container Capacity | 700 ml |
| Pulp Container Capacity | Approx. 700 ml (by deduction) |
| Filter Material | Stainless Steel |
| Bowl Material | BPA-free Plastic |
| Reverse Function (REV) | Yes, to unclog food |
| Automatic Shut-off | If lid is open or overheating |
| Rotation Speed | Single (slow, masticating juicer type) |
| Power Supply | 220-240 V, 50/60 Hz (polarized plug) |
| Weight (approx.) | 2.5 kg |
| Dimensions (H x W x D approx.) | 25 x 25 x 40 cm |
| Color | White with silver accents |
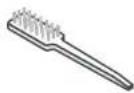
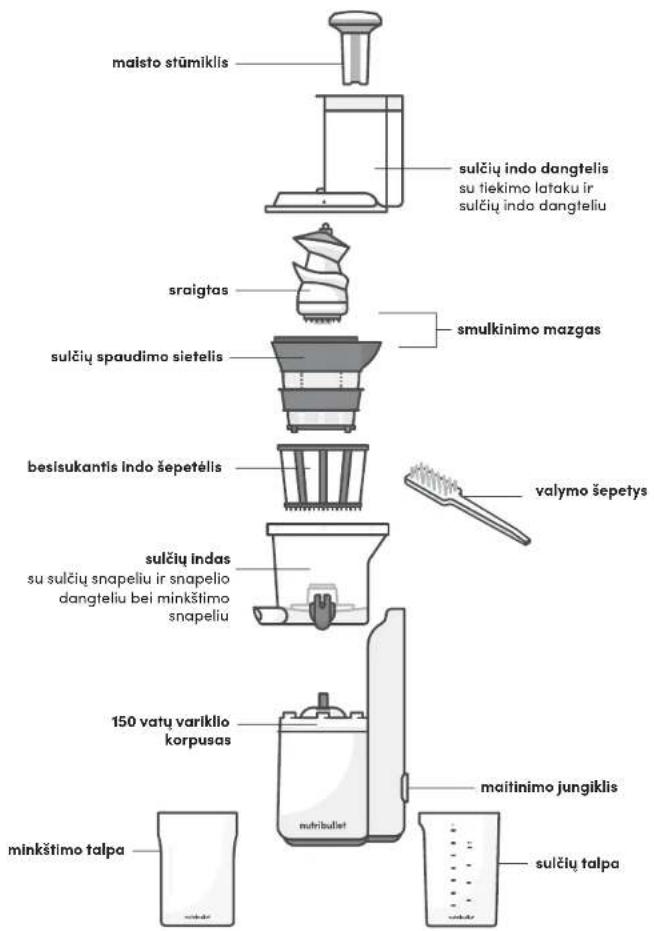
| Included Parts | Motor base, extraction bowl, lid, auger, filter, rotating brush, juice container, pulp container, pusher, cleaning brush |
| Maintenance | Removable parts are dishwasher safe (except auger, hand wash only) |
| Safety | Double insulation, automatic shut-off in case of overload or lid opening |
| Recommended Use | Fresh fruits and vegetables, without hard pits or non-juicy foods |
| Continuous Operating Time | 15 minutes max, then 1 minute rest |
Frequently Asked Questions - Slow Juicer NUTRIBULLET
User questions about Slow Juicer NUTRIBULLET
0 question about this device. Answer the ones you know or ask your own.
Ask a new question about this device
Download the instructions for your Juicer in PDF format for free! Find your manual Slow Juicer - NUTRIBULLET and take your electronic device back in hand. On this page are published all the documents necessary for the use of your device. Slow Juicer by NUTRIBULLET.
USER MANUAL Slow Juicer NUTRIBULLET
Important safeguards
Warning! To avoid the risk of serious injury, carefully read all instructions before operating your nutribullef Slow Juicer. When using any electrical appliance, basic safety precautions should always be observed, including the following important information.
Save these instructions! FOR HOUSEHOLD USE ONLY
GENERAL SAFETY INFORMATION
- This juicer system has moving parts, and is not intended for use by children or persons with reduced physical, sensory, or mental capabilities, or who lack experience and knowledge of its safe operation. Such persons require close supervision and thorough instruction on its proper use and safe operation.
- Close supervision is necessary when any appliance is used by or near children. Children should be supervised to ensure that they do not play with the appliance.
Keep cord out of reach of children. This appliance is not a toy.
- To protect against fire, electrical shock and injury to persons, do not immerse the appliance, motor base, cord, or plug in water or any other liquid.
- Unplug from outlet when not in use, before putting on or taking off parts, and before cleaning or attempting to move the appliance.
- To unplug, grasp the plug and pull from the outlet. Never pull from the power cord.
Avoid contact with moving parts.
Regularly inspect the power cord, plug, and entire appliance for any damage.
- Do not operate any appliance with a damaged cord or plug or after the appliance malfunctions, or is dropped or damaged in any manner.
- Contact nutribullet® customer service for assistance at nutribullet.com.
The use of attachments not recommended or sold by nutribullet may cause fire, electric shock, or injury.
- This appliance is for household use only. Do not use this appliance for anything other than its intended use. Do not use outdoors. Misuse may cause injury.
- Do not let the power cord hang over the edge of a table or countertop.
- Do not let the power cord touch hot surfaces, including stove, or
become knotted or tangled.
Always make sure the juice bowl cover is securely in place and locked to the juice bowl before the motor is turned on. Do not attempt to unlock the juice bowl cover from the juice bowl while the juicer is in operation.
Always make sure the juicer is turned off after each use. Make sure the auger has stopped rotating and the motor has completely stopped before disassembling. The juicer will automatically turn off if the juice bowl cover is removed during operation.
- Do not push food into the feed chute with your fingers or utensils. Always use the food pusher provided. Do not place hand or fingers into the feed chute when it is attached to the appliance. If food becomes lodged in
the feed chute, use the food pusher provided to push it down. Turn motor off and ensure that all moving parts have stopped before disassembling juicer to remove the remaining food.
- Turn motor off, unplug unit, and ensure that all moving parts have stopped before disassembling juicer to remove the remaining food or to clean.
- Do not use appliance if the auger is damaged.
- This appliance has a polarized plug (one prong is wider than the other). To reduce the risk of electric shock, this plug will fit in a polarized outlet only one way. If the plug does not fit fully in the outlet, reverse the plug. If it still does not fit, contact a qualified electrician. Do not modify the plug in any way.
ADDITIONAL SAFEGUARDS
- Remove and safely discard any packaging material or promotional labels before using the juicer for the first time.
- To eliminate a choking hazard for young children, remove and safely discard the protective cover fitted to the power plug of this appliance.
- Do not put any NON-food items into the feed chute.
Always make sure the juicer is properly and completely assembled before connecting to a power outlet and operating.
Ensure that the surface where the appliance operates is stable, level, clean, and dry.
Vibration may occur during normal operation.
- Any significant spillage onto the surface under or around the appliance, or
onto the appliance itself, should be cleaned and dried before continuing to use the appliance.
- When using this appliance, provide adequate air space above and on all sides for circulation.
- Do not operate juicer for more than 15 minutes at a time when juicing at a rapid rate or with firm pressure. Allow the motor to rest for 1 (one) minute between each use.
This juicer is only designed to juice fresh fruits and vegetables. Do not use any frozen fruits or vegetables.
- Remove rind from all citrus fruit before juicing.
- Do not juice stone fruit unless pits or seed stone have been removed.
Do not leave the appliance unattended when in use.
Keep hands, fingers, hair, clothing, as well as spatulas and other utensils, away from the feed chute opening during operation.
Keep the appliance clean. Refer to the Care and Cleaning section for tips and best practices.
Any maintenance other than cleaning should be performed by an authorized nutribullet® Service Center.
Do not attempt to repair or service this juicer yourself. Contact nutribullet Customer Service for assistance at nutribullet.com.
If any of the contained instructions or warnings are not understood, please contact nutribullet Customer Service for assistance at nutribullet.com.
Contents
10 What's included
11 Assembly Guide
12 Before first use
13 Assembly
16 Usage instructions
19 Juicing tips
21 Troubleshooting
22 Disassembly
24 Care and maintenance
25 Replacement parts
25 How to store
Thank you for purchasing the nutrbullet® Slow Juicer.
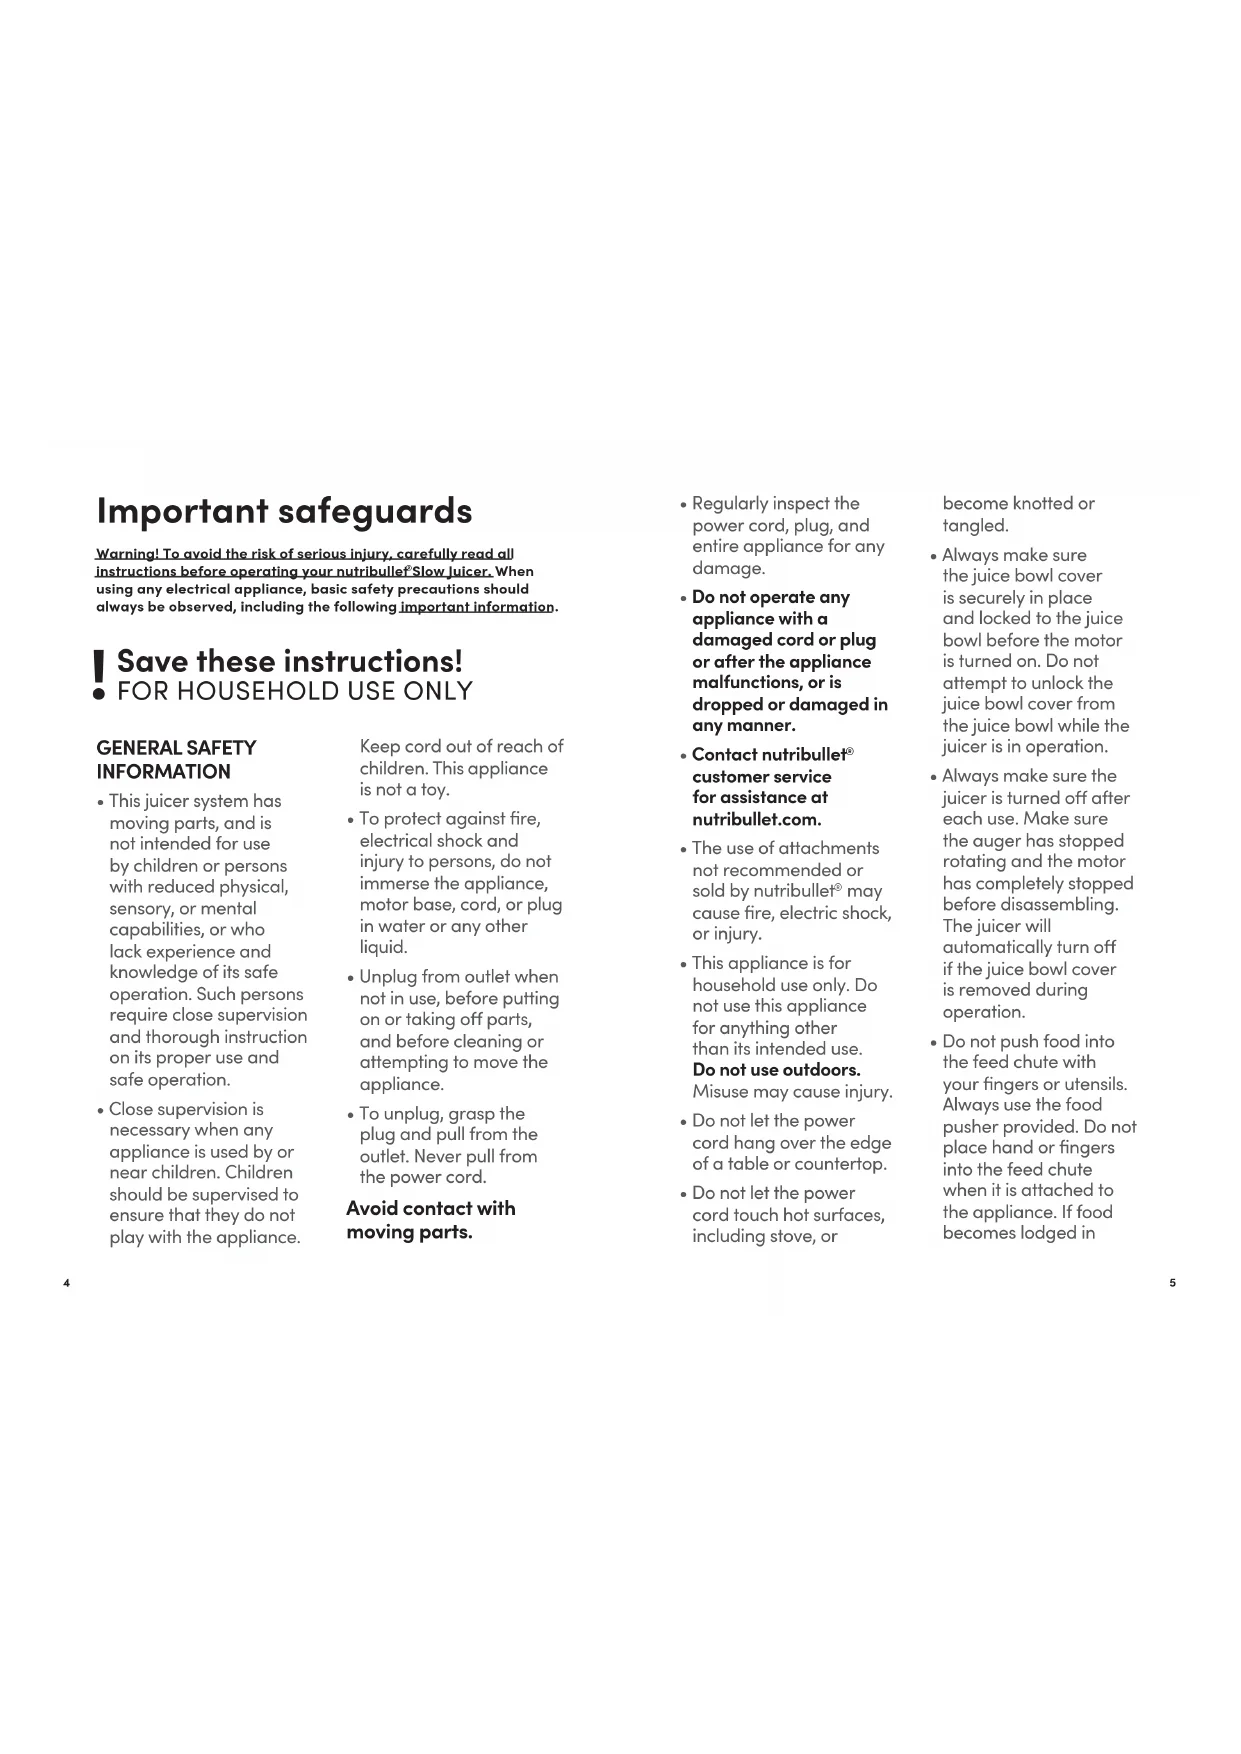
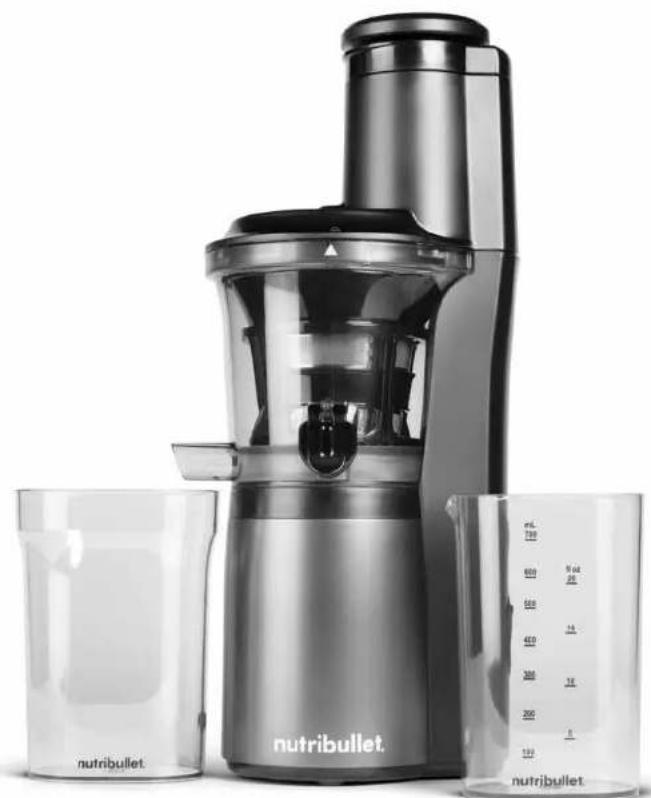
What's included Assembly guide
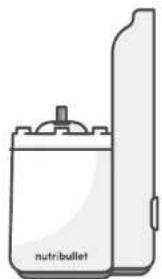
150 WATT MOTOR BASE JUICE BOWL


JUICE BOWL COVER


JUICING SCREENSTEEL-TIPPRODUINBOWL BRUSH

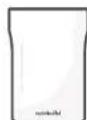
CONTAINER

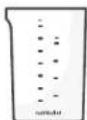
CONTAINER

FOOD PUSHER700 mCJIOING BRUSHPULP

Before first use
Before using your juicer for the first time, please take a moment to perform the steps below.
UNPACK
Open the box and remove the appliance with its various components, placing all parts on a flat, level surface.
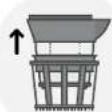
SEPARATE
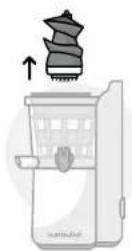
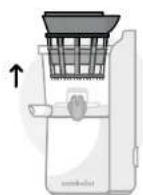
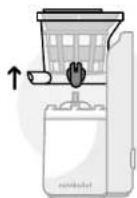
A few parts will be packed together. Separate them using the following 3 steps (see image):
a. Lifting up, remove Grinding Assembly and Rotating Bowl Brush together from the Juice Bowl.
b. Detach Rotating Bowl Brush by moving it down.
c. Lifting up, remove the Auger from Juicing Screen.

CLEAN
Immerse all detachable parts and accessories (not the base) in warm, soapy water. Rinse and dry.
Clean the outside of the base with a clean, damp cloth.
WARNING: Never submerge the Motor Base in water or any other liquid.
Assembly
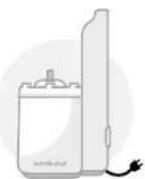
1 Before starting assembly, check that the appliance is unplugged and and the power switch is off.
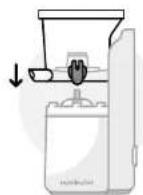
3 Attach Juice Bowl to Motor Base. Position the Juice Bowl on top of the Motor Base and push downwards, making sure the bowl is tightly fastened to the base and locked securely in place. The Juice Bowl must be attached in its proper position or the appliance will not operate.

2 Check the position of the pulp plug. Look at the bottom of the Juice Bowl. Make sure the pulp plug is positioned properly in the pulp spout (see image).

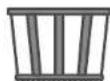
Put the Juice Screen into the Rotating Bowl Brush.

5 Place the screen and brush assembly into the Juice Bowl.
NOTE: You may need to turn it slightly before it seats properly.
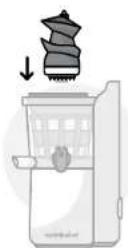
Put the Auger into the strainer and ensure the Auger is positioned properly onto the center axis. Turn and press down on the head until it is seated securely into place.

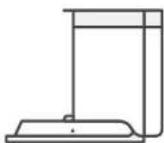
8 Place Juice and Pulp Containers under spouts.

8a Position the Juice Container below the juice spout, this is on the right side of the Juice Bowl with the spout cover.
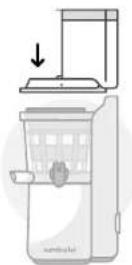
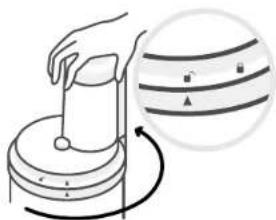
7 Place the Juice Bowl Cover on top of the Juice Bowl, making sure the "unlocked" symbol on the lid aligns with the arrow symbol on the bowl. Rotate cover clockwise to lock it in place.

NOTE: To ensure the Juice Bowl Cover is fully locked, rotate it until the "locked" symbol on the Juice Bowl Cover aligns with the up-triangle symbol on the Juice Bowl (see closeup image).
Make sure the Juice Bowl Cover is fully locked in position, or the appliance will not operate. (To remove the Juice Bowl Cover from the Juice Bowl, rotate it counter-clockwise.)

8b Place the Pulp Container below the pulp spout.
NOTE: The juice and Pulp Containers must be in their proper positions before juicing. During operation, juice will flow into the Juice Container from the juice spout, while pulp will be ejected from the pulp spout and collected by the Pulp Container.

9 Put the Food Pusher into the feed chute. The juicer is now ready to operate.
Usage instructions

Prepare foods for juicing, and make sure non-juiceable foods are not used.
- Remove any hard seeds, pits, and skin - for example, peel and pits should be removed from oranges, lemons, grapefruits, and melons.
Cut foods into smaller pieces if needed to fit into the feed chute.
- Do not attempt to process thick or hard foods that don't contain any juice to extract (for example, it is not recommended to process bananas, avocados, coconuts, or similar hard foods, since these may damage the motor).
2 Before plugging the power cord into an outlet, make sure the power switch is in the "OFF" position.

3 The power switch has three settings. Pressing the power switch to the "ON" position activates the motor and starts making juice; pressing the power switch to "OFF" turns off the machine; and "REV" means reverse rotation, only used when something is stuck and you need to unclog the unit.

4 Make sure the juice and Pulp Containers are in their proper positions.
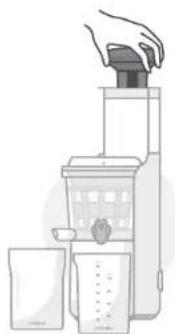
6 Drop the prepared fruits or vegetables into the feed chute and gently push the items down into the grinding assembly, using the Food Pusher.
CAUTION: Never place your your finger or hand into the feed chute. Always use the food pusher provided.

5 Plug the juicer into the power outlet, then press the power switch to the "ON" position.

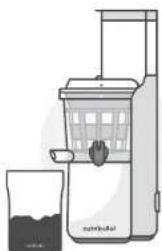
6a The appliance will start to process the food items. After a few moments, the juice will flow out.
NOTE: For efficient juicing, alternate feeding soft foods and hard foods into the feed chute. For example, follow leafy greens with an apple slice, or orange with a carrot. The harder produce will help with processing the softer produce and extract more juice.
CAUTION: The auger must stop rotating before changing from "ON" to "REV". Do not turn the power switch from "ON" to "REV" or from "REV" to "ON" without pressing the power switch to "OFF" first. Once the appliance is "OFF" and has stopped running completely then turn the power switch from "OFF" to "REV" or from "OFF" to "ON".

7 While you are juicing, you may choose to open the wide chute lid, which will open the chute to 3-inches. This will accommodate larger pieces of fruits and vegetables. When the wide chute lid is in the open position, the motor will pause and the Auger will stop rotating. After you have inserted fruits and vegetables into the large chute, close the wide chute lid to restart the motor and continue juicing.
8 Once the Juice Container is full, or all food has been processed, turn the power switch to "OFF". If you have more food to process, empty the Juice and Pulp Containers before starting a new round of juice extracting.
NOTE: Do not insert too much food to extract at one time. During operation, once the Juice Container is full, you must stop the appliance and empty the Juice and Pulp Containers before the next juicing cycle.
CAUTION: During operation, if the Juice Bowl Lid is disconnected from the Juice Bowl, the motor will stop.
Juicing tips
PROPER PRODUCE PREP
Prepare fruit and veggies before inserting them into the juicer:
Clean produce properly. Rinse with lukewarm water, produce wash, or water and apple cider vinegar.
- Peel or remove skin as needed. Foods with thick or hard skin must be peeled before being put into the juicer.
- Remove rind from all citrus fruits before juicing.
- Remove large pits and seeds from stone fruit before juicing. Stone fruit may be used only if the seeds or pits have been removed. Fruit with hard cores must be pitted. The cores of peach, plum, mango, and apricot should not be put into the feed chute, to avoid any potential malfunction.
- Chop food items down to the right size - small enough to fit easily into the feed chute, without having to force pieces down with the Food Pusher.
- Foods with less moisture and hard fiber: Cut into slices.
Leafy vegetables and foods with long, hard fiber (such as celery and kale): Cut the stems into 4 inch pieces and then roll up the leaves well.
- For efficient juicing, alternate feeding soft foods and hard foods into the feed chute. For example, follow leafy greens with an apple slice, or an orange with a carrot. The harder produce will help with processing the softer produce and extract more juice.
- Frozen food items can be put in the juicer after being defrosted.
FEED CHUTE
- Never place your hand, fingers, utensils, or other foreign objects into the feed chute while it is attached to the appliance.
- Do not overload the feed chute. Insert food gradually, at a pace the juicer can keep up with.
-
Use only the provided Food Pusher to push food into the feed chute. Never use fingers, utensils, or any other apparatus.
-
Never use excessive force to push items into the feed chute.
After inserting food, ensure all items have moved down the feed chute before adding more. - If any food gets stuck in the feed chute, use the Food Pusher to move it down the chute.
- For best taste, consume fresh juice and pulp within 72 hours of juicing.
CAUTION: Do not operate the unit without feeding food into it, to avoid damaging the grinding assembly.
FOODS THAT CANNOT BE JUICED:
- Foods that do not contain juice to extract (for example, bananas, avocados, coconuts)
Stone fruits that have large pits or seeds that have not been removed - Hard fruits or thick vegetables rich in fiber and starch
- Frozen fruits or vegetables
Troubleshooting
PROBLEM: PARTS ARE DIFFICULT TO DISASSEMBLE
Solution: After finishing juicing, in order to detach and clean parts more easily, continue to run the juicer for about 30 seconds without adding any additional food in order to process any food that might be stuck in the Auger and Juicing Screen.
Another tip: after you are done extracting juice, pouring some water in the feed chute to clean it can help make it easier to disassemble.
using the instructions given earlier in this guide. After reassembly, try turning on the machine to see if normal function has been restored.

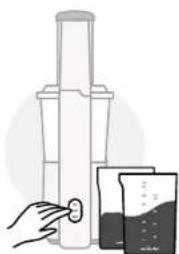
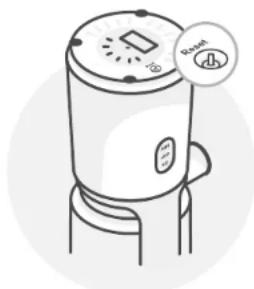
PROBLEM: JUICER IS STUCK AND WON'T OPERATE
Solution: If the juicer is stuck and not operable, press the power switch to the "OFF" position. Then press the RESET switch, which is located at the bottom of the base (see image).
Next, press and hold the power switch in the "REV" position for few seconds, then try operating again.
If this reverse function does not work, turn off the machine, unplug, and reassemble it,
PROBLEM: THE JUICER TURNED OFF IN THE MIDDLE OF JUICING
If the motor overheats, the juicer will turn off.
Solution: If the juicer is overheated and stops working, unplug it and allow it to cool down for at least fifteen minutes before attempting to use again.
Disassembly

1 Make sure the juicer is powered OFF, cooled down completely, and unplugged before starting disassembly. Ensure that the motor has completely stopped, the grinding assembly has stopped moving, and all moving parts have stopped before disassembling juicer.

3 Remove the Pulp Container from under the pulp spout.
2 Remove the Juice Container from under the juice spout. To prevent drips, use the spout cover to close the juice spout.
4 Twist the Juice Bowl lid counter-clockwise to unlock it, then lift to remove it from the top of the juicing jar.
5 Remove the Auger from the bowl.
7 Remove the Rotating Bowl Brush and Juicing Screen together from the bowl.

9 If the Food Pusher is inside the feed chute, remove it.
6 Detach and lift the Juice Bowl (with the Rotating Bowl Brush, Juicing Screen, and Auger still inside) off the top of the base.
8 Detach the Rotating Bowl Brush from Juicing Screen moving it downwards.
Care and maintenance
Cleaning the nutribullet Slow Juicer is quick and easy. All parts (except for the base) can be cleaned by simply rinsing with warm soapy water, or most parts are dishwasher safe. Here are some tips for cleaning and best practices.
1 Always make sure the base is unplugged before you begin assembly, disassembly, cleaning, or storage of the unit.
2 Detach and separate the parts of the juicer (see Disassembly section).
3 Empty the Pulp and Juice Containers (store or throw away pulp, store or consume juice).
4 Clean the Juice Bowl Cover, Food Pusher, Auger, Juicing Screen, Rotating Bowl Brush, Juice Bowl, and the Pulp and Juice Containers under running water.
CAUTION: Do not use a metal sponge to clean, it will damage the machine.
5 Clean all juicer parts, except for the Motor Base, in warm, soapy water. Or, you can put all parts into the
dishwasher except for the Auger.
CAUTION: ALWAYS clean the Auger by hand with warm, soapy water and a soft cloth. The Auger is not dishwasher safe.
6 The Cleaning Brush can be used for better cleaning of the Juicing Screen. The screen can be cleaned completely using the small Cleaning Brush. Use this brush to scrub the Screen under running water. Be sure to properly clean the screen every time you juice. Leftover traces of fruits and vegetables can cause residue buildup in the strainer, which can clog the holes and may prohibit maximum juice extraction.
CAUTION: The Juice Screen is sharp, so handle carefully during cleaning.
7 If you need to clean the pulp spout, first pull the pulp plug out of the pulp spout, then clean it thoroughly with the narrow end of the Cleaning Brush. The narrow end of the Cleaning Brush is sized so that it can fit inside of the
pulp spout to help remove pulp that has been stuck. Run water through the bowl and pulp spout to help remove any remaining pulp.
8 Wipe the outside of the base with a clean, damp cloth.
WARNING: Never submerge the Motor Base into water or other liquid.
9 Let all parts dry thoroughly, then assemble and store the appliance in a dry place. The Juice Container
can be stored in the Pulp Container.
PRO TIP: Clean your appliance as soon as possible after juicing. If allowed to sit, pulp may dry on one or more parts (such as the Juicing Screen), which can make it more difficult to scrub away residue. If any pulp residue does cake onto any parts of the unit, allow those parts to soak in hot water for 30 minutes, which should soften the residue and make it easier to remove.
Replacement parts
To order additional parts and accessories, please visit our website at nutribullet.com/ shop/accessories or feel free to contact Customer Service.
How to store
To save juice for future use, store it covered in the Juice Container in your refrigerator. You can also store pulp the same way, in the Pulp Container. For best taste, consume juice and pulp within 72 hours. Store juicer in a safe dry place where parts will not be damaged and won't cause harm. When moving the juicer, always grasp it by the base (not the Juice Bowl or Juice Bowl Cover).
Explanation of the marking

This marking indicates that this product should not be disposed with other household wastes throughout the EU. To prevent possible harm to the environment or human health from uncontrolled waste disposal; recycle it responsibly to promote the sustainable reuse of material resources. To return your used device, please use the return and collection systems or contact the retailer where the product was purchased. They can take this product for environmental safe recycling.

The transport and protective packing has been selected from materials, which are environmentally friendly for disposal and can be recycled. Ensure that any plastic, wrappings, bags etc. are disposed of safely and kept out of the reach of babies and young children. Rather than just throwing these materials away, recycle them.

A Class II or double insulated electrical appliance is one which has been designed in such a way that it does not require a safety connection to electrical earth (ground).

Manufacturer's declaration that product meets the requirements of the applicable EC directives.
nutribullet® is the registered trademark of Capbran Holdings, LLC
Copyright © 2024 Capbran Holdings, LLC. Distributed by Capital Brands
Distribution, LLC. Los Angeles, CA 90024 USA.
All Rights Reserved. Made In China.
Illustrations may differ from the actual product. We are constantly striving to improve our products, therefore the specifications contained herein are subject to change without notice.
nutribullet
SLOW JUICER

Manuale d'uso
PREPARATION ADEQUATE DES PRODUITS
OBERER DECKEL DES ENTSAFTERKORBS

STAHLSPITZE

SIEBSCHNECKEMIT

ROTATIONSBURSTE
SAFTBEHALTER


SVARPSTs AR METALA GALU

SULU SPIESANAS
EKRANS

ROTEJOSBA LODAS BIRSTE

TVERTNE

700 ml SULAS TVERTNE

PARTIKAS PRODUKTU TIRISANAS BIRSTEBIEZUMU STUMEJS

PROBLEM MAHLAVALMISTAJA EI TOOTA

SULCIU SPAUDIMOSIETELIS

BESISUKANTIS INDO SEPETELIS

TALPA

TALPA


MAISTOSTUMIKLIS700MALSEDEPETYSMINKSTIMO
Pries pradèdami naudotis
Pries naudodami sulciaspaude pirmq karta, atlikite foliau nurodytes veiksmus.
ISPAKUOKITE
Distribution, LLC. Los Angeles, CA 90024 SAD.
Sva prava pridrzana. Proizvedeno u Kini.
Proizvod se moze razlikovati od ilustracija u ovom dokumentu. Stalno radimo na podoljsanju svojih proizvoda te se značajke iz ovog dokumenta mogu promijeniti bez obavijesti.
nutribullet
SLOW JUICER

Uputstvo za upotrebu
Vazne mere zašite
PROBLEM: SOKOVNIKJE ZAGLAVLJEN I NE RADI
Reşenje: Ako je dokovnik
zaglavjen i ne radi, pritisnite
taster za napajanje u poziciji
"OFF". Nakon toga pritisnite
taster RESET koji se nalazi na
donjem delu postolja (pogledaj slik).
Sledece, pritisnite i zadrzite taster za napajanbe u pozicij "REV" nekoliko sekundi, zatim pokušajte ponovo da radite.
Ako ova obratna funkcija ne
funkcionise, isklučite masinu,
izvadite kabl iz uticnice, i
ponovo je sklopipe korisćenjem
uputstava datih prethodno
OTcTpaHeteKopaTaHa BCnUKNZITpyCobN PLODoBe IpeDnN3CTNCKBaHe.
He 3nckBaTe KOCTNKOBI IIOOBe,6e3 npeBapntJHo Da cTe OTCTpaHIN KOCTNKITE.
He octabraye ypea 6e3
Ha6liodeHne,doKaTo
pa6oTn.
IpbXte pbCeTe, npCTnte,
Kocata, dpexnte, mNaTyInTe
ndpyrnp6opn daJeU ot
yena 3a noDaBaHe no Bpeme
ha pa6ota.
PpKaTe ypea nCT.3a CbBETN OTHOCHO npabnHata ynotpe6a BnKte pa3dIe NocntBaHe I PpBkka.
KaTo Ce n3KlouCh
NouCTBaHTo,BCa Ka
NoaPbXka Tp6Ba Da ce
N3BbPbWAOTYbJHOMoHe
cePBn3eH cHTbp Ha
nutribullet
He ce onntbaine da pemontnpate ypea camn.3a cbdeiCTBne ce cBbpxte COTdena 3a o6cnykbahe Ha KIneHTn nutribullet'Ha aqpec nutribullet.com.
Ako HaryoON OT INHCTpyKUInTE NIN pIpeDynpexDeHnraTHe
CA BIN RCHN, CbBpKeTe ce 3a cbdeIcTBne c OTdela 3a o6cnykBaHe Ha KIneHTn nutribullet® Na aJpec nutribullet.com.
CbDbpxkaHne
440 CbAbpXaHHe Ha onaKOBkata
441 PbkoBoaCTBO 3a crNo6BaHe
442 Ipeu npbba ynotpe6a
443 Crno6Bahe
446 Yka3aHn3a ynoTpe6a
449 CbBETN
451 OToTpaHraBaHe Ha Hen3npaBHOCTn
452 Pa3rNo6BaHe
454 NouncTbaHe H noApbKka
455 Pe3epBn qactn
455 CbxpaaHHe Ha ypeda
Blaorapum Bn, ye 3akynxte nutribullet* Slow Juicer.
CbApxahne Ha onakOBkata

MOTOPHA OCHOBA 150 W

KNYA 3A N3CTNCKBAHE HAKO

TOPEH KAKAN
HA KYNATA 3A
NUCTCKBAHE HA COK

WHEK CbC CTOMAHEB BPXb

ΦHNTbP
BbPTaCA CEYETKA

KOHTEENHEP 3A IYIIN

COK 700 m

OtctpaHЯBaHe Ha Hen3npaBHOCTN
HEN3PABHOCT: KOMIOHEHTNTE TPYJHO CE PA3JIIO6JBAT
OtctpaHbAbe: Cled kaTo npKIOUOHTNE h3CTNCKBaHETO ha coka, 3a da pa3dEnITE n nouchTne NO-NECHO YACTNE, OCTabete ypeDa pa6botu Ooie Okono 30 cekyHn, 6e3 da doabare dpyTu xpaHn, Taka Ye da oTcpaHnTE BCNUKn 3acehdHn octatbun B WHeKa n
Oue einn cbBET: cIe kato npNKIOUHTe M3CTNCKBaHE Na coka, HaneTe MAJIko BODa B yJey 3a noDAbaHe, 3a da Ro noyCHTne n da yJeCHnTe pa3rno6BaHeto.
HEN3PABHOCT: COKOH3TNUCKAUKATA E BLOKUPAJNHE PABOTU
OtpaHbAbe: Ako ypeBt e 6oknpuH n He paBots, HATcHete OFF Ha npBekkIOvBaTeJIa. CJeT ToBA HATcHete RESET B donHata qact Ha oCHOBATA (BX, n3o6paxKeHneTO).
CneT ToBa 3aApbXte HATCHAT REV Ha NpeBkIOyBaTeIa 3a HAKoIko cekyniOnnTaTe pectaptnpate ypeDa OTHBO. Ako fHKuYraTa 3a O6pbuahe
Ha nocokata He pa60tn,
n3klouetaypeda,naBade
IeNcenaOaNTKoTakTaHro
Crlnoobote OTHOBO,KATO CneBbATE
NHCTpyKunTe,daJeHN no-
rope B ToBa pbKoBOdCTBO.CneJ
kato ro crNo6bte,OnnTaite
da BknIOUHTyepa,3a da
npobepnHeHopMaHnHaTa pa60ta
e Bb3CTaHOBeHa.
HEN3NPAHBOCT:YPEDbT CE N3KJIIOUyBA IIO CPEDAI HA ZIKbla 3A IN3CTNCBAHE HA COKA
Ako MOTOpBt nperpee, ypeBt ce N3KlIOUOyA.
OcTpaHbAbe: Ako ypeBt cnpe da pa60tn, m3KnIOyete 3aXpaHbAuaN Ka6eN IOCTABeMoTOp a Da ce OxlaDn HAI-MANKo 15 MNHyTN, npeDN da ro HnONJBAte OTHOBO.
Pa3rno6rahe
1 Ppei da 3aonohete pa3rno6raBaHeto, yBepetce ce,yeypebte H3KIOUeH,HNbIHO n3CTnHaH N3KIOUeHOT eEKeTPrueckata Mpeka. Ppei da pa3rno6te cokOn3CTNCKBAHKATA, yBepetce ce,ye MOTOpBTn 6Ioka 3a cmInaHe,3aeHNO C BCINKN NODINXHH YcAHTNo ypeDa,ca cnpei HanbIHo.

3 OCTpaHete KOHTeHepa noa 4yypaa 3a nn.

2 OTrpanete KOHTeHepa noa yyppa 3a coka.3a da n36erHete kankite, h3no13BaTe Kanaqkata npOTnB KANK, 3a da 3aTbOpnte yyppa 3a n3TMHa He cok.

4 3aBpTe rOpHnKanak HA Kynata 3a nCTnCKBaHe 06paTHo Ha YacOBHNKBaTa cTpeKa, 3a da ro ocbo6OHTe, CneI KoETo ro NOBHNHTe HnBaeTe OT kynata.

5 NsBaxJaHe Ha WHeKa O T KynTa 3a H3CTNCKBaHe Ha COK.

7 N3baTee bptraata ce 9KnH nntbpa ot kynata.

9 Ako 6yTano e B yner 3a noDaahe, HbAeTe ro.

6 OTeIeTe H3BaTeE Kynata (CbptaaTa ce YeKa, 0HnbpA u WneKb Btpe B He) OT rOpHATA qACT Ha OCHOBaT.

8 OTeJeTe BbTpAata ce YETKa OT hTbp, KATO R NMeCTe HADQy.