BS701SE - Endoscope VOLTCRAFT - Free user manual and instructions
Find the device manual for free BS701SE VOLTCRAFT in PDF.
User questions about BS701SE VOLTCRAFT
0 question about this device. Answer the ones you know or ask your own.
Ask a new question about this device
Download the instructions for your Endoscope in PDF format for free! Find your manual BS701SE - VOLTCRAFT and take your electronic device back in hand. On this page are published all the documents necessary for the use of your device. BS701SE by VOLTCRAFT.
USER MANUAL BS701SE VOLTCRAFT
natural_image
Technical diagram of a mechanical assembly with directional arrows indicating movement (no text or symbols)GB Operating Instructions
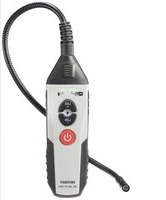
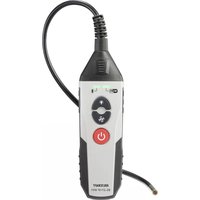
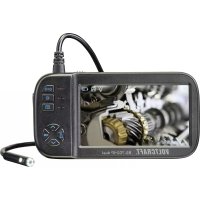
Endoscope
Item no: 2446356 / BS-701 + IP Single
Item no: 2446357 / BS-702 + IP Dual
CE

1 Intended use
The product is a battery-operated endoscope. Use the product to inspect and troubleshoot voltage-free systems and installations.
The main unit must always stay dry.
The goose neck camera is protected against water and dust ingress (IP67). Only immerse the goose neck in water and watery liquids. Do not immerse in acids or alkaline solutions.
Item no. 2446357 is additionally equipped with a sideview camera.
The product is designed for private and commercial use.
In commercial institutions, the accident prevention regulations of the Employer's Liability Insurance Association for Electrical Systems and Operating Materials are to be observed.
The product can be used in schools and training centres. The use must be supervised by trained personnel.
If you use the product for purposes other than those described, the product may be damaged.
Improper use can result in short circuits, fires, or other hazards.
The product complies with the statutory national and European requirements.
For safety and approval purposes, you must not rebuild and/or modify the product.
Read the operating instructions carefully and store them in a safe place. Make this product available to third parties only together with the operating instructions.
All company names and product names are trademarks of their respective owners. All rights reserved.
2 Delivery contents
Main unit
Operating instructions
Gooseneck with camera
■ Attachments (hook, magnet, mirror, protective cap)
3 Latest product information
Download the latest product information at www.conrad.com/downloads or scan the QR code shown. Follow the instructions on the website.
4 Symbols in this document

The symbol warns of hazards that can lead to personal injury. Read the information carefully.

The symbol warns of dangerous voltage that can lead to personal injury by electric shock. Read the information carefully.
5 Symbols on the product

Read the operating instructions carefully.
6 Safety instructions

Read the operating instructions carefully and especially observe the safety information. If you do not follow the safety instructions and information on proper handling, we assume no liability for any resulting personal injury or damage to property. Such cases will invalidate the warranty/guarantee.
6.1 General
The product is not a toy. Keep it out of the reach of children and pets.
Do not leave packaging material lying around carelessly. This may become dangerous playing material for children.
If you have questions which remain unanswered by this information product, contact our technical support service or other technical personnel.
- Maintenance, modifications and repairs must only be completed by a technician or an authorised repair centre.
6.2 Handling
- Handle the product carefully. Jolts, impacts or a fall even from a low height can damage the product.
6.3 Operating environment

Danger to life from electric shock! Touching voltage-carrying objects with the goose neck or the camera head can cause electric shocks. Only investigate voltage-free objects.
Do not place the product under any mechanical stress.
- Protect the appliance from extreme temperatures, strong jolts, flammable gases, steam and solvents.
■ Protect the product from direct sunlight.
6.4 Operation
Consult an expert when in doubt about the operation, safety or connection of the product.
If it is no longer possible to operate the product safely, take it out of operation and protect it from any accidental use. DO NOT attempt to repair the product yourself. Safe operation can no longer be guaranteed if the product:
- is visibly damaged,
– is no longer working properly,
– has been stored for extended periods in poor ambient conditions or
– has been subjected to any serious transport-related stresses.
6.5 Li-ion battery
- Never damage the rechargeable battery. Damaging the casing of the rechargeable battery might cause an explosion or a fire!
Never short-circuit the contacts of the rechargeable battery. Do not throw the battery or the product into fire. There is a danger of fire and explosion!
Charge the rechargeable battery regularly, even if you do are not using the product. Due to the rechargeable battery technology being used, you do not need to discharge the rechargeable battery first.
■ Never charge the rechargeable battery of the product unattended.
When charging, place the product on a surface that is not heat-sensitive. It is normal that a certain amount of heat is generated during charging.
6.6 Connected devices
Also observe the safety and operating instructions of any other devices which are connected to the product.
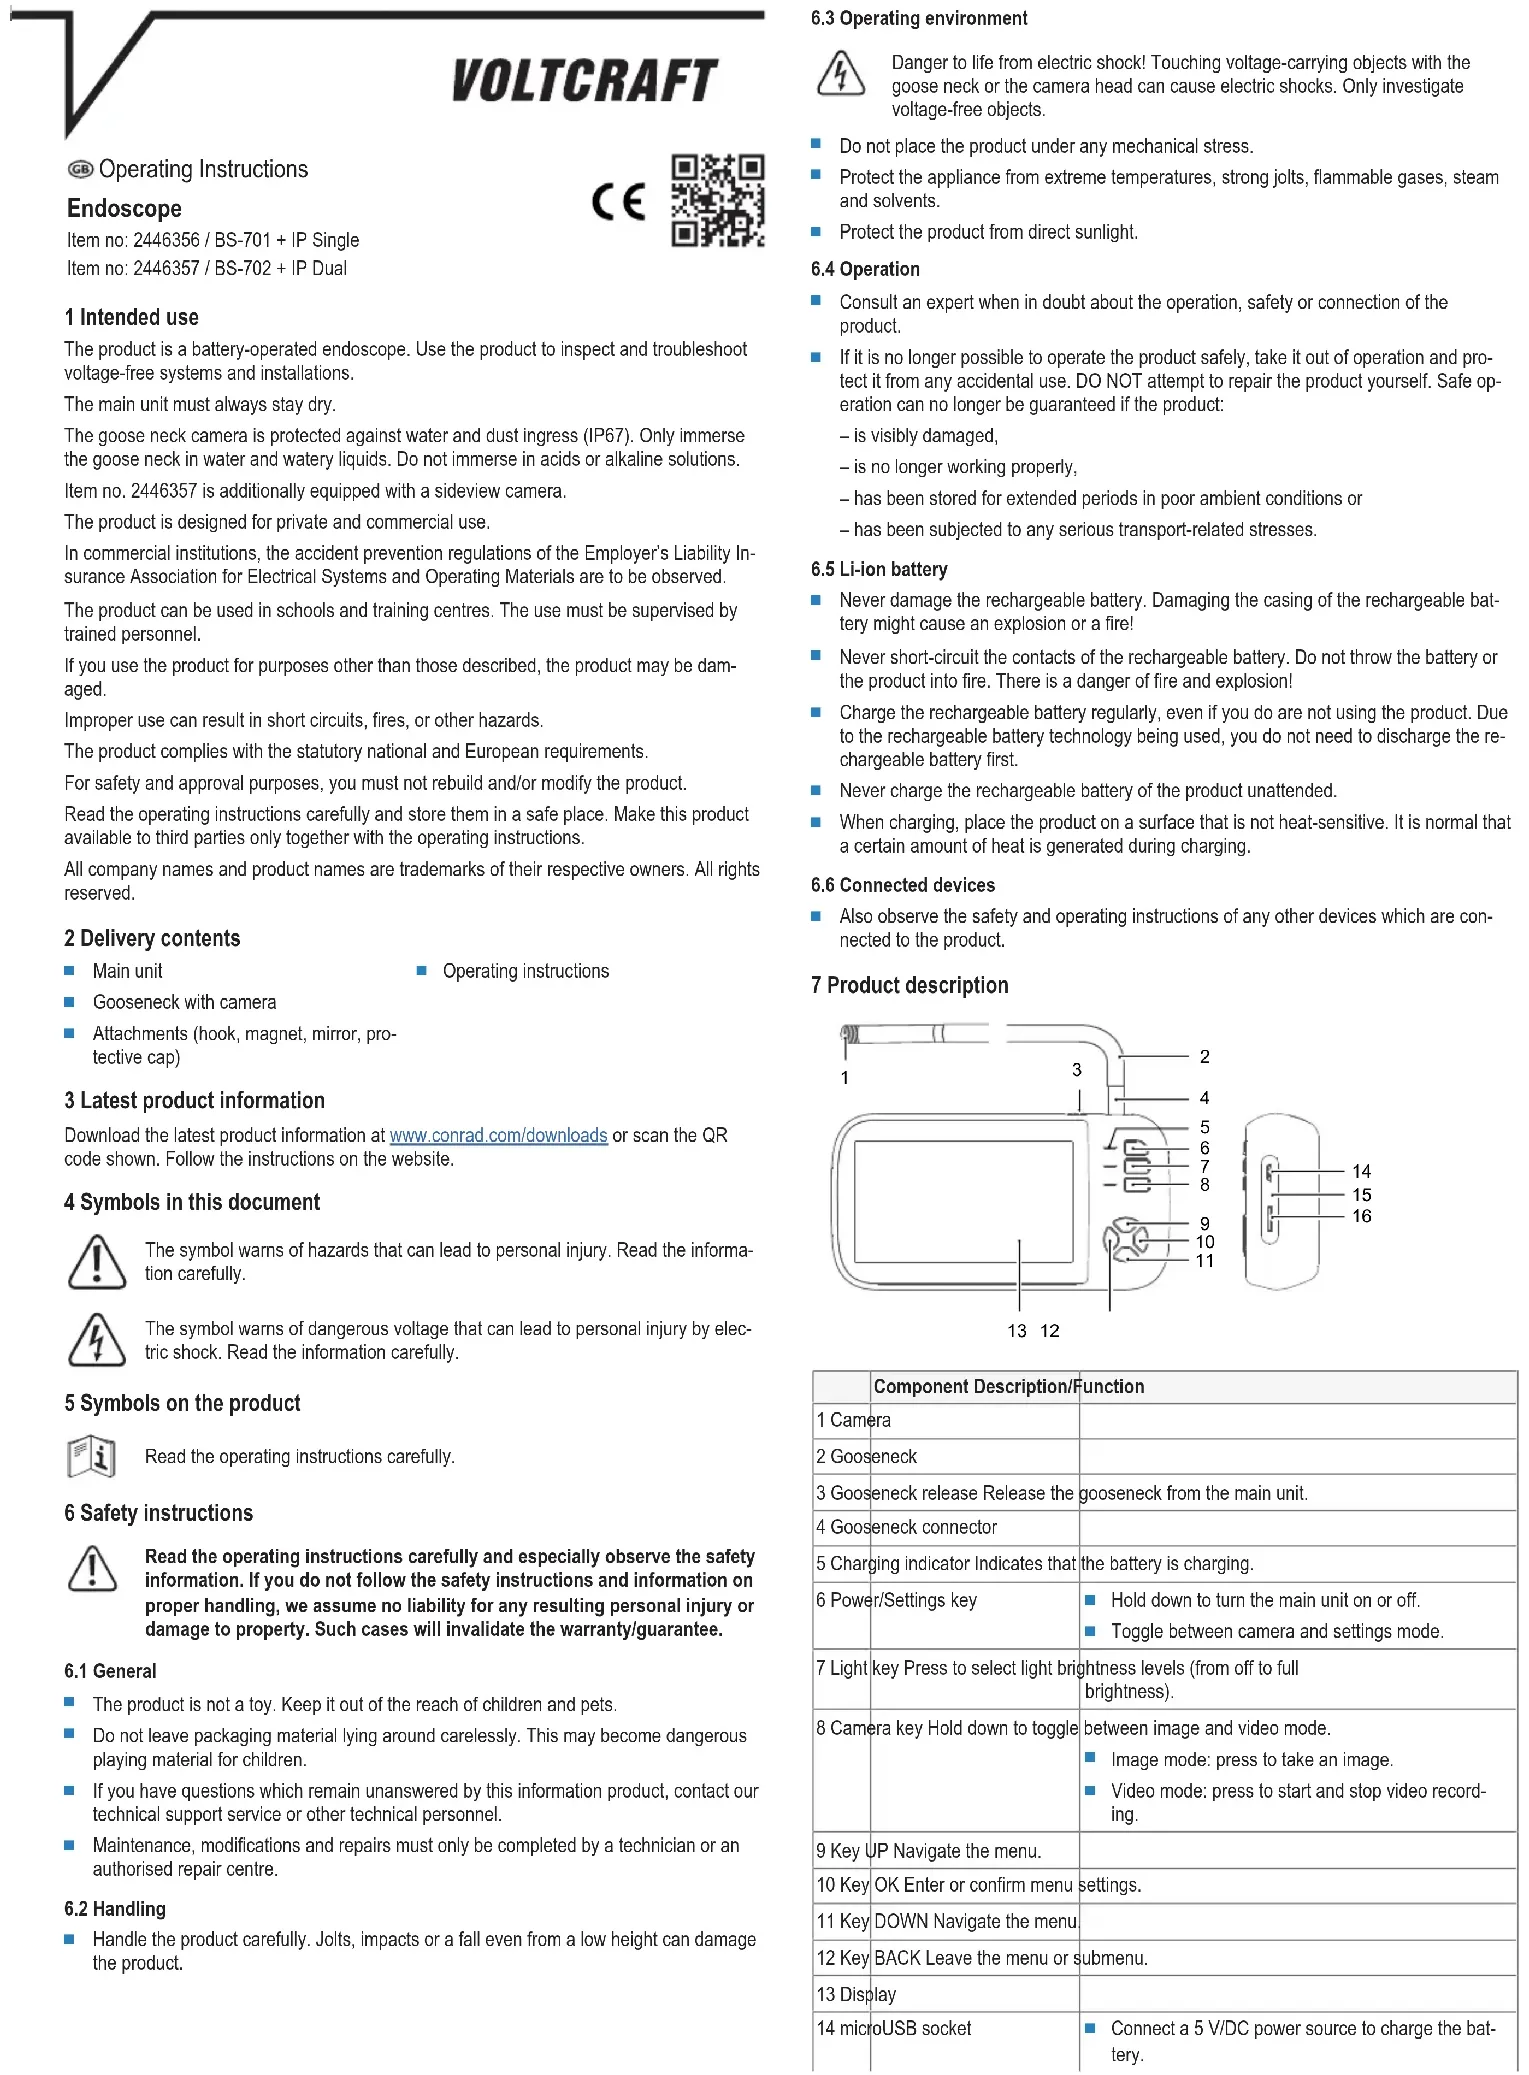
7 Product description
text_image
1 2 3 4 5 6 7 8 9 10 11 13 12 14 15 16| Component Description/Function | ||
| 1 Camera | ||
| 2 Gooseneck | ||
| 3 Gooseneck release Release the | gooseneck from the main unit. | |
| 4 Gooseneck connector | ||
| 5 Charging indicator Indicates that | the battery is charging. | |
| 6 Power/Settings key | Hold down to turn the main unit on or off Toggle between camera and settings mode. | |
| 7 Light key Press to select light brightness levels (from off to full brightness). | ||
| 8 Camera key Hold down to toggle | between image and video mode.Image mode: press to take an image.Video mode: press to start and stop video recording. | |
| 9 Key UP Navigate the menu. | ||
| 10 Key OK Enter or confirm menu | settings. | |
| 11 Key DOWN Navigate the menu. | ||
| 12 Key BACK Leave the menu or | submenu. | |
| 13 Display | ||
| 14 microUSB socket | Connect a 5 V/DC power source to charge the battery. | |
| Connect a computer to transfer images and videos. | ||
| 15 Reset key Reset the main unit to the factory settings. | ||
| 16 microSD card slot Insert a microSD card to store recorded images and videos. | ||
8 Getting started
8.1 Charging the battery
The main unit runs on battery power. Fully charge the battery before you start your investigation work to ensure uninterrupted working.
Fully charging the battery takes about 3 hours.
- Connect the USB cable to the microUSB socket on the main unit.
→ The charging indicator indicates the battery charging status: RED (charging)/GREEN (charged).
- (If the battery indicator light is GREEN) disconnect the cable.
8.2 Switching on and off
-
(If main unit is off) hold down the power key until the display switches on.
-
To switch off, hold down the power key until the display switches off.
8.3 Installing microSD card for storage
Install a microSD card to store recorded pictures and videos of your investigation work for further processing.
PRECONDITIONS:
√ You have a microSD card ready (speed class: min. 10, size: max. 32 GB)
-
Insert the microSD card into the microSD card slot until it locks.
-
(If main unit is off) hold down the power key until the display switches on.
-
Press the settings key to enter the settings menu.
-
Navigate to the entry Format and press the key OK to start the formatting process.
-
Follow the on-screen instructions to format the card.
→ The microSD card storage is ready for use.
8.4 Setting date and time
The date and time settings will be used when taking pictures and recording videos.
-
(If main unit is off) hold down the power key until the display switches on.
-
Press the settings key to enter the settings menu.
-
Navigate to the entry Date/Time and press the key OK.
-
Use the keys UP and DOWN to adjust settings and press the key OK to confirm them.
-
Press the key BACK leave the menu. Press repeatedly, if necessary.
8.5 Setting image resolution
While you investigate objects you can take pictures and video for further analysis. Pictures and videos can be recorded at different resolutions. Set the desired image resolution.
Supported resolutions
| Menu entry Camera Video | |||
| 1080P | 1920 x 1080P | 1280 x 720P | |
| 720P | 1280 x 720P | 1280 x 720P | |
| VGA | 640 x 480P | 640 x 480P | |
Procedure
- (If main unit is off) hold down the power key until the display switches on.
- Press the settings key to enter the settings menu.
- Navigate to the entry Resolution and press the key OK.
- Use the UP and DOWN keys to select a resolution.
- Press the key OK to save the setting.
- Press the key BACK to leave the menu.
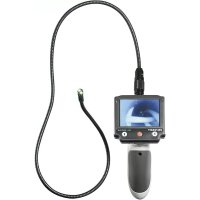
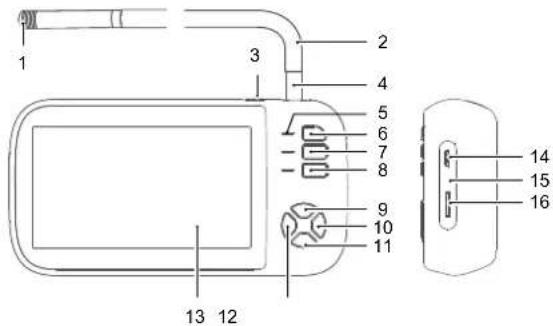
8.6 Connecting the gooseneck
The camera transmits the camera image through the gooseneck to the main unit.
natural_image
Mechanical diagram showing a lever mechanism with red directional arrows indicating motion (no text or symbols)- To install, insert the gooseneck connector into the receptable in the main unit until it locks.
- To remove, pull the gooseneck release and carefully pull the gooseneck out.
8.7 Installing camera attachments
To help you with your investigation work, you can install attachments to the camera body.
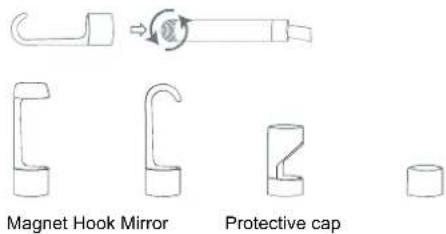
text_image
Magnet Hook Mirror Protective cap- (If the protective cap is installed) unscrew it from the camera.
- Carefully screw an attachment onto the camera and hand-tighten it.
Important:
To protect the camera from damage, install the protective cap if no attachment is installed.
9 Investigating objects
If the gooseneck is connected, you can start your investigation work.
Important:
- Only the gooseneck with camera is protected against water (IP67). Do not immerse
the gooseneck connector in water. Keep the main unit dry at all times. - Keep the bending radius of the gooseneck at min. 30 mm.

! WARNING
Danger to life from electric shock!
Touching voltage-carrying objects with the gooseneck or the camera head can cause electric shocks.
- Shut off voltage supply.
- Protect against accidental switch-on.
9.1 Adjusting the brightness of the camera light
The camera has different brightness levels. Adjust the brightness to a level that fits the lighting conditions of the work environment.
- (If the light is off) press the light key to switch the light on.
- Repeatedly press the light key to adjust the brightness to the desired level (from off to full brightness).
9.2 Rotating camera image
Depending on the work environment, you might need to hold the main unit upside down. In this case, the display is also upside down and you can use the image rotating function to rotate the camera image.
PRECONDITIONS:
√ The display shows the camera image.
- Press the key UP to rotate the image by 180^ .
9.3 Switching cameras (Item no. 2446357)
The camera body has a front and a sideview camera. The camera images can be displayed in three configurations: front camera, sideview camera, and side-by-side.
PRECONDITIONS:
√ The display shows the camera image.
- Repeatedly press the key DOWN to switch the camera display configuration.
9.4 Taking pictures
While you investigate objects, you can take pictures for further analysis.
- Press the camera key to take a picture.
→ The picture is saved to the microSD card.
9.5 Recording video
While you investigate objects, you can record a video for further analysis.
- Hold down the camera key until the display shows the video camera symbol.
→ Video recording starts.
→ The indicator light next to the camera key flashes.
- Press the camera key to stop recording video.
→ The video is saved to the microSD card.
10 Managing recordings
You can manage recorded images and videos in the main unit or with a connected computer.
10.1 Viewing recordings
After your investigation work you can view recorded pictures and videos on the display.
PRECONDITIONS:
√ There is no video recording in progress.
- Press the key BACK to open the picture and video storage.
- Use the UP and DOWN keys to scroll through the recorded pictures and videos. Stop at the picture or video you want to display.
- Press the key OK to open a picture or play a recorded video.
- (For videos) press the key OK to start and stop the playback.
- Press the key BACK to close the picture/video.
- Press the key BACK to leave the menu.
10.2 Deleting recordings
If you no longer need recorded pictures and images or to free storage space, you can delete pictures and videos via the settings menu.
- Press the key BACK to open the picture and video storage.
- Use the UP and DOWN keys to scroll through the recorded pictures and videos. Stop at the image or video you want to delete.
- Press the power key to open the deletion screen.
- Use the UP and DOWN keys to select a deletion option.
- Press the key OK to start the deletion process. Follow the on-screen instructions to complete the deletion process.
- Press the key BACK to leave the menu.
10.3 Transferring recordings to computer
To store recorded pictures and videos permanently or for further processing, you can transfer them from the internal storage to a computer.
PRECONDITIONS:
√ The main unit is switched on.
- Connect the USB cable to the microUSB socket on the main unit.
- Connect the other end of the cable to the computer.
→ The microSD card appears as a storage device on the computer.
- Transfer pictures and videos to the computer.
11 Troubleshooting
11.1 Resetting the main unit
If the endoscope does not operate as usual, you can reset the main unit to the factory default settings.
PRECONDITIONS:
√ The main unit is switched on.
- Press the reset key to reset the main unit.
→ The main unit switches off. - Switch the main unit on.
→ You have reset the main unit.
12 Cleaning and care
12.1 Main unit
Important:
- Do not use aggressive cleaning agents, rubbing alcohol or other chemical solutions. They damage the housing and can cause the product to malfunction.
-
Do not immerse the product in water.
-
Clean the product with a dry, fibre-free cloth.
12.2 Gooseneck camera
Important:
- Do not use aggressive cleaning agents, rubbing alcohol or other chemical solutions. They damage the housing and can cause the product to malfunction.
- Disconnect the gooseneck camera from the main unit.
- Clean the gooseneck camera with water. NOTICE! Gooseneck damage possible! Only immerse the gooseneck up to the connector in water. Keep the camera connector dry.
- Dry the gooseneck camera with a dry, fibre-free cloth.
13 Disposal

This symbol must appear on any electrical and electronic equipment placed on the EU market. This symbol indicates that this device should not be disposed of as unsorted municipal waste at the end of its service life.
Owners of WEEE shall dispose of it separately from unsorted municipal waste. Spent batteries and accumulators, which are not enclosed by the WEEE, as well as lamps that can be removed from the WEEE in a non-destructive manner, must be removed by end users from the WEEE in a non-destructive manner before it is handed over to a collection point.
Distributors of electrical and electronic equipment are legally obliged to provide free takeback of waste. Conrad provides the following return options free of charge (more details on our website):
in our Conrad offices
■ at the Conrad collection points
at the collection points of public waste management authorities or the collection points set up by manufacturers or distributors within the meaning of the ElektroG
End users are responsible for deleting personal data from the WEEE to be disposed of.
It should be noted that different obligations about the return or recycling of WEEE may apply in countries outside of Germany.
14 Technical data
14.1 Power supply
Rechargeable battery ..... Li-ion rechargeable battery, 3.7 V, 2000 mAh, 7.4 Wh
Charging voltage and current ..... 5 V/DC, min. 500 mA via USB
14.2 Camera
Sensor ...... Front camera: CMOS, 2.0 MP
Sideview camera: CMOS, 2.0 MP (Item no. 2446357)
Camera lighting 8 LEDs
White balance ...... Automatic
Exposure ...... Automatic
Camera head ∅ 8.0 mm
Field of vision 70°
Depth of field 10 – 100 mm
Goose neck bending radius .... min. 30 mm
Gooseneck length.... 5 m
Ingress protection IP67
14.3 Video and image
Data storage .... microSD card (size: max. 32 GB, speed class: min. 10)
Image resolution 1920 x 1080, 1280 x 720, 640 x 480P
Image format ...... JPEG
Video resolution 1280 x 720P, 640 x 480P
Video format ...... AVI
Frame rate 25 fps
14.4 Others
Operating temperature .... 0 to +50 °C
Operating humidity .... <95 % RH
Storage temperature 0 to +50 °C
Storage humidity .... <95 % RH
Dimensions (W x H x D) (approx.) . 152 x 79 x 34 mm
Weight (approx.) 357 g
This is a publication by Conrad Electronic SE, Klaus-Conrad-Str. 1, D-92240 Hirschau (www.conrad.com).
All rights including translation reserved. Reproduction by any method (e.g. photocopying, microfilming or the capture in electronic data processing systems) requires prior written approval from the editor. Reprinting, also in part, is prohibited. This publication reflects the technical status at the time of printing.
Copyright by Conrad Electronic SE.
*2446356_2446357_V1_0222_jh_mh_en pj-id: 18014398927490315-1 i/o: I3/O1 edtl-id: en
VOLTCRAFT
F Mode d'emploi
Endoscope
N° de commande 2446356 / BS-701 + IP simple
N° de commande 2446357 / BS-702 + IP double
CE

CONDITIONS PRÉALABLES:
natural_image
Mechanical assembly diagram showing a lever mechanism with red directional arrows indicating motion (no text or symbols)CONDITIONS PRÉALABLES:
CONDITIONS PRÉALABLES:
CONDITIONS PRÉALABLES:
CONDITIONS PRÉALABLES:
CONDITIONS PRÉALABLES:
12.1 Apparel principal
Important:
natural_image
Technical diagram of a mechanical assembly with directional arrows indicating motion (no text or symbols)natural_image
Pure technical line drawings of mechanical components without any text, numbers, or symbolsMagneet Haak Spiegel Beschermdop

Copyright by Conrad Electronic SE.
*2446356_2446357_V1_0222_jh_mh_nl pj-id: 18014398927490315-1 i/o: I3/O1 edtl-id: en