SYDB400 - Intercom Sygonix - Free user manual and instructions
Find the device manual for free SYDB400 Sygonix in PDF.
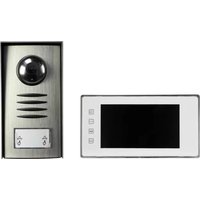
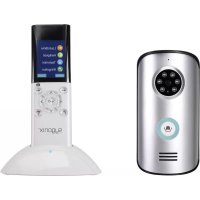
| Product type | WiFi doorbell with camera |
| Brand | Sygonix |
| Model | SYDB400 |
| Dimensions (L x H x D) | 45 x 115 x 41 mm |
| Weight | 103 g |
| Power supply | 12 V/DC, 1 A (power adapter included) or 12-24 V/AC, 1 A |
| Video resolution | Full HD 1920 x 1080 (25 fps) |
| Night vision | Yes, infrared LED, range 10 m |
| Audio | Two-way (built-in microphone and speaker) |
| Wireless connectivity | WiFi 2.4 GHz, IEEE 802.11 b/g/n, max range 50 m |
| Protection rating | IP54 (dust and splash water protection) |
| Motion detection | Yes, software-based, angle identical to field of view, range 8 m |
| Storage | microSD card (8 to 128 GB, class 10), FAT32 format |
| Mobile app | Smart Life – Smart Living for Android 5.0+ and iOS 9.0+ |
| Chime | Up to 101 dB |
| Field of view | Horizontal 100°, Vertical 55° |
| Installation | Flat or angle bracket included, wall mounting |
| Package contents | Camera chime, power supply unit, 2 brackets, screws, wall plugs, key, reset pin, user manual |
| Maintenance | Disconnect before cleaning, use a dry, lint-free cloth, avoid aggressive products |
| Operating conditions | -20 to +50 °C, ≤ 90% RH (non-condensing) |
| WiFi frequency | 2.412 - 2.484 GHz |
| Transmission power | < 20 dBm |
Frequently Asked Questions - SYDB400 Sygonix
User questions about SYDB400 Sygonix
0 question about this device. Answer the ones you know or ask your own.
Ask a new question about this device
Download the instructions for your Intercom in PDF format for free! Find your manual SYDB400 - Sygonix and take your electronic device back in hand. On this page are published all the documents necessary for the use of your device. SYDB400 by Sygonix.
USER MANUAL SYDB400 Sygonix
GB Operating Instructions SY-DB-400 Wi-Fi Doorbell with camera
Item No. 2226161
Page 28 - 52
text_image
QR code with a blue house icon in the center, likely linking to a digital service or website.text_image
QR code image with partial text 'sun-' visible in the bottom-left cornertext_image
Warning symbols for electrical hazard, showing a lightning bolt and an exclamation marktext_image
Two warning symbols: a lightning bolt and an exclamation mark, commonly used in safety or hazard prevention contexts.a) Allgemeines
text_image
Two triangular warning symbols: a lightning bolt and an exclamation mark, commonly used in safety or hazard prevention contexts.text_image
Two warning symbols: a lightning bolt and an exclamation mark, commonly used in safety or hazard prevention contexts.d) Netzteil
text_image
Diagram showing wireless devices including a smartphone, tablet, WiFi, and remote device with signal iconsnatural_image
Three identical metal bracket components connected by a dashed line (no text or symbols)text_image
Diagram showing three types of electrical connectors with warning symbols and an exclamation mark, indicating a warning or warning.text_image
Diagram illustrating a process of battery charging with warning symbols and error indicatorswww.conrad.com/downloads
natural_image
Symbol of a trash bin crossed out by two diagonal lines (no text or numbers present)Sensor 1/3" CMOS, 2 Megapixel
- Introduction......29
- Explanation of symbols ....30
- Intended use....31
- Privacy and surveillance....32
- Mobile application....33
- Delivery content....34
- Up-to-date operating instructions ....34
- Features and functions....35
- Safety instructions....35
a) General information....36
b) Ingress protection....37
c) Mounting ....37
d) Power adaptor....38
- Operating elements....39
- Installation 40
a) Location....40
b) Power outlet / adaptor ....41
c) Flat bracket 42
d) Angled bracket and flat bracket....43
- Operation....44
a) Doorbell....44
b) Reset device / enter pairing mode ....44
c) Status indicator description....44
d) Low light recording....45
e) SD card....45
f) Motion detection....46
-
Care and cleaning 46
-
Declaration of Conformity (DOC)......47
-
Disposal....48
-
Technical data ....49
a) Power adaptor....49
b) Doorbell....49
c) Wireless connectivity....51
d) Application software....51
1. Introduction
Dear customer,
Thank you for purchasing this product.
This product complies with the statutory national and European requirements.
To maintain this status and to ensure safe operation, you as the user must observe these operating instructions!

These operating instructions are part of this product. They contain important notes on commissioning and handling. Also consider this if you pass on the product to any third party. Therefore, retain these operating instructions for reference!
If there are any technical questions, please contact:
www.conrad.com/contact
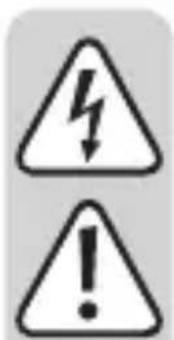
2. Explanation of symbols
The symbol with the lightning in the triangle is used if there is a risk to your health, e.g. due to an electric shock.

The symbol with the exclamation mark in the triangle is used to indicate important information in these operating instructions. Always read this information carefully.
The arrow symbol indicates special information and advice on operation.
Read the operating instructions carefully.
3. Intended use
The product is intended to be used as a doorbell camera. A doorbell will sound when pressed and a push notification is sent to a mobile device where you can then see and talk to the caller.
Motion sensors can be set to trigger notifications and recordings when movement is detected within range.
The camera is equipped with a low light camera capable of recording black and white images in total darkness. The device connects to a 2.4 GHz WLAN network via Wi-Fi and is powered by the included adaptor.
The application is available for download from the App Store or Google Play ^TM Store.
The product has an IP54 ingress protection rating and provides limited protection against dust and light rain. If used outdoors it should be mounted in sheltered areas. The included power adaptor is not IP rated and should be led to an indoor connection or weatherproofed junction box
For safety and approval purposes, you must not rebuild and/or modify this product. If you use the product for purposes other than those described above, the product may be damaged. In addition, improper use can result in short circuits, fires, electric shocks or other hazards. Read the instructions carefully and store them in a safe place. Make this product available to third parties only together with its operating instructions.
All company names and product names are trademarks of their respective owners. All rights reserved.
4. Privacy and surveillance
- It is the responsibility of the user to be aware of all applicable laws and regulations that prohibit or limit the use of cameras, and to comply with the applicable laws and regulations.
- Recording and circulating an image of an individual may constitute an infringement of their privacy for which you may be held liable.
- Ask for authorization before filming individuals, particularly if you want to keep your recordings and/or circulate images on the Internet or any other medium.
- Do not circulate degrading image(s) or one which could undermine the reputation or dignity of an individual.
- In your country it may be a legal requirement to display a warning when using surveillance cameras on your property. In such cases it is important to display a warning sticker where potential intruders can see it.
- You should not point cameras where surveillance extends to public areas, and video recordings should not identify people in a public space.
5. Mobile application

Access the camera using the application and a compatible mobile phone or tablet.
Have the password for your Wi-Fi router ready.
Connect the mobile phone or tablet to the same Wi-Fi network the doorbell camera will connect to.
Application operating instructions are available from the URL listed in chapter "7. Up-to-date operating instructions" on page 35.
text_image
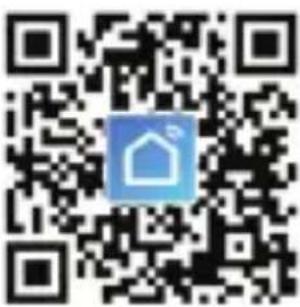
QR code with a blue house icon in the center, likely linking to a digital service or website.Compatible Android™ and iOS apps are available from their respective app stores. Search for “Smart Life - Smart Living” and download the application, or scan the QR code shown.
6. Delivery content
- Doorbell camera
- Power adaptor
- Flat bracket
- Angled bracket
- 2x screws for bracket
-
3x mounting screws
-
3x dowels
- L-shaped star wrench
- Star screw
- Reset pin
- Operating instructions
7. Up-to-date operating instructions
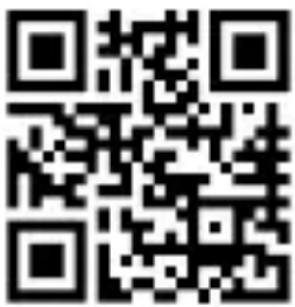
Download the latest operating instructions at www.conrad.com/downloads or scan the QR code shown. Follow the instructions on the website.
text_image
QR code image containing encoded data, no visible human-readable text8. Features and functions
- Easy installation
- Camera has an IP54 ingress protection rating
- 1920 x 1080 full HD
- Two-way audio
• 2.4 GHz Wi-Fi - Motion detection
- Low light recording
• Video playback and screen shots - “Smart Life - Smart Living” mobile application
9. Safety instructions

text_image
Warning symbols for electrical hazard, showing a lightning bolt and an exclamation markRead the operating instructions carefully and especially observe the safety information. If you do not follow the safety instructions and information on proper handling in this manual, we assume no liability for any resulting personal injury or damage to property. Such cases will invalidate the warranty/guarantee.

text_image
Two warning symbols: a lightning bolt and an exclamation mark, commonly used in safety or hazard prevention contexts.a) General information
- The device is not a toy. Keep it out of the reach of children and pets.
- Do not leave packaging material lying around carelessly. This may become dangerous playing material for children.
- Protect the device from extreme temperatures, direct sunlight, strong jolts, high humidity, moisture, flammable gases, steam and solvents.
- Do not place the product under any mechanical stress.
-
If it is no longer possible to operate the product safely, take it out of operation and protect it from any accidental use. Safe operation can no longer be guaranteed if the product:
-
is visibly damaged,
- is no longer working properly,
- has been stored for extended periods in poor ambient conditions or
- has been subjected to any serious transport-related stresses.
- Please handle the product carefully. Jolts, impacts or a fall even from a low height can damage the product.
- Consult an expert when in doubt about the operation, safety or connection of the device.
text_image
Two warning symbols: a lightning bolt and an exclamation mark, commonly used in safety or hazard prevention contexts.- Maintenance, modifications and repairs must only be completed by a technician or an authorised repair centre.
- If you have questions which remain unanswered by these operating instructions, contact our technical support service or other technical personnel.
b) Ingress protection
- The device has an IP54 rating and offers protection against dust and splashing water.
• The power adaptor is not IP rated. - To maintain the ingress protection rating make sure the bracket forms a good seal when attached to the device.
c) Mounting
- Before drilling, check for concealed wires or pipes beneath the surface that could be damaged or cause harm.

text_image
Two warning symbols: a lightning bolt and an exclamation mark, commonly used in safety or hazard prevention contexts.d) Power adaptor
- The mains outlet must be located near to the device and be easily accessible.
- As power supply, only use the supplied mains adaptor.
- Only connect the power adaptor to a normal mains socket connected to the public supply. Before plugging in the power adaptor, check whether the voltage stated on the power adaptor complies with the voltage of your electricity supplier.
- Never connect or disconnect power adaptors if your hands are wet.
- Never unplug the power adaptor from the mains socket by pulling on the cable; always use the grips on the plug.
- When setting up the product, make sure that the cable is not pinched, kinked or damaged by sharp edges.
• Always lay the cables so that nobody can trip over or become entangled in them. This poses a risk of injury. - For safety reasons, disconnect the power adaptor from the mains socket during storms.
10. Operating elements
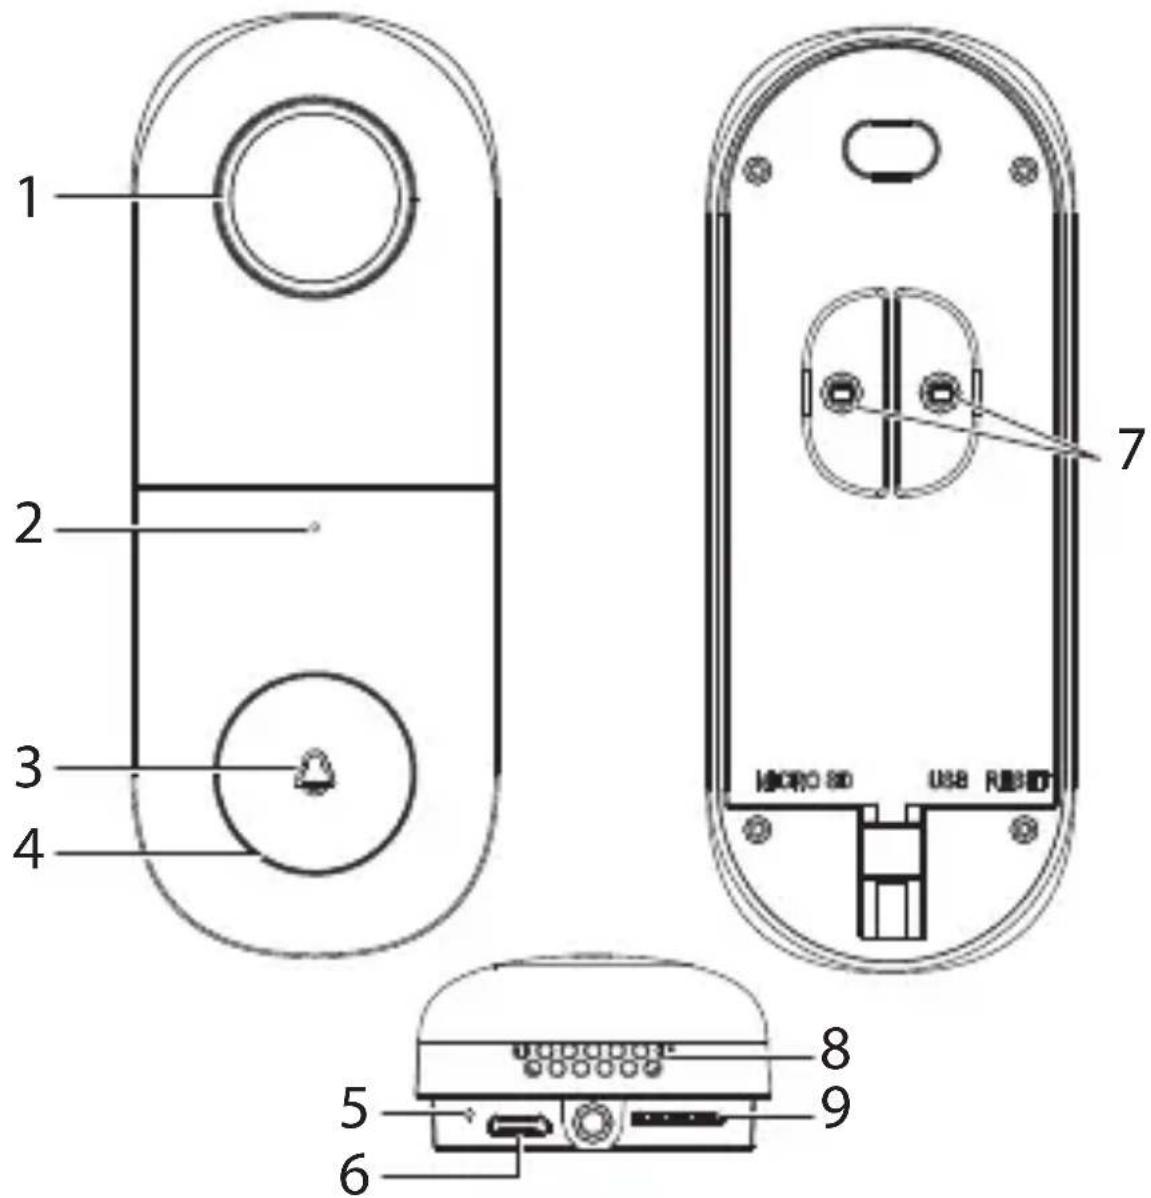
text_image
1 2 3 4 7 USB RUB 8 9 5 61 Lens
2 Microphone
3 Status indicator light
4 Doorbell button
5 Reset button hole
6 Micro USB port: This is only used once during the manufacturing process.
7 AC adaptor connectors
8 Speaker
9 SD card slot
11. Installation

Do not plug the adaptor into the power outlet until the installation process is complete.

Check the provided screws are appropriate for the surface material. If in doubt consult a professional.
a) Location

The doorbell has an IP54 rating and provides limited protection against dust and light splashes of water. It can be installed outdoors but in a sheltered location which is protected against the elements.
Before drilling holes and mounting the device, consider the camera recording and motion detection angles. See section “16. Technical data” on page 48 for further information.
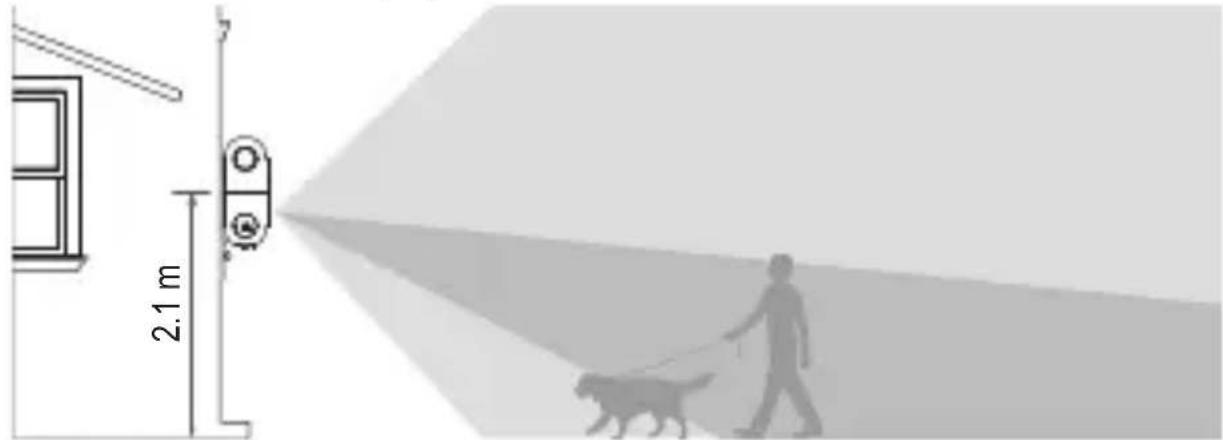
text_image
2.1 m- Check that the device is within range of your Wi-Fi access point. Use of other 2.4 GHz products e.g. wireless networks and microwave ovens may cause interference.
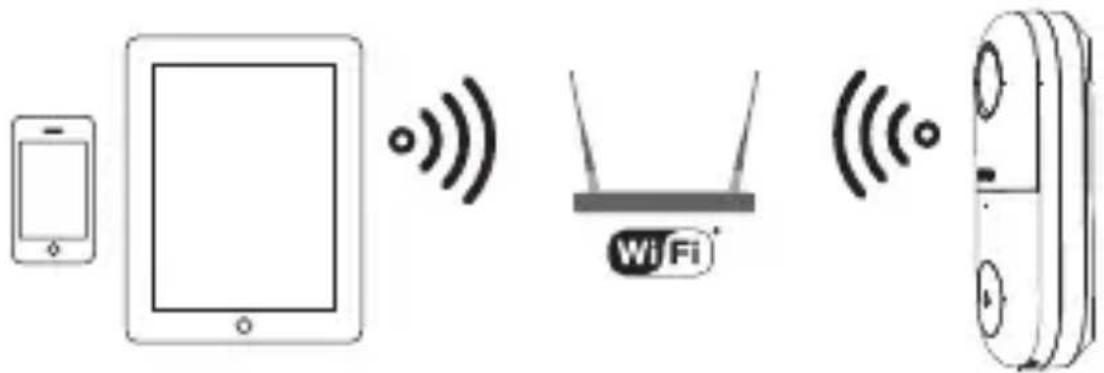
text_image
Diagram showing wireless devices including a smartphone, tablet, WiFi, and remote device with signal iconsYou may need to set up a wireless repeater to improve the connection.
b) Power outlet / adaptor

The included adaptor is designed for indoor use. Keep it away from water and humid environments.
If installing the device outdoors, connect the adaptor to a weatherproof socket box.
- Locate a power outlet as close to the device as possible.
- Lead the wires to where you will be installing the doorbell camera.
- To get the wires outside, lead them through a wall behind your device, through a window or a doorway.
natural_image
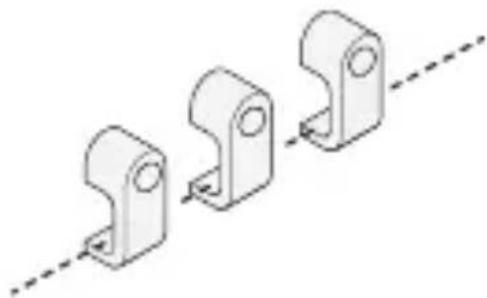
Three identical mechanical bracket components connected by a dashed line (no text or symbols)
Please observe good cable management practice such as securing cables with wall clips.
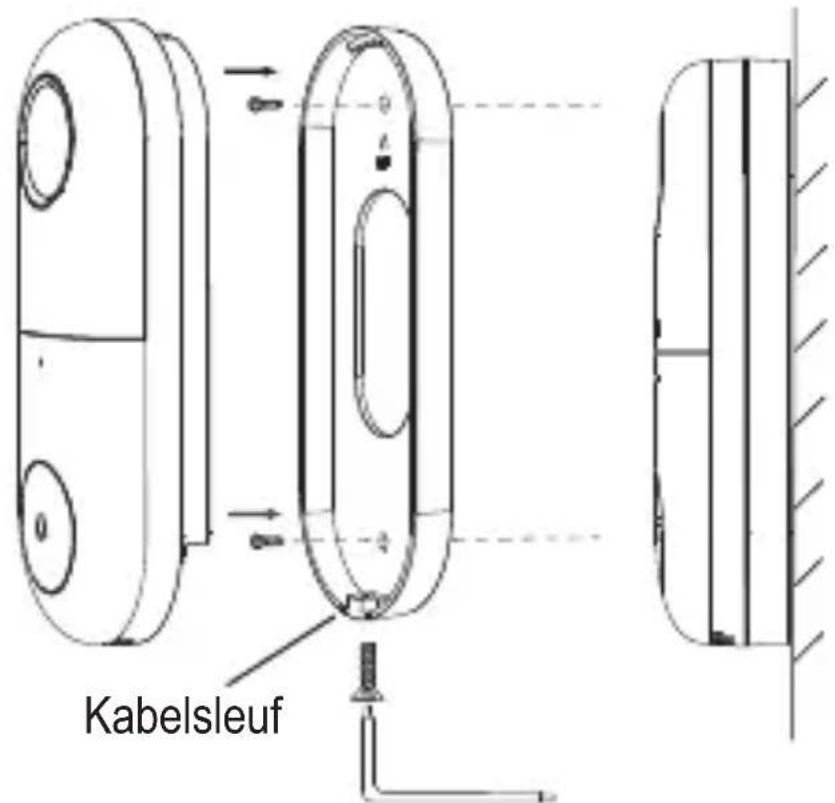
c) Flat bracket
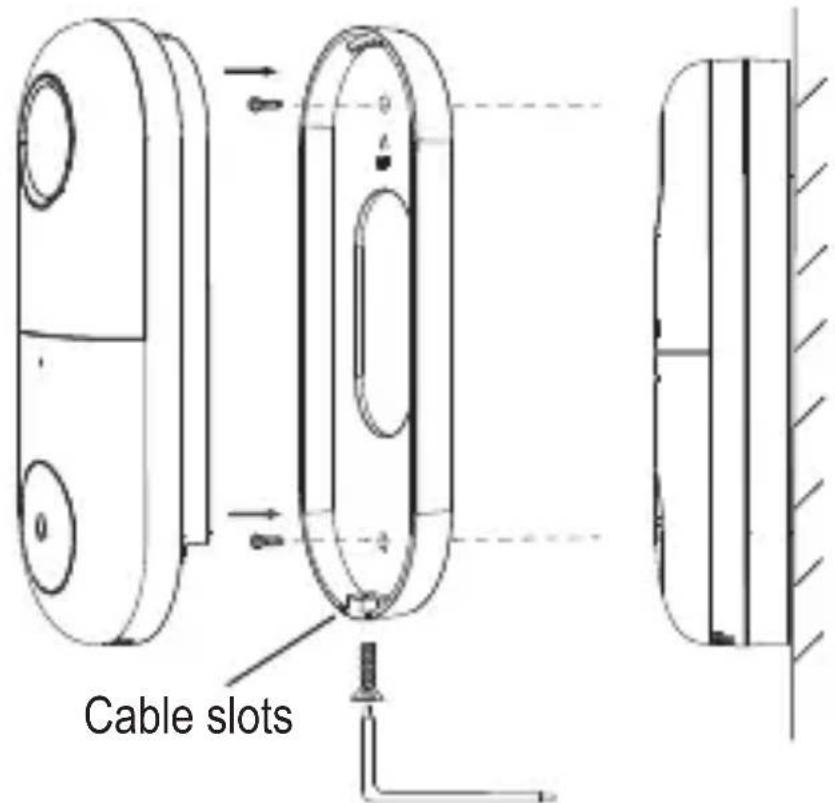
text_image
Cable slots-
Use the holes in the flat bracket as a template for where to drill. Drill holes and insert the dowels using a mallet if needed.
-
Fix the bracket to the wall using the wall screws, facing UP as indicated by the symbol.

- Use a plus head screwdriver to attach the adaptor leads to the connectors (7).
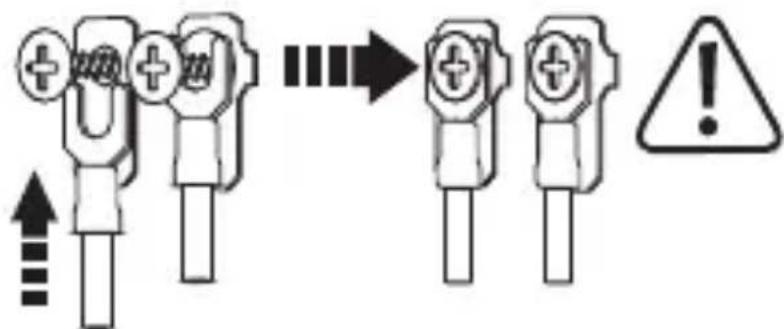
text_image
Diagram showing a sequence of electrical connector symbols with an exclamation mark indicating warning or failure.The doorbell chime has a built in converter, so the polarity does not matter.
-
Guide the wires through the cable slots.
-
Fasten the camera to the bracket using the star screw.
d) Angled bracket and flat bracket
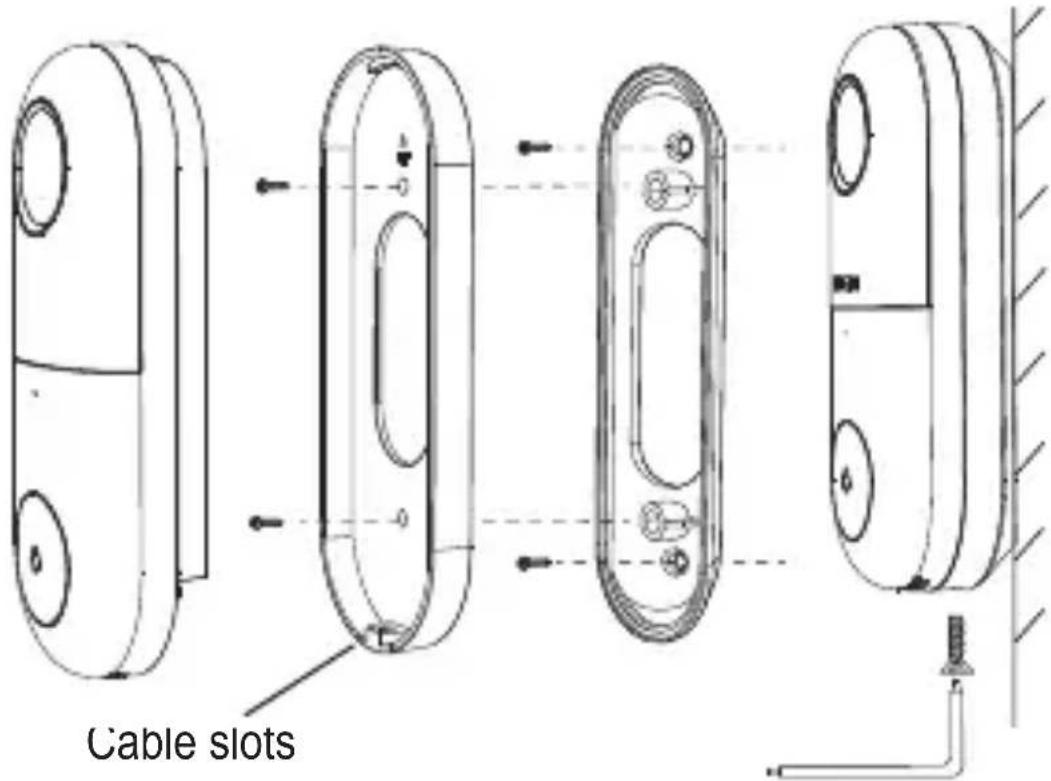
text_image
Cable slots-
Use the holes in the angled bracket as a template for where to drill. Drill holes and insert the dowels using a mallet if needed.
-
Fix the angled bracket to the wall using the wall screws.
-
Attach the flat bracket to the angle bracket, facing UP as indicated by the symbol.

- Use a plus head screwdriver to attach the adaptor leads to the connectors (7).
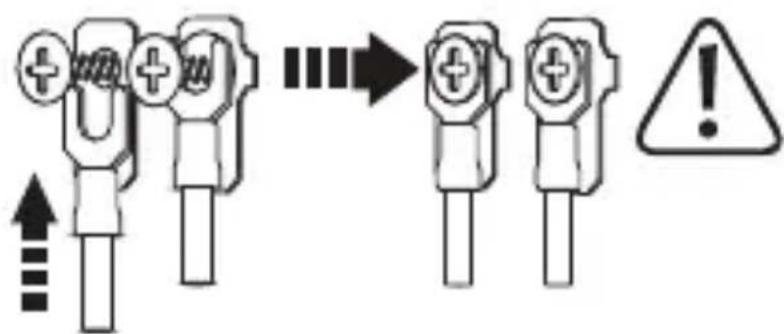
text_image
Diagram showing a sequence of electrical connector symbols with an exclamation mark indicating warning or failure.The doorbell chime has a built in converter, so the polarity does not matter.
- Fasten the camera to the bracket using the star screw.
12. Operation
a) Doorbell
Press the doorbell button (4) to activate the doorbell. You will receive an alert on your mobile device if paired with the application.
Refer to your mobile device operating instructions for information about notification settings.
b) Reset device / enter pairing mode
Reset the camera if it is not working correctly or you wish to enter pairing mode.
- Insert the included pin into the RESET button hole (5).
- Press until you feel a “click” and hold for 5 seconds until you hear an audio prompt.
- The status indicator light (3) will blink red to indicate reset is successful and the camera is now open for pairing.
c) Status indicator description
| Light (3) Status Description | ||
| Red Solid | on Camera or network is abnormal. | |
| Red Blinking | Waiting for Wi-Fi connection. | |
| Blue Solid | on Camera operating correctly. | |
d) Low light recording

Do not place the camera behind glass, glare from the infrared LED light may over expose the image.
- The device is equipped with a sensor that triggers “night vision” when the ambient light falls below a certain level.
• The light has a range of approximately 10 m. - The recorded image will be in black and white.
e) SD card

The microSD card should be formatted using the FAT32 file system. Refer to your computer instructions for information about how to do this.
The camera supports class 10 SD cards 8 - 128 GB capacity.
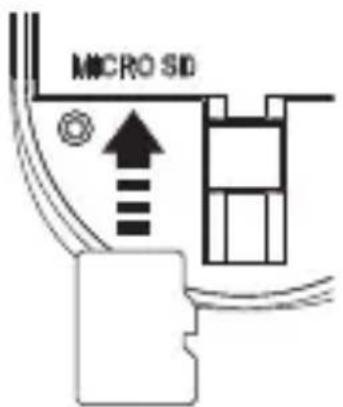
text_image
MICRO SID- Insert a card into the slot (9) in the direction shown. It will "click" into place.
- To eject, use the tip of your finger to press down until you feel a “click”, then release.
f) Motion detection
When motion is detected, a push alarm notification will be sent to your mobile device.
- With microSD inserted: 60 second clips will be saved.
- There are two kinds of recording (event and non-stop). These settings are accessed through the application. The Default time for event recording is 60 seconds.
- Cloud storage service: If subscribed to this service through the application, motion triggered recording will be saved to your cloud storage account. You do not need an SD card.
13. Care and cleaning

Do not use any aggressive cleaning agents, rubbing alcohol or other chemical solutions as they can cause damage to the housing and malfunctioning.
- Disconnect the product from the mains before each cleaning.
- Clean the product with a dry, fibre-free cloth.
14. Declaration of Conformity (DOC)
Conrad Electronic SE, Klaus-Conrad-Straße 1, D-92240 Hirschau hereby declares that this product conforms to the 2014/53/EU directive.
→ Click on the following link to read the full text of the EU declaration of conformity:
www.conrad.com/downloads
Select a language by clicking on a flag symbol and enter the product order number in the search box. You can then download the EU declaration of conformity in PDF format.
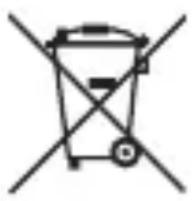
This symbol must appear on any electrical and electronic equipment placed on the EU market. This symbol indicates that this device should not be disposed of as unsorted municipal waste at the end of its service life.
Owners of WEEE (Waste from Electrical and Electronic Equipment) shall dispose of it separately from unsorted municipal waste. Spent batteries and accumulators, which are not enclosed by the WEEE, as well as lamps that can be removed from the WEEE in a non-destructive manner, must be removed by end users from the WEEE in a non-destructive manner before it is handed over to a collection point.
Distributors of electrical and electronic equipment are legally obliged to provide free take-back of waste. Conrad provides the following return options free of charge (more details on our website):
- in our Conrad offices
• at the Conrad collection points - at the collection points of public waste management authorities or the collection points set up by manufacturers or distributors within the meaning of the ElektroG
End users are responsible for deleting personal data from the WEEE to be disposed of.
It should be noted that different obligations about the return or recycling of WEEE may apply in countries outside of Germany.
16. Technical data
a) Power adaptor
Input.... 100 - 240 V/AC 50/60 Hz max. 0.4 A
Output....12 V/DC, 1 A
Cable length ....approx. 2 m
b) Doorbell
Input voltage / current.... 12 V/DC, 1 A (via included adaptor) 12 - 24 V/AC, 1A (power source not included)
Converter......AC to DC rectifier (built in)
Connected devices....unlimited
Doorbell max. 101 dB
Audio .... Input:Speaker Output: Microphone
Resolution.... HD 1920 x 1080 SD 640 x 320
Frames per second....25 fps
Sensor ....1/3" CMOS, 2 megapixels
Recording ......Non-stop
Event: max. 60 s clips
Saved to microSD
Proprietary format
Focal length....3.2 mm
Field of view....Horizontal:100°
Vertical: 55°
Storage .... MicroSD class 10 (max 128 GB)
MicroSD file system.....FAT32
Ingress protection....IP54
Infrared (night vision)...... LED: 1 pc
Range: 10 m
Motion detection ....Software based
Motion detection angle ....Same as field of view
Motion detection range 8 m
Operating conditions.... -20 to +50 °C, ≤ 90 % RH (non-condensing)
Storage conditions....-20 to +50 °C, ≤ 90 % RH (non-condensing)
Dimensions camera (W x H x D) ....45 x 115 x 41 mm
Weight 103 g
c) Wireless connectivity
Bandwidth......Min. 10 Mbps upload speed
WLAN technology......IEEE 802.11 b/g/n, 2.4 GHz
WLAN security......WEP, WPA, WPA2
Frequency....2.412 - 2.484 GHz
Transmission power....< 20 dBm
Transmission distance......max. 50 m
d) Application software
Shared accounts......Nolimit
max. 6 (shared video)
Supported OS...... Android 5.0 (or higher),
IOS 9.0 (or higher)
Page
France (email) : technique@conrad-france.fr
text_image
QR code with a blue home icon in the center, likely linking to a digital service or application.text_image
QR code image containing encoded data, no visible human-readable texttext_image
Warning symbols for electrical hazard, showing a lightning bolt and an exclamation marktext_image
Two warning symbols: a lightning bolt and an exclamation mark, commonly used in safety or hazard prevention contexts.expert.
text_image
Two warning symbols: a lightning bolt and an exclamation mark, commonly used in safety or hazard prevention contexts.text_image
Diagram showing wireless devices including a smartphone, tablet, WiFi, and remote device with signal iconsnatural_image
Three identical metal bracket components aligned with a dashed diagonal line (no text or symbols)
text_image
Diagram showing three types of electrical connectors with warning symbols and arrows indicating process stepstext_image
Diagram showing electrical connector symbols and warning symbol with arrows and labelswww.conrad.com/downloads
Sortie ....12 V/CC, 1 A
text_image
QR code with a blue house icon in the center, likely linking to a digital service or website.text_image
QR code image containing encoded data, no visible human-readable texttext_image
Warning symbols for electrical hazard, showing a lightning bolt and an exclamation marktext_image
Two warning symbols: a lightning bolt and an exclamation mark, commonly used in safety or hazard prevention contexts.text_image
Two warning symbols: a lightning bolt and an exclamation mark, commonly used in safety or hazard prevention contexts.text_image
Two warning symbols: a lightning bolt and an exclamation mark, commonly used in safety or hazard prevention contexts.d) Netvoedingadapter
text_image
Diagram showing wireless devices including a smartphone, tablet, WiFi, and remote device with signal iconsnatural_image
Three identical metal bracket components aligned with a dashed diagonal line (no text or symbols)c) Vlakke beugel
text_image
Kabelsleuftext_image
Diagram showing a process of connector pinout and warning symbol, with arrows indicating sequence and error message.text_image
Diagram showing three types of electrical connectors with warning symbols and an exclamation mark indicating hazard.www.conrad.com/downloads
Sensor 1/3" CMOS, 2 megapixels
Afmetingen camera (B x H x D).....45 x 115 x 41 mm
Gewicht....103 g
c) Draadloze verbinding
Bandbreedte......Min. 10 Mbps upload-snel-heid
Wifi-technologie......IEEE 802.11 b/g/n, 2.4 GHz
Wifi-beveiliging ....WEP, WPA, WPA2
Frequentie 2,412 - 2,484 GHz
Transmissievermogen ....../< 20 dBm
Zendbereik....max. 50 m
d) App-software
Copyright 2022 by Conrad Electronic SE.

This is a publication by Conrad Electronic SE, Klaus-Conrad-Str. 1, D-92240 Hirschau (www.conrad.com).
All rights including translation reserved. Reproduction by any method, e.g. photocopy, microfilming, or the capture in electronic data processing systems require the prior written approval by the editor. Reprinting, also in part, is prohibited. This publication represents the technical status at the time of printing.
Copyright 2022 by Conrad Electronic SE.

Copyright 2022 by Conrad Electronic SE.

Copyright 2022 by Conrad Electronic SE.