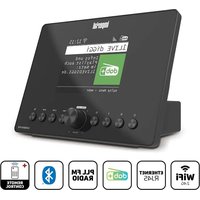
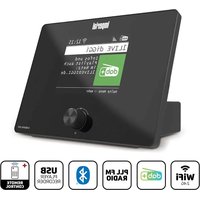
DABMAN d30 Stereo - Radio Imperial - Free user manual and instructions
Find the device manual for free DABMAN d30 Stereo Imperial in PDF.
User questions about DABMAN d30 Stereo Imperial
0 question about this device. Answer the ones you know or ask your own.
Ask a new question about this device
Download the instructions for your Radio in PDF format for free! Find your manual DABMAN d30 Stereo - Imperial and take your electronic device back in hand. On this page are published all the documents necessary for the use of your device. DABMAN d30 Stereo by Imperial.
USER MANUAL DABMAN d30 Stereo Imperial
8.5. Emergency Warning Functionality EWF
- Foreword. 50
2.SAFETYINSTRUCTIONS. 51
2.2.Intended Use. 52
2.3. Safety Instructions. 53
2.4. Operational safety 54
2.5. Connect the device 55
2.6. Protecting the device against defects 55
2.7.Risk of injury 56
2.8. Handling the batteries 56
2.9.Cleaning the device 57
2.10. Actions in case of malfunction. 58
3.DELIVERY CONTENT 59
4. IMAGES 60
5. REMOTE CONTROL 63
- INSTALLATION 66
6.1.Power Connection 66
6.2 Switching on the radio 66
- OPERATION 67
7.1.Station selection. 67
7.2.Volume 69
7.3. Change the reception mode 69
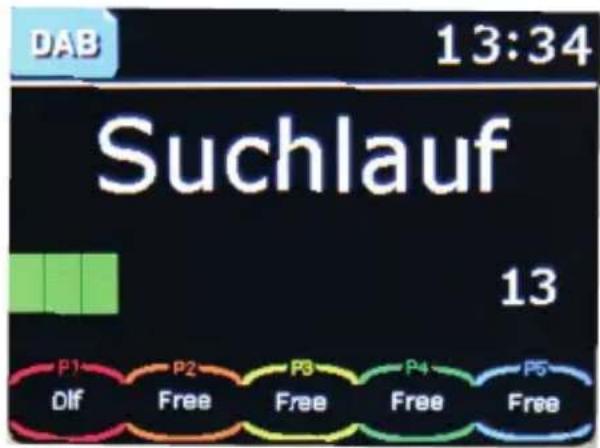
7.4. Search DAB programs 71
7.5. Search FM programs 72
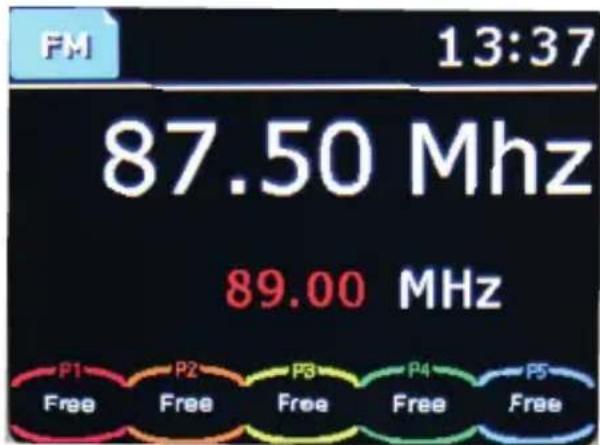
7.6.Saving DAB/VHF programs 73
7.7. Radio Information 74
7.8.Alarm 75
7.9. Equalizer. 77
TABLE OF CONTENT
- SETTINGS 78
8.1.Language 80
8.2.Time and date 80
8.3.FM Search Settings. 82
8.4.Factory settings 83
8.5. Emergency Warning Functionality EWF 84
9.TROUBLESHOOTING 86
10. TECHNICAL SPECIFICATIONS 87
11.DISPOSALINSTRUCTIONS 88
12. SERVICE AND SUPPORT 89
13. CE MARKING 90
1. Foreword
Dear customer
Thank you for choosing this product. If your Internet radio is not working properly, it is not necessarily due to a defect. Please do not immediately send the device back, call us!
Technical Hotline
for Germany: +49 02676/9520101
You are also welcome to send an e-mail to or a fax to
+49 02676/9520159.
If we cannot solve the problem in this way, please send the device to our service centre at the following address:
For Germany: TELESTAR Service Centre,
Am Weiher 14,
56766 Ulmen
For Austria: fsms GmbH,
Welser StraBe 79,
A-4060 Leonding
Please read these instructions carefully and keep them for future reference. If you sell the device, or pass it on, please also hand over this manual.
2. SAFETY INSTRUCTIONS
2.1. Key to the symbols
| Symbol | Importance |
| DANGER! | This signal word indicates a hazard with a high degree of risk, which, if ignored, results in death or serious injury. |
| WARNING! | This signal word indicates a hazard with a medium degree of risk, which, if ignored, may result in death or serious injury. |
| ATTENTION! | This signal word indicates a hazard with a low degree of risk, which, if ignored, may result in minor or moderate injury. |
| NOTE! | This signal word warns of possible property damage.. |
2. SAFETY INSTRUCTIONS
Protection class II

Electrical appliances with protection class II have reinforced or double insulation in the amount of the rated insulation voltage between active and touchable parts (VDE 0100 part 410, 412.1). They usually have no connection to the protective conductor. Even if they have electrically conductive surfaces, they are protected by a reinforced or double insulation from contact with other live parts
2.2. Intended Use
The device is used as a receiver for DAB/DAB+/VHF radio signals for receiving Internet radio stations and Bluetooth audio signals, or for playing back audio files on a USB data storage device or on a network drive. Any other operation or use of the device is considered improper and may result in personal injury or property damage. Do not use the device for any other purpose.
Operate the device indoors only.
The device is only intended for private use and not for commercial use. We assume that the person operating this device has general knowledge of how to use electronic entertainment devices. There is no liability in the event of improper use.
2. SAFETY INSTRUCTIONS
Only use spare parts and accessories supplied or approved by us.
Do not modify the device and do not use any accessories or spare parts not explicitly approved or supplied by us.
Do not use the device in potentially explosive areas.
These include e.g. fuel storage areas, tank facilities, or areas where solvents are stored or processed.
Do not operate the device in areas with particle-contaminated air (e.g. flour or wood dust)
Do not expose the device to extreme conditions, [e.g. direct sunlight High humidity, wet, extremely high or low temperatures, open fire.
2.3. Safety Instructions
NOTE!
Risk of injury!
Risk of injury to children and persons with reduced physical, sensory, or mental abilities (e.g. partially disabled, elderly persons with limited physical and mental abilities), or lack of experience and knowledge. Please keep the device only in places that are inaccessible to children. This device may be used by children 8 years old or older and persons with reduced physical, sensory or mental abilities or lack of experience and/or knowledge, if they have been supervised or instructed in the safe use of the device and have understood the resulting hazards.
2. SAFETY INSTRUCTIONS
Do not allow children to use the device unattended.
Do not store the used packaging materials (bags, polystyrene pieces, etc.) within the reach of children.
Children are not allowed to play with the packaging.
2.4. Operational safety

DANGER!
Risk of injury!
Risk of injury due to electric shock from live parts.
There is a risk of electric shock or fire due to an unintentional short circuit.
Please check the device for damage before every use.
If you notice any visible damage or if the device has visible damages, please stop operating it.
If you notice a technical or mechanical problem, please contact TELESTAR Service.
Use only the supplied power supply unit!
Never open the housing of the device.
In the event of a malfunction, disconnect the device from the power source.
If you move the device from a cold to a warm environment, moisture may develop inside the device.
In such a case, wait for approximately one hour before using it.
In case of prolonged periods of absence or during thunder storms, unplug the device from the wall socket.
If foreign bodies or liquids enter the device, immediately dis connect the power supply unit from the wall socket.
2. SAFETY INSTRUCTIONS
Have the device inspected by qualified personnel before using it again. Otherwise, you run the risk of an electric shock.
2.5. Connect the device
Only connect the device to a professionally installed, earthed and electrically fused wall socket.
Make sure that the power source [socket] is easily accessible.
Do not bend or squeeze the cable connections.
Before operating the device, check that the voltage indicated on the device matches the local mains voltage.
2.6. Protecting the device against defects
NOTE!
Unfavourable environmental conditions such as humidity, excessive heat or lack of ventilation can damage the device.
Use the device only in dry rooms.
Avoid the direct proximity of: heat sources, such as radiators, open flames, like e.g. candles, devices with strong magnetic fields, such as speakers.
Ensure that there is sufficient distance to other objects and that the device is not covered to always guarantee -sufficient ventilation.
Avoid direct sunlight and places with excessive dust.
Make sure that contact with moisture, water, and splashing water is avoided and that there are no liquid filled objects - i.e. vases - placed near the unit. Do not place any heavy objects on the device. Make sure that the device is not exposed to dripping or splashing water, and that there are no open sources of fire (e.g. burning candles) near the device.
2. SAFETY INSTRUCTIONS
2.7. Risk of injury

WARNING!
Excessive sound pressure when using earphones or headphones may result in damage or loss of hearing. Listening with earphones or headphones with increased volume over a long period of time may cause damage to the user. Please check the volume before inserting earphones into your ears or putting on headphones.
E
Set the volume to a low level and increase it only enough that it is still comfortable for you.
2.8. Handling the batteries
The device comes with 2 batteries of the type LRO3/AAA/1.5V. Only use this battery type for the remote control.

DANGER!
If the batteries are swallowed, there is a risk of internal injury. The battery acid in the batteries may cause injury on contact with the skin. Immediately seek medical attention after accidental swallowing or signs of skin burns. Always keep new and used batteries away from children. Immediately remove the leaked batteries from the device and clean the contacts before inserting new batteries.
2. SAFETY INSTRUCTIONS

Improper use of batteries results in a risk of explosion.

Use only new batteries of the same type.
Please do not use any new and old batteries together in one device.
When inserting the batteries, ensure the correct polarization.
Never charge batteries.
Batteries should only be stored in cool and dry locations.
Never throw batteries into a fire.
If the device will not be used for a long time, remove the batteries from the device.
Never expose batteries to extreme heat or direct sunlight.
2.9. Cleaning the device
Before cleaning, unplug the device from the wall socket.
Use a dry, soft cloth to clean the device.
Please do not use liquids to clean the device.
Do not use solvents and cleaning agents as they may damage the surface and/or inscriptions of the device.
2. SAFETY INSTRUCTIONS
2.10. Actions in case of malfunction
If the device malfunctions, disconnect it from the power supply and wait a few seconds. Reconnect the device to the power supply.
It may be necessary to reset to factory settings If this does not work, please contact your dealer or contact TELESTAR Digital GmbH directly. Further information can be found in chapter 12.
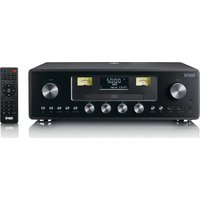
3. DELIVERY CONTENT
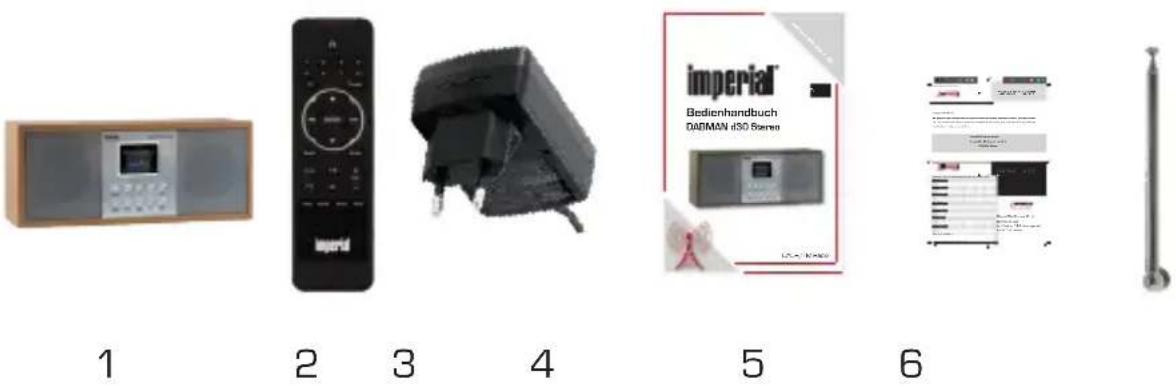
No. Quantity Statement
1 1 DABMAN d30 Stereo
21 Remote control
3.1 External power supply unit
41 User manual
51 Warranty card
61 Telescopic antenna
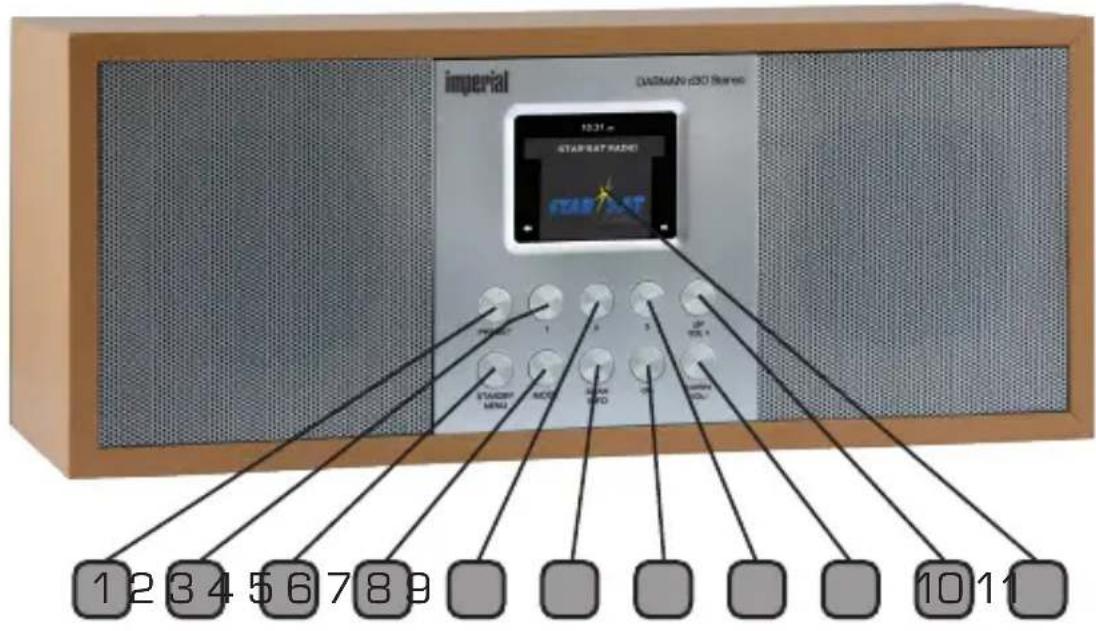
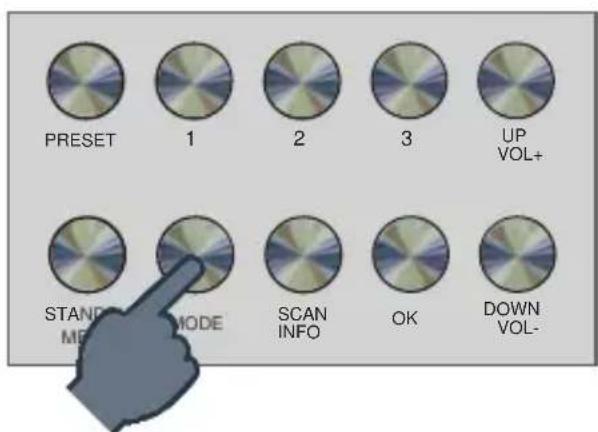
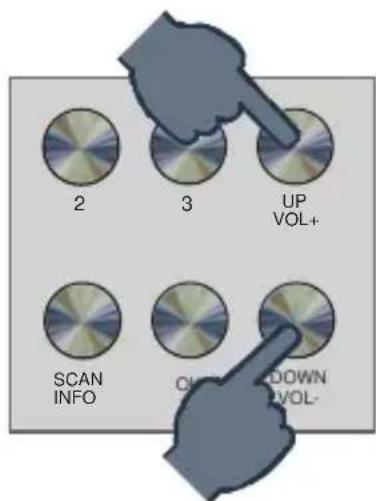
4. IMAGES
E

Operating Manual
60
4. IMAGES
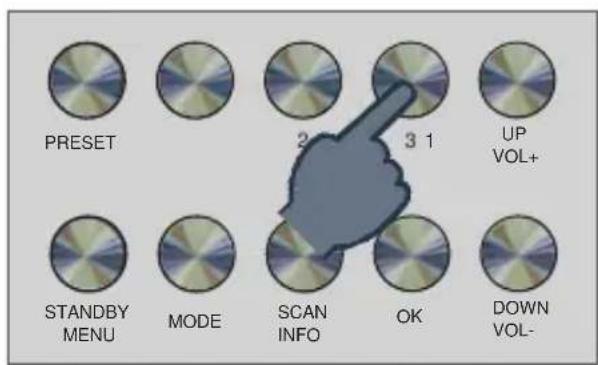
1.Preset
Opens Preset menu.
2. Station memory button 1
Turns to 1st programme memory in radio mode.
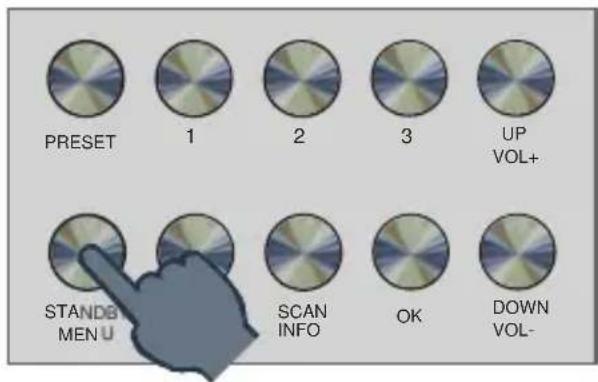
3. power button on/off/menu
Use this button to turn on the device or to standby. Displays the menu of the device.
4. MODE
Switches the device's operating mode between DAB+, VHF, AUX.
5. Station memory button 2
Turns on 2nd programme memory in radio mode.
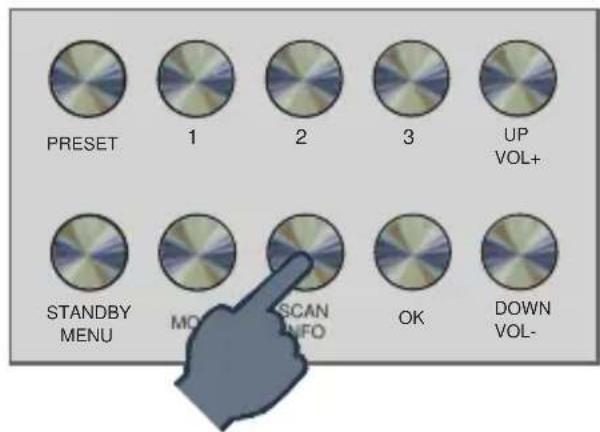
6. Scan/Info
Open Scan or Info with this button.
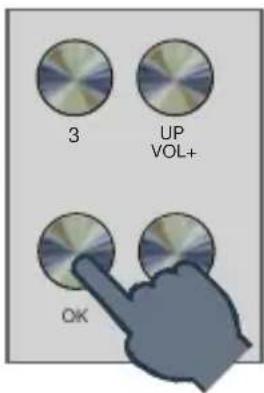
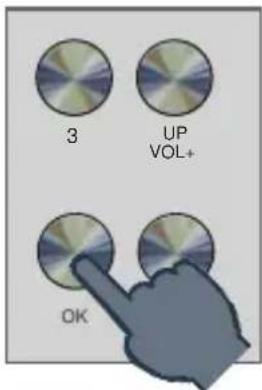
7. Confirmation button OK
Confirm menu entries by pressing this button.
8. Station memory button 3
Turns on 3rd programme memory in radio mode.
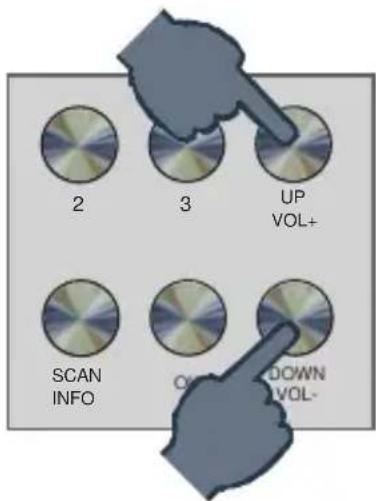
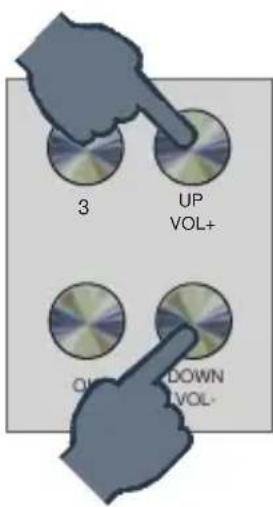
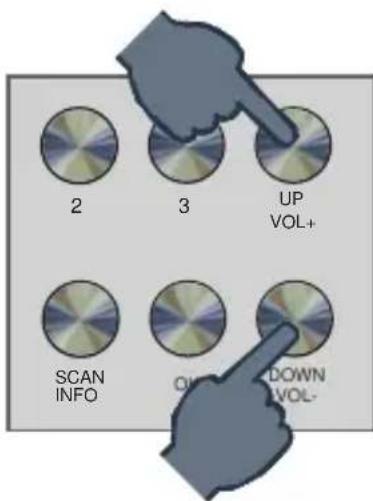
9. Navigation Up/Volume control VOL +
Navigate upwards in the menu with this button or increase the volume using this button.
10. Navigation DOWN/ volume control VOL -
Navigate upwards in the menu with this button or decrease the volume using this button.
11. DISPLAY
12.VHF/DAB
Antenna connection
13. AUX IN
Here you can connect an external audio source like an MP3 Player, Smart Phone or tablet with the 3.5 mm AUX cable.
14. Headphone jack
4. IMAGES
Insert a headset here to listen to the music played by the radio with headphones.
When connecting headphones, music playback through the speakers of the device is interrupted.
15. LINE OUT
Here you connect the radio with a Hi-Fi amplifier or active speakers, to direct music received by the radio to a sound system.
16. USB connection
E
Here you connect the device with a USB data carrier to process a potentially required firmware update.
- Connect the power supply provided at this port on the device.
NOTE!
(Pleasesuseonly the supplied power supply unit]
5.REMOTE CONTROL
5. REMOTE CONTROL
- Standby button
Use this button to turn the device on or off.
- Numeric keypad
For direct selection of a stored radio station.
- Preset
Use this button to save radio stations or recall a stored station.
- ENTER
This button is used to confirm an entry
- Navigation up/down - left/right
Use these buttons to navigate through the menu
- Menu
Use this button to activate the device's menu
7.Mode
Switch to the different operating modes here.
- SCAN
Press this button to start a channel scan.
-
No function
-
V+ volume
Increases the volume
- Mute
Mutes the device's volume to silent.
- V-volume
Decreases the volume
- EQ Equalizer Function
You can activate the equaliser function and configure custom sound settings using this button.
5. REMOTE CONTROL
14 Alarm
Use this button to activate the alarm clock function
15 SNOOZE
Turn off the alarm clock here for 6 minutes silently.
16 INFO
Shows you current information of the current radio program..
17 Display Dimmer
Changes the display brightness
6. INSTALLATION
Please take care when removing the parts from the packaging. Check that all parts have been supplied.
Note: The radio can be controlled by using either the device buttons or the remote control.
6.1. Power Connection
First, connect the included power supply unit to the corresponding port on the back of the DABMAN d30 Stereo. Now, plug the power supply unit into a 230V mains socket. Then connect the supplied telescopic antenna to the antenna connector and pull the telescopic antenna onto the radio back to full length, this ensures the best possible reception.
6.2 Switching on the radio
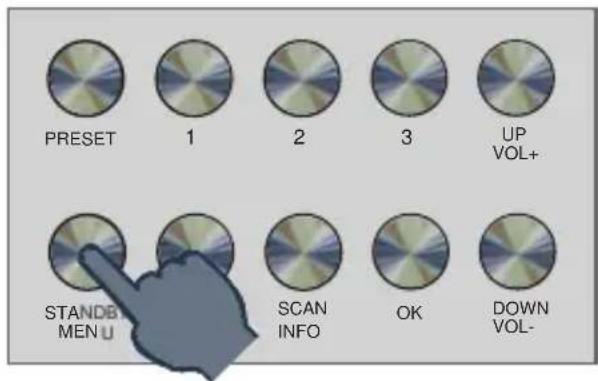
Press Standby/MENU button.
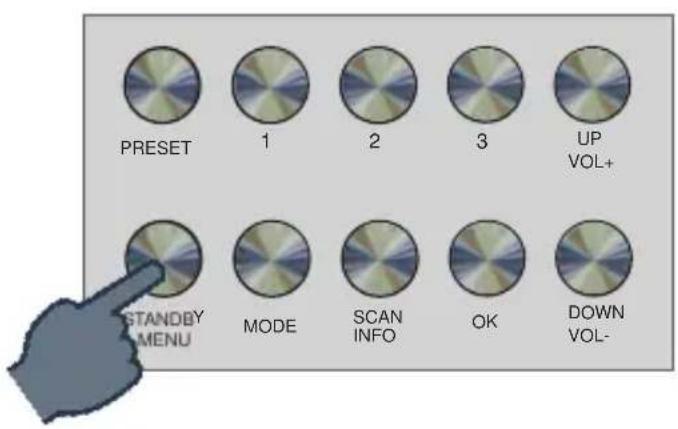
The device will switch on.
Operating Manual
7. OPERATION
When you use the radio for the first time, DAB mode automatically starts a station search.

The stations found in the search are automatically stored. When the search is finished, the first station will be shown in the display and played back.
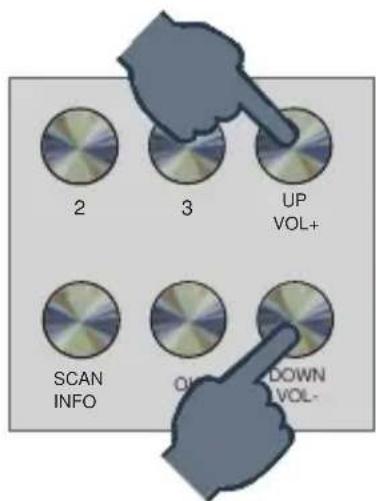
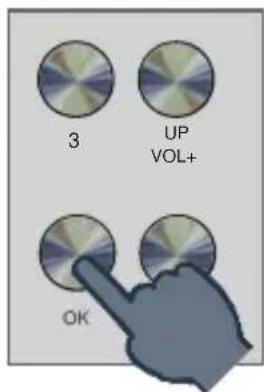
7.1. Station selection
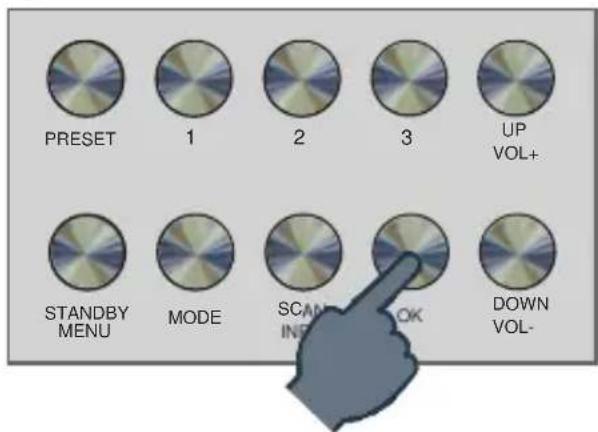
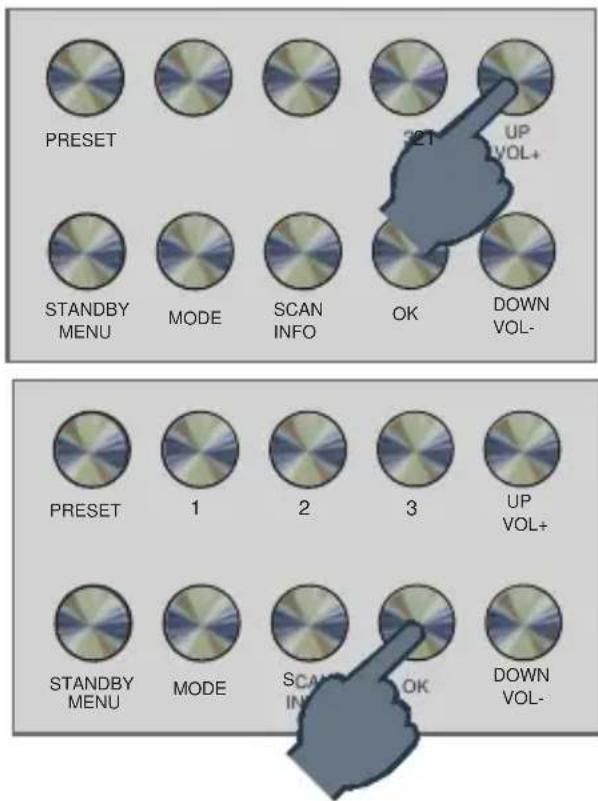
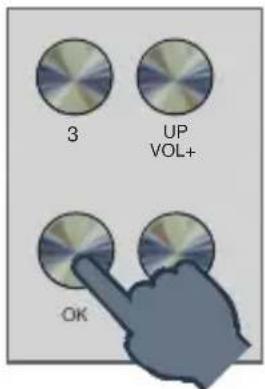
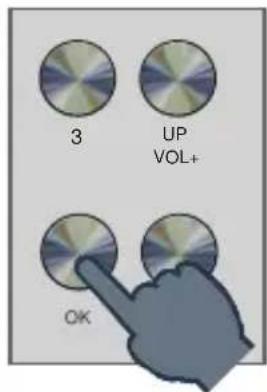
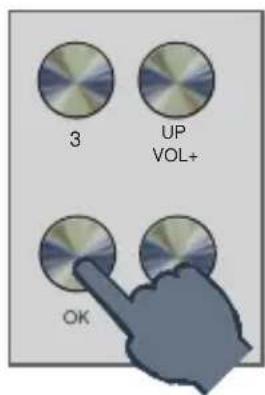
Press OK button to get a list of all receivable stations.
7. OPERATION

E
Use the UP/Down buttons to select a station you want to hear and confirm with OK.
7. OPERATION
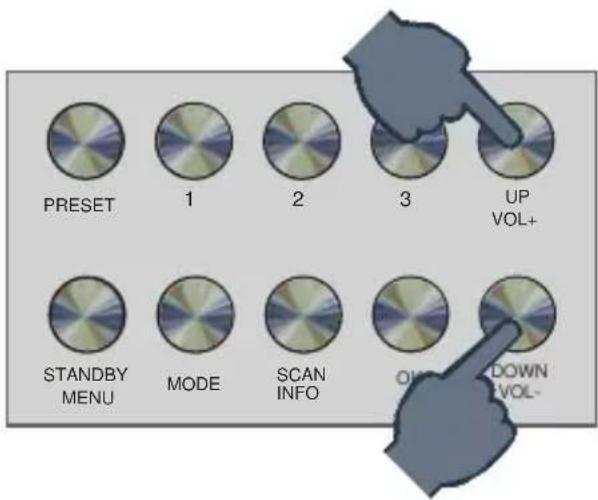
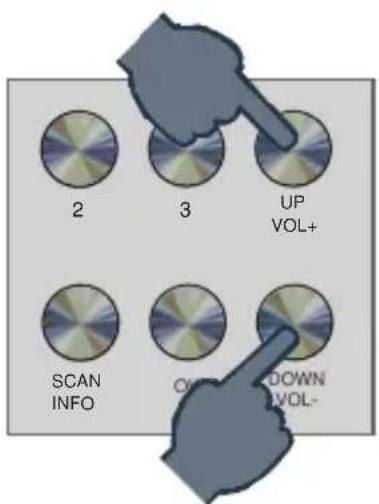
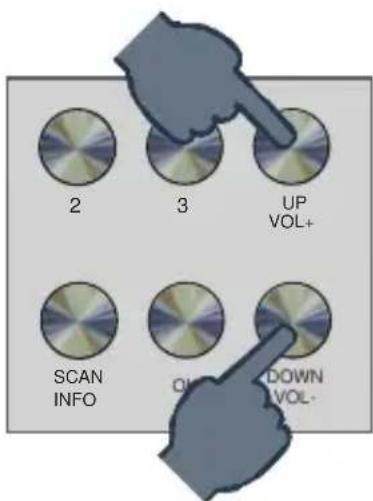
7.2. Volume
Change the volume via the buttons VOL+/VOL-
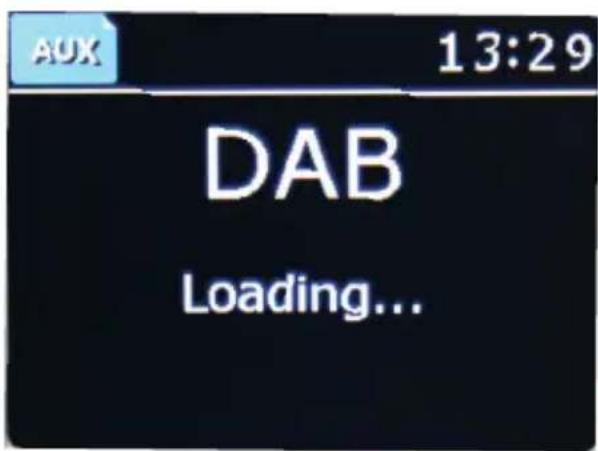
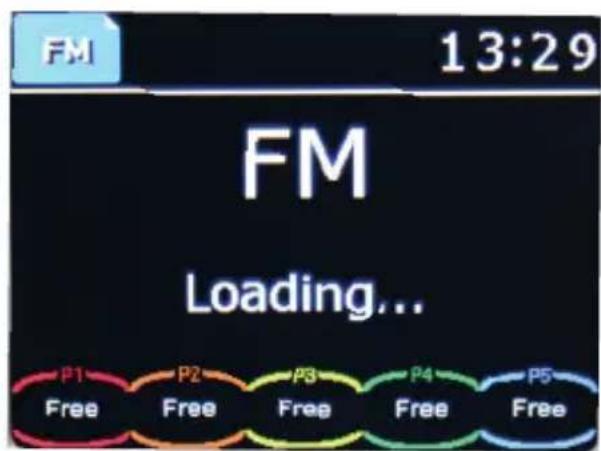
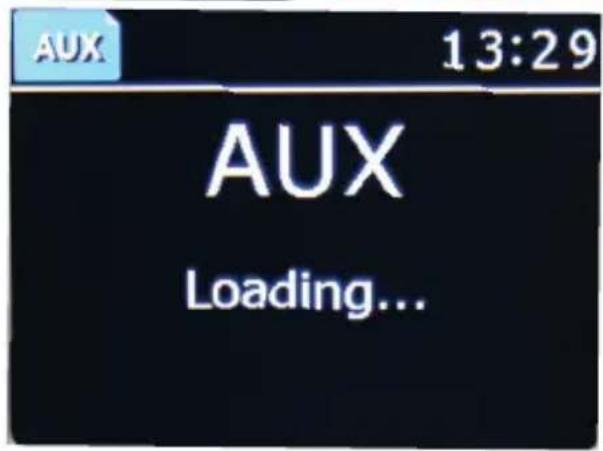
7.3. Change the reception mode
To switch between VHF and DAB + reception and the AUX mode press the mode button.
7. OPERATION
The device thus switches between analogue FM reception, DAB + reception and AUX operation mode.

7. OPERATION
7.4. Search DAB programs
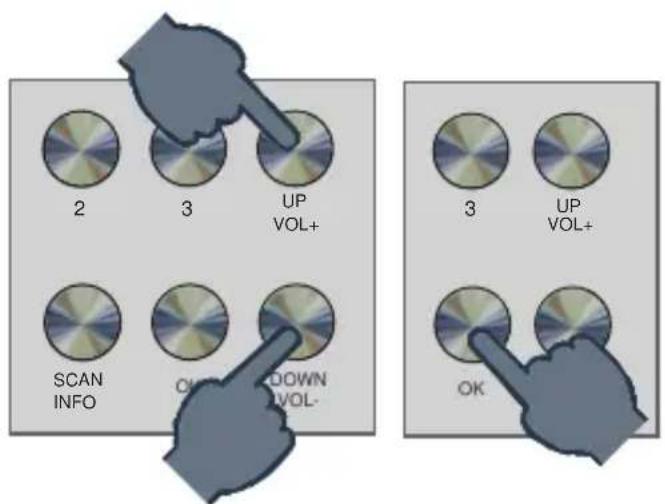
To perform a DAB station search, hold the SCAN button for about Pressed for 1 second.
1 Sekunde halten
The radio updates the DAB + receive list.
The stations found in the search are automatically stored. When the search is finished, the first station will be shown in the display and played back.
7. OPERATION
7.5. Search FM programs
To start a search for VHF programs, switch to the VHF mode as described in chapter 6.4. Press and hold the SCAN button for 1 second.
E
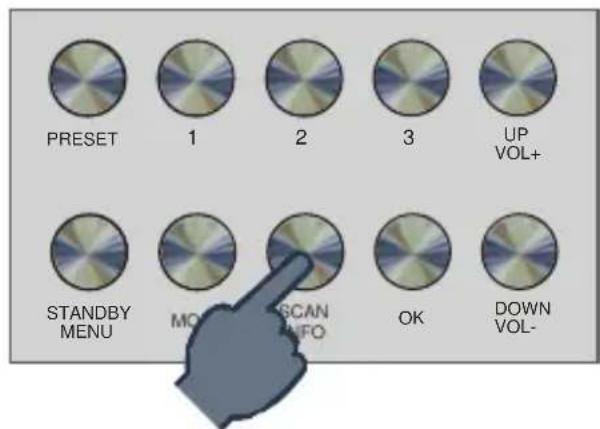
Hold for 1 second
The unit will now search for the next receivable station in the frequency range. As soon as a station is found, the search stops.
Operating Manual
7. OPERATION
7.6. Saving DAB/VHF programs
If you want to save a station found in the search, press and hold one of the program buttons on the device or on the remote control for 2 seconds.
2
Seconds

The station is stored on the desired program slot.
Note:
The first 3 stations can be stored on the device via the program buttons.
Station pre-sets 4-9 can only be stored via the remote control.
7. OPERATION
7.7. Radio Information
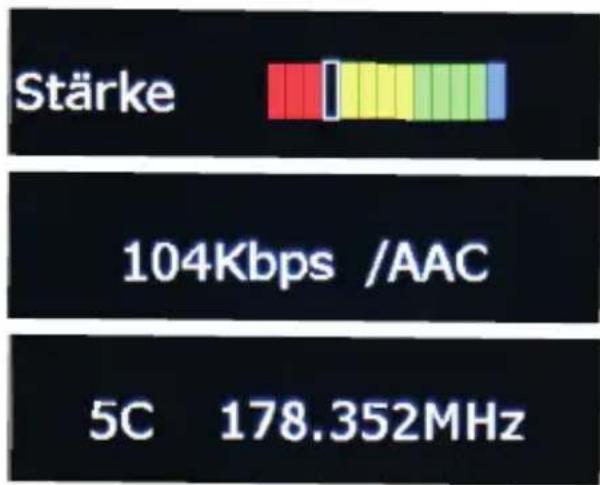
Information about the current radio station, such as reception strength/ bit rate etc. can be found in the DAB mode by pressing the button INFO. Press the button to cycle through the information.
E

7. OPERATION
7.8. Alarm
You can set up 2 different alarm times.
You can also set whether the alarm will wake up in the event of an alarm with a sound, a DAB + radio station or an FM station.
To set an alarm, do the following: Press the button MENU.

Select the menu item SYS via the buttons UP/DOWN and confirm with OK.

7. OPERATION
In the menu, select the menu item via the buttons UP/DOWN Set alarm clock and confirm with OK.
E
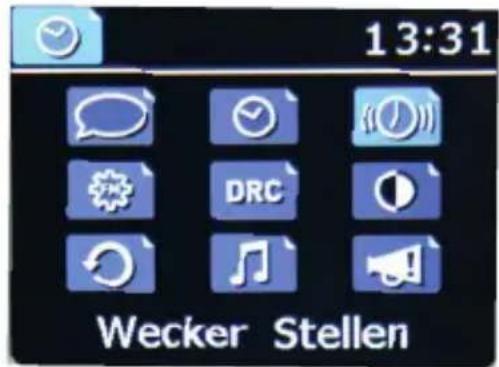
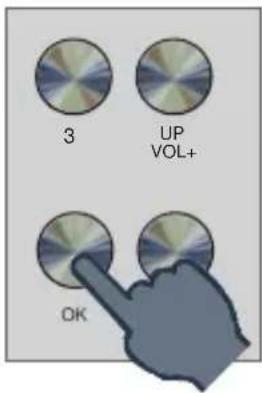

Use the UP/DOWN buttons in the alarm clock menu to select the desired menu item and confirm your entries with the OK button.
In the upper line, select alarm time 1 or alarm time 2.
In the next line, decide whether the device should wake up with an alarm tone, a DAB radio station or an FM (VHF) radio station.
Set the alarm volume in the next line.
Select alarm time in the 4th line.
Activate the alarm function in the 5th line
Operating Manual
7. OPERATION
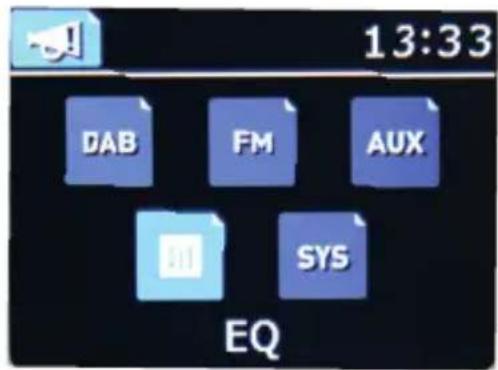
7.9. Equalizer
With the Function EQ you can set certain sound pre-sets -to customize the sound of the radio to your needs.

Select the menu item SYS via the buttons UP/DOWN and confirm with OK.
7. OPERATION

E
Use the buttons UP/DOWN to select the desired sound pre-set and confirm with OK.
8. SETTINGS
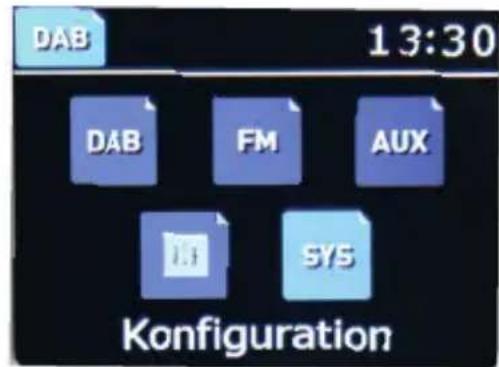
You can make various settings via the system menu.
Select the menu item SYS via the buttons UP/DOWN and confirm with OK.
8. SETTINGS
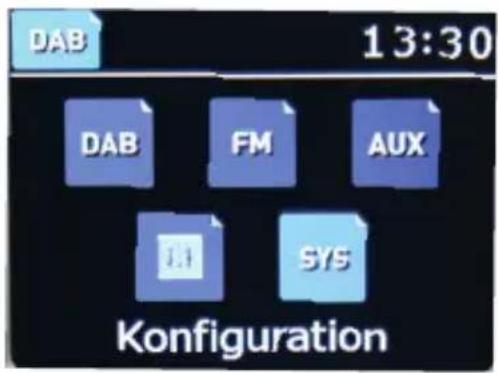
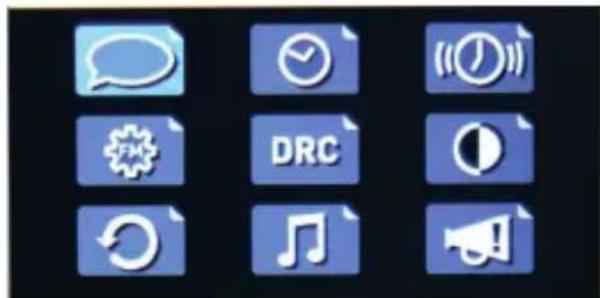
Select the menu item SYS via the buttons UP/DOWN and confirm with OK.
8. SETTINGS
8.1. Language

E

8.2. Time and date
The device's factory setting is on automatic time setting. When the unit receives DAB + radio stations, the time and date are automatically synchronized. In such a case, setting the time is not required.
8. SETTINGS
To set the time and date manually, proceed as follows: In the SYS menu select the menu item time of day and confirm with OK. Select the desired menu item and make the changes using the UP/DOWN buttons in front. Confirm the entries with OK.

8. SETTINGS
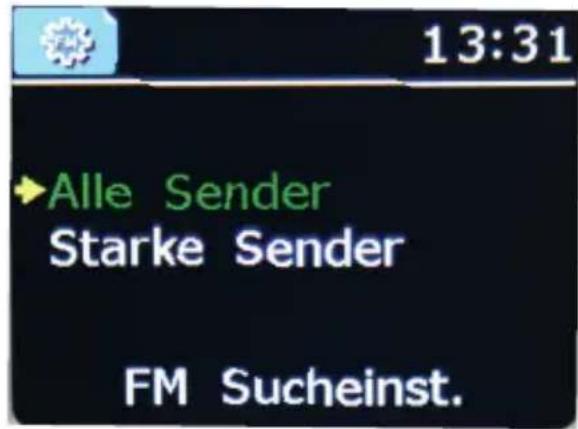
8.3. FM Search Settings
Here, you decide if the (FM) seek tuning should stop only on strong transmitters with good reception quality, or if the device should also consider weak transmitters with limited signal quality.
Choose in the SYS menu the menu item FM search settings and confirm with OK.
E
8. SETTINGS
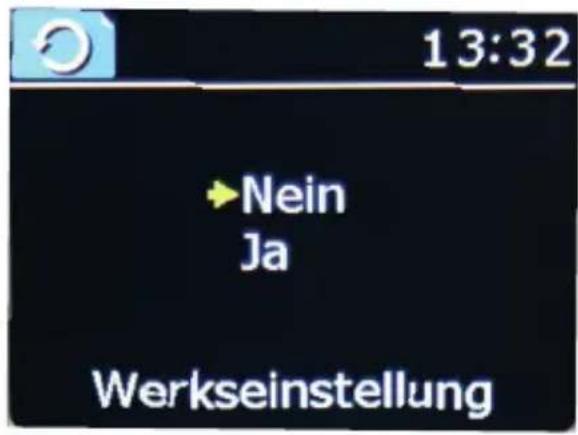
8.4. Factory settings
You can reset all settings made on the radio to the factory settings.
This is useful if you have made changes that should subsequently lead to a non-optimal function of the device.
Choose in the SYS menu the menu item Factory setting and confirm with OK. Select the desired menu item and make the changes using the UP/DOWN buttons.
8. SETTINGS
8.5. Emergency Warning Functionality EWF
Emergency Warning Functionality enables fast and reliable warning of the population in case of disaster. Whether high water, storm, chemical accident or terrorist attack. Your digital radio informs you about imminent dangers if a danger message is sent via EWF.
The current radio program is interrupted in the event of an emergency alarm. The radio also automatically turns on from standby.
E
Here you can make settings.
Select the menu item SYS via the buttons UP/DOWN and confirm with OK.
Select the menu item SYS via the buttons UP/DOWN and confirm with OK.
8. SETTINGS
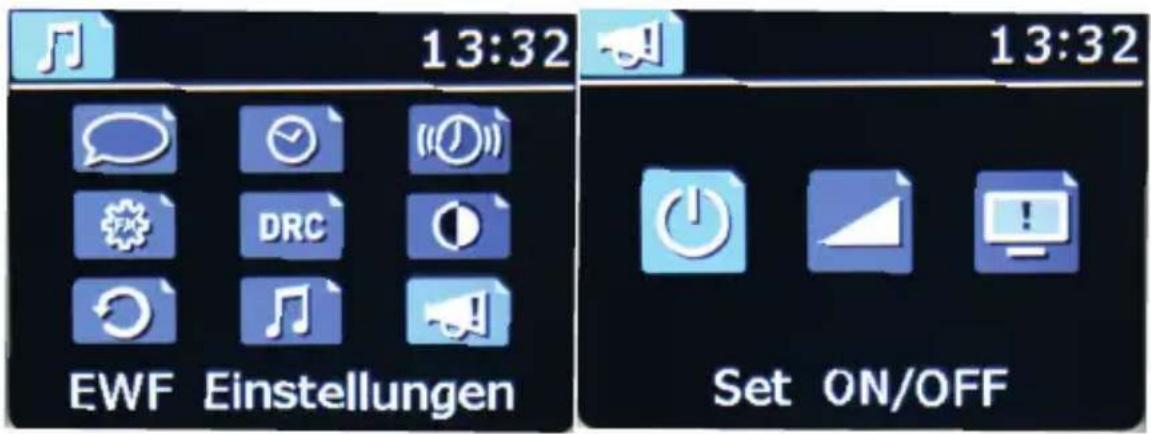
SET ON/OFF: Switch the EWF function on or off here.
ALL ON: All types of events are signalled by the emergency radio.
ALL OFF: No warning messages are signalled.
Manual: In this menu you can decide for yourself which types of events should be signalled.
SET VOLUME Here you set the volume with which a warning message is to be played.
STANDBY
MONITOR If necessary, additional text information is transmitted via DAB. If you want to see them on the display, select Standby Monitor Yes.
9. TROUBLESHOOTING
| Symptom | Possible cause and solution |
| No display, radio does not respond to commands | Connect the device to the mains using the power supply unit which is supplied with the radio |
| DAB + reception faultyFM reception faulty | No channels available. Carry out a search Bad location Change the location of the radio (possibly closer to the window), perform another scan |
| Antenna not fully extended, pull out the FM antenna to its full length. | |
| Alarm clockdoes not work properly | Incorrect time. Turn on the unit and select a DAB transmitter. After a short time, the time will be synchronized via DAB. |
10. TECHNICAL SPECIFICATIONS
| Main function | |
| DAB/FM receiver | DAB/DAB+/FM RDS receive Support DAB+ broadcasting DAB sensitivity to -100dBm DAB+ sensitivity to -100 dBm FM sensitivity to -108dBm Frequency range: DAB Band III 174 MHz 240MHz FM 87.5 MHz - 108.0MHz |
| Decoder | Decoding up to 384 kbit/s MP3/AAC/AAC+ |
| Amplifier | 2x 7 Watt (Music Power) an 4 Ohm |
| Connections | |
| AUX IN | 3.5 mm L/R |
| Headphone | 3.5MM L/R, 250mW. |
| USB | USB (Type A) Nur für Software Update |
| Power supply unit | (100~240 V 50/60Hz primär/ DC 12 V 2A sekundär) |
| Operating temperature | 0-40 °C |
11. DISPOSAL INSTRUCTIONS
The packaging for your device consists entirely of recyclable materials. Please dispose of these appropriately in accordance with the „Dual System". At the end of its service life, this product must not be disposed of as normal household waste but must be disposed of at a recycling collection point for electric and electronic equipment.
The symbol on the product, instruction manual or the packaging indicates this.
The materials are recyclable according to their labelling. The reuse and recycling of old materials and devices makes an important contribution to protecting the environment. Please ask your municipal administration for the location of a suitable disposal point. Please ensure that electronic waste and empty batteries are disposed of properly and are not disposed of as household waste.
12. SERVICE AND SUPPORT
Dear Customer
Thank you for choosing a product from our company. Our product meets the legal requirements and was manufactured under constant quality control. The technical data correspond to the status at the time of going to press. Subject to change.
The warranty period for the DABMAN d30 Stereo meets the legal requirements at the time of purchase. We also offer our telephone HOTLINE service with professional help.
In our service centre, professional technicians are available to answer your questions. Here you can ask any questions you have regarding IMPERIAL products and receive tips for locating a possible fault.
Our technicians are available Monday - Friday 8:00 to 16:45 at the following telephone number:
+49 2676/95 20 101
or by e-mail to: service@telestar.de
If the Service Hotline is unable to help you, send your
DABMAN i30 Stereo, preferably in its original packaging,
or at least packed securely for transport, to the following address:
TELESTAR-DIGITALGmbH
Service Centre
Am Weiher 14 [industrial area]
56766 Ulmen
13. CE MARKING

Your device bears the CE marking and complies with all relevant EU standards.
Hereby the TELESTAR DIGITAL GmbH declares that the device IMPERIAL DABMAN d30 stereo is in compliance with the basic CE requirements.
The Declaration of Conformity for this product is available on:
9.PROBLEEMOPLOSING 130
- TECHNISCHE GEGEVENS 131
- RECYCLAGE 132
- SERVICE EN ONDERSTEUNING. 133
- EC-RICHTLIJN 134
NL
1. Voorwoord
Besteklant,
8.5. Emergency Warning Functionality EWF
9. PROBLEEMOPLOSSING
8.5. Emergency Warning Functionality EWF
Chere cliente, cher client!
8.5. Emergency Warning Functionality EWF

FM 87,5 MHz - 108,0 MHz
Decoder
Decoding up to 384 kbit/s
MP3/AAC/AAC+
Amplificatore
2x 7 Watt (Music Power) a 4 Ohm
Collegamenti
Ingresso AUX
3.5 mm L/R
Cuffie
3.5MM L/R, 250mW.
USB
All technical specifications and functions described in these oper-
ting instructions are valid at the time of printing and are
subject to change without prior notice.
We assume no liability for misprints and errors.
Copy and duplication only with the express permission of
TELESTAR-DIGITAL GmbH.
May 2018