PCLB 3077 - Humidifier ProfiCare - Free user manual and instructions
Find the device manual for free PCLB 3077 ProfiCare in PDF.
| Product type | Ultrasonic humidifier |
| Brand | ProfiCare |
| Model | PCLB 3077 |
| Power supply | 220-240 V~, 50-60 Hz |
| Power consumption | 25 W |
| Tank capacity | Approx. 5 liters |
| Recommended area | Up to 50-60 m² |
| Mist adjustment | 3 levels (1, 2, 3) |
| Humidity adjustment | 45% to 80% in 5% increments |
| Ionizer function | Yes, can be turned on/off |
| Delayed shutdown | 1, 2, 4 or 8 hours |
| Energy saving mode | Yes (display off) |
| Remote control | Yes, with CR2025 battery (range 8 m) |
| Filters | Ceramic filter and foam filter |
| Protection class | II |
| Net weight | Approx. 1.47 kg |
| Maintenance | Regular cleaning of tank, base, ultrasonic transducer, and filters |
| Safety | Automatic shut-off when tank is empty |
Frequently Asked Questions - PCLB 3077 ProfiCare
User questions about PCLB 3077 ProfiCare
0 question about this device. Answer the ones you know or ask your own.
Ask a new question about this device
Download the instructions for your Humidifier in PDF format for free! Find your manual PCLB 3077 - ProfiCare and take your electronic device back in hand. On this page are published all the documents necessary for the use of your device. PCLB 3077 by ProfiCare.
USER MANUAL PCLB 3077 ProfiCare
natural_image
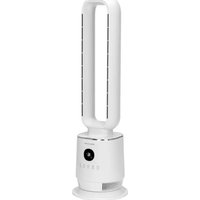
White water purifier with digital display showing temperature reading of 6.3 MWh (no text or symbols on device body)Volume: ....ong. 5 liter
Nettogewicht: ...... ong. 1,47 kg
Thank you for choosing our product. We hope you will enjoy using the appliance.
Symbols in this Instruction Manual
Important information for your safety is specially marked. It is essential to comply with these instructions in order to avoid accidents and prevent damage to the appliance:

WARNING:
This warns you of dangers to your health and indicates possible injury risks.

CAUTION:
This refers to possible hazards to the appliance or other objects.

NOTE:
This highlights tips and information.
Contents
Overview of the Components....3
General Notes......40
Special Safety Precautions for this Appliance....41
Handling Batteries....42
Unpacking the Appliance....42
Overview of the Components/Scope of Delivery......42
Notes for Use....42
Location 42
Water 42
Preparation 43
Remote Control 43
Filling with Water 43
Electrical Connection 43
Operation 43
Switching the Appliance On/Off 43
Set Fog / Steam Level 43
Set Humidity....43
Ionizing Function 43
Time-Delayed Switch-Off 44
Energy-Saving Mode 44
End of Operation....44
Cleaning 44
Tank 44
Base Appliance 44
Ceramic Filter 44
Foam Filter 44
Cleaning Around the Appliance....44
Storage....44
Troubleshooting....45
Technical Data....45
Disposal 45
Battery Disposal 45
Meaning of the "Dustbin" Symbol 45
General Notes
Read the operating instructions carefully before putting the appliance into operation and keep the instructions including the warranty, the receipt and, if possible, the box with the internal packing. If you give this appliance to other people, please also pass on the operating instructions.
- The appliance is designed exclusively for private use and for the envisaged purpose. This appliance is not fit for commercial use.
- Do not use it outdoors. Keep it away from sources of heat, direct sunlight, humidity (never dip it into any liquid) and sharp edges. Do not use the appliance with wet hands. If the appliance is humid or wet, unplug it immediately.
- When cleaning or putting it away, switch off the appliance and always pull out the plug from the socket (pull the plug itself, not the lead) if the appliance is not being used and remove the attached accessories.
- Do not operate the appliance without supervision. If you leave the room you should always turn the appliance off. Remove the plug from the socket.
- The appliance and the mains lead have to be checked regularly for signs of damage. If damage is found the appliance must not be used.
- Use only original spare parts.
- In order to ensure your children's safety, please keep all packaging (plastic bags, boxes, polystyrene etc.) out of their reach.

WARNING:
Do not allow small children to play with the plastic foil. There is a danger of suffocation!
Special Safety Precautions for this Appliance

WARNING:
Disconnect the appliance from the mains supply when refilling with water or during cleaning.

CAUTION:
- Do not place the appliance directly next to heating appliances or electrical devices.
- Never turn on the appliance without water.
- Do not scratch the ultrasound probe.
- The appliance works with ultrasound. This sound can be bothersome to pets.
- Do not repair the appliance by yourself. Always contact an authorized technician. If the supply cord is damaged, it must be replaced by the manufacturer, its service agent or similarly qualified persons in order to avoid a hazard.
- This appliance can be used by children aged from 8 years and above and persons with reduced physical, sensory or mental capabilities or lack of experience and knowledge if they have been given supervision or instruction concerning use of the appliance in a safe way and understand the hazards involved.
• Children shall not play with the appliance.
- Cleaning and user maintenance shall not be made by children without supervision.

CAUTION:
This appliance is not intended for immersion in water during cleaning. Please refer to the instructions provided in the chapter, "Cleaning".
Handling Batteries

WARNING:
- Do not expose batteries to excessive heat such as sunlight, fire or similar. There is a risk of explosion!
- Batteries are not toys. Keep away from children.
- Do not open batteries by force.
- Avoid contact with metal objects (rings, nails, screws, etc.). There is a risk of short circuit!
- A short circuit could cause the battery to heat up excessively or even to catch fire, resulting in injuries.
- For your own safety, cover the battery terminals with adhesive tape during transport.
- In case of battery leakage, make sure not to rub the liquid into your eyes or mucous membranes. In case of contact, wash your hands and rinse your eyes with clear water. Seek medical attention if any discomfort persists.

CAUTION:
- Different battery types or new and used batteries must not be used together.
- Batteries can leak and lose battery acid. If the remote control is not used for a long period of time, remove the batteries.
Unpacking the Appliance
- Take the appliance out of its packaging.
- Remove all the packaging material such as plastic foil, filling material, cable ties and cardboard packaging.
- Check that all parts are supplied in the box.
- In case of incomplete delivery or damage, do not operate the appliance. Return it to your dealer immediately.
Overview of the Components / Scope of Delivery
1 Steam nozzle
2 Water tank lid
3 Water tank
4 Water level indicator
5 Tank cap
6 Ceramic filter
7 Steam outlet
8 Ultrasound probe
9 Base unit
10 Foam filter
11 Foam filter cover
14 Display
15 Button (on / off)
17 Water vessel
18 Handle
12 button (humidity / energy saving mode)
13 button (fog / vapor intensity / ionization function)
16 Button (time-delayed switch-off)
19 Remote control:
POWER button (on / off)
HUMIDITY button (humidity)
© TIMER button (time-delayed switch-off)
© SLEEP button (energy saving mode)
MIST LEVEL button (fog / vapor intensity)
-ION button (ionization function)
Notes for Use
This air humidifier with low energy consumption has been developed for rooms of up to 50 - 60 m². This depends on ceiling height, climate etc.
You can use the appliance to supply dry room air with pleasant air moisture. This will offer the following benefits:
- It ensures a healthy room climate and thus your well-being.
- A relative humidity ranging from 45 % to 65 % can provide for pleasant air humidity.
• We recommend using this air humidifier at temperatures between 5 °C and 40 °C and low humidity. - It prevents the raising of dust and is therefore ideally suited for allergy sufferers.
- Your skin is supplied with moisture.
- It protects your furniture from drying out and prevents a forming of gaps in parquet or wood floors.
• Electrostatic charge in the air is suppressed.
Location
• A suitable location is a non-slip, even surface.
- Do not place the appliance onto wood, to avoid deformation due to moisture.
- Watch out for electrical devices close by. They must not get wet.
- Keep a distance of 2 meters from electrical equipment and delicate furniture to protect these from moisture.
- The appliance works more effectively if you have the windows and doors closed during operation.

NOTE: Do not forget to air on a regular basis.
Water

CAUTION:
- Do not use any water from the tumble dryer and water with additives (such as perfumes, fabric softeners, or other chemicals). These can damage the appliance.
- You can add 3 - 4 drops of essential oil to the water. Do not add too much essential oil or you may damage the appliance!

NOTE:
If you use extremely hard water, then limescale may form in the tank, on the bottom of the base appliance and on the surface of the ultrasound probe. If this probe is calcified, then the appliance is not able to work properly.
• We recommend that you use distilled or freshly boiled and cooled water.
• The water may not exceed a temperature of 40 °C .
- Replace the water every 3 - 4 days, even if it is not used up.
- If you do not use the appliance for longer periods of time, remove the water from the tank and from the base appliance. Allow the parts to dry.
Preparation
Remote Control

NOTE:
The button cell in the battery compartment of the remote control has been secured with a foil for transport. This will extend the durability of the battery. Before initial use please remove this foil so that the remote control is ready for operation.
The remote control has a range of approx. 8 meters. When using the remote control, please ensure that there are no obstacles placed between it and the sensor on the appliance.
Changing the Battery of the Remote Control
If the range of the remote control is reduced during use, please proceed as follows:
- Open the battery compartment on the bottom of the remote control by holding the lever inwards and pulling out the battery compartment.
- Replace the button cell with a battery of the same type (CR2025). Ensure correct polarity.
- Then close the battery lid.
Filling with Water

CAUTION:
Do not pour any water into the opening of the nozzle.
- Remove the lid to pour in water. Use the handle to remove the water tank from the base unit. Turn the water tank over. The filler hole is located underneath the tank.
- Twist off the filler cap in the direction. Fill the water into the tank up to approx. 3 centimetres below the rim.
- Close the filler cap again by twisting it in the direction and put the tank back into the base appliance. Observe the markings on the right side of the water tank and the base unit. These must be aligned with each other.
- Place the lid with the steam nozzle on the water tank.

NOTE:
During operation, always put on the lid with the steam nozzle, otherwise moisture will settle on the appliance.
Electrical Connection
-
Before connecting the plug to a wall socket, verify the correct mains voltage. Refer to the specifications on the rating label of the appliance.
-
Insert the plug in a duly installed protective contact socket. You will hear a short beep.
Operation
- The buttons are to be found both on the appliance itself and on the remote control. Buttons with the same symbol have the same function.
- The buttons on the appliance are sensor touch buttons. In order to perform the corresponding function gently touch the buttons. Whenever a button is pressed, it will be confirmed by a beep sound.
- The buttons ^b/ and ^c/ on the appliance are also multifunctional buttons. In order to use the different functions, the corresponding button must either be pressed briefly, or be pressed for about 3 seconds.

NOTE:
Operation is explained by the buttons on the remote control.
Switching the Appliance On/Off
- Press the POWER button to switch on the appliance. The appliance always starts operating in level 3.
Steam generated at the steam outlet will be transported to the steam nozzle by fan operation. The display shows the current humidity (HUMID) and temperature (TEMP) alternately. - Press the ⒽPOWER button again to switch off the appliance.
Set Fog/Steam Level
You can select 3 different steam settings – from low to high. Press the OMIST LEVEL button to select a level. The selected level (1, 2 or 3) is shown in the display.
Set Humidity
Press the ⒽHUMIDITY button repeatedly, to select a humidity between 45 % and 80 %. You can adjust the humidity in 5 % steps.

NOTE:
- The set air humidity flashes for approx. 3 seconds in the display. After that, the display alternately shows you the current humidity and temperature.
- Once the preset setting has been reached, the appliance will turn off and then control the humidity automatically.
Ionizing Function
Negative ions support the well-being of humans. They can, for example, help with the dissipation of electrostatic charges.
- Press the ⊙ ION button to activate ionization. The symbol appears in the display.
- Press the ⓄN button again, to turn off the function.
Time-Delayed Switch-Off
You can set the appliance to turn off automatically within 1, 2, 4, or 8 hours.
- Press the CMER button to activate the function. The display shows TIME and the set time is displayed.
- If you want to deactivate this function, press the button repeatedly, until the display TIME disappears from the display.
Energy-Saving Mode
- Press the SLEEP button to switch the appliance to energy-saving mode. The display goes out.
- As soon as a button is pressed, the display switched on again and the energy-saving mode is deactivated.
End of Operation
- Switch off the appliance.
- Disconnect the mains plug from the socket.
- Completely empty the appliance if you do not want to use it for a long period of time.
Cleaning

WARNING:
• Always remove the plug before cleaning.
- Do not immerse the base appliance in water for cleaning under any circumstances. Otherwise this might result in an electric shock or fire.

CAUTION:
- Do not use a wire brush or any abrasive items.
- Do not use any acidic or abrasive detergents.
- Do not use any chemical cleaning products.
- Do not damage the ultrasound probe at the bottom of the base appliance!
Tank
- Remove the tank from the base appliance.
- Rinse the tank with clear water.
- In case of limescale, add about 100 ml of household vinegar to the cleaning water. Allow the solution to work for approx. 10 minutes.
- Remove any lime deposit at the steam nozzle and tank cap by using some household vinegar.
- Rinse the tank out once more with clear water.
- Allow the tank to dry before you close it again.
Base Appliance
- Wipe the casing with a damp cloth. Then wipe it with a dry cloth.
-
The area on which the tank stands should be cleaned once per week.
-
Pour the remaining water out of the water vessel.
- Wipe the area with a damp cloth. Use some drops of household vinegar if necessary, and allow to work for about 5 minutes.
-
Remove the ceramic filter.
-
Moisten a cotton bud with vinegar. Use it to carefully wipe the ultrasound probe until any limescale is completely removed.
- Then wipe the appliance once more.
Ceramic Filter
If necessary, clean the ceramic filter under running water.
Foam Filter
- Open the cover on the bottom of the base unit.
- Tap out the filter as needed. If there is heavy staining, clean the filter under running water
- Allow the filter to air-dry completely before refitting it!
- Refit the cover. It must audibly snap in.
Cleaning Around the Appliance
If the appliance has been used over a long period, limescale deposits may occur around the appliance, in spite of the integrated ceramic filter. Clean the surface on which the appliance rests and all objects found close to the appliance, on a regular basis.
Storage
- Clean the appliance as described and allow it to dry.
- Pack the filter with the ceramic spheres separately into a bag when it is dry. Store it in a cool, shady place.
- We recommend that you keep the appliance in the original packaging if it will not be used for long periods.
- Always store the appliance out of the reach of children in a dry, well ventilated place.
Troubleshooting
| Problem Possible Cause Remedy | ||
| The appliance is not functioning. | The appliance has no power supply. | Check the socket with another appliance. |
| Plug in the mains plug correctly. | ||
| Check the main circuit breaker. | ||
| The appliance is faulty. Contact our service centre or a specialist. | ||
| The appliance is turned on, but no mist is being generated. | The tank is empty. Fill the tank. | |
| The float gauge in the bottom right of the water vessel is jammed. | Check the float gauge in the water vessel. It must slightly move up and down. | |
| Too much water in the vessel. Remove some water and then tighten the tank cap again. | ||
| Too little mist is coming out of the nozzle. | The ultrasound probe is soiled. Clean the ultrasound probe as described above. | |
| The ceramic filter is soiled. Clean the filter as described above. | ||
| The water is dirty. Replace the water. | ||
| Setting too low. | Press the ⬆MIST LEVEL button to change the setting. | |
| Water too cold. Add some warm water. | ||
| A bad smell is developing. | The appliance is new. | Remove the tank, take off the lid. Allow the appliance to air in a cool place for 12 hours. |
| The water is too old or soiled. | Replace the water and clean the appliance. | |
| The appliance is abnormally loud. | The appliance is unstable. | Check the stand space. |
| The tank is almost empty. | Refill the tank. | |
| The symbol ⬆ flashes in the display and 3 signals sound. | The water tank is empty. | Pour in water as described in chapter “Preparation” ➔ “Filling with Water”. |
Technical Data
Model: PC-LB 3077
Power supply: 220 - 240 V\~, 50 - 60 Hz
Power consumption: 25 W
Protection class: II
Capacity: ....approx. 5 litre
Net weight: .... approx. 1.47 kg
The right to make technical and design modifications in the course of continuous product development remains reserved.
This appliance has been tested according to all relevant current CE guidelines, such as electromagnetic compatibility and low voltage directives, and is manufactured according to the latest safety regulations.
Disposal
Battery Disposal

As a consumer you are obliged by law to return old batteries/ accumulators.
Remove the battery from the remote control before disposing of the appliance.
Return the battery to a collection facility for the collection of old batteries or hazardous waste.
Contact your local authority for more information.
Meaning of the "Dustbin" Symbol
Protect our environment: do not dispose of electrical equipment in the domestic waste.
Please return any electrical equipment that you will no longer use to the collection points provided for their disposal.
This helps avoid the potential effects of incorrect disposal on the environment and human health.
This will contribute to the recycling and other forms of re-utilisation of electrical and electronic equipment.
Information concerning where the equipment can be disposed of can be obtained from your local authority.
Instrukcja obsługi
CTC Clatronic Sp. z o.o
Ul. Brzeska 1
45-960 Opole
Usuwanie
Usuwanie baterii