PCLR 3076 - Air purifier ProfiCare - Free user manual and instructions
Find the device manual for free PCLR 3076 ProfiCare in PDF.
User questions about PCLR 3076 ProfiCare
0 question about this device. Answer the ones you know or ask your own.
Ask a new question about this device
Download the instructions for your Air purifier in PDF format for free! Find your manual PCLR 3076 - ProfiCare and take your electronic device back in hand. On this page are published all the documents necessary for the use of your device. PCLR 3076 by ProfiCare.
USER MANUAL PCLR 3076 ProfiCare
PykoBODCTBO no 3KcNpyataun
(Air Pollution Detection)
Nettoyage / Maintenance. 22
Thank you for choosing our product. We hope you will enjoy using the appliance.
Symbols in this Instruction Manual
Important information for your safety is specially marked. It is essential to comply with these instructions in order to avoid accidents and prevent damage to the appliance:

WARNING:
This warns you of dangers to your health and indicates possible injury risks.

CAUTION:
This refers to possible hazards to the appliance or other objects.

NOTE:
This highlights tips and information.
Contents
Overview of the Components. 3
General Notes 37
Special Safety Precautions for this Appliance. 37
Handling Batteries 39
Unpacking the Appliance 39
Overview of the Components/ Scope of Delivery. 39
Remote Control 39
Changing the Battery of the Remote Control 39
Notes for Use 40
Location 40
Filter Element 40
Electrical Connection 40
Operating Buttons 40
APD Sensor 40
Operation 40
Switching the Appliance On/Off 40
Power Level Selection 40
Sleep Mode/Power Saving Mode 41
Time-delayed Switch-off. 41
Child Lock. 41
Ionizing Function 41
Cleaning / Maintenance. 41
Cleaning the Filter Element. 41
Replacing the Filter Element. 41
Cleaning the Sensor 42
Troubleshooting 42
Technical Data. 42
Disposal 42
Battery Disposal 42
Meaning of the "Dustbin" Symbol 42
General Notes
Read the operating instructions carefully before putting the appliance into operation and keep the instructions including the warranty, the receipt and, if possible, the box with the internal packing. If you give this appliance to other people, please also pass on the operating instructions.
- The appliance is designed exclusively for private use and for the envisaged purpose. This appliance is not fit for commercial use.
- Do not use it outdoors. Keep it away from sources of heat, direct sunlight, humidity (never dip it into any liquid) and sharp edges. Do not use the appliance with wet hands. If the appliance is humid or wet, unplug it immediately.
- When cleaning or putting it away, switch off the appliance and always pull out the plug from the socket (pull the plug itself, not the lead) if the appliance is not being used and remove the attached accessories.
- Do not operate the appliance without supervision. If you leave the room you should always turn the appliance off. Remove the plug from the socket.
- The appliance and the mains lead have to be checked regularly for signs of damage. If damage is found the appliance must not be used.
- Use only original spare parts.
- In order to ensure your children's safety, please keep all packaging (plastic bags, boxes, polystyrene etc.) out of their reach.

WARNING:
Do not allow small children to play with the plastic foil.
There is a danger of suffocation!
Special Safety Precautions for this Appliance
- Operate the appliance only with the filter element inserted and the cover closed.
-
Never cover the appliance. Pay attention to a sufficient ventilation distance at the air intake and air outlet.
-
Never place the appliance directly next to ovens or other sources of heat.
- Do not insert any items into the openings of the appliance.
- Never place burning items, such as candles, cigarettes or the like on the appliance. There is the danger of damage or even fire.
- Never operate the appliance in rooms with high air humidity, such as bathrooms, showers or swimming pools. Moisture could accumulate in the appliance and result in an electric shock.
- Never operate the appliance in rooms, in which explosive gases could build up. Danger of explosion by solvents in paints and adhesives or by leaking petrol.
- Do not use any sprays in the room. Do not sprinkle fragrance oil on the filter of the filter element.
- Only operate the appliance in rooms with a temperature between 0^ and 40^ .
- Do not repair the appliance by yourself. Always contact an authorized technician. If the supply cord is damaged, it must be replaced by the manufacturer, its service agent or similarly qualified persons in order to avoid a hazard.
- This appliance can be used by children aged from 8 years and above and persons with reduced physical, sensory or mental capabilities or lack of experience and knowledge if they have been given supervision or instruction concerning use of the appliance in a safe way and understand the hazards involved.
Children shall not play with the appliance. - Cleaning and user maintenance shall not be made by children without supervision.

CAUTION:
This appliance is not intended for immersion in water during cleaning. Please refer to the instructions provided in the chapter, "Cleaning / Maintenance".
Handling Batteries

WARNING:
- Do not expose batteries to excessive heat such as sunlight, fire or similar. There is a risk of explosion!
- Batteries are not toys. Keep away from children.
- Do not open batteries by force.
- Avoid contact with metal objects (rings, nails, screws, etc.). There is a risk of short circuit!
- A short circuit could cause the battery to heat up excessively or even to catch fire, resulting in injuries.
- For your own safety, cover the battery terminals with adhesive tape during transport.
In case of battery leakage, make sure not to rub the liquid into your eyes or mucous membranes. In case of contact, wash your hands and rinse your eyes with clear water. Seek medical attention if any discomfort persists.

CAUTION:
- Different battery types or new and used batteries must not be used together.
- Batteries can leak and lose battery acid. If the remote control is not used for a long period of time, remove the batteries.
Unpacking the Appliance
- Take the appliance out of its packaging.
- Remove all the packaging material such as plastic foil, filling material, cable ties and cardboard packaging.
- The filter element is wrapped in foil for protection against damage during transport. Before using the appliance for the first time, remove the foil and proceed to the sections "Cleaning / Maintenance" and "Replacing the Filter Element".
- Check that all parts are supplied in the box.
- In case of incomplete delivery or damage, do not operate the appliance. Return it to your dealer immediately.
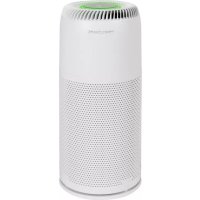
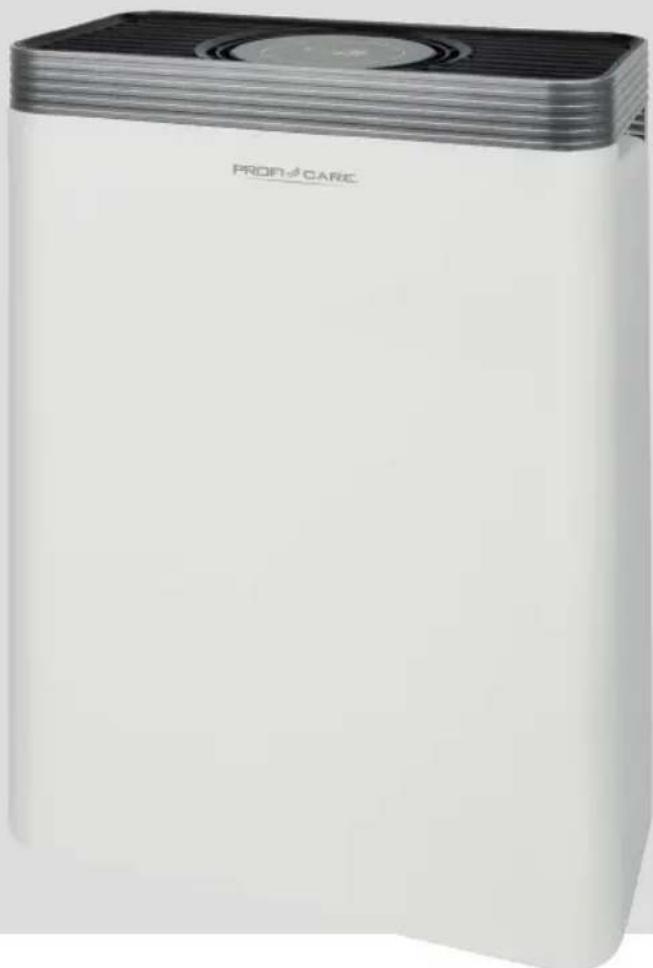
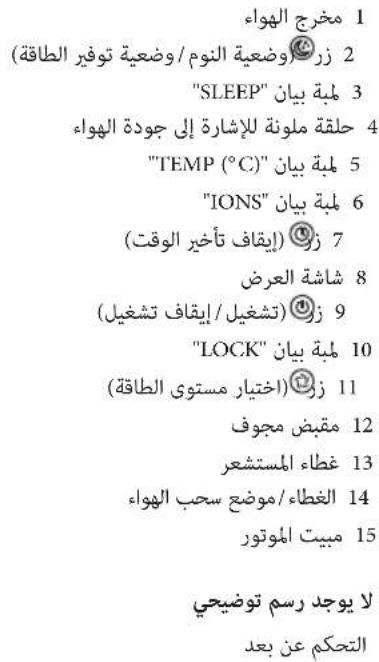
Overview of the Components / Scope of Delivery
1 Air outlet
2 button (sleep mode / power saving mode)
3 Indicator lamp "SLEEP"
4 Colour ring as indication of air quality
5 Indicator lamp "TEMP (°C)"
6 Indicator lamp "IONS"
7 Button (time-delayed switch-off)
8 Display
9 Button (on / off)
10 Indicator lamp "LOCK"
11 button (power level selection)
12 Recessed grip
13 Sensor cover
14 Cover / Air intake
15 Motor housing
Not illustrated
Remote Control
Remote Control

E:
The button cell in the battery compartment of the remote control has been secured with a foil for transport. This will extend the durability of the battery. Before initial use please remove this foil so that the remote control is ready for operation.
The range of the remote control is limited.
When using the remote control, please ensure that there are no obstacles placed between it and the sensor on the appliance.
Changing the Battery of the Remote Control
If the range of the remote control is reduced during use, please proceed as follows:
- First open the battery compartment cover on the back of the remote control.
- Replace the button cell with a battery of the same type (CR2025). Ensure correct polarity. Insert the battery and ensure it is positioned between the two metal contacts.
- Then close the battery lid.
Notes for Use
- The air purifier is not a substitute for medical treatment required when facing pre-existing allergic conditions. If you are not sure, always consult your doctor.
- By the use of the special filter system, the air purifier removes harmful spores causing the formation of mold from the ambient air. Thus, both the risk of mold spreading and health-related issues is reduced.

NOTE:
In case mold is already present in the room, it cannot be removed anymore just using the air purifier.
- Unpleasant odors are removed.
Location
A skid-proof, even surface is suitable as installation location. The appliance operates more effectively, if you keep the windows and doors closed during operation.

NOTE:
Do not forget to air on a regular basis.
Filter Element
Your appliance features a 4-filter system, consisting of the following filter stages:
- Pre-filter, retains coarse particles
HEPA filter, retains fine dust particles, pollen etc. - Activated carbon filter that, among other things, can remove odors
- Catalysis filter that neutralizes harmful environmental gases.
For more information about the filter element, see "Cleaning / Maintenance".
Electrical Connection
- Before connecting the plug to a wall socket, verify the correct mains voltage. Refer to the specifications on the rating label of the appliance.
- Insert the plug in a duly installed protective contact socket. You will hear a beep sound and all indicator lamps light up briefly. In addition, the ring is changing its colours. The appliance will then enter standby mode.
Operating Buttons
The buttons on the appliance are sensor touch buttons. In order to perform the corresponding function gently touch the buttons. Whenever a button is pressed, it will be confirmed by a beep sound.
| Control Panel | Remote Control | Function |
| ◎ | ON / OFF | On / off |
| (Setting R) | AUTO Automatic mode | |
| ◎ | TIMER | Time-delayed switch-off: 1h to 12h |
| ◎ | SPEED | Power level selection (1, 2 and 3) |
| ◎ +◎ | LOCK Child lock | |
| — ION Ionizing function | ||
| ◎ | ◎ | Sleep mode / power saving mode |
APD Sensor
(Air Pollution Detection)
The appliance is equipped with an APD sensor that is monitoring the air quality. It indicates the air quality as follows:
green = good
blue = satisfactory
yellow = sufficient
red =poor
Operation

NOTE:
Operation is explained by the buttons on the remote control.
Switching the Appliance On/Off
- Press the ON/OFF button to switch on the appliance. The appliance always starts operating in level 2. The appliance displays the room temperature and the "TEMP (°C)" control lamp is on. Also, the ionizing function is switched on and the "IONS" control lamp is illuminated.
- Press the ON/OFF button again to switch off the appliance.
Power Level Selection
Press the SPEED button repeatedly to choose between the available power levels.
I = Power level 1
2 = Power level 2
3 = Power level 3
Press the AUTO button to activate automatic mode (R).
Depending on the air quality, the power level in automatic mode will be automatically adjusted.
Sleep Mode / Power Saving Mode
- Press the button to enter sleep mode / power saving mode. Both the display and the coloured ring go out while the "SLEEP" control lamp lights up. The appliance is operating in power level.
- As soon as a button is pressed, the display switched on again and the energy-saving mode is deactivated.
Time-delayed Switch-off
You can set a time-controlled switch-off for the appliance.
- Use the TIMER button to select a time setting between 1h and 12h
- Upon expiry of the timer, the appliance will switch off automatically.
Child Lock
Press the LOCK button to enable or disable the child lock. This prevents the operation of the appliance.
Ionizing Function
The electronic ionization of the air causes dust particles to become electrostatically charged. As a result, they combine to form larger particles and thus get caught by the HEPA filter in a more reliable manner.
NOTE:
- The ionization function can only be switched on and off via the ION button on the remote control. This is not possible on the appliance.
- When the ionization function is activated, the "IONS" control lamp lights up.
Cleaning / Maintenance

WARNING:
- Always pull the plug before cleaning and maintenance.
- Never immerse the motor housing in water for cleaning. It could result in an electric shock or fire.

CAUTION:
- Do not use any wire brush or other abrasive objects.
-
Do not use any acidic or abrasive detergents.
-
Clean the motor housing with a dry cloth, without additives.
You can moisten the cloth slightly to wipe away extreme.
soiling.
- When "FILTER" appears on the display, it should be cleaned or replaced.

NOTE:
Despite this message, the appliance may still be operated with confidence. Once you have cleaned or replaced the filter, simultaneously press and hold the TIMER and the SWITCH button for 3 seconds, until "FILTER" disappears from the display.
Cleaning the Filter Element
- To remove and install the filter element, proceed as described in the following section "Replacing the Filter Element".
-
Remove the pre-filter from the main filter.
-
If required, you may gently clean the pre-filter and the main filter by beating it or carefully wiping it with a soft brush or a damp cloth.

CAUTION:
Do not immerse the filter element in water!
- Then reattach the pre-filter to the main filter.
Replacing the Filter Element
In case the airflow at the outlet decreases during operation, the filter element must be replaced.
- Remove the cover located at the back of the appliance.
- Remove the filter element.
- If dust has accumulated on the grille located in front of the fan, you may use a brush for removal.
- Insert the new filter element.
- Replace the cover.
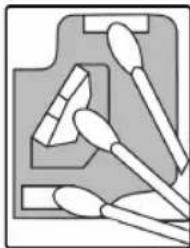
Cleaning the Sensor

NOTE:
-
Only clean the sensor after the filter element has been cleaned or replaced.
If the sensor is the only component that is cleaned it will become dirty very quickly. This may cause the displayed air quality to be no longer accurate. It is therefore necessary to always clean both the filter element and the sensor. -
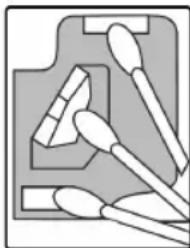
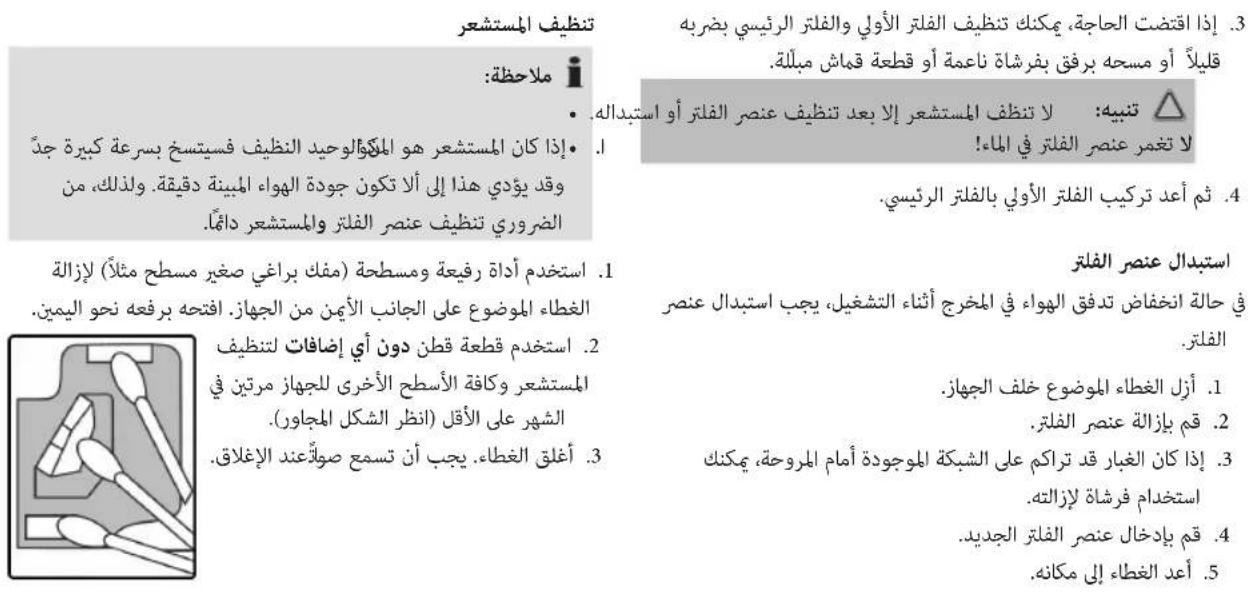
Use a thin, flat tool (e.g. a small flat-head screwdriver) to lift the cover located on the right side of the appliance. Open it by flipping it to the right.
- Use a cotton swab without additives to clean the sensor and all other surfaces of the appliance at least every two months (see adjacent figure).
- Close the cover. It must audibly engage.
Troubleshooting
| Problem Cause Solution | ||
| Appliance does not work. No power supply. Examine the power supply connection. | ||
| Electronic defect. Please contact your dealer or the service department. | ||
| The appliance is too loud. High air humidity. Reduce air humidity by a dehumidifier. | ||
| Soiled filter element. Replace the filter element. | ||
| Too little air flows out of the outlet. | Soiled filter element. Replace the filter element. | |
| The coloured ring is permanently red. | Dirty sensor. Clean the sensor and the filter element. If necessary, replace the filter element. | |
| Soiled filter element. | ||
| It is not possible to press a button. | Child lock is enabled. | Switch off the child lock via the LOCK button on the remote control. |
| The appliance does not respond to the remote control. | The battery of the remote control is empty. | Replace the battery. |
| The remote control is defective. Please contact your dealer or the service department. | ||
Technical Data
Model: PC-LR 3076
Power supply: .220-240V~, 50 Hz 60Hz
Power consumption: .50 Hz: 45W; 60Hz: 55W
Standby performance: .0.3W
Protection class: II
Net weight: approx. 4.45kg
The right to make technical and design modifications in the course of continuous product development remains reserved.
This appliance has been tested according to all relevant current CE guidelines, such as electromagnetic compatibility and low voltage directives, and is manufactured according to the latest safety regulations.
Disposal
Battery Disposal

As a consumer you are obliged by law to return old batteries/ accumulators. Remove the battery from the remote control before disposing of the appliance.
Return the battery to a collection facility for the collection of old batteries or hazardous waste. Contact your local authority for more information.
Meaning of the "Dustbin" Symbol
Protect our environment: do not dispose of electrical equipment in the domestic waste. Please return any electrical equipment that you will no longer use to the collection points provided for their disposal.
This helps avoid the potential effects of incorrect disposal on the environment and human health.
This will contribute to the recycling and other forms of re-utilisation of electrical and electronic equipment.
Information concerning where the equipment can be disposed of can be obtained from your local authority.
Instrukcja obslugi
Jaet COBtI INHOpMaIIO.
CoapedkaHne
O63op deraen npnbopa. 3
O6aHaHΦopMa. 56
Oc6bIe yka3aHnno Texnke 6e3oNaChocTn dnn
daHHoro yctpoiCTBa 56
Kak obaaatabca c bataeikamn. 58
PacnaKOBka np6opa. 58
O63op deTaneep np6opa / KomnjeKT nocTaBkn 58
DuctauHooHoe ynpabHeHne 59
3aMeHa 6aTapeKn B ndCTaHcMOHHom ynpabNeHHn ...59
PpmeuHnno nncnoB3OBAHn.. 59
YcTaHOBKa 59
IoiKJIIOUeHnE K cTeN
- Праздуем Вклочь пибор в розету, поверпт ha npяжен.ОратсьК Тхнчесим даньie, KOtopbie yka3aHbHa tabnue C homHaJIbHbIMn daHHbIMn пибopa.
2.BCTaBbTe CTeByU BnKy B po3Etky C HanpJxHHeM cETN, OChAuEHHyU 3aUHTbIMN KOHTaTAMN U yCTaHOBJIeHHyU B COOTBeTCTBmC IpeDINsCAHnMn. BblAeTc3ByKOBOI CNHaJI, BCE INHdNKATOpbI KpaTkoBpeMeHHO BKIOuHOTc. KpOME TOrO, KOJIbO MeHReT CBoI CBeT. Pnp6Op nepeKnOuaeTcB pexmOxNdaHn.
KhONKn ynpabJIeHnIa
Ha yctpoiCTBe HcnoIb3yIOCTe CeHcOpHbIe KhoNKn. CnErKa KOCHNTecb KhoNKn, YTO6bl BbINOHNHTb COOTBETCTByIOUyO yHKuio. IprK kaxdOM hXaTmN KhoNKn BbIdaeTc 3ByKOBOI cHrHan nOdTbePckDeHn.
Bb6op ypoBHa MoHocTn
BbIbepeYpoBeH MoUHocTn, HaxKIMaH HeCKoJIbKO pa3 KhoNky SPEED.
$$ \begin{array}{l} I = \mathcal {Y} \rho o B e H b M O u l h O C T n 1 \ = \mathcal {Y} \rho o B e H b M O u l h O C T n 2 \ \exists = \mathrm {Y p o B e H b M O u l l H O C T n 3} \ \end{array} $$
Haxmte KhONky AUTO nAaKTHBaunn ABTomatueckoro pexima (R).B 3aBcMocnT ON KaeeCTBa BO3dyxa,yoBeHB MOHOCn 6yDet HAcTPOe ABTomatueckn.
Pexm cHa / pexm 3heproc6epexhen
Haxmte KhoKy dIa nepexoDa B pexkM cHa / aHeproc6epexehna. Iucnneu uCBtHoe KOJIbO norachyT,3aropntc nHdkatop «SLEEP». UcpoiCTBO pa6oTaet Ha ypoBHe MoUHOCTnI
-ПинхатилбовКНОПКДИСПЕВБКИЧТСCHOBA n6byet DeakTNBupOBaH pexIM 3HePrc6epeXeHn.
BbIKHueHHe c 3aedePxxKo n BpeMeHN
Bb mokeTe yctaHOHTb Bpem OTKIOueHnI np6opa.
IcnoJIb3yIte KhoNky TIMER dIa BbIbopa BpeMeHn OTHn do 12h
-ПОИСТЕЧENINВРЕМЕНТаIMЕРа yCTpoIcTBO ABTomaTnueCKN OTKIIQUHITcR.
Блokровka ot DeTei
Haxmte KhoNky LOCK nBkNoyeHn mNn OTKIOeHn 6IokpOBKn OT deTe. 3Ta fynKuHa oTKIOaet oprahbl ynpabHeHy ycTpoCTBOM.
Функциюннзаци
PnnoHn3aun qactnKn nbJIn, JetaoUne B Bo3dyXe, nOlyaOT 3neKtpocTaTnueckn 3apd.Bpe3yIbTaTe OHn cInnaTOB 60nee KpyNbIe qactnbl, YTO N03BOJIaET Phnltpy HEPA 3axBaTbIBaTBnx 60nee 3phiKtNBHO.

ПРIMЕЧИЗ:
ΦyHKUIO NOHn3aUIM MOXHO BkHouHTb N BBKlHouHTb TOJbKO C NOMOUBIO KHOKN ION Ha npJIte D. Ha CAMOM YCTPOIcTBe HET KHOOK dJa BkHIOueHn 3TOI ΦyHKUIN.
- Пив BKПОЧЕНСОУнКЦИ NОнИЗАЦИ ROPИТ ИДИΚA-Top «IONS».
OuIncTa / O6cnyxNbHne

PPEdUnPEXDEHNE:
- Перацсткови обслужиBaHemeBceгдаи3ВлЕкайTe BnIky n3 p03eTKI.
- HNKOrda He norgykaIte DBrIaTeIb B Body dIra OChCTKn. 3To MoXeT npNBecTI K nopaxKeHIO 3JIeKTpUcECKIM TOKOM IIN K NoXapy.

BHIMAHNE:
He npimehnTe npoBOJIOHbIe 1eTKN ININ ppeMeTbIC a6pa3NBbIM NOKpbITmE.

BHIMAHHE:
-
He npimEnHnTe cnIbHbIe nIa6pa3NbHbIe moIoune cpeIcTBA.
-
YnCTnTe KOpny DnBraTeN cyXoTpAknO 6e3 Do6aBJIeHnry NcTnTxN CpeDCTB.
YTObI ydaJIntb OcObO CnJIbHbIe 3aPra3HeHrN,MOxHO CJIeKa CMOUHTb TpIky.
-Пиюьлелин HaЗкpane HeДпсИС«FILER» Heo6xo-DIMMO OчNTb ИИЗ ameHnTbФИnbTp.

ПРИМЕЧАНО:
Hecmotprha3tocoo6eHne,yctpoCTBOMOxHO NCNoIb3OBaTb6e3OrpaHnueHn. Tocne toro, KaK Bbl ONUCTte INN 3aMeHnTeΦnIbTp,ODHOBpeMeHHo HaxMITEuYdepXnBaNTe KONKN TIMER N SWITCH B TeUeHne 3 cekyHn, noka HaDnncb «FILTER» He Icye3HeTc 3kpaHa.
OuHCTka 1nIbTpuyoUeero 3JeMeHa
- UTO6bI CHaTb N yCTaHOBnTB φnNbTPyUOuN 3NeMent, BbINOJIHNTe DeICTBnA, ONmCaHHbIe B CneDyUOcE mpa-DeIe «3aMeHa φnNbTPyUOuero 3NeMenta».
- CHIMITE ppeBapntbHbI ΦnIbTp c rnaBHoro ΦnIbTpa.
3.EcHn Tpe6yeTcMoxHO aKKypaTHo OuNCTHTppeBapntbHbIΦnIbTp n IraHBHbIΦnIbTp, CnerKa INX NOCTyKINBA, INIb 6epexHo OUChTB C NOMOUB MRAKOJ UETKN INI BnaxHO TKAHN.

BHIMAHHE:
He norpykaite fNbtpkyuOuenn 3nement B Body!
- PnpcoeHnHTe npedBapntelhbi K rnaBHomy cnIbtpy.
3aMeHaФnIbTpUoJero 3JeMeHTo
EcnBbVbEmpa60bI np6bopa nOTOK Bo3dyxa Ha BblXoJe yMeHbShaetc, Heo6xOdIMO 3aMeHHTb fNtpyuoiu3JIeMENT.
- Chmnte Kpbuiky, pacnoJIOKeHHyU Ha 3aDHei cTOpOHe np6opa.
- CHINMITE qinltpyioui 3JIeMeHt.
- Ecni Ha peWeTke, pacnoLoXeHHo nepei BeHTnIaTOpom, HAKONIIacb IIbJIb, ee MOxHO ydaJIITb IeTkoN.
- BCTaBbTe HOBBI ΦnIbTpYHouN 3JIeMeHrT.
- YctaHOBITE KpbIiKy.
OuHCTka DaTUnka

ПИМЕЧАНО:
OuNTKy DaTUnka CneDyET BbINOHNrTa TOnbKO NocNe OuNCTKn INI 3aMeHbI DnBtpyIOUero 3JeMeHTa.
- EcIN BbINOJHrTb TOnIbKO OuNCTKy DaTnKa OH CHOBA CTaHET rpa3HbIM OueHb 6bICTpo. 3TO MOKeT pInBeCTN K TOMy, YTO KaueCTBO Bo3Dyxa 6bET ONpeJeJIrTbcr HeToUHO. TaKIM O6pa3OM BcERda CneDuYET BbINOJHrTb OuNCTKy qNlBtpuOJeero 3JEMENTa N daTnKa.
1.ПонHMnTe KpbIshky,pacnoJoxeHHyH Na npaBoi cTOpOHe yCTpoINCTBa C NOMOuBIO TOHKOrO,NIOCKOrO IN-CTpyMeHTa(HapnpMep,OTBepTK C NIOCKMM UJIuCEm)OTKpoIte ee,pepeBepHyB HappBO.
2.C NOMOsbB aTHoro TaMNoHa 6e3 KaKx-Jn6o YnCTaXnx CpeDCTB BbIOHHTe OChTky DaTnka I npOHX NOBepXHOCTey yCTpoiCTBa KaMHNIMyMa3B Dba MeCra (CM PnCyHOK PAnOM).
3. 3aKpoTe KpbIuKy. DOnJKeH npO3By- yatb uenyok.
YcTpaHHe HEnCnpaBHOCTe
a a a a a a a a a a a a a a a a
Joo 1
A. a,b,c,d,e,f,g,h,i,j,k,l,m,n
jolalil jSe gill slloy lalobl clogbgl de Jgall
aalalal alalal lalal
Lgulagolb0y
| الله | الله | |
| .الله بَعْدُ مَسَنَمِهُ وَبَعْدُ مَسَنَمِهُ | .الله بَعْدُ مَسَنَمِهُ وَبَعْدُ مَسَنَمِهُ | الله |
| .الله بَعْدُ مَسَنَمِهُ وَبَعْدُ مَسَنَمِهُ | .الله بَعْدُ مَسَنَمِهُ | الله |
| .الله بَعْدُ مَسَنَمِهُ وَبَعْدُ مَسَنَمِهُ | .الله bengd l l l l l l l l l l l l l l l l l l l l l l l l l l l l l l l l l l l l l l l l l l l l l l l l l l l l l l l l l l l l l l l l l l l l l l l l l l l l l l l l l l l l l l l l l l l l l l l l l l l l | |
| .الله بَعْدُ مَسَنَمِهُ وَبَعْدُ مَسَنَمِهُ | .الله bengd l l l l l l l l l l l l l l l l l l l l l l l l l l l l l l l l l l l l l l l l l l l l l l l l l l l l | |
| .الله bengd l l l l l l l l l l l l l l l l l l l l l l l l l l l l l l l l l l l l l l l l l l l l l l l l l l l l l l l l l l l l l l l l l l l l l l l l l l l l l l l l l l l l l l l l l l l l | ||
| .الله bengd l l l l l l l l l l l l l l l l l l l l l l l l l l l l l l l l l l l l l l | | .الله bengd l l l l l l l l l l l l l l l l l l l l l l l l l l l l l l l l l l l l l l l l l l l l l l l l l l l l l l l l l l l l l l l l l l l l l l l l l l l l l l l l l l l l l l l l l l l l | | |
| .الله bengd l l l l l l l l l l l l l l l l l l l l l l l l l l l l l l l l l l l l l l l l l l l l l l l l l l l l l l l l l l l l l l l l l l l l l l l l l l l l l l l l l l l l l l l l l l | | .الله bengd l l l l l l l l l l l l l l l l l l l l l l l l l l l l l l l l l l l l l l l l l l l l l l l l l l l l l | | .الله |
| .الله bengd l l l l l l l l l l l l l l l l l l l l l l l l l l l l l l l l l l l l l l l l l l l l l l l l l l l l l l l l l l l l l l l | | .الله bengd l l l l l l l l l l l l l l l l l l l l l l l l l l l l | | .الله |
| .الله bengd l l l l l l l l l l l l l l l l l l l l l l l l | | .الله bengd l l l l l l l l l l l | | .الله |
| .الله bengd l l l l l l l l | | .الله bengd | | .الله |
jglsl jolal
aJbUJ 0Jauu
Joo 100000000000000000000000000000000000000000000000000000000000000

yllal gaiagall lglalg yjol jaylalb. 1oglab joi jolal ababla golgi
A
PC-LR 3076.
50/60240-220.
55;60;45:50.
0,3.
45.
144
ailll jgj aog/g gll aag
aagaaalgagagagagagagag
Lo: "SLEEP" Sollil cuao o lauic dglal aolng
1234567890
J 1
.
gll
jglal jzjjg y 20
12h j h j gll 1011j 1j x y TIMER j j p a
1.15 Jlgljagglg 2.3gglg
Jabll ayoo Jaa
jglauu:Jalal aLg JgLOCK jJe
jglj
山
$$ \frac {\partial \omega}{\partial t} = \frac {\partial \omega}{\partial t} $$
$$ \dot {a} \dot {a} \dot {a} = j a \dot {0} \dot {1} $$
山
:ddzdo
aie jie pseall jge oogggljjll abwgluee
jlll j#
Jalll jglld la Ie1s.jgdl Jj ON/OFF jJI JaI
e 1 1 1 1 1 1 1 1 1 1 1 1 1
y j 111111111111111111111111111111111111
"IONS"
jLJ 10ON/OFF jIJI
aBbIgSua
aolilallllglss jy jzSIOJSCSPEEDjI Jd
$$ 1 \quad a \text {山} \quad b \quad s g _ {a} = 1 $$
$$ 2 a b \vert a b s g i n = 2 $$
$$ 3 \text {a 3} \square \text {b} \text {a l l} \text {s g i n a l} = 3 $$
()AaAALALALALALAUTO JJ Jc
aalll aaggl jaae wae gall gss
/
:
.
a000g
.
450 - 360 = 150
aui jI lo. sio65 Jao jol jol jj jSe dll oia po
SWITCH jjg TIMER jj g
"FILTER" 15
jiall jaiie aaii
Jlll"lll p aal 1 1
"julllnais
J 2
:4
.aa 10gol g
. 4a5g a
bi . ①
3
.
gddbbgddgddgddgddgddgddgddgddgddgddgddgddgddgddgddgddgddgddgddgddgddgddgddgddgddgddgddgddgddgddgddgddgddgddgddgddgddgddgddgddgddgddg
A


.1j000000000000000000000000000000000000000000
puluul 1b/1gSbl 1e aole ojbi
Aa


J 1

jgljlllglgolgo Jldy
.
·
.4 5 1 1 1 1 1 1 1 1 1 1 1 1 1 1 1 1 1 1
J.
J 1
.
4090j 40j 40j j j j j j j j j
. 1
J 8 J 15
1
aaii 1 15 1 15 1 15 1 15 1 15 1 15 1
jLJIJIbI 1
p 1
4
a 1
"ddla/da
:
A
y. lo gj jw gl
aaii aai i 1
·
S_ OBC = 12 · CO · BC = 12 × CD × 5
18,31,11, 26, b,20, 2
.1
如 | x - 2| = 2| x|
jglglg
.
Jolgo g, gao all olog a jiaobj jil Jua 10 algo J5 jj.2
.
pIaaii Jaii iaii jiaayaoj yaiia 3
g"al/abll"psgglgdlj0
"jiall aie Juiiui" pao
A
cl cluii lalgl dyl Jusl aol 3. abloa aiey
a111 1
- jiall 1
- 64
- 64
- 64
- “alaalil glio" 100
aole Udo 1
3 Le clall bai g jagll Jg auiu Jg uaiu cui 1j3
ogall de .ggyi gll guaill .kai 15g .pkiyil Jauy g iuaall U
de la paeib! y r. yir jay jgal liae albe! uie .dla
L
jglal pluulw gucui j Jol. liua 1Jusl de
pduowyI cLdJgO
L 1
1011 1011 1011 1011 1011 1011 1011 1011 1011 1011 1011 1011 1011 1011 1011 1011 1011 10
jgljy
:

jblao 99g jyag elao yjblz aolly jno jolll iia jai
alolw jewell alao
:

aai 1 g jiaaii i jao aaiaa o aoao baoo g jaoi li
S 1
clogobg pailll 0gall jolll liy y
- y. j. 2015 30
gJgljll pllaow jglw lio
0j1yol jlaa 1234567890123456789012345678901234567890
(23)
3.
g jjglj 15 is!. aaiu uug jglal y. odll
68.
jgl jgljgljglj
68.
131 (Jgglll lLw g aaiy wlll wwi) Lds yjySul
-
- w.w.fll. 3. jilg. al. a. ab. g. ai jai. jaiell, y.
a3j1 1j1g j1g j1g jS
67.
66.
jui jui jui jui joi joi jai jai jai jai jai jai jai jai jai jai jai jai jai jai jai jai jai jai jai jai jai jai jai jai jai jai jai jai jai jai jai jai jai jai jai jai jai jai jai jai jai jai jai jai jai jai jai jai jai jai jali
j86jai,10000000000000000000000000000000000
66
jglal plaiw jc aagll ay csl s iie.
663.
66
. Jia 8GluI, IiIgI gHa pIaui
. a566yll.lilalil.LuSly, yogill. klan. gnn. (ullab)
66
65.
Jglio jlu (Lg+ gjglgllg
:yoo
65.
y 1
- 65
65
65
jlaa aolal oxlal
.
gog 1gall gog go dic a5 dgaia Lwu Jui jui jui jui y
= | g + 1|
.
GARANTIEKARTE
warranty card · garantiekaart · carte de garantie · scheda di garanzia · tarjeta de garantia · cartao de garantia · garantikort · karta gwarancyjna · zaru.cnli list · kartica jamstva · carte de garantie · fapaunnoHa Kapta · zaru.cnly list · garancijski list · garanciajegy · rapaHTiHmΦOpMynap · fapaHTnHbTanoH
PC-LR 3076
24 Monate Garantie gemäß Garantieerklarung - 24 months warranty according to warranty declaration - 24 maanden garantie volgens garantieverklaring - 24 mois de garantie selon la déclaration de garantie - 24 messi de garanzia seconde la dichiarazione di garanzia - 24 meses de garantia de acuerdo con la déclaration de garantia - 24 meneds garanti i henhold til garantibetingelsene - 24 misiezare gwarancjna podastawie owiadczenia gwarancjnego - záruka 24 mésicó podle prohläsen o záruche - 24 mjesećno jamstvo u skladu s jamstvenom declaraciçojm - 24 luni garantie conform déclaratie de garanjie - 24 meça rapanjua a cboletctbne c rapaunohhara deknapaúra - 24-mesačna záruka podla vhylasenia o záruche - 24-mesečna garancjna, skladno z garancjsko izjavoo 24 hönap garancia a garanciafeltetelekben leirtak szerint - rapahtir na 24 mični Bidnoiho na pno rapahtio - rapahtny 24 meça cornaccho zábanenbHM rapahtnhm npabnarn -
Kaufdatum, Handlsterpmel, Unterschied - date of purchase, dealer stamp, signature - aankoepdatum, dealtempel, handbekening - date d'achat, tampon du concessionaire, signature - data di acquisto, timbre di rienditone, firma - fecha de compra, sellio del distribuiador, firma - data de compra, carimbo do distribuiador, assinatura - kippsdato, forhandlstempel, signature - data zakpu, pieczec spradewie, podisp - datum zakupeni, radlo prodede, podisp - datum koupivne, zig trovocne, podisp - data o achite /iachy, stamplia furnizolaru, semnatura - Dara na nojukiva, neurat na Ptopevava, Ptopev - datum nikupu, pecliatka obchodnica/ predaje, podisp - datum nikupu, zig trovocne, podisp - visilaris datuma, kereskedé belyegroje, alárikas - data npodbanha, nevata npodanpa, npitnc - Data npodopetemir, ilamrnpodanra, pnochna
PROFI CARE
www.proficare-germany.de
PROFI CARE.
Internet: www.proficare-germany.de
Made in P.R.C.