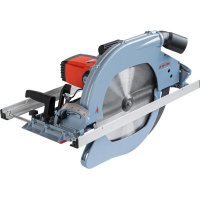
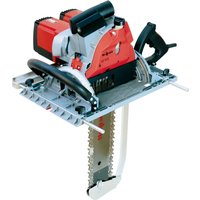
MKS 145 Ec - Saw Mafell - Free user manual and instructions
Find the device manual for free MKS 145 Ec Mafell in PDF.


| Product type | Portable circular saw |
| Brand | Mafell |
| Model | MKS 145 Ec |
| Supply voltage | 230 V AC |
| Frequency | 50 Hz |
| Power consumption | 2600 W |
| No-load speed | 1900 - 2400 min⁻¹ |
| Max cutting depth | 145 mm |
| Max cutting depth at 30° | 125.5 mm |
| Max cutting depth at 45° | 102.5 mm |
| Max cutting depth at 60° | 72.5 mm |
| Max/min blade diameter | 370 / 341 mm |
| Blade bore | 30 mm |
| Weight | 15.3 kg |
| Dimensions (L × W × H) | 460 × 710 × 430 mm |
| Protection class | II |
| Sound pressure level | 103 dB(A) |
| Sound power level | 111 dB(A) |
| Hand-arm vibration | < 2.5 m/s² |
| Safety devices | Fixed upper guard, movable lower guard, riving knife, electric brake |
| Standard equipment | Carbide blade 370 mm 26 teeth, riving knife, parallel guide, suction sleeve, service tool |
| Maintenance | Regular cleaning, lifetime lubrication of bearings, revision by authorized service center after extended use |
| Special features | Electronic speed control with overload indicator light |
Frequently Asked Questions - MKS 145 Ec Mafell
User questions about MKS 145 Ec Mafell
0 question about this device. Answer the ones you know or ask your own.
Ask a new question about this device
Download the instructions for your Saw in PDF format for free! Find your manual MKS 145 Ec - Mafell and take your electronic device back in hand. On this page are published all the documents necessary for the use of your device. MKS 145 Ec by Mafell.
USER MANUAL MKS 145 Ec Mafell
natural_image
Exterior view of a gray mallet cutter with visible blade and mounting bracket (no text or symbols)MAF01516/a
WARNUNG
Please read all safety instructions and directions. Failure to comply with the safety instructions and directions can cause electric shock, fire and/or serious injuries. Please retain all safety instructions and directions for future reference.
AVERTISSEMENT
GB - EC Declaration of Conformity
We herewith confirm that the machine MKS 145 Ec complies with the EU directives quoted. The standards listed were used for design and construction. Empowered person for the configuration of the technical documents: Mafell AG
| 1 | Signs and symbols | 17 |
| 2 | Product information | 17 |
| 2.1 | Manufacturer's data | 17 |
| 2.2 | Machine identification | 17 |
| 2.3 | Technical data | 18 |
| 2.4 | Emissions | 18 |
| 2.5 | Scope of supply | 19 |
| 2.6 | Safety devices | 19 |
| 2.7 | Use according to intended purpose | 19 |
| 2.8 | Residual risks | 19 |
| 3 | Safety instructions | 20 |
| 4 | Setting / Adjustment | 21 |
| 4.1 | Mains connection | 21 |
| 4.2 | Chip extraction | 21 |
| 4.3 | Saw blade selection | 21 |
| 4.4 | Saw blade change | 21 |
| 4.5 | Riving knife/splitter | 22 |
| 5 | Operation | 22 |
| 5.1 | Initial operation | 22 |
| 5.2 | Switching on and off | 22 |
| 5.3 | Cutting depth adjustment | 22 |
| 5.4 | Setting for bevel cuts | 22 |
| 5.5 | Sawing according to tracings | 23 |
| 5.6 | Sawing with the parallel stop | 23 |
| 6 | Service and maintenance | 23 |
| 6.1 | Storage | 23 |
| 7 | Visual signal indication of operating condition | 23 |
| 8 | Troubleshooting | 24 |
| 9 | Optional accessories | 25 |
| 10 | Exploded drawing and spare parts list | 25 |
1 Signs and symbols

This symbol is found in all places where you will find information for your safety.
Non-compliance with these instructions may result in very serious injuries.
This symbol indicates a potentially hazardous situation.
If this situation is not avoided, the product or objects in its vicinity may get damaged.

This symbol indicates tips for the user and other useful information.
2 Product information
for machines with product no. 924701, 924720, 924722
2.1 Manufacturer's data
MAFELL AG, Beffendorfer Straße 4, D-78727 Oberndorf / Neckar, Phone +49 (0)7423/812-0, Fax +49 (0)7423/812-218, e-mail: mafell@mafell.de
2.2 Machine identification
All details required for machine identification are available on the attached rating plate.

Protection class II

CE symbol to document compliance with the basic safety and health requirements according to Appendix I of the Machinery Directive.
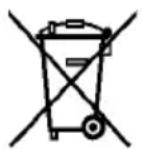
For EU countries only
Do not dispose of electric tools together with household waste material!
In accordance with the European directive 2002/96/EC on waste electrical and electronic equipment and transposition into national law, obsolete electrical tools must be collected separately and recycled in an environmentally-compatible manner.

To reduce the risk of injury, please read the operating instructions.
2.3 Technical data
| Operating voltage | 230 V AC |
| Mains frequency | 50 Hz |
| Input power continuous operation 2600 W | |
| Power consumption continuous operation | 14,5 A |
| Speed during idling | 1900 - 2400 rpm |
| Cutting depth | 65 - 145 mm (2 1⁄2 - 5 5/8 in.) |
| Maximum cutting depth 30°/45°/60° | 125.5/102.5/72.5 mm (5, 4, 2 7/8 in.) |
| Tilting saw unit | up to 60° |
| Saw blade diameter max/min 370/341 mm (14 3⁄4 / 13 1⁄2 in.) | |
| Saw blade body thickness 2.5 mm (3/32 in.) | |
| Tool cutting width | 4.2 mm (11/64 in.) |
| Saw blade mounting hole 30 mm | |
| Hose connector diameter | 58 mm (2 9/32 in.) |
| Weight without mains cable, with parallel guide fence | 15,3 kg (33.7 lbs) |
| Dimensions (W x L x H) | 460 x 710 x 430 mm (18 1/8 x 28 x 17 in.) |
2.4 Emissions
The declared noise emission values have been measured in accordance with EN 62841-1 and EN 62841-2-5 and may be used for comparing the tool with another and also in a preliminary assessment of exposure.

Danger
The noise emissions during actual use of the power tool can differ from the declared values depending on the ways in which the tool is used especially what kind of workpiece is processed.
Always wear hearing protection, even when the power tool is running idle in addition to the trigger time!
2.4.1 Noise emission specifications
Noise emission values determined according to EN 62841-1 and EN 62841-2-5:
| Sound pressure level L | _PA = 103 dB (A) |
| Uncertainty K | _PA = 3,0 dB (A) |
| Sound power level L | _PA = 111 dB (A) |
| Uncertainty K | _PA = 3,0 dB (A) |
The noise measurement was recorded using the saw blade included in the standard equipment.
2.4.2 Vibration specifications
The typical hand-arm vibration is less than 2.5 m/s ^4 .
2.5 Scope of supply
Portable circular saw MKS 145 Ec complete with:
1 carbide-tipped circular saw blade ∅ 370 mm (14 3/4 in.), 26 teeth
1 riving knife / splitter (thickness 2.5 mm / 3/32 in.)
1 hose connector
1 parallel guide fence
1 service tool in bracket on the machine
1 operating manual
1 folder "Safety Instructions"
2.6 Safety devices

Danger
These devices are required for the machine's safe operation and may not be removed or rendered inoperative.
Before operating the machine, check the safety devices for function and possible damage. Do not use the machine with missing or ineffective safety devices.
The machine is equipped with the following safety devices:
- Upper stationary saw guard
- Lower retractable saw guard
- Large base plate
- Handles
- Riving knife / splitter
- Index mechanism and electrical brake
- Hose connector
2.7 Use according to intended purpose
The portable circular saw is exclusively suitable for longitudinal and cross cutting of solid wood.
In doing so, the machine must only be used with a horizontal base plate.
This machine must not be used for plunge cuts.
Panel materials such as chip board, core board and medium density fibre board can also be processed. Use approved saw blades according to EN 847-1.
Any other use than described above is not permissible. The manufacturer cannot be held liable for any damage arising from such other use.
So as to use the machine as intended, comply with the operating, maintenance and repair instructions specified by Mafell.
2.8 Residual risks

Danger
Even if used in accordance with its intended purpose and despite conforming with the safety instructions, residual risks caused by the intended use that can lead to health consequences will always remain.
- Touching the saw blade in the vicinity of the starting aperture below the base plate.
- Touching the part of the saw blade that protrudes below the workpiece when cutting.
- Touching of turning parts from the side: saw blade, clamping flange and flange screw.
- Machine backlash if the blade gets stuck in the workpiece.
- Breakage of the saw blade and risk of the blade or pieces of the blade being hurled away.
- Touching live parts with the housing open and the mains plug not removed.
- Hearing can be impaired when working for long periods without ear protectors.
- Emission of harmful wood dusts during longer operation without extraction.
3 Safety instructions

Danger
Always observe the following safety instructions and the safety regulations applicable in the respective country of use! Please also read the safety information in the enclosed folder 070500 "Safety instructions" (according to standard 62841-1).
General instructions:
- Children and adolescents must not operate this machine. This rule does not apply to young persons receiving training and being supervised by an expert.
- Never work without the protection devices prescribed for the respective operating sequence and do not make any changes to the machine that could impair safety.
- When operating the machine outdoors, use of an earth-leakage circuit-breaker is recommended.
- Damaged cables or plugs must be immediately replaced. Replacement may only be carried out by Mafell or an authorised MAFELL service workshop in order to avoid safety hazards.
- Avoid sharp bends in the cable. Especially when transporting and storing the machine, do not wind the cable around the machine.
Do not use:
- Cracked and misshapen saw blades.
- Saw blades made of high speed steel (HSS saw blades).
- Blunt saw blades as they impose an excessive load on the motor.
- Saw blades with a base body with a thickness greater than, or a cutting width (setting) less than, the thickness of the riving knife / splitter.
- Saw blades which are not suitable for the saw blade's idling speed.
- Grinding discs
Instructions on the use of personal protective equipment:
- Always wear ear protectors during work.
- Always where a dust mark during work.
- Always wear protective goggles during work.
Instructions on operation:
- Do not reach with your hands into the sawing area and do not touch the saw blade. With your other hand, support the supplementary handle or the motor casing.
- Do not reach under the workpiece.
- Adapt the cutting depth to the workpiece thickness.
- Never support the workpiece in your hand or over your leg. Secure the workpiece against a sturdy support.
- Only hold the device by its isolated handle surfaces when carrying out work during which the cutting tool could hit hidden power cables or its own connection cable.
- Always use a limit stop or a straight edge guide for longitudinal cutting.
- Always use correctly sized saw blades with matching receiving bore (e.g. star-shaped or round).
- Never use damaged or incorrect saw blade washers or screws.
- Hold the saw with both hands and bring your arms into a position where you are able to resist the backlash forces. Always keep to the side of the saw blade. Never bring the saw blade in line with your body.
- If the saw blade gets jammed or sawing is interrupted for some other reason, release the on/off switch and keep the saw steady in the material, until the saw blade has come to a complete standstill. Never try to remove the saw from the workpiece or to pull it backwards while the saw blade is still moving or while a backlash could occur.
- If you would like to restart a saw that is stuck in the workpiece, centre the saw blade in the saw slit and check whether the saw teeth are stuck in the workpiece.
- Support large plates to reduce the risk of backlash caused by a jammed saw blade.
- Do not use any blunt or damaged saw blades.
-
Before starting to saw, tighten the cutting depth and cutting angle adjustments.
-
Be especially careful when making a "plunge cut" into a concealed area, e.g. into an existing wall.
- Prior to every use, check whether the lower saw guard is closing properly. Do not use the saw if the lower saw guard is not freely movable and does not close immediately. Never clamp or tie down the lower saw guard in an open position.
- Check the function of the spring for the lower saw guard. Have the device serviced if lower saw guard and spring do not work properly.
- Only manually open the lower saw guard for special cuts, such as "plunge and angle cuts". Open the lower saw guard using the retracting lever and release the lever as soon as the saw blade has penetrated the workpiece.
- Do not place the saw on the work bench or on the floor without the lower saw guard covering the saw blade.
- Use the saw blade that matches the riving knife/splitter
- Adjust the riving knife / splitter as described in the operating instructions.
- Always use the riving knife / splitter except for "plunge cuts".
- For the riving knife / splitter to function, it has to be located in the saw slit.
- Never operate the saw with a bent riving knife / splitter.
- Examine the workpiece for foreign objects. Never attempt to cut into nails or other metal objects.
Instructions on service and maintenance:
- Regularly cleaning the machine, especially the adjusting devices and guides, constitutes an important safety factor.
- Only original MAFELL spare parts and accessories may be used. Otherwise the manufacturer will not accept any warranty claims and cannot be held liable.
- Risk of injury when changing the saw blade! There is a risk of injury from touching the sharp teeth of the saw blade when changing the saw blade. Wear protective gloves. Exercise caution when changing the saw blade.
4 Setting / Adjustment
4.1 Mains connection
Prior to commissioning make sure that the mains voltage complies with the operating voltage stated on the machine's rating plate.
4.2 Chip extraction
Connect the machine to a suitable external dust extractor during all work generating a considerable amount of dust. The air velocity must be at least 20 m/s (65.6 ft / sec.).
The inside diameter of hose connector 6 (Fig. 1) is 58 mm (2 9/32 in.).
4.3 Saw blade selection
Use a sharp tool to obtain a good cut quality and select a tool from the following list according to material and application:
For cuts across the grain in soft and hard wood, plywood, chipboard and coreboards:
- TCT circular saw blade ∅ 370 x 4.2 x 30 mm (14 ¾ x 11/64 in. x 30 mm), 26 teeth WZ
For cuts along the grain in soft and hardwood:
- TCT circular saw blade ∅ 370 x 4.2 x 30 mm (14 ¾ x 11/64 in. x 30 mm), 18 teeth WZ
4.4 Saw blade change

Danger
Pull the power plug during all service work.
Risk of injury even if the saw wire is standing still. Wear protective gloves!
Proceed as follows to replace the saw blade:
- Press the stop lever 15 (Fig. 2) to lock the saw blade.
- Place the hexagon head socket wrench that is available in a bracket on the machine into the flange screw 4 (Fig. 1) and turn it until the stop lever has engaged completely. Turn the wrench counter clockwise to release the flange screw. Remove the screw and the front clamping flange 5. After opening the retractable saw guard 1, you can now remove
the saw blade by lifting it to the front and then pulling it in a downward direction.
- Before mounting the new saw blade, both clamping flanges must be checked for adhering parts and cleaned. Pay attention to the sense of rotation when inserting the saw blade. The saw blade teeth must point in the same direction as the arrow on the upper saw guard. Afterwards, mount the clamping flange, attach the flange screw and tighten it by clockwise turning. In doing so, the stop lever can be used in the same way as when the screw was released.
Do not press the locking bolt 15 (Fig. 2) with the machine running! The machine may get damaged.
4.5 Riving knife/splitter

Danger
Pull the power plug during all service work.
The riving knife / splitter 2 (Fig. 1) prevents the saw blade from jamming during longitudinal cutting. The correct distance to the saw blade is shown in Fig. 3.
- For adjustment, unfasten the two cylinder-head screws 3 (Fig. 1) with the hexagon head socket wrench supplied, adjust the riving knife / splitter by moving it accordingly in its longitudinal slot and afterwards retighten the two cylinder-head screws.
5 Operation
5.1 Initial operation
Personnel entrusted to work with the machine must be made aware of the operating instructions, calling particular attention to the chapter "Safety instructions".
5.2 Switching on and off
- Switching on: First of all, unlock the switch-on lock by pressing the locking lever 8 (Fig. 4). Then, keeping the locking lever depressed, activate the gearshift lever 7.
As this is a switch without locking device, the machine will only run for as long as this gearshift lever is pressed.
The built-in electronic system provides for jerk-free acceleration when the machine is switched on and under load readjusts the speed to the fixed setting.
In addition, this electronic system adjusts the motor down in case of overload, i.e. the saw blade will stop. Switch the machine off then. Then switch the machine on again and continue sawing at a reduced feed speed.
With the setting wheel 22 (Fig. 4) you can steplessly adjust the saw speed between 1900 and 2400 rpm.
- Switching off: To switch off, release the switch trigger 7. The built-in automatic brake limits the saw blade slowing time to approx. 5 s. The switch-on lock automatically takes effect again and secures the portable circular saw against accidental switch-on.
5.3 Cutting depth adjustment
The cutting depth is continuously variable between 65 and 145 mm (2 ½ and 5 5/8 in.).
Proceed as follows to adjust it:
- First of all, release the clamping lever 10 (Fig. 5) by turning it counter clockwise.
- You can now adjust the cutting depth by turning the handle 9.
- The set depth can be read off the scale ring 21 (Fig. 5). The inscription on the gearbox case serves as indicator in this regard.
• After adjusting, tighten the clamping lever again.

Always set the cutting depth approx. 2 to 5 mm (5/64 to 13/64 in.) larger than the material thickness to be cut.
5.4 Setting for bevel cuts
For bevel cuts, the saw unit can be set to any angle between 0 and 60°.
- Bring the machine into a stable position and support it such that it is possible to tilt the saw unit.
- Then release the two wing screws 16 (Fig. 2 and Fig. 4), tilt the unit to the desired angle shown on the indicator 17 (Fig. 2) on scale 18 at the segment for tilting.
- Afterwards, retighten both wing screws 16 (Fig. 2 and Fig. 4).
5.5 Sawing according to tracings
The base plate is on the inside equipped with a tracing edge that applies both to straight cuts and for all angles of inclination. This tracing edge corresponds to the saw blade's inside. For bevel cuts, the tracing can be viewed through the opening on the left-hand side of the upper saw guard (arrow, Fig. 5).
- For sawing, hold the machine by both its handles 11 (Fig. 4) and 12 (Fig. 2) and place the front part of the base plate onto the workpiece.
- To facilitate the first cut, the retractable saw guard 1 (Fig. 1) can be opened by pressing the lever 13 (Fig. 5) that is arranged directly next to the front handle.
When this lever is released, the saw guard closes automatically.
- Switch on the portable circular saw (see chapter 5.2) and slide the machine evenly forward in the direction of the cut.
- Once you have executed the cut, immediately switch off the saw by releasing the gearshift lever 7 (Fig. 4).
5.6 Sawing with the parallel stop
The portable circular saw is equipped with a parallel guide fence on both sides, so that it is possible to saw on both sides of the machine parallel to an already existing edge without retooling. The cutting range on the right-hand side amounts to 140 mm (5 1/2 in.) and on the left-hand side to 320 mm (12 5/8 in.).
- In order to adjust the cutting width, unscrew the wing screws 14 (Fig. 4) and move the guide fence accordingly. Afterwards, retighten the wing screws 14.
In addition, it is possible to turn the guide fence plate 20 (Fig. 2) of the parallel guide fence by 90°. With that it is possible to use the guide fence surface both above and below the base plate. If a straight workpiece edge is already available and if a parallel cut is to be made to this, the guide fence plate 20 is turned down.
If there is no straight workpiece edge, the guide fence plate is turned up to carry out a straight cut.
Now the machine can be guided either along a lathe fastened on the workpiece or along the guide rail that is available as optional accessory.
6 Service and maintenance

Danger
Pull the power plug during all service work.
MAFELL machines are designed to be low in maintenance.
The ball bearings used are greased for life. When the machine has been in operation for a longer period of time, we recommend to hand the machine in at an authorised MAFELL customer service shop for inspection.
Only use our special grease, order No. 049040 (1 kg tin) for all greasing points.
6.1 Storage
Clean the machine thoroughly if the machine is not used for a longer period of time. Spray blank metal parts with a rust-proofing agent.
7 Visual signal indication of operating condition
The colour of the speed adjusting wheel indicates the machine's operating state.
As long as the machine is not overloaded in terms of output, the speed adjusting wheel permanently lights up green during operation.
If the adjusting wheel permanently lights up red, there is a defect (see the Chapter Troubleshooting).
8 Troubleshooting

Danger
Determining the causes for existing defects and eliminating these always requires increased attention and caution. Pull the mains plug beforehand!
Some of the most frequent defects and their causes are listed in the following chart. In case of other defects, please contact your dealer or the MAFELL customer service directly.
| Defect | Cause | Elimination |
| Machine cannot be switched on and the speed adjusting wheel lights up red | Overtemperature shutdown | Allow the machine to cool down |
| Overvoltage switch-off | Have power supply checked by an electrician | |
| Undervoltage switch-off | ||
| Machine cannot be switched on and the speed adjusting wheel does not light up | No mains voltage | Have power supply checked by an electrician |
| Mains fuse defective | Have fuse replaced by an electrician | |
| Machine cannot be switched on and the speed adjusting wheel lights up green | Carbon brushes worn | Take the machine to a MAFELL customer service shop |
| Machine stops during cutting and the speed adjusting wheel lights up red | Overload switch-off | Reduce feed speed |
| Overvoltage switch-off | Have power supply checked by an electrician | |
| Undervoltage switch-off | ||
| Machine stops during cutting and the speed adjusting wheel does not light up | Mains failure | Have mains-side pre-fuses checked by an electrician |
| Saw blade jams as the machine is advanced | Feed rate too fast | Reduce feed speed |
| Blunt saw blade | Release the switch immediately. Remove the machine from the workpiece and replace the saw blade | |
| Tension in the workpiece | Heightened caution during sawing, risk of backlash increases. | |
| Poor machine guidance (for example due to free-hand guidance) | Use parallel guide fence | |
| Uneven workpiece surface | Straighten the surface | |
| Saw blade vibrates in the work piece | Saw blade not correctly adjusted | Retighten saw blade |
| Work piece not fastened Fasten work piece with clamps | ||
| Saw blade stops - motor continues to turn | Saw blade not correctly fastened | Retighten saw blade |
| Burn marks on the cut surfaces | The saw blade used is unsuitable for the task or blunt | Replace saw blade |
| Chip ejection blocked | Wood is too damp | Clean chip ejectionUse dry wood |
| Extended operation without extraction | Connect machine to an external extraction, e.g. portable dust extractor | |
| Lower mobile protective cover does not close or closes only slowly | Chips and pieces of wood in the bottom mobile protective cover | Remove chips and pieces of wood |
9 Optional accessories
- Guide rail, one-piece complete 3 m (9,85 ft) long Order No. 200672
- Guide rail, two-piece complete 3 m (9,85 ft) long Order No. 037037
- Guide rail – extension 1,5 m (4,9 ft) long Order No. 036553
- Adapters (pair) for parallel limit stop for hooking into the guide rail Order No. 037195
- Saw blade-TCT ∅ 370 x 4.2 x 30 mm (14 ¾ x 11/64 in. x 30 mm), 18 Order No. 092524 teeth WZ (longitudinal cut)
- Saw blade TCT ∅ 370 x 4.2 x 30 mm (14 ¾ x 11/64 in. x 30 mm), 26 Order No. 092526 teeth WZ (longitudinal and cross cuts)
- Guide rail F80, 800 mm (2,6 ft) long Order No. 204380
- Guide rail F110, 1100 mm (3,6 ft) long Order No. 204381
- Guide rail F160, 1600 mm (5,25 ft) long Order No. 204365
- Guide rail F210, 2100 mm (6,9 ft) long Order No. 204382
- Guide rail F310, 3100 mm (10,2 ft) long Order No. 204383
- Sliding bevel segment F-WA Order No. 205357
- Accessories for guide rail:
- Screw clamp F-SZ 180MM Order No. 207770
- Connecting piece F-VS Order No. 204363
- Rail bag TZ-FST1600 Order No. 095257
- Rail bag kit F80/160 with sliding bevel segment consisting of: F80 + F160 Order No. 209592 + connecting piece + sliding bevel segment + 2 screw clamps + rail bag
- Rail bag kit F160/160 consisting of: 2 x F160 + connecting piece + 2 Order No. 209591 screw clamps + rail bag
10 Exploded drawing and spare parts list
The corresponding information in respect of spare parts can be found on our homepage: www.mafell.com
Français
Sommaire
$$ _ {P A} = 3, 0 \mathrm{dB(A)} $$
Äänitehotaso
$$ \mathrm{L} _ {\mathrm{WA}} = 1 1 1 \mathrm{dB(A)} $$
Epävarmuus
$$ \mathrm{K} _ {\mathrm{WA}} = 3, 0 \mathrm{dB(A)} $$
$$ _ {P A} = 3, 0 \mathrm{dB(A)} $$
Lydeffektniveau
$$ \mathrm{L} _ {\mathrm{WA}} = 1 1 1 \mathrm{dB(A)} $$
Usikkerhed
$$ \mathrm{K} _ {\mathrm{WA}} = 3, 0 \mathrm{dB(A)} $$
MAFELL AG
Beffendorfer Straße 4, D-78727 Oberndorf / Neckar
Telefon +49 (0)7423/812-0
Internet:
E-Mail:
Fax +49 (0)7423/812-218
www.mafell.de
mafell@mafell.de
- WARNUNG
- AVERTISSEMENT
- GB - EC Declaration of Conformity
- Signs and symbols
- Product information
- Manufacturer's data
- Machine identification
- Technical data
- Emissions
- Danger
- Noise emission specifications
- Vibration specifications
- Scope of supply
- Safety devices
- Use according to intended purpose
- Residual risks
- Safety instructions
- General instructions:
- Do not use:
- Instructions on the use of personal protective equipment:
- Instructions on operation:
- Instructions on service and maintenance:
- Setting / Adjustment
- Mains connection
- Chip extraction
- Saw blade selection
- For cuts across the grain in soft and hard wood, plywood, chipboard and coreboards:
- For cuts along the grain in soft and hardwood:
- Saw blade change
- Riving knife/splitter
- Operation
- Initial operation
- Switching on and off
- Cutting depth adjustment
- Setting for bevel cuts
- Sawing according to tracings
- Sawing with the parallel stop
- Service and maintenance
- Storage
- Visual signal indication of operating condition
- Troubleshooting
- Optional accessories
- Exploded drawing and spare parts list
- Français
- Sommaire
Brand : Mafell
Model : MKS 145 Ec
Category : Saw