
09600 - Chopper N8WERK - Free user manual and instructions
Find the device manual for free 09600 N8WERK in PDF.
| Product type | Multifunction meat grinder |
| Brand | N8WERK |
| Model | 09600 (MG419H) |
| Rated power | 800 W |
| Maximum motor power | 2000 W |
| Supply voltage | 220-240 V ~ 50/60 Hz |
| Protection class | II |
| Housing material | Robust plastic |
| Included accessories | 3 perforated discs (fine, medium, coarse), blade head, worm screw, filling tray, pusher, grater mill with 3 attachments (slicer, coarse grater, fine grater), sausage stuffing tube, kebbe attachments (part A and B), shortcrust pastry cookie accessory with molding slide, locking nut |
| Main functions | Meat and fish grinding, sausage making, kebbes, shortcrust cookies, slicing and grating vegetables |
| Safety | Overload protection, unlock button, automatic stop in case of blockage, reverse (REV) |
| Cleaning | Dishwasher-safe accessories (except housing, tray, nut, worm screw and meat accessory) |
| Spare parts and repairability | Spare parts available through online after-sales service (n8werk.net) |
| Warranty | Warranty excluding normal wear and improper use |
| Household use only | Yes, not intended for professional use |
Frequently Asked Questions - 09600 N8WERK
User questions about 09600 N8WERK
0 question about this device. Answer the ones you know or ask your own.
Ask a new question about this device
Download the instructions for your Chopper in PDF format for free! Find your manual 09600 - N8WERK and take your electronic device back in hand. On this page are published all the documents necessary for the use of your device. 09600 by N8WERK.
USER MANUAL 09600 N8WERK
Before Initial Use 16
Assembling the Device 16
Use 18
Dismantling 20
Cleaning and Storage 20
Troubleshooting 21
Disposal 21
Technical Data 21
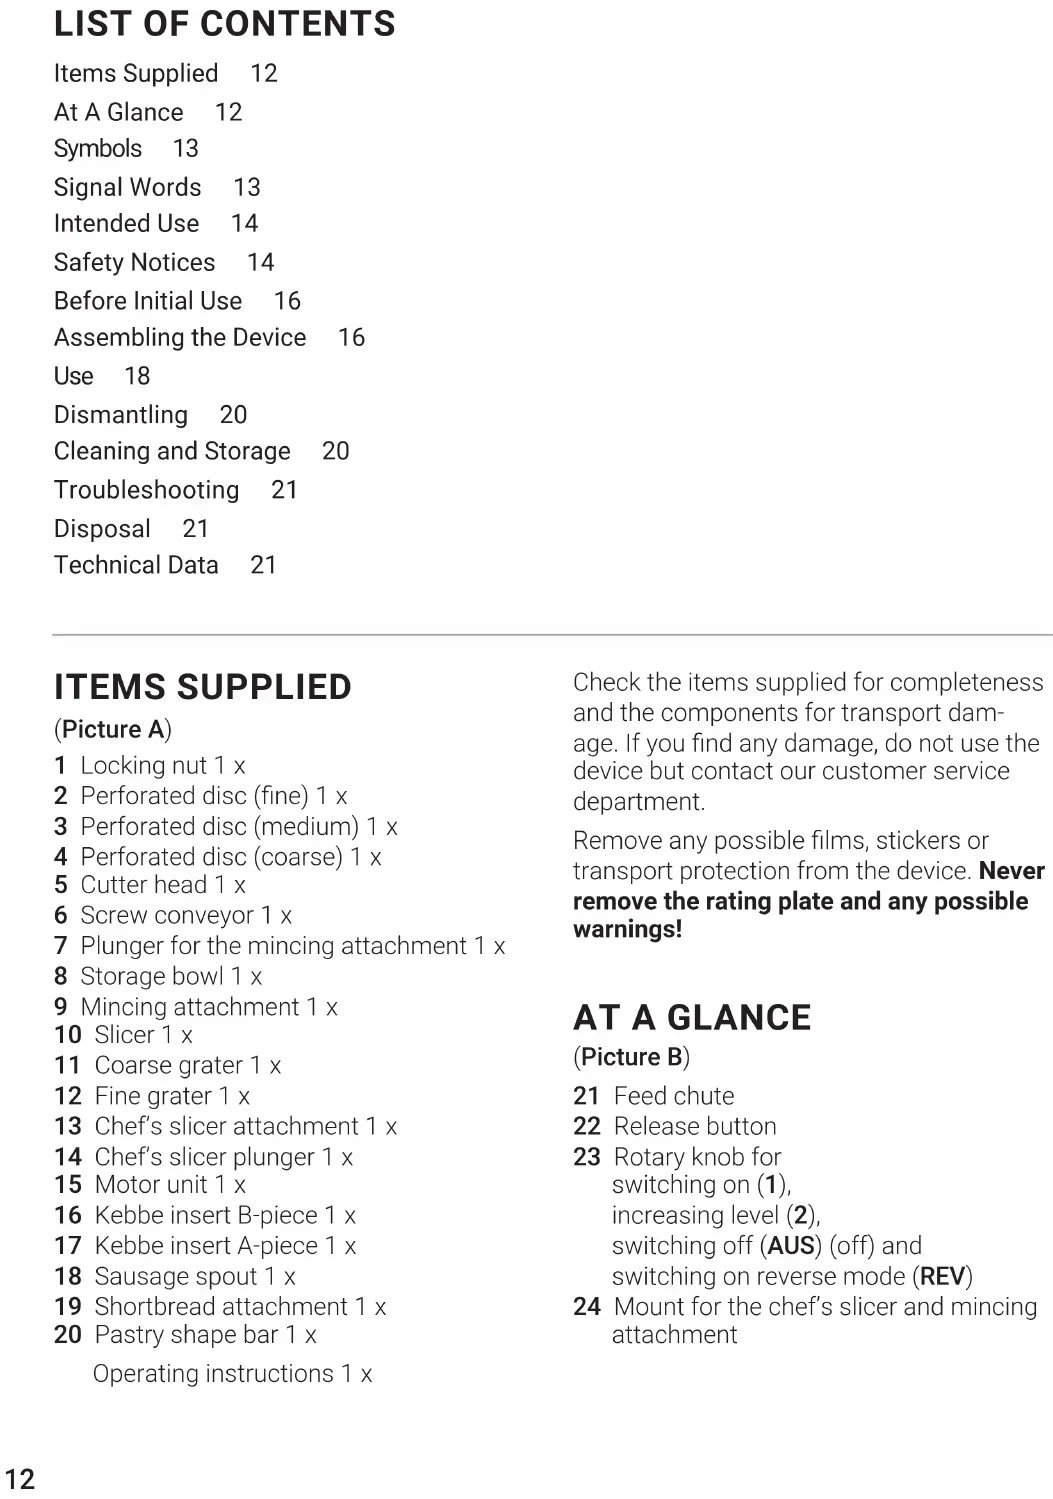
ITEMS SUPPLIED
(Picture A)
1 Locking nut 1 x
2 Perforated disc (fine) 1 x
3 Perforated disc (medium) 1 x
4 Perforated disc (coarse) 1 x
5 Cutter head 1 x
6 Screw conveyor 1 x
7 Plunger for the mincing attachment 1 x
8 Storage bowl 1 x
9 Mincing attachment 1 x
10 Slicer 1 x
11 Coarse grater 1 x
12 Fine grater 1 x
13 Chef's slicer attachment 1 x
14 Chef's slicer plunger 1 x
15 Motor unit 1 x
16 Kebbe insert B-piece 1 x
17 Kebbe insert A-piece 1 x
18 Sausage spout 1 x
19 Shortbread attachment 1 x
20 Pastry shape bar 1 x Operating instruction
Check the items supplied for completeness and the components for transport damage. If you find any damage, do not use the device but contact our customer service department.
Remove any possible films, stickers or transport protection from the device. Never remove the rating plate and any possible warnings!
AT A GLANCE
(Picture B)
21 Feed chute
22 Release button
23 Rotary knob for switching on (1), increasing level (2), switching off (AUS) (off) and switching on reverse mode (REV)
24 Mount for the chef's slicer and mincing attachment
Dear Customer,
We are delighted that you have chosen the N8WERK mincer and hope you have a lot of fun with it.
If you have any questions about the device and about spare parts/accessories, contact the customer service department via our website: n8werk.net
Information About the Operating Instructions
Before using the device for the first time, please read through these operating instructions carefully and keep them for future reference and other users. They form an integral part of the device. The manufacturer and importer do not accept any liability if the information in these operating instructions is not complied with.

IMPORTANTNOTICES!
PLEASE KEEP FOR REFERENCE!
SYMBOLS

Danger symbols: These symbols indicate possible dangers. Read the associated safety notices carefully and follow them.

Supplementary information

Read the operating instructions before use!

Symbol for protection class II

Suitable for use with food.

Alternating voltage
SIGNAL WORDS
Signal words indicate hazards if the associated notices are not followed.
DANGER - high risk, results in serious injury or death
WARNING - medium risk, may result in serious injury or death
CAUTION - low risk, may result in minor or moderate injury
NOTICE - may result in risk of damage to material
INTENDED USE
This device is intended to be used for:
chopping up meat and fish,
O making small sausages and kebbe,
chopping, grating and shredding vegetables
O making shortbread shapes.
Not suitable for breaking up bones!
Not suitable for chopping up stringy foods (e.g. ginger or asparagus)!
Not suitable for frozen food!
The device is for personal use only and is not intended for commercial or domes
tic-like applications, e.g. in hotels, bed and breakfasts, offices, staff kitchens or similar places.
Use the device only for the specified purpose and as described in the operating instructions. Any other use is deemed to be improper. Incorrect operation and incorrect handling may cause faults with the device and cause injury to the user.
The warranty does not cover faults caused by incorrect handling, damage or attempted repairs. The same applies to normal wear and tear.
SAFETYNOTICES

WARNING: Note all safety notices, instructions, illustrations and technical data provided with this device. Failure to follow the safety notices and instructions may result in electric shock, fire and / or injuries.
This device may be used by people with reduced physical, sensory or mental abilities or a lack of experience and/or knowledge if they are supervised or have received instruction on how to use the device safely and have understood the dangers resulting from failure to comply with the relevant safety precautions.
Children must not play with the device.
The device must not be used by children. The device and its connecting cable must be kept away from children.
The device must be switched off and disconnected from the mains power before replacing accessories or additional parts that move during operation.
The device must always be disconnected from the mains power when it is left unattended and before it is assembled, disassembled or cleaned.
- Do not make any modifications to the device. Do not replace the connecting cable yourself. If the device or the connecting cable are
damaged, they must be replaced by the manufacturer, customer service department or a similarly qualified person (e.g. specialist workshop) in order to avoid any hazards.
It is essential to follow the instructions in the "Cleaning and Storage" chapter.

DANGER - DANGER OF ELECTRIC SHOCK
Use and store the device only in closed rooms. Do not operate or store the device in rooms with high humidity.
- Never immerse the motor unit and the connecting cable in water or other liquids and ensure that these components cannot fall into water or become wet.
If the motor unit falls into water while it is connected to the mains power, pull the mains plug out of the plug socket immediately. Only after this should you retrieve the motor unit from the water. Never attempt to pull it out of the water while it is connected to the mains power!
If the motor unit has fallen into water or other liquids, do not use it. Before using it again, have it checked by the manufacturer, customer service department or an authorised distributor in order to avoid possible hazards.
- Never touch the motor unit and the connecting cable with wet hands when they are connected to the mains power.

WARNING - DANGER OF INJURY
- Keep children and animals away from the packaging material. There is a danger of suffocation.
- Keep clothing, jewellery, hair, hands and other body parts away from the device so that nothing can get caught in rotating device parts.
The cutter head has sharp blades. Be careful when handling the cutter head. There is a danger of cuts.
Only ever use the plunger which is also supplied to push food into the feed chute. Never reach into the feed chute while the device is in operation.
- Lay the connecting cable in such a way that it does not present a trip hazard. The connecting cable may not hang down from the surface on which the device is placed in order to prevent the device from being pulled down.
- Do not move the device during operation. Ensure sufficient stability.

WARNING - DANGER OF FIRE
- Do not operate the device in the vicinity of combustible material.
- Do not cover the device during operation.
- Do not place any combustible materials (e.g. cardboard, plastic, paper or candles) on or in the device.
- Do not stick any objects into the device openings and make sure that they are always kept free of dirt or other blockages.
- Do not connect the device along with other consumers (with a high wattage) to a multiple socket in order to prevent overloading and a possible short circuit (fire).
Only use suitable extension cables whose technical data is the same as that of the device. Do not use any extension cables more than 3m long or cable extension reels.
NOTICE - RISK OF DAMAGE TO MATERIAL AND PROPERTY
- Only connect the device to a plug socket that is properly installed. The plug socket must also be readily accessible after connection so that the connection to the mains can quickly be isolated. The mains voltage must match the technical data of the device.
Use only original accessories from the manufacturer in order to guarantee that there is no interference that may prevent the device from working and to avoid possible damage. - Do not operate the device for a long period of time without any contents to prevent overheating.
- Switch off the device and pull the mains plug out of the plug socket if an error occurs during operation or before a thunderstorm.
Always pull the mains plug and never the mains cable to disconnect the device from the mains power. - Do not carry or pull the device by the connecting cable.
- Lay the connecting cable in such a way that it does not become squashed or bent and does not come into contact with hot surfaces.
- Protect the device from heat, naked flames, direct sunlight, extreme temperatures, moisture and impacts.
Store the device in a dry place at temperatures of between 0 and 40^ out of the reach of children and animals. - Do not lay or place any heavy objects on the device or the connecting cable.
BEFORE INITIAL USE
There may still be some production residues on the device. To avoid harmful effects to your health, clean all accessories thoroughly before you first use them (see "Cleaning and Storage").
ASSEMBLING THE DEVICE
Please Note!
Pull the mains plug from the plug socket before swapping inserts to prevent the device from being switched on accidentally!
BASIC ACCESSORIES
The following basic accessories are required for processing meat and fish, and making small sausages, kebbe, and shortbread shapes:
- Motor unit (15)
-
Mincing attachment (9)
Screw conveyor (6)
Storage bowl (8) -
Place the motor unit on a kitchen unit or another dry, flat and stable surface.
-
Insert the mincing attachment into the mount (24) of the motor unit as follows: Plug the mincing attachment into the mount so that the feed chute (21) is at an angle of 45^ to the release button (22) (Picture D), press the release button if necessary and twist the feed chute upwards until it is vertical and engages (Picture E).
-
Place the screw conveyor with the long, narrow end first through the mincing attachment into the mount (Picture F).
- Mount the accessory that is required for the processing you want (see below).
- Place the storage bowl onto the feed chute of the mincing attachment.
ACCESSORY FOR CHOPPING UP AND MAKING SAUSAGES
In addition to the basic accessories, you also require:
- Cutter head (5)
- A perforated disc - fine (2), medium (3) or coarse (4), depending on the result you want
- Locking nut (1)
-
For making sausages: Sausage spout (18)
-
Assemble the basic accessories.
- Place the cutter head onto the screw conveyor (Picture G). Make sure that the blades of the cutter head are pointing outwards, and not towards the motor unit.
- Place one perforated disc in front of the cutter head (Picture H). Make sure that the two locking lugs of the perforated disc rest correctly in the recesses of the mincing attachment.
- To make sausages, place the sausage spout on the perforated disc (Picture I). Otherwise skip this step.
- Screw the locking nut onto the mincing attachment (Picture J). Do not screw too tightly!
KEBBE INSERTS
In addition to the basic accessories, you also require:
- Kebbe insert A-piece (17)
- Kebbe insert B-piece (16)
-
Locking nut (1)
-
Assemble the basic accessories.
- Place the kebbe insert A-piece onto the screw conveyor (Picture K). Make sure that the two locking lugs rest correctly in the recesses of the mincing attachment.
- Place the kebbe insert B-piece on the A-piece.
- Screw the locking nut onto the mincing attachment. Do not screw too tightly!
SHORTBREAD ATTACHMENT
In addition to the basic accessories, you also require:
Shortbread attachment (19)
- Pastry shape bar (20)
- Locking nut (1)
- Assemble the basic accessories.
- Place the shortbread attachment with the curve on the outside on the screw conveyor (Picture L).
- Screw the locking nut onto the mincing attachment. Do not screw too tightly!
- Slide the pastry shape bar into the shortbread attachment until you get to the pastry shape you want.
CHEF'S SLICER ATTACHMENT
To chop up vegetables you require:
- Motor unit (15)
- Chef's slicer attachment (13)
-
Vegetable slicing insert (10, 11 or 12)
-
Place the motor unit on a kitchen unit or another dry, flat and stable surface.
-
Insert the chef's slicer attachment just like the mincing attachment (9) into the mount (24) of the motor unit:
-
Plug the chef's slicer attachment into the mount so that its feed chute is at an angle of 45^ to the release button (22), press the release button if necessary and
- twist the feed chute upwards until it is vertical and engages.
- Plug the vegetable slicing insert you want onto the shaft of the chef's slicer attachment (Picture C).
USE
Please Note!
The device should only be used if it has been completely assembled! Make sure that the chef's slicer or mincing attachment is engaged and all accessories are inserted correctly.
- Do not attempt to force food down the feed chute; this may damage the device!
Clean the used accessories after each use (see "Cleaning and Storage").
The device is not suitable for constant operation. Operate it for no more than 5 - 10 minutes without a pause and then let it cool down for a few minutes.
The device is equipped with overload protection; the device switches off if it is overloaded. In this case, pull the mains plug out of the plug socket and allow the device to cool down for 5 - 10 minutes. It is then ready to be used again.

For the best results, we recommend that before processing food you cut it up roughly and remove bones and tendons from meat.
CONNECTING THE DEVICE, SWITCHING ON / OFF AND REVERSE MODE
- Fully unwind the connecting cable and connect it to a plug socket.
- To switch on the device, move the rotary knob (23) to the 1 position.
- To increase the speed, turn the rotary knob to the 2 position.
- To switch it off, turn the rotary knob to the AUS (off) position.
If food is blocking the device, move the rotary knob to the REV (Reverse) position for a few seconds so that the food causing the blockage can be dislodged. Then switch off the device and pull the mains plug from the plug socket before
any food residues which are stuck are removed.
Please Note!
- Never move the rotary knob to the REV (Reverse) position while the device is operating! Always wait until the motor has come to a complete standstill.
CHOPPING UP MEAT AND FISH
- Assemble the device (see "Assembling the Device" - "Basic Accessories" and "Accessory for Chopping Up and Making Sausages").
- Place a bowl beneath the mincing attachment to capture the chopped-up food.
- Switch on the device.
- Place the food in the feed chute and push it through bit by bit using the plunger (7) Picture M).
- Switch off the device and pull the mains plug out of the plug socket.
MAKING SAUSAGES
- Assemble the device (see "Assembling the Device" - "Basic Accessories" and "Accessory for Chopping Up and Making Sausages").
- Fully unwind the connecting cable and connect it to a plug socket.
- Place a bowl beneath the mincing attachment to capture the chopped-up food.
- Select a sausage casing (e.g. artificial or natural gut) and stretch it over the sausage spout.
- Switch on the device.
-
Place the food in the feed chute and push it through bit by bit using the plunger (7).
-
Allow the filling to run into the sausage spout. When you do this, make sure that it is not overfilled.
- Switch off the device and pull the mains plug out of the plug socket.
- Finally twist the sausage casing to shape little individual sausages.
MAKING KEBBE
Kebbe meatballs are a traditional dish from the Middle East: It features fried croquettes made from lamb and bulgur wheat with a mince filling. Below you will find a sample recipe for how to make kebbe:
Prepare the pastry
Ingredients:
500 g of lamb or low-fat mutton, cut into strips
500g of bulgur wheat, washed and drained
1 small onion, finely chopped
Preparation:
IMPORTANT! Always process the bulgur wheat immediately after draining. If it dries out, the mincer could be overwhelmed and damaged as a result.
- Assemble the device in the manner described in "Assembling the Device" - "Basic Accessories" and "Accessory for Chopping Up and Making Sausages". Use the fine perforated disc (2).
- Place a bowl beneath the mincing attachment.
- Switch on the device.
- Pour meat and bulgur alternately into the feed chute and twist through the mincer (Picture M).
- Mix together meat and bulgur again thoroughly in a bowl.
- Twist the meat/bulgur mixture through the mincer another two times.
-
Switch off the device and pull the mains plug out of the plug socket.
-
Add the onion to the mixture and mix all the ingredients together again.
Prepare the filling
Ingredients:
400 g of lamb, cut into strips
1 tbsp. of oil
2 medium-sized onions, finely chopped
1 tbsp. of flour
Salt and pepper
Preparation:
- Assemble the device in the manner described in "Assembling the Device" - "Basic Accessories" and "Accessory for Chopping Up and Making Sausages". Use the fine perforated disc (2).
- Place a bowl beneath the mincing attachment.
- Switch on the device.
- Turn the meat through the fine perforated disc (Picture M).
- Switch off the device and pull the mains plug out of the plug socket.
- Fry the onions until golden-brown.
- Add the lamb and brown it.
- Add the rest of the ingredients and simmer for around 2 minutes.
- Pour off excess fat and allow it to cool down.
Prepare kebbe
- Convert the device: Unscrew the locking nut, take off the perforated disc and the cutter head.
- Mount the kebbe inserts (see "Assembling the Device" - "Kebbe Inserts").
- Switch on the device.
- Place the prepared meat/bulgur mixture for the pastry in the feed chute and push it through bit by bit using the plunger (7). This produces a hollow strand.
-
Switch off the device and pull the mains plug out of the plug socket.
-
Divide the hollow strand into pieces of around 8 cm in length.
- Press down the strand pieces on one side to seal them. Pour some of the prepared and cooled filling into the pouch and then seal the other side of the pouch as well (Picture N).
- Fry the filled pouches in hot oil until they are golden brown.
MAKING SHORTBREAD SHAPES
- Prepare the shortbread mixture according to your preferred recipe.
- Assemble the device in the manner described in "Assembling the Device" - "Basic Accessories" and "Shortbread Attachment".
- Switch on the device.
- Place the shortbread mixture into the feed chute. Slide the mixture down the feed chute bit by bit using the plunger (7).
- Switch off the device and pull the mains plug out of the plug socket.
CHOPPING UP VEGETABLES
- Assemble the device (see "Assembling the Device" - "Chef's Slicer Attachment").
- Place a bowl beneath the chef's slicer attachment to capture the chopped-up food.
- Switch on the device.
- Place the food in the feed chute and push it through bit by bit using the chef's slicer plunger (14) (Picture C).
- Switch off the device and pull the mains plug out of the plug socket.
DISMANTLING
MINCING ATTACHMENT
- Remove the storage bowl (8).
- Undo the locking nut (1).
- Remove the used insert with a screwdriver or something similar (Picture 0) and if applicable the cutter head (5).
- Take out the screw conveyor (6).
- Remove the mincing attachment (9) from the motor unit (15) by pressing the release button (22) and turning the mincing attachment to the right and pulling it out at the same time.
CHEF'S SLICER ATTACHMENT
- Pull the used vegetable slicing insert (10, 11 or 12) out of the chef's slicer attachment (13).
- Remove the chef's slicer attachment from the motor unit (15) by pressing the release button (22) and turning the chef's slicer attachment to the right and pulling it out at the same time.
CLEANING AND STORAGE
Please Note!
- The motor unit, storage bowl, locking nut, screw conveyor and mincing attachment are not dishwasher-safe!
-
Do not use any caustic or abrasive cleaning agents to clean the device. These may damage the surface.
-
Dismantle the device in the reverse order (see "Dismantling").
- Remove any possible food residues.
-
Clean the storage bowl (8), the locking nut (1), the screw conveyor (6) and the mincing attachment (9) with warm water and detergent.
-
Clean the rest of the accessories (apart from the motor unit (15)!) with warm water and detergent or in the dishwasher.
- Wipe down the motor unit with a damp cloth if necessary.
- Once all parts are dry, store the device and accessories in a clean, dry place that is out of the reach of children and animals.
TROUBLESHOOTING
If the device does not work properly, check whether you are able to rectify the problem yourself. If the problem cannot be solved with the steps below, contact the customer service department.

Do not attempt to repair an electrical device yourself!
The device does not work.
The mains plug is not inserted in the plug socket correctly.
Correct the fit of the mains plug.
The plug socket is defective.
Try another plug socket.
There is no mains voltage.
Check the fuse of the electrical distributor (fuse box).
The device switches itself off automatically.
The device is overloaded.
- Switch off the device and pull the mains plug out of the plug socket. Allow the device to cool down for approx. 5 - 10 minutes. Then start operating it again.
During use, an unpleasant smell is detected.
The device is being used for the first time. There are production residues in / on the device. This is normal and will not occur again later.
Make sure that the room is well ventilated!
DISPOSAL

Dispose of the packaging material in an environmentally friendly manner so that it can be recycled.

This device is governed by the European Directive 2012/19/EU on waste electrical and electronic equipment (WEEE). Do not dispose of this device as normal domestic waste, but rather in an environmentally friendly manner via an officially approved waste disposal company.
TECHNICAL DATA
Article number: 09600
Model number: MG419H
Voltage supply: 220 - 240V 50 / 60Hz
Power: 800 W; 2000 W max. motor power
Protection class: II
ID of the operating instructions: Z 09600 M N8W V1 0820 md

All rights reserved.
SOMMAIRE
Composition 22
Apercu general 22
Symboles 23
Chere cliente, cher client,


- ITEMS SUPPLIED
- (Picture A)
- AT A GLANCE
- (Picture B)
- Dear Customer,
- Information About the Operating Instructions
- IMPORTANTNOTICES!
- PLEASE KEEP FOR REFERENCE!
- SYMBOLS
- SIGNAL WORDS
- INTENDED USE
- SAFETYNOTICES
- DANGER - DANGER OF ELECTRIC SHOCK
- WARNING - DANGER OF INJURY
- WARNING - DANGER OF FIRE
- NOTICE - RISK OF DAMAGE TO MATERIAL AND PROPERTY
- BEFORE INITIAL USE
- ASSEMBLING THE DEVICE
- Please Note!
- BASIC ACCESSORIES
- ACCESSORY FOR CHOPPING UP AND MAKING SAUSAGES
- KEBBE INSERTS
- SHORTBREAD ATTACHMENT
- CHEF'S SLICER ATTACHMENT
- USE
- CONNECTING THE DEVICE, SWITCHING ON / OFF AND REVERSE MODE
- CHOPPING UP MEAT AND FISH
- MAKING SAUSAGES
- MAKING KEBBE
- Prepare the pastry
- IMPORTANT! Always process the bulgur wheat immediately after draining. If it dries out, the mincer could be overwhelmed and damaged as a result.
- Prepare the filling
- Prepare kebbe
- MAKING SHORTBREAD SHAPES
- CHOPPING UP VEGETABLES
- DISMANTLING
- MINCING ATTACHMENT
- CLEANING AND STORAGE
- TROUBLESHOOTING
- Do not attempt to repair an electrical device yourself!
- The device does not work.
- The device switches itself off automatically.
- During use, an unpleasant smell is detected.
- DISPOSAL
- TECHNICAL DATA
- SOMMAIRE
- Chere cliente, cher client,
Brand : N8WERK
Model : 09600
Category : Chopper