DD95 - Dehumidifier DELONGHI - Free user manual and instructions
Find the device manual for free DD95 DELONGHI in PDF.
User questions about DD95 DELONGHI
0 question about this device. Answer the ones you know or ask your own.
Ask a new question about this device
Download the instructions for your Dehumidifier in PDF format for free! Find your manual DD95 - DELONGHI and take your electronic device back in hand. On this page are published all the documents necessary for the use of your device. DD95 by DELONGHI.
USER MANUAL DD95 DELONGHI
Instructions for use
Mode d'emploi
Gebrauchsanweisung
To ensure optimum results and maximum safety, read this instruction manual carefully before installing and using the appliance.
Introduction
The Dehumidifier removes humidity from the air in the areas in which it is installed. The appliance is compact and fitted with wheels and handles which facilitate its movement.
This appliance is recommended for all rooms in which excessive humidity is liable to build up, e.g. kitchens, bathrooms, laundry rooms, cellars etc.
Experts have established that optimal atmospheric conditions, both for our physical health and the preservation of furniture and other items, vary between 45% and 60% relative humidity. It is therefore advisable to keep rooms within these values.
Electrical connection (U.K. only)
A) If your appliance comes fitted with a plug, it will incorporate a 13 Amp fuse. If it does not fit your socket, the plug should be cut off from the mains lead, and an appropriate plug fitted, as below.
WARNING: Very carefully dispose of the cut off plug after removing the fuse: do not insert in a 13 Amp socket elsewhere in the house as this could cause a shock hazard.
With alternative plugs not incorporating a fuse, the circuit must be protected by a 15 Amp fuse.
If the plug is a moulded-on type, the fuse cover must be re-fitted when changing the fuse using a 13 Amp Asta approved fuse to BS 1362.
In the event of losing the fuse cover, the plug must NOT be based until a replacement fuse cover can be obtained from your nearest electrical dealer. The colour of the correct replacement fuse cover is that as marked on the base of the plug.
B) If your appliance is not fitted with a plug, please follow the instructions provided below:
WARNING - THIS APPLIANCE MUST BE EARTHED
IMPORTANT
The wires in the mains lead are coloured in accordance with the following code:
Green and yellow:
Earth
Blue:
Neutral
Brown:
Live
As the colours of the wires in the mains lead may not correspond with the coloured markings identifying the terminals in your plug, proceed as follows:
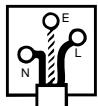
The green and yellow wire must be connected to the terminal in the plug marked with the letter E or the earth symbol 12 or coloured green or green and yellow.
The blue wire must be connected to the terminal marked with the letter N or coloured black.
The brown wire must be connected to the terminal marked with the letter L or coloured red.
Technical characteristics
Power supply
Absorbed power
Absorbed current
Maximum humidity removed per 24 hours
Volume of air dehumidified
Coolant
Defrosting device
Humidostat
Dimensions (W x H x D)
Weight (net)
Capacity of canister
Operating limits:
temperature
- relative humidity
Standard operating conditions: 27^ - 60% RH
220/240 V (50 Hz)
290 W
1,8 A
7.5 litres
240 m³/hl
R22
yes
yes
300x570x300 mm
21.5 Kg.
4 litres
5^ - 32 °C
30 - 90 %
Description
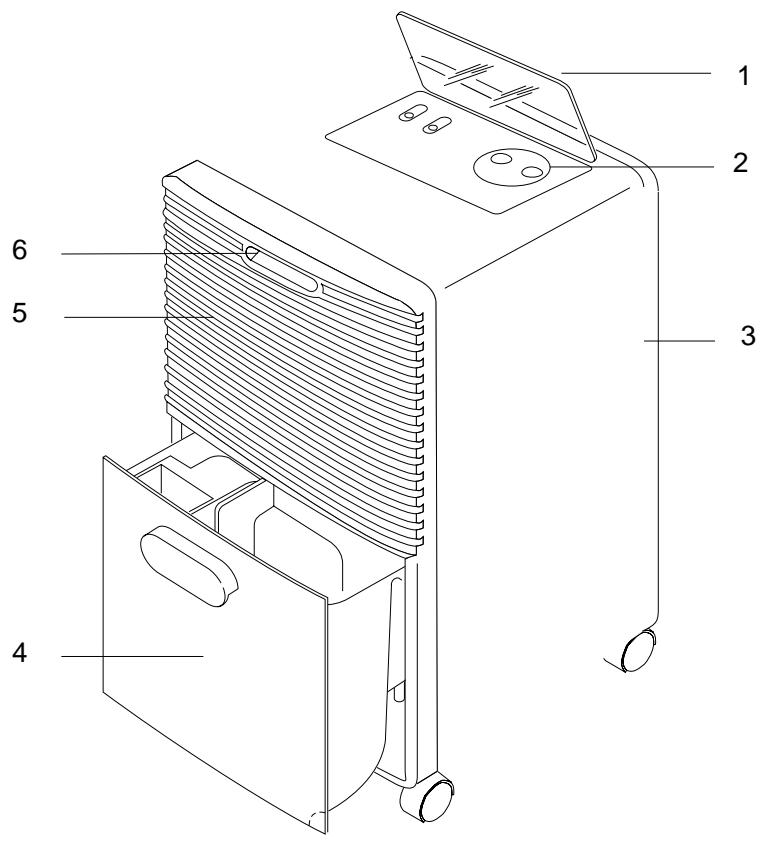
- Panel cover
- Control panel
- Air filter
- Condensate collection tank
- Air outlet grill
- Handle
Accessories
| Description | Quantity | |
| rubber bung | 1 |
Installation
Place the appliance in the room that you wish to dehumidify.
It is essential to leave a space of at least 50~cm around the appliance in order to ensure adequate ventilation.
The condensation can be discharged in one of two ways:
A) Discharge into the canister
The condensation generated by the dehumidifier can be discharged directly into the canister.
The canister is easy to extract when it needs to be emptied. It has an ergonomic form and is equipped with 2 handles which makes it easy to carry and to empty.
B) Continuous External Discharge
If you need to have the appliance working for a long period of time but are unable to empty the canister repeatedly, it is possible to use the continuous discharge.
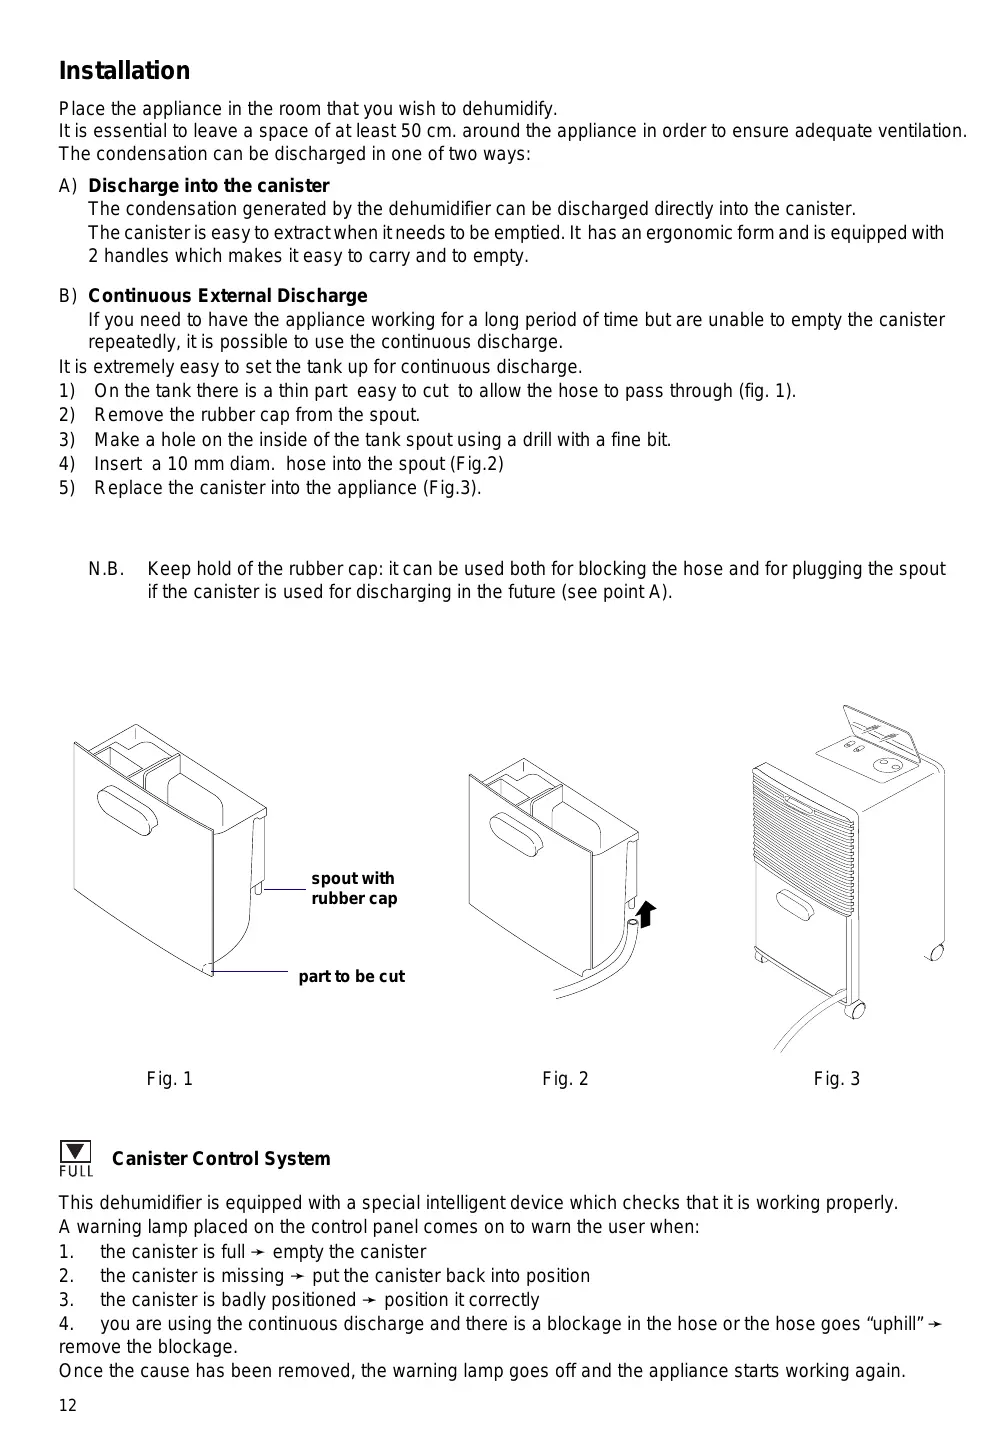
It is extremely easy to set the tank up for continuous discharge.
1) On the tank there is a thin part easy to cut to allow the hose to pass through (fig. 1).
2) Remove the rubber cap from the spout.
3) Make a hole on the inside of the tank spout using a drill with a fine bit.
4) Insert a 10mm diam. hose into the spout (Fig.2)
5) Replace the canister into the appliance (Fig.3).
N.B. Keep hold of the rubber cap: it can be used both for blocking the hose and for plugging the spout if the canister is used for discharging in the future (see point A).

Fig. 1
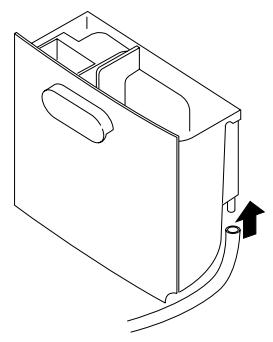
Fig. 2
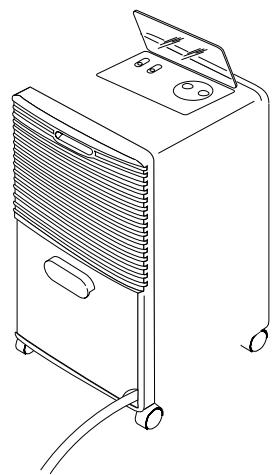
Fig. 3

FULL
Canister Control System
This dehumidifier is equipped with a special intelligent device which checks that it is working properly.
A warning lamp placed on the control panel comes on to warn the user when:
- the canister is full empty the canister
- the canister is missing put the canister back into position
- the canister is badly positioned position it correctly
- you are using the continuous discharge and there is a blockage in the hose or the hose goes "uphill" → remove the blockage.
Once the cause has been removed, the warning lamp goes off and the appliance starts working again.
Electrical connections
Before connecting the appliance to the power supply, check the following:
- The mains power supply must correspond to the power supply shown on the rating plate.
- The power socket and the electrical circuit must be adequate to supply the appliance.
- The power socket must match the plug. If not, have the plug replaced by qualified personnel.
- The power socket must be adequately earthed.
The manufacturer accepts no responsibility if these safety regulations are not complied with.
This appliance is manufactured in compliance with EEC directive EN 55014 relative to the suppression of radio interference.
Description of the controls
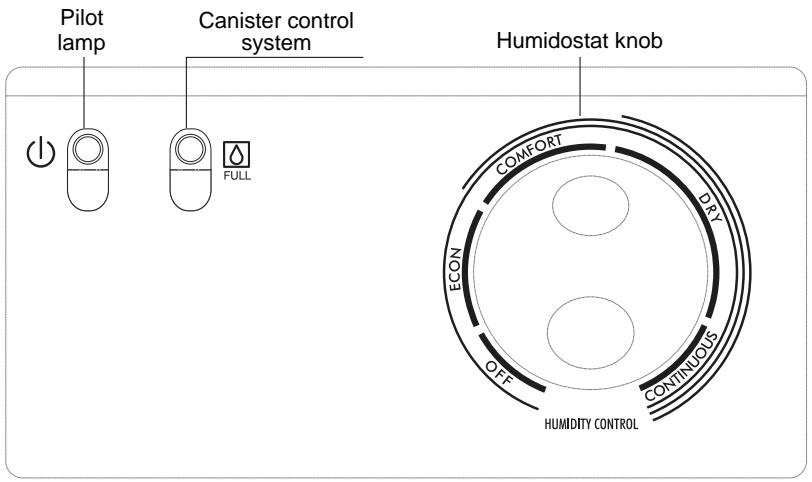
Using the dehumidifier
1) Plug the appliance into the power socket. The pilot lamp lights to show that the appliance is switched on.
2) Check that the "Canister control system" pilot lamp is off.
3) Turn the humidostat knob to the desired position.
4) To switch off the appliance, turn the humidostat knob anti-clockwise to the "OFF" position.
Note:
For technical reasons, the humidity is expressed in levels rather than in degrees.
We recommend starting with the humidostat knob set to t"CONTINUOUS". When the humidity in the room reaches the desired level, turn the knob slowly anti-clockwise until the appliance switches off. In this way, the appliance is programmed to maintain the exact humidity level that you desire.
Maintenance
Always remove the plug from the power socket before performing any cleaning or maintenance operations. For safety, never use a jet of water to wash the appliance.
Cleaning the cabinet
- Clean the appliance using a damp cloth and dry using a dry cloth.
- Never use petrol, methylated spirits or solvents to clean the appliance.
- Never spray the appliance with insecticides or similar products. These may cause the paint to flake or the pastic parts to become mis-shapen.
Cleaning the air filter
- The filter should be cleaned weekly.
- To remove the filter, remove the filter by pulling upwards (fig. 4).
- Use a vacuum cleaner to remove the dust that builds up on the filter. If the filter is very dirty, wash it in warm water and rinse several times. The temperature of the water should not exceed 40^ .
After washing the filter, allow it to dry completely before replacing it in the appliance. To replace the filter, insert first the lower and then the upper hooks and push down.
If the appliance is not used for long periods
- Disconnect the plug from the power socket and empty the canister.
- Clean and replace the filter.
- Protect the appliance from dust by covering with a large plastic bag.
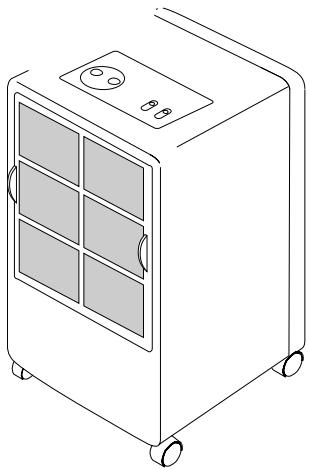
Fig. 4
Important
- This appliance is designed to dehumidify domestic living areas, and must not be used for other purposes.
- The appliance must not be modified in any way, as any modifications may be extremely dangerous.
- The power cable must not be replaced by the user, as this requires the use of special tools. If the power cable is damaged, contact an authorized Service Centre.
- If the appliance requires repair, always contact a Service Centre authorized by the manufacturer. Always insist on original spare parts. Repairs carried out by non-qualified personnel may be dangerous and render the warranty null and void.
- This appliance must be used by adults only. Do not allow children to play with the appliance.
- The appliance must be adequately earthed. Have your electrical circuit checked by a qualified electrician.
- Do not use extension power cables.
- Always remove the plug from the socket before performing cleaning or maintenance operations.
- Do not move the appliance by pulling the power cable.
- Do not install the appliance in areas containing gas, oil or sulphur. Do not install the appliance near sources of heat.
- Do not place heavy or hot objects on the top of the appliance.
- Clean the air filter at least once weekly.
- The appliance must always remain upright or laid on one side during transportation. Remember to drain the canister before transporting the appliance.
After transporting the appliance, wait at least one hour before using it.
Troubleshooting
Before calling your local authorized Service Centre, check the following:
| Problem | Cause | Solution |
| The dehumidifier does not switch on | ·the appliance is not plugged in ·the humidostat is set to the minimum position ·the canister is full ·the canister is not in position | ·insert the plug into the socket ·adjust the humidostat to the desired position ·empty the canister ·position the canister correctly |
| The appliance does not dehumidify | ·the filter is dirty ·the temperature or humidity in the room is too low | ·clean the filter ·in certain conditions, the appliance will not dehumidify the room (see "Technical Characteristics") |
| The appliance works but the humidity in the room is not reduced | ·the room is too big ·too many sources of humidity in the room (e.g. boiling saucepans) | |
| The air conditioner doesn't work for about 3 minutes from turning on the appliance | ·The appliance's security system has intervened | ·wait for 3 minutes |