
Ariadry DDS 30 - Dehumidifier DELONGHI - Free user manual and instructions
Find the device manual for free Ariadry DDS 30 DELONGHI in PDF.


| Product Type | Dehumidifier |
| Brand | DeLonghi |
| Model | Ariadry DDS 30 |
| Dehumidification Capacity (30°C, 80% RH) | 30 pints / 14 liters per day |
| Water Tank Capacity | 2.5 liters |
| Air Flow | 120 m³/h |
| Power Supply | 220-240V ~ 50Hz |
| Power Consumption | 350 W |
| Noise Level | 45 dB(A) |
| Dimensions (W x D x H) | 35 x 25 x 50 cm |
| Weight | 12 kg |
| Refrigerant | R134a |
| Operating Temperature Range | 5°C to 35°C |
| Humidity Control | Electronic with digital display |
| Continuous Drainage | Yes, via hose (not included) |
| Air Filter | Washable mesh filter |
| Auto Defrost | Yes |
| Auto Shut-off | When tank full or set humidity reached |
| Castors | Yes, 4 wheels |
| Energy Efficiency Class | A |
| Warranty | 2 years |
Frequently Asked Questions - Ariadry DDS 30 DELONGHI
User questions about Ariadry DDS 30 DELONGHI
0 question about this device. Answer the ones you know or ask your own.
Ask a new question about this device
Download the instructions for your Dehumidifier in PDF format for free! Find your manual Ariadry DDS 30 - DELONGHI and take your electronic device back in hand. On this page are published all the documents necessary for the use of your device. Ariadry DDS 30 by DELONGHI.
USER MANUAL Ariadry DDS 30 DELONGHI
Some notions on humidity
Air always contains a certain quantity of water in the form of vapour; this determines the degree of humidity in a room.
The capacity of air to contain water vapour increases as its temperature increases.
This is why in our homes, as soon as the temperature drops, the air releases the water vapour contained in it, turning into condensation, which appears on all cold surfaces such as windows, walls etc.
The dehumidifier is an electric appliance that extracts humidity from the air, avoiding the damage that it causes.
Studies have established that the ideal conditions for our
health and home are achieved when relative humidity is between 40% and 60%.
With very low temperatures, you are recommended to heat the room even minimally. This will increase the dehumidifying capacity of the appliance considerably. This is the only way, in fact, to allow the condensation that forms on the windows and other cold surfaces to evaporate into the air and be collected by the dehumidifier.
The Extra Power mode included in this model makes it easier to raise the temperature. The air released by the dehumidifier is, however, generally warmer than the air in the room.
Description of accessories
- Control panel
- Water level viewing window
- Condensate collection tank
- Lifting handles
- Air intake openings
- Air filter
- Air outlet grille
- Accessory box containing condensate drain nozzle and 4 castors
- Continuous drain door

INTRODUCTION
Thank you for choosing a De'Longhi product.
Take a few minutes to read these instructions for use.
This will avoid danger or damage to the machine.
Symbols used in these instructions
The important warnings are represented by the symbols listed here below.
It is vital to observe these warnings.
Failure to observe the warnings provided may result in electric shock, serious injury, burns, fire or damage to the appliance.

Danger!
Failure to comply can be the cause of life-threatening injury by electric shock.

Important!
Failure to comply can be or is cause of injury or damage to the appliance.

Nota Bene:
This symbol highlights recommendations and important information for the user.
Problems and repairs
In the event of problems, first try to resolve them by following the warnings provided in the "Troubleshooting" chapter on page 17.
For any repairs, always contact a Technical Service Centre authorised by the Manufacturer only.
Always insist on the use of original spare parts.
Repairs carried out by unqualified personnel can be dangerous and can invalidate the guarantee.
WARNINGS
Fundamental Safety Warnings

Danger! As this appliance runs on electrical current, it
is important to observe the following safety warnings:
• Do not touch the appliance with wet hands. • Do not touch the plug with wet hands. • Make sure that the socket used can always be easily reached, so that the plug can be removed when required. - If you wish to remove the plug from the socket, act directly on the plug itself.
Never pull the power cable as it might be damaged.
- To disconnect the appliance completely you must remove the plug from the socket.
- Do not attempt to repair the appliance if it is down.
Switch the appliance off, remove the plug from the socket and contact the After-Sales Technical Assistance.
• Do not move the appliance by pulling the power cable. - It is dangerous to modify or alter the characteristics of the appliance in any way. - If the power cable is damaged it must be replaced by the manufacturer or an authorised technical service centre in order to avoid all risk. - Avoid the use of extension leads for the electrical power supply cable. - The appliance must be installed in accordance with national rules on household appliances. - The appliance must be connected to an efficient earthing system. Have a qualified electrician check your electrical circuit. - This appliance is not intended for use in the reclamation of commercial or residential property damaged by water.

Important! Keep the packaging material (plastic
bags, polystyrene foam) out of the reach of children.

Important! Do not allow the appliance to be used
by persons (also children) with reduced psycho-physical-sensorial capacities or that have insufficient experience and knowledge, unless they are carefully monitored and trained by a person responsible for their safety. Children must be supervised to ensure they do not play with the appliance.
Use in compliance with its intended use
This appliance is intended for domestic use only.
Use this appliance only as described herein.
These instructions do not intend to cover every possible condition and situation that may arise. Common sense and caution should be applied when installing, operating and storing any appliance.
General safeguards
- Do not install the appliance in rooms where the air contains gas, oil, sulphur or near sources of heat. • Do not use the appliance on sloping surfaces.
- Keep the appliance at least 50 cm away from flammable substances (alcohol, etc.) or pressurised containers (e.g. aerosol cans). Do not rest objects of any kind on top of the appliance. Always transport the appliance upright or on one side.
Drain the condensate tank before moving the appliance.
Wait at least 1 hour after transporting the appliance before starting it.
R 134a is a refrigerant gas that complies with EC environmental regulations; nevertheless, avoid perforating the refrigerant circuit of the appliance.
At the end of its service life, the air conditioner must be disposed of at a suitable collection centre.
ENVIRONMENTAL INFORMATION: This unit contains fluorinated greenhouse gases provided for by the Kyoto Protocol. The maintenance and disposal operations must be carried out by qualified personnel only (R134a, GWP=1300).
- The materials used for packaging can be recycled. You are therefore advised to dispose of them in special differentiated waste collection containers. Do not use the appliance outdoors. Do not obstruct the air intake or outlet.
USE
Read these instructions carefully before using the appliance.
- Keep these instructions carefully. If the appliance is transferred to other owners, they must also be provided with these instructions for use.
- Failure to comply with these instructions may result in injury and damage to the appliance. The manufacturer is not liable for damage deriving from the failure to comply with the instructions for use.
- Keep the list of Technical Service Centres and identify the Centre nearest you.
Electrical connections
After having transported the appliance, wait at least one hour before starting it up.
Danger! Before plugging the appliance into the mains, check the following:
- The mains power supply corresponds to the working voltage indicated on the rating plate.
- The power socket and the electrical circuit are adequate for the required load.
- The mains socket is suitable for the plug, otherwise have the plug replaced by a qualified electrician.
- The mains socket is connected to an efficient earthing system.
Setting it up for use
Position the appliance in the room to be dehumidified.
It is essential to leave a free space of at least 50 cm in front of and above the dehumidifier, so as not to obstruct the air intake and outlet.
For efficient ventilation it is advisable to leave a space of at least 5-10 cm all around the appliance.
Applying the castors
If you wish to apply the castors to the appliance, proceed as follows:
1) Make sure the appliance is unplugged and the tank is empty. 2) Remove the rubber caps from the base of the appliance by pulling them out hard, using pliers if necessary (see figure 1/a). 3) Apply the castors by inserting their pins into the holes (see figure 1/b).

Fig. 1
i Note: When carrying out these operations be careful not to incline the appliance by more than 45°; in any case, once the castors have been assembled, wait at least one hour before turning it on.
Draining the condensate water
The condensate can be drained in 2 ways:
a) Draining into the tank
The condensate can be drained directly into the tank. With this draining system, when the tank is full, the appliance stops and the screen displays the tank alarm. When the tank is full, remove it as shown in fig. 2 and empty it into a sink or a bathtub.

When the operation is complete, put the tank back in correctly, being careful to position the handle as shown in figure 3.

b) Continuous external draining
If you require the appliance to operate for a long period of time without periodically emptying the tank, we advise you to set up continuous draining as follows:
- Open the door on the side of the appliance and screw the nozzle onto the fitting, as shown in figure 4.

- Insert a garden hose into the nozzle and lead the end of the hose to a floor-level drain.
Make sure the tank is inserted correctly.
• Make sure the hose is never placed at a height above the level of the nozzle (fig. 5). Otherwise the water will continue to drain back into the tank.
Make sure there are no kinks in the hose.

Fig. 5

Button descriptions

"ON/Stand-by" Button
This turns the appliance on / off.

Dehumidifying Button
This starts the dehumidifying mode. Press the button repeatedly to select the desired dehumidifying level (MIN/MED/MAX/AUTO).

Dehumidifying Extra Power Button
This starts the dehumidifying Extra Power mode.
Press the button repeatedly to select the desired power level (MIN/MED/MAX/AUTO).

Laundry / Laundry Extra Power Button
This starts the Laundry and Laundry Extra Power modes. Press to select the mode you wish to use.

Hygrometer/Thermometer Button
This temporarily displays the temperature and the level of humidity detected in the room where the appliance is installed.

Timer Button
This allows you to set the timer mode to delay when the appliance comes on or goes off.

Increase/Decrease Buttons
These allow you to set the percentage of humidity you wish to achieve in the room, by increasing or decreasing it by 5% at a time. It is also possible to set the timer using these buttons. From 0 to 10 h the time is adjusted by 30-minute increments,
and from 10 to 24 h the time is adjusted by 1-hour increments.
Description of the Display
The meanings of the codes or symbols which may appear on the display:

Stand-by
This indicates that the appliance is in Stand-by mode.

Tank Alarm
If this symbol appears it means that the tank is full, absent or incorrectly positioned.
This alarm continues until the tank is correctly positioned.

Defrost alarm
At low temperatures, the appliance frequently carries out defrost cycles.
During defrost this symbol will appear.

Sensor alarms
This indicates a possible malfunction of the sensors or that the ambient humidity is too low to be detected.
Keyboard Lock
This symbol appears when the keyboard lock is enabled.

Note: with the aim of saving energy, after the
appliance has been in stand-by for a few minutes, the display will go off.
MODE SELECTION
Plug the appliance into a mains socket.
The appliance will operate in the previously-set mode. If the symbol appears on the display, this means that the appliance is in stand-by. Press the button to turn the appliance on. If the symbol appears, it is necessary to empty or position the tank correctly.
Dehumidifying Mode
Press the button. The display shows the previously-set level of relative humidity. Press the + or - button to select the desired level of humidity (30% corresponds to a dry environment, 80% corresponds to a humid environment).
Press the button repeatedly to select the desired dehumidifying level (MIN/MED/MAX/AUTO).
MIN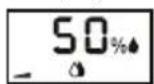
MED
MAX
AUTO
With the "AUTO" dehumidifying level, the appliance independently establishes the most suitable power and level of humidity, based on the ambient conditions.
When the room has reached the set level of humidity, it will stop. It will automatically begin dehumidifying as soon as the ambient humidity exceeds the desired level.
Dehumidifying Extra Power Mode
This mode differs from the previous one as it switches on a heating element that increases the dehumidifying capacity of the appliance. In this mode, the heating element can make the room temperature increase up to a maximum of 23°C. Press the button repeatedly to select the desired dehumidifying Extra Power level (MIN/MED/MAX/AUTO).
MIN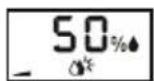
MED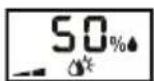
MAX
AUTO
Laundry/Laundry Extra Power Mode
In Laundry mode the appliance operates at its maximum dehumidifying capacity only. The Laundry Extra Power mode adds a heating element that further increases the dehumidifying capacity of the appliance. In this case, the heating element can make the room temperature increase up to a maximum of 28°C. Press the button repeatedly to select Laundry or Laundry Extra Power mode.
LAUNDRY LAUNDRY EXTRA POWER

Note: In the extra power modes, upon first start up, it is advisable to air out the room in order to eliminate the odour that may be released by the appliance.
Hygrometer/Thermometer Function
Press the button. The screen temporarily displays: temperature and level of humidity in the area surrounding the appliance.

Note: The detected and displayed measurements should be considered indicative.
Keyboard Lock Mode
This mode is used to lock the keyboard, with the aim of avoiding unwanted tampering with the appliance. To enable or disable this mode, with the appliance on (not in stand-by), press and hold down the ⏻ and - keys for at least 3 seconds. The appliance will emit an acoustic signal. When the mode is enabled the ⏱ symbol appears on the appliance.
Change temperature scale
To change the temperature scale from °C to °F and vice versa, with the appliance on, press the button for at least 20 seconds. The appliance will emit an acoustic signal.
Timer Mode
How to programme delay ON
1) With the appliance in stand-by, press the button. The symbol will appear, together with the number of hours of delay you wish the appliance to start up. 2) With the + and - buttons set the number of hours required (0.5÷24h).
Press the Ⓛ button to confirm.
The Ⓛ symbol will stay on.
3) When the set time has passed, the appliance will start up.
How to programme delay OFF
1) While the appliance is on, press the ⏻ button. The ⏻ symbol will appear, together with the number of hours of delay you wish the appliance to switch off. 2) With the + and - buttons set the number of hours required (0.5÷24h).
Press the Ⓛ button to confirm.
The Ⓛ symbol will stay on.
3) When the set time has passed, the appliance will shut down.
Changing or disabling the timer mode
If you wish to change the timer settings press the ⏻ key once, and use the + and - buttons. Press the ⏻ button to confirm. If you wish to disable the timer mode press the timer key twice. The ⏻ symbol will switch off.

Note: at start up or when the power comes back on, the appliance will start up in the last mode that was enabled before the appliance was switched off.
In case of a power outage, any timer programming will be deleted.
CLEANING AND MAINTENANCE
Always unplug the appliance from the power socket before performing any cleaning or maintenance operations.
For safety reasons, never wash the dehumidifier using a jet of water.
Cleaning the cabinet
- Clean with a slightly damp cloth.
- Do not use petrol, alcohol or solvents to clean the appliance.
- Do not spray liquid insecticide or similar; they may deform the plastic.
Cleaning the air filter
If the filter is dirty, air circulation is compromised and consequently the efficiency of the dehumidifier decreases.
It is therefore good practice to clean the filter at regular intervals. Frequency depends on the conditions and duration of operation. If the appliance is used constantly or frequently, it is advisable to clean the filter once a week.
- Once the tank has been taken out, remove the filter by pulling it downwards (fig. 6).
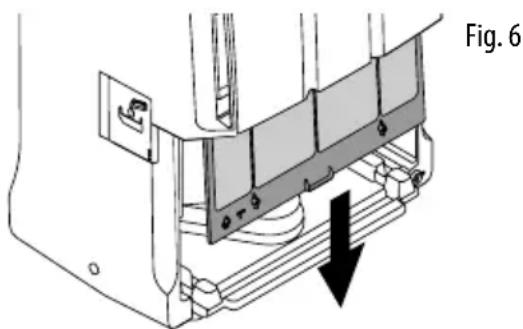
- Use a vacuum cleaner to remove dust accumulation from the filter.
If the filter is very dirty, rinse it well with warm water.
The temperature of the water must not exceed 40°C.
After washing the filter, allow it to dry completely before putting it back in place. The filter, in addition to trapping dust particles, has an anti-bacterial action.
Furthermore, it considerably reduces other irritating agents such as pollen and spores.
For long periods of downtime
• After unplugging the appliance from the power socket, empty the tank. • Clean the filter and put it back in. • Cover the appliance with a plastic bag to protect it from dust.
TECHNICAL SPECIFICATIONS
Power supply voltage: see rating plate
Absorbed power
Maximum absorbed power
Maximum absorbed power in Extra Power mode
Defrost device: Yes
Hygrometer: Yes
Fan speed: 3
Air filter: Yes
Operating limits:
Temperature: 2°C - 32°C
Relative humidity: 30-90%
Disposing of the appliance

In compliance with European directive 2002/96/EC, the appliance must not be disposed of with household waste, but taken to an authorised waste separation and recycling centre.
IF SOMETHING DOES NOT WORK
Check the following before calling the authorised Technical Service Centre operating in your area.
| PROBLEMS CAUSES SOLUTION | ||
| The appliance is operating in dehumidifying mode but the humidity does not decrease. | The filter is clogged.Either the temperature or the humidity in the room is too low.The room is too large for the dehumidifying power of the appliance, or there are too many sources of humidity (boiling pots, etc.).The set humidity value is too high. | Clean the filter.In certain conditions it is normal for the appliance not to dehumidify.Check the operating limits of the appliance in the “Technical Specifications” chapter. In certain cases it is advisable to heat the room you wish to dehumidify. The Extra Power mode included in this model makes it easier to raise the temperature.Decrease the set humidity value. |
| The appliance does not operate for approximately 3 minutes after start up. | The safety device has correctly made the appliance trip. | Wait for 3 minutes to pass. |
 appears on the display appears on the display appears on the display appears on the display the display the display | The tank is missing.The tank is full.The tank is positioned incorrectly.The room temperature is very low.One of the probes is faulty or the humidity in the room is too low or too high to be detected correctly. | Put the tank back in place.Empty the tank.Position the tank correctly.Increase, if possible, the room temperature.See if the appliance starts working again when moved into another room with a level of humidity within the operating limits indicated in the “Technical Specifications” section.If the problem persists, call the Service Centre. |
- SOME NOTIONS ON HUMIDITY
- DESCRIPTION OF ACCESSORIES
- INTRODUCTION
- SYMBOLS USED IN THESE INSTRUCTIONS
- DANGER
- IMPORTANT
- NOTA BENE
- PROBLEMS AND REPAIRS
- WARNINGS
- FUNDAMENTAL SAFETY WARNINGS
- USE IN COMPLIANCE WITH ITS INTENDED USE
- GENERAL SAFEGUARDS
- USE
- ELECTRICAL CONNECTIONS
- SETTING IT UP FOR USE
- APPLYING THE CASTORS
- DRAINING THE CONDENSATE WATER
- DRAINING INTO THE TANK
- CONTINUOUS EXTERNAL DRAINING
- BUTTON DESCRIPTIONS
- ON/STAND-BY" BUTTON
- DEHUMIDIFYING BUTTON
- DEHUMIDIFYING EXTRA POWER BUTTON
- LAUNDRY / LAUNDRY EXTRA POWER BUTTON
- HYGROMETER/THERMOMETER BUTTON
- TIMER BUTTON
- INCREASE/DECREASE BUTTONS
- DESCRIPTION OF THE DISPLAY
- STAND-BY
- TANK ALARM
- DEFROST ALARM
- SENSOR ALARMS
- KEYBOARD LOCK
- NOTE: WITH THE AIM OF SAVING ENERGY, AFTER THE
- MODE SELECTION
- DEHUMIDIFYING MODE
- DEHUMIDIFYING EXTRA POWER MODE
- LAUNDRY/LAUNDRY EXTRA POWER MODE
- HYGROMETER/THERMOMETER FUNCTION
- KEYBOARD LOCK MODE
- CHANGE TEMPERATURE SCALE
- TIMER MODE
- HOW TO PROGRAMME DELAY ON
- HOW TO PROGRAMME DELAY OFF
- CHANGING OR DISABLING THE TIMER MODE
- CLEANING AND MAINTENANCE
- CLEANING THE CABINET
- CLEANING THE AIR FILTER
- FOR LONG PERIODS OF DOWNTIME
- TECHNICAL SPECIFICATIONS
- DISPOSING OF THE APPLIANCE
- IF SOMETHING DOES NOT WORK
Brand : DELONGHI
Model : Ariadry DDS 30
Category : Dehumidifier