01383 - Bread maker Gourmetmaxx - Free user manual and instructions
Find the device manual for free 01383 Gourmetmaxx in PDF.
| Product type | Bread machine |
| Brand | Gourmetmaxx |
| Model | 01383 (BM8301) |
| Power supply | 220-240 V ~ 50 Hz |
| Power | 500 W |
| Protection class | I |
| Bread capacity | 550 g or 700 g |
| Number of programs | 18 (Standard, French, Sweet, Ultra-fast, Fast, Cake, Dessert, Multigrain, Whole wheat, Gluten-free, Porridge, Glutinous rice, Dough, Leavened dough, Kneading, Yogurt, Jam, Bake) |
| Crust levels | 3 (light, medium, dark) |
| Delayed timer | Up to 15 hours |
| Keep warm | Yes (up to 1 hour after baking) |
| Included accessories | Pan, kneading hook, hook extractor, measuring cup (240 ml), measuring spoon |
| Maximum ingredient capacity | Bread: 400 g dry + 220 ml liquid; Jam: 500 g fruit; Yogurt: 600 ml liquid; Others: 250 g dry or 400 ml liquid |
| Safety | Hot surfaces, do not immerse, use by children aged 8 and above under supervision |
| Maintenance | Body: damp cloth; Accessories: hot water and mild detergent; Do not put in dishwasher |
| Operating conditions | Flat and heat-resistant surface, minimum distance 30 cm around, ambient temperature 0-40 °C |
| Repairability | Repair by the manufacturer or a specialized workshop (do not repair yourself) |
Frequently Asked Questions - 01383 Gourmetmaxx
User questions about 01383 Gourmetmaxx
0 question about this device. Answer the ones you know or ask your own.
Ask a new question about this device
Download the instructions for your Bread maker in PDF format for free! Find your manual 01383 - Gourmetmaxx and take your electronic device back in hand. On this page are published all the documents necessary for the use of your device. 01383 by Gourmetmaxx.
USER MANUAL 01383 Gourmetmaxx
www.service-shopping.de
Intended Use 25
Safety Instructions 25
Items Supplied 28
Device Overview 29
Before Initial Use 30
Control Panel 30
Functions 30
Programme List 31
What Do I Need to Note When Baking Bread? 33
How Do I Operate the Bread Maker? 35
Suggested Recipes 37
Cleaning and Storage 39
Troubleshooting 40
Technical Data 43
Disposal 43
Explanation of the Symbols


Danger symbols: These symbols indicate risks of injury (e.g. from electricity or fire). Read through the associated safety instructions carefully and follow them.
Supplementary information

Read operating instructions before use.

Caution: hot surfaces!

Suitable for use with food.
Explanation of the Signal Words
DANGER warns of serious injuries and danger to life
WARNING warns of potential serious injuries and danger to life
CAUTION warns of slight to moderate injuries
NOTICE warns of damage to property
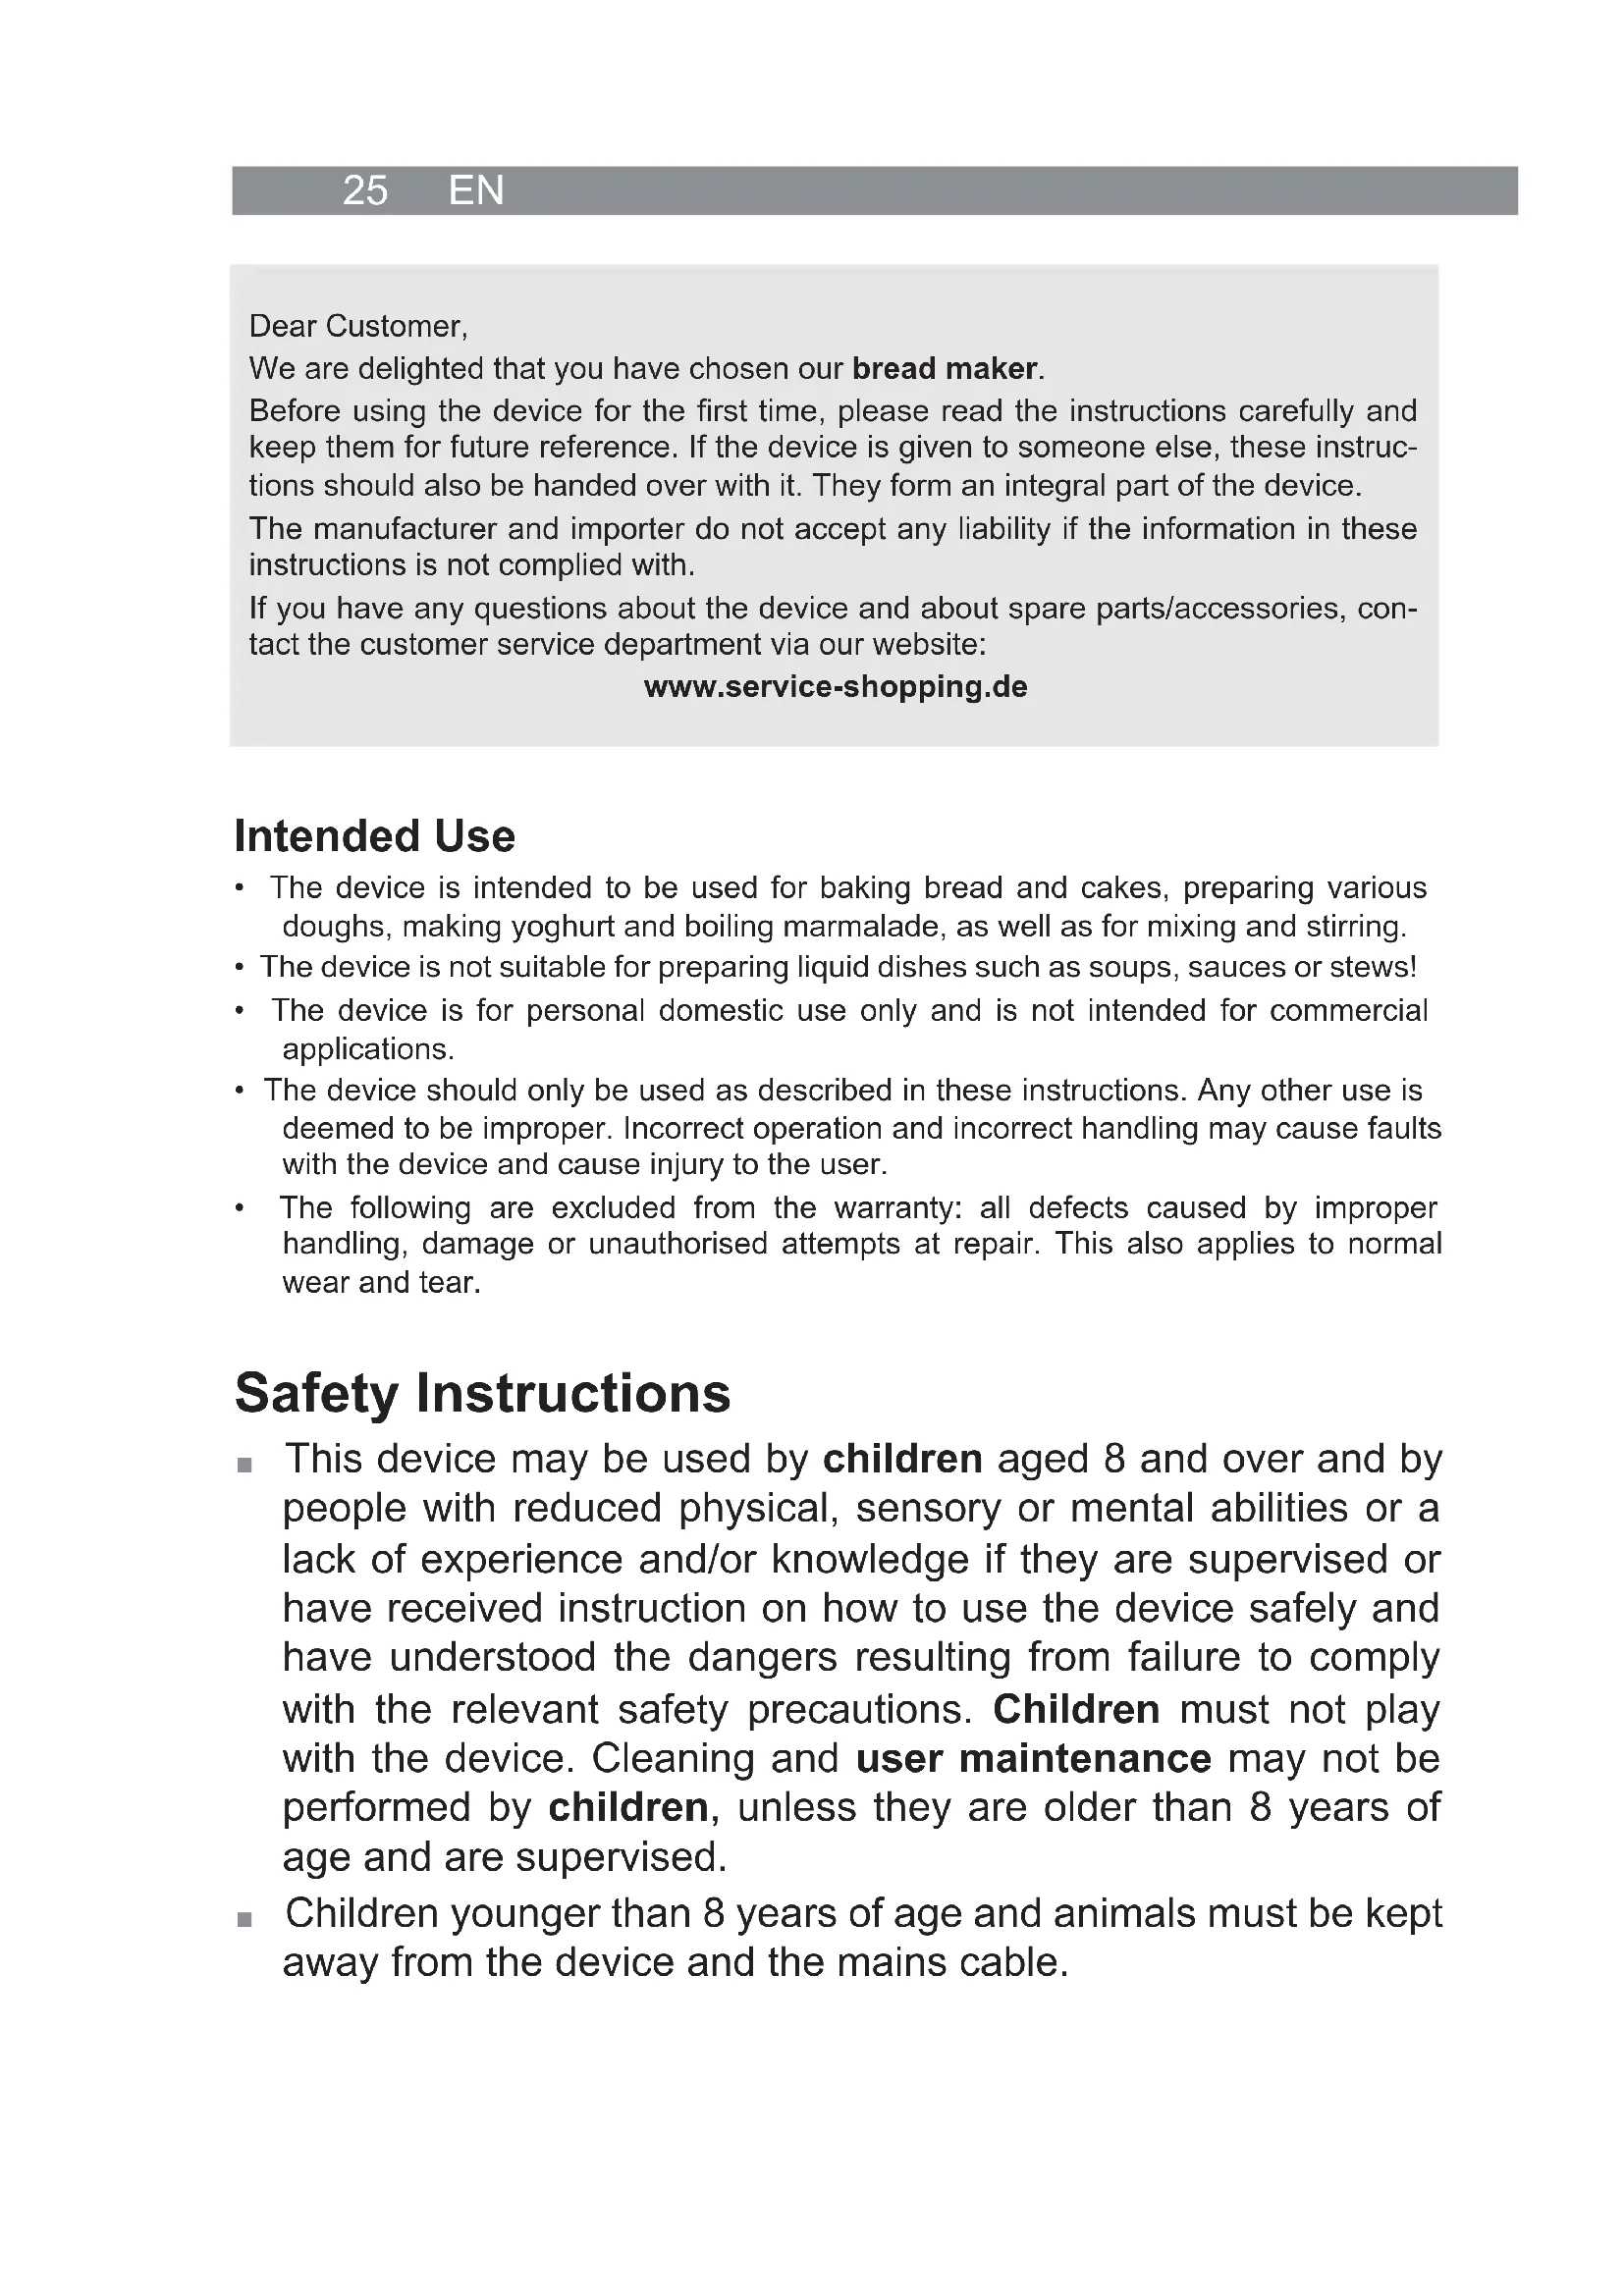
Dear Customer,
We are delighted that you have chosen our bread maker.
Before using the device for the first time, please read the instructions carefully and keep them for future reference. If the device is given to someone else, these instructions should also be handed over with it. They form an integral part of the device.
The manufacturer and importer do not accept any liability if the information in these instructions is not complied with.
If you have any questions about the device and about spare parts/accessories, contact the customer service department via our website:
www.service-shopping.de
Intended Use
- The device is intended to be used for baking bread and cakes, preparing various doughs, making yoghurt and boiling marmalade, as well as for mixing and stirring.
- The device is not suitable for preparing liquid dishes such as soups, sauces or stews!
- The device is for personal domestic use only and is not intended for commercial applications.
- The device should only be used as described in these instructions. Any other use is deemed to be improper. Incorrect operation and incorrect handling may cause faults with the device and cause injury to the user.
- The following are excluded from the warranty: all defects caused by improper handling, damage or unauthorised attempts at repair. This also applies to normal wear and tear.
Safety Instructions
This device may be used by children aged 8 and over and by people with reduced physical, sensory or mental abilities or a lack of experience and/or knowledge if they are supervised or have received instruction on how to use the device safely and have understood the dangers resulting from failure to comply with the relevant safety precautions. Children must not play with the device. Cleaning and user maintenance may not be performed by children, unless they are older than 8 years of age and are supervised.
Children younger than 8 years of age and animals must be kept away from the device and the mains cable.
- The device is not designed to be operated with an external timer or a separate remote control system.
-
Do not overfill the baking tin. The maximum fill volume is:
-
400g of dry ingredients and 220ml of liquid for different types of bread
-500 g of fruit for marmalade or jam
-600 ml of liquid for yoghurt
-250 g of dry ingredients or 400 ml of liquid for other foods
CAUTION: hot surfaces! The device will become very hot during use. It is essential to make sure that heated parts are not touched while using and after using the device. Only touch the handles and control knobs while the device is in operation or immediately after it has been switched off. Only transport or store away the device when it has cooled down completely. Use suitable oven gloves when handling the device.
- The device must always be disconnected from the mains power when it is left unattended and before assembling, disassembling and cleaning the device.
In the interest of your own safety, you should inspect the device for damage each time before you use it. Only use it if the device, mains cable and mains plug have no signs of damage!
If the device, the mains cable or the mains plug of the device is damaged, it must be replaced by the manufacturer, customer service department or a similarly qualified person (e.g. specialist workshop) in order to avoid any hazards.
CAUTION: Note the cleaning instructions in the "Cleaning" chapter!

DANGER - Risk of Electric Shock
Use and store the device only in closed rooms. Do not operate the device in rooms with high humidity.
- Never immerse the device, mains cable or mains plug in water or other liquids and ensure that they cannot fall into water or become wet.
Should the device fall into water, switch off the power supply immediately. Do not attempt to pull the device out of the water while it is still connected to the mains power!
- Never touch the device or the connecting cable with wet hands when these components are connected to the mains power.

WARNING - Danger of Injuries!
Risk of suffocation! Keep children and animals away from the packaging material.
Danger of scalding from heat, hot steam or condensation! Be careful when you open the device. When the device is opened, hot steam can escape. You should therefore keep your head and hands out of the danger zone. We also recommend using oven cloths or kitchen gloves when you want to open the lid or remove the frying basket containing the food.
Danger of falling! Make sure that the connected mains cable does not present a trip hazard.
The device should only be used and stored out of the reach of children.
- Keep clothing such as scarves, shawls, ties and long hair away from the device.
Always switch off the device before the baking tin is removed from the device.

WARNING - Danger of Fire
- Do not use the device in rooms containing easily ignitable dust or poisonous and explosive fumes.
- Do not operate the device in a very damp environment or in the vicinity of combustible material.
- Maintain a sufficient distance from heat sources such as hobs or ovens in order not to damage the device. Do not place any naked flames, e.g. burning candles, in the immediate vicinity of the device, mains cable or mains plug.
Never cover the device with cloths or something similar.
- Do not place any combustible materials (e.g. cardboard, plastic, paper or candles) on or in the device.
Make sure that the baking tin is not overfilled! Overflowing dough that touches the heating elements may catch fire! - Never put out the fire using water! If parts of the device catch fire, disconnect the device from the mains power and smother the flames using a damp cloth or a fire blanket, for example.
NOTICE - Risk of Damage to Material and Property
Always set up the device with a clear space on all sides (at least 30~cm ) and clear space above it (at least 30~cm ) on a dry, flat, solid and heat-resistant surface.
Only the accessory parts supplied by the manufacturer should be used. If accessory parts which are not authorised by the manufacturer are used, all warranty and guarantee claims are void.
The device should only be connected to a properly installed socket with safety contacts. The socket must also be readily accessible after connection so that the connection to the mains can quickly be isolated. The mains voltage must match the technical data of the device. Only use suitable extension cables whose technical data is the same as that of the device.
- Only use the device if the lid is closed and the baking tin has been inserted into the device correctly.
The device must not be moved during operation.
Do not switch on the device without any contents to prevent overheating. - Switch off the device and pull the mains plug out of the plug socket if an error occurs during operation or before a thunderstorm.
Always pull the mains plug and never the mains cable to disconnect the device from the mains power. - Do not carry or pull the device by the mains cable. Keep the mains cable away from hot surfaces, do not pinch it in doors or pull it over sharp edges or corners.
- Protect the device from heat, naked flames, direct sunlight, extreme temperatures, moisture and collisions.
- Do not use any corrosive or abrasive cleaning agents to clean the device. These can damage the surface.
Store the device in a dry place at temperatures of between 0 and 40^ out of the reach of children and animals.
Items Supplied
Check the items supplied for completeness and any transport damage. If you find any damage to the components, do not (!) use them, but contact our customer service department.
- Bread maker
Baking tin - Dough hook
- Dough hook remover
- Measuring cup
- Measuring spoon
Instruction manual
Device Overview
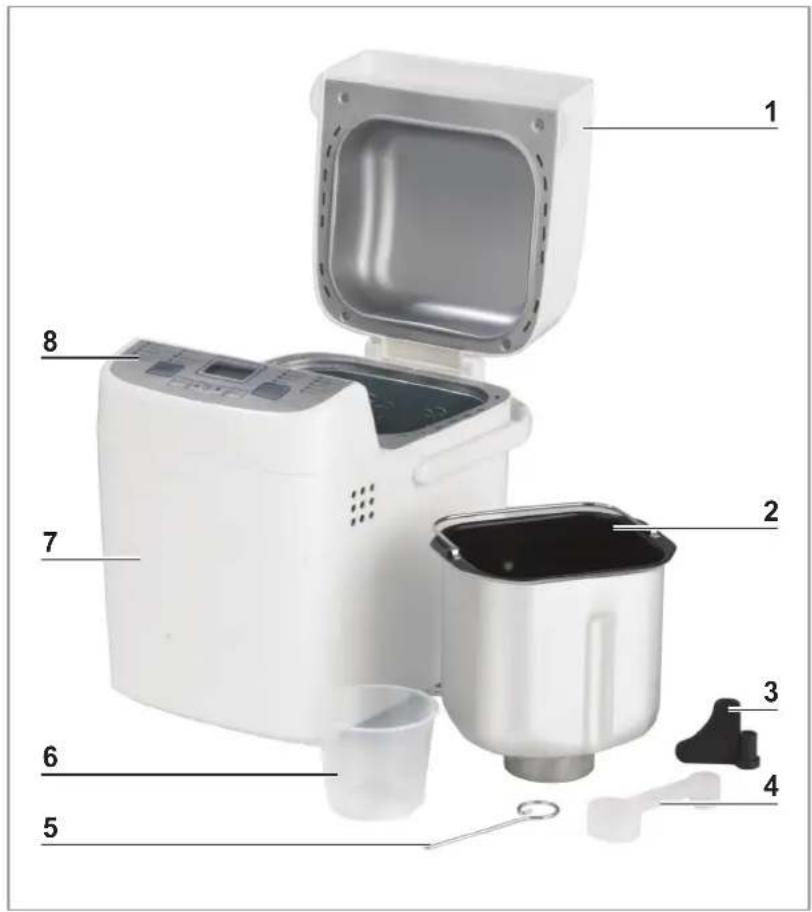
1 Lid
2 Baking tin
3 Dough hook
4 Measuring spoon
5 Dough hook remover
6 Measuring cup
7 Motor unit
8 Control panel
Accessories
Measuring cup
The measuring cup is suitable for measuring out flour and liquid ingredients. A full measuring cup is equivalent to 240ml .
Measuring spoon
The measuring spoon is suitable for measuring out salt, oil, yeast and other ingredients in small quantities. The large side of the measuring spoon is equivalent to one table-spoon, the small side is equivalent to one teaspoon.
Dough hook remover
The dough hook remover is used to remove the dough hook from the baked bread.
Before Initial Use

PLEASE NOTE!
Danger of burns! The device gets very hot during operation and shortly afterwards!
Never remove the rating plate and any possible warnings!
- Remove any possible films, stickers or transport protection from the device.
- The device may contain production residues. To avoid harmful effects to your health, clean the inside of the housing and the accessories thoroughly before using them for the first time (see "Cleaning and Storage").
- Place the device on a dry and heat-resistant flat surface at a safe distance from flammable objects. Make sure that the device is not accessible to children.
- Insert the mains plug into a properly installed plug socket.
- You should use the device for the first time without any food in it, as it may produce a small amount of smoke or odours due to coating residues. Allow the device to heat up on the highest temperature setting for approx. 15 minutes without any food in it (see "Use"). During this time, make sure the room is well ventilated, e. g. with wide-open windows!
Control Panel
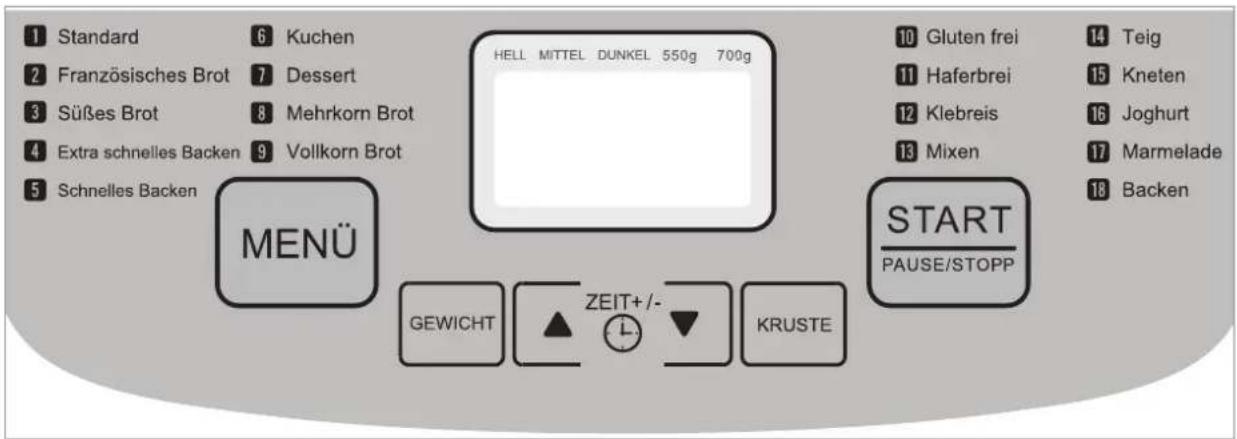
Functions


MENU (Menu)
You select the programme you want by pressing repeatedly.
The chosen programme number is shown on the display.
START-PAUSE/STOPP
Press once: start the chosen programme
Press once during operation: pause programme; press once more to resume the programme
Press for a long time until you hear a beep: stop programme


GEWICHT (Weight)
The weight of the bread (550 g or 700 g) is selected by pressing repeatedly. The chosen weight is shown on the display.
KRUSTE (Breadcrust)
Level of browning of the crust (Light, Medium or Dark) is selected by pressing repeatedly. The chosen level of browning is shown on the display.
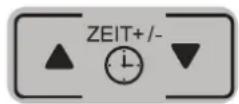
ZEIT (Time)
The time which is preset in the programme can be extended or shortened by pressing the arrow buttons.
Keep them held down to run through the time quickly.
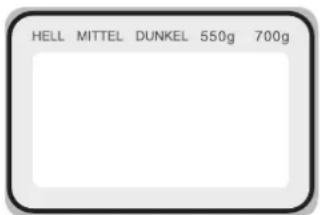
Display
Crust of the bread: Light - Medium - Dark (top left)
Weight of the bread: 550g - 700g (top right)
Programme (bottom left)
Remaining time (bottom right)
Programme List
You can choose from 18 programmes:
Programme 1: Standard
For standard bread doughs, such as wheat breads and mixed-type breads made from wheat and rye fl our.
For light breads made from fine flour. The bread is normally airy and has a crispy crust, like traditional French white bread.
Programme 3: SüBes Brot (Sweet Bread)
For sweet breads containing special ingredients such as extra sugar, raisins, chocolate, coconut flakes, etc. A longer rise time makes the dough particularly light and airy.
Programme 4: Extra schelles Backen (Extra Fast Baking)
In this programme, the times for kneading, proving and baking are reduced to 1 hour. The end result is a very coarse, solid bread.
Note: The bread becomes much harder than on other programmes.
Programme 5: Schnelles backen (Fast Baking)
In this programme, the times for kneading, proving and baking are reduced to 2 hours.
The end result is a coarse, solid bread.
Programme 6: Kuchen (Cake)
For normal sponge cakes made with baking powder or soda. The ingredients are mixed together, proved and baked.
Programme 7: Dessert
For desserts that need to be baked. The ingredients are mixed together, proved and baked.
Programme 8: Mehrkorn Brot (Multigrain Bread)
For multigrain bread made from different flours and grains.
Programme 9: Vollkorn Brot (Wholemeal Bread)
For breads with heavy wholemeal flours that take a long time to knead and prove. These breads are usually more compact and heavier.
Programme 10: Glutenfreies Brot (Gluten-Free Bread)
For breads made from gluten-free flour that take longer to absorb liquids and have different rising characteristics.
Gluten is contained in many types of grain (wheat, barley, rye, oats, kamut, spelt etc.). Note the instructions on the packaging! If you are following a strict gluten-free diet, you must ensure that the yeast used also contains no gluten. The baking tin must also always be cleaned thoroughly to make sure that no residues of other types of flour come into contact with the gluten-free flour. Gluten-free bread has a thicker consistency and a lighter colour than conventional bread and also does not last as long.
Consult a doctor if you have a gluten intolerance and are going to bake gluten-free bread yourself.
Programme 11: Haferbrei (Porridge)
For porridge, oatmeal and similar. The ingredients are mixed together and brought to the boil.
Programme 12: Klebreis (Sticky Rice)
For rice which is intended to be particularly sticky. The ingredients are heated with constant stirring so that the rice cannot set.
Programme 13: Mixen (Mixing)
With this programme, different ingredients can slowly be mixed together.
Programme 14: Teig (Dough)
This programme can be used to prepare yeast doughs for pizzas or cakes. The dough is kneaded and allowed to prove. However, the dough is not baked!
The raw dough can then be processed further in a traditional way in an oven to make a pizza or cake!
Programme 15: Kneten (Kneading)
This programme can be used to process doughs which are not intended to rise. The programme mixes together the ingredients and kneads the dough; it is not baked. Suitable for pasta dough but also for cookie or waffle mixtures.
Programme 16: Joghurt (Yoghurt)
For making yoghurt from milk and natural yoghurt (lactic acid bacteria). The ingredients are always mixed together again over a long period of time with a small amount of heat.
Programme 17: Marmelade (Marmalade)
This programme can be used to process fresh fruit to make marmalades, jams or sauces.
Programme 18: Backen (Baking)
This programme can be used to extend the baking time for breads which are not yet fully baked or for ready-made doughs which have not yet been baked (Note: In contrast to the Schnell backen (Fast Baking) programme, here the dough is not kneaded or allowed to prove, but just baked!) The programme can be used several times in succession.
What Do I Need to Note When Baking Bread?
The quality of the bread depends on many different factors: Always make sure that the ingredients used are fresh and are at room temperature. Note the following information:
Ingredients
Flour
Flour is the main component of bread. Flour forms gluten when liquid is added to it. Gluten is in turn responsible for the rise and the strength of the dough. The baking capability is therefore heavily dependent on the gluten formation. Before baking, you should therefore check in the manufacturer's information on the flour packaging whether the flour is suitable for baking bread (flour type). As flour is the main component of bread, in bread recipes the amount of flour is usually used as the basis for calculating the rest of the ingredients. Make sure you always weigh out the amount of flour specified in the recipe correctly.
- Yeast
Yeast allows the dough to rise and makes the bread more airy and easier to digest. For baking in the bread maker, we recommend using dry yeast as dry yeast lasts longer and is easier to process than fresh yeast.
Salt
Salt enriches the flavour and also aids the fermentation process.
Butter/oil
Butter or oil enrich the flavour and also give the bread a softer consistency. The butter or oil should be at room temperature.
Sugar
Sugar is used to "feed" the yeast and is very important to the fermentation process. Both refined and brown sugar or honey is suitable for this. Sugar increases the nutritional value of the bread and makes it last longer.
- Eggs
Eggs can make a bread more nutritious and bigger. They should be raw, whisked and always without the shell.
Note: Never use eggs if the timer function is to be used as eggs can quickly go off if they are not kept cool.
Baking powder
Baking powder is used for "quick" bread doughs and sponge cakes. The dough does not require any time to rise, as is the case with yeast, and the doughs contain more air.
- Soda
Soda has the same function as baking powder in doughs. Soda and baking powder are also frequently used together.
Water
We recommend that you use normal tap water. Make sure that the water is not too hot or too cold, but is at room temperature. If the water is too cold, the yeast will not start the fermentation process. If the water is too hot, the yeast ferments too quickly (only recommended if the "Schnell backen (Fast Baking)" programme is used).
Milk
Milk or dairy products enrich the flavour, increase the nutritional value of the bread and ensure that the bread has a delightful brown crust. The amount of milk added should be deducted from the amount of water specified in the recipe.
Note: Never use milk or dairy products if the timer function is to be used as dairy products can quickly go off if they are not kept cool.
- Ready-made bread mixtures with yeast
In the case of ready-made bread mixtures which contain yeast, only water needs to be added to the mixture, select Programme 1 ("Standard") and specify a bread size according to the quantity of the bread baking mixture. The fraction of yeast in such ready-made bread baking mixtures frequently varies, therefore the baking result may differ.
- Ready-made bread mixtures without yeast
First pour the yeast into the baking tin, then the bread mixture and finally the water. Select a programme which reflects the type of flour in the bread mixture.
Making Dough
- Make sure that all ingredients are at room temperature (exception: with the "Schnelles Backen (Fast Baking)" and "Extra Schnelles Backen (Extra Fast Baking)" programmes, the water which is added may be slightly hotter).
- Use dry yeast as it is less complicated and "more reliable".
- Note that rye flour does not have the same baking characteristics as wheat flour. A dough made from rye flour will not rise very well without sufficient raising agent. To achieve good baking results, a mixture of at least 30% wheat flour and no more than 70% rye fl our should be used to make rye breads.
Measuring Out Ingredients
- When baking bread, it is vital for the amounts specified in the recipes to be adhered to and measured out correctly. Use the measuring cup and measuring spoon supplied to measure out the ingredients. With the measuring spoon, always measure out "level" and not "heaped" measuring spoons. Use scales to measure out butter, flour etc.
Order of Ingredients
The order in which the ingredients are added to the baking tin is important for the fermentation process to ensure that the bread can rise:
- First pour water or milk into the baking tin.
- Then add the fl our.
- Press a small recess into the flour in one corner, add the salt and then cover the recess with fl our again.
- Press another recess into the flour on the opposite corner, add the yeast and cover up again.
Note: Salt and yeast should not be mixed together right at the start. If the salt mixes with the yeast too early, this may have a negative effect on the fermentation properties of the bread.
- Add flakes of butter or oil.
- Finally add a dash of sugar.
How Do I Operate the Bread Maker?

PLEASE NOTE!
Make sure that no food gets onto the heating elements inside the bread maker. This may lead to a device fire!
Before inserting the baking tin, check whether there are any food residues on the outside of the baking tin which could touch the heating elements.
Ensure that there is sufficient ventilation while the device is in operation.
CAUTION - Danger of scalding! Hot air emerges from the ventilation slots during and shortly after the baking process. Be careful when handling the device.
CAUTION - Danger of burns! The baking tin will become hot during baking! Use kitchen gloves to remove the baking tin.
Use
- Place the device on a dry, stable, heat-resistant, flat surface a sufficient distance away from flammable objects.
- To remove the baking tin from the device, twist it slightly anticlockwise and pull it out.
- Insert the dough hook into the baking tin by placing it onto the dough hook mount in the baking tin.

We recommend that the dough hook mount is greased with baking margarine or butter beforehand so that no dough can settle between the mount and the dough hook and the dough hook can be removed more easily afterwards.
- Pour the ingredients into the baking tin. Pay attention to the order of the ingredients (see the "What Do I Need to Note When Baking Bread?" chapter, "Order of Ingredients" section).
-
Insert the baking tin into the device and turn it clockwise to secure it.
-
Close the lid.
- The mains plug should be connected to a plug socket that has been properly installed. It should also be readily accessible after connection. As soon as the device has been connected to a plug socket, a beep is heard and the display is activated.
- Select a baking programme (see the next "Programme Start" section).
Programme Start
- Use the MENU (menu) button to select a baking programme (see the "Programme List" chapter) by pressing the button repeatedly. The display shows which programme (1 - 18) has been selected.
- Press the GEWICHT (weight) button to select a loaf size (550 g or 700 g). An arrow at the top right of the display indicates which loaf size has been selected. Note: Be aware that it is not possible to select the loaf size on Programmes 4, 6, 7 and 11 - 18.
- Press the KRUSTE (breadcrust) button to select the level of browning of the crust (Light, Medium, Dark). An arrow at the top left of the display indicates what level of browning has been selected. Note: Be aware that it is not possible to select the level of browning on Programmes 4 and 11 - 18.
- To start the programme, press the START-PAUSE/STOPP button. The time remaining until the programme ends is shown on the display.

All other buttons are disabled during the baking programme. To pause the baking process, for example in order to add further ingredients, briefly press the START-PAUSE/STOPP button once.
Press the START-PAUSE/STOPP button again to resume the baking process. Make sure that this interruption does not last too long so that the heat which the bread dough requires is not lost.
Programme End
- When the programme ends, the time shown on the display is 0:00 and a beep sounds several times in succession to indicate the end of the programme.
- After the end of the programme, press the START-PAUSE/STOPP button for around 3 seconds.

If the START-PAUSE/STOPP button is not pressed after the end of the programme, the device automatically switches to keep-warm mode (only with Programmes 1 - 10). The device switches off automatically after an hour. If this is to be ended prematurely, press the START-PAUSE/STOPP button for around 3 seconds.
- Remove the mains plug from the plug socket.
- Open the lid.
- Remove the baking tin by turning it anticlockwise slightly and pulling it up and out. NOTE: The baking tin is hot! Use kitchen gloves!
- Allow the bread to rest in the baking tin for approx. 15 minutes, then remove it from the baking tin and place it on a rack to cool.
- If the dough hook is still in the bread, remove it with the aid of the dough hook remover once the bread has completely cooled down.
- Allow the device to cool down before it is used again, cleaned or stored away.
Note: If the device is to be used again, it must have cooled down completely. If the error message H:HH appears on the display after the device is switched on, the device is still too hot. In this case, remove the baking tin containing the foodstuffs from the device, pull the mains plug out of the plug socket and allow the device to continue to cool.
Delayed Baking
The device can be preprogrammed up to 15 hours in advance.

For delayed baking, do not use any fresh ingredients such as milk, fruit, onions, eggs or similar products as they can quickly go off if they are not kept cool.
- Select the programme you want, the size and crust of the bread in the manner described in the "Programme Start" section.
- Press the time arrow buttons on the control panel to select in increments of 10 minutes the time at which the device should automatically end the baking programme. When you do this, be aware that the baking time must also be included in the calculation.
Example: It is 20:30 and the bread should be ready at 7:00 the next morning, so in 10 hours and 30 minutes. Whichever programme has been chosen, the time must therefore be set to 10 hours and 30 minutes. The baking programme then automatically starts so that it will have ended at 7:00.
- To start the device, press the START-PAUSE/STOPP button. The time remaining until the programme ends is shown on the display.
- After the programme has ended, follow the instructions in the "Programme End" section.
Suggested Recipes

- In these quoted recipes, one tablespoon (tbsp.) is equivalent to one large heaped measuring spoon.
- In these quoted recipes, one teaspoon (tsp.) is equivalent to one small heaped measuring spoon.
- Note the instructions provided in the "Programme List", "What Do I Need to Note When Baking Bread?" and "How Do I Operate the Bread Maker?" chapters.
It is essential to pay attention to the order of the ingredients (see the "What Do I Need to Note When Baking Bread?" chapter, "Order of Ingredients" section).
| White bread (550 g) ·180 ml of water ·320 g of household fl our (light wheat fl our) ·1½ tsp. of salt ·1 tsp. of dry yeast ·1½ tbsp. of oil or butter ·1 tbsp. of sugar | White bread (700 g) ·220 ml of water ·400 g of household fl our (light wheat fl our) ·1½ – 1 tsp. of salt ·1½ tsp. of dry yeast ·2 tbsp. of oil or butter ·1 – 2 tbsp. of sugar |
| French bread (550 g) ·180 ml of water ·320 g of household fl our (light wheat fl our) ·1 tsp. of salt ·1 tsp. of dry yeast ·1½ tbsp. of oil or butter ·1½ – 1 tbsp. of sugar | French bread (700 g) ·220 ml of water ·400 g of household fl our (light wheat fl our) ·1½ tsp. of salt ·1½ tsp. of dry yeast ·2 tbsp. of oil or butter ·1 – 1½ tbsp. of sugar |
| Sweet bread (550 g) ·160 ml of water ·320 g of household fl our (light wheat fl our) ·1 pinch of salt ·1 tsp. of dry yeast ·1½ tbsp. of oil or butter ·4 tbsp. of sugar | Sweet bread (700 g) ·200 ml of water ·400 g of household fl our (light wheat fl our) ·1 pinch of salt ·1½ tsp. of dry yeast ·2 tbsp. of oil or butter ·5 tbsp. of sugar |
| Extra fast bread ·230 ml of water ·400 g of household fl our (light wheat fl our) ·1/2 tsp. of salt ·3 tsp. of dry yeast ·2 tbsp. of oil or butter ·3 tbsp. of sugar | Extra fast bread can also be baked using other types of flour. Depending on the type of flour, the amounts of the further ingredients may need to be adjusted. |
| Fast bread (550 g) ·180 ml of water ·320 g of household fl our (light wheat fl our) ·1/2 tsp. of salt ·2 tsp. of dry yeast ·1 1/2 tbsp. of oil or butter ·1 tbsp. of sugar | Fast bread (700 g) ·220 ml of water ·400 g of household fl our (light wheat fl our) ·1/2 - 1 tsp. of salt ·2 1/2 tsp. of dry yeast ·2 tbsp. of oil or butter ·1 - 2 tbsp. of sugar |
| Cake ·30 ml of water ·220 g of household fl our (light wheat fl our) ·3 eggs ·A pinch of salt ·1 tsp. of dry yeast ·2 tbsp. of oil or butter ·1/2 tbsp. of sugar | Dessert (rice pudding with raisins) ·240 ml of milk ·270 g of rice (cooked) ·2 eggs ·125 g of sugar ·100 g of raisins |
| Multigrain bread (550 g) ·180 ml of water ·240 g of household fl our (light wheat flour, spelt flour or wholemeal flour) ·80 g of grains (as you wish) ·1/2 tsp. of salt ·1 tsp. of dry yeast ·1 1/2 tbsp. of oil or butter ·1 tbsp. of sugar | Multigrain bread (700 g) ·220 ml of water ·300 g of household fl our (light wheat flour, spelt flour or wholemeal flour) ·100 g of grains (as you wish) ·1/2 - 1 tsp. of salt ·1 1/2 tsp. of dry yeast ·2 tbsp. of oil or butter ·1 - 2 tbsp. of sugar |
| Wholemeal bread (550 g) ·180 ml of water ·320 g of household fl our (wholemeal fl our) ·1/2 tsp. of salt ·1 tsp. of dry yeast ·1 1/2 tbsp. of oil or butter ·1 tbsp. of sugar | Wholemeal bread (700 g) ·220 ml of water ·400 g of household fl our (wholemeal fl our) ·1/2 - 1 tsp. of salt ·1 1/2 tsp. of dry yeast ·2 tbsp. of oil or butter ·1 - 2 tbsp. of sugar |
| Gluten-free bread (550 g) · 180 ml of water · 160 g of gluten-free fl our · 160 g of corn fl our · 1/2 tsp. of salt · 1 - 1½ tsp. of dry yeast · 1½ tbsp. of oil or butter · 1 tbsp. of sugar | Gluten-free bread (700 g) · 220 ml of water · 200 g of gluten-free fl our · 200 g of corn fl our · 1½ - 1 tsp. of salt · 1½ - 2 tsp. of dry yeast · 2 tbsp. of oil or butter · 1 - 2 tbsp. of sugar |
| Porridge · 400 ml of water · 60 g of oatfl akes | Sticky rice · 275 ml of water · 250 g of sticky rice |
| This programme can also be used to process other ingredients such as wheat bran, seeds, beans etc. to make porridge. | |
| Yoghurt · 600 ml of milk · 60 ml of lactic acid bacteria (probiotic cultures – available from pharmacies) Instead of lactic acid bacteria, you may alternatively also use around 60 g of natural yoghurt as it al-ready contains these bacteria. | Marmalade · 500 g of orange pulp · 250 g of sugar · 3 tbsp. of freshly squeezed lemon juice · 1 tbsp. of concentrated lemon juice Lots of other fruits are also suitable for making marmalade or jams, e.g. cherries, berries, apricots. |
Cleaning and Storage

PLEASE NOTE!
CAUTION - Danger of burns from hot device parts! Allow the device and all accessories to cool down before any cleaning.
- Do not pour any water into the motor unit! The heating elements must not come into contact with water or other liquids.
Do not pour any cleaning agents directly onto or into the motor unit.
The accessories are not dishwasher-safe!
- Do not use any caustic or abrasive cleaning agents for cleaning. These can damage the surface.
- Remove the baking tin and the dough hook from the device (see the "Programme End" section).

If the dough hook cannot be removed from the baking tin, pour warm water into the baking tin and allow it to soak for a few minutes.
-
Clean the motor unit with a damp cloth.
-
Clean all accessories with warm water and mild detergent.
- Make sure that all parts are dry before the device is reassembled and stored away.
- Store the device and all accessory parts in a dry, clean place that is not accessible to children and animals.
Troubleshooting
If the device does not work properly, first check whether you are able to rectify the problem yourself. If the problem cannot be solved with the following steps, contact the customer service department.

Do not attempt to repair an electrical device yourself!
| Problem Possible cause | solution |
| The device does not work. | Is the mains plug inserted in the plug socket correctly?Is the plug socket defective? Try another plug socket.Check the fuse of the mains connection.Has the baking tin been inserted correctly?Is the lid closed correctly?Has the START-PAUSE/STOPP button been pressed?The device has overheated. Switch off the device and pull the mains plug out of the plug socket. Remove the baking tin containing the ingredients from the device and then allow the device to cool down COMPLETELY before it is used again. |
| The error message H:HH appears on the display. | The device is still too hot. In this case, remove the baking tin containing the foodstuffs from the device, pull the mains plug out of the plug socket and allow the device to continue to cool. |
| The bread does not rise. | Has fresh yeast been used? Dry yeast is easier to handle and does not have to be mixed in fi rst.Has a suffi cients amount of yeast been used? Check the amount stated in the recipe and measure it out precisely.Is the yeast too old? Check the best-before date.Were the ingredients added to the baking tin in the correct order? The yeast should not come into contact with the salt too early.Has too much salt and too little sugar been used? Check the fi gures in the recipe and weigh / measure out the ingredients precisely.Which flour was used? Is the flour suitable for baking bread? Check the details on the pack and use a different fi our if necessary.Is the quality of the flour used still acceptable? The characteristics of the fi our can deteriorate due to incorrect storage (moisture, temperature, stored for too long). |
| The bread has large air pockets. | • Too much yeast was used. Check the amount stated in the recipe and measure it out precisely. • Too much water was used or the water was too hot. Some types of fl our absorb more water than others. Next time add around 10 – 20 ml less liquid. |
| The bread has collapsed in on itself after it has risen. | • The type of fl our does not have good baking properties. Use another type of fl our. • Too much liquid was used. Next time add around 10 – 20 ml less liquid. • Too little salt was used. Check the amount stated in the recipe and measure it out precisely. • Too much yeast was used. Check the amount stated in the recipe and measure it out precisely. • Was the lid open during baking? Do not leave the lid open during baking. • The air humidity is too high or it is too warm. Make sure that the room is well ventilated. |
| The bread has risen too much. | • Too much yeast / water was used. Check the amounts stated in the recipe and measure out precisely. • Check whether ingredients containing a lot of water were used. Next time add less water if ingredients containing a lot of liquid are being used. • Is the water too warm? The water used should be at room temperature. • Not enough fl our was used. Check the amount sta in the recipe and measure out the fl our using accurate scales. • Too little salt was used. Check the amount stated in the recipe and measure it out precisely. |
| The bread is too light and sticky. | • Too much yeast was used. Check the amount stated in the recipe and measure it out precisely. • Is the yeast too old? Check the best-before date. • The bread was not baked for long enough. Increase the baking time. • Was the baking process interrupted (power outage, accidental pressing of the START-PAUSE/STOPP button)? If the baking process is interrupted for too long, the end result is generally unsatisfactory and cannot be corrected. |
| The bread is too dry and too solid. | • Too little liquid was used. Next time add around 10 – 20 ml more liquid. • Too much yeast was used. Check the amount stated in the recipe and measure it out precisely. • Is the yeast too old? Check the best-before date. |
| The bread is too dark. | • Too much sugar was used. Check the amount stated in the recipe and measure it out precisely. • The wrong level of browning was selected. Next time select a lighter level of browning using the KRUSTE (breadcrust) button. |
| The bread is not yet fully baked and is moist inside. | • Too many additional ingredients (nuts, dried fruits, honey etc.) were used. Check the amounts stated in the recipe and measure out precisely. |
| The sides and the bottom of the bread are covered with too much fl our. | • Either too much fl our or too little liquid was used. the amounts stated in the recipe and measure out precisely. |
| The ingredients are not mixed together properly. | • The dough hook is not inserted correctly. The dough hook needs to be inserted before ingredients are added to the baking tin. • Was the baking process interrupted (power outage, accidental pressing of the START-PAUSE/STOPP button)? If the baking process is interrupted for too long, the end result is generally unsatisfactory and cannot be corrected. |
| The dough does not rise. | • Was Programme 15: Kneading selected? The dough is only kneaded here. No heat is added for proving. |
| The bread has collapsed in on itself and the bottom is too moist. | • The bread was left in the bread maker for too long after the end of the baking programme. When the baking programme comes to an end, the bread should be removed from the bread maker as soon as possible. |
| The crust is too soft. | • The bread was left in the bread maker for too long after the end of the baking programme. The steam has softened the crust. |
| The dough hook "rattles". | • Is the dough hook inserted correctly? Make sure that the dough hook is fit tted securely in the baking tin. |
| The dough hook is stuck in the bread after the bread has been removed from the baking tin. | • The bread is very compact. Allow the bread to cool down completely and then remove the dough hook using the dough hook remover. Tip: Some types of fl our absorb more water than others. Next time use a little more liquid to break up the dough. |
| How do I get a crispier crust? | • Select Programme 2: French Bread or the Dark option when you select the crust. |
| The bread cannot be sliced. | • The bread is still too warm. Always allow the bread to cool before slicing it. |
Check
| Problem Possible cause | solution |
| There is a burning smell and smoke emerges from the ventilation slots of the device. | Was there food on the baking tin that has got onto the heating elements? Check the baking tin for any food residues that could come into contact with the heating elements before inserting it.Does the dough flow over the side of the baking tin onto the heating elements? Interrupt the baking process and remove the dough that has overfl owed as soon as the device has cooled down.During the kneading process, fl our or another ingredient has fallen out of the baking tin onto the heating elements. Interrupt the baking process and clean the heating elements as soon as the device has cooled down. |
Technical Data
Article number: 01383
Model: BM8301
Voltage supply: 220 - 240V 50Hz
Power: 500 W
Protection class: I
Disposal

Dispose of the packaging material in an environmentally friendly manner and take it to a recycling centre.

This device is governed by the European Directive 2012/19/EU on waste electrical and electronic equipment (WEEE). Do not dispose of this device as normal domestic waste, but rather in an environmentally friendly manner via an offi cially approved waste disposal company.
Customer service / importer:
(Calls to German landlines are subject to charges. The cost varies depending on the service provider.)
All rights reserved.
Contenu
Attention: surfaces chaudes!
Chere cliente, cher client,
www.service-shopping.de
Programme 13: Mixen (malaxage)
Programme14:Teig (pate)
Programme 16: Joghurt (yaourt)
www.service-shopping.de