PIP1500 - Baby monitors MOTOROLA - Free user manual and instructions
Find the device manual for free PIP1500 MOTOROLA in PDF.

| Product Type | Video Baby Monitor |
| Brand | Motorola |
| Model | PIP1500 |
| Dimensions (parent unit) | Approximately 130 x 80 x 25 mm |
| Weight (parent unit) | Approximately 180 g |
| Power Supply | DC 5V / 1500 mA power adapter |
| Battery (parent unit) | Built-in rechargeable, up to 8 hours battery life |
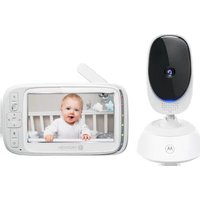
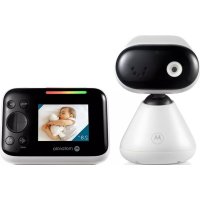
| Screen | 2.4-inch color LCD screen |
| Range | Up to 300 m in open field |
| Night Vision | Yes, infrared LED |
| Room Temperature | Display in °C or °F |
| Two-way Communication | Yes, talk button |
| Lullabies | Multiple built-in lullabies |
| Digital Zoom | Yes, forward/backward |
| Auto-off Timer | 5 / 30 / 60 minutes |
| Voice Activation (VOX) | Yes, screen saver |
| Wall Mount | Wall mount bracket included |
| Supported Cameras | Up to 4 (additional cameras sold separately) |
| Safety | Power cord out of reach (distance > 1 m) |
| Cleaning | Wipe with a soft, dry cloth |
| Accessories Included | Power adapter, wall mount bracket, screws and anchors included |
Frequently Asked Questions - PIP1500 MOTOROLA
User questions about PIP1500 MOTOROLA
0 question about this device. Answer the ones you know or ask your own.
Ask a new question about this device
Download the instructions for your Baby monitors in PDF format for free! Find your manual PIP1500 - MOTOROLA and take your electronic device back in hand. On this page are published all the documents necessary for the use of your device. PIP1500 by MOTOROLA.
USER MANUAL PIP1500 MOTOROLA
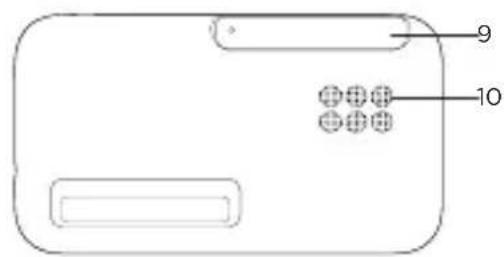
- Camera
- Base
- Speaker
- Antenna
-
Power jack
-
Power / Linking LED indicator
Lights up in blue when the parent unit is powered on and linked to the baby (camera) unit.
- Pair button
Press and hold to pair with the parent unit.
Parent unit
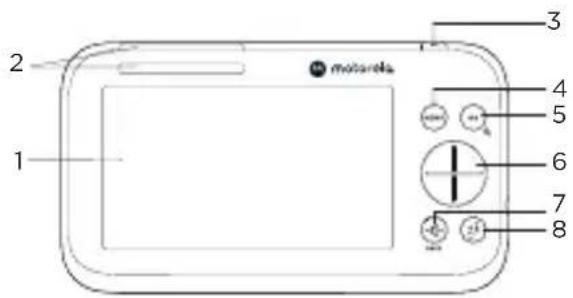
- Screen display
- Dual sound level indications
(front and top view)
- Power button
Press and hold to turn on or off.
Press to turn the screen on or off.
- Menu button
Press to open the menu.
- OK / Zoom button
Press to confirm a selection/zoom in or out.
- Navigation button
Adjust menu settings/press left or right to select the parent unit's volume level. - Volume / Back button
- Talk back button
Press and hold to talk to the baby. - Antenna
- Speaker
2. Connect and charge
Baby (camera) unit
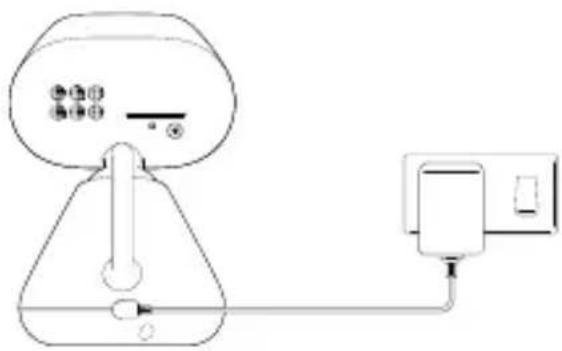
- Plug the DC plug of the power adapter into the power socket on the rear of the baby (camera) unit and plug the other end of the AC adapter into the wall socket.
- The baby unit turns on and the power indicator lights up in blue and flashes in red if the parent unit has not been powered up or loss connection with the baby (camera) unit.

WARNING
Strangulation Hazard. Children have STRANGLED in cords. Keep this cord out of the reach of children (more than 1 meter or 3 feet away). Do not remove the tags from the AC Adapters. Only use the AC Adapters provided.
Parent unit

A rechargeable battery is already pre-installed inside the parent unit. When fully charged, you can move the parent unit without losing the link and picture from the baby (camera) unit. When charging the battery for the first time, charge for at least 16 hours continuously.
- Plug the DC plug of the power adapter into the power socket on the side of the parent unit and plug the other end of the AC adapter into the wall socket.
- Switch on the AC power and the parent unit will turn on.
- When the parent unit is fully charged, appear steadily on the screen display.
- Press and hold the power button on the top of the parent unit to turn it on and off.
Note
Use only the supplied power adapter (DC5V / 1500 mA).
Pair the baby (camera) unit to the parent unit
We have paired the baby unit to the parent unit in the pack. In case you want to pair an extra camera, press and hold on the rear of the baby (camera) unit for more than 5 seconds.
3. Wall mount the baby (camera) unit
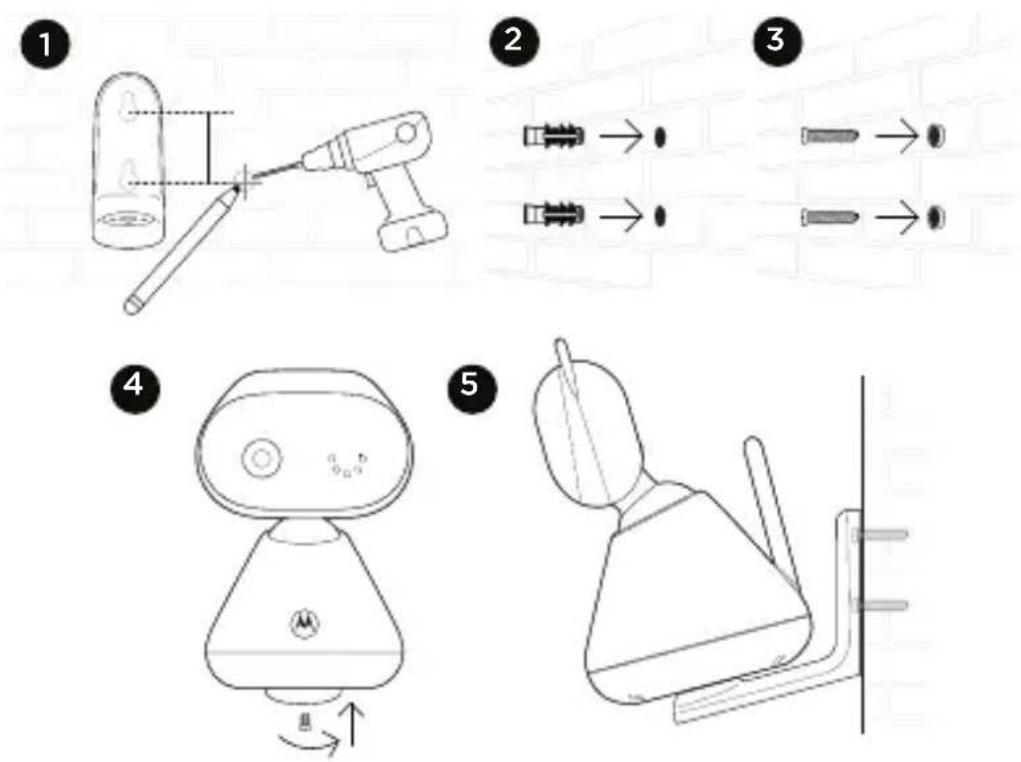
- Mark the positions of 2 screw holes on the wall. Drill a screw hole at each marking.
- Install the supplied wall anchors into 2 screw holes on the wall.
- Insert the supplied wall mounting screws into the wall anchors.
- Fix and fasten the underside of the baby (camera) unit and the wall mount bracket with the supplied separate screw.
- Hang the wall mount bracket on the wall mounting screws on the wall.
- Adjust the camera manually if necessary.
Note
The pack includes a power adapter with a longer cord which is beneficial for wall mount application, where your wall socket is far from the camera.
4. Use your video baby monitor
Parent unit main menu

Zoom in/out

Screen on/off timer

Adjust LCD brightness

View multiple cameras

Play list

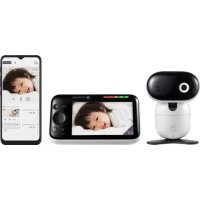
Message inbox

Set the alarm

Temperature unit ^ C or ^ F selection

Camera selection
Status icons

Signal strength

Talk back

Battery level indication

Night vision

Zoom in

Screen off time (5/30/60 minutes)

Alarm set

Screen saver enabled

Playing lullaby

Cycle view from camera

Speaker off


Camera selected
Other menu options
Lullabies playback
- Press MENU on the parent unit to open the menu.
- Scroll the navigation button up and down to select a desired lullaby.
- Press OK on the desired lullaby and the volume status bar pops up.
- Scroll the navigation button up and down to select a desired volume.
For more detailed explanation of all features and instructions, visit or download the user manual from motorolanursery.com.
1. Überblick
Tryk for at abne menuen.
5. OK / Zoom-knap
Tryk for at bekraefte et valg/zoom ind eller beskaer.
6. Navigationsknap
Juster menuindstillinger/tryk venstre eller hjo're for at vaelgeforalldreenhedens volumenniveaua.
For customers in Europe and UK:
Imported and Distributed by: A.I.&E., Adrian Mulderweg 9-11, 5657 EM Eindhoven, The Netherlands. Edco UK Ltd, 1st Floor, Two Chamberlain Square, Birmingham, B3 3AX, UK.
EU Declaration of Conformity
Hereby, MZGW declares that the radio equipment type is in compliance with RE Directive 2014/53/EU. The full text of the EU declaration of conformity is available on the website: motorolanursery.com.
UK Declaration of Conformity
Hereby, MZGW declares that this product is in compliance with the requirements for UKCA marking. The Declaration of Conformity can be obtained at motorolanursery.com.
Distributed or sold by Meizhou Guo Wei Electronics Co. LTD., official licensee for this product. MOTOROLA and the Stylized M Logo are trademarks or registered trademarks of Motorola Trademark Holdings, LLC. and are used under license. All other trademarks are the property of their respective owners. © 2022 Motorola Mobility LLC. All rights reserved.
Version 1 (EU)