
SCD7600 - Radio Soundmaster - Free user manual and instructions
Find the device manual for free SCD7600 Soundmaster in PDF.
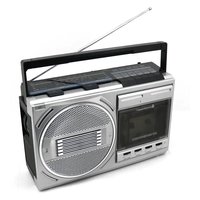
| Product Type | Clock radio with CD player, Internet radio, DAB+, FM, Bluetooth, USB and AUX |
| Power Supply | AC mains cable (adapter supplied) or 6 UM-2 (size C) batteries |
| Display | Backlit display with brightness adjustment |
| Network Connectivity | Wi-Fi (802.11 b/g/n) for Internet radio and UPnP/DLNA |
| Bluetooth | Bluetooth audio reception (pairing with a source device) |
| USB Port | Playback of audio files from a USB stick |
| AUX Input | 3.5 mm jack socket for external source |
| DAB / DAB+ Radio | Digital reception with auto scan and presets |
| FM Radio | FM reception with RDS, auto scan and presets |
| Internet Radio | Access to thousands of stations via Skytune portal |
| CD Player | Audio CD, with play, pause, stop, next/previous track, repeat functions |
| Docking Station / Charger | No |
| Alarm | 2 independent alarms with source selection (buzzer, favorites, FM, DAB+) and snooze |
| Sleep Timer | Adjustable from 15 to 180 minutes |
| Equalizer | EQ presets for different music genres (headphone/line output) |
| Remote Control | Yes, infrared with dedicated buttons |
| Speaker | Built-in speaker |
| Headphone Output | 3.5 mm jack socket |
| Maintenance and Cleaning | Clean with a dry cloth only. Do not use detergents or abrasive cloths. |
| Safety | Do not open the device (risk of electric shock). Avoid humidity, direct sunlight and heat sources. Do not place objects filled with liquid on the device. Keep batteries out of reach of children. |
| General Information | Brand: Soundmaster, Model: SCD7600. Manufacturer: Wörlein GmbH, Germany. |
Frequently Asked Questions - SCD7600 Soundmaster
User questions about SCD7600 Soundmaster
0 question about this device. Answer the ones you know or ask your own.
Ask a new question about this device
Download the instructions for your Radio in PDF format for free! Find your manual SCD7600 - Soundmaster and take your electronic device back in hand. On this page are published all the documents necessary for the use of your device. SCD7600 by Soundmaster.
USER MANUAL SCD7600 Soundmaster
Email.info@soundmaster.de
GERMANY
Web: www.soundmaster.de
CE

Copyright by Woerlein GmbH, 90556 Cadolzburg, www.soundmaster.de
Do not dispose of this product with the normal household waste at the end of its life cycle. Return it to a collection point for the recycling of electrical and electronic devices. This is indicated by the symbol on the product, user manual or packaging
The materials are recyclable according to their labeling. By reusing materials or other forms of recycling old devices and packaging, you are making an important contribution to protecting our environment. If necessary, remove batteries and personal data before disposal free of charge and ask your local authority about the responsible disposal point

WARNING
Risk of electric shock
Do not open!

Caution: To reduce the risk of electric shock, do not remove the cover (or back). There are no user serviceable parts inside. Refer servicing to qualified service personnel.

This symbol indicates the presence of dangerous voltage inside the enclosure, sufficient enough to cause electric shock.

This symbol indicates the presence of important operating and maintenance instructions for the device.

Used batteries are hazardous waste and NOT to be disposed of with the household waste! As a consumer you are legally obligated to return all batteries for environmentally responsible recycling - no matter whether or not the batteries contain harmful substances*)
Return batteries free of charge to public collection points in your community or shops selling batteries of the respective kind. Only return fully discharged batteries *) marked Cd = cadmium, Hg = mercury, Pb = lead
- Only use mercury and cadmium-free batteries.
- Used batteries are hazardous waste and NOT to be disposed of with the household waste!!!
- Keep batteries away from children. Children might swallow batteries.
- Contact a physician immediately if a battery was swallowed.
- Check your batteries regularly to avoid battery leakage.
- Batteries shall not be exposed to excessive heat such as sunshine, fire or the like.
- CAUTION: Danger of explosion if battery is incorrectly replaced
- Replace only with the same or equivalent type

WARNING
DO NOT INGEST BATTERY, CHEMICAL BURN HAZARD
This product contains a coin/button cell battery. If the coin/button cell battery is swallowed, it can cause severe internal burns in just 2 hours and can lead to death. Keep new and used batteries away from children. If the battery compartment does not close securely, stop using the product and keep it away from children. If you think batteries might have been swallowed or placed inside any part of the body, seek immediate medical attention.

CAUTION - INVISIBLE LASER RADIATION WHEN OPENING THE COVER OR PRESSING THE SAFETY INTERLOCK. AVOID EXPOSURE TO THE LASER BEAM.

To prevent possible hearing damage, do not listen at high volume levels for long periods
Safety, Environmental and Setup Instructions
- Use the device in dry indoor environments only.
- Protect the device from humidity.
- This apparatus is for moderate climates areas use, not suitable for use in tropical climates countries.
- No objects filled with liquids, such as vases, shall be placed on the apparatus.
- The mains plug or an appliance coupler is used as the disconnect device, the disconnect devices shall remain readily operable.
- Connect this device to a properly installed and earthed wall outlet only. Make sure the mains voltage corresponds with the specifications on the rating plate.
- Make sure the mains cable stays dry during operation. Do not pinch or damage the mains cable in any way.
- A damaged mains cable or plug must immediately be replaced by an authorized service center.
- In case of lightning, immediately disconnect the device from the mains supply.
Children should be supervised by parents when using the device. - Clean the device with a dry cloth only.
- Do NOT use CLEANING AGENTS or ABRASIVE CLOTHS!
- Do not expose the device to direct sunlight or other heat sources.
- Install the device at a location with sufficient ventilation in order to prevent heat accumulation.
- Do not cover the ventilation openings!
- Install the device at a safe and vibration-free location.
- Install the device as far away as possible from computers and microwave units; otherwise radio reception may be disturbed.
- Do not open or repair the enclosure. It is not safe to do so and will void your warranty. Repairs only by authorized service/ customer center.
- No naked flame sources, such as lighted candles, should be placed on the unit.
- When you are necessary to ship the unit store it in its original package. Save the package for this purpose.
- In case of malfunction due to electrostatic discharge or fast transient (burst), remove and reconnect the power supply.
- If the unit is not using for a long period of time, disconnect it from the power supply by unplugging the power plug. This is to avoid the risk of fire.
- The device is equipped with a "Class 1 Laser". Avoid exposure to the laser beam as this could cause eye injuries.
LOCATION OF CONTROLS
FRONTSIDE
1 VOLUME + / -
2, SPEAKER
3 SCAN+
4 SCAN-
5 SELECTION Left / BACK
6 SELECTION Right / ENTER
7 STOP
8 DISPLAY
9 INFRARED SENSOR
10 TUNE/SELECT
11 PLAY PAUSE
12 FAVORITE
13 POWER ON/OFF
14 MENU / MODE
15 ALBUM
16 USB-Socket

BACKSIDE
17 AUX-IN Socket
18 Battery door
19 Headphone socket
20 AC socket

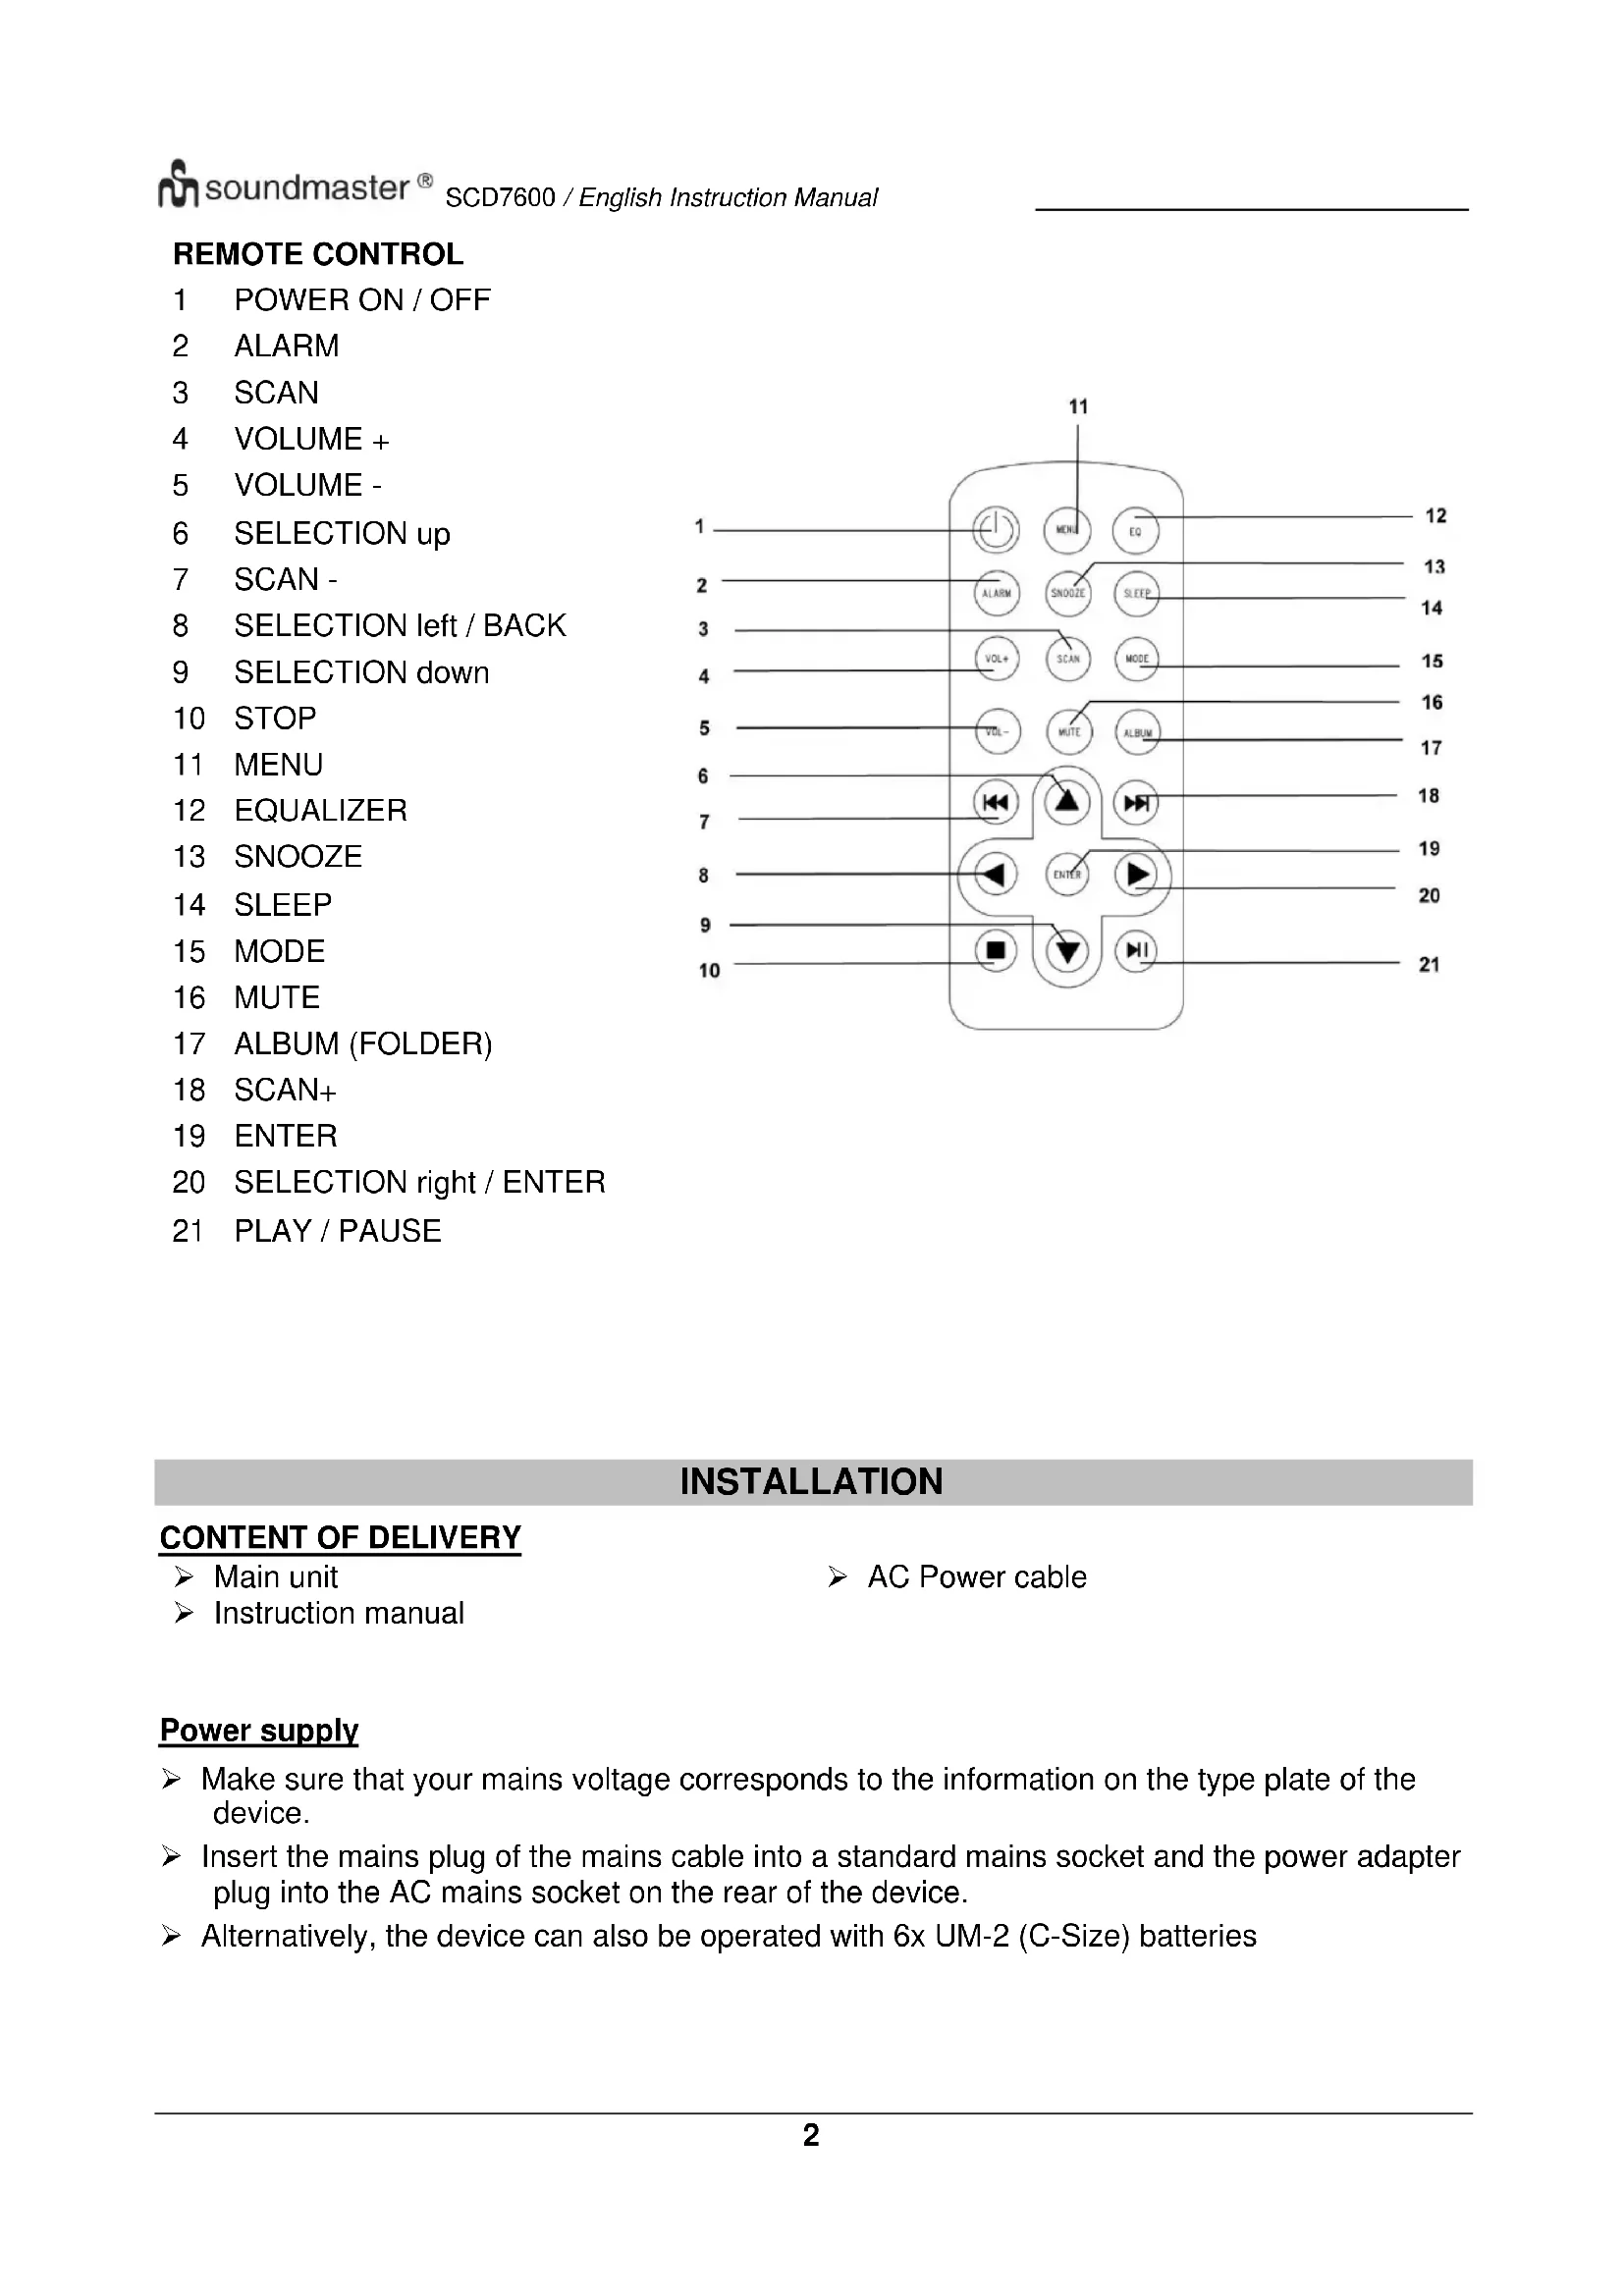
REMOTE CONTROL
1 POWER ON/OFF
2 ALARM
3 SCAN
4 VOLUME +
5 VOLUME -
6 SELECTION up
7 SCAN-
8 SELECTION left / BACK
9 SELECTION down
10 STOP
11 MENU
12 EQUALIZER
13 SNOOZE
14 SLEEP
15 MODE
16 MUTE
17 ALBUM (FOLDER)
18 SCAN+
19 ENTER
20 SELECTION right / ENTER
21 PLAY/PAUSE

INSTALLATION
CONTENT OF DELIVERY
Main unit
Instruction manual
AC Power cable
Power supply
Make sure that your mains voltage corresponds to the information on the type plate of the device.
Insert the mains plug of the mains cable into a standard mains socket and the power adapter plug into the AC mains socket on the rear of the device.
Alternatively, the device can also be operated with 6x UM-2 (C-Size) batteries
BASIC OPERATIONS
POWER ON / OFF
Press and hold the "POWER" button to torn the unit on.
During on mode, press and hold the "POWER" button to turn the unit off.
SELECTING MODES
During on mode, press the "MENU" button to get into the main menu. Turn the "TUNE/SELECT" Knob until your desired mode is shown on the display and press the "TUNE/SELECT" Knob to select the desired mode.
ADJUSTING VOLUME
Rotate the "TUNE/SELECT" knob to the right side to decrease or increase the volume.
GETTING STARTED
Press and hold the Power button to turn the unit on.
SELECTING LANGUAGE
When you switch on the radio for the first time, you have to select the desired language.
CONNECT TO WIRELESS LAN (WI-FI)
Use the "TUNE/SELECT" knob to scroll through the characters, when the correct one is highlighted, press "TUNE/SELECT" button to input the next character. When it comes to the last character of the password and it is highlighted, press and hold "TUNE/SELECT" to confirm. Note: The security code is case sensitive.
- If this is first time use, the Configure Network wizard will be displayed. Choose Yes to start configuring network. Turn the "TUNE/SELECT" knob to highlight Yes and press "TUNE/SELECT" to confirm.
- Select Add/Remove AP from the list, use the "TUNE/SELECT" knob to scroll and press it to confirm, then choose Add AP (Scan):
Configure Network?
Yes> No
Add/Remove AP
AP:[ ]
Add AP
Remove AP
- It will start scanning the available Wi-Fi routers around. Scroll to your network and press "TUNE/SELECT" to confirm. If your Wi-Fi network has a security code protected, it will ask you to enter the passphrase/password.
Note: The password is case sensitive. Please consult with the one who setup your network if you don't know the password.
- When the Wi-Fi connection is successful, the Association Complete will be shown briefly. The Wi-Fi signal bar will appear on the top left corner of the display.

OVERVIEW OF FEATURES AND FUNCTIONS
Press "MENU" to enter the main menu. Scroll by rotating the "TUNE/SELECT" knob:
| My Favorite | To show the list of favorite stations which have been assigned to the presets. There are up to 99 presets available. |
| Internet Radio | Start exploring the worldwide radio stations and music here. |
| Media Centre | You can browse and stream music from your network via UPnP or DLNA Compatible devices. |
| DAB Radio | Pick up DAB+ and DAB radio signal if available in your local area. |
| FM Radio | Receive ordinary FM radio stations in your local area. |
| Bluetooth | Bluetooth playback, to play audio stream (receive) from another Bluetooth enabled device after pairing/connected each other. |
| AUX-IN | Connect an other device via AUX for playback |
| CD | Listen to CD's |
| USB | Connect a USB device for playback |
| Alarm | Set two different Alarms. Alarm sound can be played from different sources |
| Sleep Timer | Enable the timer to turn the radio in standby after the selected time elapsed. |
| Configuration | More options/settings available to personalize as you desire. |
INTERNET RADIO
On the main menu, choose Internet Radio and you will find the options below:
Skytune
Search
History
Skytune
Select Skytune to start enjoying thousands of radio stations over the world. You can filter your search by Region, Music genre and talks.
Local Radio
Globe All
Globe By Genre
Globe By Region
The Local Radio let you access quickly the stations available in your local area through internet connection.
Note - You can change the Local Radio area under Configuration> Local radio setup. Please refer to section 11 for the details.
Note - When you scroll along the list of Globe All and want to quickly reach to a certain point of the long list, input the index number on the remote control to quickly jump to that point. For example, press 2 and 8 and press "OK", it will highlight the station no. 28.
Search
Instead of browsing the radio station list, you can input a few characters of the desired station to filter out / short list the stations.
History
The radio memorizes the stations you have listened up to 99 stations.
If you have listened more than 99 stations, it will supersede the first station that you have listened.
Start playing internet radio
When a radio station starts playing, more radio information can be displayed. Press the Right button in the state of the playing screen below:

Every time you press the button, it will show various informations e.g. time, the streaming bit rate, name of the song, artist name (if available), the big time clock and the radio's station logo (if available):


My Favorite
This is to show the list of your favorite stations which have been assigned to the presets.
Preset a station
When a radio station is playing, press the "FAVORIT" button, you will see the icon appears as below. It means the station is added to the Favorite list.

The new added station will always show in the last item on the Favorite list. You can store up to 99 presets.
Recall a station
Press the "FAVORIT" button to recall the list of presets, or navigate to My Favourite on the main menu and select it to confirm.
Edit your favorite list
On the Favorite list, choose the radio station you want to edit then press the button. It will enter the Edit menu with the following options:
Move down - To move down the ranking of a station.
Move up - To move up the ranking of a station
Delete To delete a particular station.
Move to Top To move a station to the top of the ranking
Move to Bottom To move a station to the bottom of the ranking
MEDIA CENTRE
The device supports UPnP and is DLNA-compatible.
This provides the opportunity to stream music from your network. However, this requires you to have a compatible device in your network that can function as a server. This can be e.g., a network hard drive or a conventional PC with e.g., Windows 10 via which access to the shared folder or media sharing is permitted. The folders can then be browsed and played on the unit.
Note - Please make sure your computer laptop is on the same Wi-Fi network as the Radio before you start using this function.
Music streaming
Once the UPnP/DLNA compatible server is configured to share media files with your radio, you can start music streaming.
On the main menu, select Media Centre and choose UPnP.
It may take a few seconds for the radio to complete the scan for available UPnP servers. If no UPnP servers are found, it will show Empty List.
After a successful scan is done, select your UPnP server.
The radio will show the media categories available from the UPnP server, e.g. 'Music', 'Playlists' etc.
Choose the media files that you wish to play.
You can set the mode of playback under Configuration >Playback setup.
My Playlist
You can make your own playlist for the UPnP music files. Choose and highlight the song you want to add to playlist, press and hold the "TUNE/SELECT" knob until the sign appears. The song will be added to My playlist.
Clear My Playlist
Remove all songs in "My Playlist" to allow a new playlist to be prepared.
Note - If you have DLNA compatible servers available, follow the steps described above to browse the audio files from DLNA compatible device on the unit to play.
DAB RADIO
If there is Digital Audio Broadcasting (DAB) in your area, the unit can pick up the DAB stations as well. The unit supports both DAB and DAB + .
Place the unit close to the window and extend the antenna as far as it can go to get the best reception.
On the main menu, scroll to DAB Radio to switch to DAB Radio. Press "TUNE/SELECT" to start.
It will ask whether you want to Scan DAB Station. Press "OK" to start scanning and it will show the progress on the number of channels received. When it is done, a preset page will be displayed for your action.

You can select the channel and start listening to it. Whenever you want to add to My Favourite, press the "FAVORIT" button and it will add to the favorite list.
Always press the button (or "Back/Left" on the unit) to return to the Preset list.
Note - When a DAB radio is playing, press the button to view more radio information, each time you press the Right button, it will display various information at a time such as radio frequency, rolling texts (if available) and big time clock.
New digital radio stations should be picked up automatically by the unit if they are part of a multiplex you already received. Otherwise you need to do the Preset Scan again.
FM RADIO
To receive the ordinary FM stations. Place the unit close to the window and extend the antenna as far as it can go to get the best reception.
On the main menu, scroll to FM Radio to switch to FM Radio. Press "TUNE/SELECT" to start.
It will ask whether you want to Scan FM Station. Press "TUNE/SELECT" to start scanning and it will show the progress on the number of channels are found. When it is done, it will automatically save the found channels on presets and display the list for your action.

You can select the channel and start listening to it. Whenever you want to add to My Favourite, press the "FAVORIT" button and it will add to the favorite list.
Always press the button (or "Back/Left" button on the unit) to return to the Preset list.
Note - When it is playing FM radio, press the button to view more radio information, each time you press the button, it will display various information at a time such as radio frequency and big clock display.
Manual Tune
To manual tune to the frequency, long press "TUNE/SELECT" on the unit, until you see the "Tuning" appeared on the display, at the bottom right corner. Use the / button on remote to tune the frequency. When done, long press the "OK" button to exit manual tune

BLUETOOTH
Note: This device is not able to pair with Bluetooth-speakers or Bluetooth-headphones.
Before transmission between your Bluetooth device and the radio is possible, both devices must be coupled. This process is called "pairing". The unit is served as a receiver, to receive music stream to play on the unit.
If you have already coupled to a Bluetooth device before, this connection will be restored automatically when both devices are in range and Bluetooth operation has been selected on the radio. "Pairing" does not have to be repeated. This function may need to be activated in your Bluetooth device, however.
- Push the "Menu" button to display the selection menu for the different operating modes.
- Turn the "TUNE/SELECT" knob to select the operating mode Bluetooth and push the "TUNE/SELECT" confirm you selection.
- Switch your Bluetooth device to which you want to connect the radio on and activate the pairing mode here. The device scans for Bluetooth devices in the reception range.
- When the radio is found, your Bluetooth device shows its name SCD7600.
- Select the radio at your Bluetooth device.
- Start playback on your Bluetooth device. Playback now takes place using the radio
AUX
With the aux-in function, you can connect other playback devices such as your smartphone or tablet via a 3.5mm jack plug.
To do this, select "AUX" in the main menu and confirm your selection with the "TUNE / SELECT" button. You can now start the playback.
CD
The SCD7600 has an audio book function, this allows an interrupted playback to be continued at the point at which it was interrupted. This can happen, for example, when changing the source.
CD-Playback
Select "CD" in the main menu and confirm with the "TUNE / SELECT" button
Place a CD in the CD compartment and close the compartment
The CD will start playing automatically
- To pause the playback, press the ^一 button. Press the ^一 button again to continue the playback.
- To stop the playback, press the "■" button
- Press the "按钮, to skip back to the previous track.
- Press the _v button to skip forward to the next track.
- To select a specific album, press the "ALBUM" button. "Album" will now be displayed in the lower right corner of the screen. Now press the "or the " button to choose between your albums.
Repeat function
Press the „MODE“ button to select between the repeat modes:
The entire CD is repeated
The current track is repeated
USB
Select "USB" in the main menu and confirm your selection with the "TUNE / SELECT" button.
Connect a USB stick to the USB socket on the front of the device.
Operation is the same as in CD mode.
ALARM
You have the option of setting two different alarm times. To do this, select "Alarm" in the main menu and confirm with the "TUNE / SELECT" button.
- Select Alarm 1 or Alarm 2 and confirm again.
- Now choose whether the alarm clock should be switched on or off
- If you select Activate alarm clock, you can make the following settings.
Time
Sound Source: Buzzer, My Favorites, FM, DAB+
Frequency: Once, Daily, set weekdays
Volume: Choose volume
Alarm duration: Choose between 15 and 180 Minutes
Once you are done with your settings, press the button.
The alarm clock icon will now appear in the top left corner of the screen.
To deactivate the alarm clock, select "Alarm clock" in the main menu and select the alarm clock. Now press "Switch off". The alarm clock is now deactivated and the symbol on the screen is no longer active.
SLEEP TIMER
You can set the timer to let the radio goes standby after the selected time elapsed in the range of 15 minutes to 180 minutes.
Press the "MENU" button to get in the main menu. Select "Sleep Timer" and press "TUNE/SELECT" to confirm.
Turn the "TUNE/SELECT" until your desired Sleep Time is displayed. Press the "TUNE/SELECT" to confirm your selection.

CONFIGURATION
Here you will find the complete settings / options available to configure your own unit.
Wi-Fi Network
> Add / Remove AP
Add AP - It will scan out a list of routers around.
Remove AP - If you have already added a router and want to remove it, choose this option. Note - Always bring the unit within 2 meters of the Wi-Fi router for setup.
>AP:[]
If you have added more than one routers on the radio and want to switch to another one, select this option to change.
Signal
This is to show the strength of the Wi-Fi Signal of the Wi-Fi router as received by the radio. Usually signal levels lower than -70dBm is at weaker level and if it affects the reception of your radio, you may need to optimize the router location or check any problem of the router itself.
IP
The IP is set Dynamic by default. Select to change Fixed IP according to your network condition.
DNS
The DNS is set Dynamic by default. Select to change
Wi-Fi Channels
Not all of the Wi-Fi channels are available in every country. There may be variation between different countries. Therefore it is necessary to choose the Wi-Fi channels to ensure the Wi-Fi performs satisfactory.
We have already set the channels according to the requirement in different countries. Choose the country you are staying from the list to get the correct channel.
The Europe/United Kingdom is set by default, push the
"TUNE/SELECT" knob to edit the country selection.
Date and Time
The radio will set your local time automatically after the internet connection is completed. If you want to do manual setting, change it by the following options:
Time zone
Auto-set Time Zone: This option is set by default.
Manual-set Time Zone: Choose this option if you want to set the time in another region.
Choose and highlight the region/city you prefer and press "TUNE/SELECT" to confirm.
Coupled with NTP (use network time) and DST (Daylight time saving) will be adjusted automatically if you choose to use network time (NTP).
Set Time Format
Choose either 12-hour or 24-hour notation you prefer.
Set Date Format
NTP (Use network time)
NTP is designed to synchronize a device's clock with a time server. Your unit will synchronize the time server by default every time it powers up and connects to Internet. This ensures a very high degree of accuracy in the unit's clock. You can change to use other time server by inputting the URL address (see below NTP server). You can choose "Do not use network time" if you don't want it to.
If you choose not to use NTP for clock synchronization, highlight the NTP (Network time protocol) and press "TUNE/SELECT" to make the change. You will see the Set Date & Time appeared on the menu. Select it and adjust the date and time as you desire.
NTP Server
NTP is designed to synchronize a device's clock with a time server. Here it shows the server being used for the unit.
Language
The default language is English, you can choose other languages as preferred. Scroll with the "TUNE/SELECT" knob to the item with and press "TUNE/SELECT". Scroll to highlight and press "TUNE/SELECT" to select your language of choice. English, French, Spanish, Italian, German, Dutch, Polish, Russian and Simplified Chinese are available.
Local Radio
The radio is set by default to detect the radio stations in your local area automatically through internet connection and these stations can be accessed by a press of "Local" button. You can also set Local in another region if you want. Highlight the Local Radio and press "TUNE/SELECT". Choose Manual-set Local radio to change the region setting.
DAB Setup
DAB Preset Scan
You can always carry out a new scanning of DAB channels by selecting this option. All current presets and channels will be erased.
DAB Radio Preset
The scanned DAB stations will be listed here for management. You can move the position or even delete any station. Scroll to the station and press button. A pop up window will be presented: Move up, Move down and Delete.
FM Setup
>FM Area
Choose the Region according to your physical location to define the search range for the unit.
>FM Preset Scan
You can always carry out a new scanning of FM channels by selecting this option. All current presets and channels will be erased.
The radio at the lowest frequency of the scanned values will be highlighted. The preset list will be saved unless a new preset scan is carried out.
> FM Radio Presets
You can adjust the preset ranking by Move down, Move up or Delete it. Highlight one of the preset, then press the button, it will enter into the Edit menu.
Always press the button to return to the Preset list.
Playback Setup
This is to set the mode of playback under UPnP/DLNA compatible streaming: Repeat All, Repeat Once or Shuffle.
Resume when Power on
This function is ON by default. The radio will resume to the last state of mode when the radio is power on next time, e.g. if it was playing radio station before power off, it will resume playing the last listened station when it is power on the next time.
Dimmer
You can set the backlight level for the display as you prefer. There are two settings: Mode and Level
> Mode - Normal or Dim
Normal - the display will stay with the same level of brightness all the time without dim down.
Dim - the display will dim down after 20 seconds if no operation is made on the radio.
> Level - Bright and Dim
Bright - This is to adjust the level of brightness in Normal mode.
Dim - This is to adjust the level of brightness in Dim mode.
> Dimmer in Standby
When the radio is in Standby, rotate the "TUNE/SELECT" knob to adjust the backlight level at your preference which you feel comfortable especially during night time.
EQ (Equalizer)
Various music genres can be set.
Buffer Time
Sometimes you may experience uneven playback of the internet radio. This can happen if the internet connection is slow or network congestion occurs. To help improving the situation, you can choose longer buffer time to get a few seconds of radio stream before beginning to play.
The default value is 2 seconds. You can choose 5 seconds if you prefer to have a longer buffering time.
Information
View the Network and System Information of your radio.
When you use your PC to manage the My favorite stations, you have to use the IP address and you can view this info from here. Then type in the IP address (Configuration > Info > Network > IP) to your PC's browser input window.
Software Update
There may be software release to upgrade features of the radio from time to time. Check the update regularly to keep your radio up to date with the latest software.
Reset to Default
You can do the reset to clear all the settings and return to default settings. Please note all the Station presets, Settings and configuration will be erased after you have performed the Reset.
You can add your favorite radio station if you know the published audio stream URL of the radio. We provide an embedded server for your radio and you can manage your favorite stations anytime to add or edit the list. Follow the steps below to access the embedded server:
Connect your PC to the same Wi-Fi network as your radio.
Locate the IP address in either way as follow:
On the main menu, go to Configuration > Information > Network > IP
Open the web browser (we support Internet Explorer and Chrome) in your PC and type the IP address of the radio (e.g. 192.168.1.11). The screen will pop up as below:
MY STATIONS


You can input the name and URL of a new radio station under the Add channel section, then click Submit. The new station will sync to the Favorite list of your radio immediately. You can add up to 99 radio stations.
TROUBLE SHOOTING
| Problem | Cause | Solutions |
| Cannot connect to Wi-Fi network | Network down | ➢ Confirm that a Wi-Fi or Ethernet Wired connected PC can access the internet (i.e. can browse the web) using the same network. ➢ Check that a DHCP server is available, or that you have configured a static IP address on the radio. ➢ Check that you firewall is not blocking any outgoing ports. As a minimum the radio needs access to UDP and TCP ports 80,443 and 8008, DNS port 53. |
| Router restricts access to listed MAC addresses | Obtain the MAC address from Configuration > Information > Network > Wi-Fi MAC and add to the allowed equipment list on your access point. Note: The radio has separate MAC addresses for wired and wireless networks; | |
| Insufficient Wi-Fi signal strength | Check distance to router; see if a computer can connect to the network in this location Optimize the distance of the router's location | |
| Unknown encryption method | Change encryption method on router. The radio supports WEP, WPA, WPA2 | |
| Firewall preventing access | Windows Media Player: varies -non- Microsoft firewalls may require configuration for UPnP. | |
| If your radio can connect to the network successfully, but is unable to play particular stations | The station is not broadcasting at this time of the day (remember it may be located in a different time zone).The station has too many people trying to attach to the radio station server and the server capacity is not large enough.The station has reached the maximum allowed number of simultaneous listeners.The link on the radio is out of date. This is updated automatically every day, so the next time you turn on the link will be recognised. | |
| No DAB/FM reception | Please carry out "Factory Reset" on the radio and extend the antenna.Move the radio close to the window. | |
| DAB/FM Radio reception is poor | Please check that the aerial is extended for the maximum signal strength and improved reception. Check that you do not have other electrical equipment too close to your radio, causing interference. | |
| No sound | Adjust the volume using the Tune/Select knob.Please check that the mains power lead is connected at the back of the radio and the mains power wall socket is switched on. |
Germany Web: www.soundmaster.de
The current instruction manual can be downloaded from www.soundmaster.de
Copyright by Woerlein GmbH, 90556 Cadolzburg, www.soundmaster.de
Duplication only with permission of Woerlein GmbH
CE

PROTECTION DE L'ENVIRONNEMENT

CLASS 1 LASER PRODUCT
KLASSE 1 LASER PRODUKT
LUOKAN 1 LASER LAITE
KCLASS 1 LASER APPARAT
PRODUCTO LASER CLASE 1
ATTENTION - RADIATION LASER INVISIBLE LORSQUE VOUS OUVREZ LE COUVERCLE OU APPUYEZ SUR L'ENCLENCHEMENT DE SECURITE. EVITEZ TOUTE EXPOSITION AU RAYON LASER

Web: www.soundmaster.de
CLASS 1 LASER PRODUCT
KLASSE 1 LASER PRODUKT
LUOKAN 1 LASER LAITE
KCLASS 1 LASER APPARAT
PRODUCTO LASER CLASE 1
WAARSCHUWING-ONZICTBARE LASERSTRALING WANNEER DE BEHUIZING GEOPEND WORDT OF DE INTERNE BEVEILIGING UITGESCHAKELD. VERMIJD BLOOTSTELLING AAN DE LASERSTRAAL.

Press and hold the Power button to turn the unit on.
SELECTING LANGUAGE
Web: www.soundmaster.de
Web: www.soundmaster.de
Aktuálnu verziu námovu na obsluhu je možné stiahnut' z www.soundmaster.de
Cadolzburg, www.soundmaster.de
Reprodukcia iba s vyslovnym suhlasom spolocnosti Woerlein GmbH


TECHNICAL SPECIFICATIONS
| Hersteller | Fabricante | Wörlein GmbH, Gewerbestrasse |
| Manufacturer | Producent | 12, D-90556 Cadolzburg www.soundmaster.de |
| Fabricant | Tilverkare | |
| Fabrikant | Výrobce | |
| Fabbricante | Výrobca | HRB-N° 771 bei Amtsgericht Fürth/Bay. |
| Fabricante | ||
| Spannungseingang | Entrada de energia | |
| Power input | Strømindgang | |
| Entrée d'alimentation | Krafttuttag | 230V~ 50/60Hz 0.5A max. |
| Voedingsingang | Vstup napájení | |
| Ingresso di alimentazione | Zdroj napájania | |
| Entrada de alimentación | ||
| DAB Bereich | Gama DAB | |
| DAB range | DAB-række | |
| Plage DAB | DAB-intervall | Band III 174.928 - 239.200MHz |
| DAB-bereik | Rozsah DAB+ | |
| Portata DAB | Rozsah DAB+ | |
| Rango DAB+ | ||
| UKW Bereich | Gama FM | |
| FM range | FM rækkevidde | |
| Plage FM | FM-intervall | 87.5MHz - 108.0MHz |
| FM-bereik | Rozsah pásma FM | |
| Portata FM | Rozsah frekvenci FM | |
| Rango de FM | ||
| Festsenderspeicher | Estações predefinidas | |
| Preset Stations | Forudinstillet station | |
| Stations préselectionnées | Fürinställd station | 99 |
| Voorkeuzestation | Přednastavení stanic | |
| Stazione in presezione | Predvolné stanice | |
| Presintonías | ||
| Bluetooth® - Version | Bluetooth® - Versão | |
| Bluetooth® - Version | Bluetooth® - version | |
| Bluetooth® - Version | Bluetooth® - version | Version 5.0 |
| Bluetooth® - Versie | Verze Bluetooth® | |
| Bluetooth® - Versione | Bluetooth® - verzia | |
| Bluetooth® - Version | ||
| WLAN-Verbindung | Conectividade | |
| Connectivity | Tilslutninger | |
| Connectivité | Anslutning | WiFi 2.4GHz |
| Draadloos network | Pripojení | |
| Connettività | Pripojite'lnost' | |
| Conectividad | ||
| Audioausgangsleistung | Saida de potência de áudio | |
| Audio power output | Lydeffektudgang | |
| Sortie de puissance audio | Ljudeffekt | |
| Audio-uitgangsvermögen | Napájecí vystup zvuku | |
| Uscita di potenza audio | Výstupný zvukový vykon | |
| Potencia de salute de audio |
Standby consumption with setting "Keep network in standby"
D 90556 Cadolzburg, Germany
Tel: +49 9103 71 67 0
Fax: +49 9103 71 67 12
E-Mail: info@soundmaster.de
Internet: www.soundmaster.de
Hereby, Worlein GmbH declares that this device is in compliance with the essential requirements and other relevant provisions of Directive 2014/53/EU.
A copy of the declaration of conformity can be obtained from the above address.

- WARNING
- Risk of electric shock
- Do not open!
- DO NOT INGEST BATTERY, CHEMICAL BURN HAZARD
- LOCATION OF CONTROLS
- FRONTSIDE
- BACKSIDE
- REMOTE CONTROL
- INSTALLATION
- CONTENT OF DELIVERY
- Power supply
- BASIC OPERATIONS
- POWER ON / OFF
- SELECTING MODES
- ADJUSTING VOLUME
- GETTING STARTED
- SELECTING LANGUAGE
- CONNECT TO WIRELESS LAN (WI-FI)
- Note: The password is case sensitive. Please consult with the one who setup your network if you don't know the password.
- OVERVIEW OF FEATURES AND FUNCTIONS
- INTERNET RADIO
- Skytune
- Local Radio
- Search
- History
- Start playing internet radio
- My Favorite
- Preset a station
- Recall a station
- Edit your favorite list
- MEDIA CENTRE
- Music streaming
- My Playlist
- Clear My Playlist
- DAB RADIO
- FM RADIO
- Manual Tune
- BLUETOOTH
- AUX
- CD
- CD-Playback
- Repeat function
- USB
- ALARM
- SLEEP TIMER
- CONFIGURATION
- Wi-Fi Network
- > Add / Remove AP
- >AP:[]
- Signal
- IP
- DNS
- Wi-Fi Channels
- Date and Time
- Time zone
- Set Time Format
- Set Date Format
- NTP (Use network time)
- NTP Server
- Language
- DAB Setup
- DAB Preset Scan
- DAB Radio Preset
- FM Setup
- >FM Area
- >FM Preset Scan
- > FM Radio Presets
- Playback Setup
- Resume when Power on
- Dimmer
- > Mode - Normal or Dim
- > Level - Bright and Dim
- > Dimmer in Standby
- EQ (Equalizer)
- Buffer Time
- Information
- Software Update
- Reset to Default
- MY STATIONS
- PROTECTION DE L'ENVIRONNEMENT
- ATTENTION - RADIATION LASER INVISIBLE LORSQUE VOUS OUVREZ LE COUVERCLE OU APPUYEZ SUR L'ENCLENCHEMENT DE SECURITE. EVITEZ TOUTE EXPOSITION AU RAYON LASER
Brand : Soundmaster
Model : SCD7600
Category : Radio