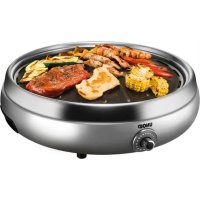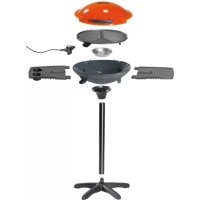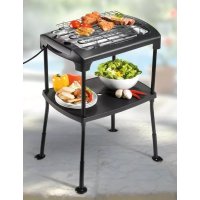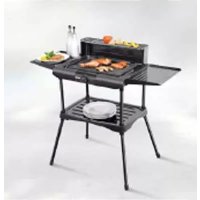
Power Grill 58580 - Barbecue UNOLD - Free user manual and instructions
Find the device manual for free Power Grill 58580 UNOLD in PDF.


User questions about Power Grill 58580 UNOLD
0 question about this device. Answer the ones you know or ask your own.
Ask a new question about this device
Download the instructions for your Barbecue in PDF format for free! Find your manual Power Grill 58580 - UNOLD and take your electronic device back in hand. On this page are published all the documents necessary for the use of your device. Power Grill 58580 by UNOLD.
USER MANUAL Power Grill 58580 UNOLD
natural_image
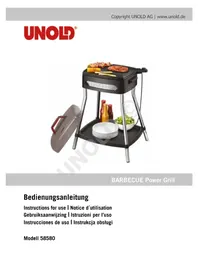
Modern outdoor grill setup with cutlery, food items, and a flat-screen lid (no visible text or symbols)BARBECUE Power Grill
Bedienungsanleitung
Instructions for use | Notice d'utilisation Gebruiksaanwijzing | Istruzioni per l'uso Instrucciones de uso | Instrukcja obsługi
Modell 58580
Impressum:
natural_image
Modern kitchen appliance with digital display and a bucket containing red chili sauce (no visible text or symbols)
natural_image
Illustration of a modern wheat bread machine with a bucket and kitchen utensils (no text or symbols)UNOLD
Care + Style
natural_image
Product photo of a red and black electric toothbrush with a black clip, next to a black conical tool (no text or symbols visible)
natural_image
Close-up of a metallic iron cutting tool with a white cable, no visible text or symbolsUNOLD®
Fan + Heat
natural_image
Close-up of a desktop electric fan with mesh grille and stand (no visible text or symbols)
natural_image
Red portable electric fan with a circular grille and control panel (no visible text or symbols)INHALTSVERZEICHNIS
Instructions for use Model 58580
Technical Specifications....23
Explanation of the symbols 23
For your safety....23
Assembly and first use 27
Temperature control 28
Grill surface 29
Lid 29
Food to be grilled 29
Grilling 30
Grilling without the stand 31
Cleaning and care....31
Recipes 32
Guarantee Conditions....34
Waste Disposal/Environmental Protection ... 34
Service 22
text_image
Exploded view diagram of a smart air conditioner module with numbered parts for identificationEINZELTEILE
DE Ab Seite 10
1 Lid with handle
2 Grill plate
3 | Socket for power cord / thermostat plug
4 Temperature indicator light
5 Temperature controller
6 Grill housing
7 Grease drip pan
8 Grill base
9 Stand tube 4x
10 Holder for the tray
11 Tray
FR Page 35
text_image
Exploded view diagram of a smart air conditioner module with numbered parts for identificationEINZELTEILE
IT Pagina 59
text_image
Three black triangular warning symbols: exclamation mark, steam symbol, and flame iconGrill plate: removable, non-stick coating, grill surface approx. 35 x 40 cm
Dimensions: Approx. 58.5 x 48.0 x 89.5 cm (W/D/H)
Power cord: Approx. 175 cm
Weight: Approx. 11.8 kg
Features: Compact electric grill, large grill surface, variable temperature control, overheating protection circuit, can be completely dismantled, stable plastic grill table with a large tray, can also be used as a tabletop appliance.
Accessories: Operating instructions with recipes
Technology, colours and design are subject to change without notice. Errors and omissions excepted
EXPLANATION OF THE SYMBOLS

This symbol indicates potential hazards that may result in injury or damage to the appliance.

This symbol indicates a potential burning hazard. Please be especially careful at all times here.

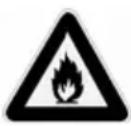
This symbol indicates a possible fire hazard.
FOR YOUR SAFETY
Please read the following instructions and keep them on hand for later reference.
Instructions for persons in the household
- This appliance can be used by children 8 years and older, as well as by persons with reduced physical, sensory or mental abilities or with lack of experience and/or knowledge, if they are supervised or if they have been instructed with regard to safe
use of the appliance and have understood the dangers that can result from use of the appliance.
- Children must not play with the appliance.
- Children are not allowed to perform cleaning and user maintenance, unless they are 8 years of age or older and are supervised.
- Keep the appliance and the power cord out of the reach of children under 8 years of age.
- Only connect the appliance to an AC power supply with voltage corresponding to the voltage specified on the rating plate.
- This appliance must not be operated with an external timer or a remote control system.
- Never immerse the appliance or the power cord in water or other liquids.
- The appliance is intended for household use only, or for similar areas of use, such as,
■ kitchenettes in businesses, offices or other workplaces,
■ agricultural enterprises,
■ for use by guests in hotels, motels or other lodgings,
■ in private guest houses or holiday homes.
Electrical safety
-
Do not clean the appliance or power cord in a dishwasher.
-
The electric grill should never come into contact with water or other liquids. However, if this should happen, all parts must dry completely before it is used again.
- Do not, under any circumstances, use the appliance in the vicinity of containers filled with water (bathtubs, swimming pools, etc.).
- Do not, under any circumstances expose the appliance to rain, snowfall or other wet environmentsn.
- Do not, under any circumstances, touch the appliance or power cord with wet hands.
- For safety reasons, do not, under any circumstances, place the appliance on hot surfaces, a metal tray or a wet substrate.
- Do not place the appliance or power cord near open flames during operation.
- Always use the electric grill on a level, uncluttered surface.
- If you use the appliance as a tabletop grill, ensure that the power cord does not hang over the edge of the countertop or table,
since this can cause accidents, for example, if small children pull on the cord.
- The power cord should never run underneath the appliance or come into contact with hot parts of the appliance, since this could cause it to become damaged.
- If you use an extension cord, ensure that it is intact and suitable for the power draw of the appliance; otherwise, there is a possibility of overheating.
- If you use a cable reel as an extension cord, the power cord must be completely unwound to prevent the possibility of overheating.
- The rated current of the electrical outlet should not exceed 10 A.
- The appliance must only be operated via a residual current device (RCD/FI) with a tripping characteristic of not more than 30 mA. If in doubt consult an electrician.
- Check the appliance, the plug and the power cord regularly for wear or damage. In case of damage to the power cord or other parts, please send the appliance or only the heating element for inspection and repair to our customer service department. Unauthorised repairs can result in serious hazards for the user and void the warranty.
Instructions for set-up and safe use of the appliance
- Use the electric grill only indoors or in protected outdoor areas, such as a balcony or other covered area.
- Only grill outdoors when the weather is dry. Do not, under any circumstances use the appliance outdoors in damp weather. Do not, under any circumstances leave the appliance outdoors after use.
- For safety reasons, the appliance may be used indoors only as a table grill. The appliance may be used as a free-standing grill only in a protected area out of doors.
- Do not, under any circumstances, place the electric grill directly next to a wall or near flammable materials, such as curtains, during use. Maintain a distance of at least 30 cm from other objects.
- Never use charcoal or other flammable fuels.
- To prevent the appliance from overheating, do not, under any circumstances cover the grill with solid or flexible materials, such as aluminium foil, aluminum bowls or other materials.
This would impair the safety of the appliance and cause severe damage.
- Do not touch the grill and the grill plate as long as they are still hot – danger of burns!
- When grilling with the cover closed, hot steam can form under the lid. When opening the lid, maintain a safe distance to avoid burn injuries.
- The grill plate must only be used if it is properly placed in the grill insert. Do not, under any circumstances, use the grill plate without grill insert.
- Do not, under any circumstances, use the appliance if the grease drip pan is not inserted.
- Do not use the appliance with accessories of other manufacturers or brands. Such use could damage the appliance.
- Unplug the mains plug from the electrical outlet after use and before cleaning. Do not, under any circumstances, leave the appliance unattended when the mains plug is plugged in.
- Allow the appliance to cool completely before moving it, cleaning it, etc. – danger of burn injuries!
- Clean the appliance after every use.
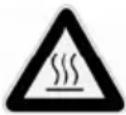
CAUTION:
The appliance is very hot during and after operation!
Never operate the appliance if water or other liquids are in the grease drip pan - danger of file!
Never operate the appliance if the grease drip pan is not inserted.

Do not open the housing of the appliance under any circumstances. There is danger of electric shock.
The manufacturer will not be liable in the event of incorrect assembly, improper or incorrect use or if repairs are carried out by unauthorized third parties.
ASSEMBLY AND FIRST USE
- Remove all packaging materials. Keep packaging materials away from children - danger of suffocation!
- Clean all parts with a damp cloth, as described in the section „Cleaning and care“.
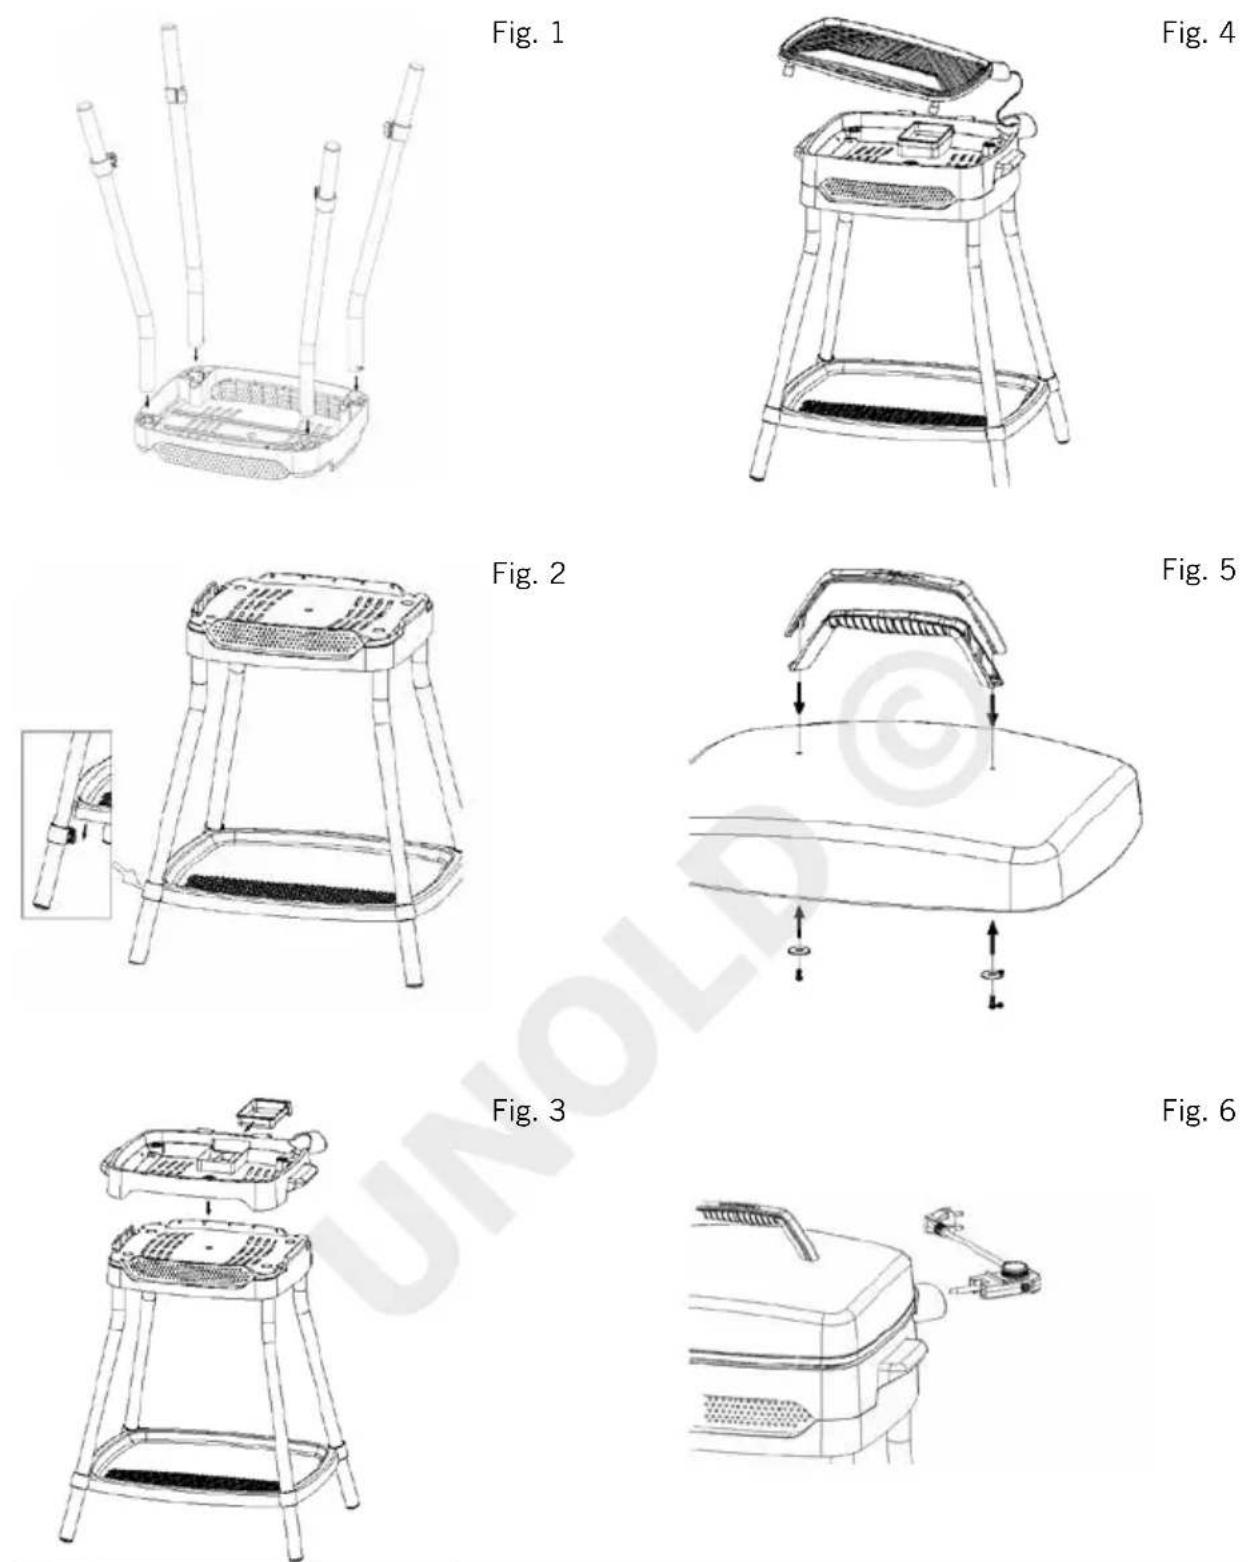
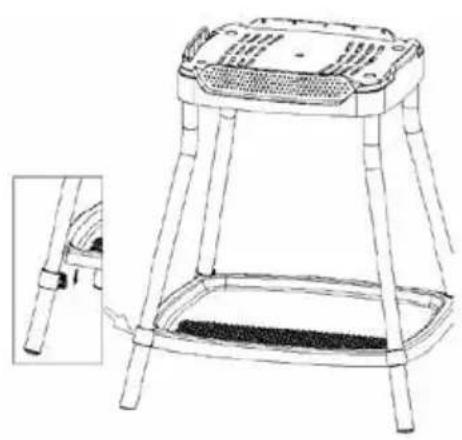
- Fasten the four stand tubes on the grill base (Fig. 1). There is a pin on the end stand tube, which is inserted in the appropriate opening on the grill base and must audibly engage.
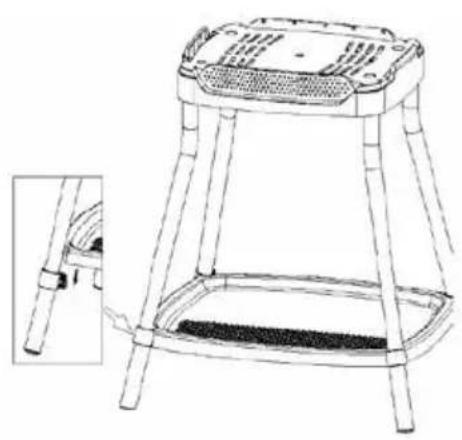
- Insert the tray. There are appropriate holders on the stand tubes, in which the tray must engage (Fig. 2).
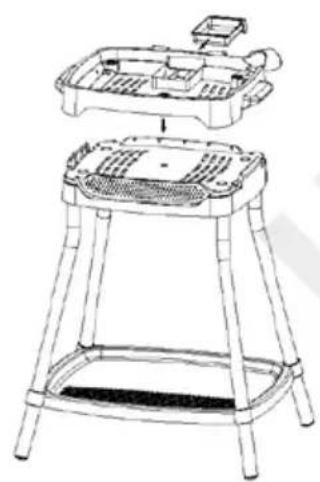
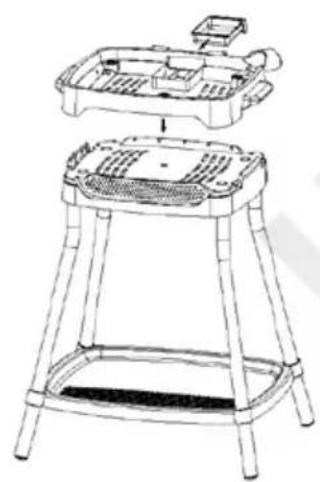
- Now place the grill housing on the grill base (Fig. 3).
- Check whether the grease drip pan is correctly inserted. The grease drip pan must be pushed into the grill housing and must firmly lock in place. To take out the grease drip pan, you must carefully press it downwards and then pull it out.
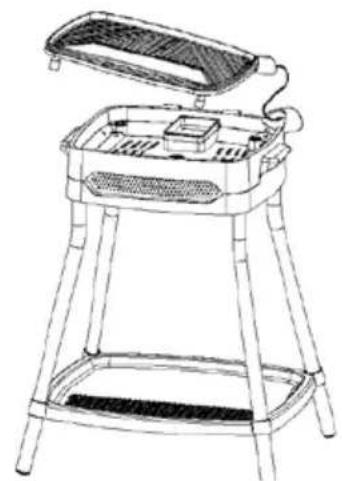
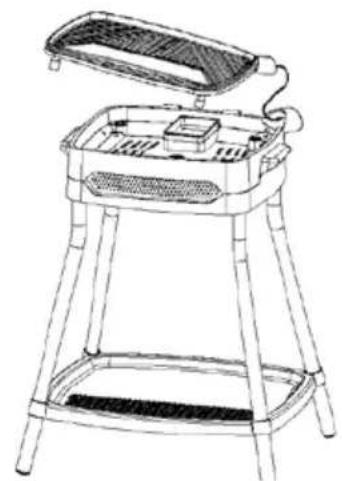
- Insert the grill plate. To do this, hold the grill plate at an angle so that the thermostat connection on the grill plate fits through the opening provided in the grill housing (Fig. 4).
- Before first use, wipe off the grill plate with a damp cloth in order to then apply a light coat oil.
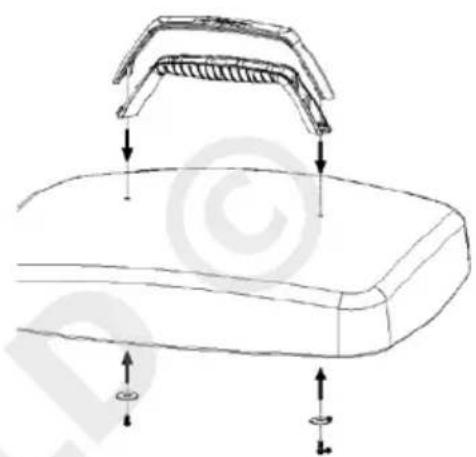
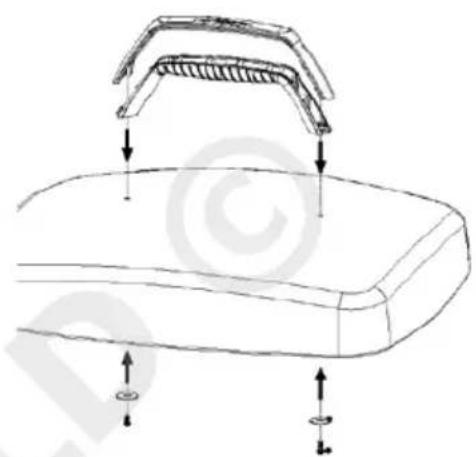
- Fasten the handle on the lid by screwing it on clockwise with two M4 x 14 screws and washers (insert from the inside of the lid) (Fig. 5).
- Check to make sure that the appliance is stable.
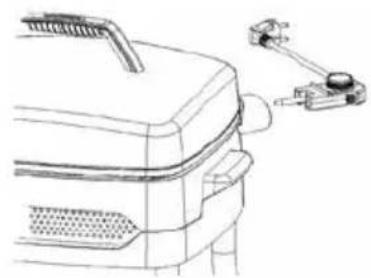
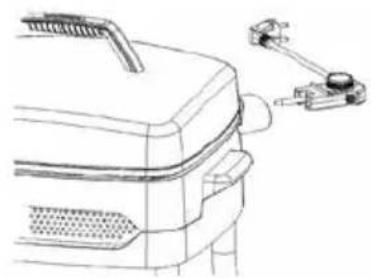
- Connect the thermostat plug to the socket on the appliance. Attention: Always plug the thermostat plug into the socket on the appliance first, and then plug the plug into an electrical outlet! (Fig. 6).
- Plug the plug into a 220-240V\~ electrical outlet and set the temperature controller to the highest temperature.
- Allow the appliance to heat up for a few minutes. In this process, ensure that the room is adequately ventilated.
- At first use, some smoke and odours can form that will disappear after a short time.
- Allow the appliance to cool completely.
- After it has cooled you can use the appliance.
TEMPERATURE CONTROL
The temperature can be adjusted variable.
The following apply as guide values:
■ Low heat (level Lo): e. g. for fish
■ Medium heat (level Med) for tender meat (e.g. poultry), vegetables
■ High heat (level Hi): Steaks
GRILL SURFACE
- The grooved grill surface is ideal for meat, such as steaks.
- We particularly recommend the smooth surface for preparation of vegetables or fish. It is also ideally suited for keeping grilled food warm that was prepared on the grooved grill surface.
- Only use cooking utensils of wood or plastic to place the food on the grill plate, or to remove food from the grill plate. Metallic objects can scratch the coating.
LID
- When grilling in a protected outdoor area, the lid can remain open or closed, as desired. With the lid closed, the grill temperature is slightly higher and the grilled food is cooked more quickly. moreover meat, for example, remains particularly tender.
- When preparing food with the lid closed, be very careful when opening the lid, because hot steam can form – danger of burning!
- Only use the lid if you are grilling in a protected outdoor area. Do not use the lid indoors!

Only use the lid handle to open the lid. When grilling the glass of the lid can become extremely hot – danger of burn injuries!
FOOD TO BE GRILLED
- Try out our recipes or simply use your usual grill recipe.
- If you plan to grill food that has been frozen, bear in mind that it must be completely thawed before it is grilled.
- For meat that has been stored in the refrigerator beforehand, you will obtain the best results if you take it out of the refrigerator some time before grilling and let it acclimatise to room temperature.
- Depending on the preparation method and type of meat, if possible meat should not be salted until after it is grilled. If you marinate the meat before grilling it will be particularly tender and flavourful.
- Grease and meat juices are collected in the grease drip pan. Thus you are grilling with minimal grease and your food is healthier and more easily digestible.
GRILLING

Attention! Never cover the grill surface with aluminium foil, baking paper or other materials. Do not use aluminium grilling trays. Fire can occur due to the heat accumulation.
Note: Indoors we recommend that you only grill without the lid, due to smoke development!
- Place the closed appliance on a heat-resistant surface.
- Ensure that the grease drip pan is properly inserted. Do not, under any circumstances, operate the appliance if the grease drip pan is not inserted, and never fill the grease pan with liquids, such as water.
- Connect the thermostat plug to the socket on the appliance.
- Plug the plug into a 220-240V\~ electrical outlet and set the temperature controller to the lowest temperature.
- Then select the desired temperature for your food. The temperature controller can be adjusted variable (see chapter, Temperature control).
- Allow the appliance to heat up for a few minutes. Then, if necessary, open the lid and place the food on the grill plate.
- As soon as the desired temperature is reached the temperature indicator light goes out.
- Only use cooking utensils of wood or plastic to place the food on the grill plate, or to remove food from the grill plate. Metallic objects can scratch the coating.
- Regularly check whether the grease drip pan is full. If the grease drip pan is full, switch off the appliance and let the appliance cool down, empty the grease drip pan, and then continue preparing the food. The grease drip pan must not overflow, under any circumstances. Otherwise there is danger of fire.
- When your food is prepared turn the regulator on the thermostat plug to „0“ and unplug the plug from the electrical outlet.
- Then unplug the thermostat plug from the socket on the appliance.
- Allow the appliance to cool completely before cleaning it.

CAUTION:
The appliance, the grill plate and the lid are very hot during and after operation!
GRILLING WITHOUT THE STAND
- You can also use the grill without the stand. If you wish to use the grill indoors, for safety reasons this is only permitted without the stand. You may use the appliance as a free-standing grill only outdoors.
- Prepare the appliance as described and place the grill housing with inserted grill plate and grease drip pan on a heat-resistant surface.
CLEANING AND CARE


Allow the appliance to cool completely before cleaning it. Before cleaning, always turn off the appliance and unplug it from the electrical outlet. Do not immerse the appliance, the thermostat plug or power cable in water or other liquids.
- After each use, clean the plate with a soft, damp cloth.
- To avoid damaging the non-stick coating of the plate, do not – under any circumstances – use scouring pads or similar cleaning items. Do not use any abrasive scouring agents, steel wool, metal objects, hot cleaning agents or disinfectants, since these items can damage the appliance.
- Ensure that the connection socket is absolutely dry before the next use.
- The heating coils and heat radiating surfaces under the plate, as well as the housing can be wiped off with a well wrung-out, damp cloth.
- Remove any grease that may have accumulated from the grease drip pan, and clean it in warm rinsing water.
- Likewise, the lid can be cleaned in warm rinsing water.
- Then thoroughly dry the lid and grease drip pan, re-insert them in the appliance.
- Wipe off the grill housing and the tray with a damp cloth and a little dishwashing detergent.
- Ensure that water cannot get into the housing.
- Store the appliance in a dry place where it is protected against dust.
RECIPES
If not specified otherwise, the recipes are for 6 to 8 persons.
Schnitzel appetisers
400 g turkey (cut in 30 extremely thin slices), 2 eggs, salt, pepper, 5 tbsp flour, 5 tbsp grated almonds, 2 tbsp oil, 150 g horseradish cream cheese, 100 g lingonberry preserves, several leaves of iceberg lettuce, 7 slices of brown bread (box-shaped)
Salt and pepper schnitzel meat. Beat the eggs, first dip the meat in the flour, then in the egg, and then in the almonds. Heat the grill to level 4, add the oil. Fry the schnitzel pieces until they are golden brown on both sides, take them out and let them cool.
Mix the cream cheese with 50 g of the lingonberry preserves. Divide the bread slices twice in such a manner that 4 triangles per slice are produced. Spread the cream cheese mixture on the bread triangles, add a small piece of iceberg lettuce, place schnitzel slice on top. For the final touch place a dab of lingonberry preserves on each appetiser.
Pork medallions with pepper butter
250 g butter, lemon juice, salt, 5-6 tbsp pickled peppercorns, 1000 g pork medallions
On the day before: Stir the butter with lemon juice and salt until it is foamy. Stir in the peppercorns. Form the
butter into a roll and let it become firm overnight in the refrigerator.
Pre-heat the grill with 2 tbsp oil on level 4 and grill the medallions 3-4 minutes on each side. Salt and pepper the medallions.
Slice the butter in slices that are 0.5 cm thick, and place the slices of butter on the medallions.
Juniper steak
14 I gin, a few splashes of Worcestershire sauce, 16 crushed juniper berries, 200 g beef steaks, salt, 60 g butter Mix gin, Worcestershire sauce and juniper berries to form a marinades. Pat the steaks dry, pour the marinade over the steaks, cover the container and let them steep in the marinade for 3-4 hours.
Pre-heat grill with 2 tbsp on level 4. Take the meat out of the marinade and pat dry. Grill 3-4 minutes on each side.
Pour the melted butter over the steaks.
Garlic shrimp
30 shelled, raw shrimp, 1 bunch of flat-leaf parsley, juice of one lemon, 2 tbsp olive oil, 3 garlic cloves, several fresh bay leaves, salt, pepper, wooden skewers
On the day before: Finely chop parsley, peel and chop garlic. Mix with oil and lemon juice and let the shrimp steep overnight in the mixture.
Pre-heat grill with 2 tbsp on level 4. Pat shrimp dry, place on the skewer alternating with sage. Fry skewers 3–5 minutes, turn once in this process. Salt and pepper before serving.
Sautéed seafood
2 onions, 2 garlic cloves, 1 bay leaf, 2 tbsp oil, 500 g mussels (can), 500 g scampi, 200 g squid (can), salt, pepper
Peel and finely chop onions and garlic. Pre-heat grill with 3 tbsp oil on highest level for 3 minutes. Add onions and garlic and steam until glassy. Add seafood and bay leaf, sauté on level 3 for approx. 10 minutes. Season with salt and pepper.
Zucchini fritters
750 g potatoes, 500 g small zucchini, 2 eggs, 4 tbsp oatmeal, 1 onion, 1 tbsp salt, 1 pinch sugar. 6 tbsp oil Peel and grate potatoes, grate zucchini, finely grate onion.
Mix potatoes, zucchini, onions, oatmeal, eggs, salt and sugar. Preheat grill with 6 tbsp on level 4. With a tablespoon, put fritters into the hot oil and fry until golden brown on both sides.
Keep the fritters warm, until they are all fried, and serve hot. Goes well with apple sauce and herb quark.
The authors have thoroughly considered and tested the recipes included in these operating instructions. Nevertheless, a guarantee cannot be accepted. The authors, respectively UNOLD AG and their assignees shall not be liable for personal injuries, material damages and financial loss.
GUARANTEE CONDITIONS
We grant a 24 months guarantee, and in case of commercial use a 12 months guarantee, starting from the date of purchase for any damage demonstrably due to manufacturing defects and when the appliance has been used according to its intended use. Within the warranty period we will remedy defective materials or workmanship through repair or replacement, at our option. Our warranty terms apply only to appliances sold in Germany and Austria. For other countries, please contact the responsible importer. In the event of a claim for remedy of defects, please send the appliance to our after sales service, properly packaged, together with a copy of the automatically generated sales receipt, which must show the date of purchase, and a description of the defect. You can print out a return receipt on our website www.unold.de/ruecksendung. (only for entries from Germany and Austria). The warranty does not cover damage from normal wear, improper handling and failure to comply with the maintenance and care instructions. The warranty is void if repairs or modifications are made to the appliance by third parties. Any claims of the end consumer vis-à-vis the retailer are not limited by this warranty.
WASTE DISPOSAL / ENVIRONMENTAL PROTECTION
Our appliances are produced on a high quality level for a long lifetime. Regular maintenance and expert repairs by our after-sales service can extend the useful life of the appliance. If an appliance is defective and repair is not possible we ask you to follow the following instructions for disposal. Do not dispose this appliance together with your standard household waste. Please bring this product to an approved collection point for recycling of electric and electronic products. By separate collection and disposal of waste products you help to protect natural resources and ensure, that the product is disposed in an adequate way to protect health and environment.
The instruction booklet is also available for download: www.unold.de
NOTICE D'UTILISATION MODÈLE 58580
SPÉCIFICATION TECHNIQUE
Puissance : 1 680–2 000 W, 220–240 V\~, 50/60 Hz
CONDITIONS DE GARANTIE
natural_image
Line drawing of a wireless router with four vertical tubes and a base (no text or symbols)Fig. 1
natural_image
Line drawing of a portable stove or grill stand with a lid open, showing internal compartments and base (no text or symbols)Fig. 4
natural_image
Line drawing of a four-legged stool with a mesh cover and a small inset showing the side view (no text or symbols)Fig. 2
natural_image
Technical line drawing of a mechanical component with mounting brackets and directional arrows indicating movement (no text or symbols)Fig. 5
natural_image
Line drawing of a small outdoor table with a tray and seat, no text or symbols presentFig. 3
natural_image
Line drawing of a mechanical device with attached lever and handle (no text or symbols)Fig. 6
natural_image
Line drawing of a wireless router with four vertical tubes and a base (no text or symbols)Fig. 1
natural_image
Line drawing of a portable stove or grill stand with a lid open, showing internal components and base (no text or symbols)Fig. 4
natural_image
Line drawing of a four-legged stool with a perforated top and a textured base, shown from an inset view (no text or symbols)Fig. 2
natural_image
Technical line drawing of a mechanical component with mounting features and dimension arrows (no text or symbols)Fig. 5
natural_image
Line drawing of a small outdoor table with a tray and seat, no text or symbols presentFig. 3
natural_image
Line drawing of a mechanical device with attached bracket and handle (no text or symbols)Fig. 6