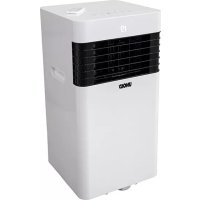
Arctic 12K 86240 - Air Conditioning UNOLD - Free user manual and instructions
Find the device manual for free Arctic 12K 86240 UNOLD in PDF.
| Product type | Portable air conditioner |
| Brand | Unold |
| Model | Arctic 12K 86240 |
| Dimensions (W x D x H) | 44 x 33.5 x 71 cm |
| Weight | Approx. 29.5 kg |
| Power supply | 220–240 V~, 50 Hz, 6.0 A |
| Cooling power | 3500 W (12,000 BTU/h) |
| Power consumption (cooling) | 1300 W |
| Refrigerant | R290 (flammable, environmentally friendly) |
| Noise level (pressure/acoustic) | 54 dB(A) / 65 dB(A) |
| Energy efficiency class | A |
| EER (Energy Efficiency Ratio) | 2.7 |
| Airflow | 400 m³/h |
| Dehumidification capacity | 1.2 L/h |
| Maximum recommended area | Up to 50 m² (120 m³) |
| Functions | Cooling, dehumidification, ventilation, quiet night mode, oscillation |
| Temperature range | 15 °C to 31 °C (adjustable in 1 °C steps) |
| Timer | 1 to 24 hours |
| Remote control | Yes, with CR2025 button cell battery |
| Exhaust hose length | Approx. 180 cm |
| Window sealing kit | Included, suitable for casement and roof windows |
| Air filter | Washable, cleaning recommended every 100 hours (or 2 weeks in dusty environment) |
| Water tank | Self-evaporating, manual drain if code E4 |
| Safety | Internal protection device, child lock, auto-off after 6 hours in sleep mode |
| Warranty | 24 months (domestic use), 12 months (professional use) |
Frequently Asked Questions - Arctic 12K 86240 UNOLD
User questions about Arctic 12K 86240 UNOLD
0 question about this device. Answer the ones you know or ask your own.
Ask a new question about this device
Download the instructions for your Air Conditioning in PDF format for free! Find your manual Arctic 12K 86240 - UNOLD and take your electronic device back in hand. On this page are published all the documents necessary for the use of your device. Arctic 12K 86240 by UNOLD.
USER MANUAL Arctic 12K 86240 UNOLD
natural_image
White portable air conditioner unit with black lid and control panel (no visible text or symbols)Mobiles KLIMAGERÄT Arctic 12 K
Bedienungsanleitung
natural_image
Modern kitchen appliance with digital display and a bucket containing red liquid, accompanied by a side panel (no visible text or symbols)
natural_image
Modern industrial machine with control panel and grain bowl, accompanied by small kitchen utensils (no visible text or symbols)UNOLD®
Care + Style

natural_image
Product photo of a red and black electric toothbrush with a black clip, accompanied by a separate brush (no text or symbols visible)
natural_image
Close-up of a metallic iron cutting tool with a white cable, no visible text or symbolsUNOLD®
Fan + Heat
natural_image
Close-up of a desktop electric fan with visible blades and base (no text or symbols)
natural_image
Red portable air conditioner fan with cooling fan and control panel (no visible text or symbols)INHALTSVERZEICHNIS
Instructions for use Model 86240
Foreword....31
Symbols used in this document....31
Technical data....32
For your safety....33
Before first use....37
The ideal location....38
Installation of the exhaust hose....38
Window sealing kit....39
Remote control....40
Control panel....41
Operation....42
Memory function 45
Safety device....45
Residual water and water tank 45
Cleaning and care 46
Troubleshooting....47
Guarantee Conditions....49
Waste Disposal/Environmental Protection ...49
Service 30
Control remoto....120
Panel de mando ....122
Manejo 123
3 Exhaust hose adapter
4 Water drain
5 a
5 b
6 Exhaust hose connector
7 Air inlet
8
9 Film window seal
10 Zip fastener window seal
11 Mounting plate
12
FR Page 50
1
2 Sortie de l'air
flowchart
graph LR
    A["Initial circular component"] --> B["①"]
    B --> C["Internal spring-loaded component"]
    C --> D["Final cylindrical component with internal spring"]
    D --> E["②"]
natural_image
Technical line drawing of a portable air conditioner unit with coiled tube and ventilation slots (no text or symbols)natural_image
White portable air conditioner unit with black lid and white handle, isolated on white background (no text or symbols visible)SPEICHERFUNKTION
Thank you for having chosen a quality product from the Unold range. Please read the instruction manual carefully. This will allow you to familiarise yourself quickly with all functions of your new air conditioner (hereinafter referred to as „appliance“).
Please make sure that all persons who use, clean or maintain the appliance have read the instructions and adhere to them. When handing over the appliance to a new owner, always include the instruction manual.
If you have any queries that are not answered in this document, or if you encounter technical problems, please contact our customer service department or your dealer.
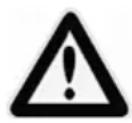
SYMBOLS USED IN THIS DOCUMENT

This symbol points to possible dangers that may result in injury or damage to the appliance.
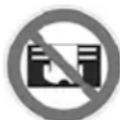
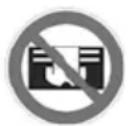
This symbol indicates that the appliance must not be covered with objects.
This symbol indicates that the appliance must only be used indoors.
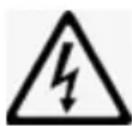
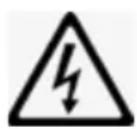
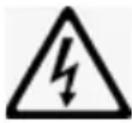
This symbol warns of the risk of electric shock or short circuit.
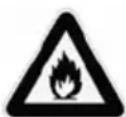
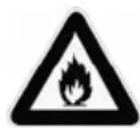
Caution: risk of fire. This symbol indicates a possible fire hazard.
TECHNICAL DATA
Power: 1,300 Watt, 6.0A, 220–240 V\~, 50 Hz
Material: Plastic
Dimensions: approx. 44 x 33.5 x 71 cm W/D/H
Weight: approx. 29,5 kg
Power cord: approx. 150 cm
| Noise level: | L_PA 54 dB(A) L_WA 65 dB(A) |
Refrigerant: R290
Dehumidifier capacity: 1,2 litres/hour
Rated energy efficiency EER_rated : 2,7
Global warming potential kg Co_2 : 3
Energy efficiency class: A (626/2011)
Air flow: 400 m ^3 / hour
Cooling input power: 3,500 W
Maximum room size: up to approx 50 m ^2 or rooms with a max. room volume of approx. 120 m ^3
Fuse: 3,15 A 250VAC
| Features: | Powerful portable air conditioner with 12,000 BTU/h (~ 3.5 KW cooling capacity), environmentally safe refrigerant R290, floor casters for easy movement, 3 modes (cool, dehumidify, ventilate), low-volume night mode, timer 1 to 24 hours, and temperature setting 15 to 31 °C |
Instructions manual, exhaust hose length approx. 180 cm, window sealing kit, and remote control with battery
Equipment features, technology, colours and design are subject to change without notice.
FOR YOUR SAFETY
Please read and keep the following instructions.
Persons in household
- This appliance can be used by children aged 8 years or more and persons with reduced physical, sensory or mental capabilities or lack of experience and knowledge, provided they are supervised or have been instructed in the safe use of the appliance and understand the hazards involved.
- Children must not play with the appliance.
- Children from the age of 8 may be permitted to clean or maintain the appliance, provided they are supervised.
- Keep the appliance and its power cord out of the reach of children under the age of 8.
- Do not connect the appliance to an external timer or remotely controlled power system.
- Never use the appliance while under the influence of medication or alcohol or if your sensory perception is reduced.
- Use the appliance only under supervision if children or vulnerable people are in the same room.
- Never leave the house while the appliance is in operation. Do not leave the appliance unattended for extended periods.
- The appliance has been designed for household use or use in similar environments, such as
■ tea kitchens in offices, shops, or other workplaces,
- farms,
■ kitchenettes for guests in hotels, motels, hostels,
■ bed and breakfast accommodations and holiday homes.
Safe handling of electricity
- Connect the appliance to an alternating current source as specified on the type plate.
- Connect the appliance to a grounded power socket only. Ask an electrician if you have any questions.
-
Never immerse the appliance, the power cord or the plug in water or another liquid.
-
Never touch the appliance, the power cord or the plug with wet hands – risk of electric shock!
- Regularly check the appliance, the power cord and the plug for wear and damage. If the power cord or other parts of the appliance are damaged, return the appliance for inspection and repair to our customer service department. Improper repair can result in serious hazards to the user and shall void all warranty.
- If the power cord of the appliance is defective, return the appliance to our customer service department or have it replaced by a qualified electrician.
- Never pull on the power cord to avoid damage to the inside of the power cord.
- To unplug the power cord from the power socket, always pull at the plug and never at the cable.
- Always switch off the appliance and disconnect the plug from the power socket before cleaning the appliance and installing or disassembling the appliance and when the appliance is not in use or during a thunderstorm.
- Do not wrap the power cord around the appliance.
- Not suitable for use in very moist and/or hot environments such as bathrooms, indoor swimming pools or kitchens.
- Immediately switch off the appliance and disconnect the power plug from the socket if you notice unusual noises or odours at the appliance or the appliance runs unusually hot.
- Unplug the appliance from the power socket after use, before cleaning and whenever performing maintenance.
- Also disconnect the plug from the power socket before taking the appliance out of service for an extended period.
- Always comply with all applicable local regulations on connecting electrical appliances.
- If operation is interrupted, wait for 3 minutes before switching the appliance back on in order to allow for pressure regulation in the cooling circuit.
Handling batteries
-
Never expose batteries to direct sunlight, fire, etc. There is a risk of explosion.
-
Keep batteries away from children. Batteries are not toys. There is a risk of asphyxiation after swallowing small batteries.
- Do not open batteries by force.
- Avoid contact with metal objects such as rings, nails, screws, etc. There is a risk of short circuit!
- Remove the battery from the remote control when not using it for longer periods.
- Do not dispose of batteries in regular household waste. Take used batteries to the appropriate collection point or your dealer for disposal.
Information on how to set up and use the appliance safely
- The vents must never be covered by furniture, walls or other objects. Unobstructed air circulation must be ensured at all times. The front and the top require at least 30 cm of clearance to other objects, while the clearance on the rear must be 20 cm.
- The appliance is very heavy. Therefore, never move the appliance without a second person.
- Make sure to keep the remote control out of the reach of children.
- Do not switch on the appliance unless all filters have been installed properly.
- Never fill any fragrances, essential oils or similar agents into the water tank. This will cause damage to the appliance.
- Never use the appliance in a room that contains remnants of insecticide aerosols, smoke from incense sticks or other oily or chemical vapours. These also include paints or other flammable substances.
- To avoid damage to the appliance, do not use the appliance with accessories made by other manufacturers. Use only filters made by our company.
- The appliance must only be used indoors.
- Make sure to route the power cord such that it does not pose a trip hazard.
- Never route the power cord under carpets, rugs or other textiles.
- Never shift or move the appliance during operation.
-
Make sure to keep the power cord away from heaters, stoves, ovens and other heat sources.
-
Never stick objects such as fingers, needles, pens, etc. through the openings and into the interior of the appliance – risk of injury!
- To avoid damage to the appliance, never sit on the appliance and never place any objects on top of the appliance. Never place any containers filled with water near the appliance.
- Do not set down the appliance upside down. There is liquid inside the appliance that may cause damage.
- Do not touch or bend the fins of the heat exchanger when the covers are open.
- Never tap against the appliance, especially not against the air inlets and outlets.
- Never use the appliance close to gas-powered devices, heaters, stoves or open flames.
- Make sure the appliance cannot become damaged when put in storage.
Notes on handling the R290 refrigerant
- The R290 refrigerant is contained in the cooling circuit of the product. While highly compatible with the environment, it is a natural gas that is flammable. When transporting and installing the product, make sure not to damage any components of the cooling circuit.
- Transport and store the appliance only in the upright position.
- Switch off the appliance and disconnect the power plug from the socket prior to cleaning and maintenance.
- Never block the air inlets and outlets of the appliance.
- Use appliances operating with flammable refrigerants in ventilated rooms only.
- Observe all applicable local regulations on handling gas.
- Personnel performing maintenance or repairs on the cooling circuit should possess a valid certificate for handling refrigerants.
- If the appliance is defective and beyond repair, dispose of it properly in accordance with the applicable local regulations for appliances with refrigerants.
- Make sure not to damage any components that are part of the cooling circuit.
The manufacturer will not be liable in the event of incorrect assembly, improper or incorrect use or if repairs are carried out by unauthorized third parties.
When removing the appliance from the packaging, do not tilt the appliance by more than 35^ , as the built-in compressor might otherwise be damaged. After unpacking the appliance, leave the appliance at its final location for at least 2 hours before putting it into operation. The refrigerant in the appliance needs to settle first to keep the compressor from becoming damaged.
The refrigerant is flammable.
In case of damage to the cooling circuit:
Avoid open flames and sources of ignition.
Thoroughly ventilate the room where the appliance is located.
Never open the motor housing of the appliance – risk of electric shock!
Never cover the appliance during operation!
Do not hang the exhaust hose out of the window when it rains to keep water from penetrating the appliance.
BEFORE FIRST USE
- Remove all packaging and transport safety devices. Keep packaging materials out of the reach of children – danger of suffocation! Dispose of the packaging material according to the applicable statutory waste disposal regulations.
- Inspect the appliance for damage. If there is visible damage, do not operate the appliance; instead, contact our customer service department.
- Check whether all accessories listed in this manual have been shipped with your appliance.
- Make sure that the cover cap of the water drain on the rear of the appliance has been tightened firmly.
- When the appliance is used for the first time, and after prolonged storage, there might be some minor odour.
THE IDEAL LOCATION
- Observe all information provided below as your appliance will otherwise not run safely.
- Never set up the appliance in places that are very hot or exposed to direct sunlight. The appliance may otherwise become damaged or display error messages.
- Never set up the appliance close to television sets or radios. The image or sound quality of these devices may otherwise be affected. Set up the appliance with a minimum distance of 1 metre from such devices. Caution: If you run the air conditioner from the same power strip as TV or radio sets, you may experience noise or image distortion as well. If this happens, plug the appliance into a different power socket.
- The appliance will not be able to deliver its maximum performance unless it is set up on a level surface.
- Keep an adequate distance from other objects and walls. The front and the top require at least 30 cm of clearance to other objects, while the clearance on the rear must be 20 cm.
- Never place any objects on the appliance to prevent the appliance from malfunctioning.
- Never cover up any air inlets or air outlets.
- Make sure not to point the air flow directly at people.
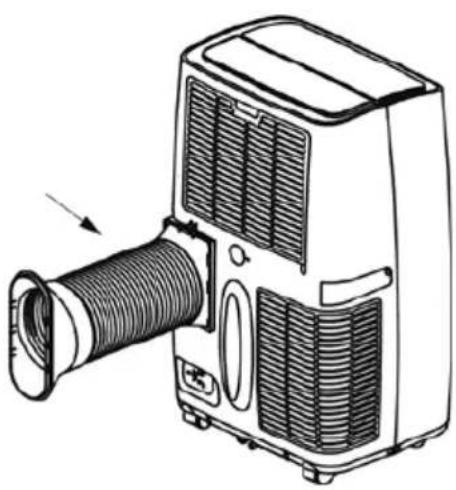
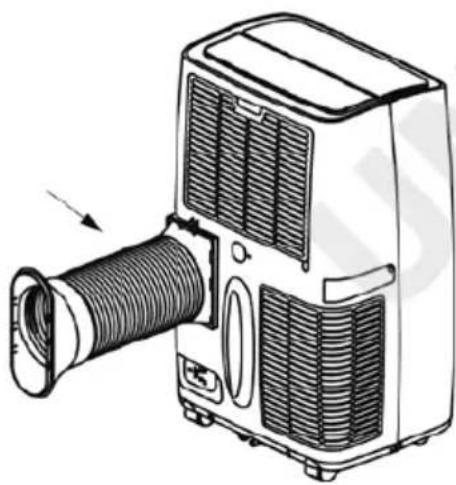
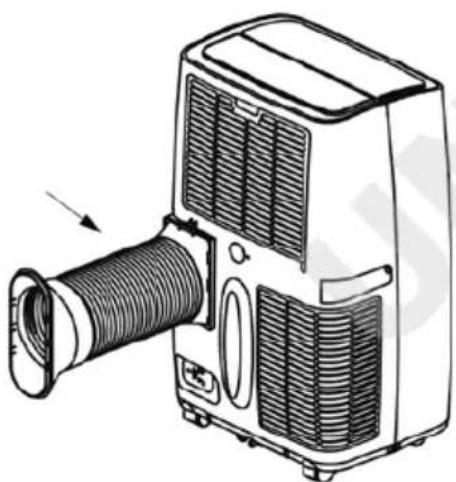
INSTALLATION OF THE EXHAUST HOSE

The exhaust and the adapter have been matched exactly with this device. Do not replace either one with third-party products to ensure the appliance will continue to run properly.
- Connect the exhaust hose adapter (1) with one end of the hose by plugging in the hose and turning it lightly.

text_image
Diagram showing a mechanical assembly with labeled parts and directional arrows, including a circular component and a curved component.- Connect the mounting plate (2) with the other end of the hose as described in step 2.

natural_image
Line drawing of a portable air conditioner unit with coiled hose and ventilation slots (no text or symbols)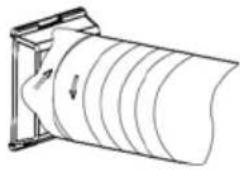
natural_image
Diagram of a cylindrical object with internal parallel grooves, mounted on a frame (no text or symbols)-
Next, plug the adapter (1) into the hose connector on the appliance. Position the adapter from the top before sliding it in completely until the adapter securely locks into place. The release tab must be pointing up.
-
Clamp the open end of the hose into the open window. Make sure to seal the rest of the open window in order to conserve energy. If the window is fitted with an outer shutter, lower the shutter as much as possible.
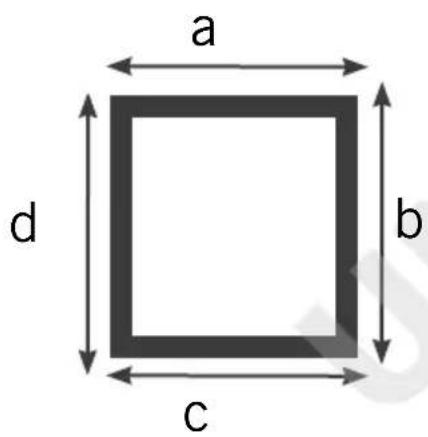
WINDOW SEALING KIT
text_image
a d b c-
The kit is suited for casement windows and top-hung windows (top-hung roof windows that can be hinged open all the way).
-
The length of the sealing film is approx. 390 cm. To calculate if this length is sufficient for your window, you need to measure all four sides of the window. If the total length of the window sides a+b+c+d is less than 390 cm, you can use the kit. If the window circumference is greater, you will need to use a different sealing option.
-
Start by cleaning the adhesive surface on the window pane and window sash thoroughly.
-
Now, apply the included adhesive hook-and-loop tape to each outer edge of the window sash. The hook-and-loop tape is self-adhesive. Therefore, only pull off a small portion of the protective film at a time and apply the hook-and-loop to the window sash.
-
Next, apply the hook-and-loop tape to the window frame.
-
Spread out the sealing film and hold it up in front of the window with the curved side facing you. Attach the film next, making sure that the middle of the sealing film is level with the middle of the window.
- Proceed by connecting the hook-and-loop parts of the sealing film with the hook-and-loop tape on window sash and window frame. The curved portion of the sealing film needs to be connected to the hook-and-loop tape on the window frame, while the straight portion of the sealing film must be joined with the hook-and-loop tape on the window sash.
- Close the window and check if the sealing film is properly seated. Correct as needed.
- Open the window again and pull down the zip fastener far enough for the exhaust hose to be slipped through. Pull the zip fastener up again and make sure that the hose is seated firmly and cannot slip out.
- When the air conditioner is not in use, remove the hose from the zip fastener. You can now close the window normally. Another option is to remove the sealing film and to re-apply when using the air conditioner again.
REMOTE CONTROL
- Prior to initial use, pull the small plastic film out of the battery compartment.
- Carefully release the cover on the battery compartment and pull the cover off the remote control.
- Place the battery into the designated holder.
- If you wish to insert a new battery, make sure to use a CR2025 coin battery.
- Slide the cover carefully back into the remote control.
- If the appliance is not used for an extended period, please remove the battery.
- When setting up the appliance with the remote control, make sure to point the remote at the air conditioner while adjusting the settings. The remote control has a range of approx. 5 metres.
- The individual functions are represented by the following symbols:
ON/OFF Oscil
+ and - Mode


Ventilation

Timer Sleep


CONTROL PANEL
1 ON/OFF button (ON/OFF)
Switches the appliance on or off

2 Speed button (Fan)
For toggling the fan speed between low, medium and high

3 Timer button (Timer)
Use this button to select the desired operating time of the appliance. After this time has elapsed, the appliance will switch off

4 Sleep mode button (Sleep)
When set to sleep mode, the appliance will run with less noise, automatically adjust the temperature, and switch off automatically after 6 hours.
5 Oscillation button (Swing)
For setting the oscillation function
6 Mode button (Mode)
For increasing or reducing the settings chosen for Timer and Temperature
Indicator lamps
Automatic mode Dehumidifier mode
Cooling mode Ventilation mode

Ventilation low Ventilation low, high
Water tank full Oscillation

on

off
Timer on °C / °Fahrenheit
Timer off

OPERATION
- Follow all instructions provided in the safety regulations.
- Make sure to have chosen a safe location.
- Place the plug in a power socket (220–240 V\~, 50 Hz). An acoustic signal sounds.
- Press the ON/OFF button.
- The ventilation damper opens.
-
By default, the appliance operates in auto mode. The display shows the current room temperature.
-
Press the “Mode” button. Once this button has been pressed, the indicator lamp of the next operating mode will flash five to six times before the appliance switches to the selected operating mode. Afterwards, the indicator lamp will be lit permanently.
- You can now choose between different modes.
■ Automatic
■ Cooling
■ Dehumidifying
■ Ventilation

flowchart
graph LR
    ng --> ○ --> ⚪ → ⌍ → ⌴ → ≈
    style ng fill:#f9f,stroke:#333
    style ○ fill:#ccf,stroke:#333
    style ⌍ fill:#cfc,stroke:#333
    style droplet fill:#fcc,stroke:#333
    style ≈ fill:#cff,stroke:#333
Select temperature
-
You can adjust the cooling temperature between 15^ C and 31^ C in increments of 1^ C. Keep pressing the buttons + and - until the desired temperature is shown on the display. The set temperature will be displayed for 5 seconds before the temperature shows the current room temperature.
-
Note: If you press and hold the + and - buttons for 5 seconds, you can change the display from °C to Fahrenheit. The adjustable temperature is then 59^ F to 88^ F.
11. Ventilation speed
Press the ventilation button to toggle the fan speed between low, medium and high.
ON/OFF
-
Another press of the button will switch the appliance off and close the ventilation damper. We recommend that you not disconnect the plug from the power socket until the ventilation damper is closed all the way. This will keep dust and other foreign objects from entering the appliance.
-
Note: If you insert the plug into the power socket with the ventilation damper open, the damper will close first. If the ventilation damper was closed, you will still briefly hear the motor of the damper. This is normal and no defect.
EXPLANATION OF THE INDIVIDUAL MODES
Automatic mode
- Once automatic mode is enabled, the sensor will automatically select between cooling and ventilating. For room temperatures above and below 24 °C, the appliance will provide cooling and ventilation, respectively.
Dehumidifying
- The settings in this operating mode cannot be adjusted. The fan runs at low speed, while the compressor and centrifugal fan run and stop in alternating order for 8 and 6 minutes, respectively.
Cooling
- Once the room temperature rises above the desired target temperature, the compressor comes on and the appliance provides cooling. Once the room temperature drops below the target temperature, the compressor stops and the top fan comes on.
Ventilation
- The fan operates at the selected level, and the compressor is off. There is no option to select the temperature.
Timer
-
Press the Timer button one time to enter timer mode.
-
The adjustable time ranges from 1 to 24 hours of operating time. Press the buttons + and - to set the desired time. You can adjust the operating time in increments of 1 hour.
Sleeping/Child Lock
-
This setting can only be adjusted in "Cooling" mode.
-
Press this button once with the appliance set to Cooling mode. The appliance will then automatically run at low speed, and the target temperature will first drop by 1^ C after an hour and then by 2^ C after two hours. The appliance will automatically switch off after six hours.
-
If you press this button for more than 3 seconds, the display will read LC and the button lock will be activated, protecting the appliance from inadvertent operation. The appliance can also no longer be switched off. Another press of the button will cause the display to show LC for 5 seconds again before resuming to indicate the room temperature.
Oscillation
- Press this button to activate oscillation. The upper damper moves up and down and distributes the air evenly. To disable this function again, press this button one more time.
MEMORY FUNCTION
- The appliance has a memory function. When the appliance is ready for operation, but not switched on, the setting of its last operation will remain. The next time it is switched on, the appliance will continue in the mode selected last, unless the previous mode was automatic mode.
- This does not apply if the plug was disconnected from the power socket. In that case, the appliance will lose the stored values and you will have to adjust all settings again.
SAFETY DEVICE
- The following situations may trigger the internal safety device, causing the appliance to switch off:
■ If the temperature rises above 43^ C or the room temperature drops below 15^ C in Cooling mode.
■ If the room temperature drops below 15^ C in Dehumidifier mode.
- If the air conditioner operates in “Cool” or “Dehumidify” mode, the window in the room is opened for an extended period, and the relative humidity rises above 80%, condensation may drip out of the appliance.
- Caution: If operation is interrupted, the internal safety device of the compressor will switch on. In that case, the compressor cannot be switched on for 3 minutes, allowing for regulation of the cooling circuit. There is no defect. Wait for 3 minutes before switching the appliance back on
RESIDUAL WATER AND WATER TANK
- The appliance is self-evaporating. This means that the condensation water produced by the cooling evaporates and is discharged to the outside via the hose. However, in very humid weather, some water may collect in the small water tank inside the device. In this case E4 appears in the display. Then do the following:
- Have a wiping cloth and a shallow receptacle ready.
- Draining the water is easier if you elevate the appliance slightly, e.g. by placing it on a stool. Make sure to provide for sufficient stability to keep the appliance from falling off.
- Disconnect the plug of the appliance from the power socket.
-
Remove the cover caps from the water drain. Make sure to store the caps carefully.
-
Carefully allow the condensation to drain, tilting the appliance slightly as needed.
- Refit the cover caps securely on the water drain as water may otherwise escape from the appliance and cause damage.
- You can now put the appliance back into operation.
CLEANING AND CARE

Switch off the appliance with a press of the ON/OFF button and disconnect the power plug.
Never allow water to enter into the openings of the appliance. Risk of electric shock and fire!
Do not use any spray cleaners.
- If the housing shows heavy soiling, use a cloth dampened with lukewarm water (below 40^ C) to wipe off the housing.
- Never use scouring agents, steel wool, metal objects, hot cleaners, polishing paste or disinfectants.
- You can use a vacuum cleaner to carefully vacuum off the air inlets and outlets as well as the fins.
Cleaning the filter insert
- The filter needs to be cleaned every 100 hours of operation. If appliance operates in a dust-rich environment, the filter must be cleaned every two weeks.
- Do not remove the filter unless the appliance has been switched off and the plug has been disconnected from the power socket.
- Remove the cover.
- Carefully pry the filter cover found underneath up and over the retaining tabs using, for instance, a screwdriver and pull the filter insert out of the cover grille in order to replace it or clean it separately.
- Clean the dust off, e.g. using a vacuum cleaner, or wipe the filter cover off with a dampened cloth. Allow the filters to fully dry in the air if you wiped them off with a dampened cloth.
- Do not reinsert filters into the appliance unless they are completely dry.
Never put the appliance into operation without inserting the filters first!
- Before putting the appliance into storage for a prolonged period, complete the following steps.
- Make sure there is no more condensation in the water tank.
- Before putting it into storage, let the appliance run in Ventilator mode for half an hour. This will allow the interior of the appliance to dry completely.
- Clean the filters as described above and place them back into the appliance.
- Remove the battery from the remote control.
- Remove the exhaust hose.
TROUBLESHOOTING
| Problem Remedy | |
| Appliance without function even though the plug is inserted | Check if the safety switch has been activated or if a fuse has been tripped.Fuse (3.15 A/250 V AC) in the appliance defective; contact our customer service department.Wait for 3 minutes before switching the appliance back on.Battery of the remote control drained?Has the plug been inserted properly? |
| Appliance runs only for a brief period | The target temperature is too close to the current room temperatureThe air outlet is blocked. |
| The appliance runs, but does not cool | Close windows and doorsSwitch off other sources of heat such as lamps or heatersClean the filter.Make sure air inlet and air outlet are not blocked.The target temperature is too high |
| Water drips out when the appliance is moved | ■ Empty the water tank before moving the appliance.■ Only set up the appliance upright on a level surface |
| The appliance is not operational, and the display reads E 4 | ■ Empty the water tank.■ If the message is shown with great frequency, contact our customer service department. |
| Error code E 2 | ■ The sensor measuring the room temperature is defective; contact our customer service department. |
| Error code E 3 | ■ The evaporator sensor is defective; contact our customer service department. |
GUARANTEE CONDITIONS
We grant a 24 months guarantee, and in case of commercial use a 12 months guarantee, starting from the date of purchase for any damage demonstrably due to manufacturing defects and when the appliance has been used according to its intended use. Within the warranty period we will remedy defective materials or workmanship through repair or replacement, at our option. Our warranty terms apply only to appliances sold in Germany and Austria. For other countries, please contact the responsible importer. In the event of a claim for remedy of defects, please send the appliance to our after sales service, properly packaged, together with a copy of the automatically generated sales receipt, which must show the date of purchase, and a description of the defect. You can print out a return receipt on our website www.unold.de/ruecksendung. (only for entries from Germany and Austria). The warranty does not cover damage from normal wear, improper handling and failure to comply with the maintenance and care instructions. The warranty is void if repairs or modifications are made to the appliance by third parties. Any claims of the end consumer vis-à-vis the retailer are not limited by this warranty.
WASTE DISPOSAL / ENVIRONMENTAL PROTECTION
Our appliances are produced on a high quality level for a long lifetime. Regular maintenance and expert repairs by our after-sales service can extend the useful life of the appliance. If an appliance is defective and repair is not possible we ask you to follow the following instructions for disposal. Do not dispose this appliance together with your standard household waste. Please bring this product to an approved collection point for recycling of electric and electronic products. By separate collection and disposal of waste products you help to protect natural resources and ensure, that the product is disposed in an adequate way to protect health and environment.

Please dispose of used batteries in accordance with the Waste Electrical and Electronic Equipment Regulation 2202/96/EC - WEEE. The relevant municipal authority will provide you with the appropriate disposal points.
The instruction booklet is also available for download: www.unold.de
NOTICE D'UTILISATION MODÈLE 86240
AVANT-PROPOS
flowchart
graph LR
    A["Eye lens"] --> B["①"]
    B --> C["Coiled spring"]
    C --> D["Coiled tube"]
    D --> E["Coiled cap"]
    E --> F["② Si"]
natural_image
Line drawing of a portable air conditioner unit with coiled tube and ventilation slots (no text or symbols)5 Touche Oscillation (Swing)
CONDITIONS DE GARANTIE
flowchart
graph LR
    A["Component 1"] --> B["Internal Component 1"]
    B --> C["Final Part 2"]
natural_image
Technical line drawing of a portable air conditioner unit with coiled tube and ventilation slots (no text or symbols)text_image
Technical diagram showing a mechanical assembly with labeled components and directional arrows indicating motion or flow.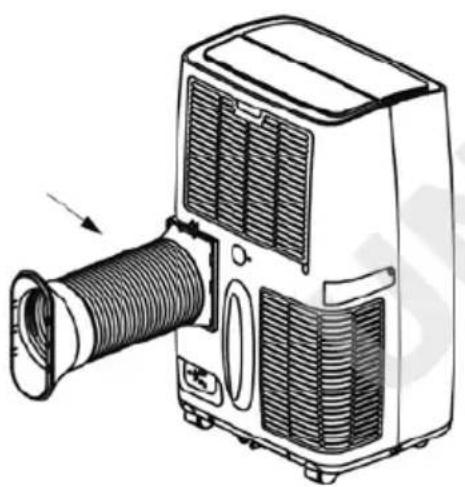
natural_image
Line drawing of a portable air conditioner unit with coiled tube and ventilation slots (no text or symbols)flowchart
graph LR
    A["Section 1"] --> B["Section 2"]
    B --> C["Cross-sectional view of component"]
    C --> D["Final assembled part with curved internal structure"]

natural_image
Line drawing of a portable air conditioner unit with coiled hose and ventilation slots (no text or symbols)Moc: 1300 W, 6,0 A, 220–240 V\~, 50 Hz
text_image
Technical diagram showing three stages of a mechanical assembly: lens, spring, and cap with labeled components.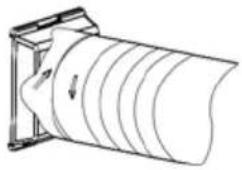
natural_image
Diagram of a cylindrical object with internal layered structure, mounted on a frame (no text or symbols)