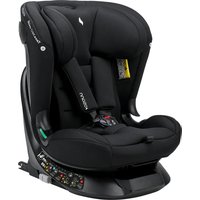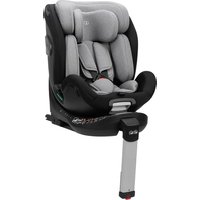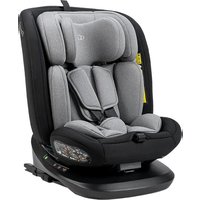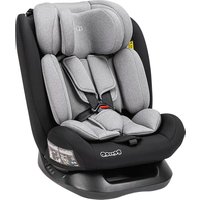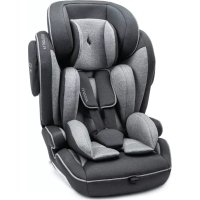
Flux Plus - High chair Osann - Free user manual and instructions
Find the device manual for free Flux Plus Osann in PDF.


User questions about Flux Plus Osann
0 question about this device. Answer the ones you know or ask your own.
Ask a new question about this device
Download the instructions for your High chair in PDF format for free! Find your manual Flux Plus - Osann and take your electronic device back in hand. On this page are published all the documents necessary for the use of your device. Flux Plus by Osann.
USER MANUAL Flux Plus Osann
natural_image
Black and white photo of a Usoo car seat with red accents, no visible text or symbols on the seat body.text_image
Diagram illustrating how to adjust seatbelt usage in a car, with zoomed-in insets showing key components and red circles highlighting specific areas.text_image
Diagram illustrating how to adjust seatbelt from a person's seatbelt, showing three steps with close-ups.text_image
Diagram illustrating a medical procedure on a device, showing step-by-step insertion and change in the main view.text_image
Diagram showing vehicle safety symbols including checkmarks, exclamation mark, and red X marks with numbers ① and ②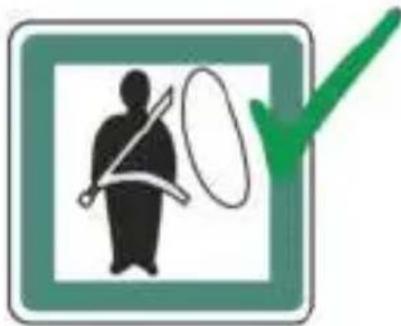
natural_image
Green checkmark icon with a silhouette of a person holding a tool, no text or symbols present
natural_image
Line drawing of a car seat assembly with no text or symbolsnatural_image
Illustration of a baby car seat with red ribbon and black buttons, no text or symbols presenttext_image
Diagram illustrating how to adjust seatbelt and seatbelt harnesses, showing a close-up of the component with red straps.natural_image
Illustration of a person adjusting a white object with black bands, no text or symbols presenttext_image
Medical illustration showing a hand holding a device with red arrows indicating force application, alongside a close-up of the device's internal structure.natural_image
Illustration of a child sitting in a white car seat with a red brake stopper (no text or symbols)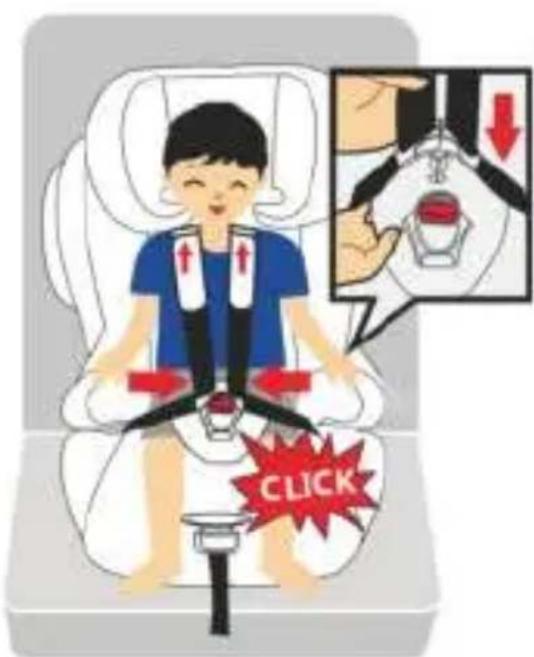
text_image
CLICK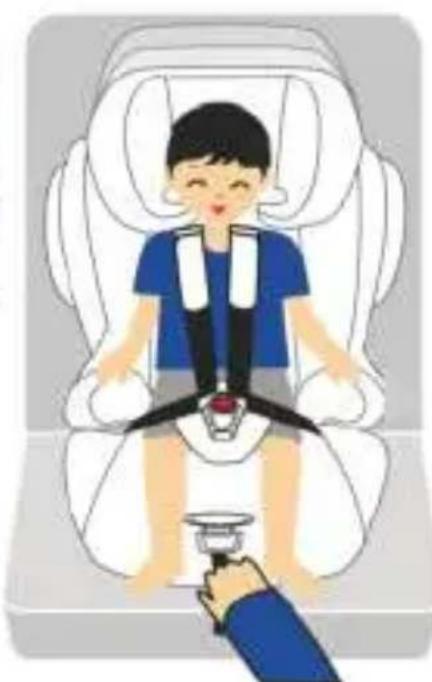
natural_image
Illustration of a child seated in a car seat with a hand holding a screwdriver (no text or symbols present)natural_image
Illustration of a medical procedure showing a hand using a tool to adjust or install a white anatomical structure (no text or symbols present)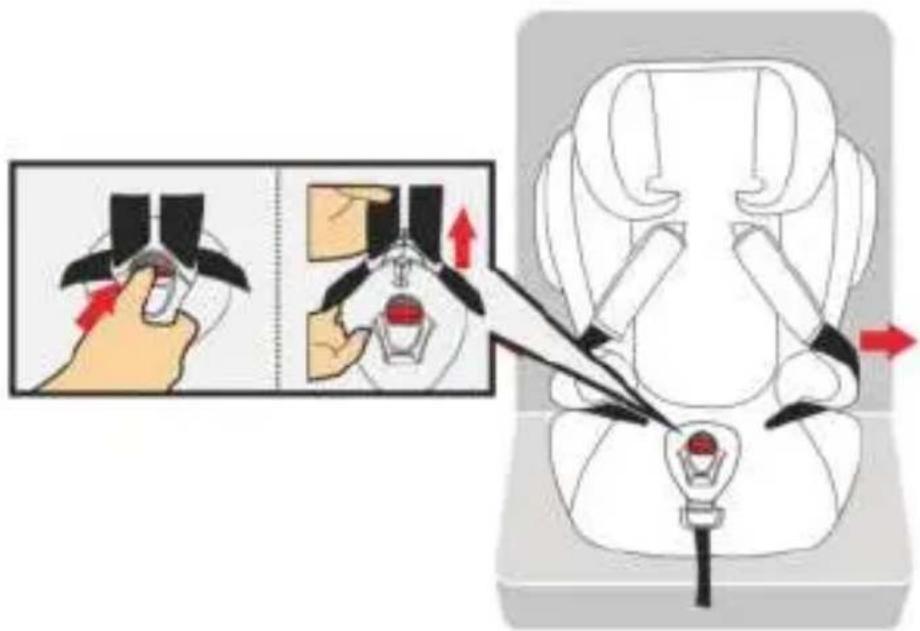
text_image
Medical illustration showing a hand performing a medical procedure on a seated patient seat, with instructions and red arrows indicating movement.natural_image
Illustration of a child sitting in a white car seat with a red brake test device (no text or symbols)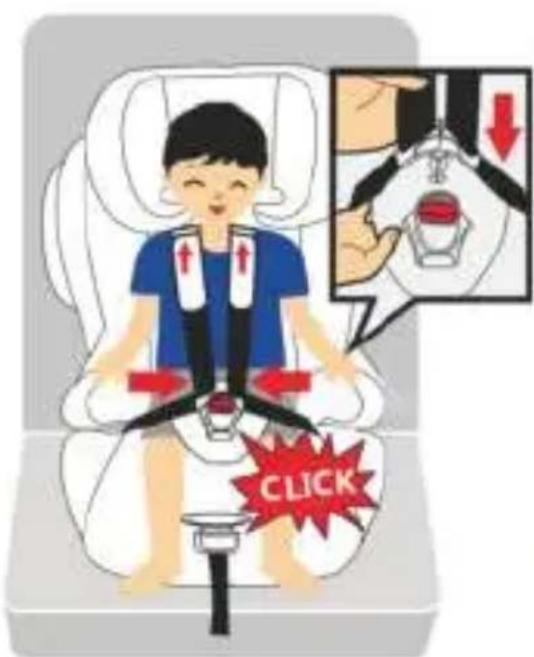
text_image
CLICK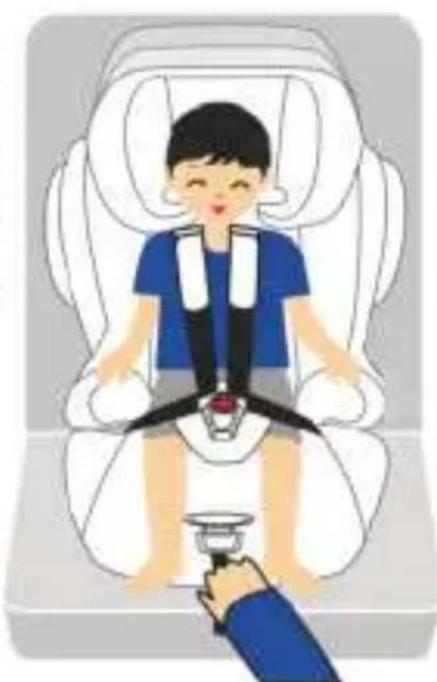
natural_image
Illustration of a child wearing a seatbelt sitting inside a car seat, with a hand holding a small cup (no text or symbols present)natural_image
Illustration of a child sitting in a car seat with red and gray straps, showing three different positions (no text or symbols)We would like to congratulate you on your purchase of a group 1/2/3 car seat. If you would like to obtain any help regarding this product, you can contact our customer service.
SAFETY INSTRUCTIONS
- Please read these instructions carefully before using the seat and keep this guide in a safe place for future reference.
- If you do not comply with these instructions, the safety of your child could be compromised.
- When somebody else is using your car seat, ensure they also know how to use it, especially the correct way to adjust it.
- This child seat can be used for children of 9 to 36 kg in weight (recommended age: 9 months to 12 years).
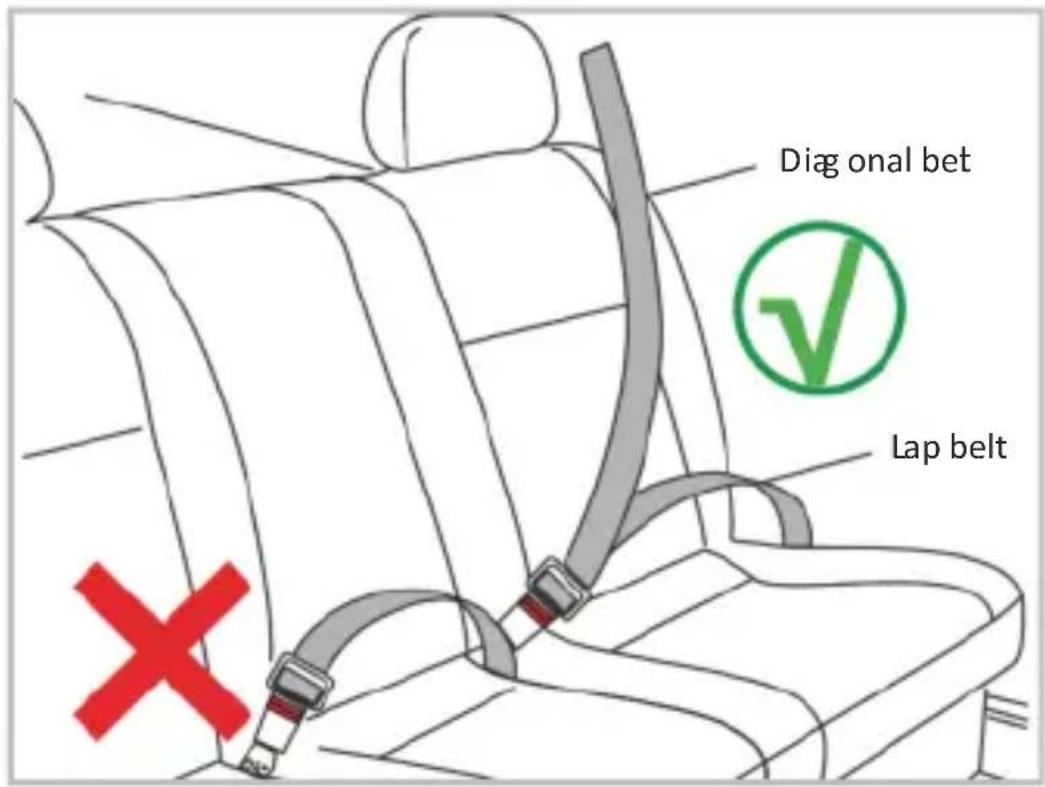
- This car seat is only suitable if the vehicle is fitted with 3-point seat belt, approved to UN/ECE Regulation No. 16 or other equivalent standards.
- Using the child seat on passenger seats with front airbag, slide back the passenger seat.
- The safest position for this seat is on the rear seat of a vehicle. Never transport the child without using the belt. For correct use of car seat belt please refer to this instruction booklet. The car seat belt cannot be used to any identified forcing point.
- Periodically inspect the harness for wear, to make sure each harness and vehicle seat belt are completely fastened. The seat belt should be adjusted according to the body of child and should not be twisted.
- Don't use any car seat again after impact or accident.
- Car interiors can become very hot when in direct sunlight, it is therefore recommended that the child seat should be covered when not in use. So it will not burning your child.
- Do not leave your child unattended in the seat at any time.
- Luggage and other heavy or sharp objects should be secured in the car. Loose objects are liable to cause injury in the event of an accident.
- The child seat must not be used without the cover.
- The cover cannot be changed to other materials, other than manufacturers recommended, as it will impact the functions of child seat system.
- In the event of an emergency it is important that the child can be released quickly. This means that the buckle is not fully tamper proof and so your child must be taught never to play with the buckle.
- When the child seat is not in use, it is recommended that it is fastened into the car with a seat belt to avoid injury in the event of an accident.
- Store this child seat in a safe place when it is not being used. Avoid placing heavy objects on top of it.
- Do not allow your child seat to come in contact with corrosive substances e.g. battery acid.
- Do not leave the child seat with a child in it on a raised surface, such as a table, work top, bed or shopping trolley, due to risk of falling.
- Do not use this child seat in the home. It has not been designed for home use and should only be used in your car.
- The manufacturer can only guarantee the safety of the car seat if it is used by the original owner.
• We strongly advise against using a second-hand product, as you can never be sure of its history.
• Always check to make sure the seat fits in your car properly before purchasing it.
Parts and fittings
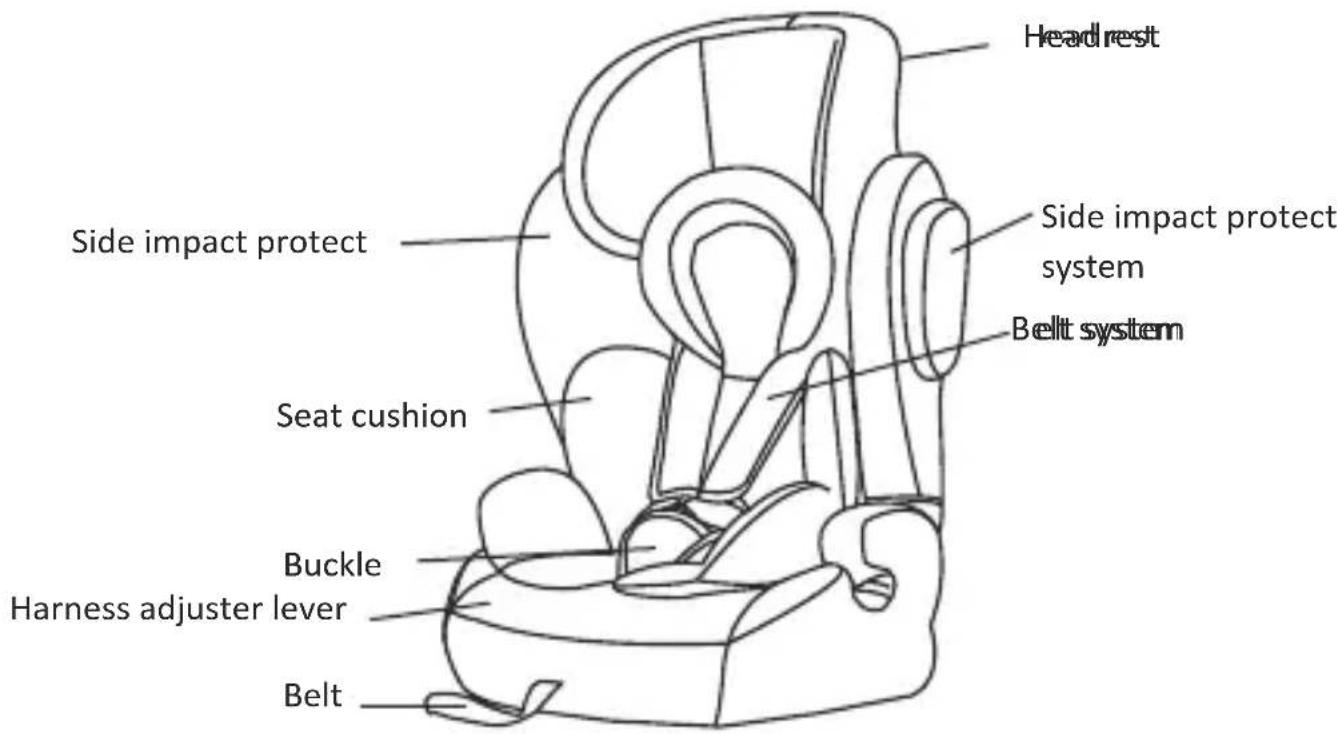
text_image
Headrest Side impact protect Side impact protect system Belt system Seat cushion Buckle Harness adjuster lever Belt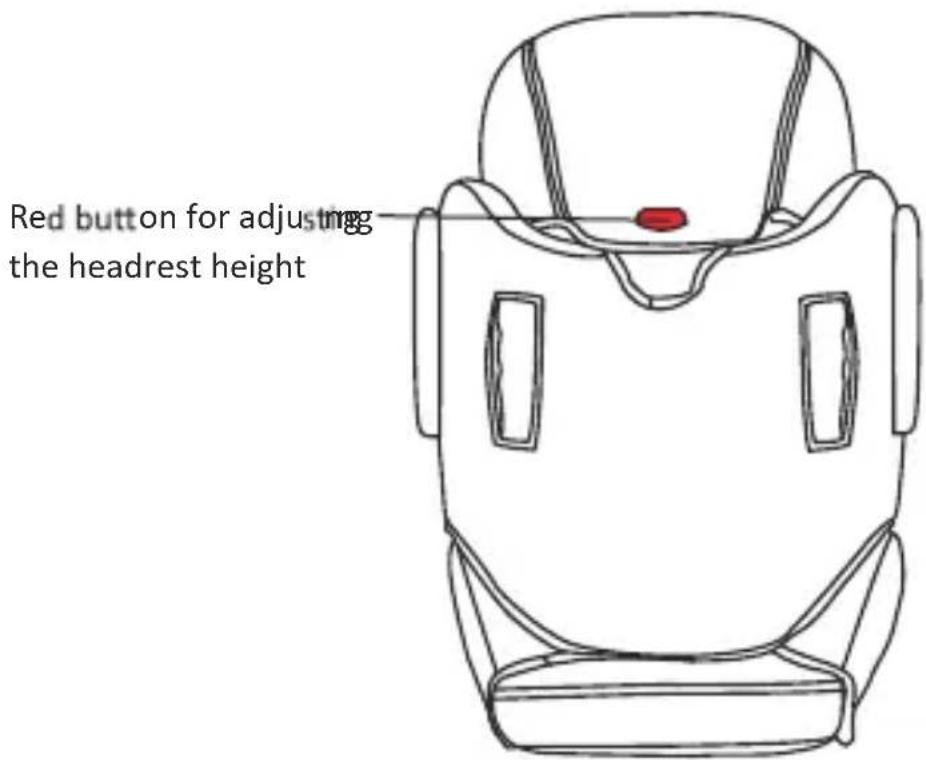
text_image
Red button for adjusting the headrest heightCorrect shoulder strap height
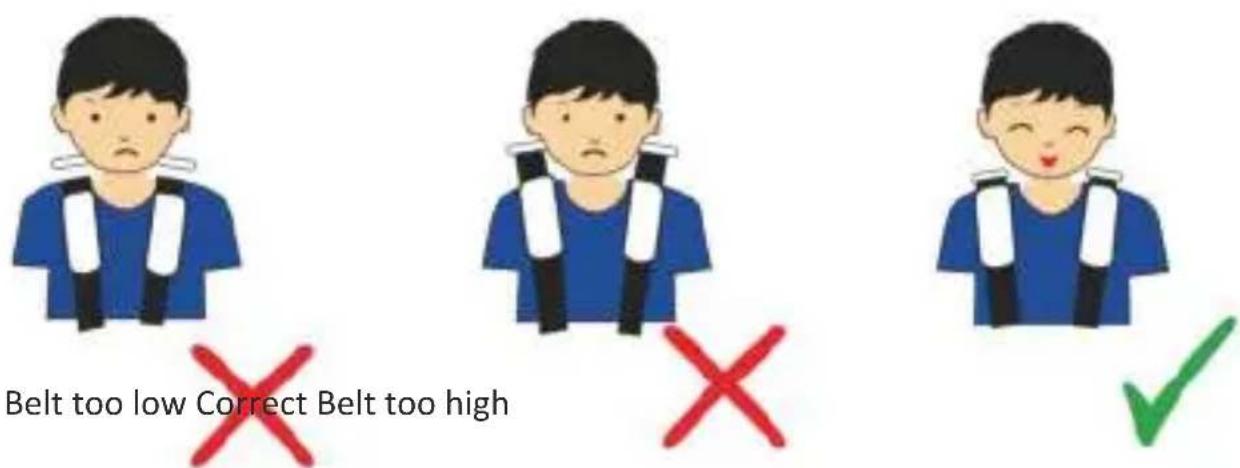
Always check that the shoulder straps are at the correct height for your child. The child's shoulders should always be below the slot for the harness.
Changing the shoulder strap height
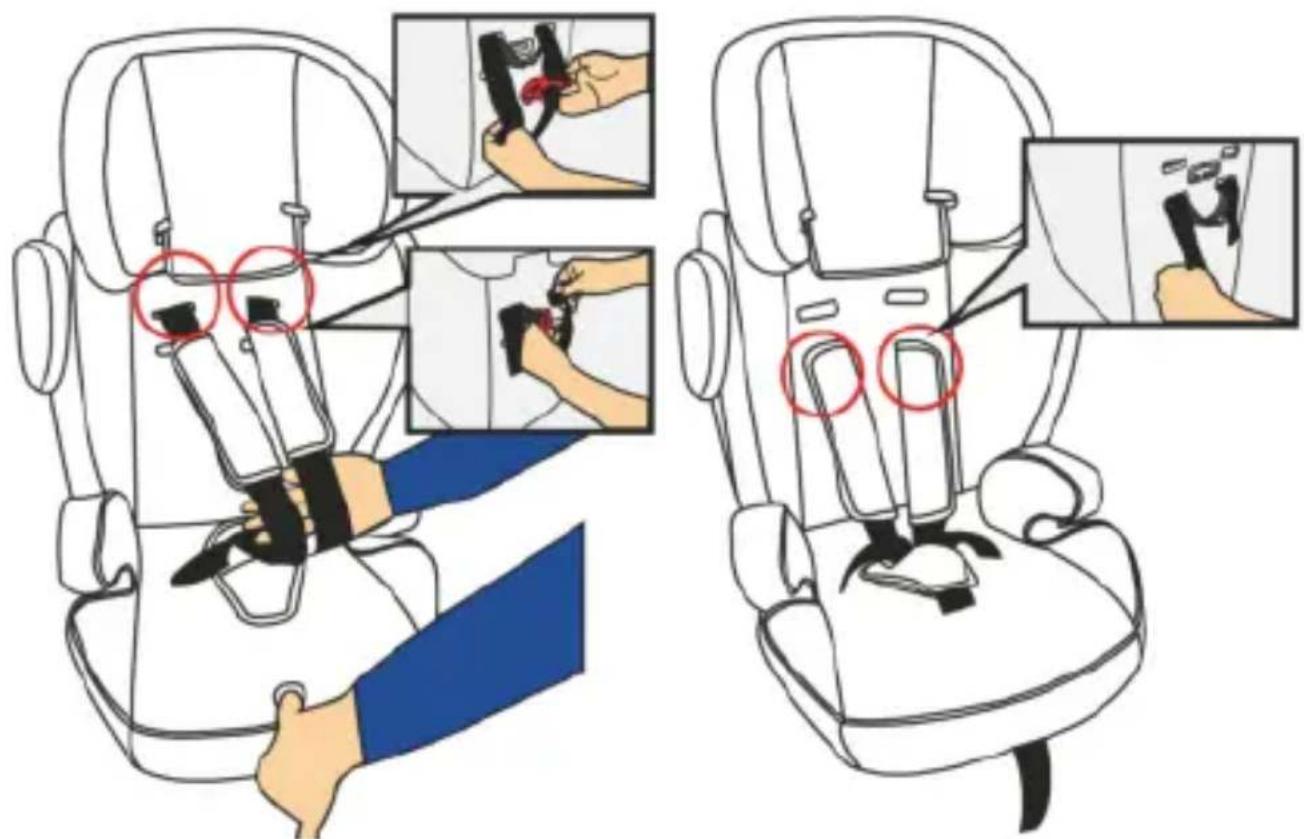
text_image
Diagram illustrating how to adjust seatbelt usage in a car, with zoomed-in views showing key components and red circles highlighting specific areas.Slide one of the harness straps off the harness connector. Then from the front of the seat, pull it through the slot in the seat's backrest and fabric cover. Thread the harness strap back through the next hole up or down on the seat's backrest. Re-thread the harness strap back onto the harness connector at the back of the seat. Repeat the same process for the other harness strap. Make sure both of the straps go through slots at the same height.
Removing all straps
1. Removing the safety harness shoulder straps
text_image
Diagram illustrating how to adjust seatbelt from a person's seatbelt, showing three steps with close-ups.Release the strap at the bottom of the backrest cover to gain access to the harness. Slide both of the harness straps off the harness connector at the back of the backrest and pull the webbing through the slots in the seat's backrest and fabric cover.
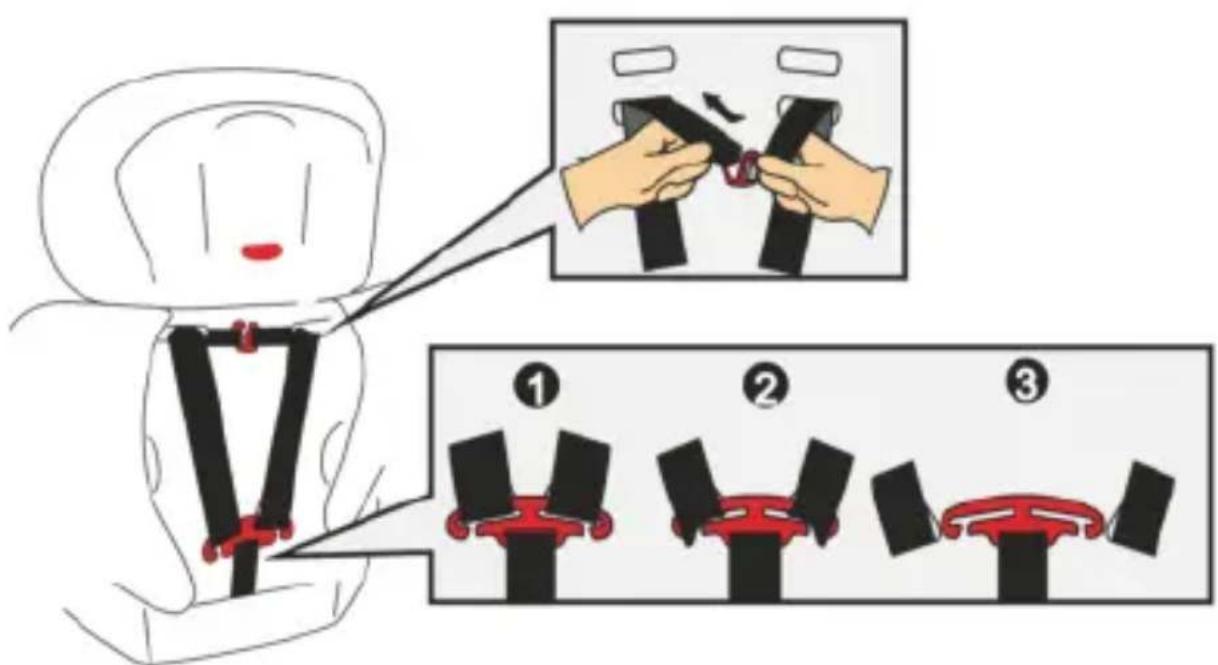
2. Removing the safety harness lap straps
text_image
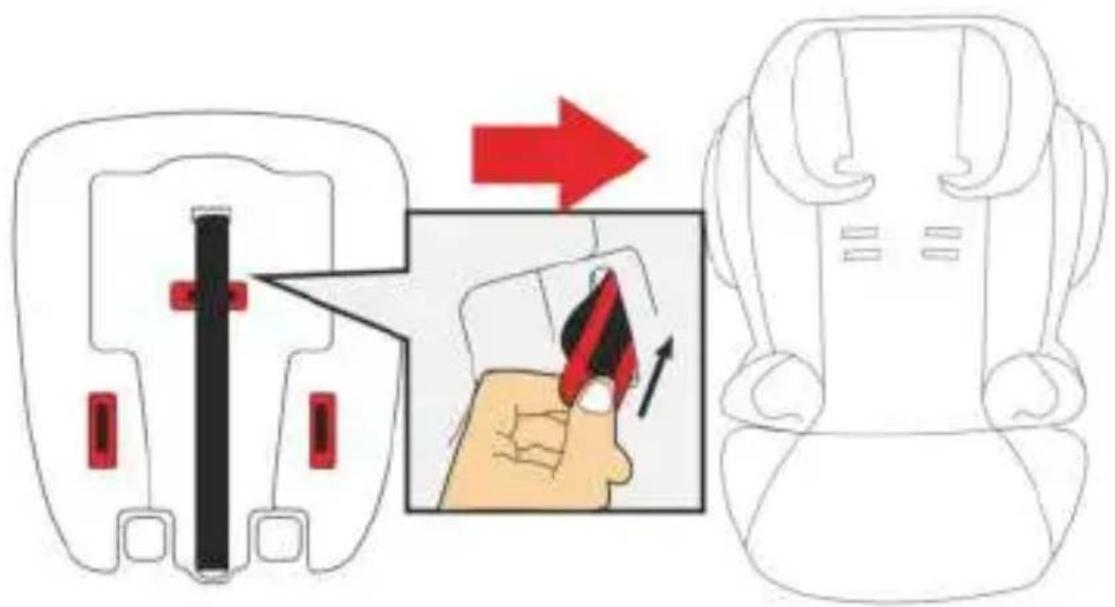
Diagram illustrating a medical procedure on a device, showing step-by-step insertion and change in the main view.Turn the webbing retainers on their narrowest end and feed them through the slots in the base of the seat and then through the slots in the fabric cover.
WARNING: Never remove the back of your car seat. Without the back, your child will not be protected laterally.
Universal Retaining system: for cars without Isofix
This type of approved seat belt you should have
text_image
Diag onal bet Lap belt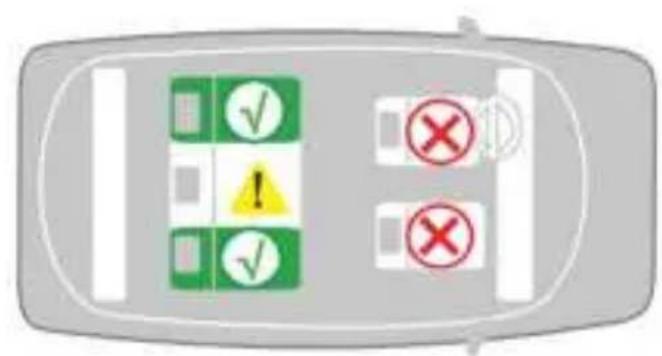
text_image
Diagram showing vehicle safety symbols including checkmarks and red X marks indicating failure or hazard status
natural_image
Green checkmark icon with a silhouette of a person holding a tool, no text or symbols present
This car seat is only suitable if the vehicle is fitted with 3-point- static, 3-point retractor safety belts, approved to UN/ECE Regulation No. 16 or other equivalent standards.
This type of child seat may be compatible to other car seats, too. If you have any doubt, please consult the manufacturer or retailer.
Fitting the car seat for 9-18 kg (Group I, approx. 9 months to 4 years)
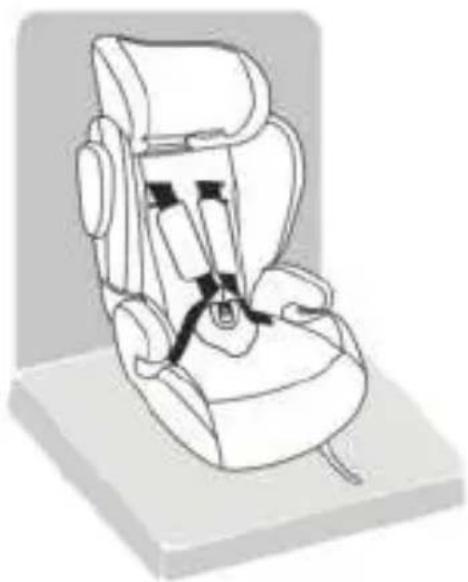
Install the child seat in consistent with the vehicle driving direction.
natural_image
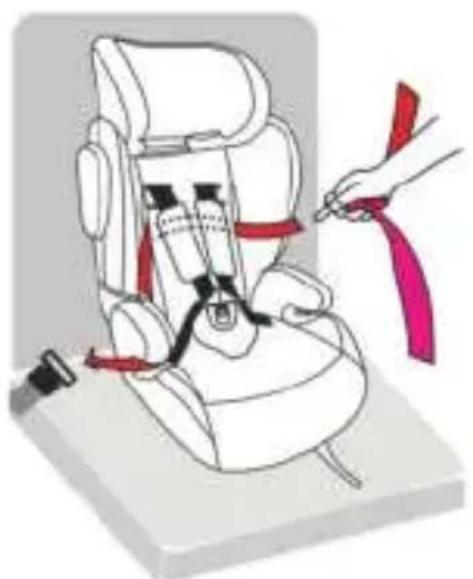
Line drawing of a car seat assembly with no text or symbolsStep 1: Place the child seat on the vehicle's seat ensuring that it firmly leans against the car seat backrest.
natural_image
Illustration of a child's seat assembly with red belt and blue straps, no text or symbols presentStep 2: Fasten the seat cushion and backrest fully as shows in the picture.
text_image
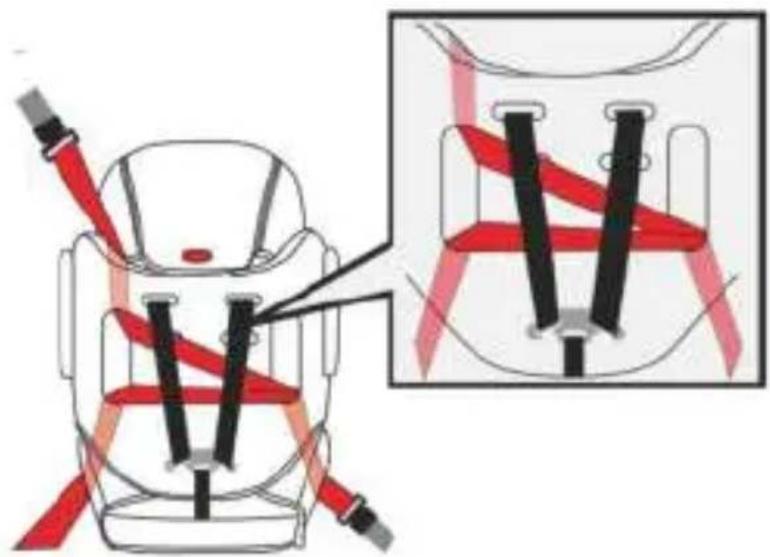
Diagram illustrating car seatbelt usage with red and black bands, showing a close-up of the seatbelt component.Step 3: Caution: From the back view, make sure that the seat belt goes under the belt of the child's seat, go over is the incorrect installation. This is very important.
text_image
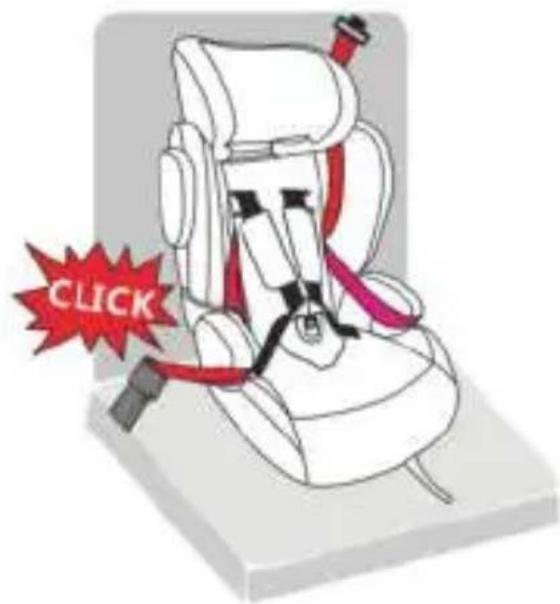
CLICKStep 4: Make sure that the seat belt is not twisted. Also make sure that the lap section of seat belt webbing goes under the armrest and the diagonal section of the seat belt webbing goes under the red clip. Fastening the belt into the buckle, make sure that you hear a „click“ and then fasten the belt.
Fitting the car seat for 9-18 kg (Group I, approx. 9 months to 4 years)
natural_image
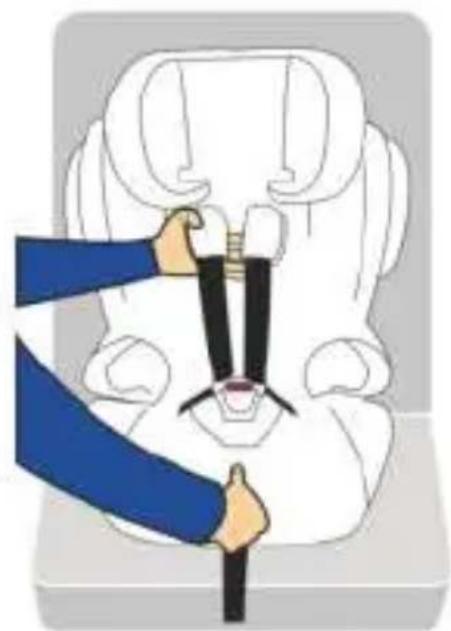
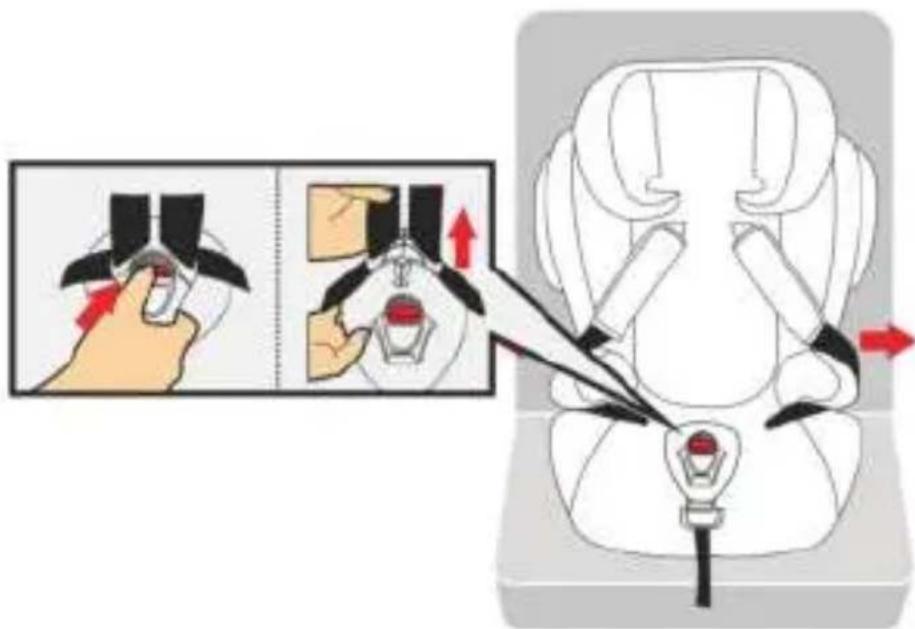
Illustration of a person adjusting a white object with black straps, no text or symbols presentStep 1: As shows in the picture above, one hand press the harness adjuster, and another hand loose the shoulder straps, then we can loose the shoulder straps its longest lenght.
text_image
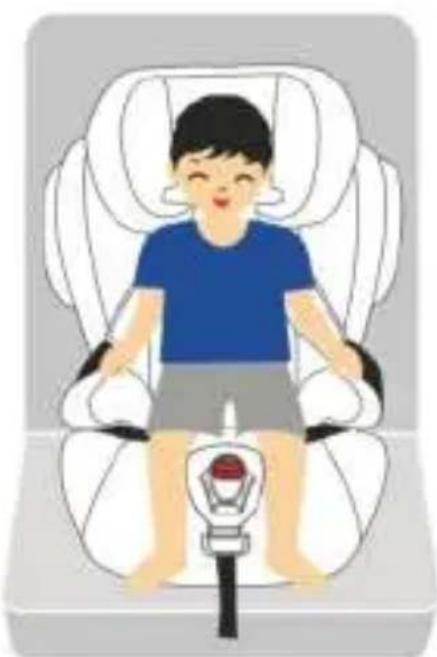
Medical illustration showing hand positioning and laparoscopic procedure on a patient seat, with Chinese annotations.Step 2: As shows in the picture press the red button to release the buckle, then put the shoulder straps on both sides of the armrest.
natural_image
Illustration of a child sitting in a white car seat with a red brake stopper (no text or symbols)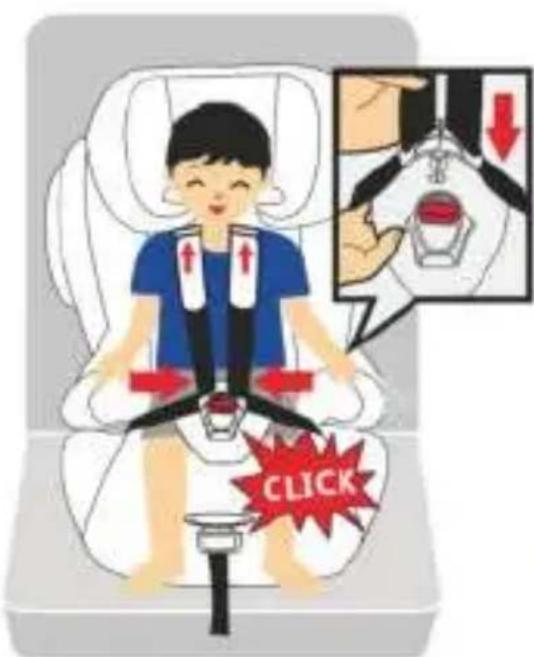
text_image
CLICK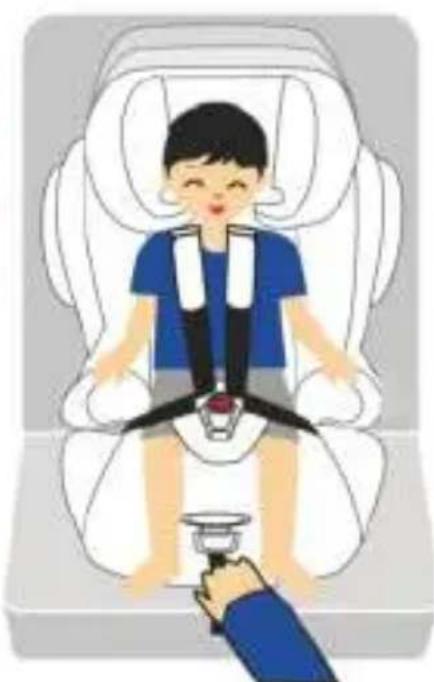
natural_image
Illustration of a child seated in a car seat with a hand holding a seatbelt (no text or symbols present)Step 3: Put your baby into the child seat, put the shoulder straps in its original position. Adjust the shoulder straps according to the height of your child's shoulder. Close the insert and press it into the buckle, make sure you hear a „click“. Make sure that the seat belt is not twisted. Fastening the shoulder section of belt, and finally adjust the height of the headrest according to your child's height.
Fitting the car seat for 15-36 kg (Group II & III, approx. 3 years to 12 years)
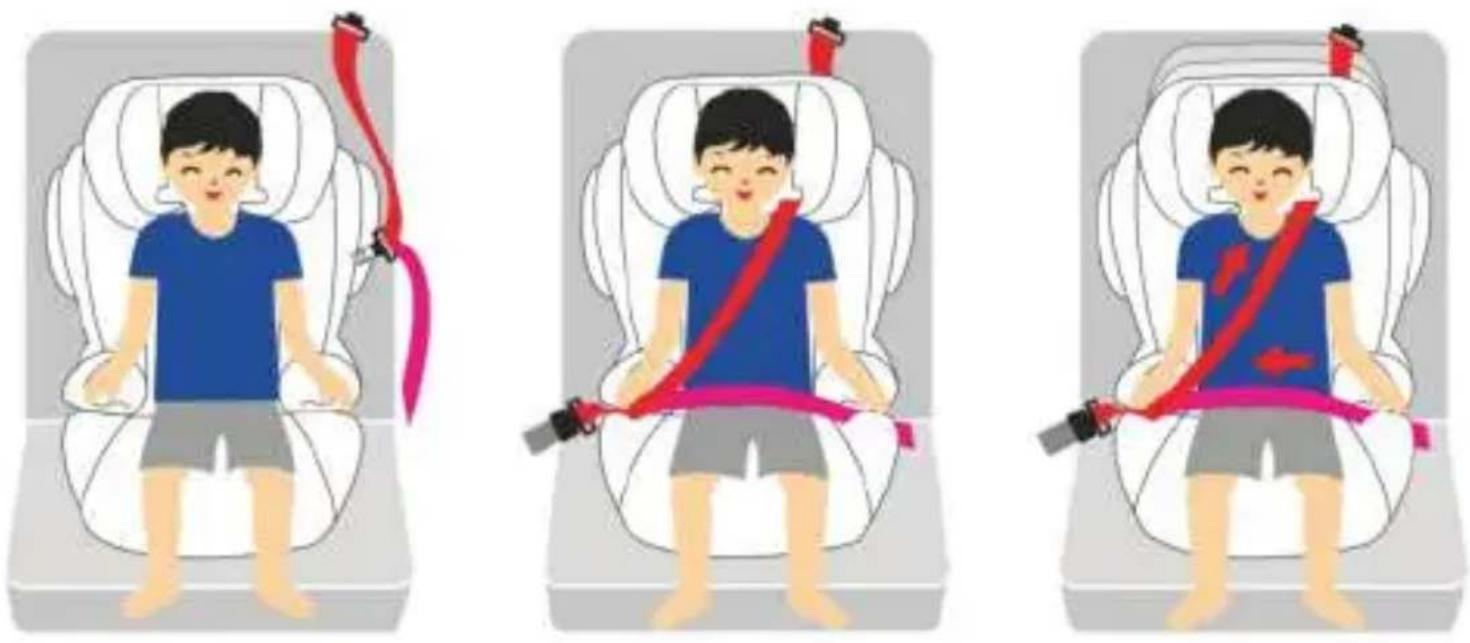
Step 1: Place the child seat on the vehicle's seat ensuring that it is firmly pressed against the car seat's backrest.
Step 2: Place your child into the child seat.
Step 3: Fastening the seat belt, making sure that a) the lap section of the seat belt webbing goes above the crotch of the child; b) the diagonal sections of the seat belt webbing goes above your child's shoulder. Making sure the lap section of the seat belt webbing goes under the armrest and then fasten it into the buckle.
Step 4: Make sure that the seat belt is not twisted. Check whether the diagonal sections of the seat belt webbing goes through the groove on the armrest. At the same time, the shoulder straps should be adjusted to the height that is right over your child's neck.
Step 5: Adjust the height of the headrest, make sure that the hook on the headrest is 1 cm over your child's shoulder.
Step 6: Fasten the seat belt upwards firmly, ensure that the seat is firmly installed.
Caution: Make sure that the seat belt is not twisted. Also check whether the cover is correctly installed, and whether match will with the seat belt.
Fitting the car seat for 9-18 kg (Group I, approx. 9 months to 4 years)
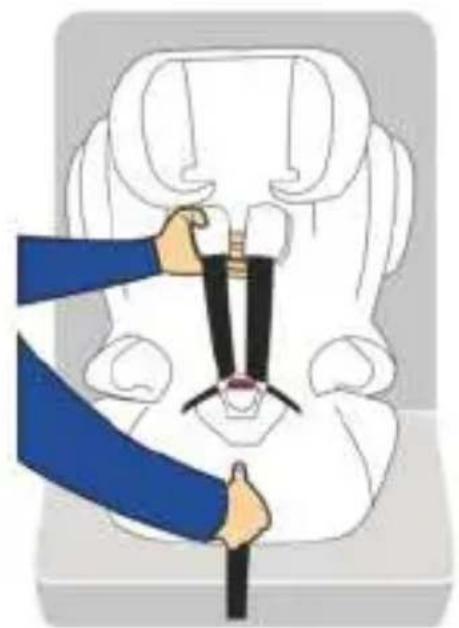
natural_image
Illustration of a medical procedure showing a hand adjusting a patient's seatbelt (no text or symbols present)Step 1: As shows in the picture above, one hand press the harness adjuster, and another hand loose the shoulder straps, then we can loose the shoulder straps its longest lenght.
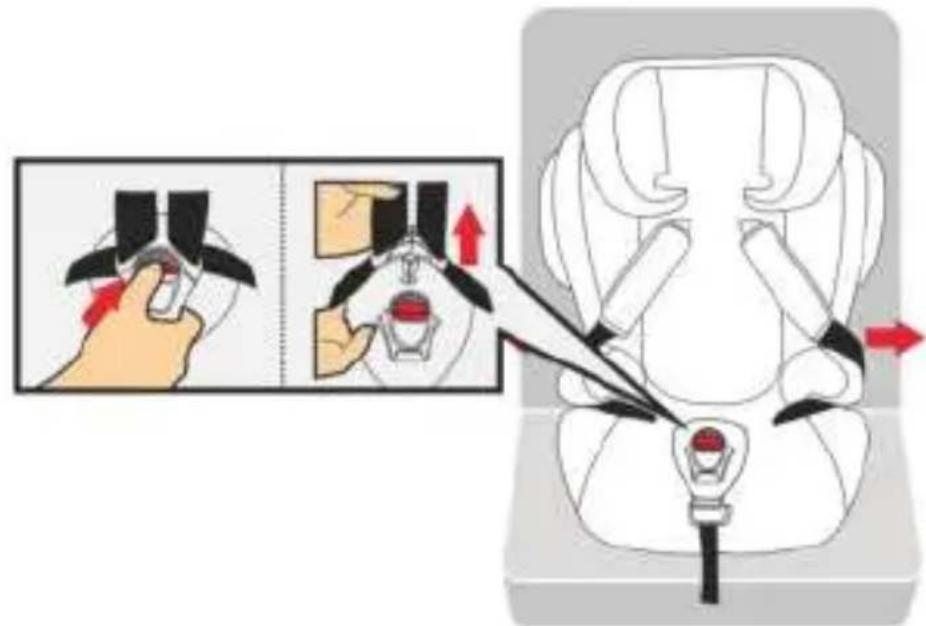
text_image
Medical illustration showing a hand performing a shoulder press technique on a car seat, with close-up and directional arrows indicating action.Step 2: As shows in the picture press the red button to release the buckle, then put the shoulder straps on both sides of the armrest.
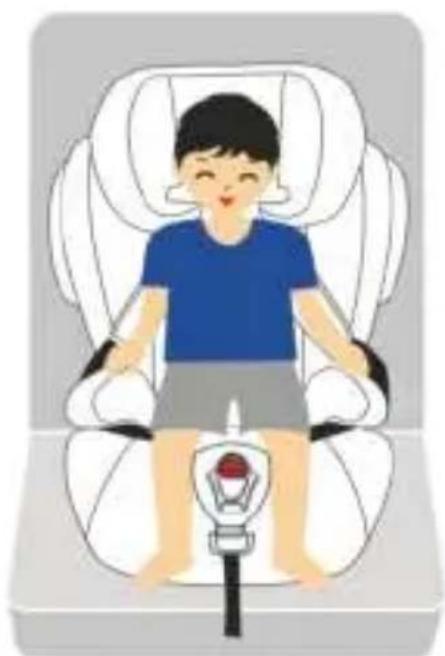
natural_image
Illustration of a child sitting in a car seat with a red button on the seat (no text or symbols)
text_image
CLICK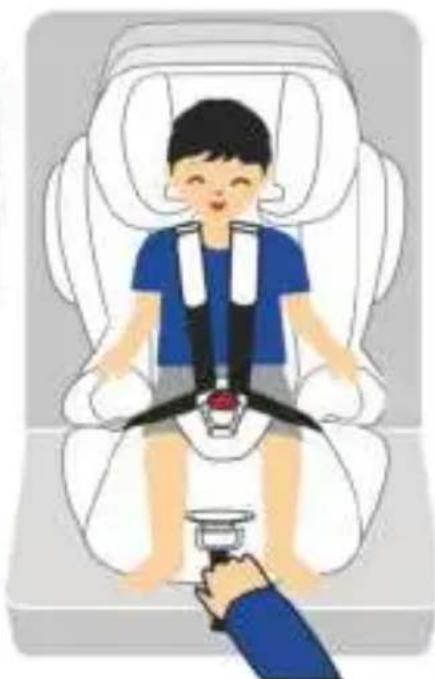
natural_image
Illustration of a child wearing a seatbelt sitting inside a white car seat, with a hand holding a small cup (no text or symbols present)Step 3: Put your baby into the child seat, put the shoulder straps in its original position. Adjust the shoulder straps according to the height of your child's shoulder. Close the insert and press it into the buckle, make sure you hear a „click“. Make sure that the seat belt is not twisted. Fastening the shoulder section of belt, and finally adjust the height of the headrest according to your child's height.
Fitting the car seat for 15-36 kg (Group II & III, approx. 3 years to 12 years)
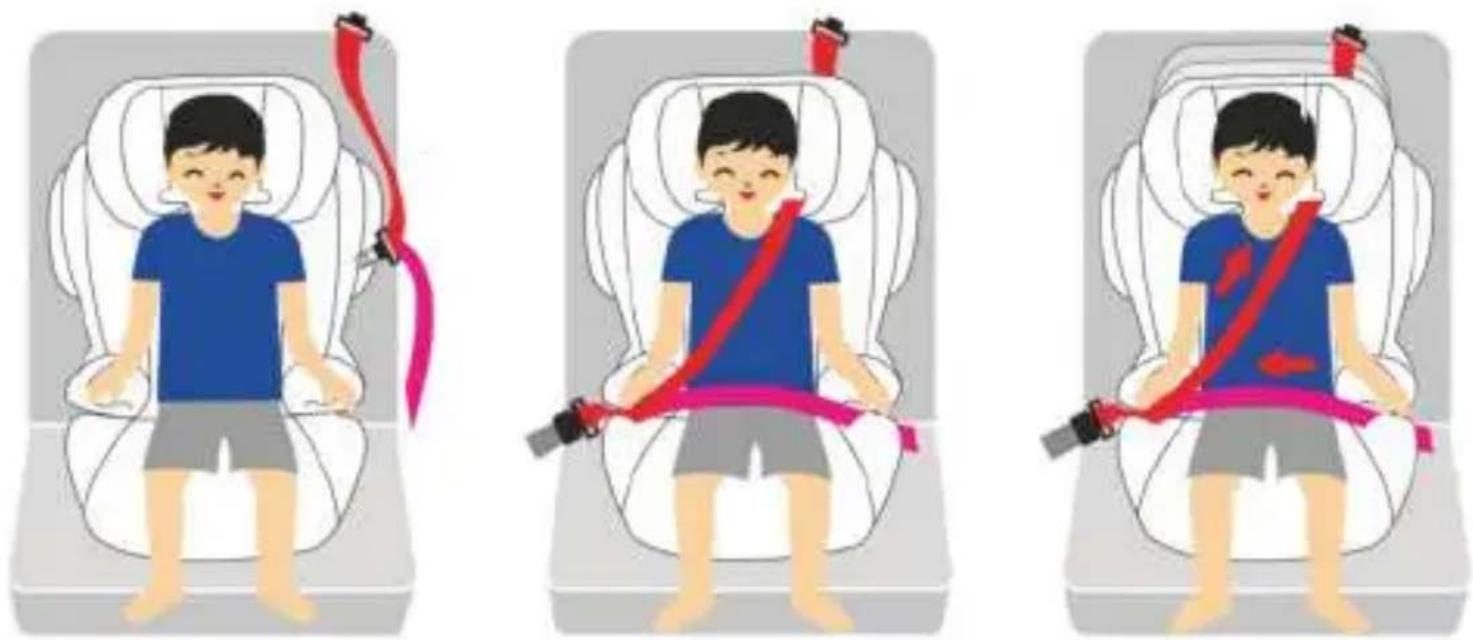
Step 1: Place the child seat on the vehicle's seat ensuring that it is firmly pressed against the car seat's backrest.
Step 2: Place your child into the child seat.
Step 3: Fastening the seat belt, making sure that a) the lap section of the seat belt webbing goes above the crotch of the child; b) the diagonal sections of the seat belt webbing goes above your child's shoulder. Making sure the lap section of the seat belt webbing goes under the armrest and then fasten it into the buckle.
Step 4: Make sure that the seat belt is not twisted. Check whether the diagonal sections of the seat belt webbing goes through the groove on the armrest. At the same time, the shoulder straps should be adjusted to the height that is right over your child's neck.
Step 5: Adjust the height of the headrest, make sure that the hook on the headrest is 1 cm over your child's shoulder.
Step 6: Fasten the seat belt upwards firmly, ensure that the seat is firmly installed.
Caution: Make sure that the seat belt is not twisted. Also check whether the cover is correctly installed, and whether match will with the seat belt.
Care and maintenance
1. Removing the cover
Backrest cover removal: First, release the elas c strap at the bo om of the backrest cover, then slide the cover off .
Headrest and booster seat cover removal: Slide the cover off.
Hand Wash No dry-cleans
Temperature below
30 degree
Do not iron
Use mild soapNo decolorizer
2. Cleaning the seat cover:
All the material parts can be removed. Slight stains can be removed using a damp sponge soaked in soapy water or it can be washed by hand at 30^ in soapy water. Do not use bleach, do not iron, do not machine wash, and do not tumble dry.
3.Cleaning the seat:
The harness and plastic parts can be sponged with very mild detergent and warm water. Do not use chemical cleansers, bleach or corrosives on any part of the seat.
text_image
Diagram illustrating how to adjust seatbelt usage in a car, with zoomed-in views showing key components and red circles highlighting specific areas.text_image
Diagram illustrating how to adjust seatbelt from a person's seatbelt, showing three steps with close-ups.text_image
Diagram illustrating a medical procedure on a device, showing step-by-step insertion and change in the main view.text_image
Diagram showing vehicle safety warning signs with checkmarks and red X marks, indicating incorrect detection or failure.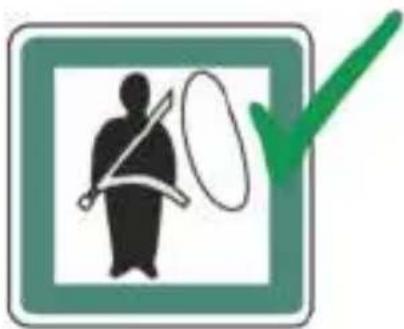
natural_image
Green checkmark icon with a silhouette of a person holding a crossbar and a circle, no text or symbols present.
natural_image
Line drawing of a car seat assembly with no text or symbolsnatural_image
Illustration of a car seat assembly with a hand adjusting the seatbelt (no text or symbols present)text_image
Diagram illustrating car seatbelt usage with red and black bands, showing a close-up of the seatbelt component.natural_image
Illustration of a person adjusting a white object with a blue bandage, no text or symbols presenttext_image
Medical illustration showing hand positioning and surgical procedure on a patient's seat, with labeled arrows indicating movement.natural_image
Illustration of a child sitting in a car seat with a red brake test device (no text or symbols)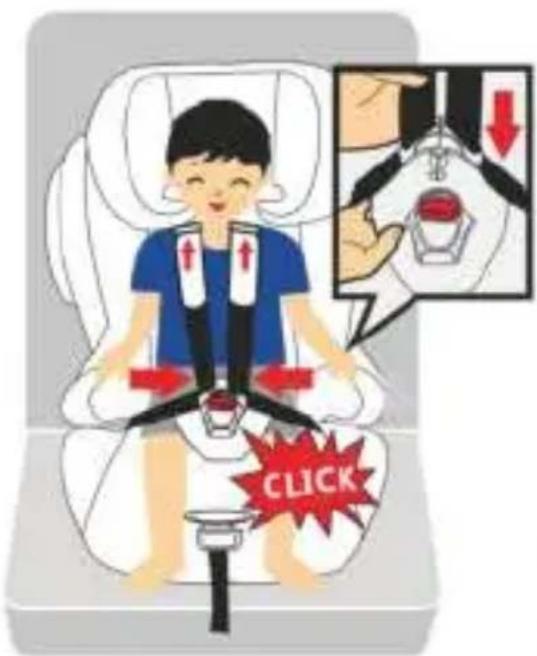
text_image
CLICK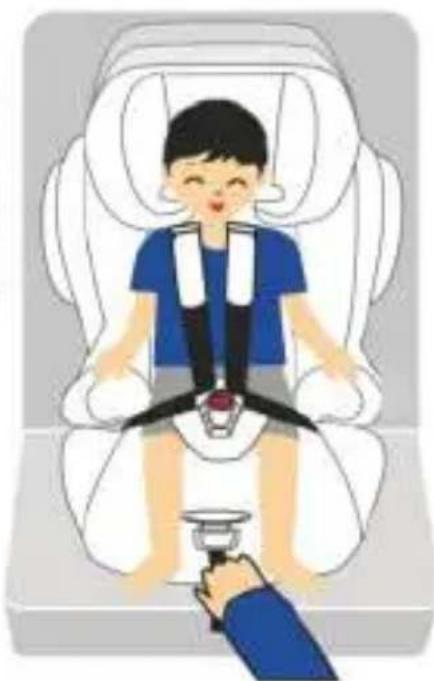
natural_image
Illustration of a child wearing a seatbelt sitting in a white car seat, with a hand holding a small cup (no text or symbols present)natural_image
Illustration of a person adjusting a seatbelt on a white object (no text or symbols)text_image
Medical illustration showing a hand holding a device with red arrows indicating force application, alongside a close-up of the device's internal structure.natural_image
Illustration of a child sitting in a car seat with a red brake test device (no text or symbols)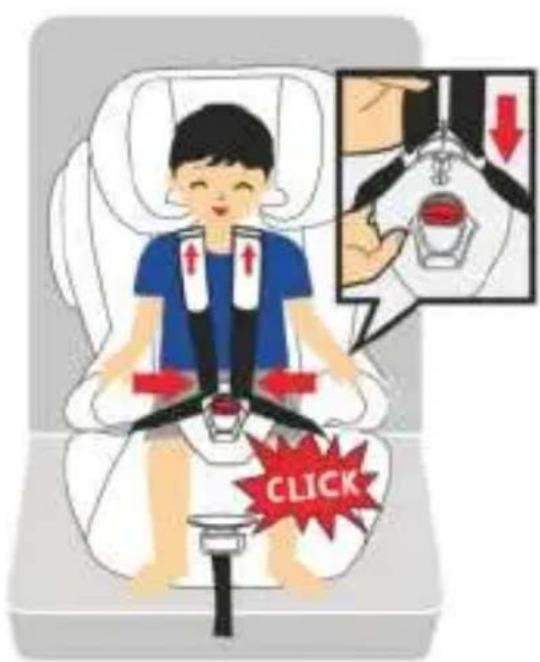
text_image
CLICK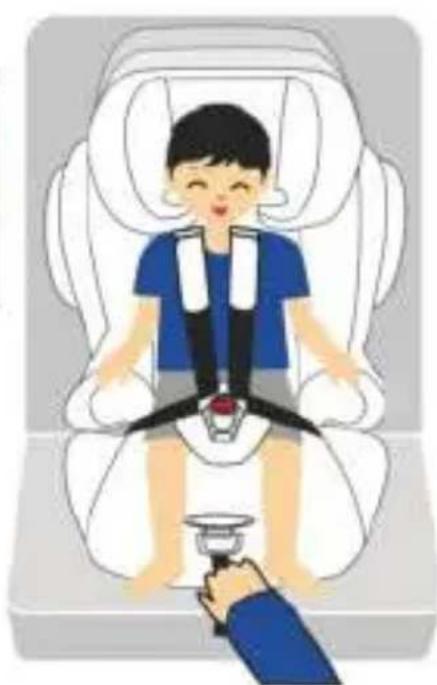
natural_image
Illustration of a child wearing a seatbelt sitting in a car seat, with a hand holding a small cup (no text or symbols present)text_image
Diagram illustrating how to adjust seatbelt usage in a car, with zoomed-in views showing key components and red circles highlighting specific areas.text_image
Diagram illustrating how to adjust seatbelt buckle, showing step-by-step instructions with labeled steps ①, ②, and ③.text_image
Diagram illustrating a step-by-step instructions for using a device to adjust the black pen, with a hand holding a pen and red arrow indicating direction.text_image
Diagram showing vehicle safety symbols including checkmarks, exclamation mark, and red X marks indicating failure or rejection status.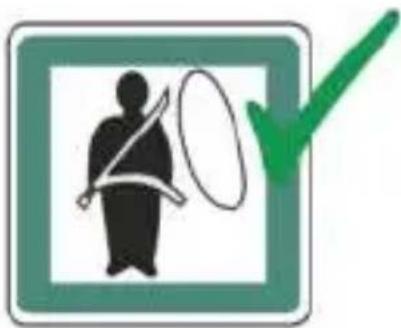
natural_image
Green checkmark icon with a silhouette of a person holding a crossbar and a circle, no text or symbols present.
natural_image
Line drawing of a car seat with black straps and seatbelt (no text or symbols)natural_image
Illustration of a car seat assembly with a hand adjusting the seatbelt (no text or symbols present)text_image
Diagram illustrating how to adjust seatbelt and harnesses in a car seat, with magnified detail showing the same configurations.natural_image
Illustration of a medical procedure showing a hand adjusting a patient's seatbelt (no text or symbols present)text_image
Medical illustration showing a hand holding a car seat with instructions for adjusting the seatbelt, including a close-up of the hand performing a grip.natural_image
Illustration of a child seated in a car seat with a bicycle seat, no text or symbols present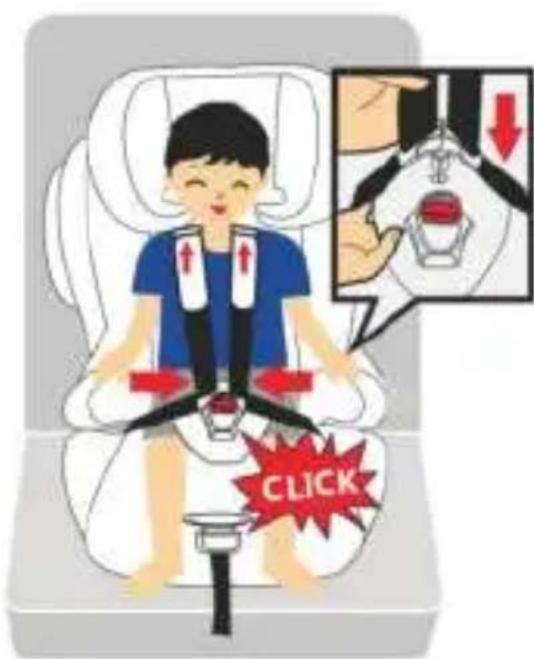
text_image
CLICK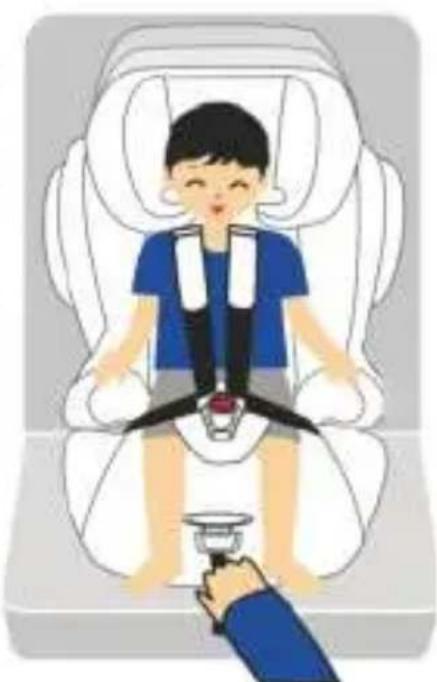
natural_image
Illustration of a child wearing a seatbelt sitting in a car seat, with a hand holding a small cup (no text or symbols present)natural_image
Illustration of a medical procedure showing a hand inserting a sutured device into a patient's seat (no text or symbols present)text_image
Medical illustration showing hand positioning and surgical procedure on a patient's head, with labeled steps and directional arrows.natural_image
Illustration of a child sitting in a car seat with a red bicycle on the seat (no text or symbols)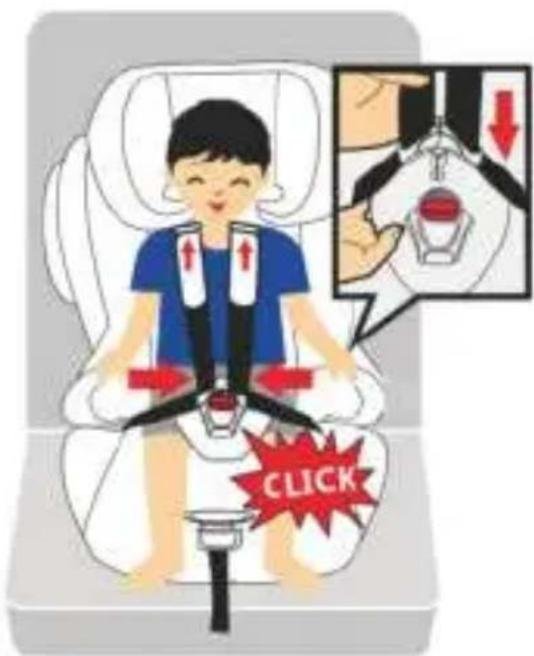
text_image
CLICK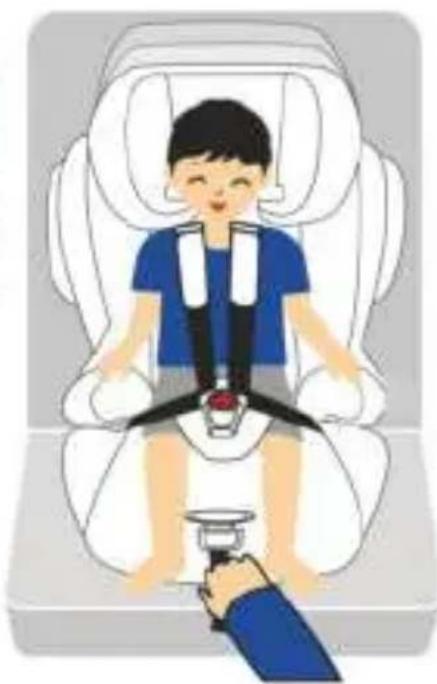
natural_image
Illustration of a child seated in a car seat with a hand holding a seatbelt (no text or symbols present)natural_image
Facebook logo icon (no text or symbols present)
text_image
QR code image containing encoded data, no visible human-readable textFind us on F acebook!
www.facebook.com/Osann.de

osann
Osann GmbH
Gewerbestr. 22
D-78244 Gottmadingen