TSA3221 - Croque monsieur clip Teesa - Free user manual and instructions
Find the device manual for free TSA3221 Teesa in PDF.
User questions about TSA3221 Teesa
0 question about this device. Answer the ones you know or ask your own.
Ask a new question about this device
Download the instructions for your Croque monsieur clip in PDF format for free! Find your manual TSA3221 - Teesa and take your electronic device back in hand. On this page are published all the documents necessary for the use of your device. TSA3221 by Teesa.
USER MANUAL TSA3221 Teesa
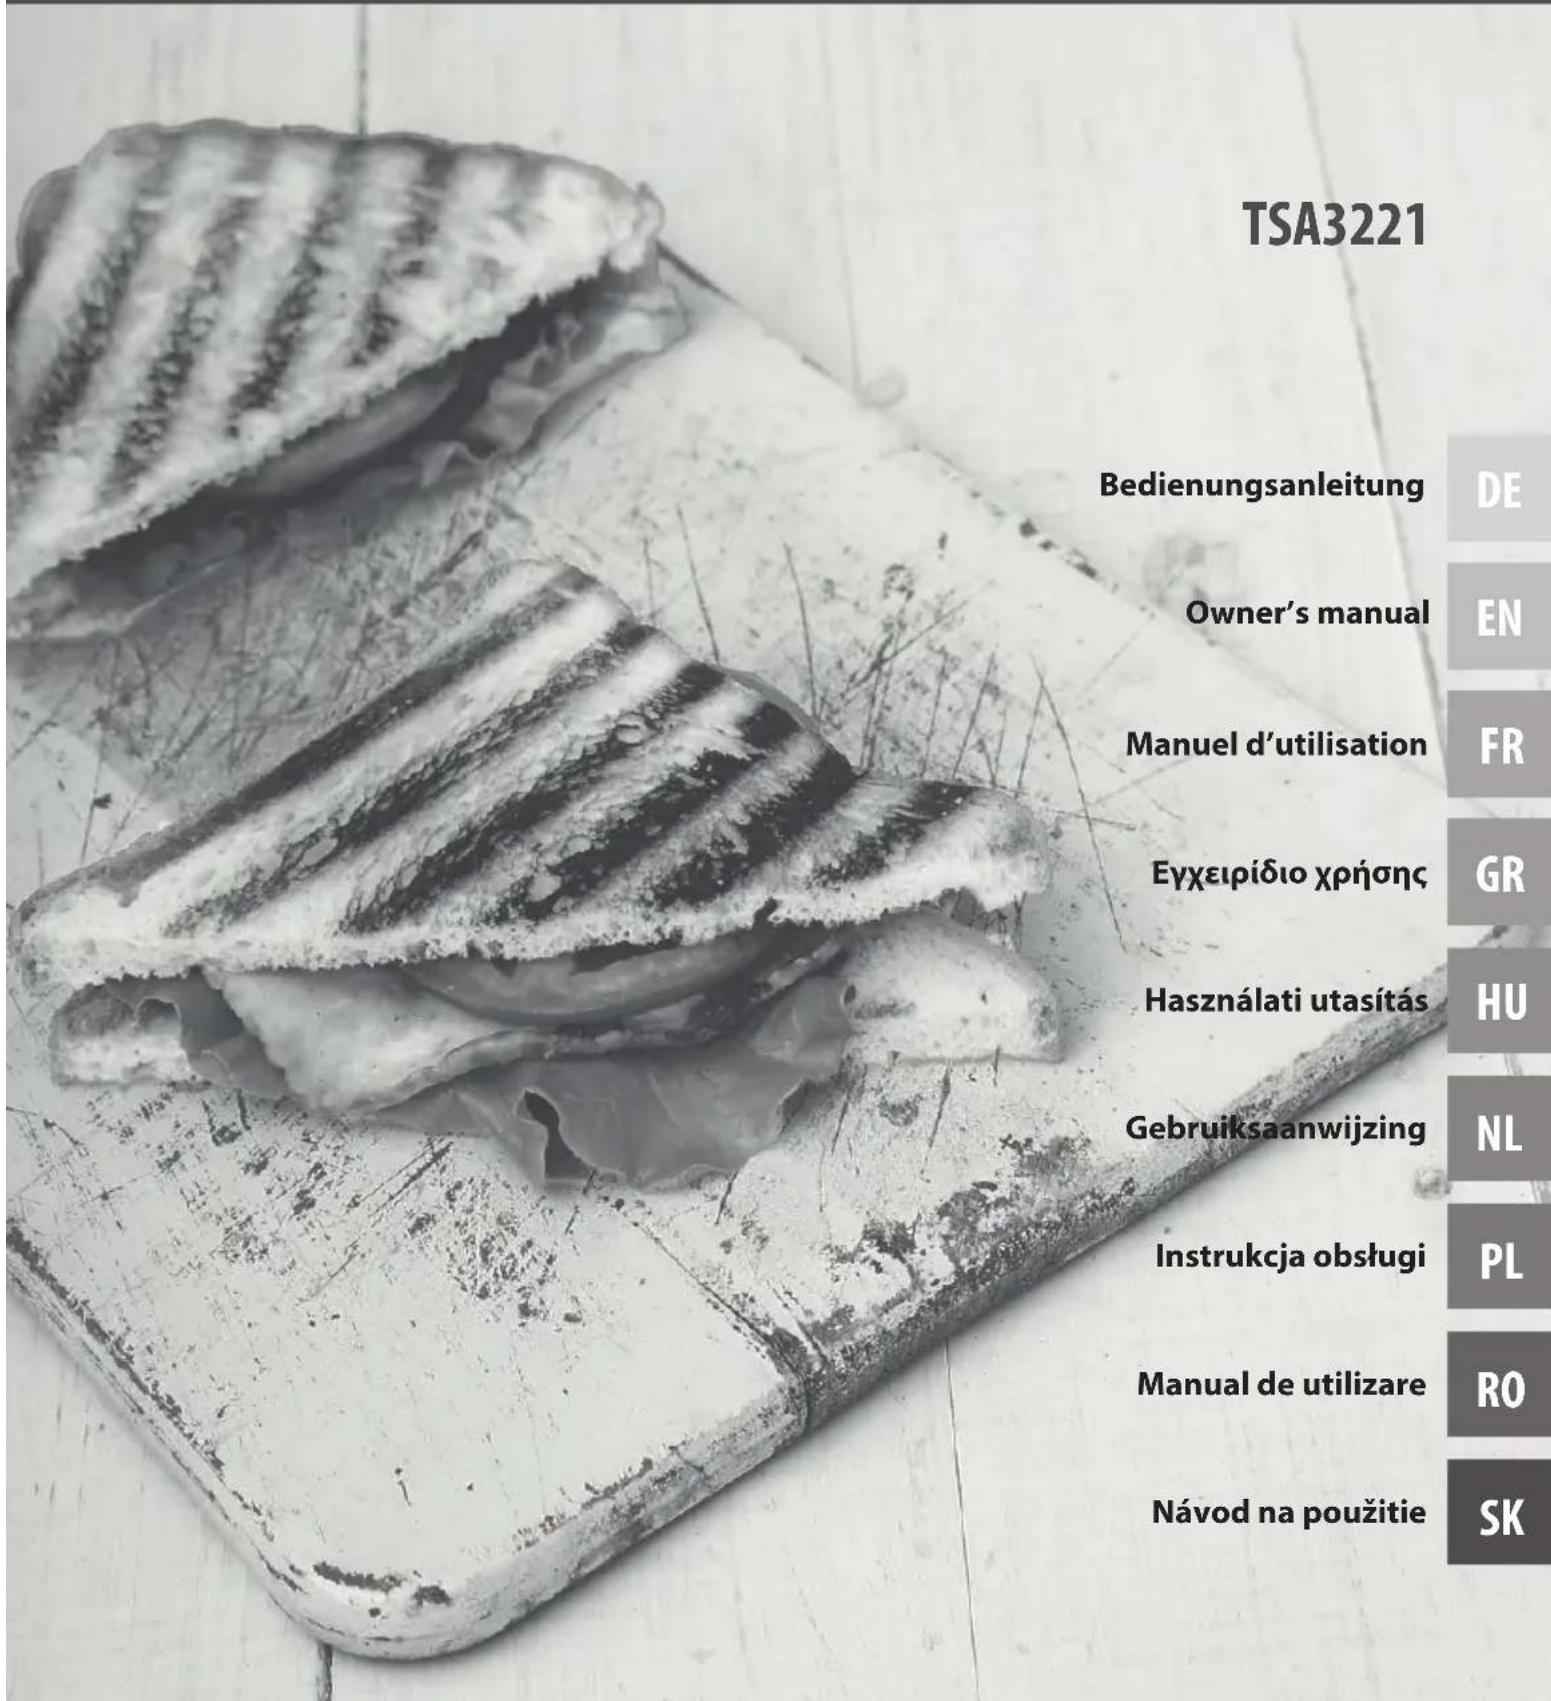
Sandwich maker 3-in-1 with ceramic plates
Thank you for purchasing TEESA appliance. Please read this operation instruction carefully before use, and keep it for future use. Distributor does not take responsibility for damages caused by inappropriate handling and use of the product.
SAFETY INSTRUCTIONS
In order to reduce the injuries or damages, follow basic safety precautions applied when using any electrical device, including the following:
- Read this instruction manual carefully, even if you are familiar with the appliance. Keep the manual for future reference.
- Before connecting the device to power supply socket, make sure the voltage indicated on the appliance corresponds to the voltage in the power supply socket.
- In order to avoid a hazard due to inadvertent resetting of the thermal cutout, this appliance must not be supplied through an external switching device, such as a timer, or connected to a circuit that is regularly switched on and off by the utility.
- Place the device on flat, stable surface.
- Clean this device in accordance to instructions listed in "Cleaning" section.
-
ALWAYS turn off the device and disconnect it from the mains supply:
-
if it's not operating correctly
- if there's an uncommon voice when using
- before disassembling the device
- before cleaning
-
before servicing
-
When you disconnect the power cord of the device, grasp and pull the plug, not the cord/cable.
- Keep the device out of the reach of children. Do not leave children unsupervised with the product.
-
This appliance may be used by children who are above 8 years old and by persons with reduced physical, sensory or mental capabilities, or lack of experience and knowledge, if they are supervised and guided by a person who is responsible for their safety in a cautious manner, and all the safety precautions are understood and followed. Children should not play with this device. Children should not perform cleaning and servicing of the device unsupervised.
-
Fixed power cable may only be replaced in an authorized service point.
- Keep the device and its cord/cable away from heat, water, moisture, sharp edges and any other factor which may damage the appliance or its cord.
- Do not place the appliance in water or any liquid; nor handle/use it with wet or moist hands.
- Do not use the product for purposes different from displayed in this operating manual.
- Do not leave the appliance unattended when it's working.
- Producer of this product is not responsible for damages caused by inappropriate handling and using of the device.
- DO NOT use this device if the cord or the plug is damaged, or the appliance is broken.
- Do not attempt to repair this appliance yourself. Only authorized and qualified personnel may repair this device. There are no user-serviceable parts inside the device, never disassemble this product.
- Do not use unauthorized accessories.
- Appliance for indoor use only.
Make sure the power cord does not touch any hot or sharp elements. - Do not move the appliance while it is operating.
- This appliance is suitable exclusively for food preparation. Do not place anything but food in the appliance.
- Switch off the appliance before fitting and removing the attachment.
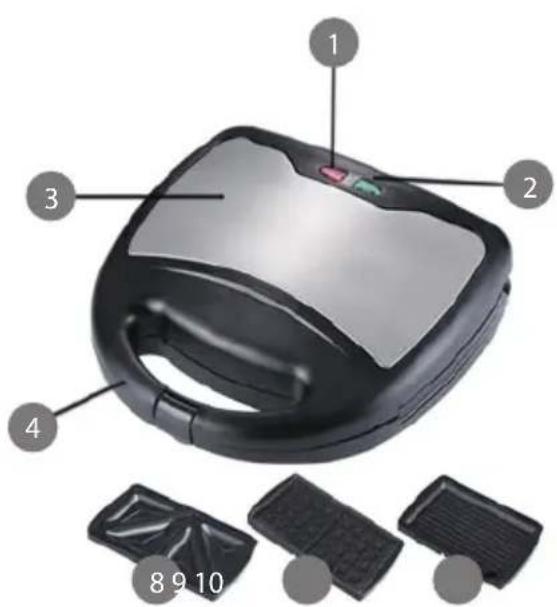
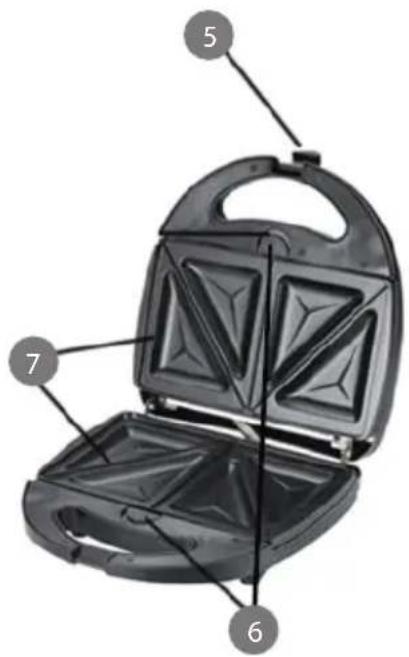
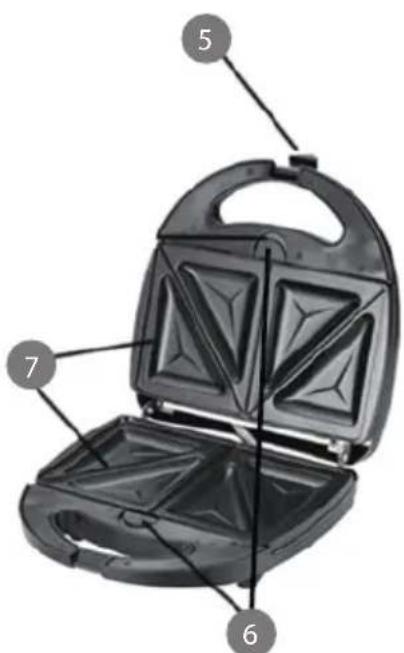
PRODUCT DESCRIPTION
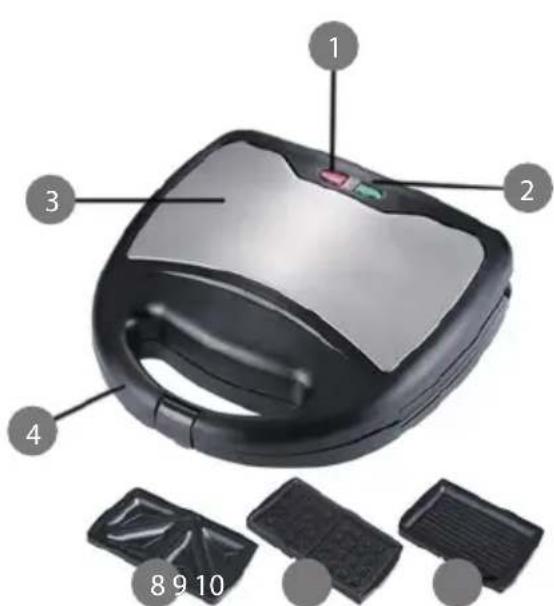
- Red pilot light (power)
- Green pilot light (heating)
- Cover
- Handle
- Hook
- Releasing buttons
- Ceramic interchangeable plates
- Heating plates for sandwiches
- Heating plates for waffles
- Heating plates for grilling
ASSEMBLING AND DISASSEMBLING OF HEATING PLATES
Removing:
- Open the cover of the sandwich maker.
- Pull the releasing buttons to release upper and lower plates and remove them.
EN
Inserting:
- Place the selected plate in the upper and lower casing and press them toward corresponding cases until they click in place. Make sure the heating plates are installed correctly.
Warning! Before removing or inserting heating plates make sure the device has cooled down after operating. Never replace the plates when the device is still hot.
OPERATION
- Remove the device from the packaging and peel off any labels.
- Place the device on dry and flat surface.
- Make sure the power supply socket is nearby.
- Open the cover and apply a layer of vegetable oil or butter on the plates using kitchen towel or brush for dough.
- If necessary wipe off any excess oil.
- Close the cover and insert the plug into supply socket. Red and green indicators turn on.
- Wait until green light goes off; it means that heating plates reached the toasting temperature. Sandwich maker is now ready to be used.
Note:
It is normal for the green light to go on and off while the device is operating. It means that the sandwich maker keeps the toasting temperature.
- Hot steam can emit from the cover of the sandwich maker during operation. Please exercise caution.
- Initially, the appliance may release an odor. This is a normal reaction caused by initial heating of the plates and should not reoccur.
PREPARATION
SANDWICHES
- Make sure the heating plates for sandwiches are inserted into the device.
- Insert the plug into power supply socket and preheat the device.
- Prepare your sandwich.
- When the device is ready to be used (green light goes off), open cover and place your sandwiches on the lower plates.
- Use the hook to close the sandwich maker.
Notes:
If it is difficult to close the device, remove any excess from your sandwich.
- Do not use force while closing the device.
- Do not touch the device while it is operating.
- Do not open the cover during the cooking process.
- Open the cover after about 4 to 5 minutes (or longer if you prefer; it depends on the recipe or user's preferences) and carefully remove the sandwich.
WAFFLES
- Make sure the heating plates for waffles are inserted into the device.
- Apply a layer of vegetable oil or butter on the plates using kitchen towel or brush for dough.
- Pour the dough on the center of the lower waffle plate and distribute it evenly on the whole plate.
- Close the cover but do not lock the hook (locking it would not allow the waffles grow).
- Bake the waffles for about 7 to 10 minutes.
Note: Do not open the sandwich maker during baking!
- Open the cover and carefully remove the waffles.
GRILL
- Make sure the heating plates for grill are inserted into the device.
- Apply a layer of vegetable oil or butter using brush for dough on both plates.
- Put the product on the lower plate and close the cover.
Note: Do not use force while closing the device.
- After some minutes (it depends on the recipe or user's preferences) open the cover and carefully remove grilled products.
Notes:
- If the sandwich maker is used to toast ready-made waffles or sandwiches, please make sure they fit the heating plates. If not, please cut them to fit the plates.
Ready-made waffles/sandwiches must be buttered on the outside. - Do not use synthetic or low fat spread as it tends to overheat at a lower temperature forming dark brown residue that can cause the toasted sandwich to stick to the plates.
SAFETY DURING REMOIVING PRODUCTS FROM THE SANDWICH MAKER
- Remove ready products from the sandwich maker carefully as the heating plates are hot.
- Use wooden or plastic utensils not to damage the surface of the heating plates.
- Remember to pull out the plug from power supply socket after using the sandwich maker.
- Remember that products removed from the sandwich maker are hot. Be careful not to get burned while eating them.
CLEANING AND MAINTENANCE
- Remove the plug from the power supply socket and let the device cool down before cleaning.
- Wipe the plates with a cloth damped in hot, soapy water.
- Dry the plates with a clean, dry cloth or a kitchen towel.
- Do not use any abrasives or chemical agents to clean this product.
- After each usage remove the accumulated crumbs and wipe the surface of the heating plates with a paper towel to absorb and remove the fat accumulated during roasting.
- It is recommended to store the device in the original packaging to preserve it from dust and humidity.
SPECIFICATION
Power light
Heating light
Heatproof grip
- Ceramic coating
- Interchangeable plaits:
- grill
- waffle iron
- sandwich maker
Overheating protection
Stainless steel cover
Thermostat control
Anti-slip base
Upright storage
- Max. Power: 800 W
Voltage: 220 240 V;50/60 Hz
Dimensions: 240 × 235 × 102 mm
- Cable length: 90 cm
Weight: 1,67kg
English
Correct Disposal of This Product
(Waste Electrical & Electronic Equipment)


(Applicable in the European Union and other European countries with separate collection systems) This marking shown on the product or its literature, indicates that It should not be disposed with other household wastes at the end of its working life. To prevent possible harm to the environment or human health from uncontrolled waste disposal, please separate this from other types of wastes and recycle it responsibly to promote the sustainable reuse of material resources. Household users should contact either the retailer where they purchased this product, or their local government office, for details of where and how they can take this item for environmentally safe recycling. Business users should contact their supplier and check the terms and conditions of the purchase contract. This product should not be mixed with other commercial wastes for disposal.
BESCHRIJVING VAN HET PRODUCT