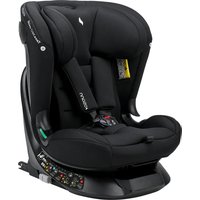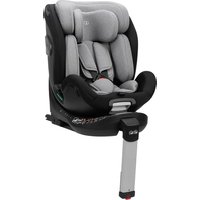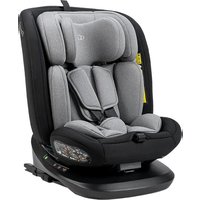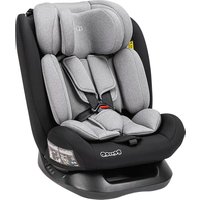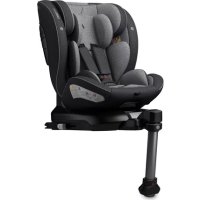
Oreo 360 iSize - High chair Osann - Free user manual and instructions
Find the device manual for free Oreo 360 iSize Osann in PDF.


User questions about Oreo 360 iSize Osann
0 question about this device. Answer the ones you know or ask your own.
Ask a new question about this device
Download the instructions for your High chair in PDF format for free! Find your manual Oreo 360 iSize - Osann and take your electronic device back in hand. On this page are published all the documents necessary for the use of your device. Oreo 360 iSize by Osann.
USER MANUAL Oreo 360 iSize Osann
natural_image
Line drawing of a car seat with seatbelt and seat, shown against a geometric background (no text or symbols)ECE R129/03 - i-Size
40-105 cm
DE
EN
FR
IT
NL
text_image
Diagram of a car with numbered positions and checkmarks indicating status or options, including question marks for questions 1 and 2.natural_image
Illustration of a hand inserting a card into a device (no text or symbols visible)natural_image
Illustration of a hand performing a medical procedure with a red circular arrow indicating clockwise motion (no text or symbols)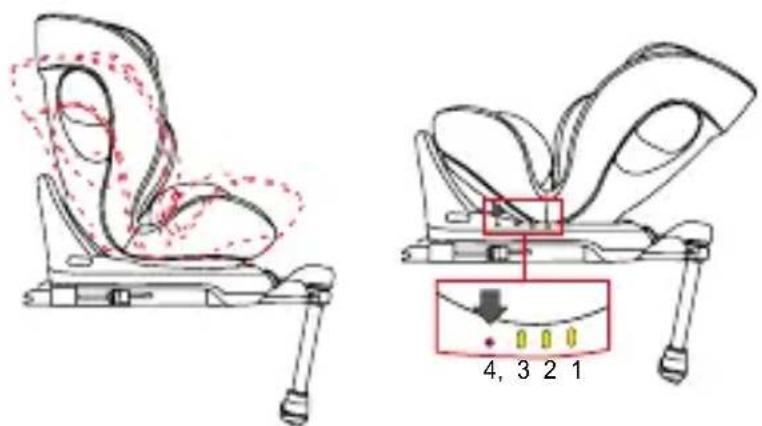
text_image
4, 3 2 1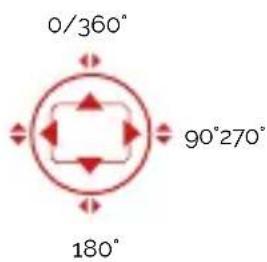
text_image
0/360° 90°270° 180°natural_image
Illustration of a child wearing a car seatbelt, no text or symbols present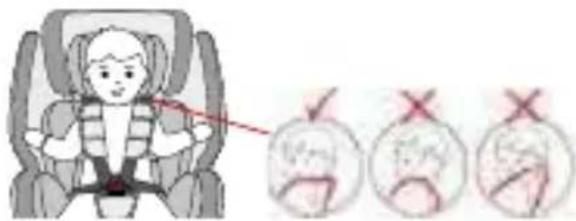
text_image
Illustration showing a child in a car seat with a red arrow pointing to three circular diagrams below indicating different scenarios or conditions.natural_image
Simple cartoon illustration of a hand holding a device with a red eye (no text or symbols)natural_image
Illustration of a car seat with a magnified inset showing a red arrow pointing to the seat (no text or symbols present)natural_image
Illustration of a hand holding red objects with a magnified inset showing two red mechanical parts (no text or symbols)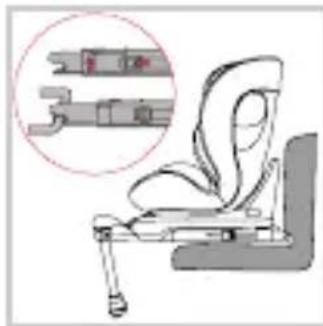
natural_image
Illustration of a seated car seat with an inset showing internal components (no text or symbols)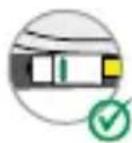
Standfuß
natural_image
Diagram of a mechanical component with a yellow arrow indicating rotation (no text or symbols)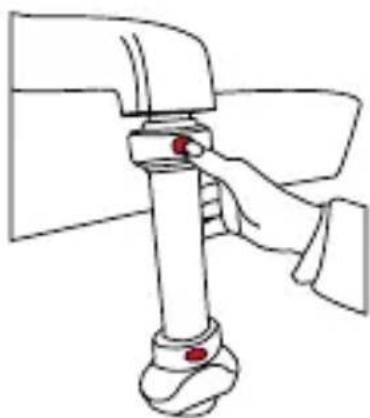
natural_image
Line drawing of a hand operating a valve mechanism (no text or symbols)text_image
Technical diagram of a car seat assembly with labeled parts and safety iconstext_image
Diagram of a car seat assembly with safety instructions and safety symbolsThank you for choosing our Oreo360 child car seat. If you require any support with this product, please contact our customer service team.
USE
- This product is suitable for children with a height of between 40 and 105 ~cm and weighing a maximum of 19 ~kg .
- Rear-facing installation for children between 40 and 105 ~cm in height: The child car seat for babies is installed in a rear-facing position using the Isofix connectors and the support leg. The child is fastened in using the five-point belt of the child car seat.
- Forward-facing installation for children with a height of between 76 and 105 ~cm : The child car seat for babies is installed in a forward-facing position using the Isofix connectors and the support leg. The child is fastened in using the five-point belt of the child car seat.
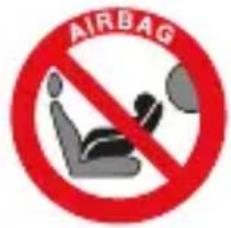
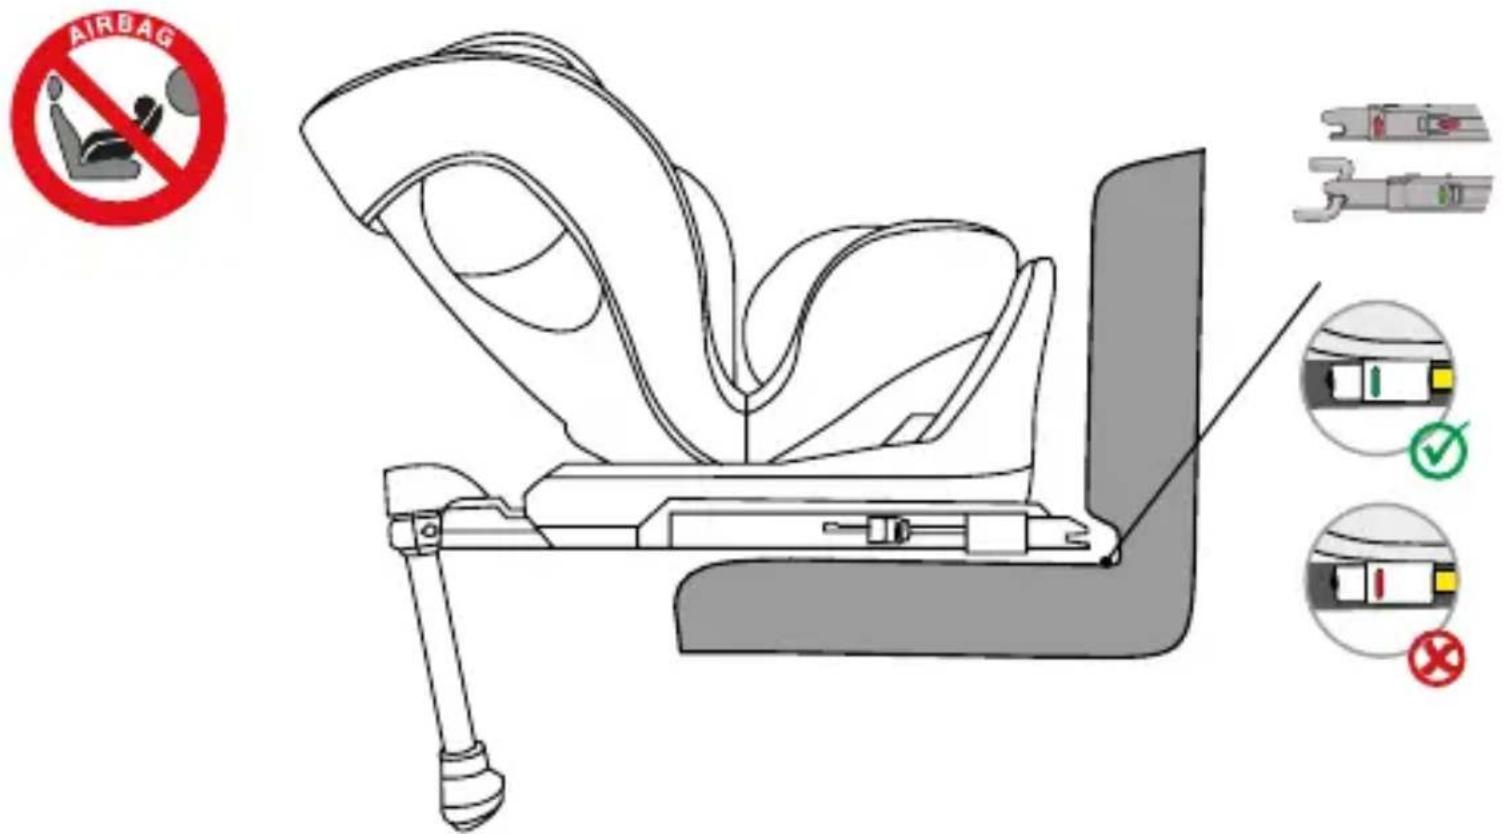
• We recommend installing the child car seat on the rear seat of the vehicle. If the child car seat is rear-facing, do NOT secure the child car seat on the front passenger seat if this seat has an airbag which cannot be deactivated. You can find additional information in the user manual for your vehicle. - This child car seat is only suitable for vehicles that feature Isofix connectors in accordance with ECE R16 or other equivalent standards.
WARNING
This is a child restraint system in the "i-Size" category. This is approved for use in accordance with ECE Regulation No. 129 in i-Size-compatible vehicle seat positions according to the information provided by the vehicle manufacturer in the vehicle user manual. In case of doubt, please contact the manufacturer of the child restraint system or the retailer.
IMPORTANT
DO NOT USE THE CHILD CAR SEAT FACING IN THE DIRECTION OF TRAVEL UNTIL THE CHILD HAS REACHED THE AGE OF 15 MONTHS.
EXTREME DANGER!
IF YOU MUST INSTALL THE CHILD CAR SEAT ON THE FRONT PASSENGER SEAT, PLEASE ENSURE THAT ANY AIRBAGS ARE DEACTIVATED!
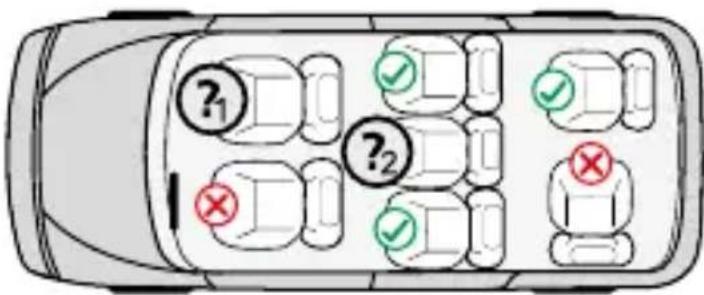
text_image
Diagram of a car with numbered positions and checkmarks indicating status or options, including question marks for questions 1 and 2.(?) Only if the airbag can be deactivated, Isofix connectors are available and the seat is recognised as i-Size-compatible in the vehicle manual
(2) Only if Isofix connectors are available and the seat is recognised as i-Size-compatible in the vehicle manual
WARNING
- Please read through the instructions carefully before use and retain them for subsequent reference in order to guarantee the safety of your child. Non-compliance with the instructions in this manual can result in serious injuries to your child.
- The child car seat must only be used with the accompanying five-point belt system for children who weigh under 19 kg (with a height of 40 - 105 cm).
- The child car seat cannot be used with a five-point belt system for children who weigh 19 kg or more (over 105 cm in height).
- The child car seat can be installed with the Isofix fastening system for both forward-facing and rear-facing positions.
Important: DO NOT USE THE CHILD CAR SEAT FACING IN THE DIRECTION OF TRAVEL UNTIL THE CHILD HAS REACHED THE AGE OF 15 MONTHS (SEE INSTRUCTIONS FOR USE).
- For the Isofix installation: You must read the manual provided by the car manufacturer.
- Do not use any supporting contact points other than those that are described in the instructions and are marked on the child restraint system.
- Do not use this child car seat at home. It has not been designed for use at home and should only be used in your car.
- Do not leave your child unsupervised in the seat at any time.
- Do not place the rear-facing child car seat on front seats with an airbag. This could lead to serious injuries or even death.
- The child car seat should be replaced if it is exposed to heavy impact during an accident.
- For safety reasons, the child car seat must also be secured in place in the vehicle when your child is not sitting in the child car seat.
- Always make sure that all connection systems that secure the child car seat in the vehicle and the belts that restrain the child are adjusted to the child's body. Also make sure that the belts are not twisted.
- Items of luggage or other objects that could cause injury in the event of a collision must be properly secured.
- The rigid components and plastic parts of a child restraint system must be positioned and installed so that they cannot get caught by a movable seat or a vehicle door during everyday use.
- It is important to secure the abdominal belt correctly. Your child should always be fastened in to prevent the risk of them falling out.
- It is dangerous to make changes or additions to the device without approval from the responsible authority. Non-compliance with the installation instructions provided by the manufacturer of the child restraint system is also associated with risks.
- This child car seat was designed for newborns and children weighing up to 19 kg. Never overload the child car seat by transporting more than one child or additional loads in it.
- The child restraint system must not be used without the seat cover.
- The seat cover may only be replaced by other seat covers that have been recommended by the manufacturer as the seat cover is an important component of the restraint performance.
COMPONENTS OF THE CHILD CAR SEAT
Front view
Adjustable head support
Comfort insert
Shoulder belt
Belt lock
Belt adjustment
Twist lever
Button for adjusting the length of the support leg
Support leg
Support leg indicator
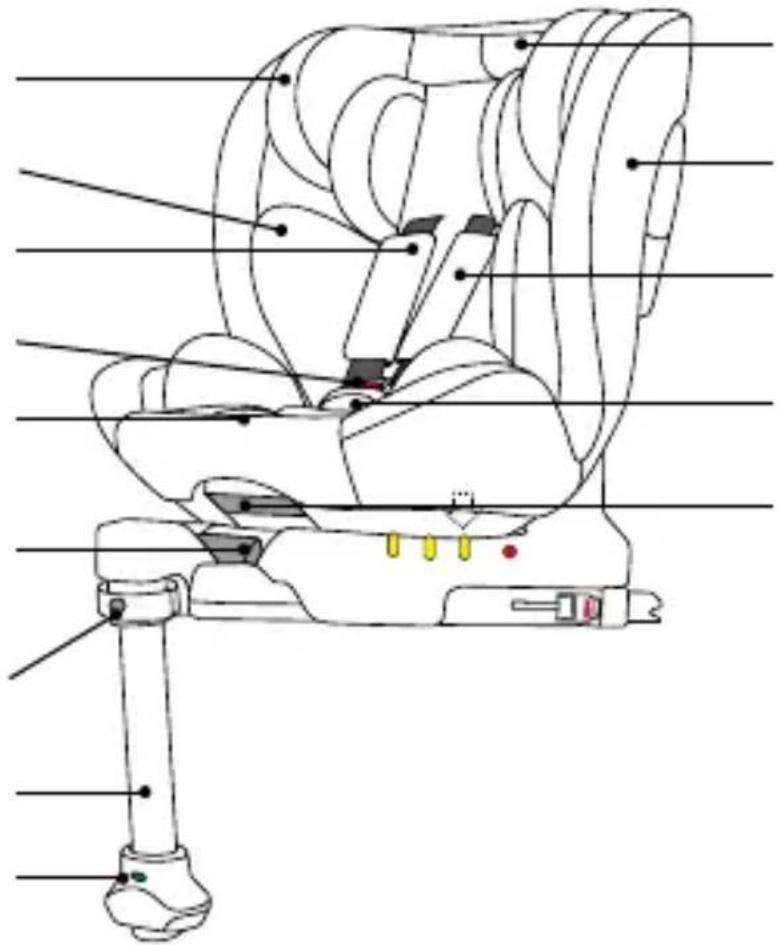
text_image
Technical diagram of a car seat assembly with labeled components in ChineseHead section adjustment
Seat bucket
Shoulder pad
Belt pad
Angle adjustment lever
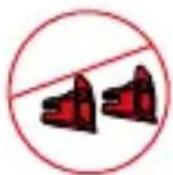
Insertion aids for Isofix connectors
Back view
Shoulder pad frame
Isofix connector
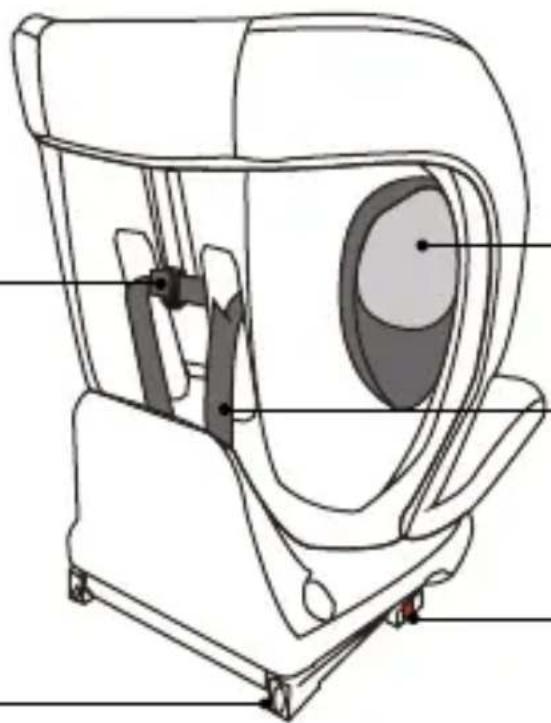
natural_image
Technical line drawing of a mechanical device with internal components (no text or symbols)Side protection
Shoulder belt
Isofix connector buttons for adjusting the length and releasing
USING THE CHILD CAR SEAT
Adjusting the tilt angle of the car seat
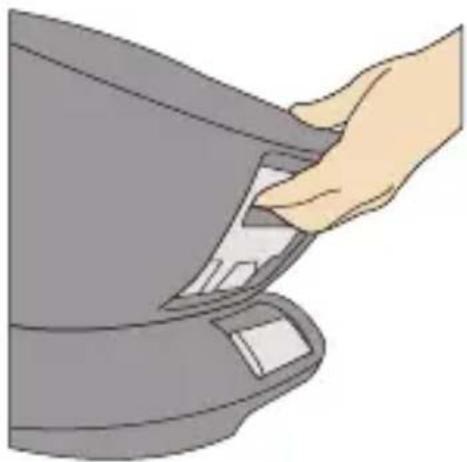
- With one hand, use the lever on the lower front side of the seat bucket to adjust the tilt.
- Hold the back of the seat bucket back with your other hand and set the tilt.
- If the child car seat is used in a rear-facing position, please always have it set to the maximum reclining position. (Position 4)
- In a front-facing position (for a height of 76 - 105 cm) you can select any of the three tilt angles (position 1 + 2 + 3) offered by the child car seat.
natural_image
Illustration of a hand inserting a card into a machine (no text or symbols visible)Turning the car seat
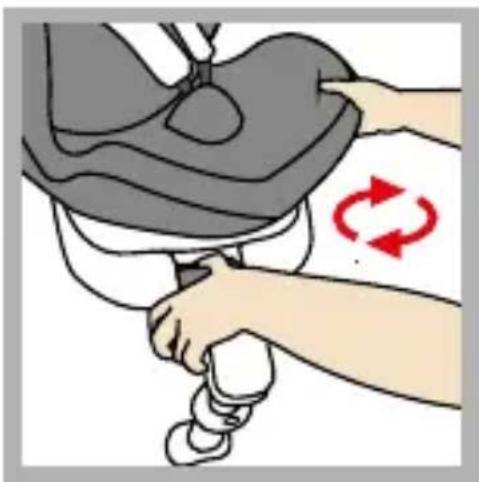
- Use one hand to pull the lever at the front of the seat and use your other hand to turn the seat bucket. The lever can be released when turning the seat bucket.
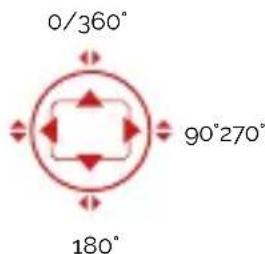
- The seat offers four locking positions: at 90, 180, 270 and 0 out of 360 degrees to the base. The seat bucket makes an audible click when it is moved into one of these positions.
- Positions 1 + 2 + 3 are only suitable for use in the direction of travel. Position 4 is exclusively for use facing away from the direction of travel. Position 4 is achieved automatically when the child car seat is placed in position 1 and then rotated by 180 degrees.
natural_image
Illustration of a hand performing a medical procedure with a red circular arrow indicating clockwise motion (no text or symbols)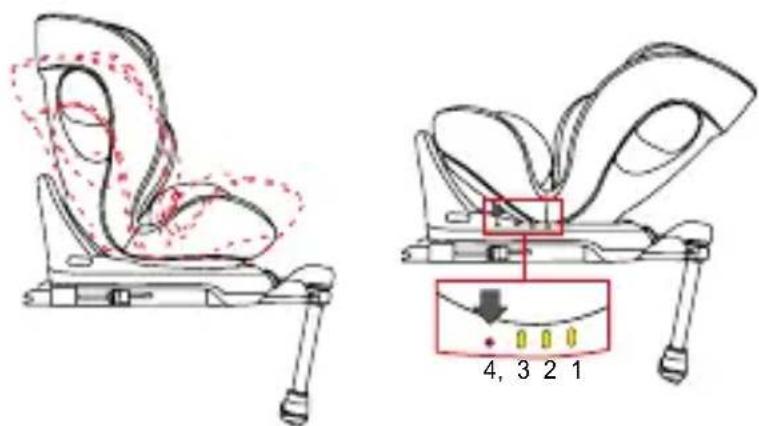
text_image
4, 3 2 1Only forward-facing Only rear-facing
text_image
0/360° 90°270° 180°Adjusting the belt
• To loosen the belt, press the belt adjustment button at the front of the seat with one hand.
- Use your other hand to hold the belt lock with the belts and loosen it.
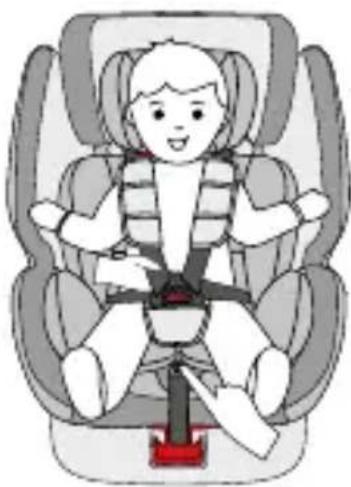
- If your child is fastened in, pull on the front adjustment tab to tighten the belt.
Please always ensure that the belts are adjusted in such a way that they rest on the child's shoulders.
natural_image
Illustration of a child wearing a car seatbelt, no text or symbols present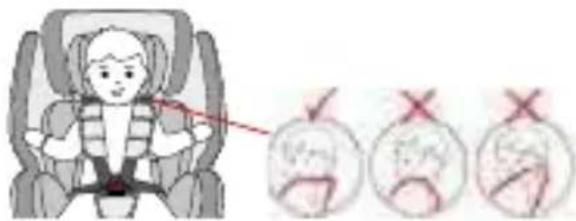
text_image
Illustration showing a child in a car seat with a red arrow pointing to three circular diagrams labeled with Chinese characters.Opening/closing the belt
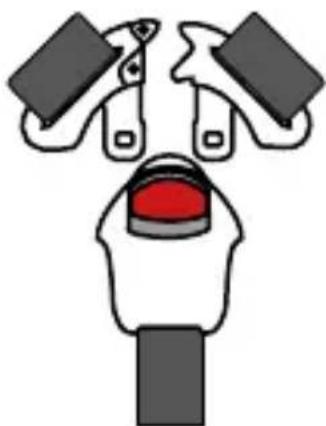
• To release the belt, press the red button on the belt lock and separate the two belt tongues.
• To close the belt, first pull together the two belt tongues and slide these into the belt lock together.
natural_image
Simple cartoon illustration of a hand holding a device with a red eye (no text or symbols)Adjusting the head support
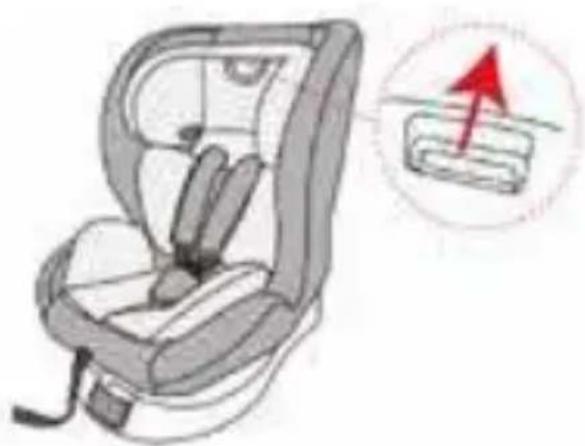
- Loosen the belt and pull the lever on the front of the head support until it is set to the desired height.
- Release the lever and ensure that the head support is locked in place.
natural_image
Illustration of a car seat with a magnified inset showing a red arrow pointing to the seat area (no text or symbols present)Isofix connectors
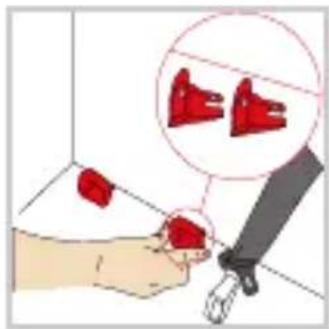
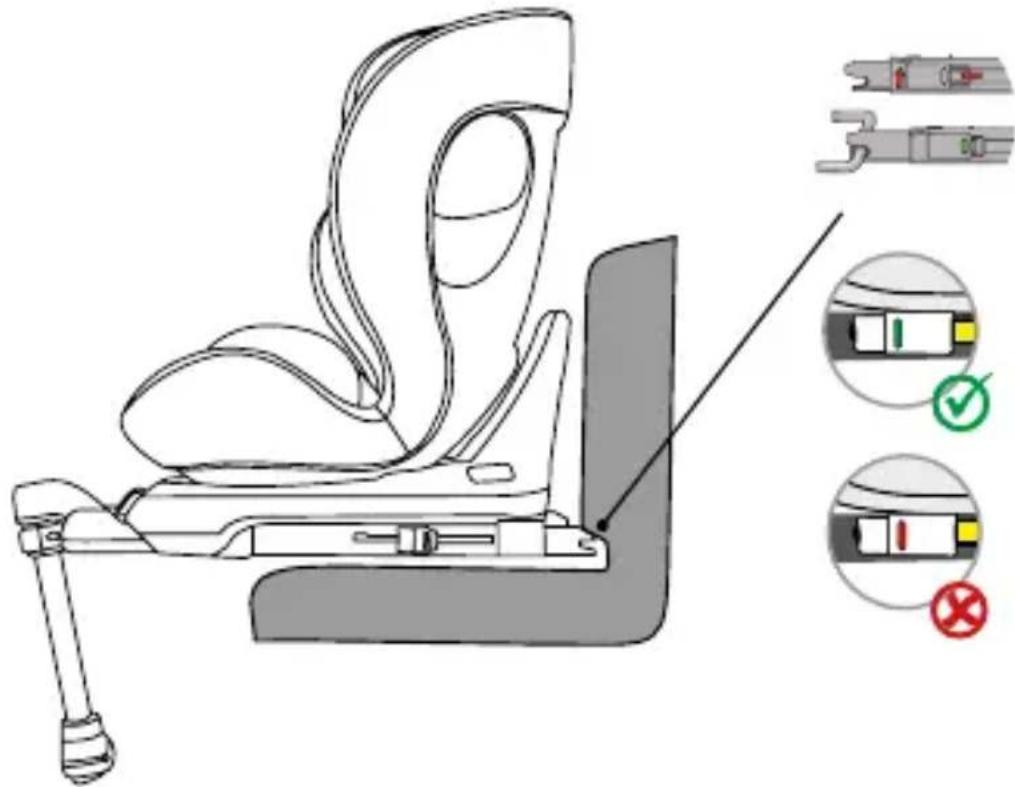
- Insert the red insertion aids through the slit in the cushion between the backrest and seat and into the Isofix holders.
- When doing this, the flat side must be facing downward. This step is not necessary if the vehicle already has firmly installed insertion aids.
- Press the buttons on the Isofix connectors on both sides to extend these.
- Slide the Isofix connectors into the insertion aids and press them in until you hear them lock in place.
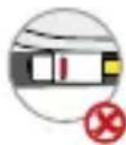
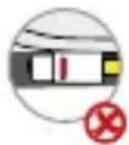
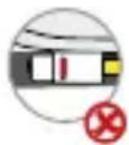
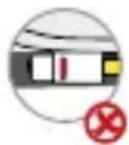
- The indicators on both sides only show green when the connections are in place. Press the child car seat against the backrest until it is securely in position.
natural_image
Illustration of a hand holding red objects with a magnified inset showing two red mechanical parts (no text or symbols)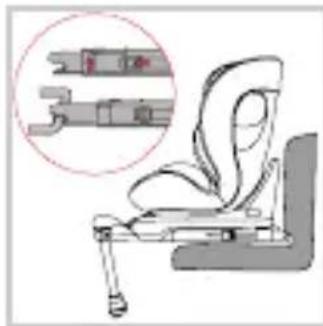
natural_image
Illustration of a seated car seat with an inset showing internal components (no text or symbols)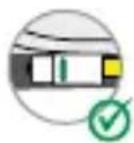
Support leg
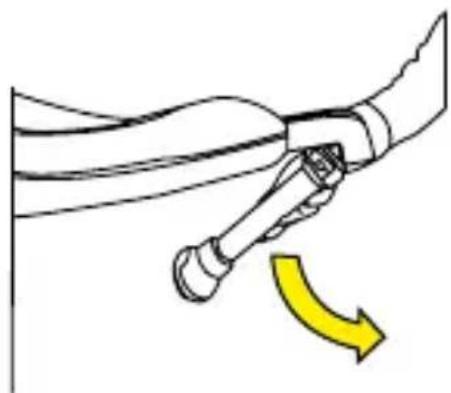
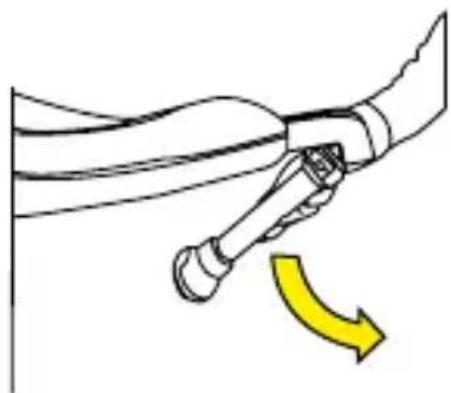
- Fold out the support leg underneath the child car seat.
- Press the button to adjust the height of the support leg and ensure that this is fully in contact with the footwell of your vehicle.
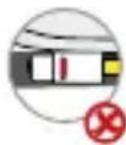
- Ensure that the indicator on the support leg is showing green.
natural_image
Diagram of a mechanical component with a yellow curved arrow indicating rotation or motion (no text or symbols)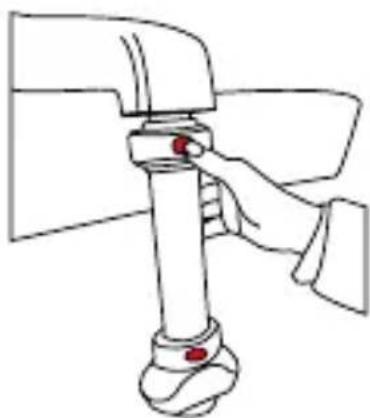
natural_image
Line drawing of a hand operating a valve mechanism (no text or symbols)INSTALLING THE CHILD CAR SEAT
1) Rear-facing 40-105 cm, max. 19 kg
text_image
AIRBAG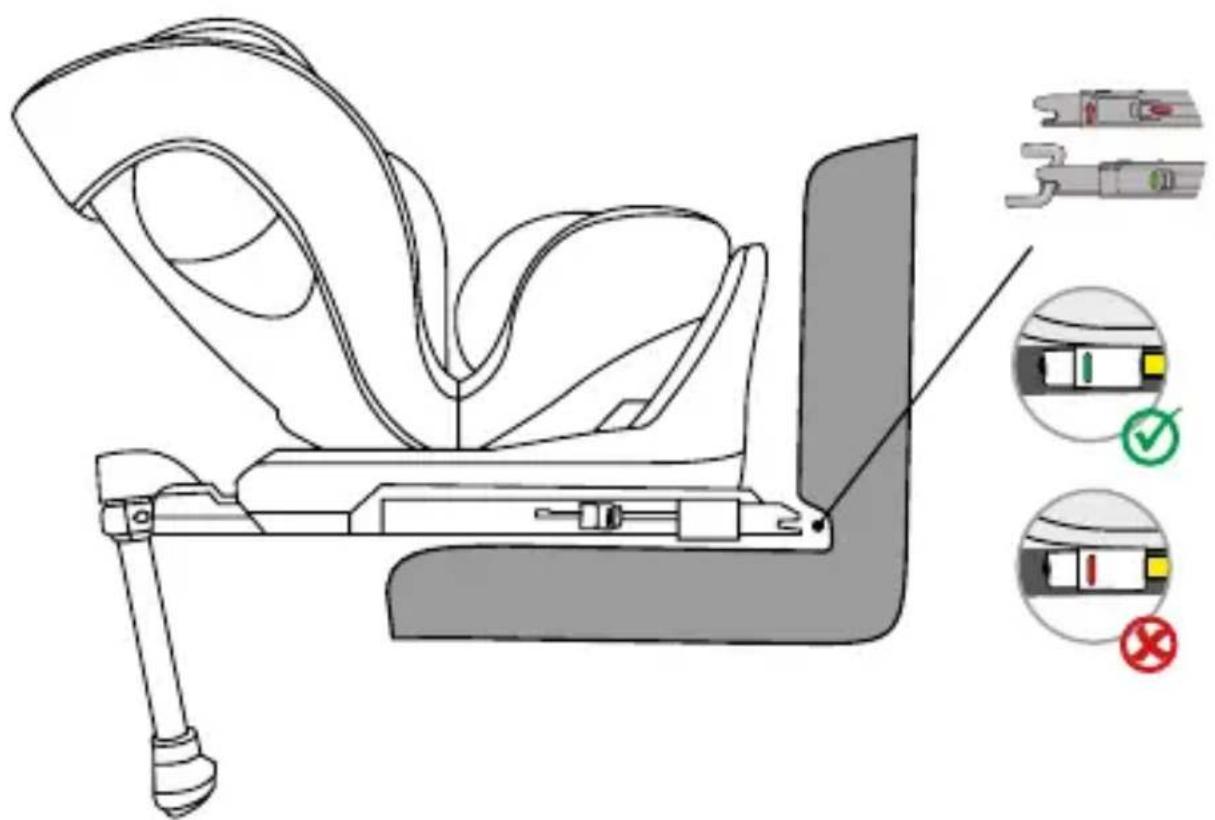
text_image
Technical diagram of a car seat assembly with labeled parts and safety icons-
Press the two lateral Isofix connector buttons in order to extend the length of the Isofix connectors.
-
Fold out the support leg.
-
Guide the Isofix connectors to the Isofix connector pieces on the seat of the vehicle and ensure that they lock in position.
-
Slide the child car seat until it rests securely against the backrest of the car seat. Please ensure that both Isofix indicators are showing green.
-
Press the button to adjust the height of the support leg and ensure that this is fully in contact with the footwell of your vehicle.
-
Please ensure that the indicator on the support leg is showing green.
-
Set the child car seat to the maximum reclining position and turn it until it is in rear-facing seat position 4.
-
When placing your child in the child car seat, turn the car seat towards the car door for convenience.
-
Loosen the belt buckle on the child car seat and place the belts on the outer side of the seat.
-
Put your child in the child car seat.
-
Adjust the height of the head support so that the shoulder belt remains free.
-
Close the belt buckle again until you hear a click.
-
Pull the front adjustment tab in order to tighten the belts. Please ensure that the straps are not twisted.
-
Turn the seat into the rear-facing position. Check whether the child car seat is locked in this position.
2) Forward-facing 76-105 cm, max. 19 kg Minimum age: 15 months
text_image
Diagram of a car seat assembly with safety instructions and safety symbolsIMPORTANT:DO NOT USE THE CHILD CAR SEAT FACING IN THE DIRECTION OF TRAVEL UNTIL CHILD HAS REACHED THE AGE OF 15 MONTHS.
-
Press the two lateral Isofix connector buttons in order to extend the length of the Isofix connectors.
-
Fold out the support leq.
-
Guide the Isofix connectors to the Isofix connector pieces on the seat of the vehicle and ensure that they lock in position.
-
Slide the child car seat until it rests securely against the backrest of the car seat. Please ensure that both Isofix indicators are showing green.
-
Press the button to adjust the height of the support leg and ensure that this is fully in contact with the footwell of your vehicle.
-
Please ensure that the indicator on the support leg is showing green.
-
When facing in the direction of travel, the child car seat offers three adjustable seat positions.
-
When placing your child in the child car seat, turn the car seat towards the car door for convenience.
-
Loosen the belt buckle on the child car seat and place the belts on the outer side of the seat.
-
Put your child in the child car seat.
-
Adjust the height of the head support so that the shoulder belt remains free.
-
Close the belt buckle again until you hear a click.
-
Pull the front adjustment tab in order to tighten the belts. Please ensure that the straps are not twisted.
-
Turn the seat into the forward-facing position. Check whether the child car seat is locked in this position.
CLEANING
This product has been developed taking into account safety, comfort and functionality. Please take the time to read these instructions carefully before using the product and retain these instructions for future reference.
To ensure that your child car seat remains in a good condition for a long time, please refrain from using solvents or abrasive or aggressive cleaning products to clean it. After washing, always check that the fabric and stitching is not damaged. Please only ever wash the cover in accordance with the instructions on the label (see below).

Wash at 30°C on a delicate cycle

Do NOT iron

Do NOT bleach

Do NOT dry clean
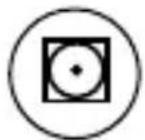
Tumble dry at a low temperature
CARE
Please check the product for any possible damage regularly. Do not use a damaged product and keep it out of the reach of children.
If you have any questions, please contact the Osann customer service team on +49 (0) 7731/970077.
text_image
Diagram of a car with numbered positions and checkmarks indicating status or options, including question marks for questions 1 and 2.text_image
Technical diagram of a car seat assembly with labeled components in Chinesenatural_image
Technical line drawing of a mechanical device with internal components (no text or symbols)Protection latérale
Sangle d'épaule
natural_image
Illustration of a hand inserting a card into a machine (no text or symbols visible)natural_image
Illustration of a hand holding a device with a red circular arrow indicating rotational motion (no text or symbols)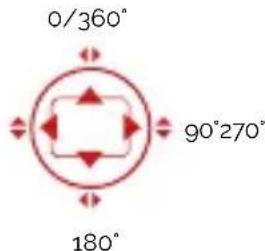
text_image
0/360° 90°270° 180°natural_image
Illustration of a child wearing a car seatbelt and seatbelt, with no text or symbols present.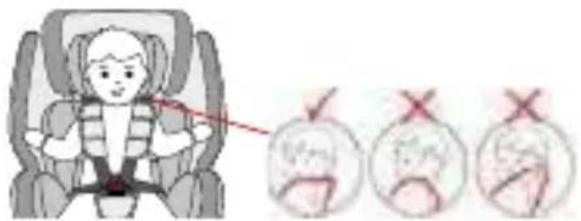
text_image
Illustration showing a child in a car seat with a red arrow pointing to three labeled circular diagrams below, each marked with a red X.natural_image
Simple cartoon illustration of a hand holding a device with a red eye (no text or symbols)natural_image
Illustration of a car seat with a magnified inset showing a red arrow pointing to the seat area (no text or symbols present)Connecteurs Isofix
natural_image
Illustration of a hand holding red objects with a magnified inset showing two red mechanical parts (no text or symbols)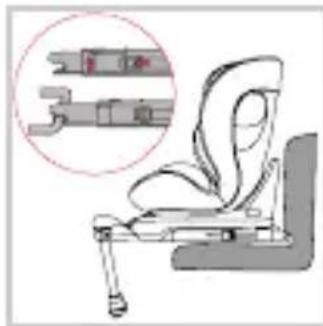
natural_image
Illustration of a seated car seat with an inset showing internal components (no text or symbols)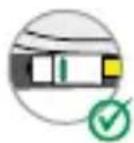
Pied
natural_image
Diagram of a mechanical component with a yellow curved arrow indicating rotation (no text or symbols)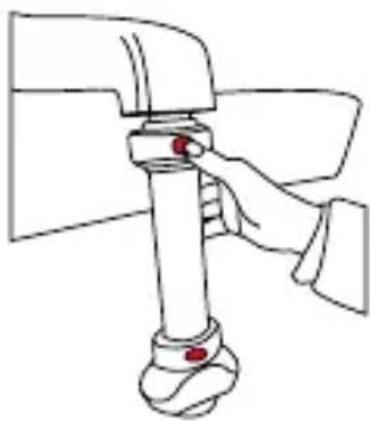
natural_image
Line drawing of a hand adjusting a vertical pipe fitting with red markers (no text or symbols)UTILISATION DU SIÈGE AUTO ENFANT
text_image
Technical diagram of a car seat assembly with labeled parts and safety check iconstext_image
Diagram of a car seat assembly with safety instructions and safety symbolsIMPORTANT : N'UTILISEZ PAS LE SIÈGE AUTO POUR ENFANTS DANS LE SENS DE CIRCULATION AVANT QUE L'ENFANT N'AIT 15 MOIS.
text_image
Technical diagram of a car seat assembly with labeled components in Chinesenatural_image
Technical line drawing of a mechanical device with internal components (no text or symbols)Protezione laterale
natural_image
Illustration of a hand inserting a card into a machine (no text or symbols visible)natural_image
Illustration of a hand holding a medical device with a red circular arrow indicating clockwise motion (no text or symbols)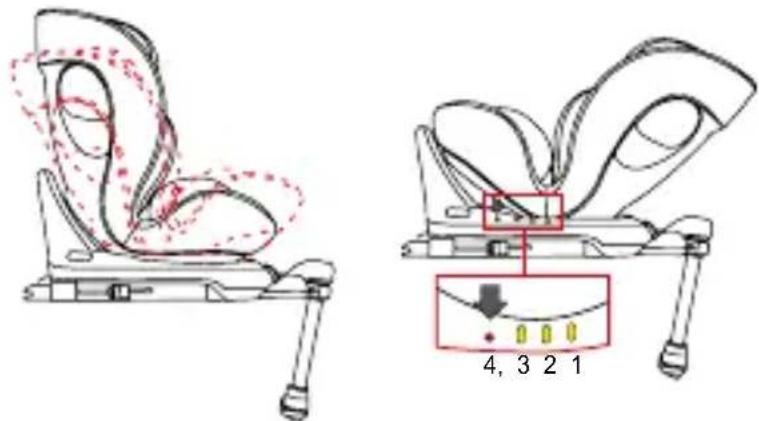
text_image
4, 3 2 1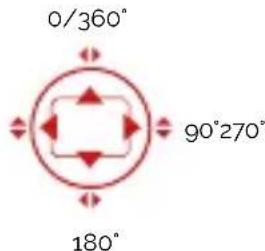
text_image
0/360° 90°270° 180°natural_image
Illustration of a child wearing a car seatbelt, no text or symbols present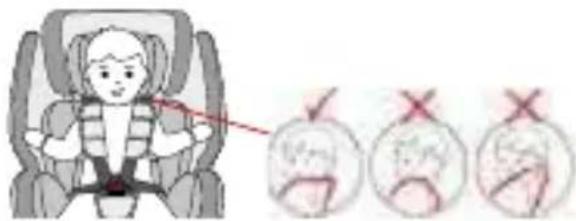
text_image
Illustration showing a child in a car seat with a red arrow pointing to three circular diagrams labeled with checkmarks.natural_image
Simple cartoon illustration of a hand holding a device with a red eye (no text or symbols)natural_image
Illustration of a car seat with a magnified inset showing a red arrow pointing to the seat area (no text or symbols present)natural_image
Illustration of a hand holding red objects with a magnified inset showing two red mechanical parts (no text or symbols)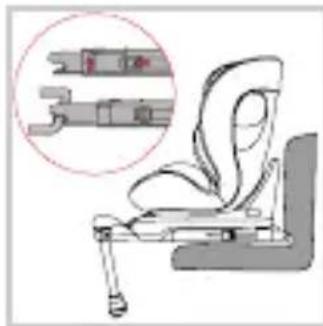
natural_image
Illustration of a seated car seat with an inset showing internal components (no text or symbols)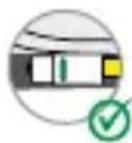
natural_image
Diagram of a mechanical component with a yellow curved arrow indicating rotation or motion (no text or symbols)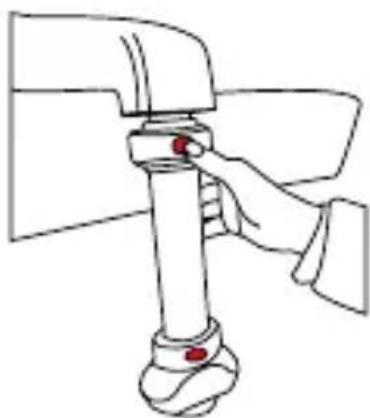
natural_image
Line drawing of a hand operating a valve mechanism (no text or symbols)INSTALLAZIONE DEL SEGGIOLINO AUTO PER BAMBINI
text_image
Technical diagram of a car seat assembly with labeled parts and safety check iconstext_image
Diagram of a car seat assembly with safety icons and safety check indicatorsIMPORTANTE: NON UTILIZZARE IL SEGGIOLINO AUTO PER BAMBINI NELLA DIREZIONE DI MARCIA FINO A QUANDO IL BAMBINO NON ABBIA RAGGIUNTO I 15 MESI DI ETÀ.
natural_image
Illustration of a hand inserting a card into a machine (no text or symbols visible)Kinderzitje draaien
natural_image
Line drawing of a car seat assembly with no text or symbols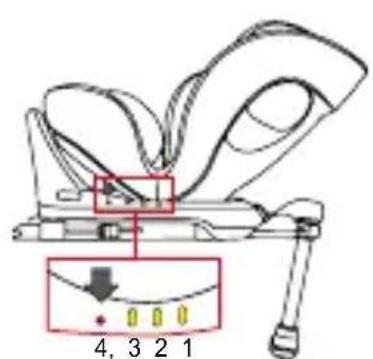
text_image
4, 3 2 1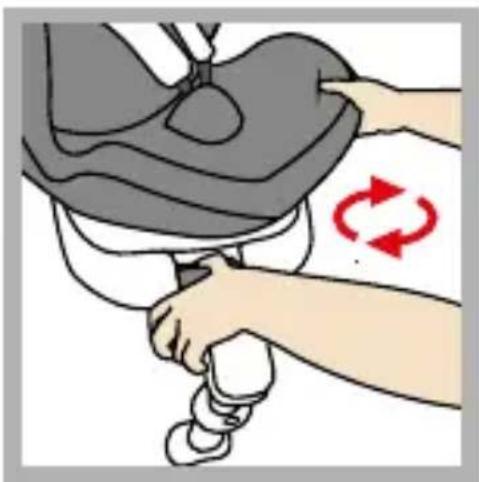
natural_image
Illustration of a hand performing a medical procedure with a red circular arrow indicating clockwise motion (no text or symbols)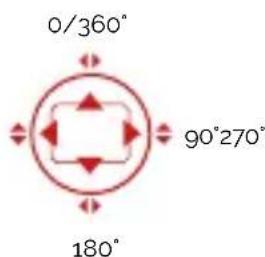
text_image
0/360° 90°270° 180°natural_image
Illustration of a child wearing a car seatbelt, no text or symbols present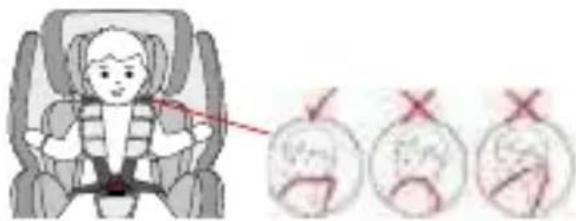
text_image
Illustration showing a child in a car seat with a red arrow pointing to three circular diagrams labeled with Chinese characters.natural_image
Simple cartoon illustration of a hand holding a device with a red eye (no text or symbols)natural_image
Illustration of a car seat with a magnified inset showing a red arrow pointing to the seat area (no text or symbols present)Isofix-verbindingsstukken
natural_image
Illustration of a hand holding red objects with a magnified inset showing two red mechanical parts (no text or symbols)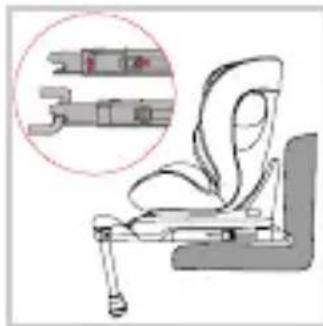
natural_image
Illustration of a seated car seat with an inset showing internal components (no text or symbols)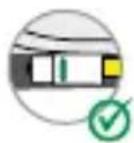
Steunpoot
natural_image
Diagram of a mechanical component with a yellow curved arrow indicating rotation or motion (no text or symbols)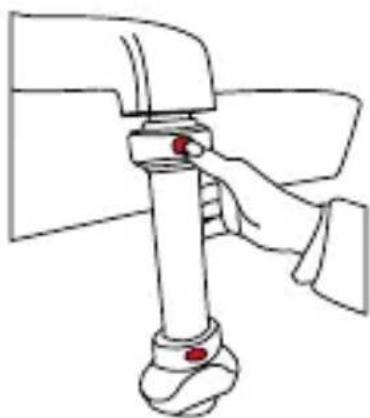
natural_image
Line drawing of a hand operating a valve mechanism (no text or symbols)MONTAGE VAN HET AUTOSTOELTJE
1) Achterwaarts gericht 40-105 cm, max. 19 kg
text_image
AIRBAG ✓ ✓ ×text_image
Diagram of a car seat assembly with safety instructions and safety symbolsBELANGRIJK: GEBRUIK HET AUTOSTOELTJE NIET IN DE RIJRICHTING ALS HET KIND JONGER I DAN 15 MAANDEN.
Find us on Facebook and Instagram

natural_image
Facebook logo icon (no text or symbols present)
text_image
QR code image containing encoded data, no visible human-readable textwww.facebook.com/Osann.de

natural_image
Instagram logo icon with gradient fill and circular design (no text or symbols)
text_image
QR code image containing encoded data, no visible human-readable textwww.instagram.com/osann_kids
osann
Osann GmbH
Gewerbestr. 22
D-78244 Gottmadingen