Milegra - Coffee machine GRAEF - Free user manual and instructions
Find the device manual for free Milegra GRAEF in PDF.


| Product type | Espresso machine with integrated grain grinder |
| Brand | Graef |
| Model | Milegra |
| Water tank capacity | Approximately 1.5 liters |
| Number of grind settings | 11 levels |
| Supported coffee types | Beans, ground coffee (via portafilter), E.S.E. pods |
| Main functions | Single and double espresso, milk steam, hot water, integrated grinder, grind adjustment, rinse function, automatic descaling |
| Indicators | Pressure gauge (3 zones: under-extraction, optimal extraction, over-extraction), descaling indicator light |
| Automatic standby | After approximately 30 minutes of inactivity |
| Materials | Plastic and metal housing, metal portafilter |
| Safety | Automatic shut-off, overheating protection, removable power cord, hot surfaces indicated, do not immerse in water |
| Maintenance and cleaning | Manual cleaning of the brew unit with Graef tablets, descaling with Graef tablets, external cleaning with damp cloth, cleaning of steam nozzle with pin |
| Spare parts and repairability | Original Graef spare parts, repair by Graef after-sales service or qualified technician |
| Warranty | 2 years (24 months) from date of purchase |
| Power supply | 220-240 V ~ 50/60 Hz, min. 10 A fuse |
Frequently Asked Questions - Milegra GRAEF
User questions about Milegra GRAEF
0 question about this device. Answer the ones you know or ask your own.
Ask a new question about this device
Download the instructions for your Coffee machine in PDF format for free! Find your manual Milegra - GRAEF and take your electronic device back in hand. On this page are published all the documents necessary for the use of your device. Milegra by GRAEF.
USER MANUAL Milegra GRAEF
EN Operating Instructions
GEFAHR DURING ELEKTRISCHEN STROM
WARNING
GENERAL SAFETY INSTRUCTIONS
This device conforms to the relevant safety regulations. However, incorrect handling may lead to injury and damage.
Please observe the following instructions for safe handling of the unit:
-
Before using the unit check for any external visible damage of the housing, the connection cable and plug. Do not operate a damaged unit.
-
If the connection cable is damaged, it must be replaced by the manufacturer, the after-sales service or a similarly qualified person in order to avoid any hazard.
-
Repairs may be carried out only by an expert or by Graef after-sales service. Incorrect repairs may cause considerable hazards for the user. In addition, any claim under guarantee is forfeited.
-
Defective parts must be replaced by original spare parts only. It is only with these parts that the safety requirements are met.
-
This appliance can be used by children aged from 8 years and above, by persons with reduced physical, sensory or mental capabilities or lack of experience and knowledge if they have been given supervision or instruction concerning use of the appliance in a safe way and understand the hazards involved. Cleaning and user maintenance shall not be made by children, unless they are older than 8 years and supervised.
-
The unit and its connection cable have to be clear of children who are younger than 8 years.
Children shall not play with the appliance or its components.
-
Do not leave the unit unattended during operation and decalcification.
-
The unit is not intended to be used with an external timer or a separate remove control.
-
Always disconnect the connection cable by using plug; do not pull the connecting cable.
-
Be careful not to let the power cord hang freely, this could cause the fall of the appliance.
-
Packaging materials must not be used for playing. There is a danger of suffocation.
-
Observe the notes on the requirements regarding the installation location and the electrical connection of the unit in order to avoid personal and material damages.
- Do not place the unit in a dishwasher, and do not hold under running water either.

The surfaces heat up during use and remain hot for a while after use.
This appliance is intended for domestic and similar use, such as:
- In staff kitchens for shops and offices
In agricultural estates - In hotels, motels and other residential areas
In bed and breakfast boarding houses
Another or any exceeding use shall not be considered intended.
CAUTION
The appliance can cause dangers, if is not used as intended. Please therefore do the following:
- Use the unit exclusively as intended.
- Observe the procedures described in these operating instructions.
Claims of any kind caused by damage by unintended use shall be excluded. The risk shall be born e sole by the operator.
PRODUCT DESCRIPTION
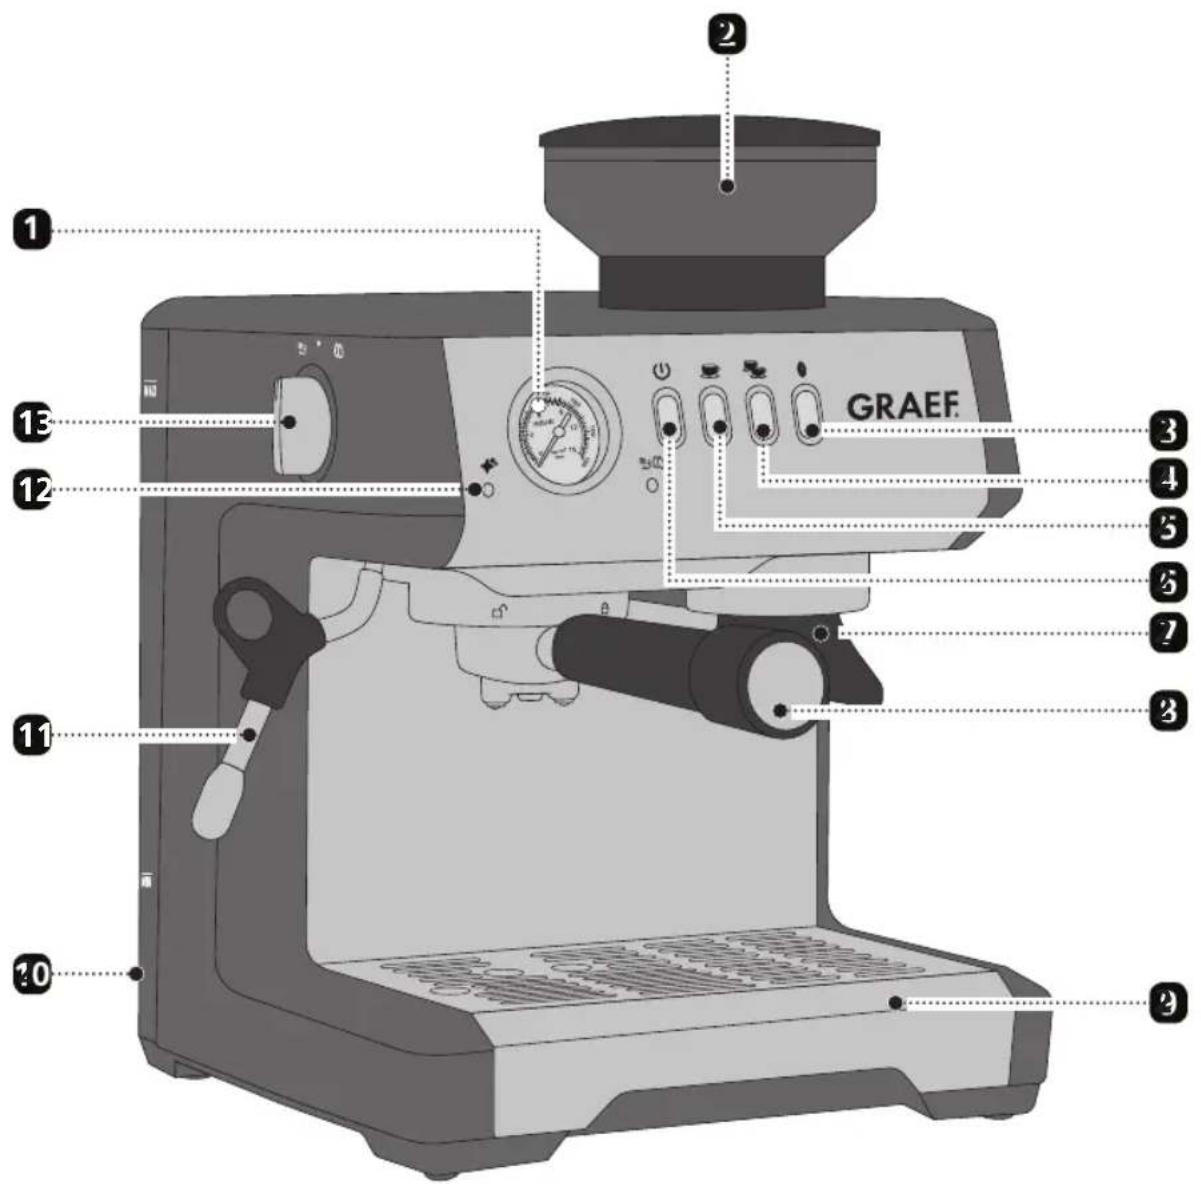
Pressure gauge
Coffee bean container
Grinding button
4 2 cup button
1 cup button
6 On / off switch
Hold for grinding
Group handle
Drip tray
10 Removable water tank
11 Steam / hot water lance
12 Descaling light
13 Rotary knob for steam and hot water
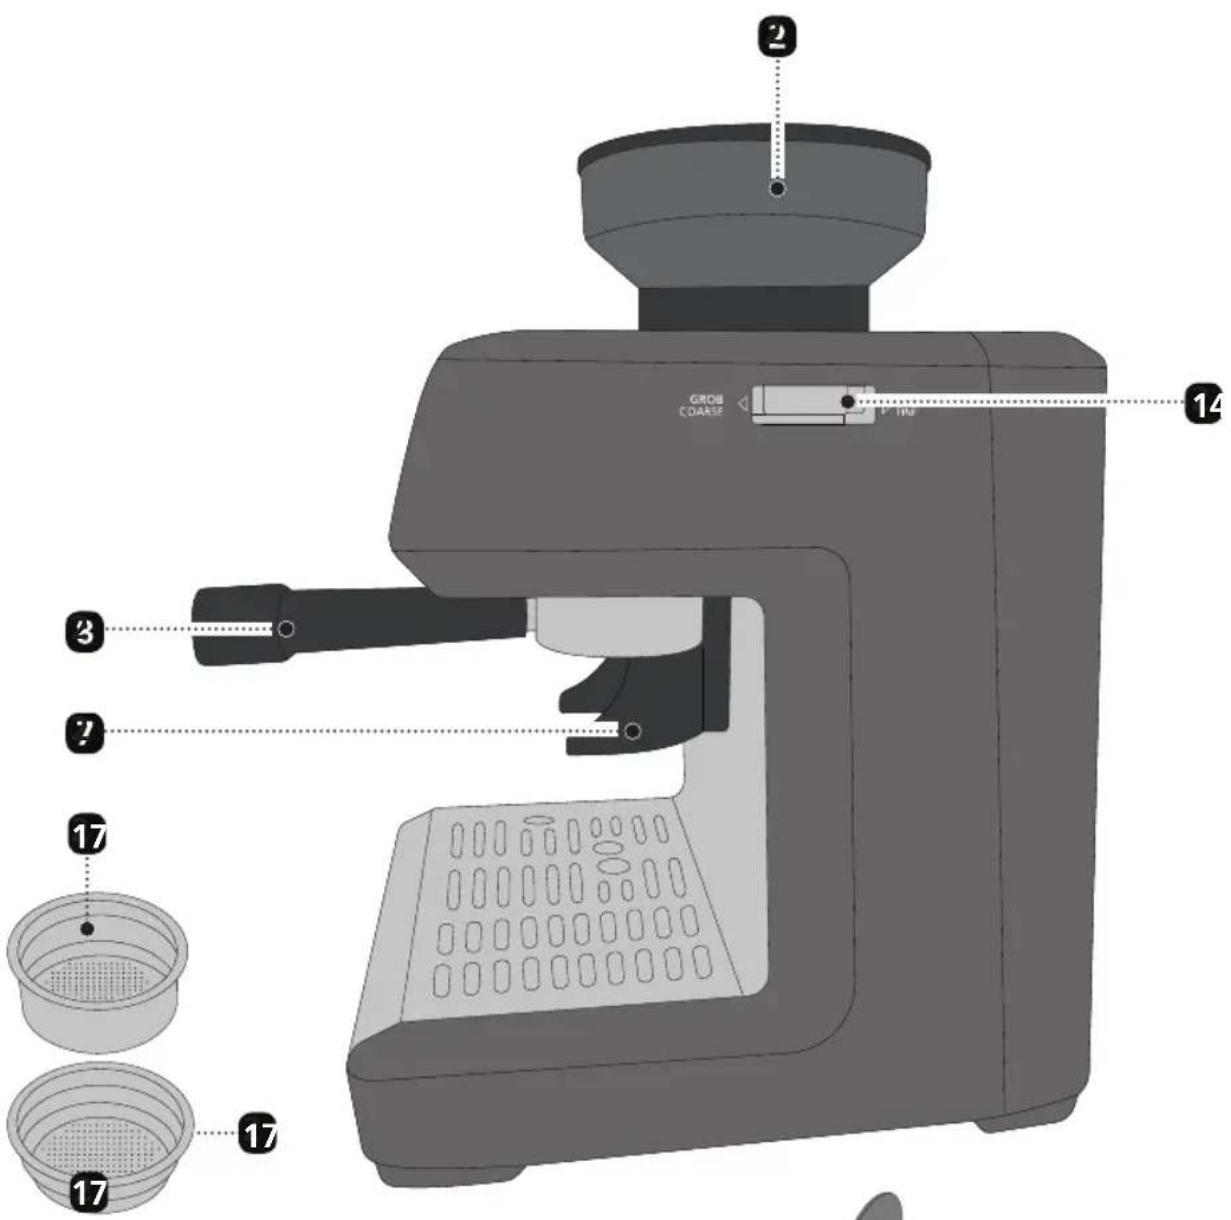
14 Setting of degree of grinding
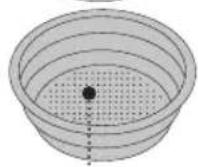
16
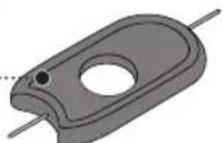
20
ACCESSIONS
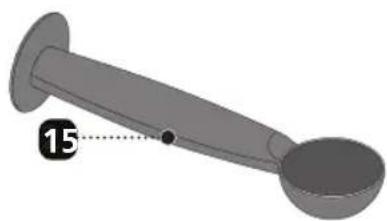
15 Coffee spoon with tamper
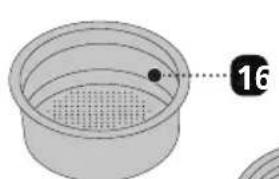
16 single-walled filter basket for 1 cup and 2 cups
17 Double-walled filter basket for 1 cup and 2 cups
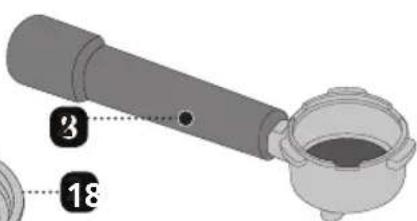
18 Filter basket for E.S.E. pads
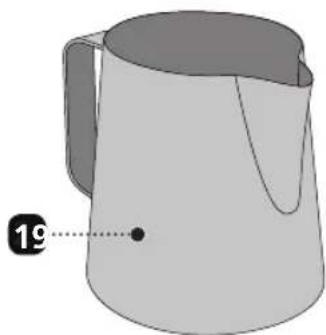
19 Milk jug
20 Cleaning pin
CONTENT
General safety instructions 24
Product description 26
Accessories 27
Preface 30
Information on these operating instructions 30
Warning messages 30
Danger caused by electric current 31
Intended use 31
Limitation of liability. 31
Unpacking 31
Disposal of the packaging. 32
Requirements on the installation location 32
Electrical connection 32
Prior to first use 33
Venting. 33
Pressure gauge 33
Initial operation 34
Insertion of the water filter 34
Preparation 35
Water tank 35
Setting of degree of grinding 35
Grinding coffee 36
Configuration of amount to grind 36
Espresso preparation 36
NormalEspresso 36
DoubleEspresso 37
Adjusting the dispensed coffee amount 37
E.S.E.Pads 38
Factory setting 38
Automatic switching off 38
Making milk froth 38
Hot water withdrawal 39
^+ Descaling 39
Cleaning the brewing unit 40
External cleaning 41
Troubleshooting 41
After-sales service 42
Disposal of the unit 42
Two-year warranty 43
43
PREFACE
Dear Customer,
With this espresso machine you have made a very good choice. You have purchased a recognised quality product. We would like to thank you for buying this machine and wish you a lot of fun with your new Graef group handle espresso machine.
INFORMATION ON THESE OPERATING INSTRUCTIONS
These operating instructions for the group handle espresso machine (hereinafter referred to as the appliance) give you important information on the commissioning, safety, the intended use and maintenance of the appliance.
The operating instructions shall have to be available at the unit at all times. The instructions have to be read and applied by every person which deals with
- initial operation,
- operation,
- Troubleshooting and/or
- Cleaning
of the unit.
Keep these operating instructions and pass them on to the next owner along with the unit.
These operating instructions cannot take into consideration every conceivable use. For further information or in case of problems which are not dealt with or not dealt with sufficiently in these instructions, please get in touch with Graef customer service or your specialist dealers.
WARNING MESSAGES
In these operating instructions, the following warning messages and signal words are used:

WARNING
This refers to a potentially dangerous situation. Failure to observe this warning may result in serious injury or even death.
CAUTION
This refers to a potentially dangerous situation. In case of non-observation of this warning message, material damage may occur.
IMPORTANT!
This refers to application tips and other especially important information!
DANGER CAUSED BY ELECTRIC CURRENT
WARNING
Mortal danger is caused by contact with energised cables or components!
Please observe the following safety instructions in order to prevent an exposure to electric current:
- Do not use the unit if the mains cable or plug are damaged.
- In this case, you should let the Graef Customer Service install a new connection cable before using the appliance again. This may be done also by an authorised specialist.
- Do not open the housing under any circumstances. If live connections are touched or the electrical and mechanical construction are modified, there is the danger of electric shock.
- Never touch live parts. This can cause an electric shock and may cause even death.
INTENDED USE
This unit is not intended for commercial use. Use the unit only in closed rooms and operate it only with water. To avoid potential hazards, use the unit only for coffee preparation, frothing milk and heating water. Any other use is not permitted.
LIMITATION OF LIABILITY
All technical information, data and notes on the installation, the operation and the care contained in these operating instructions correspond to the last status before printing, and are rendered under consideration of our previous experience and to the best of knowledge.
No claims may be derived from the particulars, illustrations and descriptions in these instructions.
The manufacturer shall not assume any liability for damage caused by:
- non-observation of the instructions
- unintended use
- incorrect repairs
- technical modifications
- use of unapproved spare parts
Translations shall be carried out to the best of knowledge. We shall not assume any liability for translation mistakes. The original German text only shall be binding.
UNPACKING
When unpacking the unit, proceed as follows:
- Remove the unit from the box.
-
Remove the packaging parts.
-
Remove any stickers on the unit (do not remove the type plate).

DISPOSAL OF THE PACKAGING
The packaging protects the unit against transport damage. The packaging materials are selected according to the environmental compatibility and disposal-related aspects and can therefore be recycled.
The return of packaging into the material cycle saves raw material and reduces the waste volume. Dispos of the packaging material no longer needed at collection points for the "Green Dot" recycling system (in Germany).
IMPORTANT!
Keep the original packaging during the warranty period so that the unit can be properly packed and transported in the event of a warranty claim.
REQUIREMENTS ON THE INSTALLATION LOCATION
For safe and fault free operation of the unit, the following requirements of the installation location have to be met:
- The unit has to be placed on a solid, flat, horizontal, and non-slipping surface with a sufficient weight-carrying capacity.
- Make sure that the unit cannot topple over.
- Choose the location in such a way that children cannot reach the hot surface of the unit or the supply lines.
- Do not place the appliance on hot surfaces, such as hotplates, or near them.
- Do not use the unit outdoors and keep it in a dry place.
- The unit is not designed for installation in a wall or a built-in cupboard.
- Do not set up the unit in a hot, wet or moist environment.
- The socket has to be easily accessible so that the power cable can be removed easily in case of emergency.
ELECTRICAL CONNECTION
For safe and fault-free operation of the unit, the following requirements have to be met during the electrical connection:
- Before connecting the unit, compare the connecting data (voltage and frequency) on the type plate with those of your energy network. These details must correspond so that no damage occurs to the unit. In case of uncertainty, contact a qualified electrician.
- The socket has to be protected at least by a 10 amps circuit breaker.
- Make sure that the power cable is not damaged and is not laid across hot surfaces or sharp edges.
- The connecting cable must not be stretched tightly.
- The electric safety of the unit is ensured only when it is connected to a socket with protective conductor installed correctly. Operatioat a socket outlet without a protective earth conductor is not permitted. If in doubt, let the house installation
checked by a trained electrician. The manufacturer shall not assume responsibility for damage which has been caused by absent or interrupted protective conductor.
PRIOR TO FIRST USE
Before first use, clean the strainer support (not the unit) and the water tank under running water to remove any production residue.
VENTING
Vent the device before initial use, in the event of longer periods of no use and if you have accidentally used the device without water in the tank. Proceed as follows to remove air from the lines:
- Insert the plug into the socket.
- Fill water in the tank.
- Switch the unit on.
- If the device is ready for operation, place a cup or a container under the steam hot waterlance.
- Turn the rotary knob to .
- Let the air escape until a water jet runs through.
- Turn the rotary knob back to .
PRESSURE GAUGE
Under-extraction (white area):
In case of under-extraction you will get a very thin and underdeveloped coffee. In this case, too little components have been dissolved out. The coffee is very light, the cream very thin, not available or very light with large bubbles.
Characteristics / causes:
- The pressure gauge needle is in the first zone during extraction.
- Grinding degree too coarse (coffee grind falls rather quickly out of the outlet, with only a few lumps or small balls to be seen and it feels very coarse when you rub it between your fingers)
Dosage is too low - Coffee grounds distributed too unevenly in the group handle
- Contact pressure too little
Pressure uneven - Coffee beans not fresh
- Coffee grounds not fresh (possibly pre-ground too long)
Extraction (optimal range):
In case of optimal extraction, the espresso flows evenly, slowly and creamily "like honey" out of the outlet into the cup. The cream is dense and dark brown to golden brown.
Characteristics / causes:
- The pressure gauge needle is in the second zone during extraction.
- Contact pressure approx. 15kg
- Coffee grounds evenly distributed in the group handle
- Optimal grinding level, not too fine, not too coarse
- Beans are fresh
- Coffee grounds freshly ground
Over-extraction (red range):
In case of over-extraction, too many bitter substances are dissolved out of the coffee. The coffee is very dark and has an unpleasant and bitter or even burnt taste. The cream is dark brown to red and the outline on the cream is very uneven. There are light spots between the dark areas.
Characteristics / causes:
- The pressure gauge needle is in the third zone during extraction.
- Grinding level too fine (coffee ground falls rather slowly out of the outlet, partly larger chunks).
Dosage too high - Contact pressure too high
- Prior to preparation, coffee grounds clamped too long in the brewing unit
INITIAL OPERATION
CAUTION
Observe the following safety instructions to prevent hazards and material damage:
- During use, the surfaces become hot.
- While water is running through the machine, never remove the group handle filled with coffee grounds, because it is under pressure.
- Before preparing the espresso, check that the strainer support is firmly tightened.
- To avoid potential hazards, use the unit only for coffee preparation, frothing milk and heating water. Any other use is not permitted.
INSERTION OF THE WATER FILTER
- Remove the water tank and fill it to the MAX marking with water.
- Remove the filter cartridge from the packaging.
- Turn the date disc until the next 2 months are shown.
Note: The filter can be used for about 2 months with normal use of the appliance. If the machine has an installed filter and is not used, it will last a maximum of 3 weeks.
-
To activate the filter, add tap water to the hole in the filter until water runs out of the opening for more than 1 minute.
-
Submerse the filter cartridge completely and sideways into the water tank for about 10 seconds.
- Lightly press together the cartridge to allow any air bubbles to escape.
- Insert the filter cartridges in the water tank and press them until they stop.
- Insert the water tank into the machine: The filter cartridge is now active and the machine can be used.
PREPARATION
After switching the unit back on again, carry out an empty withdrawal (without coffee grounds) as described below in order to bring the system to temperature.
- Fill the water tank with water.
- Switch the unit on.
Note: The appliance performs a short flushing process after switching on. Water will escape the brewing unit.
- Insert the desired filter insert.
- Put in the group handle without coffee grounds.
- Put a cup below the outlet.
- Press the button.
- Let the cup run half full, to bring the system to desired temperature.
- Empty the cup.
WATER TANK
The device signals that the water tank is empty by making all lights from the user interface blink at the same time.
Proceed as follows:
- Switch the machine off.
- Fill the tank with water.
- Switch the unit on.
- If the device is ready for operation, hold the steam/hot waterlance on the drain cover and turn the rotary button to until water escapes.
- Turn the rotary knob back to centre position
SETTING OF DEGREE OF GRINDING
The degree of grinding influences the volume of the water flow through the coffee in the group handle and the flavor of the espresso. The degree of grinding should be set fine, but not too fine and powdery. There are 11 grinding degree settings. The smaller the number, the finer the degree of grinding. The larger the number, the coarser the degree of grinding. We recommend starting with a setting of 3 and adjusting it as needed.
- Remove the bean container cover and fill the container with whole beans.
-
Place the lid back on.
-
Hold the group handle in the holder for grinding.
- Press the button and set the desired degree of grinding on the side of the device.
Note: In order to protect the conical grinder, we recommend setting the degree of grinding during the grinding process.
GRINDING COFFEE
- Set the desired degree of grinding (see degree of grinding setting).
- Place the desired filter basket in the strainer support.
- Hold the group handle in the holder for grinding.
- Press the button once for single espresso or twice for double espresso.
- You can also press the button to stop the grinding process while grinding.
CONFIGURATION OF AMOUNT TO GRIND
The amount to grind can be adjusted to your individual desires.
- Set requested grinding degree.
- Place the desired filter basket in the strainer support.
- Hold the group handle in the holder for grinding.
- For single espresso press the grinding button and hold it until the desired amount to grind has been reached.
- For double espresso press the grinding button twice and hold it until the desired amount to grind has been reached.
- The new amount to grind was saved.
ESPRESSO PREPARATION
IMPORTANT!
- Make sure that there is always enough water in the tank.
- Make sure that the water tank is always placed correctly.

NORMAL ESPRESSO
Note: Warm up the group handle, the system and the cup. See preparation.
- Dry the group handle after preparation.
- Insert the filter insert for 1 cup.
- Set the desired degree of grinding (see degree of grinding setting).
- Hold the group handle in the holder for grinding and press the grind button.
- The beans will be ground. The grinding process will stop automatically.
Note: If you want more or less ground coffee, you can also independently configure the amount to grind (see configuration of the amount to grind).
- Firmly press on the coffee grounds using the enclosed tamper.
-
The distance between the upper edge and the coffee grounds should be approx. 2mm .
-
Wipe the excess coffee from the edge and tighten the sifter.
- Put a cup below the outlet.
- Press the button.
- Wait for about 10 seconds after the process has completed and then remove the group handle.
- Remove the coffee grounds into a used coffee tray (not included in the scope of delivery).

DOUBLE ESPRESSO
Note: Warm up the filter folder, the system and the cup. See preparation.
- Dry the group handle after preparation.
- Insert the filter insert for 2 cups.
- Set the desired degree of grinding (see degree of grinding setting).
- Hold the group handle in the holder for grinding and press the grind button.
- The beans will be ground. The grinding process will stop automatically.
Note: If you want more or less ground coffee, you can also independently configure the amount to grind (see configuration of the amount to grind).
- Firmly press on the coffee grounds using the enclosed tamper.
- The distance between the upper edge and the coffee grounds should be approx. 2mm .
- Wipe the excess coffee from the edge and tighten the sifter.
- Put two cups below the outlet.
- Press the button.
- Wait for about 10 seconds after the process has completed and then remove the group handle.
- Remove the coffee grounds into a used coffee tray (not included in the scope of delivery).
ADJUSTING THE DISPENSED COFFEE AMOUNT
The first time you use the appliance, we recommend using the factory setting (about 30cc. for single coffee and about 66cc. for double coffee). Then if you are not satisfied with the result, you can change the quantity following the below procedure:
Single dose: press and keep pressed the one coffee button (A18); when you reach the desired quantity, release the button and the appliance memorized the desired quantity.
Double dose: press and keep pressed the two coffee button (A17); when you reach the desired quantity, release the button and the appliance memorized the desired quantity.
However, while the machine is making coffee, delivery can be interrupted at any moments pressing the coffee button selected.
E.S.E. PADS
Note: Warm up the filter folder, the system and the cup. See preparation.
- Dry the group handle after preparation.
- Insert the filter insert for E.S.E. Pads.
- Place one or two cups underneath the outlet.
- Press the or button.
- Remove the group handle after completing the process.
- Remove the pad into a used coffee tray (not included in the scope of delivery).
FACTORY SETTING
Press the button until a beep sounds.
AUTOMATIC SWITCHING OFF
To save energy, the device turns off after approximately 30 minutes when not in use. In order to reactivate the device, press the button.
MAKING MILK FROTH
Notice: Ideal way to produce the cappuccino is to start from the coffee (grinding and then brewing) and then to froth the milk and pour it on top of it. In fact, to keep the temperature of the coffee under control if the consumer will make a cappuccino in the opposite way (first frothing and then brewing), there are 30 seconds of waiting between steam frothing and coffee brewing. During this time the button "coffee" is blinking.
If the unit is switched off, switch it back on again
- Pour cold milk into the milk jug.
- Hold the steam distributor above the drip tray.
- Turn the rotary knob to 3 . Steam light switch on blinking.
- Wait a moment for steam to go away.
- Once the steam was escaped, turn the rotary knob back to the centre position
- Swivel the steam distributor outward.
- Dip the steam distributor at a slight angle of approx. 1 - 2cm (at an angle of approx. 45 deg.) and not straight into the milk jug. The narrow spout can be used as a guide.
- Turn the rotary knob to 33.
- Add air until the milk volume has increased by about half (drawing phase).
Note: You will have achieved the right position if you can hear kind of a "sip noise". This may be absent for a short time as the surface of the milk is in motion.
- Now hold the distributor a little deeper into the milk so that no more new air is drawn. Milk should be put into rolling motions (rolling phase).
- Turn the rotary knob back to centre position as soon as the milk jug gets to hot to be held.
-
Pull the steam distributor out of the milk jug first.
-
After frothing, gently swivel the milk jug in a circle and gently tap the bottom of the jug onto the tabletop to lift in coarse air bubbles and distribute the milk foam evenly.
- Wipe the steam plant with a damp cloth after a sufficient allowed time for cooling. Caution: It can still be very hot immediately after use.
WARNING
- To froth milk, only use the attached milk jug or a larger vessel. Do not use a cup. Excessively frothing milk may lead to burns.
- Never direct the steam plant to yourself or others. There is a risk of burning.
Please note:
If the milk is heated up to more than 70^ , the foam will simply collapse and the drink will later taste too sweet or even of burned milk.
Tips for making milk froth
Use cold milk from the refrigerator, it heats up slowly and leaves enough time to foam.
To practise it, you can use the following method:
- Pour cold water into the milk jug.
- Add a drop of detergent.
- Foam everything as described above.
- If you foam properly, the mixture should look like real milk foam.
- Please do not drink this mixture!
HOT WATER WITHDRAWAL
If the unit is switched off, switch it back on again
- Put one cup under the hot-waterlance.
- Turn the rotary knob to . Steam light switch on.
Water flows into the cup. - When the process is completed, turn the rotary knob to .

DESCALING
If the descending display lights up, please descale your device. Use only Graef descending tablets, which are especially matched to our appliances. You can obtain them in our online shop at www.graef.de under item No. 145618 or from your specialist dealer.
IMPORTANT!
We accept no liability for missing or insufficient decalcification. In this case, the warranty will become null and void.
- Switch the machine off.
- Remove the group handle.
- Take a small brush, clear the section in the brewing unit, and remove all old coffee
remnants.
- Remove the water tank.
- Remove the filter cartridge from the water tank.
- Fill the water tank with water up to the MAX mark.
- Add 4 decalcifying tablets to the water tank.
- This takes about 5 minutes to dissolve in the water.
- Re-insert the water tank.
- Put a large pot underneath the brewing unit and under the steam/hot water-lance.
- Press the following buttons at the same time for 3 seconds:
- The descending process starts.
- After completion of the descending process, the control lights for and will extinguish.
- Empty the remaining water from the water tank and fill it again with clear water up to the MAX mark.
- Re-insert the water tank.
- Put a large pot underneath the brewing unit and under the steam/ hot waterlance.
- Press the following buttons at the same time for 3 seconds:
- The flushing process starts.
- After completion of the flushing process, you will hear a signal and the machine will switch off.
CLEANING THE BREWING UNIT
Clean the brewing unit regularly with a soft, moist towel or a small brush to remove any coffee remains. The brewing unit should be cleaned manually on a weekly basis to remove any coffee residues, oils and grease. Only Use Graef cleaning tablets which are especially matched to our appliances. You can obtain them in our online shop at www.graef.de under item No. 145614.
- Remove the water tank.
- Fill the water tank with approx. 1.5 litre of water.
- Re-insert the water tank.
- Insert the filter insert for 2 cups.
- Put a Graef cleaning tablet into the group handle.
- Clamp in the group handle.
- Press the button.
- Wait for 15 minutes.
- Press the button.
- Then wait 1 minute.
- Press the button again.
-
Repeat the last process 5 times.
-
Remove the group handle.
- Press the button to remove any remaining residues from the cleaning tablet.
- Empty the drip tray and insert it back again.
- Flush the group handle and filter basket with water.
EXTERNAL CLEANING
CAUTION
Watch the following safety instructions before starting to clean the unit:
- Switch the unit off before cleaning and pull the power cord from the electric socket.
- Let the unit cool down before cleaning.
- Do not use any aggressive or abrasive detergents and no solvents.
- Do not scratch off stubborn soiling with hard objects.
- Do not place the unit in a dishwasher, and do not hold under running water either.
Use a soft and moist cloth to clean the outer surfaces of the unit. Use a mild detergent in case of heavy soiling.
Pull out the drip tray.
- Remove the drip tray.
- Empty the drip tray.
- Clean both using running water and then dry the parts with a cloth.
- Then reinsert the drip tray together with the grille.
- With the cleaning pin, you can clean the nozzle of the steam/hot waterlance and the hole from the screen inserts.
TROUBLESHOOTING
| Error Possible causes What to do | ||
| When the device is tur-ned on, the button ➀blinks very quickly | The rotary button for steam/hot water is not in the n position ● | Turn the rotary knob to ● |
| There is either too much or not enough espresso in the cup | The grinding level must be change | Change the grinding level |
| The device makes a loud pumping sound | The water tank is empty Fill | the water tank with water |
| Coffee mill does not work or makes a loud noise | A foreign object is blo-cking the mill | Remove the foreign ob-ject |
| Coffee runs too quickly from the group handle, you do not receive any cream | The coffee grounds are too coarse | Change the grinding level, grind finer |
| There are not enough coffee grounds in the filter basket | Fill the filter basket with more coffee grounds | |
| The coffee grounds were not tamped firmly enough | Increase the pressure while tamping | |
| Coffee does not run or it is only dripping from the group handle | The water tank is empty Fill | the water tank |
| The coffee grounds are ground too fine | Change the grinding level, grind less fine | |
| There are too many coffe ground in the filter basket | Fill the filter basket with less coffee grounds | |
| The filter basket is clogged | Clean the filter basket | |
| The coffee grounds have been tamped too firmly | Reduce the pressure | |
| There is air in the tubes Turn the rotary button and let the air escape. see venting | ||
| Coffee is cold The cups were not preheated | Preheat the cups with hot water | |
| Coffee runs next to the group handle | The group handle is not inserted correctly | Correctly insert the group handle |
| Coffee grounds are on the edge of the filter basket | Remove the excess coffee grounds | |
| There are too many coffe grounds in the filter basket | Fill the filter basket with less coffee grounds | |
AFTER-SALES SERVICE
If your Graef device is damaged, please contact your dealer or the Graef Customer Service at +49 (2932) 9703688 or write an e-mail to service@graef.com.

DISPOSAL OF THE UNIT
At the end of its service life, this product cannot be disposed of in normal domestic
waste. The symbol on the unit and in the instruction manual indicates this. The materials are recyclable according to your marking. With the reuse, recycling or other forms of recycling of old equipment, you make an important contribution to the protection of our environment. Please ask your municipal administration for the disposal point.
TWO-YEAR WARRANTY
For this product, we assume 24 months manufacturer warranty for defects, which are due to production or material defects. Your legal warranty claim in conformity with Section 437 et seq. of the German Civil Code (BGB) shall remain unaffected by this regulation. The warranty does not cover damage caused by improper handling or use as well as defects which only slightly influence the function or the value of the appliance. Furthermore, we do not assume any liability for damages due to a lack of or insufficient descaling and care. In this case, the warranty will also become null and void. Use original Graef descaling and cleaning tablets only. Transport damages, as far as we are not responsible for it, are excluded from the warranty claims. A warranty claim is excluded for damage caused by a repair which has not been carried out by us or one of our agents. In case of justified complaints, we shall repair the defective product or replace it by a product without defects at our discretion.
ACCESSIONS
You can order further accessories in our online shop via www.graef.de or through your specialist dealer.
Furthermore, various types of coffee can be obtained in our online shop.
INDICATIONS GÉNÉRALES SUR LA SÉCURITÉ
Chere cliente, cher client,
CAFFE ESPRESSO DOPPIO
TILBEREDNING AF ESPRESSO
VIGTIGT!

- GEFAHR DURING ELEKTRISCHEN STROM
- WARNING
- GENERAL SAFETY INSTRUCTIONS
- CAUTION
- PRODUCT DESCRIPTION
- ACCESSIONS
- CONTENT
- PREFACE
- INFORMATION ON THESE OPERATING INSTRUCTIONS
- WARNING MESSAGES
- IMPORTANT!
- DANGER CAUSED BY ELECTRIC CURRENT
- INTENDED USE
- LIMITATION OF LIABILITY
- UNPACKING
- DISPOSAL OF THE PACKAGING
- REQUIREMENTS ON THE INSTALLATION LOCATION
- ELECTRICAL CONNECTION
- PRIOR TO FIRST USE
- VENTING
- PRESSURE GAUGE
- Under-extraction (white area):
- Characteristics / causes:
- Extraction (optimal range):
- Over-extraction (red range):
- INITIAL OPERATION
- INSERTION OF THE WATER FILTER
- PREPARATION
- Note: The appliance performs a short flushing process after switching on. Water will escape the brewing unit.
- WATER TANK
- SETTING OF DEGREE OF GRINDING
- GRINDING COFFEE
- CONFIGURATION OF AMOUNT TO GRIND
- ESPRESSO PREPARATION
- NORMAL ESPRESSO
- DOUBLE ESPRESSO
- ADJUSTING THE DISPENSED COFFEE AMOUNT
- E.S.E. PADS
- FACTORY SETTING
- AUTOMATIC SWITCHING OFF
- MAKING MILK FROTH
- Please note:
- Tips for making milk froth
- To practise it, you can use the following method:
- HOT WATER WITHDRAWAL
- DESCALING
- CLEANING THE BREWING UNIT
- EXTERNAL CLEANING
- TROUBLESHOOTING
- AFTER-SALES SERVICE
- DISPOSAL OF THE UNIT
- TWO-YEAR WARRANTY
- INDICATIONS GÉNÉRALES SUR LA SÉCURITÉ
- CAFFE ESPRESSO DOPPIO
- TILBEREDNING AF ESPRESSO
- VIGTIGT!
Brand : GRAEF
Model : Milegra
Category : Coffee machine