
WAP200 - Media player Monacor - Free user manual and instructions
Find the device manual for free WAP200 Monacor in PDF.
User questions about WAP200 Monacor
0 question about this device. Answer the ones you know or ask your own.
Ask a new question about this device
Download the instructions for your Media player in PDF format for free! Find your manual WAP200 - Monacor and take your electronic device back in hand. On this page are published all the documents necessary for the use of your device. WAP200 by Monacor.
USER MANUAL WAP200 Monacor
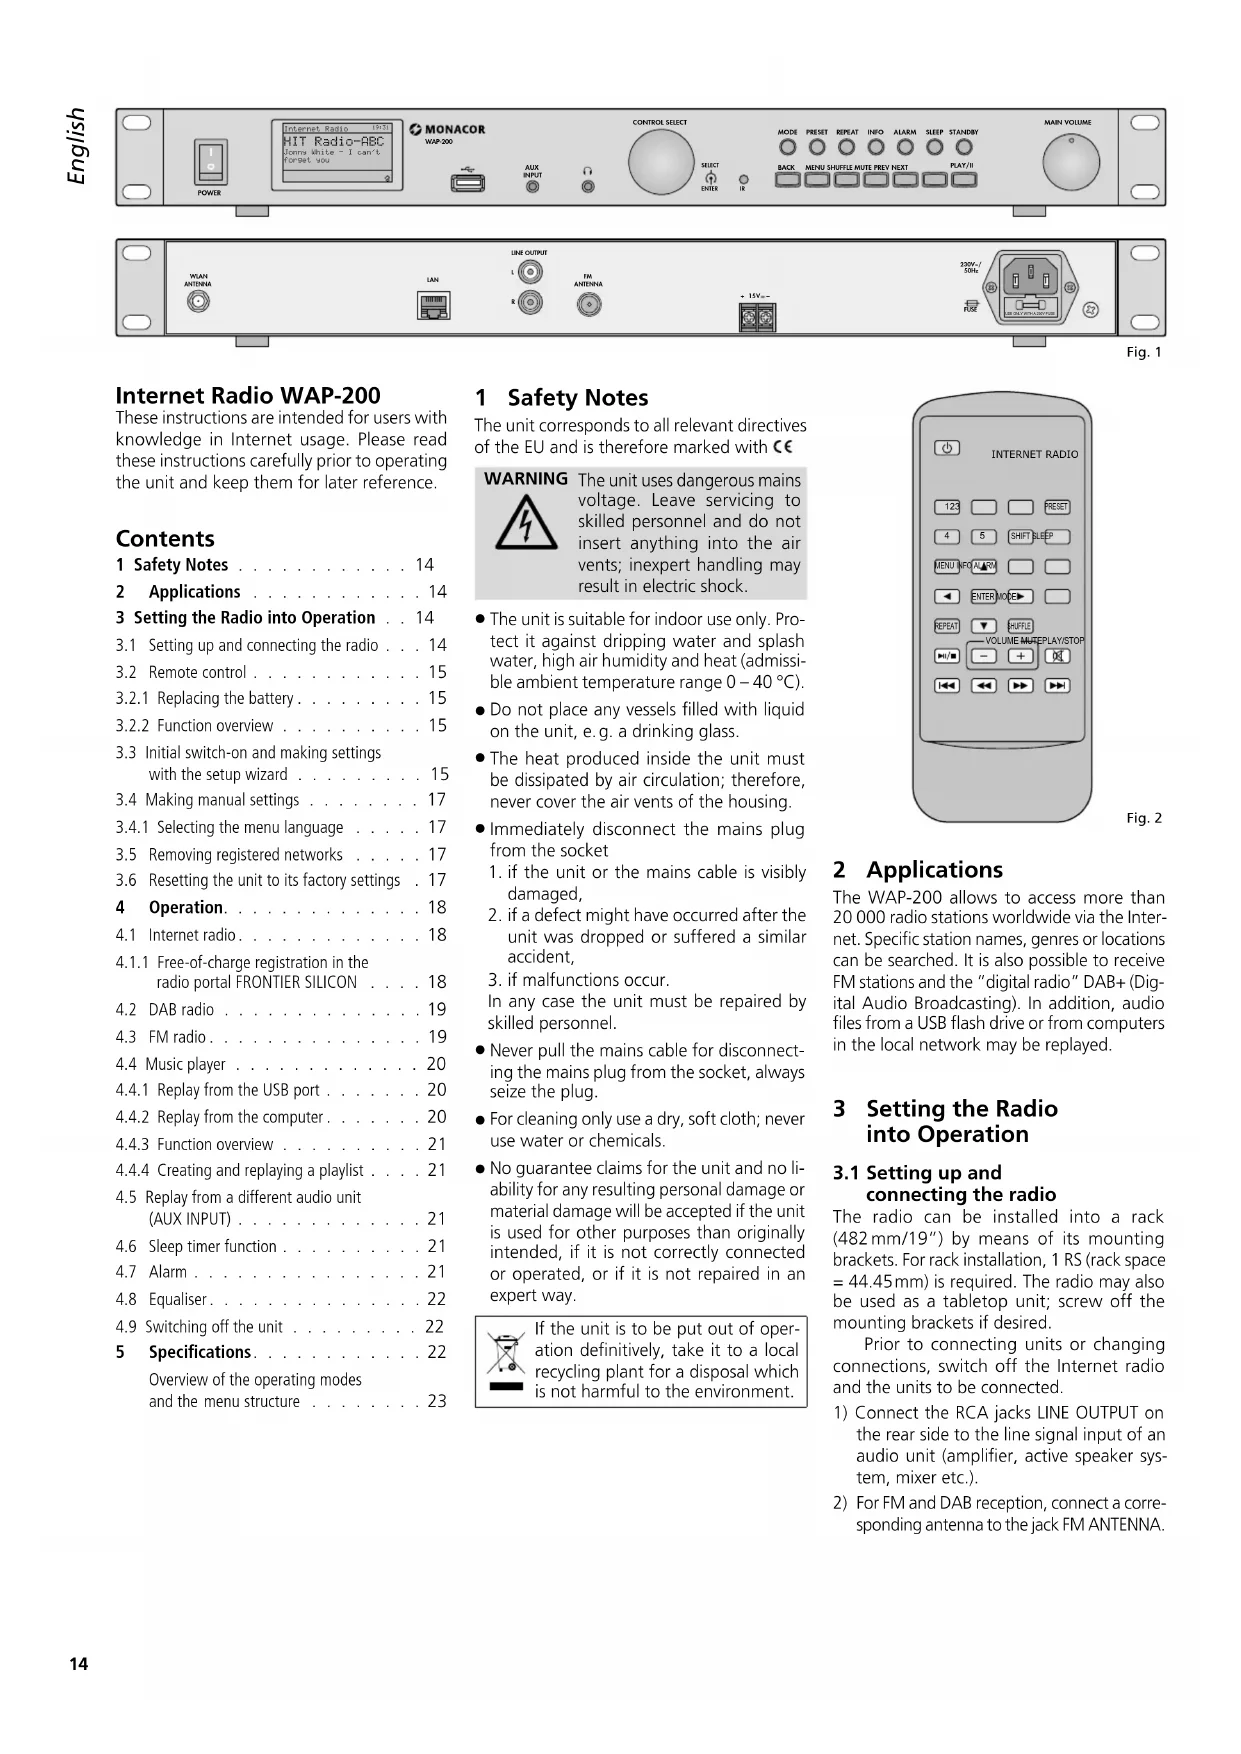
These instructions are intended for users with knowledge in Internet usage. Please read these instructions carefully prior to operating the unit and keep them for later reference.
Contents
1 Safety Notes 14
2 Applications 14
3 Setting the Radio into Operation 14
3.1 Setting up and connecting the radio 14
3.2 Remote control 15
3.2.1 Replacing the battery 15
3.2.2 Function overview 15
3.3 Initial switch-on and making settings with the setup wizard 15
3.4 Making manual settings 17
3.4.1 Selecting the menu language 17
3.5 Removing registered networks 17
3.6 Resetting the unit to its factory settings 17
4 Operation. 18
4.1 Internet radio. 18
4.1.1 Free-of-charge registration in the radio portal FRONTIER SILICON 18
4.2 DAB radio 19
4.3 FM radio 19
4.4 Music player 20
4.4.1 Replay from the USB port 20
4.4.2 Replay from the computer 20
4.4.3 Function overview 21
4.4.4 Creating and replaying a playlist . . . 21
4.5 Replay from a different audio unit (AUX INPUT) 21
4.6 Sleep timer function 21
4.7 Alarm 21
4.8 Equaliser. 22
4.9 Switching off the unit 22
5 Specifications. 22
Overview of the operating modes and the menu structure 23
1 Safety Notes
The unit corresponds to all relevant directives of the EU and is therefore marked with

The unit uses dangerous mains voltage. Leave servicing to skilled personnel and do not insert anything into the air vents; inexpert handling may result in electric shock.
The unit is suitable for indoor use only. Protect it against dripping water and splash water, high air humidity and heat (admissible ambient temperature range 0 - 40°C).
- Do not place any vessels filled with liquid on the unit, e.g. a drinking glass.
The heat produced inside the unit must be dissipated by air circulation; therefore, never cover the air vents of the housing.
-
Immediately disconnect the mains plug from the socket
-
if the unit or the mains cable is visibly damaged,
-
if a defect might have occurred after the unit was dropped or suffered a similar accident,
-
if malfunctions occur. In any case the unit must be repaired by skilled personnel.
-
Never pull the mains cable for disconnecting the mains plug from the socket, always seize the plug.
-
For cleaning only use a dry, soft cloth; never use water or chemicals.
-
No guarantee claims for the unit and no liability for any resulting personal damage or material damage will be accepted if the unit is used for other purposes than originally intended, if it is not correctly connected or operated, or if it is not repaired in an expert way.

If the unit is to be put out of operation definitively, take it to a local recycling plant for a disposal which is not harmful to the environment.
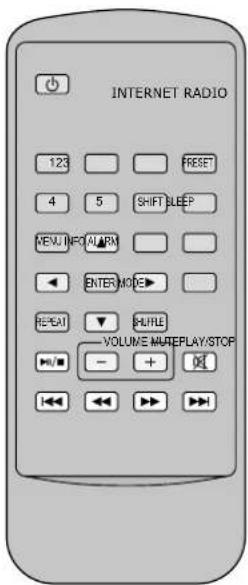
Fig. 2
2 Applications
The WAP-200 allows to access more than 20 000 radio stations worldwide via the Internet. Specific station names, genres or locations can be searched. It is also possible to receive FM stations and the "digital radio" DAB+ (Digital Audio Broadcasting). In addition, audio files from a USB flash drive or from computers in the local network may be replayed.
3 Setting the Radio into Operation
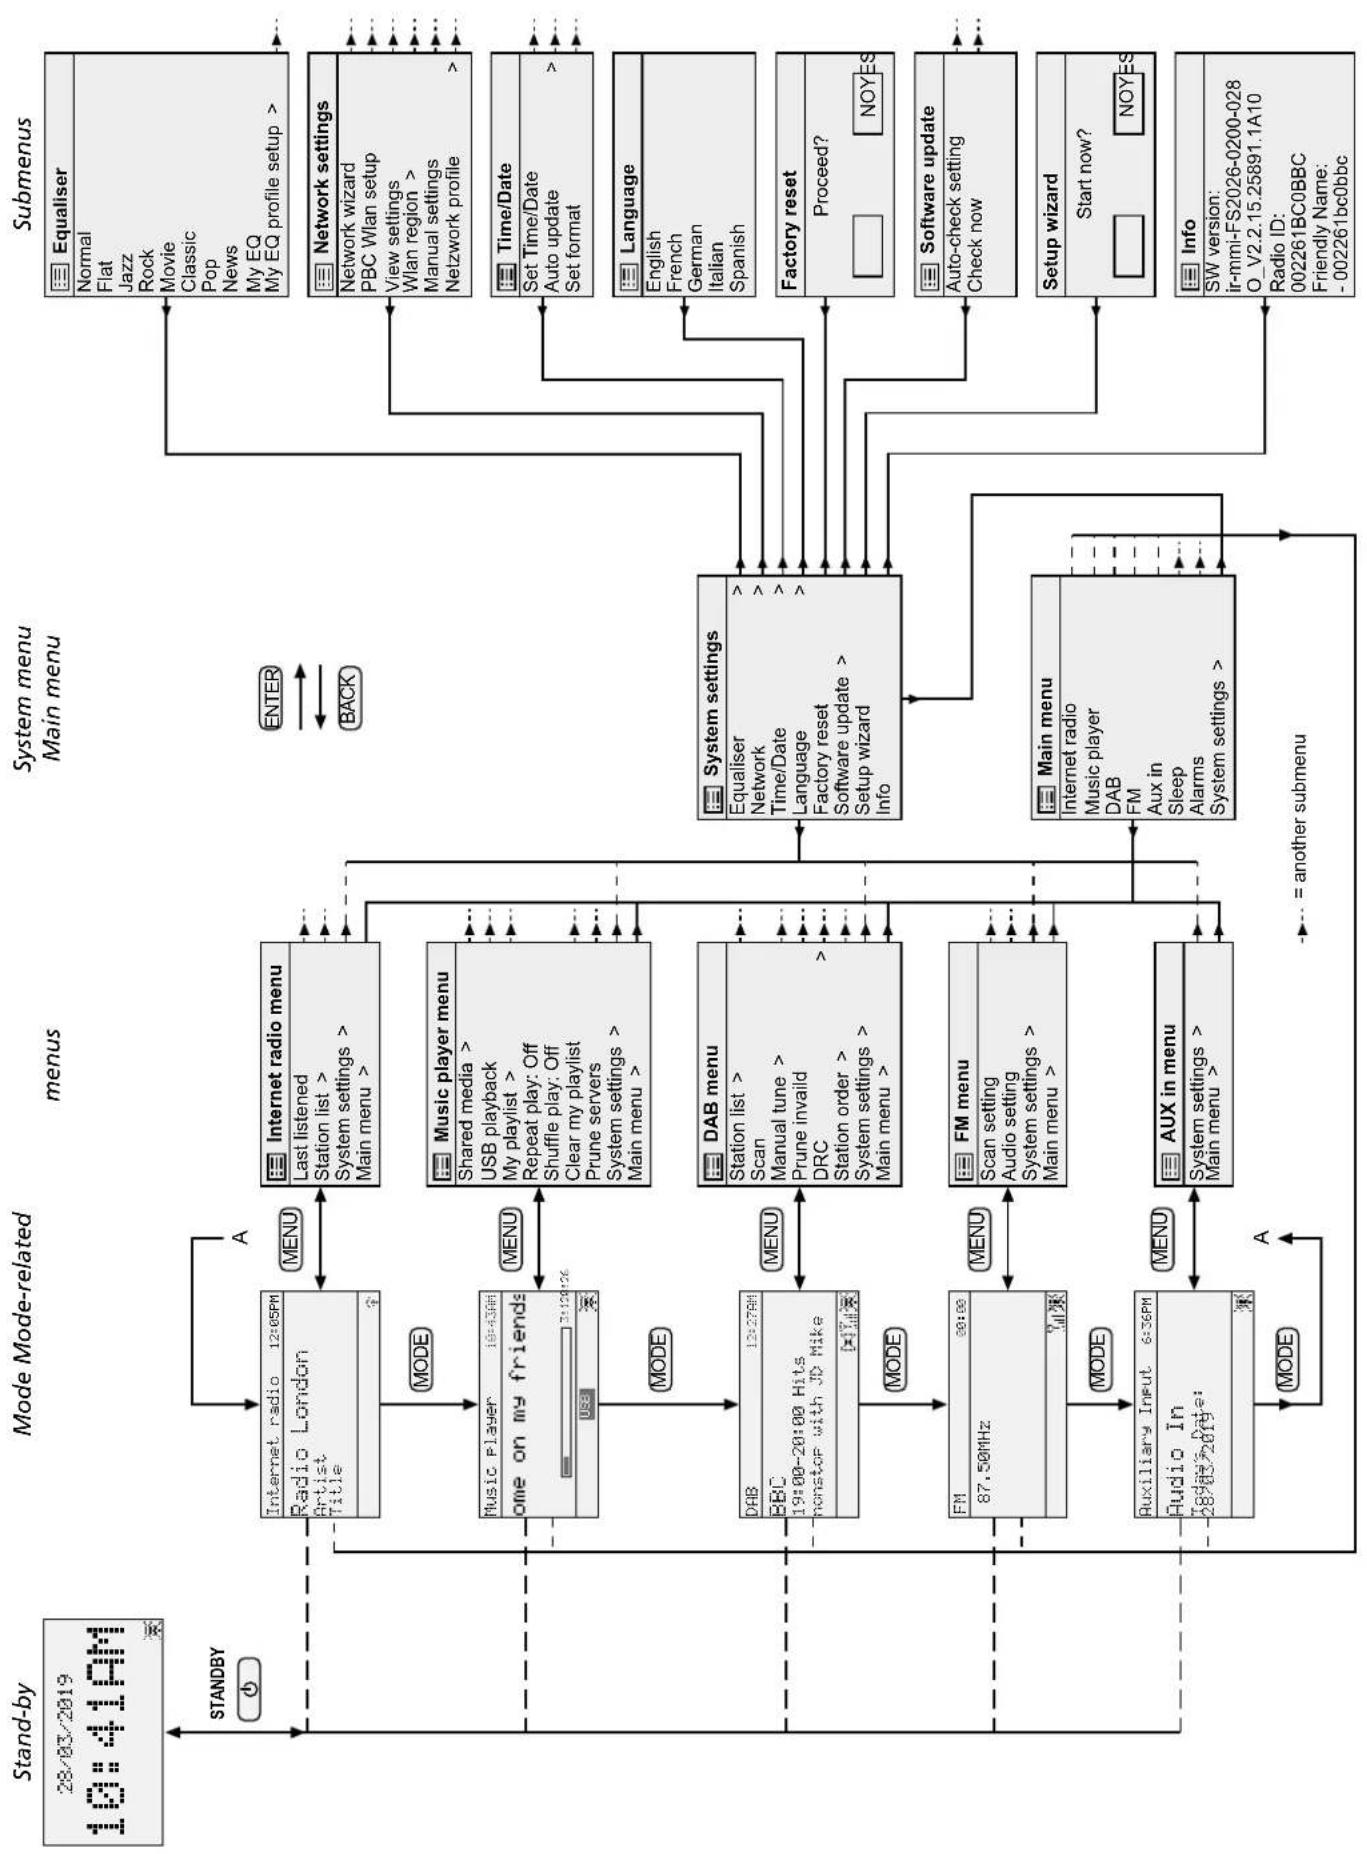
3.1 Setting up and connecting the radio
The radio can be installed into a rack (482mm / 19^ ) by means of its mounting brackets. For rack installation, 1 RS (rack space = 44.45mm is required. The radio may also be used as a tabletop unit; screw off the mounting brackets if desired.
Prior to connecting units or changing connections, switch off the Internet radio and the units to be connected.
1) Connect the RCA jacks LINE OUTPUT on the rear side to the line signal input of an audio unit (amplifier, active speaker system, mixer etc.).
2) For FM and DAB reception, connect a corresponding antenna to the jack FM ANTENNA.
If the reception conditions are good, the wire antenna supplied may be used.
3) A router is required for connection to the Internet. Connect the jack LAN of the WAP-200 to the router by means of a cable. If the router supports WLAN, a wireless connection can be established as an alternative: Insert the WLAN antenna supplied into the jack WLAN ANTENNA and fasten it with the nut.
4) For replay via headphones, connect the headphones to the 3.5mm jack This will deactivate the output LINE OUTPUT.

CAUTION
Never adjust the headphones to a very high volume. Permanent high volumes may damage your
hearing! Your ear will get accustomed to high volumes which do not seem to be that high after some time. Therefore, do not further increase a high volume after getting used to it.
5) For power supply, connect the mains jack 230V to a socket (230V / 50Hz) using the mains cable supplied. As an alternative or as a precaution against power failure, operate the unit with a DC voltage of 15 - 25V via the screw terminals 15V =
3.2 Remote control
Power supply of the remote control is provided by means of a battery. If the remote control is supplied with the battery inserted, remove the protective film (to protect the battery against discharge) from the battery support: The remote control will then be ready for operation. When pressing a button, always point the remote control to the IR sensor (to the left of the unit buttons). Make sure that there are no obstacles between the sensor and the remote control.
If the remote control is not used for a longer time, remove the battery as a precaution so that the remote control will not be damaged in case the battery should leak.
3.2.1 Replacing the battery
1) Push the latch of the battery support to the right (first arrow in fig. 3) and pull out the support (second arrow).

Fig. 3 Replacing the battery
2) Remove the discharged battery and insert the new battery (3 V button cell of type CR 2025) in the support, positive pole facing upwards.

Never put batteries in the household waste. To protect the environment, always take them to a special waste disposal, e.g. collection container at your retailer.
3) Push the support back into the remote control.
3.2.2 Function overview
Most of the functions are available via the remote control. As they are not always additionally described in the following chapters, they can be found in the following overvie w:
Fig. 4 Functions of the remote control
| Button Function | |
| ∅ | to switch to stand-by mode; in standby-mode: to switch on |
| 1-5 to call up stored stations 1 ... 5 | |
| SHIFT | to call up stored stations 6 ... 10: press SHIFT, then button 1 ... 5 |
| PRESET | for FM, DAB and Internet radio: to call up the menu for storing the station; select storage location with ▲ or ▼ and store with ENTER |
| SLEEP | to set the time of the sleep timer function; to set the alarm interval |
| ALARM | to call up/exit the menu "Alarms"; in stand-by mode: to change between the alarm times; when the alarm sounds: to stop the alarm |
| MODE | to select the operating mode: Internet radio music player DAB radio FM radio input AUX INPUT |
| MENU | to call up the menu; to return to previous menu/display |
| ▲/▼ | to select a menu line |
| ▲/▲ | to select menu options |
| ▲ | to return to previous menu/display without changing the settings |
| ENTER | to call up the submenu or to confirm the setting and return to the previous menu/display |
| INFO | FM/RDS or DAB: to show additional information; music player: to show additional track information |
| REPEAT | music player: to replay the playlist repeatedly |
| SHUFFLE | music player: to replay the tracks in random order |
| PLAY/ STOP | music player: to pause/continue the replay |
| VOLUME + - | to set the volume |
| MUTE to | mute/unmute the sound |
| ←/→ | FM or DAB: to start the scan (keep the button pressed until the scan starts) music player: to go to the previous/next track |
| ←/→ | music player: fast reverse/fast forward |
3.3 Initial switch-on and making settings with the setup wizard
Important: To establish a wireless connection between the Internet radio and the router, make sure that all Wi-Fi units (except the router) are switched off during the setup.
1) Switch on the WAP-200 with the switch POWER.
WELCOME will appear on the display.
Then the setup wizard will appear:
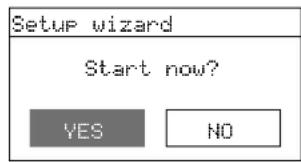
Fig. 5
Notes:
- The unit is in the stand-by mode if only the date and the time are shown on the display after the switch POWER was used. In this case, switch on the unit with the button STANDBY (or on the remote control).
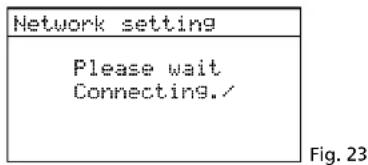
- If
Network settings
Please wait
Connecting.
appears on the display, press the button MENU, turn the knob CONTROL SELECT to select the line Systemsettings , press the knob to call up the menu "System settings" and start the setup wizard via the line Setupwizard Then continue with step 2.
- Instead of English, a different menu language can be set (see chapter 5.4.1 on page 17).
- The wizard can be called up any time via the menu "System settings".
2) YES has been selected. Press the knob CONTROL SELECT; the wizard will start and the menu "Date / Time" will appear:
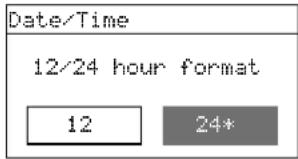
Fig. 6
3) The 24-hour format has been selected for the time (indicated by the asterisk *). If desired, turn the knob CONTROL SELECT to select the 12-hour format. Press the knob to confirm the format selected. The menu for the automatic time update will appear:

Fig. 7
4) The time and the date can be set manually or automatically. The automatic setting is easier and usually more precise. The current setting is indicated by an asterisk * (automatic setting via the Internet = factory setting).
The other options are:
Automatic setting via a DAB station or an FM station or manual setting (no update).
Note: An automatic setting will only be made when a corresponding station is received. Therefore, select the setting that corresponds to the operating mode most frequently used: If you listen to the digital radio for most of the time, for example, select Update from PAB, or if you mainly use the Internet to listen to the radio, leave the setting Update from NET unchanged.
Select the setting with the knob CONTROL SELECT and then press the knob to confirm.
5) The following menu displayed depends on the selected setting; additional time settings may be required:
Update from DAB or FM No additional time settings are required (including daylight saving time change). Continue with step 6. The menu shown there (fig.11) will appear.
Update from Network The menu "Settimezone" will appear:
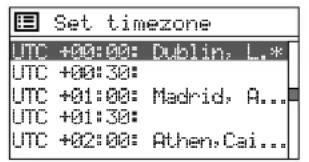
For Great Britain, the correct setting has been selected:
UTC +00:00: Dublin, London
Press the knob CONTROL SELECT to confirm this setting or, for a different country, first select the appropriate time zone and then confirm your selection. The menu "Daylight savings" will appear:
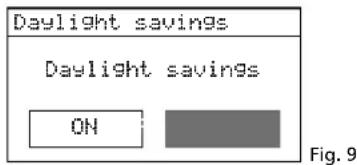
During the winter time, leave the setting OFF unchanged; for the summer time, select the setting OH with the knob CONTROL SELECT. Press the knob to confirm the setting. Continue with step 6. The menu shown there (fig. 11) will appear.
no Update
The menu for the manual time setting will appear:
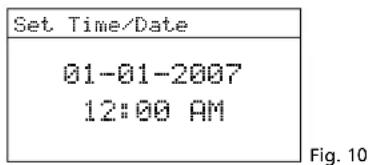
The digits for the day will flash. Turn the knob CONTROL SELECT to set the day and then press the knob to confirm. The digits for the month will start flashing. Proceed in the same way to set the month, the year, the hours, the minutes and, if required, AM or PM. To return to the previous setting, press the button BACK.
6) When the final time setting has been confirmed, the following message will briefly appear:
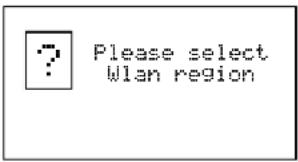
Fig. 11
Then a country list for the network setting will appear:
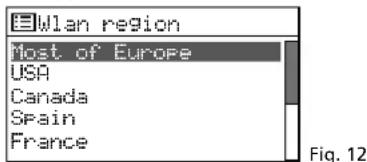
7) The line Most of Europe is selected. For Great Britain, press the knob CONTROL SELECT to confirm this setting. The unit will search for a network:
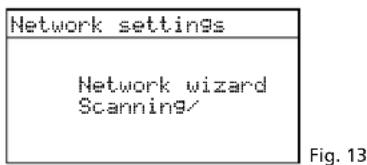
Then the menu with the networks found will appear:
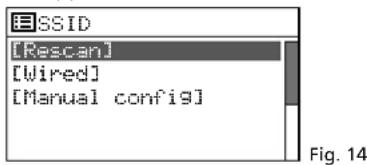
A To establish the connection to the network later (otherwise continue with item B, C or D): Press the button MENU; answer the question Run wizard again at next start up? with NO. The WAP-200 can now be used (chapter 4 on page 18), however, not as an Internet radio.
B If the name of your router is shown in this menu: Turn the knob CONTROL SELECT to select the name and then press the knob to confirm. If the network access is not encoded, the connection to the network will be established; continue with step 10. If the access is encoded, continue with step 8.
C If the name is not shown and if the WAP-200 is connected to the router via a cable: Use the knob CONTROL SELECT to select the line [Wired] and then press the knob to confirm. If the network access is not encoded, the connection to the network will be established; continue with step 10. If the access is encoded, continue with step 8.
D If the name is not shown and if a wireless connection shall be made to the router:
a) Use the knob CONTROL SELECT to select the line [Manual config] and then press the knob to confirm.
b) In the following menu, select Wireless and confirm.
c) In the following menu, select the line DHCP enable and confirm if the router automatically transfers the network settings to the WAP200 via DHCP (Dynamic Host Configuration Protocol).
If the DHCP function at the router is deactivated or not available, select the line DHCP disable, confirm and make the network settings manually in the following submenus; then continue with step d.
d) The menu for entering the network name will appear:
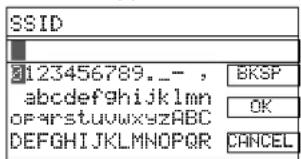
Fig. 15
Turn the knob CONTROL SELECT to select the first character and then press the knob to confirm. Proceed in the same way to enter the other characters. Then select the field OK (to be found between the special characters and the digits) and press the knob.
BkSP = delete last character
CANCEL = return to the previous menu
e) The menu "Authentication" will appear:
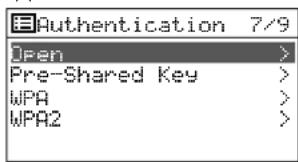
Fig. 16
In most cases, the setting WPA2 (Wi-Fi Protected Access 2) must be selected for newer routers.
f) The menu "Encryption type" will appear:
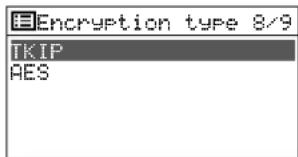
Fig. 17
For most routers, the setting TK/IP (Temporal Key Integrity Protocol) must be selected.
8) If the network access is encoded, a menu for entering the password will appear (for a WPS-encoded network, continue with step 9).
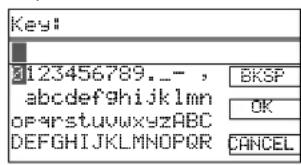
Turn the knob CONTROL SELECT to select the first character and then press the knob
to confirm. Proceed in the same way to enter the other characters.
The three fields BKSP, OK and CANCEL have the following functions:
BKSP - (Backspace) delete last character
OK - password is complete, establish the network connection
CANCEL - return to the previous menu
The position for selection is between the special characters and the digits. Press the knob CONTROL SELECT to execute the function.
9) If the network access is WPS-encoded (Wi-Fi Protected Setup), the WPS menu will appear:
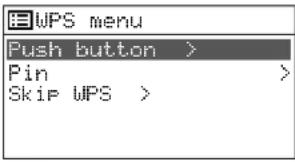
Fig. 19
The easiest way to establish the connection is to use the function "Push button". The corresponding menu line has already been selected. Press the knob CONTROL SELECT: The menu "WPS Setup" will appear. The WAP-200 will ask you to press the WPS button at the router. The connection will then be established. Finally, press the knob CONTROL SELECT at the WAP-200.
10) After the final entry required with regard to the network has been made, the connection will be established. This will be indicated by various messages
Please wait ...
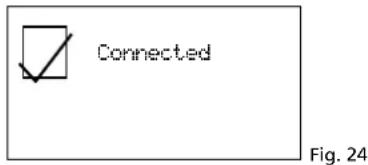
Once the network connection has been established, the message Connected will appear, followed by the message
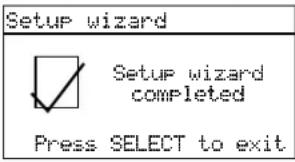
Fig. 20
Press the knob CONTROL SELECT to exit the setup wizard - the main menu will appear. Use the main menu or the button MODE to select the operating mode desired (chapter 4).
Note: If the wizard fails to establish a connection to the router (message failed to connect), first reset the unit to its factory settings (chapter 3.6) and then make the settings manually.
3.4 Making manual settings
All settings can also be made manually without the setup wizard:
1) Press the button MENU. Independently from the menu called up or from the current operating mode, a menu containing the line System settings will appear.
2) Turn the knob CONTROL SELECT to select the line System settings and then press the knob to confirm. The menu "System settings" will appear:
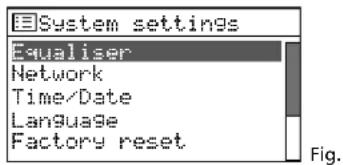
Fig. 21
This menu can be used to make all settings. Turn the knob CONTROL SELECT to select a setting and then press the knob to confirm.
3) To return to the previous menu, press the button BACK.
An overview of the menu structure can be found on page 23.
3.4.1 Selecting the menu language
Instead of English, a different menu language can be selected:
1) In the menu "System settings" (fig. 21), select the line Language with the knob CONTROL SELECT and then press the knob to call up the menu "Language":
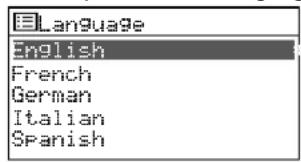
Fig. 22
2) Select the desired language in this menu. Once the selection has been confirmed, the menu "System settings" will appear in the language selected.
3) Press the button MODE (repeatedly) to select the operating mode desired (chapter 4).
3.5 Removing registered networks
The WAP-200 will remember the four wireless networks to which it was most recently connected. When switched on, it will try to find one of these networks and will connect to the network found. To call up the list of registered networks:
1) Press the button MENU.
2) Select the following:
System settings
Network
Network profile
3) Remove the networks that are not current anymore from the list. Turn the knob CONTROL SELECT to select the networks one after the other and press the knob to remove them. Thus, wrong connections can be avoided.
3.6 Resetting the unit to its factory settings
Resetting the unit to its factory settings will also remove all stations stored, disconnect the connection to the Internet, delete the connection data and set the menu language to English.
1) Press the button MENU.
2) Select the following:
System settings
Factory reset
3) In the following menu Proceed?, confirm the reset with YES.
4 Operation
1) Press the button MODE (at the unit or on the remote control) repeatedly until the display shows the operating mode desired: Internet radio Music Player DAB radio FM radio Aux in
2) Use the control MAIN VOLUME at the unit or the buttons VOLUME on the remote control to set the volume: Muted, 1-32.
3) To mute the sound, press the button MUTE. To unmute the sound, press the button MUTE again.
4) For information on how to set the sound, see chapter "4.8 Equaliser" on page 22.
4.1 Internet radio
The Internet radio can only be used when the network settings have been made (e- chapter 3.3 or 3.4).
1) Press the button MODE repeatedly until Internet radio is shown. Then, the menu for establishing the network connection will appear:
Once the connection to the Internet has been established, the following message will appear:
Then, the station most recently listened to will be shown or, when the Internet radio is switched on for the first time, the menu "Internet radio" will appear:
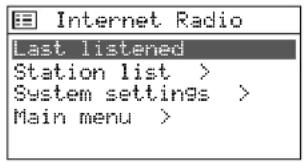
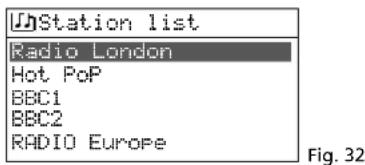
2) Turn the knob CONTROL SELECT to select the line Station list and then press the knob to call up the selection menu:
3) There are several options to select a station, e.g.: Stations Genre Blues All Stations ... (station name) or, for example:
Stations Location Caribbean Bahamas Reggae ... (station name) When a wrong selection has been made, the button BACK can be used any time to return to the previous menu.
4) To scan (search) for a specific station, select the following:
Stations Search stations The menu for entering the name will appear:
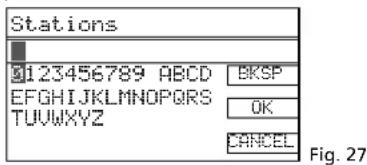
Turn the knob CONTROL SELECT to select the first character and then press the knob to confirm. Proceed in the same way to enter the other characters. Then select the field OK (to be found between Z and BKSP) and press the knob.
BKSP = delete last character CANCEL = return to the previous menu
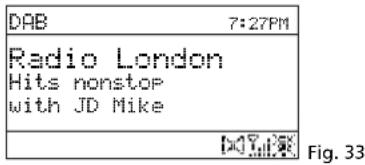
5) When a station has been found, the display will show the station and information with regard to the programme and/or with regard to the music title currently played:
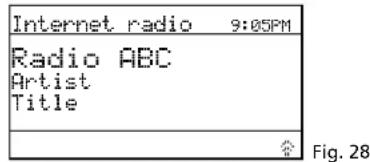
Press the button INFO (repeatedly) to show more information. The icon in the lower right corner will indicate the data stream. The icon will be crossed out when the connection to the station is interrupted.
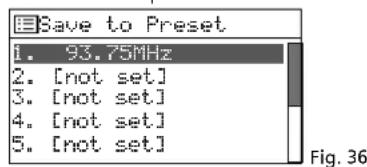
6) Ten stations can be stored on the ten storage locations: Keep the button PRESET pressed until the menu "Save to Preset" appears. Turn the knob CONTROL SELECT to select an unused storage location and then press the knob.
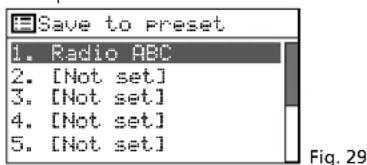
Once the station has been stored, the display will show information with regard to the station stored. In the lower line, the storage location number will be preceded by "P".
To store stations with the remote control, keep the button PRESET pressed until the menu "Save to Preset" appears. Select an unused storage location with the button or and then store the station with the button ENTER.
7) To call up a station stored, briefly press the button PRESET. Select the station with the knob CONTROL SELECT and then press the knob to confirm. To call up a stored station
by means of the remote control, press one of the buttons 1-5; for the storage locations 6-10, first press the button SHIFT and then one of the buttons 1-5.
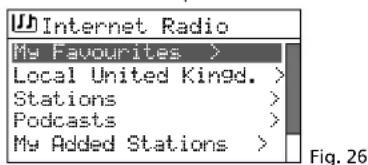
8) To save a station to the list "My Favourites" (see menu line in fig. 26), keep the knob CONTROL SELECT pressed until the message
Favourite added appears.
9) To change to another station of the current selection menu, turn the knob CONTROL SELECT and then press the knob to confirm.
With the remote control: Select the station with the button or and call it up with the button ENTER.
To carry out an entirely new station scan, press the button MENU. The menu "Internet radio" (fig. 25) will appear. Use this menu to start a new station scan.
4.1.1 Free-of-charge registration in the radio portal FRONTIER SILICON
This portal allows you to create and organise various lists of your stations, to use additional functions and to listen to Internet radio via your computer. Once the WAP-200 is connected to the Internet, your lists will be accessible via the WAP-200.
1) For registration, the following data is required:
- your e-mail address
- a password
- the radio model: Jupiter 6.2
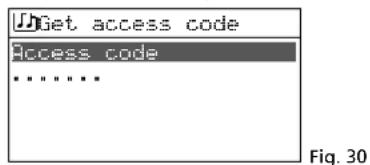
the access code
The access code can be found in the WAP-200:
In the mode "Internet radio", press the button MENU and select the following:
Station list Help Get access code:
2) On the Internet, go to the following address:
www.wifiradio-frontier.com and register a new account.
3) Additional radios can be registered via your account via:
My preferences
Add another Wi-Fi radio to the account Thus, all your Internet radios will have access to the same station lists.
4.2 DAB radio
1) Press the button MODE repeatedly until DAB radio appears. When the digital radio is switched on for the first time, the station scan will automatically be started to find the stations in your reception range:
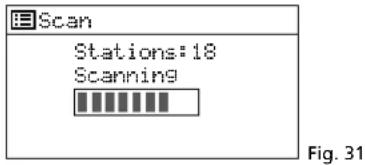
Then, a list with the stations found will appear:
2) To select a station, turn the knob CONTROL SELECT and then press the knob to confirm.
With the remote control: Select the station with the button or and call it up with the button ENTER.
The display will show the station and information with regard to the programme and / or with regard to the music title currently played. Press the button INFO (repeatedly) to show more information. The icons in the lower line have the following meaning:
[st] stereo replay
indication of the signal strength received
no connection to the Internet
3) To switch to a different station, proceed as described in step 2.
4) To perform a new station scan (e.g. because new stations are available or because the reception antenna has been realigned), press the button MENU, select the line Scan and press the knob CONTROL SELECT.
All DAB channels can also be manually selected via the menu line Manual tune. To return from the manual selection of DAB channels to the station list, press the button MENU repeatedly until the menu "DAB" appears. Then select the line Station list and press the knob CONTROL SELECT to call up the list.
5) Ten stations can be stored on the ten storage locations: Keep the button PRESET pressed until the menu "Save to Preset" appears (fig. 34). Turn the knob CONTROL SELECT to select an unused location and then press the knob.
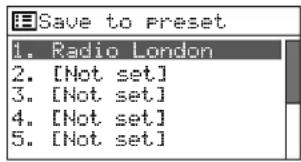
Fig. 34
Once the station has been stored, the display will show information with regard to the station stored. In the lower line, the storage location number will be preceded by "P".
To store stations with the remote control, keep the button PRESET pressed until the menu "Save to Preset" appears. Select an unused storage location with the button or and then store the station with the button ENTER.
6) To call up a station stored, briefly press the button PRESET. Select the station with the knob CONTROL SELECT and then press the knob to confirm. To call up a stored station by means of the remote control, press one of the buttons 1 - 5; for the storage locations 6 - 10, first press the button SHIFT and then one of the buttons 1 - 5.
7) Stations that currently do not broadcast signals, can be removed from the station list: Press the button MENU, select the line Prune invalid and press the knob CONTROL SELECT. In the following confirmation prompt, select YES.
8) To define the order of the stations in the stations list: Press the button MENU, select the line Station order and confirm. The following options are available:
Alphanumeric = All stations are sorted alphabetically.
Ensemble = The stations are sorted by channels; multiple stations are received for each channel.
Valid = First, the stations that currently broadcast signals are listed in alphanumeric order. Then, the stations that currently do not broadcast signals are listed.
The asterisk will indicate the current setting. Turn the knob CONTROL SELECT to select the sorting desired and then press the knob to activate it.
9) For some programmes, the dynamics of the audio signal can be compressed: The volume of quiet sounds will be increased and loud sounds will be attenuated (ideally suited for background music, for example).
Press the button MENU, select the line DRC (dynamic range control) and press the knob CONTROL SELECT. The following options are available:
DRC high = high level of compression
DRC low = low level of compression
DRC off = no compression
The asterisk will indicate the current setting. Turn the knob CONTROL SELECT to select the compression desired and then press the knob to activate it.
Note: The DRC setting will have no effect on the audio signal when no data for compression are sent along with the programme.
4.3 FM radio
1) Press the button MODE repeatedly until FM radio appears. Then, the operating mode indication "FM" will appear:
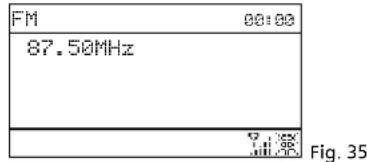
2) When the FM radio is switched on for the first time, all stations must first be scanned and stored. To start the station scan, press the knob CONTROL SELECT. The scan will start at the reception frequency 87.5 MHz and will stop at the first station.
3) If required, turn the knob CONTROL SELECT for a fine adjustment of the reception frequency in 50kHz increments.
4) If the station broadcasts RDS information (Radio Data System), · · will appear in the lower display line. The station name will be shown and, if applicable, information with regard to the station and/or with regard to the current music title. Press the button INFO (repeatedly) to show more information. The icons in the lower line have the following meaning:
= stereo replay
indication of the signal strength received
no connection to the Internet
5) To store the station, keep the button PRESET pressed until the menu "Save to Preset" appears. Turn the knob CONTROL SELECT to select an unused storage location and then press the knob.
Once the station has been stored, the display will show information with regard to the station stored. In the lower line, the storage location number will be preceded by "P".
To store stations with the remote control, keep the button PRESET pressed until the menu "Save to Preset" appears. Select an unused storage location with the button or and then store the station with the button ENTER.
6) To call up a station stored, briefly press the button PRESET. Select the station with the knob CONTROL SELECT and then press the knob to confirm. To call up a stored station by means of the remote control, press one of the buttons 1 - 5; for the storage locations 6 - 10, first press the button SHIFT and then one of the buttons 1 - 5.
7) The automatic scan is factory-set to only stop at stations with strong reception. For the automatic scan to stop at stations with poor reception, press the button MENU. The menu "FM" will appear:
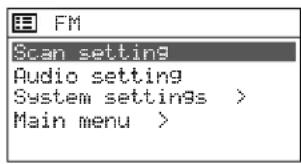
Fig. 37
The line Scan setting will be selected. Press the knob CONTROL SELECT. The following confirmation prompt will appear:
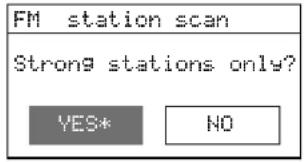
Fig. 38
Turn the knob CONTROL SELECT to select the setting NO and then press the knob to confirm.
8) Prior to scanning for the next station, first wait for the display to indicate the station most recently set.
Forward scan:
At the unit, press the knob CONTROL SELECT.
Note: If the reverse scan starts, briefly turn the knob to the right in order to change the scan direction.
On the remote control, keep the button
pressed until the scan starts.
Reverse scan:
At the unit, briefly turn the knob CONTROL SELECT to the left (to change the scan direction) and then press the knob.
On the remote control, keep the button
pressed until the scan starts.
9) Store the station as described in step 5. Proceed in the same way to scan and store the other stations.
10) Stations with poor reception may be disturbed by noise. To reduce the noise, set the reproduction to mono: Press the button MENU. The menu "FM" will appear (fig. 37). Select the line Audio setting and confirm. The following confirmation prompt will appear:
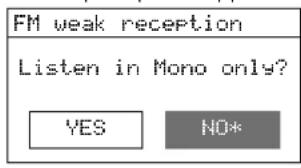
Fig. 39
Turn the knob CONTROL SELECT to select the setting YES and then press the knob to confirm.
Note: All stations will then be reproduced in mono. For stereo reproduction of stations with strong reception, set NO in the menu "FM weak reception" again.
4.4 Music player
The music player is able to replay audio files in the formats MP3, AAC, WMA, WAVE or FLAC from a USB flash drive, a hard disk or a computer in the local network.
Press the button MODE repeatedly until Music Player appears. Then, the menu "Music player" will appear:
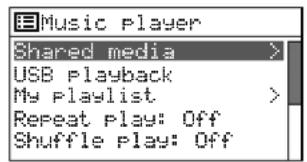
Fig. 40
4.4.1 Replay from the USB port
1) Insert a USB flash drive into the USB port or connect a hard disk to the port. After a short time, the following message will appear:
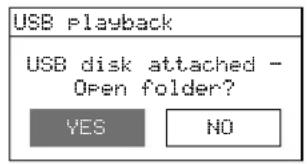
Fig. 41
YES will be selected. To indicate the tracks stored on the data storage device, press the knob CONTROL SELECT.
If the message shown in fig. 41 does not appear, turn the knob CONTROL SELECT in the menu "Music player" to select the line USB playback and then press the knob to confirm.
2) Once the data storage device has been opened, its contents will be shown:
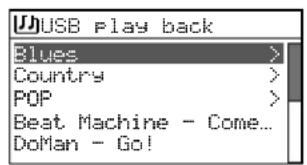
Fig. 42
Turn the knob CONTROL SELECT to select a track (if applicable, also from a folder, indicated by ) and then press the knob to start the replay.
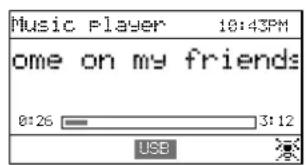
Fig. 43
3) To select a different track, turn the knob CONTROL SELECT. To exit a folder selected, press the button BACK.
4) For information on how to create and replay a playlist, see chapter 4.4.4.
4.4.2 Replay from the computer
The WAP-200 and the computer must be connected to the same local network. A UPnP service (Universal Plug and Play), e.g. Windows Media Player (version 10 or later), must be installed on the computer.
Windows is a registered trademark of Microsoft Corporation in the United States and other countries.
1) Switch on the music replay mode so that the computer can recognise the WAP-200.
2) Set the computer in such a way that it works as a media server; for Windows 7, for example, proceed as follows:
A - Network settings
Start
Control Panel
Network and Internet
Network and Sharing Center
Change advanced sharing settings (left column)
Click after "Home or Work".
Under "Media Streaming", click "Choose media streaming options ...".
If media streaming has not been turned on yet, an activation window will appear: Click the button "Turn on media streaming". (This window will be skipped when streaming has been turned on.)
For "Show Devices on", select the option "All Networks".
After "Media programs on this PC and remote connections", click "Customize ...".
Tick the option "Use default settings" and click "OK" to confirm.
After "Media programs on this PC and remote connections" and "Customize", select the setting "Allowed".
Click "OK" to exit the media streaming options.
In the sharing setting options, click again after "Home or Work".
Under "Network Discovery", select the setting "Turn on network discovery".
Click "Save All Changes".
Close the window "Network and Sharing Center".
Notes:
- The settings can also be made via the Windows Media Player (menu "Stream").
- If applicable, make changes to the Firewall settings.
B-Setting services
Start
Control Panel
System and Security
Management
Double-click "Services".
Scroll to "SSDP Discovery". The startup type "Automatic" should have been selected. If not, click "SSDP Discovery" with the right mouse button, and, via "Properties", select the startup type "Automatic". Click "OK" to confirm.
Scroll to "UPnP Device Host" and "Windows Media Player". Set the startup type to "Automatic" as well.
Close all open windows.
C-Making the audio files available
Copy the audio files desired to the folder "Libraries"/"Music" so that the Windows Media Player can make the audio files available to the local network (and thus to the WAP-200).
3) For replay via the WAP-200, use the line Shared media in the menu "Music player" (fig. 40) to select the computer and the audio files.
4.4.3 Function overview
Fig. 44 Functions of the music player
| Button | At the unit | On the remote control | Function |
| INFO | × | × | to show various track information |
| REPEAT | × | × | to replay the playlist repeatedly |
| SHUFFLE | × | × | to replay the tracks in random order |
| PLAY | × | × | to pause/continue the replay |
| ←/→ | × | to go to the previous/next track | |
| ← /→ | × | fast reverse/fast forward | |
| PREV NEXT | × | press briefly: to go to the previous/next track keep pressed: fast reverse/fast forward |
4.4.4 Creating and replaying a playlist
To replay tracks from different folders, a playlist with up to 500 tracks can be created. It is possible to mix tracks from a computer connected to the local network and from a data storage device connected to the USB port
Note: The playlist will be deleted when the unit is switched off with the mains switch POWER, but will remain available when the unit is switched to the stand-by mode with the button STANDBY or
1) While a track is being replayed or when the track is selected in the track overview (fig. 42), keep the knob CONTROL SELECT pressed until the message
Added to My Playlist
appears. Proceed in the same way to add the other tracks desired to the list.
2) To replay the playlist, press the button MENU (the menu shown in fig. 40 will
appear) and use the line My 1 a1 list to call up the list. The first track will be selected. Press the knob CONTROL SELECT to start the replay or first select a different track to start with.
3) To replay the playlist repeatedly, press the button REPEAT.
4) To remove a track from the list, select the track in the list and keep the knob CONTROL SELECT pressed until the confirmation prompt
Delete from my Playlist?
appears. Confirm with YES or cancel with NO.
5) To delete the entire playlist (as an alternative to switching off the unit with the mains switch):
Press the button MENU and then delete the list via the line Clear My Play List and a confirmation prompt.
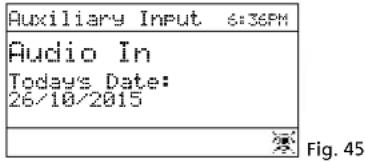
4.5 Replay from a different audio unit (AUX INPUT)
An audio unit with line output (e.g. CD player or MP3 player) can be connected to the 3.5mm jack AUX INPUT on the front side. Thus, the audio unit can be replayed via the WAP-200.
Press the button MODE repeatedly until Flux in appears. Then, the operating mode indication "Auxiliary Input" will appear:
4.6 Sleep timer function
The unit can automatically switch off after a specific time so that the listener can fall asleep to music, for example.
1) Press the button SLEEP (at the unit or on the remote control) repeatedly until the time desired is shown:
Sleep OFF, 15, 30, 45, 60 minutes
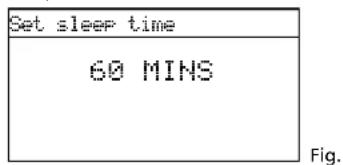
2) The previous display will appear after 2 seconds if the button is not pressed. In the lower line, the time until switch-off will be indicated after the clock icon.
3) After switch-off, the unit can be switched on again with the button STAND BY (or on the remote control).
4) The sleep timer function can also be set via the menu:
a) Press the button MENU.
b) Call up the following:
→Main menu Sleep
c) Turn the knob CONTROL SELECT to set the time and then press the knob to confirm.
4.7 Alarm
The unit can switch on at a specific time for 60 minutes. For this, two different alarm times can be set.
1) Press the button ALARM. The menu "Alarms" will appear:
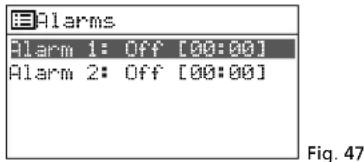
2) Turn the knob CONTROL SELECT to select the alarm 1 or 2 and then press the knob to call up the alarm time menu:

3) Select one after the other:
Enable: Off, Daily, Once, Weekends or Weekdays
Time: 00:00-12:59 AM/PM or 00:00-23:59
Mode: Buzzer, Internet radio, DAB, FM
Preset: Last listened or 1-10
Volume: Muted, 1-32
4) To save the settings and activate the alarm, select the line Save (beneath Volume) and then press the knob CONTROL SELECT. The menu "Alarms" will appear again and shortly afterwards the operating mode will be indicated. In the lower line, an alarm clock icon will be shown.
5) When the unit has been switched off with the button STAND BY (or on the remote control), it will switch on at the alarm time. The unit can be switched off with the button SLEEP so that the alarm will sound again after 5 minutes. To change the alarm interval, repeatedly press the button SLEEP: 5, 10, 15 or 30 minutes.
To completely switch off the alarm, press the button ALARM.
Note: The unit will automatically switch off after 60 minutes.
6) In the standby mode, use the button ALARM to switch off the alarm function or, if two alarm times have been defined, to switch between the alarm times.
4.8 Equaliser
For sound adjustment, it is possible to select 8 presettings or to save a user-defined sound setting.
1) Press the button MENU.
2) Select the following:
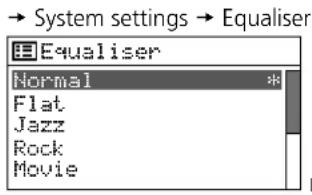
3) The current setting is indicated by an asterisk *. Beneath the line Movie, additional presettings are available:
Classic
POP
News
My EQ
My EQ Profile setup
Turn the knob CONTROL SELECT to select the sound adjustment and then press the knob to activate it.
4) For a user-defined adjustment, select the line My EQ profile setup and call up the following menu:
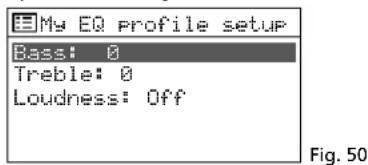
5) Select the line Bases and then press the knob CONTROL SELECT. A submenu with an adjustment scale will appear:
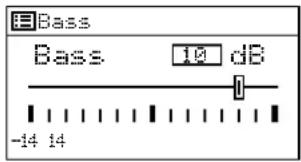
Fig. 51
6) Turn the knob CONTROL SELECT to adjust the sound and then press the knob to return to the previous menu.
7) Adjust the high frequencies accordingly.
8) In the line Loudness, press the knob CONTROL SELECT to activate or deactivate the aurally compensated sound correction (boosting of the high frequencies and low frequencies when the volume is low).
9) When the sound has been adjusted as desired, press the button BACK. The unit will ask:
Save changes?
Confirm with YES (preset).
10) The menu with the sound presettings will appear again (fig. 49). For the user-defined sound adjustment to take effect, select the line M- EQ and confirm. The menu "System settings" will appear, and shortly afterwards the current operating mode will be indicated again.
4.9 Switching off the unit
When the unit is switched off with the button STAND BY (or on the remote control), the display will continue to show the date and the time. Use the same buttons to switch the unit on again.
Use the mains switch POWER to completely switch off the unit.
5 Specifications
Reception frequencies
FM: .87.5-108MHz
Headphones: 1 V, 3.5 mm jack
Audio formats supported: MP3, WMA, WAVE, AAC, FLAC
Menu languages: English, French, German, Italian, Spanish
Power supply
Mains voltage: 230 V/50 Hz
Power consumption: . . . .20 VA max.
DC power supply
(alternative): 15-25 V- 300 mA at 15 V
Battery for
remote control: 3 V, 1 × CR 2025
Dimensions: 482× 44× 245mm
Weight: 2.7 kg
Subject to technical modification.
Overview of the operating modes and the menu structure
English
Radio internet WAP-200
Run wizard again at next start up?
Mode: Buzzer, Radio Internet, DAB, FM
Volume: Muet (mute) 1-32
Tension sector: 230 V/50 Hz
Consommation: .max.20 VA
Alimentation courant
Please wait Connecting.
Run wizard again at next start up?