Cubus 251 - Projector Reflecta - Free user manual and instructions
Find the device manual for free Cubus 251 Reflecta in PDF.

User questions about Cubus 251 Reflecta
0 question about this device. Answer the ones you know or ask your own.
Ask a new question about this device
Download the instructions for your Projector in PDF format for free! Find your manual Cubus 251 - Reflecta and take your electronic device back in hand. On this page are published all the documents necessary for the use of your device. Cubus 251 by Reflecta.
USER MANUAL Cubus 251 Reflecta
natural_image
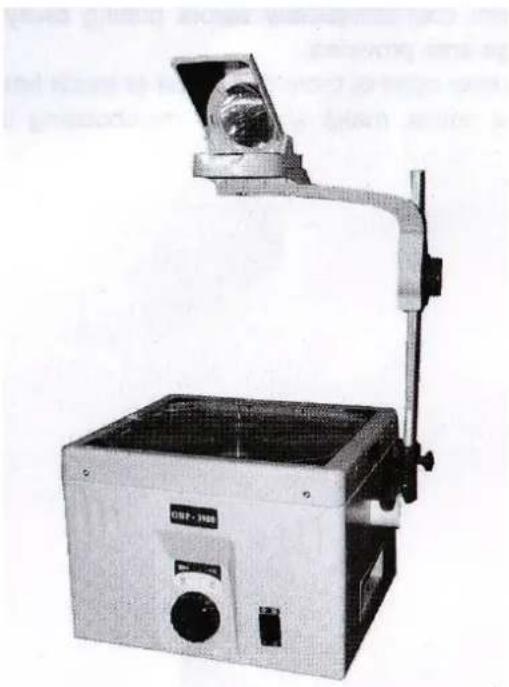
White overhead projector with a mounted screen and control panel (no visible text or symbols)DEUTSCH
natural_image
Close-up of a medical device with blue surgical instruments and a white base (no visible text or symbols)Fig(1)

natural_image
Close-up of a white industrial control panel with blue buttons and a small display (no visible text or symbols)Fig(2)
natural_image
Close-up of a blue circular control knob with a digital display and a black electrical switch (no text or symbols visible)Fig(3)
natural_image
Close-up of a hand pressing down on a white surface with a blue and black component (no visible text or symbols)Fig(4)
WARTUNG
natural_image
Close-up of a mechanical component with metallic parts and a central circular housing (no visible text or symbols)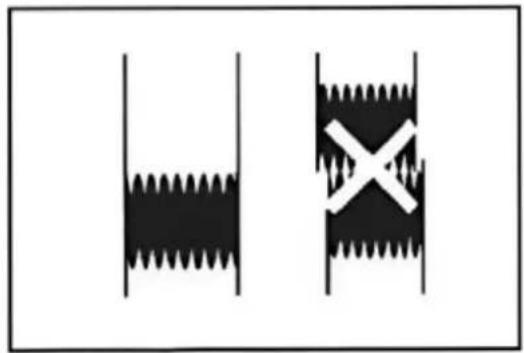
natural_image
Two black-and-white diagrams showing a wavy line and a cross symbol, no text or labels present.Fig(5)
natural_image
Modern medical imaging device with a mounted screen and control panel (no visible text or symbols)ENGLISH
IMPORTANT SAFEGUARDS
When using your overhead projector, basic safety precautions should always be followed, including the following:
- Read the following instructions carefully before operating the overhead projector.
- Make sure that the operating voltage of the overhead projector corresponds to your local voltage.
- Care must be taken to ensure the smooth airflow of the cooling system. Take care that the Projector is placed on a sturdy, flat surface. Immediately switch off the machine if the cooler is not functioning properly.
- To reduce the risk of electric shock, do not disassemble this appliance, but take it to a qualified technician when service or repair work is required. Incorrect reassembling can cause electric shock when the appliance is used subsequently.
- Tilt up the projection mirror before switching on the overhead projector.
- Always unplug appliance from electric outlet before opening the cover for cleaning, servicing, lamp changing and when not in use. Never tear cord to pull plug from outlet. Grasp plug and pull to disconnect.
- Let appliances cool completely before replacing the lamp. Attention! Care must be taken as burns can occur from touching hot parts!
- To avoid the potential electrical shock, do not expose this overhead projector to rain, moisture, or other liquids.
- Let overhead projector cool completely before putting away.
- Do not let cord hang over edge of table or counter or touch hot surfaces.
- Close supervision is necessary when any appliance is used by or near children. Do not leave appliance unattended while in use.
A Safety Interlock is located on the edge of the cabinet. When the platen of the overhead projector is opened, the power supply will cut off. Please make sure the appliances is unplugged during repair to avoid electric stock
Table of Contents 2
Name of Parts 3
Specification and Technical Data 4
Operation Procedure 5
Maintenance & Repair 6
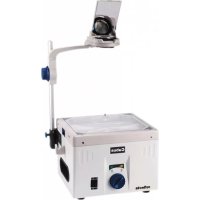
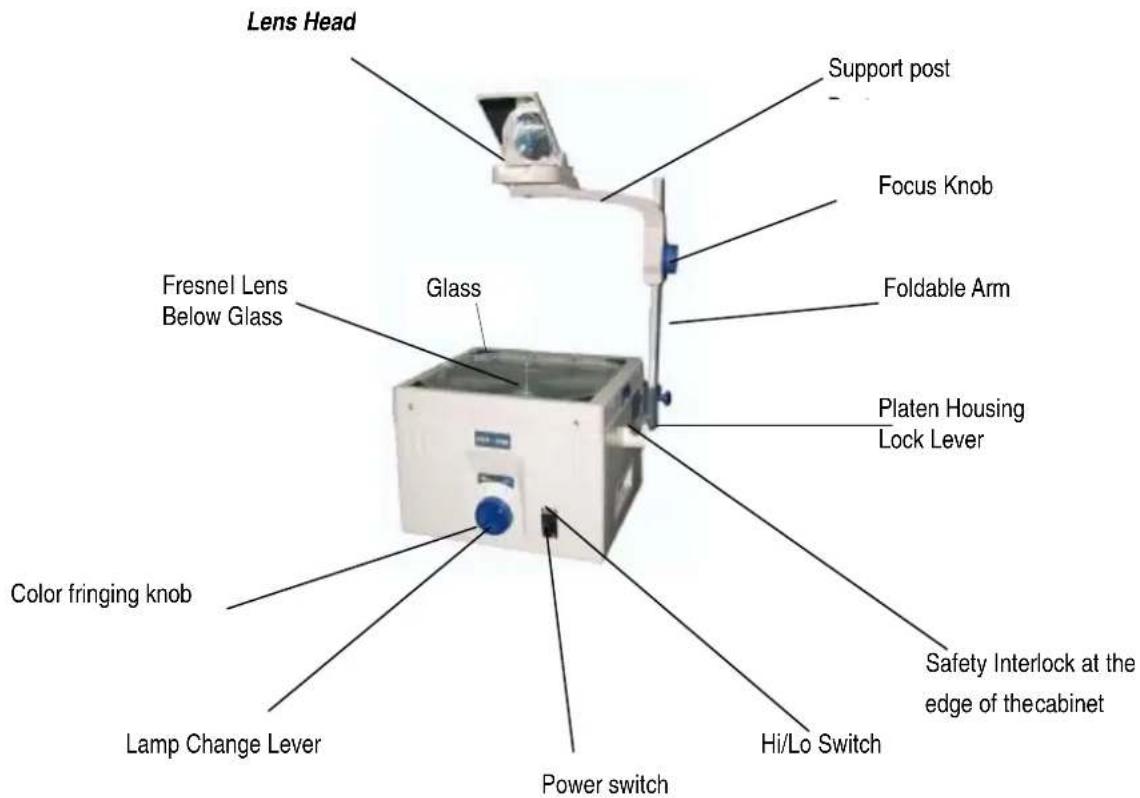
NAME OF PARTS
SPECIFICATION AND TECHNICAL DATA
| cubus | 251 353 401 403 | |||
| Lamp | 24V/250-300W Dual lamp | 36V/400W Dual lamp | ||
| Voltage | 220V/240V~/50Hz | |||
| Two-lamp changer | Is equipped with safety and reliable two-lamp changer device. For working continuously make sure there are always two functional lamps inserted. | |||
| Safety switch | Power supply will be shut off when the top cover is opened. Insure the maintenance man's safety, unplug the mains cable additionally. | |||
| Working stage | 285mmx285mm | |||
| Projection angle | 360° rotation and tilting angle up to 60° | |||
| Focal length | 1-Element lens f=285mm | 3-Element lens f=320mm | 1-Element lens f=285mm | 3-Element lens f=320mm |
| Light output | 2000 lumens | 2000 lumens | 3000 lumens | 3000 lumens |
| Packing dimensions | 54x45x34,5cm | 54x45x34,5cm | 54x45x34,5cm | 54x45x34,5cm |
| Gross Weight | 12.5kg | 13kg | 13,5kg | 14kg |
OPERATION PROCEDURE
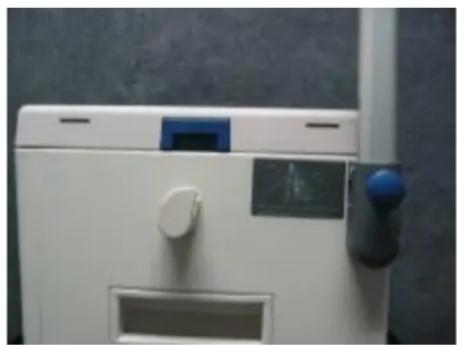
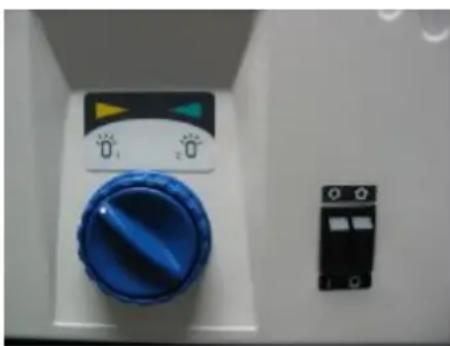
- Adjust the post to the vertical position as Fig. 1 and Fig. 2, it will self-lock tightly.
Note: Before switch on the machine, please measure the local voltage to select the input voltage, we suggest select 220v when the voltage is on alternating current 200V-230V. When the voltage > 230V, should choice 240V in order to enhance the lamp's working time.
Connect the power supply and switch on the “on/off” switch, the machine will start working immediately.

natural_image
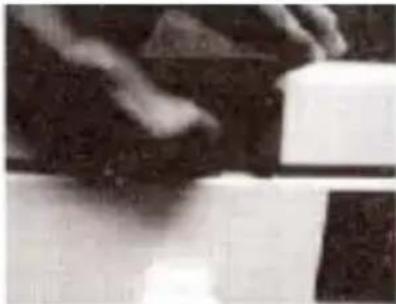
Close-up of a robotic arm gripping a white device with blue buttons (no visible text or symbols)Fig. 1
natural_image
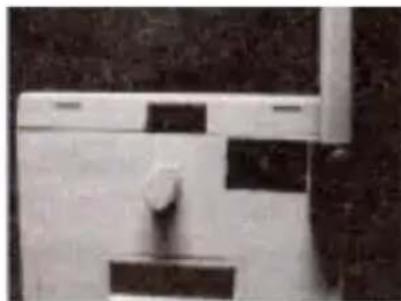
Close-up of a white industrial control panel with blue buttons and a small display (no visible text or symbols)Fig. 2
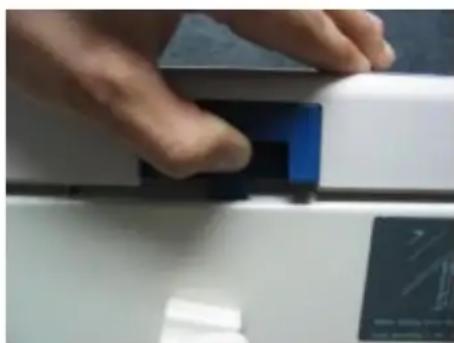
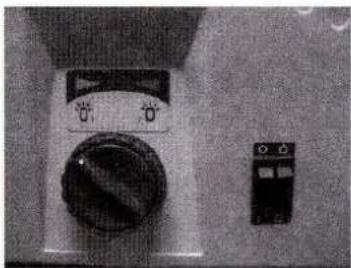
- Refer to Fig. 3 to transfer the lamp.
- color fringing adjusting ring
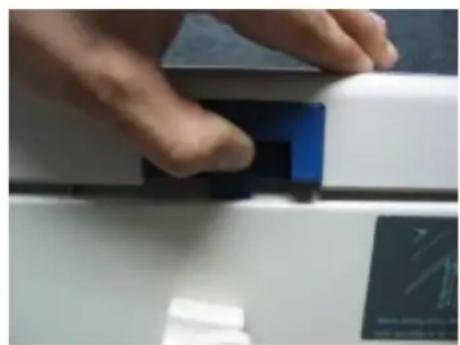
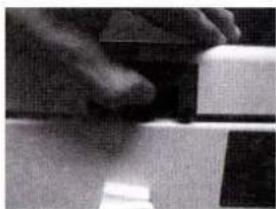
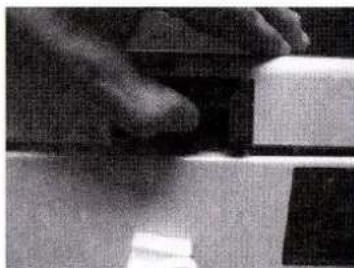
Refer to Fig. 4 to open the top cover.
natural_image
Close-up of a blue circular control knob with a digital display and adjacent black electrical switch (no visible text or symbols)Fig. 3
natural_image
Close-up of a hand pressing down on a white surface with a blue rectangular object, no visible text or symbols.Fig. 4
MAINTENANCE AND REPAIR
6
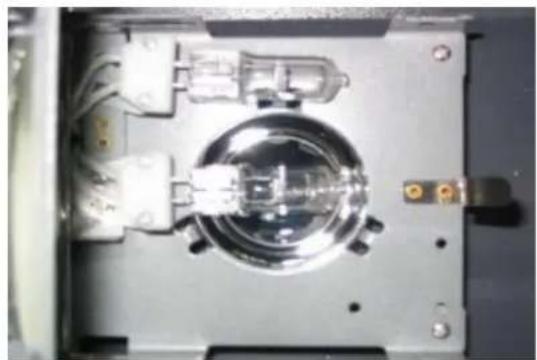
- Lamp changing: Attention! Hot parts! Do not exchange lamp until the projector has cooled down!
Pull out mains plug before opening the projector.
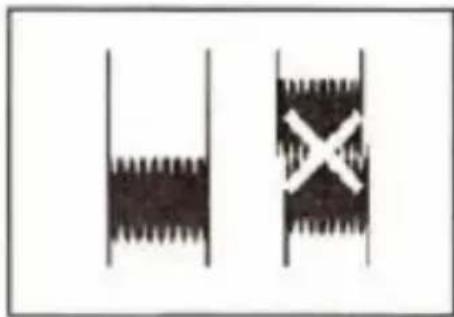
Press the platen housing lock lever an pull out faulty lamp, push new one straight into the socket right to the stop (Fig. 5). Close down cover.
natural_image
Close-up of a mechanical component with metallic parts and wiring (no visible text or symbols)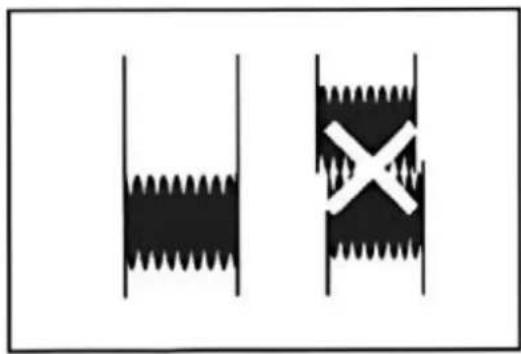
natural_image
Two black-and-white diagrams showing a wavy object inside vertical lines and a cross symbol inside a rectangular frame (no text or labels)Fig. 5
- When lamp and fan simultaneously fail to operate, exchange the fuse (located below the connector socket for the mains cable)
250 W – Fuse type T 3,0 A
400 W – Fuse type T 5,0 A
Allow only a trained specialist to open the projector, since high-tension parts may become freely accessible.
- Cleaning optical parts:
Press button to release cover. Attention: Use only a soft cloth. This also applies to the cleaning of the lens.
Note: Take care when replacing the Fresnel lens to ensure that the label UP points towards the lens.
- Let appliance cool completely before putting away or when replacing the lamp.
reflecta
Reflecta GmbH
Junghansring 70
Our policy of continuous improvement may result in changes of appearance and specification
Cubus
Proyector superior reflecta cubus 251,253 und 401,403
Manual de usuario
natural_image
Exterior view of a modern office building (no signage)RESGUARDOS IMPORTANTES
natural_image
Close-up of a mechanical device with a lever and base plate (no visible text or symbols)fig (1)
natural_image
Close-up of a kitchen sink with a handle and side panel (no visible text or symbols)fig (2)
natural_image
Close-up of a vintage rotary dial and a small electronic device (no visible text or symbols)fig (3)

natural_image
Close-up of a hand holding a black object over a white surface, possibly part of a mechanical or architectural component (no visible text or symbols)fig (4)
natural_image
Close-up of a mechanical component with metallic housing and mounting holes (no visible text or symbols)fig (5)
natural_image
Exterior view of a modern office building (no signage)natural_image
Close-up of a mechanical lever or lever device with a metallic handle and circular base (no visible text or symbols)fig (1)
natural_image
Close-up of a metallic door with a knob and rectangular buttons (no visible text or symbols)fig (2)
natural_image
Close-up of a vintage rotary dial and control panel (no visible text or symbols)fig (3)
natural_image
Close-up of a hand holding a small object, possibly a tool or component (no visible text or symbols)fig (4)
MAINTENANCE ET LA REPARATION
natural_image
Close-up of a mechanical component with metallic parts and central circular feature (no visible text or symbols)fig (5)
natural_image
Exterior view of a modern office building (no signage)Inglese
IMPORTANTI PRECAUZIONI
natural_image
Close-up of a mechanical device with a lever and handle (no visible text or symbols)Fig.1
natural_image
Close-up of a white toilet with a handle and side panel, no visible text or symbolsFig.2
natural_image
Close-up of a mechanical device with a central knob and control panel (no visible text or symbols)Fig.3
natural_image
Close-up of a textured surface with dark and light regions, possibly fabric or material (no visible text or symbols)Fig.4
natural_image
Close-up of a mechanical component with a circular housing and internal components (no visible text or symbols)Fig.5
natural_image
Two diagrams showing a saw blade and a cross-shaped object, no text or symbols presentnatural_image
Modern medical imaging device with overhead-mounted screen and control panel (no visible text or symbols)natural_image
Close-up of a mechanical lever mechanism with a handle and pivot (no visible text or symbols)fig (1)

natural_image
Close-up of a metallic mechanical component with a central knob and rectangular cutouts (no visible text or symbols)fig (2)
- Refira à fig. (3) para transferir de lâmpada. Refira à fig. (4) para abrir a tampa superior.
natural_image
Close-up of a washing machine control panel with a rotary dial and a separate electrical switch (no visible text or symbols)fig (3)
natural_image
Close-up of a hand pressing down on a mechanical component (no visible text or symbols)fig (4)
Manutenção e Reparo
4
natural_image
Close-up of a mechanical component with metallic parts and mounting holes (no visible text or symbols)fig (5)