IAN 288801 - Shower MIOMARE - Free user manual and instructions
Find the device manual for free IAN 288801 MIOMARE in PDF.
| Brand | Miomare |
| Model | IAN 288801 |
| Product type | Shower set with shelf |
| Dimensions (H x W x D) | 112.5 x 27.5 x 35 cm |
| Weight | Approximately 1.8 kg |
| Material | Chrome-plated steel and ABS plastic |
| Shower hose length | 150 cm |
| Connection hose length | 70 cm |
| Hose connections | 1/2" (∅ approx. 1.9 cm) |
| Spray types | Mixed jet, Sauna + Rain |
| Functions | Showerhead/hand shower diverter, adjustable showerhead angle |
| Installation | Wall-mounted |
| Delivery contents | Rail, showerhead, hand shower, hoses, side outlet, hand shower holder, wall mounting, seals, plugs, screws |
| Maintenance | Clean with a soft damp cloth. Do not use abrasive or corrosive products. |
| Safety | Do not use on low-pressure water heaters. Shut off water supply before installation. Risk of burns when adjusting hot water. |
| Warranty | 2 years (1 year for chrome-plated surfaces) |
| After-sales service | Eisl Sanitär GmbH, Mattseer Landesstraße 8, 5101 Bergheim, Austria |
| Intended use | Water flow regulation for pressure-resistant hot water systems |
| Minimum ambient temperature | Above 0 °C |
| Wear parts | Sealing gaskets (to be replaced periodically) |
Frequently Asked Questions - IAN 288801 MIOMARE
User questions about IAN 288801 MIOMARE
0 question about this device. Answer the ones you know or ask your own.
Ask a new question about this device
Download the instructions for your Shower in PDF format for free! Find your manual IAN 288801 - MIOMARE and take your electronic device back in hand. On this page are published all the documents necessary for the use of your device. IAN 288801 by MIOMARE.
USER MANUAL IAN 288801 MIOMARE
natural_image
Black-and-white photo of a modern bathroom showerhead and a close-up of its showerhead with a soap dispenser (no text or symbols visible)SHOWER RISER SET WITH SHELF
GB IE NI
SHOWER RISER SET WITH SHELF
Assembly, operating and safety instructions
FR BE
SET DE DOUCHE AVEC TABLETTE
Before reading, unfold both pages containing illustrations and familiarise yourself with all functions of the device.
DK
GB/IE/NI Assembly, operating and safety instructions Page 5
text_image
Diagram illustrating a human body with screwdriver tool and corresponding tool illustrations for each component.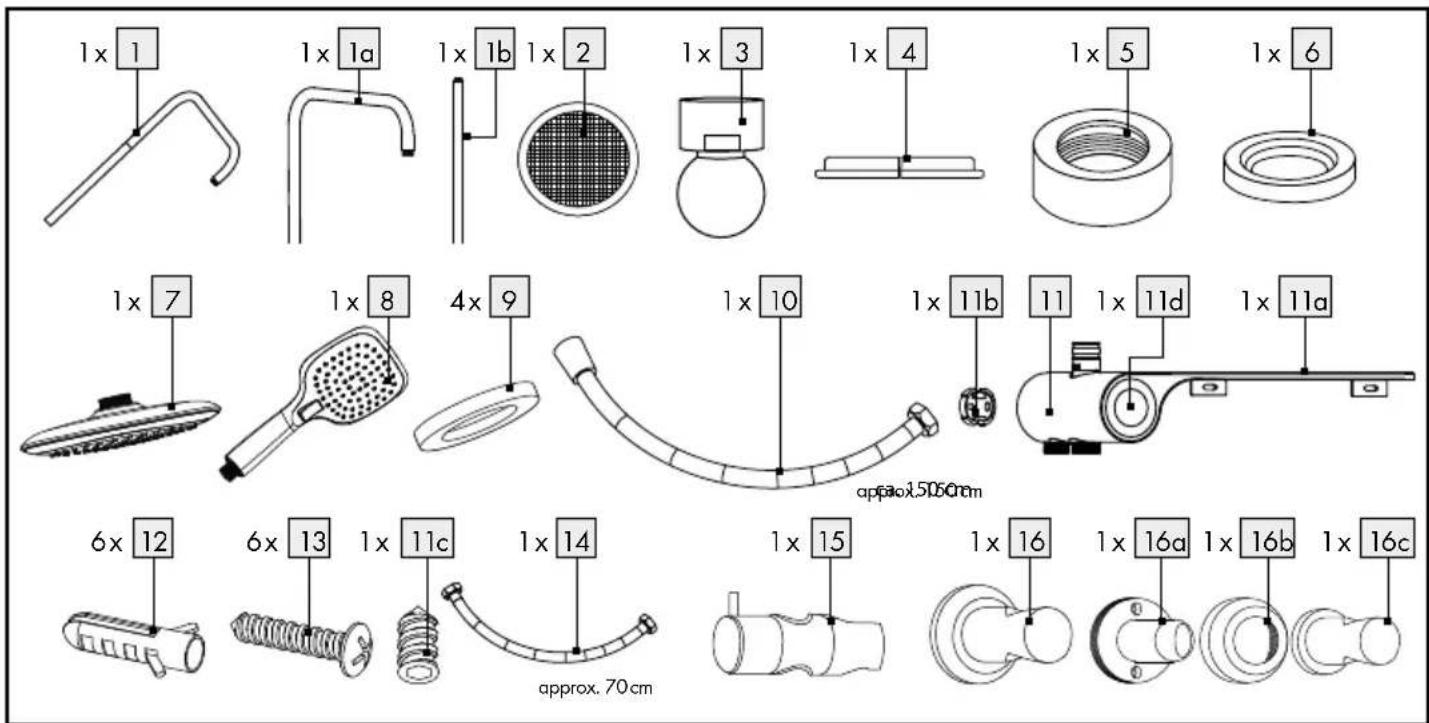
text_image
C 16c 16b 16b 16c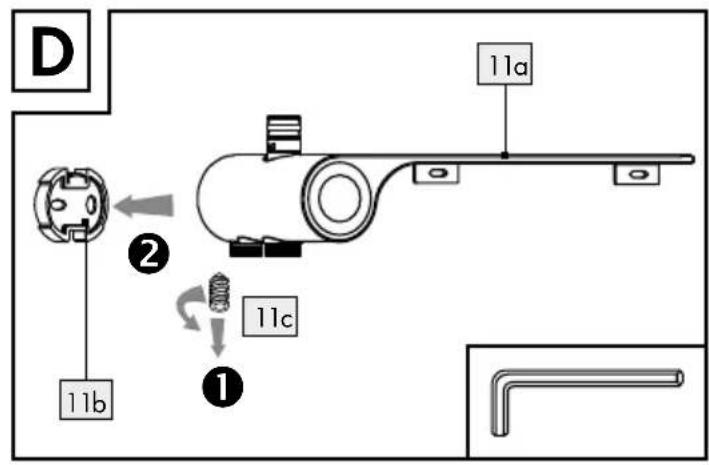
text_image
D 11a 2 11b 11c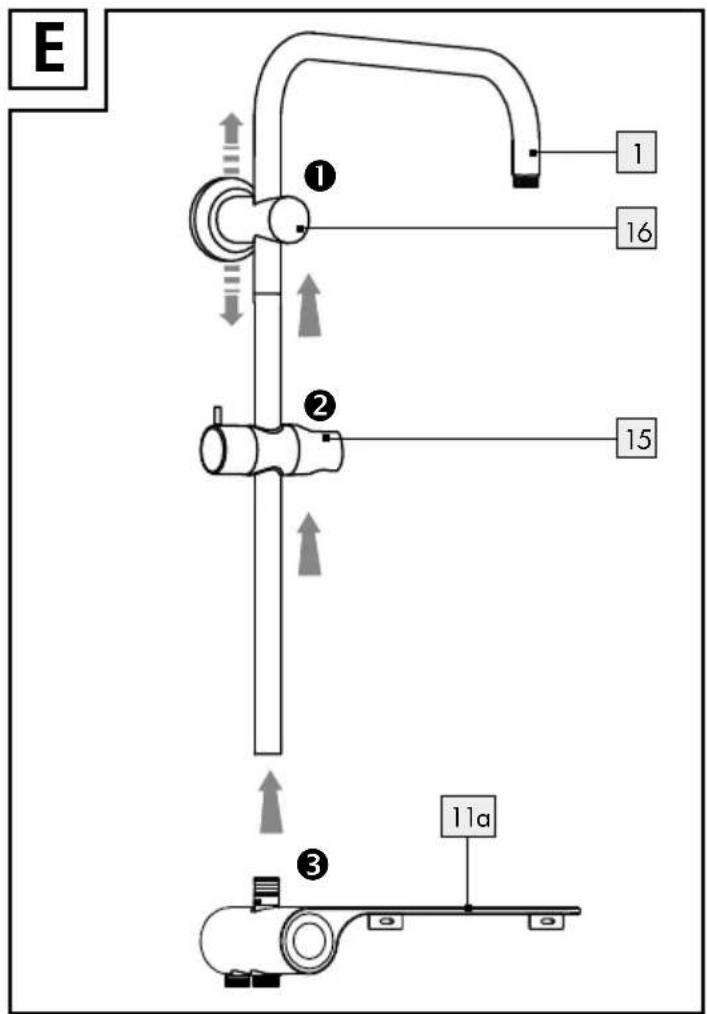
text_image
E ① 16 ② 15 ③ 11a
text_image
F 16a 2 13 X cm 12 11b 13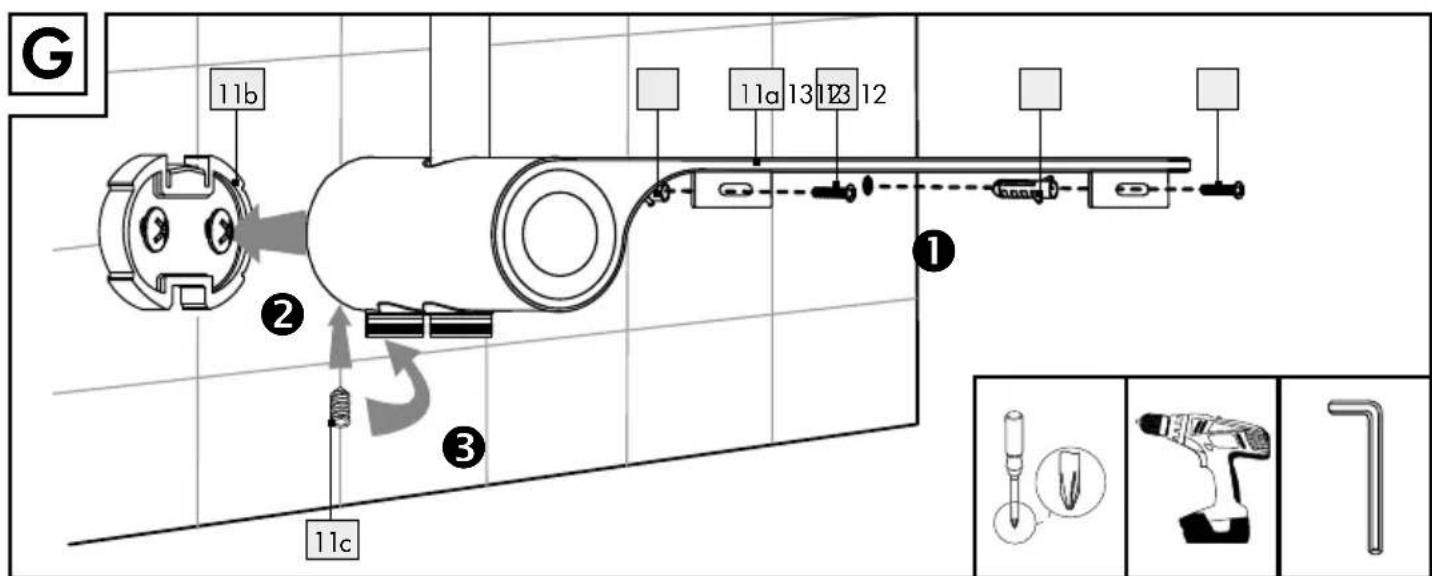
text_image
G 11b 11a 13 12 12 ① ② ③ 11cIntroduction......Page 6
Intended use....Page 6
Parts description....Page 6
Technical data....Page 6
Scope of delivery....Page 6
Safety notes....Page 6
Installation......Page 7
Use Page 8
Cleaning and care....Page 8
Maintenance......Page 8
Removal Page 8
Disposal Page 8
Service Page 8
Warranty Page 9
Shower Riser Set With Shelf
- Introduction

Congratulations on the purchase of your new product. You have chosen a high-quality product. The installation instructions and instructions for use are part of this product. Please carefully read these installation instructions and instructions for use before use and observe all instructions. These instructions contain important installation and care information. Please keep these installation instructions and instructions for use and pass them on to any future owner.
Intendeduse
This product is only intended to control the water supply. This product is suitable for all pressure-resistant water systems such as central heating, continuous-flow water heater, pressure boiler, etc. Not suitable for low pressure water heaters such as wood or coal, oil or gas hot water heaters, open electrical storage heaters. Risk of injury due to excess pressure. Any other use is considered improper and holds significant accident hazards or risks of property damage. This product is solely intended for private use.
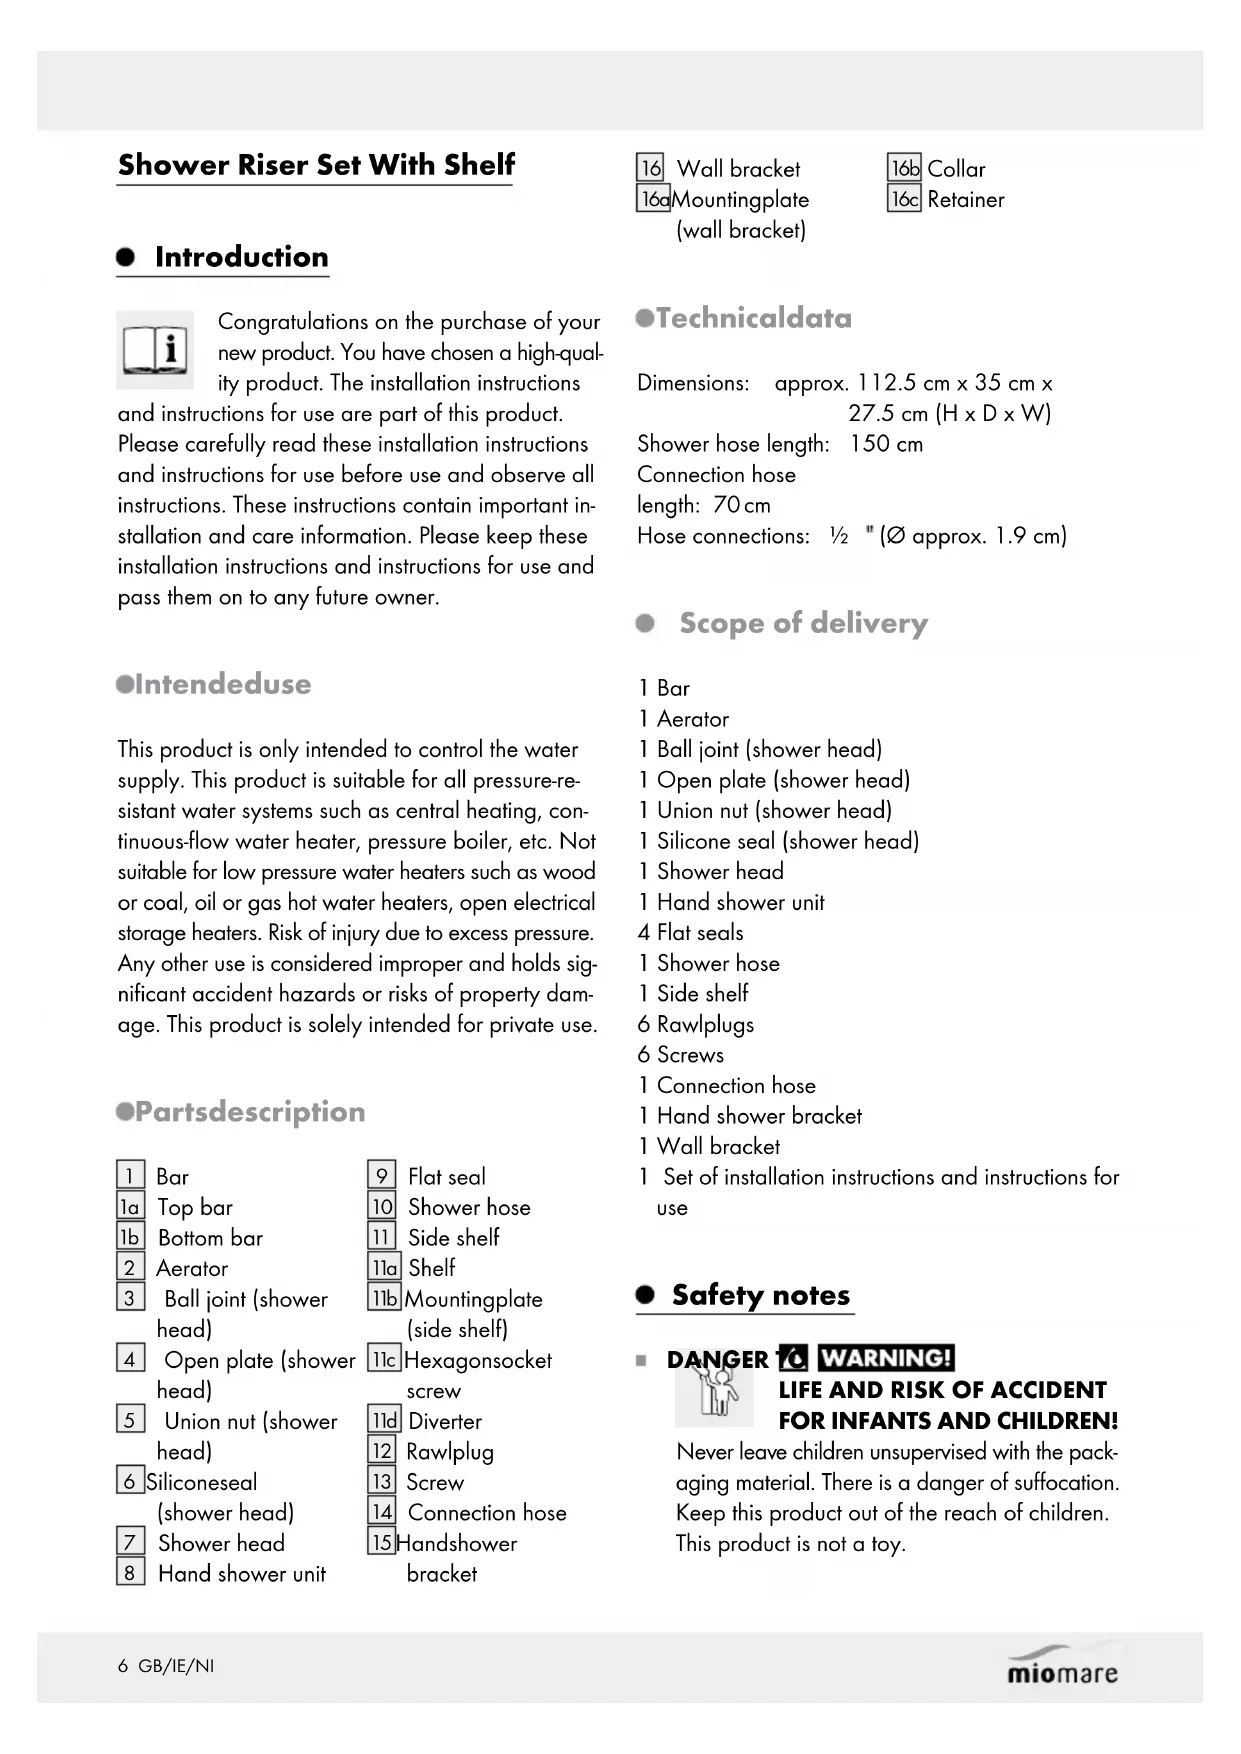
Partsdescription
1 Bar
1a Top bar
1b Bottom bar
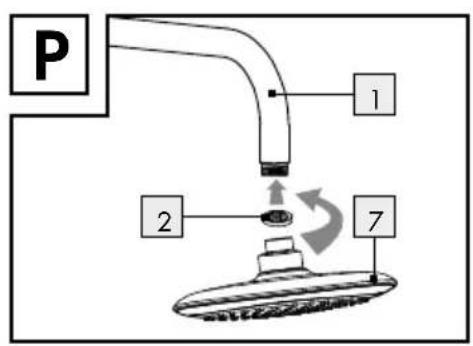
2 Aerator
3 Ball joint (shower head)
4 Open plate (shower head)
5 Union nut (shower head)
6 Siliconeseal (shower head)
7 Shower head
8 Hand shower unit
9 Flat seal
10 Shower hose
11 Side shelf
11a Shelf
11b Mountingplate (side shelf)
11c Hexagonsocket screw
11d Diverter
12 Rawlplug
13 Screw
14 Connection hose
15 Handshower bracket
16 Wall bracket
16aMountingplate
(wall bracket)
16b Collar
16c Retainer
●Technicaldata
Dimensions: approx. 112.5 cm x 35 cm x 27.5 cm (H x D x W)
Shower hose length: 150 cm
Connection hose
length: 70 cm
Hose connections: 12 " ( approx. 1.9 cm)
- Scope of delivery
1 Bar
1 Aerator
1 Ball joint (shower head)
1 Open plate (shower head)
1 Union nut (shower head)
1 Silicone seal (shower head)
1 Shower head
1 Hand shower unit
4 Flat seals
1 Shower hose
1 Side shelf
6 Rawlplugs
6 Screws
1 Connection hose
1 Hand shower bracket
1 Wall bracket
1 Set of installation instructions and instructions for use
- Safety notes
DANGER WARNING!

LIFE AND RISK OF ACCIDENT FOR INFANTS AND CHILDREN!
Never leave children unsupervised with the packaging material. There is a danger of suffocation. Keep this product out of the reach of children. This product is not a toy.
This product may be used by children aged 8 years and up, as well as by persons with reduced physical, sensory or mental capacities or lacking experience and knowledge, so long as they are supervised or instructed in the safe use of the product and understand the associated risks. Do not allow children to play with the product. Cleaning and user maintenance must not be performed by children without supervision.
■ CAUTION! RISK OF INJURY! Make sure that all parts are undamaged and correctly assembled. Improper installation may result in injury. Damaged parts could impact safety and function.
■ Installation must be performed by skilled persons.
RISK OF WATER DAMAGE! Shut off the main water supply prior to installation.
■ Ensure all seals are seated correctly.
This product is not suitable for use with low-pressure tanks and open (non-pressurised) electrical storage heaters.
■ Only use the product in rooms with temperatures above 0 °C. In case of potential frost, shut off the water supply and drain the product.
■ Careful when adjusting the water temperature: risk of scalding!
- Incorrectly installed hand shower sets can cause water damage!
- Please note that the seals are wear parts and must be changed from time to time.
Even careful production can result in sharp edges. Therefore proceed with caution during installation.
Before attaching the product to the wall, check which mounting materials are suitable for your wall. We have supplied mounting materials suitable for an ordinary solid masonry wall.
RISK OF WATER DAMAGE! Before drilling, ensure that there are no water pipes where you intend to drill.
RISK OF ELECTRIC SHOCK! Before drilling, ensure that there are no electrical cables where you intend to drill.
- Installation
Note: carefully check all connections for leaks after first use.
Note: incorrect installation will void the warranty, particularly with respect to consequential damage!
☐ Screw the bottom bar 1b anti-clockwise into the top bar 1a (see Fig. B).
Place the collar 16b over the retainer 16c (see Fig. C).
☐ Unscrew the hexagon socket screw 11c from the side shelf 11, turning anti-clockwise. This step requires a hex key (not included). Then remove the mounting plate 11b (see Fig. D).
☐ First slide the wall bracket 16, then the hand shower bracket 15 onto the 1 bar from below. Then attach the side shelf 11 to the bottom end of the bar 1 (see Fig. E).
☐ Position both mounting plates 11b, 16a in the desired location on the wall and mark the bores. Now drill the fixing holes. Then insert the rawlplugs 12 in the bores. Secure both mounting plates 11b, 16a with the screws 13 (see Fig. F).
☐ Mark the locations for the bores for the brackets below the shelf 11a. Now drill the fixing holes. Then insert the rawlplugs 12 in the bores and install the screws 13.
Attach the side shelf 11 to the mounting plate 11b. Secure the side shelf 11, tightening the hexagon socket screw 11c anti-clockwise (see Fig. G).
☐ Attach the retainer with the collar 16b 16c to the mounting plate 16a and tighten, turning clockwise (see Fig. H).
☐ Insert one flat seal 9 each into the shower hose 10 and into the connection hose 14. Then connect both shower hoses to the connections on the side shelf 11, turning clockwise (see Fig. I).
☐ Attach one flat seal 9 to the other end of the connection hose 14. Then connect it hand-tight to your water supply (see Fig. J).
☐ Check all connections by opening the water supply for 2 minutes (see Fig. K).
☐ Attach one flat seal 9 to the other end of the shower hose 10. Then connect the hand shower unit 8 hand-tight to the shower hose 10, turning clockwise (see Fig. L).
☐ Attach the open plate 4, small opening facing upward, to the ball joint 3 (see Fig. M).
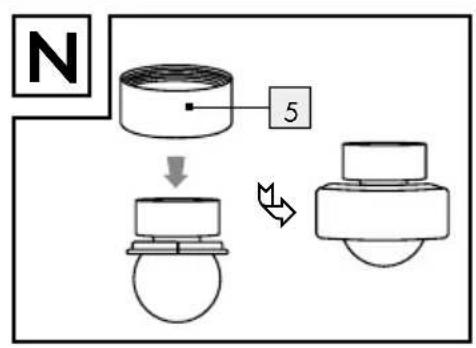
☐ Attach the union not 5 to the ball joint 3 from above (see Fig. N).
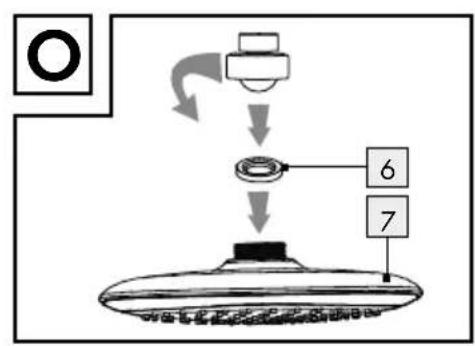
☐ Insert the silicone seal 6 in the shower head 7 and attach the entire ball joint 3, turning clockwise (see Fig. O).
☐ Insert the aerator 2 in the fitting of the shower head 7 and secure to the top end of the bar 1a, turning clockwise (see Fig. P).
Use
☐ Use the diverter 11d to switch between shower head 7 and hand shower unit 8.
☐ The angle of the shower head 7 is adjustable.
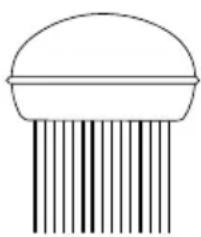
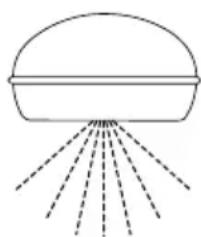
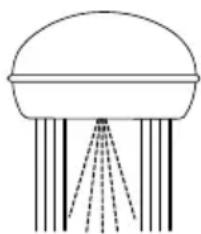
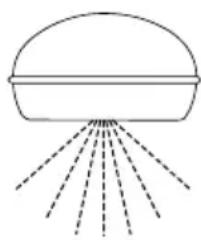
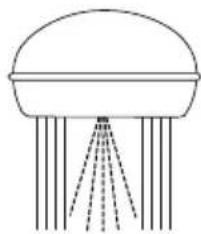
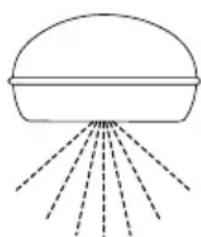
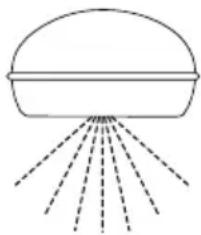
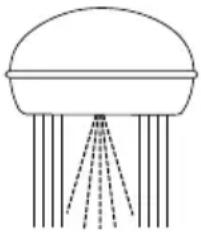
☐ You may choose from the following spray patterns:
natural_image
Simple line drawing of a mushroom-shaped object with vertical stripes (no text or symbols)Rain
natural_image
Simple line drawing of a showerhead emitting water spray (no text or symbols)Sauna
natural_image
Simple line drawing of a jellyfish with water spray and droplets (no text or symbols)Sauna + Rain mix
- Cleaning and care
- Never clean with petrol, solvents or aggressive cleaners or hard bristled brushes, etc. These could damage the product surface.
■ Ensure the hoses 10, 14 do not come into contract with caustic or corrosive agents, such as cleaning agents or household detergents. This could result in water damage.
□ Clean the product with a damp, soft cloth or chamois.
☐ Never clean coloured surfaces with scouring or corrosive cleaners, or cleaners containing alcohol.
- Maintenance
☐ Regularly check all connections and joints for leaks or visible damage.
☐ Have leaks or visible damage to the shower set or hoses checked or replaced by a professional immediately.
- Removal
☐ Shut off the water supply before removing the product.
□ Watch for residual water draining from the product.
☐ Remove the product in the reverse order specified in the installation instructions.
●Disposal
The packaging is made entirely of recyclable materials, which you may dispose of at local recycling facilities.
Contact your local refuse disposal authority for more details of how to dispose of your worn-out product.
Note: images are for illustration purposes only and may differ from the actual product. Subject to technical changes without notice.
- Service
GB:
Eisl Sanitär GmbH
Email: customerservice@eisl.at
* Toll-free number
- Warranty
Your purchase is protected by a manufacturer warranty by Eisl Sanitär GmbH in Bergheim as outlined in the following warranty terms. This warranty does not limit your legal warranty rights arising from the purchase contract with the seller or your legal rights.
Warranty terms:
1. Scope of warranty
Eisl Sanitär GmbH guarantees proper material quality and material processing for the intended purpose, proper assembly, tightness and function. The warranty is only valid in the country where the product was purchased.
The warranty includes a 1 year warranty on the durability of surfaces without high-gloss chrome plating, such as bronzed or coloured surfaces.
The warranty does not cover:
- Damages due to improper installation, initial operation and handling
- Damages caused by external factors such as fire, water, chemical effects
- Mechanical damage due to accident, falling or shock
- Negligent or malicious damage
• Normal wear or lack or maintenance - Damages due to repairs by unqualified persons
- Improper handling, insufficient care and the use of unsuitable cleaning agents
- Chemical or mechanical factors during product transport, storage, connection, repair or use
2. Activated guarantee
The performance applies to, at our discretion, free repair, free delivery of replacement parts or an equivalent product against return of the defective party or defective product.
If the respective type is no longer produced, we reserve the right to deliver a replacement product of our choosing from our product range as close to possible to the returned type. Replaced products or parts become our property. When sending in the product, the buyer bears the transport costs and the transport risk unless warranty under the legal warranty provisions also applies. In the latter case, we will refund the transport costs. Compensation for the cost of removal and installation, inspection, claims for lost profits and indemnity are excluded from warranty, as well as additional claims for damages and loss of any type caused by the product or use thereof.
3. Warranty claims
The warranty claim must be submitted to Eisl Sanitär GmbH, Mattseer Landesstraße 8, 5101 Bergheim, AUSTRIA, within the warranty term, along with the original receipt of purchase.
4. Warranty period
The warranty period is the period specified on the label or the packaging of the respective product. If a product-specific warranty period is not specified, the warranty period is 2 years from the date of purchase as determined by the date of the receipt of purchase. Exception: Durability of any high-gloss chrome plated surfaces such as bronzed or coloured surfaces, which are covered by a 1 year warranty, again determined by the date on the receipt of purchase.
Services performed under warranty do not extend or renew the warranty period of the product. Services performed under warranty also do not suspend the warranty period unless warranty under the law in addition to other legal requirements for suspension apply.
5.
This warranty is subject to German law under exclusion of the United Nations Convention on Contracts for the International Sale of Goods (CISG).
6. Severability clause
In the event a term of these provisions is or becomes void or unenforceable in whole or in part or the parties accidentally overlooked a provision pertaining to an item under this contract, the validity of the remaining provisions in this contract shall remain unaffected. The void or unenforceable term or lacuna in the contract shall be replaced by a valid or enforceable term as close as possible to the spirit and objective of the invalid or unenforceable term. In the event of lacuna, the parties agree to use the term corresponding with the spirit and objective of this contract which would have been stipulated had the matter been considered. This also applies if the invalidity of a term is based on a measure of performance or time standardised in this contract. In this case the agreed term shall be replaced by a lawful measure of performance or time as close as possible to the stipulation.
This warranty card is only valid with the associated original receipt of purchase.
Indledning ......Side 12
natural_image
Simple line drawing of a mushroom-shaped object with vertical stripes (no text or symbols)regnstråle
natural_image
Simple line drawing of a showerhead emitting water spray (no text or symbols)saunastråle

natural_image
Simple line drawing of a showerhead with vertical stripes and a central spray nozzle (no text or symbols)sauna + regn- blandingsstråle
natural_image
Simple line drawing of a jellyfish with vertical fins (no text or symbols)Jet pluie

natural_image
Simple line drawing of a showerhead emitting water spray (no text or symbols)Jet sauna
natural_image
Simple line drawing of a jellyfish with water spray and tail (no text or symbols)natural_image
Simple line drawing of a mushroom-shaped object with vertical stripes (no text or symbols)Regenstraal
natural_image
Simple line drawing of a showerhead emitting rays (no text or symbols)Saunastraal

natural_image
Simple line drawing of a jellyfish with a dome and vertical stripes (no text or symbols)natural_image
Simple line drawing of a jellyfish with vertical fins (no text or symbols)Regenstrahl
natural_image
Simple line drawing of a dome-shaped object emitting rays from a central point (no text or symbols)Saunastrahl
natural_image
Simple line drawing of a jellyfish with a dome-shaped top and three vertical supports (no text or symbols)text_image
I 9 14 10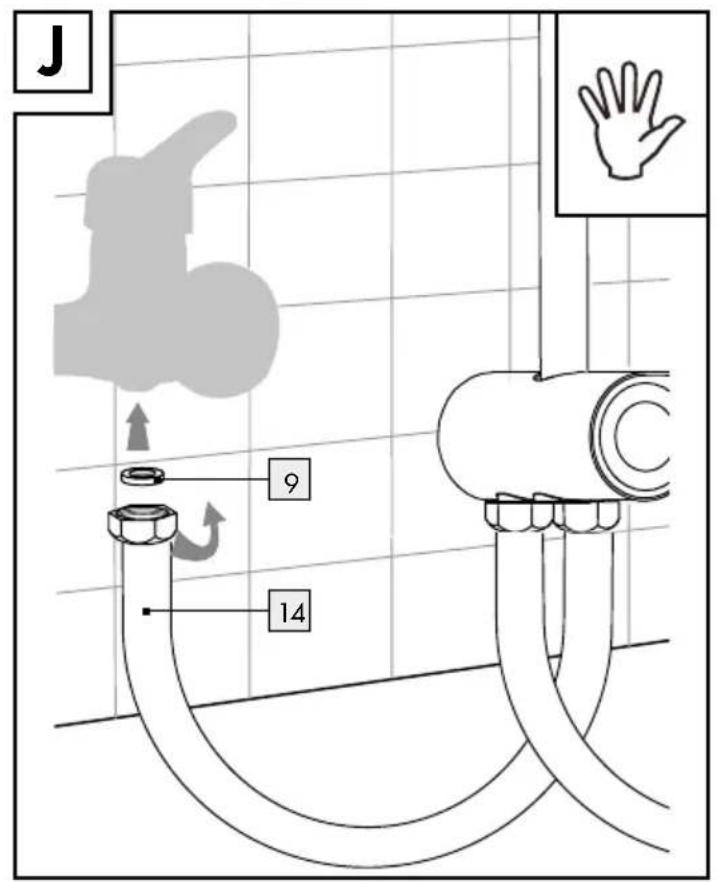
text_image
J 9 14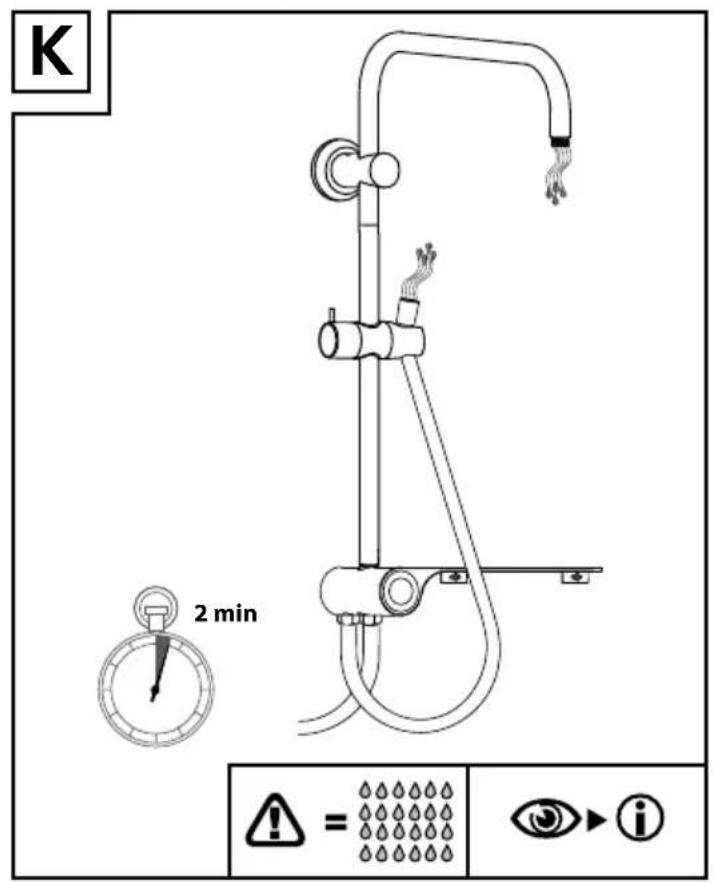
text_image
K 2 min = =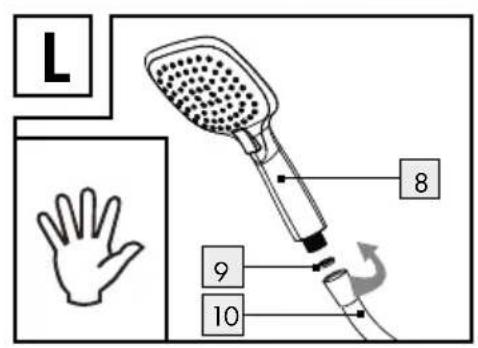
text_image
L 8 9 10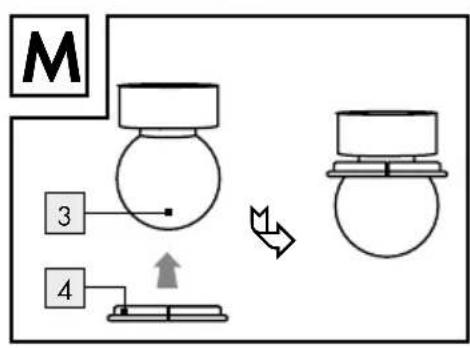
flowchart
graph TD
    M["MD"] --> 1["Device 1"]
    1 --> 2["Device 2"]
    2 --> 3["Device 3"]
    3 --> 4["Device 4"]
    4 --> 5["Device 5"]
    style M fill:#f9f,stroke:#333
    style 1 fill:#ccf,stroke:#333
    style 2 fill:#ccf,stroke:#333
    style 3 fill:#ccf,stroke:#333
    style 4 fill:#ccf,stroke:#333
    style 5 fill:#ccf,stroke:#333
flowchart
graph TD
    A[" coil "] --> B[" Magnet "]
    B --> C[" Rotating Component "]
    style A fill:#f9f,stroke:#333
    style B fill:#ccf,stroke:#333
    style C fill:#cfc,stroke:#333
flowchart
graph TD
    A["Receipt"] --> B{Check}
    B --> C["Sensor"]
    C --> D["Output"]
    style A fill:#f9f,stroke:#333
    style D fill:#ccf,stroke:#333
text_image
P 1 2 7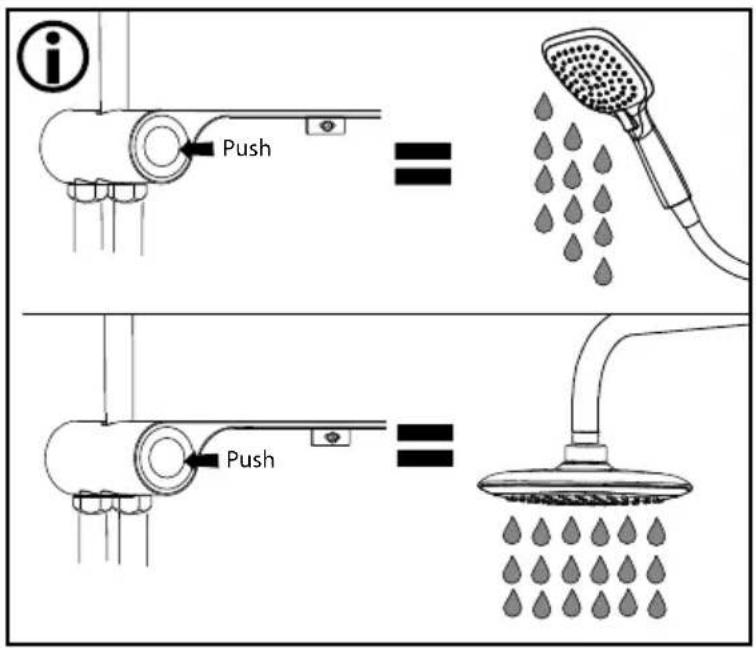
text_image
i Push = Push Push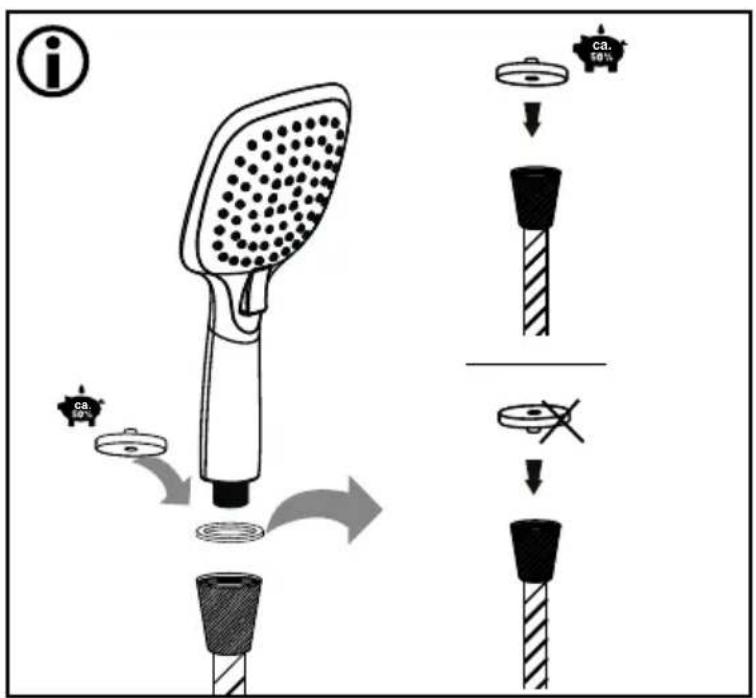
flowchart
graph TD
    A["Showerhead"] --> B["Base"]
    B --> C["Check Point"]
    C --> D["Check Point"]
    D --> E["Check Point"]
    E --> F["Check Point"]
    style A fill:#f9f,stroke:#333
    style F fill:#ccf,stroke:#333
Eisl Sanitär GmbH