
CSE 2200 - Electric chainsaw SCHEPPACH - Free user manual and instructions
Find the device manual for free CSE 2200 SCHEPPACH in PDF.
| Product Type | Electric Chainsaw |
| Brand | Scheppach |
| Model | CSE 2200 |
| Cutting Length | 37 cm |
| Guide Bar Length | 45.9 cm |
| Total Weight | 4.3 kg |
| Weight without Bar and Chain | 3.8 kg |
| Power Supply | 230-240 V~, 50 Hz |
| Rated Power | 2200 W |
| Oil Tank Capacity | 0.3 L |
| Chain Type | 3/8" .050x56DL |
| Chain Pitch | 3/8" (9.525 mm) |
| Drive Link Thickness | 1.27 mm |
| Maximum Cutting Speed | 15 m/s |
| Chain Brake | Yes |
| Sound Pressure Level (LpA) | 103.3 dB(A) |
| Guaranteed Sound Power Level | 115 dB(A) |
| Vibration (Front Handle) | 1.426 m/s² |
| Vibration (Rear Handle) | 1.411 m/s² |
| Protection Class | II (Double Insulation) |
| Safety Devices | Chain brake, start lock, front/rear hand guards |
| Lubrication | Automatic, biodegradable oil recommended |
| Maintenance | Regular cleaning, chain sharpening, tension check |
| Intended Use | Wood cutting only, outdoors |
| Wear Parts | Chain, guide bar, sprocket, carbon brushes, bumper spike |
Frequently Asked Questions - CSE 2200 SCHEPPACH
User questions about CSE 2200 SCHEPPACH
0 question about this device. Answer the ones you know or ask your own.
Ask a new question about this device
Download the instructions for your Electric chainsaw in PDF format for free! Find your manual CSE 2200 - SCHEPPACH and take your electronic device back in hand. On this page are published all the documents necessary for the use of your device. CSE 2200 by SCHEPPACH.
USER MANUAL CSE 2200 SCHEPPACH
natural_image
Black-and-white photo of a chainsaw with 'seteppach' and 'Scheppach' branding, no visible text or symbols on the main subject.CSE 2200
| DE | Elektro-KettensägeOriginalbetriebsanleitung | 8 |
| GB | Electric chainsawTranslation of original instruction manual | 28 |
| FR | Tronçonneuse électriqueTraduction des instructions d'origine | 45 |


flowchart
graph TD
    A["Pos. 1"] --> B["Brain"]
    B --> C["Pos. 2"]
    C --> D["Brain"]
    D --> A
    style A fill:#f9f,stroke:#333
    style B fill:#ccf,stroke:#333
    style C fill:#cfc,stroke:#333
    style D fill:#fcc,stroke:#333


natural_image
Illustration of hands using a power tool to cut a wooden block (no text or symbols visible)
natural_image
Diagram of fluid flow around a surface with directional arrows indicating movement (no text or labels)
natural_image
Illustration of a person using a power tool to cut tree bark in a forest (no text or symbols)
natural_image
Illustration of a person using a belt switch device to lift a seat (no text or symbols visible)
natural_image
Technical line drawing of a mechanical assembly with no visible text or symbols
Günzburger Straße 69
D-89335 Ichenhausen
Verehrter Kunde,
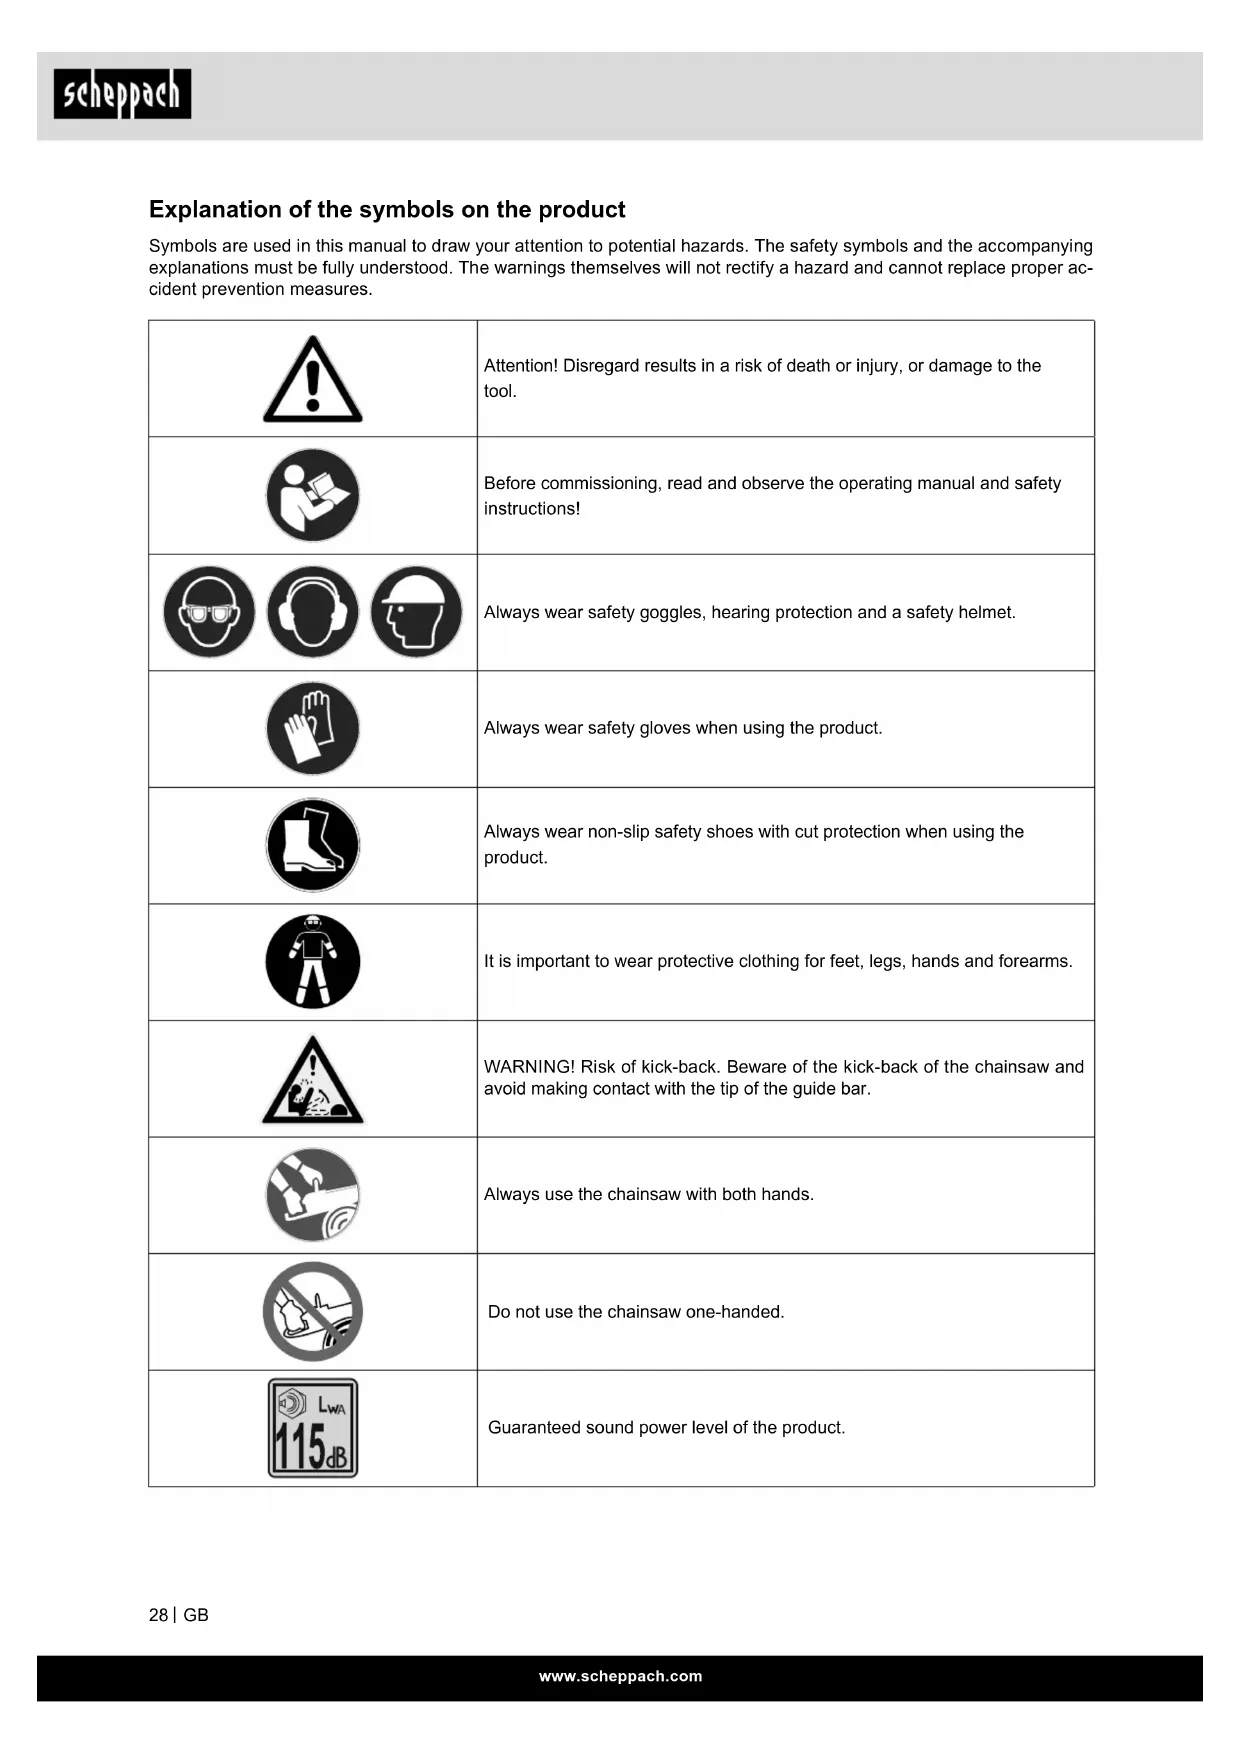
Explanation of the symbols on the product
Symbols are used in this manual to draw your attention to potential hazards. The safety symbols and the accompanying explanations must be fully understood. The warnings themselves will not rectify a hazard and cannot replace proper accident prevention measures.
 | Attention! Disregard results in a risk of death or injury, or damage to the tool. |
 | Before commissioning, read and observe the operating manual and safety instructions! |
  | Always wear safety goggles, hearing protection and a safety helmet. |
 | Always wear safety gloves when using the product. |
 | Always wear non-slip safety shoes with cut protection when using the product. |
 | It is important to wear protective clothing for feet, legs, hands and forearms. |
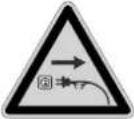
 | WARNING! Risk of kick-back. Beware of the kick-back of the chainsaw and avoid making contact with the tip of the guide bar. |
 | Always use the chainsaw with both hands. |
 | Do not use the chainsaw one-handed. |
  | Guaranteed sound power level of the product.If the mains cable is damaged or torn, it must be disconnected from the power supply immediately. |
 | Do not operate the product in rain or in humid conditions. |
 | Protection class II (double insulation) |
 | Running direction |
 | Chain tension |
 | Saw chain installation direction |
 | Chain brake ON/OFF |
 | Filling port for chain oil |
 | Weight |
 | Cutting length |
 | The product complies with the applicable European directives. |
| DANGER | Signal word to indicate an imminently hazardous situation which, if not avoided, will result in death or serious injury. |
| WARNING | Signal word to indicate a potentially hazardous situation which, if not avoided, could result in death or serious injury. |
| CAUTION | Signal word to indicate a potentially hazardous situation which, if not avoided, could result in minor or moderate injury. |
| ATTENTION | Signal word to indicate a potentially hazardous situation which, if not avoided, could result in product or property damage. |
| NOTE | Signal word to indicate a potentially hazardous situation which, if not avoided, could result in product or property damage. |

ATTENTION!
Before initial commissioning, read the operating manual thoroughly and be sure to follow the safety instructions!
It is recommended to attend a professional safety course “Chainsaw training course certificate of attendance” with a country-specific training standard on the use and maintenance of the chainsaw as well as a first aid course. For longer periods of non-use and for practice, you should always make simple cuts in safely supported wood before starting, in order to familiarise yourself with the chainsaw again.
Keep the operating manual in a safe place!
Note:
Please note that some national regulations such as work and environmental safety could restrict the use of the chainsaw.
Table of contents: Page:
- Introduction......32
- Device description (Fig. 1 - 4) ...... 32
- Scope of delivery.... 32
- Proper use....32
- Safety instructions....33
- Technical data 36
- Unpacking 36
- Attachment and operation 36
- Commissioning....37
- Working instructions....38
- Transport 41
- Maintenance....41
- Storage....42
- Electrical connection 42
- Disposal and recycling 43
- Troubleshooting....44
- Declaration of conformity 67
1. Introduction
Manufacturer:
Scheppach GmbH
Günzburger Straße 69
D-89335 Ichenhausen
Dear Customer,
We hope your new device brings you much enjoyment and success.
Note:
In accordance with the applicable product liability laws, the manufacturer of this device assumes no liability for damage to the device or caused by the device arising from:
- Improper handling,
- Failure to comply with the operating instructions,
• Repairs carried out by third parties, unauthorised specialists. - Installing and replacing non-original spare parts,
• Application other than specified, - Failures of the electrical system in the event of the electrical regulations and VDE provisions 0100, DIN 57113 / VDE0113 not being observed.
Note:
Read through the complete text in the operating manual before installing and commissioning the device.
This operating manual should help you to familiarise yourself with your product and to use it for its intended purpose.
The operating manual includes important instructions for the safe, proper and economic operation of the product, for avoiding danger, for minimising repair costs and downtimes and for increasing the reliability and extending the service life of the product.
In addition to the safety instructions in this operating manual, you must also observe the regulations applicable to the operation of the product in your country. Keep the operating manual package with the power tool at all times and store it in a plastic cover to protect it from dirt and moisture. They must be read and carefully observed by all operating personnel before starting the work.
The product may only be used by personnel who have been trained to use it and who have been instructed with respect to the associated hazards.
The required minimum age must be observed.
In addition to the safety instructions in this operating manual and the separate regulations of your country, the generally recognised technical rules relating to the operation of such products must also be observed.
We accept no liability for accidents or damage that occur due to a failure to observe this manual and the safety instructions.
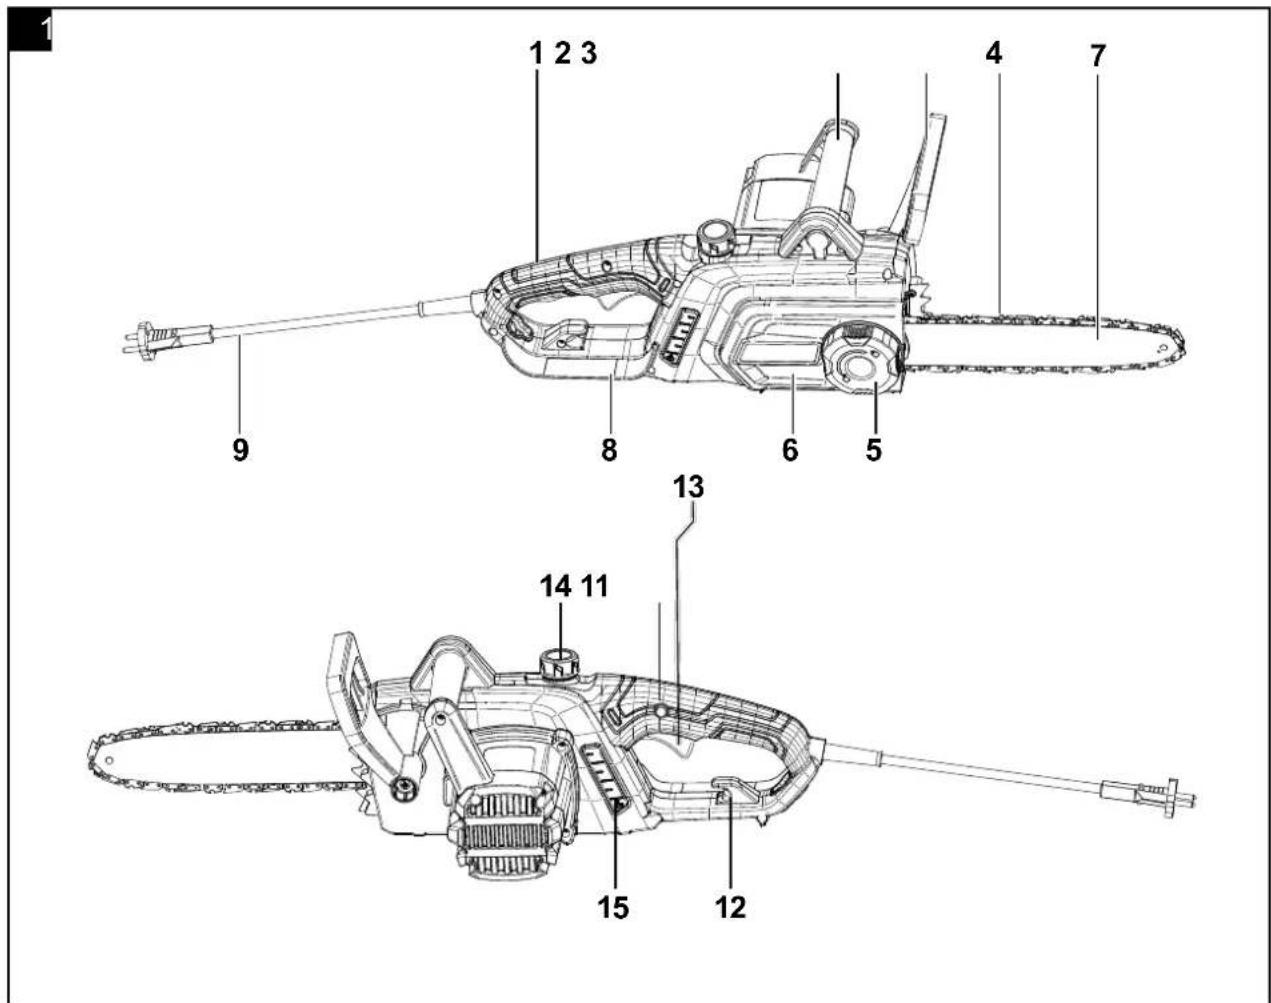
2. Device description (Fig. 1 - 4)
- Handle rear
- Handle front
- Front hand guard / chain brake
- Saw chain
- Locknut/SDS System
- Chain cover
- Saw (guide rail)
- Rear hand guard
- Mains cable
- Claw stop
- Switch lock
- Strain relief
- ON/OFF switch
- Oil tank closure cap
- Oil level display
- Chain wheel
- Guide pin
3. Scope of delivery
• Electric chainsaw
- Usage instructions
- Saw chain
- Saw (guide rail)
- 500 ml chain oil bottle (empty)
- Protective cover for sword
4. Proper use
The chainsaw may only be used for cutting wood outdoors. The chainsaw must not be used for any other purpose.
Do not use the chainsaw for work for which it is not intended. Example: Do not use the electric chainsaw to saw metal, plastic, brickwork or building materials other than wood.
The product may only be used in the intended manner. Any use beyond this is improper. The user/operator, not the manufacturer, is responsible for damages or injuries of any type resulting from this.
An element of the intended use is also the observance of the safety instructions, as well as the assembly instructions and operating information in the operating manual.
Persons who operate and maintain the product must be familiar with the manual and must be informed about potential dangers.
The liability of the manufacturer and resulting damages are excluded in the event of modifications of the product.
Please note that our products were not designed with the intention of use for commercial or industrial purposes. We assume no guarantee if the product is used in commercial or industrial applications, or for equivalent work.
5. Safety instructions
General power tool safety warnings
⚠ WARNING - Read all safety instructions, instructions, illustrations and technical data for this electric tool. Failure to follow all instructions listed below may result in electric shock, fire and/or serious injury.
Save all warnings and instructions for future reference.
The term "power tool" in the warnings refers to your mains-operated (corded) power tool or battery-operated (cordless) power tool.
1. Work area safety
a. Keep your work area clean and well-lit. Cluttered or dark areas invite accidents.
b. Do not operate power tools in explosive atmospheres, such as in the presence of flammable liquids, gases or dust. Power tools create sparks which may ignite the dust or fumes.
c. Keep children and bystanders away while operating a power tool. Distractions can cause you to lose control.
2. Electrical safety
a. Power tool plugs must match the outlet. Never modify the plug in any way. Do not use any adapter plugs with earthed (grounded) power tools. Unmodified plugs and matching outlets will reduce risk of electric shock.
b. Avoid body contact with earthed or grounded surfaces, such as pipes, radiators, ranges and refrigerators. There is an increased risk of electric shock if your body is earthed or grounded.
c. Do not expose power tools to rain or wet conditions. Water entering a power tool will increase the risk of electric shock.
d. Do not abuse the cord. Never use the cord for carrying, pulling or unplugging the power tool. Keep cord away from heat, oil, sharp edges or moving parts. Damaged or entangled cords increase the risk of electric shock.
e. When operating a power tool outdoors, use an extension cord suitable for outdoor use. Use of a cord suitable for outdoor use reduces the risk of electric shock.
f. If operating a power tool in a damp location is unavoidable, use a residual current device (RCD) protected supply. Use of an RCD reduces the risk of electric shock.
3. Personal safety
a. Stay alert, watch what you are doing and use common sense when operating a power tool. Do not use a power tool while you are tired or under the influence of drugs, alcohol or medication. A moment of inattention while operating power tools may result in serious personal injury.
b. Wear personal protective equipment and always safety goggles. Protective equipment such as a dust mask, non-skid safety shoes, hard hat or hearing protection used for appropriate conditions will reduce personal injuries.
c. Prevent unintentional starting. Ensure the switch is in the off-position before connecting to power source and/or rechargeable battery, picking up or carrying the tool. Carrying power tools with your finger on the switch or energising power tools that have the switch on invites accidents.
d. Remove any adjusting key or screwdriver before turning the power tool on. A wrench or a key left attached to a rotating part of the power tool may result in personal injury.
e. Do not overreach. Keep proper footing and balance at all times. This enables better control of the power tool in unexpected situations.
f. Dress properly. Do not wear loose clothing or jewellery. Keep hair, clothing and gloves away from moving parts. Loose clothes, jewellery or long hair can be caught in moving parts.
g. If devices are provided for the connection of dust extraction and collection facilities, ensure these are connected and properly used. Use of dust collection can reduce dust-related hazards.
h. Do not let familiarity gained from frequent use of tools allow you to become complacent and ignore tool safety principles. A careless action can cause severe injury within a fraction of a second.
4. Power tool use and care
a. Do not force the power tool. Use the correct power tool for your application. The correct power tool will do the job better and safer at the rate for which it was designed.
b. Do not use the power tool if the switch does not turn it on and off. Any power tool that cannot be controlled with the switch is dangerous and must be repaired.
c. Disconnect the plug from the power source and/or remove the battery pack, if detachable, from the power tool before making any adjustments, changing accessories, or storing power tools. Such precautionary measures reduce the risk of starting the power tool accidentally.
d. Store idle power tools out of the reach of children and do not allow persons unfamiliar with the power tool or these instructions to operate the power tool. Power tools are dangerous in the hands of untrained users.
e. Maintain power tools and accessories. Check for misalignment or binding of moving parts, breakage of parts and any other condition that may affect the power tool's operation. If damaged, have the power tool repaired before use. Many accidents are caused by poorly maintained power tools.
f. Keep cutting tools sharp and clean. Properly maintained cutting tools with sharp cutting edges are less likely to bind and are easier to control.
g. Use electric tools, insertion tools, etc. according to these instructions. taking into account the working conditions and the work to be performed. Use of the power tool for operations different from those intended could result in a hazardous situation.
h. Keep handles and grasping surfaces dry, clean and free from oil and grease. Slippery handles and grasping surfaces do not allow for safe handling and control of the tool in unexpected situations.
5. Service
a. Only have your electric tool repaired by qualified specialists and only with original spare parts. This will ensure that the safety of the power tool is maintained.
⚠ WARNING! This power tool generates an electromagnetic field during operation. This field can impair active or passive medical implants under certain circumstances. In order to prevent the risk of serious or deadly injuries, we recommend that persons with medical implants consult with their physician and the manufacturer of the medical implant prior to operating the power tool.
Vibration
⚠ WARNING! Raynaud's syndrome is a vascular disease that causes the small blood vessels on the fingers and toes to cramp in spasms. The symptoms include: Numbness, loss of sensitivity, tingling, itching, pain, decrease in strength, change of colour or condition of the skin. The affected areas are no longer supplied with sufficient blood and therefore appear extremely pale. The frequent use of vibrating tools can cause nerve damage in people whose circulation is impaired (e.g. smokers, diabetics). If you notice unusual adverse effects, stop working immediately and seek medical advice. For long-term and regular users, it is therefore recommended to closely monitor the condition of your hands and fingers. Observe the following information to reduce hazards:
- Keep your body warm, especially your hands, especially in cool weather.
• Take regular breaks and move your hands to promote circulation. - Limit the use of high vibration tools per day and spread them over several days Make a work schedule that limits vibration exposure.
- Ensure as little vibration as possible of the tool via regular maintenance and stable parts on the device. Replace worn parts immediately.
- Change your working position regularly.
- If the machine is to be used or operated frequently, you should contact your specialist dealer and request anti-vibration accessories (handles) if applicable.
Safety functions of the electric chainsaw
- The front hand guard protects the left hand of the operating person should it slip off the front handle while the electric chainsaw is running.
- The rear hand guard protects the right hand from contact with a discarded or broken saw chain.
- The chain brake is a safety function for minimising injuries from kick-backs by stopping a running saw chain in milliseconds. It is activated by the front hand guard in the event of a kick-back.
- The throttle interlock prevents the engine from randomly accelerating. The throttle lever can only be pressed when the switch-on lock is pressed.
- The claw stop supports the chainsaw on the wood while working. Never work without a claw stop, the chainsaw can pull the operator forward. Use the claw stop for cutting tree trunks or thick branches. Using the claw stop increases work safety, reduces personal strain when working and vibrations are also reduced. The claw stop must always be positioned on the tree trunk when using the chainsaw. Push the claw stop onto the tree trunk using the rear handle. To cut, push the front handle in the direction of the cutting line. The claw stop may need to be repositioned for further cutting.
General chainsaw safety warnings
a) Keep all body parts away from the saw chain when the saw is running. Before starting the pruning saw, ensure that the saw chain is not touching anything. When working with a chainsaw, a moment of carelessness can result in clothing or body parts being caught by the saw chain.
b) Always hold the chainsaw with your right hand on the rear handle and your left hand on the front handle. Holding the chainsaw using the opposite grip increases the risk of injuries and shall be avoided at all times.
c) Only hold the chainsaw by the insulated gripping surfaces, as the saw chain could hit hidden power lines or its own mains cable.
Contact between the saw chain and a live power line can also electrify metal device parts and lead to an electric shock.
d) Wear eye protection. Further protective equipment for hearing, head, hands, legs and feet is recommended. Suitable protective clothing reduces the risk of injury from flying chips and accidental contact with the saw chain.
e) Do not work with the chainsaw in a tree, on a ladder, or from a roof or an unstable standing surface. There is a serious risk of injury if operated in such a manner.
f) Always make sure you have a firm footing and only use the chainsaw when standing on firm, safe and level ground. Slippery ground or unstable standing surfaces can cause loss of balance or loss of control of the chainsaw.
g) When cutting a branch that is under tension, expect it to spring back. If the tension in the wood fibres is released, the tensioned branch can hit the operator and/or wrest the chainsaw from control.
h) Be especially careful when cutting under-growth and young trees. The thin material can get caught in the saw chain and hit you or throw you off balance.
i) Carry the chainsaw by the front handle when switched off, with the saw chain facing away from your body. Always put the protective cover on when transporting or storing the chainsaw. Careful handling of the chainsaw reduces the likelihood of accidental contact with the running saw chain.
j) Follow the instructions for lubrication, chain tensioning and replacing the guide bar and chain. An improperly tensioned or lubricated chain can break or increase the risk of kick-back.
k) Only saw wood. Do not use the chainsaw for work for which it is not intended. Example: Do not use the electric chainsaw to saw metal, plastic, brickwork or building materials other than wood. Using the chainsaw for unintended work can cause dangerous situations.
I) Do not attempt to fell a tree until you have a clear understanding of the risks and how to avoid them. The user or other persons can be seriously injured by a falling tree.
Causes and avoidance of kick-back
Attention: kick-back!
- Kickback can arise if the tip of the guide rail touches an object or if the wood bends and the saw chain jams in the cut.
-
Touching with the tip of the guide bar can sometimes lead to an unexpected backward reaction, whereby the guide bar whips up and in the direction of the operator.
-
The jamming of the saw chain on the upper edge of the guide rail can force the bar backwards in the direction of the operator.
• Each of these reactions can lead to you losing control of the saw and possibly suffering a serious injury. Never rely solely on the safety equipment integrated in the chainsaw. - As the chainsaw operator, you should implement various measures to work without a risk of accidents and injuries.
Kickback is the result of incorrect or deficient use of the power tool. It can be prevented by suitable precautionary measures, as described in the following:
- Hold the saw firmly with both hands, with the thumbs and fingers enclosing the electric chainsaw handles (Fig. L). Bring your body and arms into a position in which you can absorb the kickback forces.
- If suitable measures are implemented, the operator will be able to withstand the kickback forces. Never let go of the chainsaw.
- Avoid an unusual body stance and never saw above shoulder height.
- This will help to avoid unintentional contact with the rail tip, and enable improved control of the chain-saw in unexpected situations.
- Always use replacement guide rails and saw chains prescribed by the manufacturer.
- Incorrect replacement rails and saw chains may cause the chain to break and/or lead to kick-back.
- Adhere to the instructions of the manufacturer when sharpening and maintaining the saw chain.
- If the depth limiter is too low, this increases the tendency towards kickback.
Further safety instructions
- Lay the connecting cable so that it is not caught by branches or similar during sawing.
- Use a residual current circuit breaker with a trigger current of 30 mA or less.
- Carefully follow the maintenance, inspection and service instructions in this operating manual.
- Damaged protective devices and parts must be repaired properly or replaced by our service centre unless otherwise specified in the operating manual.
- Before you start working with the electric chainsaw, familiarise yourself well with all the control parts. Practise using the saw (cutting logs to length on a metal work trestle) and have the function, mode of operation, sawing techniques and personal protection equipment explained to you by an experienced user or specialist.
6. Technical data
| Electric chainsaw cutting data | |
| Cutting length 37 cm | |
| Blade length 45,9 cm | |
| Oil tank capacity 0.3 l | |
| Oil type Wear-resistant oil | |
| Saw chain pitch 3/8" (9.525 mm) | |
| Drive link thickness | 1.27 mm |
| Saw chain type | 3/8 .050x56DL |
| Number of drive sprocket teeth | 6 x 9.525 |
| Tooth pitch of drive sprocket | 3/8" |
| Chain brake | Yes |
| Guide rail type | AP16-56-507P |
| Drive | |
| Engine | 230-240 V~ / 50 Hz |
| Rated engine power | 2200 W |
| Max. cutting speed | 15 m/s |
| Weight complete | 4,3 kg |
| Weight without blade and chain | 3,8 kg |
Subject to technical changes!
Information about noise level measured in accordance with applicable standards:
| Sound pressure L_pA | 103.3 dB |
| Measurement uncertainty K_PA | 3 dB |
| Sound pressure L_WA | 111.3 dB |
| Measurement uncertainty K_WA | 3 dB |
| Guaranteed sound power level L_WA.d | 115 dB |
Wear hearing protection.
Excessive noise can result in a loss of hearing.
| Vibration A_h (front handle) | 1,426 m/s ^2 |
| Vibration A_h (rear handle) | 1.411 m/s ^2 |
| Measurement uncertainty K_P | 1.5 m/s ^2 |
- The specified total vibration value and the specified noise emission value have been measured in accordance with a standardised test procedure and can be used to compare one power tool with another.
- The specified total vibration value and the specified noise emission value can also be used for an initial estimation of the exposure.
Warning:
- The vibration emission value can vary from the specified value during the actual use of the electric tool, depending on the type and the manner in which the electric tool is used;
- Try to minimise stress from vibrations as low as possible. Some examples of means for reducing the vibration stress are wearing gloves while using the tool and limiting work time. In doing so, all parts of the operating cycle must be taken into account (such as times in which the power tool is switched off or times in which it is switched on, but is not running under a load).
7. Unpacking
- Open the packaging and carefully remove the device.
- Remove the packaging material, as well as the packaging and transport safety devices (if present).
- Check whether the scope of delivery is complete.
- Check the device and accessory parts for transport damage.
- If possible, keep the packaging until the expiry of the warranty period.
ATTENTION!
The device and the packaging are not children's toys! Do not let children play with plastic bags, films or small parts! There is a danger of choking or suffocating!
8. Attachment and operation
Warning!
Always wear safety goggles, hearing protection, protective gloves and sturdy work clothes!
Use the electric chainsaw only with approved extension cables (rubber-covered) of the specified rating and with outdoor-approved connections that match the saw's plug.
The chain saw is equipped with a safety switch. It only works if you press the switch-on lock (11) and the on/off switch (13) with one hand at the same time. When the electric chainsaw is not running, the chain brake must be released with the front hand guard (3).
Assembly
Attaching the guide rail and chain (Fig. 1, 2, 3)
Warning: If the saw has already been connected to the power supply: Always disconnect the device from the power supply first. Wear protective gloves for all work with/on the saw.
Important note: The front hand guard (3) must always be in the upper (vertical) position (Fig. 5).
The guide rail (7) and the saw chain (4) are supplied separately, i.e. not fitted. When assembling, first loosen the lock nut / SDS system (5) and then remove the chain cover (6). The guide pin (17) must be in the middle of the guide.
If necessary, adjust the chain tension with the lock-nut/SDS system (5) (Fig. 3).
Warning! To avoid injury from the sharp edges, protective gloves must always be worn when installing, tensioning and inspecting the chain!
Before installing the guide rail (7) with the saw chain (4), check the cutting direction of the teeth! The running direction is indicated by an arrow on the chain cover (6). To determine the cutting direction, it may be necessary to turn the saw chain (4) around.
Hold the guide rail (7) vertically with the tip pointing upwards and attach the saw chain (4), starting at the tip of the guide rail (7). Then fit the guide rail (7) with the saw chain (4) as follows:
- Attach the guide rail (7) with the saw chain (4) to the sprocket (16) and guide pin (17).
- Guide the saw chain (4) around the sprocket (16) and check that it is correctly positioned (see Fig. 3).
- Install the chain cover (6) on top and carefully secure it with the lock nut (5).
Now the saw chain (4) must be properly tensioned.
Tensioning the saw chain
Warning!
Always disconnect the device from the power supply before carrying out any work on the electric chain-saw!
Always wear protective gloves when working on the chain!
- It is essential that the saw chain (4) lies in the guide rail (7)!
- Turn the locknut/SDS system (5) clockwise (Fig. 3) until the saw chain is properly tensioned.
- The chain must not be too taut. In cold weather conditions it must be possible to raise the saw chain (4) approx. 5 mm in the middle of the guide rail (7).
- In warm weather, the saw chain (4) expands and it sits looser. Here there is a risk of the chain running off from the guide rail (7).
- It must therefore be retensioned in good time if necessary.
- If a heated saw chain (4) has been retensioned, it must be loosened again at the end of the work. Otherwise the chain tension would become too great when the saw chain (4) cools down and contracts.
- A new saw chain (4) must be run in for approx. 5 minutes. Lubrication of the saw chain (4) is particularly important in this instance. After running in, the chain tension must be checked and adjusted if necessary.
9. Commissioning
⚠ Attention!
Always make sure the device is fully assembled before commissioning!
The voltage and type of current of the power supply must comply with the specifications on the type plate.
Before starting work, always check that the electric chainsaw is functioning properly and operating safely.
Also check that the saw chain (4) is well lubricated and that the oil level is sufficiently high (see Fig. 4). If the oil level is approx. 5 mm above the lower marking, oil must be topped up. When the oil level is higher, you can start working.
- Switch on the electric chainsaw and hold it above the base. The electric chainsaw must not touch the floor. For safety reasons, a minimum distance of 20 cm must be maintained in this instance. If you detect increasing traces of oil, it means the lubrication system for the chain is working properly. If you cannot determine any signs of oil, first clean the oil outlet (Fig. 2, C) and the oil line. If necessary, contact a specialist company. (Before doing this, please read the relevant instructions in the “Top up chain lubricant” section).
- If necessary, also check the chain tension and sag (see the section "Tensioning the saw chain").
- Check that the chain brake is working properly (see also the section on "Releasing the chain brake").
Switching on
- Release the chain brake (3), press the on lock (11) and operate the on/off switch (13).
- Place the lowest claw of the claw stop (10) (Fig. 2, J) against the wood. Lift the electric chainsaw by the handle at the back (1) and saw into the wood. Move the electric chainsaw a little backwards, and then set the claw stop (10) a little lower.
- Be careful with split wood because pieces of wood can be torn off.
Attention!
After switching on, the electric chainsaw immediately runs at full speed.
Switching off
- To switch off, release the on/off switch (13) on the rear handle (1).
- When switching off with the on/off switch (13), the electric chainsaw stops in 1 second, in case of violent sparking. However, this is completely normal and it does not affect the proper functioning of the electric chainsaw.
• After working with the electric chainsaw: Always clean the saw chain (4) and the blade (7), and refit the chain guard. - When the chain brake (3) is triggered, the electric chainsaw is immediately deactivated
10. Working instructions
Transport of the electric chainsaw
Before transporting the electric chainsaw, always remove the mains plug from the socket and fit the chain guard over the blade (7) and the saw chain (4). If several cuts are to be made with the electric chainsaw, the saw must be switched off between cuts.
Extension cable
Only extension cables designed for outdoor use may be used. The cable cross-section (max. length of the extension cable: 75 m) must be at least 2.5 mm². For safety, the extension cable must end in a loop that is passed through the strain relief on the housing (Fig. M).
Extension cables longer than 30 m have a detrimental effect on the performance of the electric chainsaw.
Lubrication of the chain
To protect against excessive wear, the saw chain (4) and guide rail (7) must be lubricated evenly during operation. Lubrication takes place automatically. Never work without chain lubrication. If the saw chain (4) runs dry, the entire cutting fixture will be severely damaged within a short time.
Therefore, always check the chain lubrication and oil level before starting work (Fig. 4).
Do not operate the saw if the oil level is below the "Min" mark.
- Min.: If the oil level on the indicator (15) is only 5 mm above the lower mark, oil must be topped up.
- Max.: Fill with oil until the maximum level is indicated on the indicator (15).
Chain lubricant
The durability of the saw chain (4) and guide rail (7) is also largely determined by the quality of the lubricant used. Do not use used oil! Only use environmentally friendly lubricant. The chain lubricant may only be stored in containers that comply with the relevant regulations.
Blade
The blade (7) is heavily stressed especially at the tip (nose) and at the bottom. To avoid one-sided wear, turn the blade (7) around when sharpening the saw chain (4).
Chain wheel
The sprocket (16) is subjected to particularly high stress. If you find deep signs of wear on the teeth, the sprocket (16) must be replaced. A worn sprocket (16) shortens the service life of the saw chain (4). The sprocket (16) must be replaced at a specialist dealer or by a specialist company.
Chain guard
The chain guard must be fitted over the saw chain (4) and guide rail (7) immediately after finishing work and during transport.
Chain brake
In the event of the saw kicking back, the chain brake (3) is released via the front hand guard (3). The front hand guard (3) is pressed forward with the back of the hand. This causes the chain brake (3) to bring the electric chainsaw or the motor to a standstill within 0.15 sec. (Fig. 5, H).
Releasing the chain brake (Fig. 5)
To make the saw ready for operation again, the blocking of the saw chain (4) must be released. To do this, first switch off the electric chainsaw.
Then fold the front hand guard (3) back into its vertical starting position until it clicks into place (Fig. 5, I). This makes the chain brake (3) fully functional again.
Electric chainsaw protection
Do not use the electric chainsaw in the rain or in wet conditions.
Warning: If the extension cable is damaged, remove the plug from the socket immediately. Do not work with a damaged cable.
- Check the electric chainsaw for damage. Before using the device again, carefully check the protective devices or any slightly damaged parts to make sure they are working properly and as intended.
- Check the proper functioning of the moving parts.
- All parts must be properly fitted and meet all conditions to ensure proper operation of the electric chainsaw.
- Damaged safety devices and parts must be properly repaired or replaced by a specialist company, unless otherwise specified in these operating instructions.
Note for practical use
Kick-back
Sawing accidents can be avoided if you do not saw with the tip of the guide rail (7), because the saw can then suddenly kick up and back.
Always wear full protective equipment and sturdy work clothes when working with the saw.
Kickback is an upward and/or backward movement of the guide rail (7) that can occur when the saw chain (4) hits an obstacle (object) at the tip of the saw (7).
Always secure your workpiece well. Use clamping devices to hold the workpiece in place. This makes it easier to safely operate the chainsaw with both hands.
Kickback causes uncontrollable behaviour of the saw, this danger is particularly present with a loose or blunt saw chain (4). An insufficiently sharpened chain increases the risk of kickback. Never saw above shoulder height.
Tips for sawing in practice Important information
- Only use the device for sawing wood. Do not machine metal, plastic, masonry, non-wood building materials, etc.
- Switch off the motor if the saw comes into contact with a foreign object. Check the saw and repair it if necessary.
- Protect the chain from dirt and sand. Even small amounts of dirt can quickly dull the chain and increase the risk of kickback.
- Start by sawing smaller logs for practice to get a feel for your device before tackling more difficult tasks.
- Press the housing of the electric chainsaw against the tree trunk when you start sawing.
- Let the saw work for you. Apply only light downward pressure.
- To avoid losing control of the device after the chain has come out of the wood, do not apply pressure to the saw towards the end of the cut.
Felling trees - only with appropriate training
Caution! Watch out for broken or dead branches that can fall down during sawing and cause serious injuries. Do not saw near buildings or power lines if you do not know which way the felled tree will fall. Do not work at night, as this makes it harder to see, or in rain, snow or storms, as the direction of tree fall is unpredictable.
- Plan your work with the electric chainsaw in advance.
-
The work area around the tree should be clear so that you have a secure footing.
-
When sawing on a slope, the machine operator should always stay on the higher level of the work area because the tree is likely to roll or slide down after felling.
- Look out for broken or dead branches that could fall and cause serious injury.
The following conditions can influence the direction of fall of a tree:
• Wind direction and speed
- Inclination of the tree. The inclination is not always recognisable due to uneven or sloping terrain. Determine the inclination of the tree using a plumb bob or spirit level.
- Branch growth (and thus weight) on one side only.
- Surrounding trees or obstacles
If cutting and felling is done by two or more persons at the same time, the distance between the felling and cutting persons should be at least twice the height of the tree to be felled. When felling trees, care must be taken not to expose other persons to danger, not to hit supply lines and not to cause damage to property. Should a tree come into contact with a supply line, the utility company must be informed immediately.
Look out for destroyed and rotten parts of the tree. If the trunk is rotten, it can suddenly break and fall on you. Ensure that there is sufficient space for the falling tree. Keep a clearance of 2 1/2 tree lengths to the nearest person or other objects. Motor noise can drown out warning calls.
Remove dirt, stones, loose bark, nails, staples and wire from the sawing point.
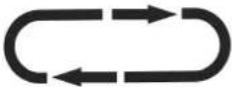
Keep an escape route clear (Fig. A)
Before felling, an escape route should be planned and cleared if necessary. The escape route should lead away from the expected fall line at an angle to the rear (Fig. A).
Position 1: Evacuation route
Position 2: Falling direction of the tree
Felling of large trees - only with appropriate training (from 15 cm diameter)
The undercutting method is used to fell large trees. A wedge is cut out of the side of the tree according to the desired direction of fall. After the drop cut has been made on the other side of the tree, the tree falls towards the wedge.
Note: If the tree has large supporting roots, these should be removed before the notch is cut. If the saw is used to remove the supporting roots, the saw chain should not touch the base so that the chain does not become blunt.
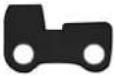
Undercutting and felling of the tree (Fig. B - C)
- Saw a notch at right angles to the direction of fall with a depth of 1/3 of the tree diameter. First make the lower horizontal notch cut (Fig. B, Pos. 1). This avoids jamming the saw chain or guide rail when setting the second notch (Fig. B, Pos. 2). Now remove the wedge that has been cut out.
- The felling cut (Fig. B, Pos. 3) can then be carried out on the opposite side of the tree. To do this, place it approx. 5 cm above the centre of the notch. Make the felling cut parallel to the horizontal notch cut. Saw the felling cut (Pos. 3) only deep enough to leave a bar (Pos. 4) (felling bar) that can act as a hinge. The bar prevents the tree from turning and falling in the wrong direction. Do not saw through the bar.
Note: As the felling cut approaches the bar, the tree should begin to fall. If it appears that the tree is potentially not falling in the desired direction or is leaning back and the saw chain is jammed, stop the felling cut and use wooden, plastic or aluminium wedges to open the cut and move the tree to the desired fall line.
When the tree starts to fall, remove the electric chain-saw from the cut, switch off, lay down and leave the danger zone via the planned escape route. Watch out for falling branches and do not trip.
- Look for signs that it is beginning to fall: Cracking noises, opening drop section or movement in the upper branches.
- Do not cut partially felled trees with your saw to avoid injury. Pay special attention to partially felled trees that are not supported. If a tree does not fall completely, set the saw down and assist with a cable winch, pulley block or tractor.
Sawing a felled tree (trunk division)
The term “trunk division” refers to the cutting of a felled tree into trunks of the desired length.
Caution! Do not stand on the trunk you are cutting. The trunk could roll away and you lose your footing and control of the device. Never carry out sawing work on sloping ground. Make sure you stand securely and distribute your body weight evenly on both feet. If possible, the trunk should be underpinned and supported by branches, beams or wedges.
Important information
- Only saw one trunk or branch at a time.
- Be careful when cutting splintered wood. You could be hit by sharp wood particles.
- Cut small trunks or branches on a metal work trestle. When cutting trunks, no other person shall hold the trunk. Do not secure the trunk with your leg or foot either.
- Do not use the saw for places where trunks, roots and other tree parts are intertwined. Pull the trunks to a free spot, taking the exposed trunks first.
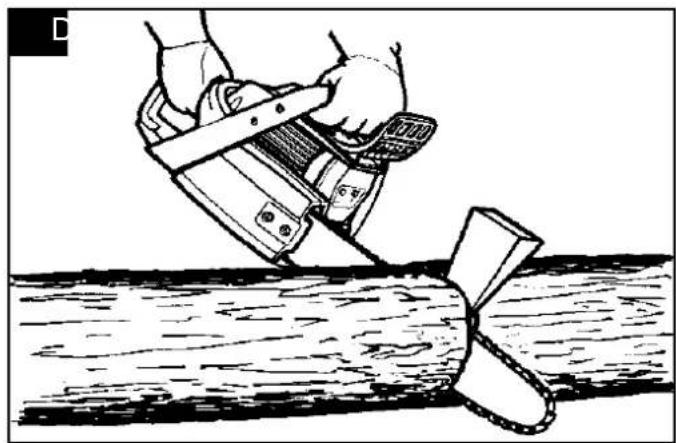
Different cuts for trunk division (Fig. D)
Caution! If the saw gets jammed in a trunk, do not pull it out by force. You can lose control of the device and cause serious injury and/or damage the saw. Stop the saw and drive a plastic or wooden wedge into the cut until the saw can be easily pulled out. Leave the saw on again and carefully reapply the cut. Never start the saw when it is jammed in a trunk.
Top cut (Fig. E, Pos. 1)
Start at the top of the trunk for sawing, holding the saw against the trunk. Apply only light downward pressure to the top cut.
Undercut (Fig. E, Pos. 2)
Set for undercutting on the underside of the trunk, holding the top of the saw against the trunk. When undercutting, only exert a slight upward pull. Hold the saw well to be able to control the device. The saw pushes backwards (towards you).
Caution! Never hold the saw upside down for an undercut. In this position you have no control over the device.
Always make the first cut on the compression side of the trunk. The compression side of a trunk is where the pressure of the trunk weight is concentrated.
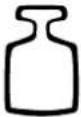
Trunk division without nozzles (Fig. F)
- When the entire length of the log rests evenly, saw from above (Pos. 1).
- Be careful not to saw into the ground.
Trunk division resting on one side (Fig. G)
- If the log rests on one end, saw the first cut (Pos. 1) from the underside (1/3 of the log diameter) to avoid splintering
- Second cut from the top (2/3 diameter) at the level of the first cut to avoid jamming.
Trunk division resting on both sides (Fig. H)
- When the log is supported at both ends, saw the first cut (Pos. 1) from the top (1/3 of the log diameter) to avoid splintering.
- Second cut from the bottom (2/3 diameter) at the level of the first cut to avoid jamming.
Limbing and bucking
Caution! Always take care and protect yourself from kickback. Never allow the running chain at the tip of the guide rail to come into contact with other branches or objects when limbing or pruning. Such contact can cause serious injury.
Caution! Never climb into the tree to limb or buck. Do not stand on ladders, platforms, etc. You could lose your balance and control of the device.
Important information
- Work slowly and hold the saw firmly with both hands. Ensure a secure standing position and balance.
- Watch out for tree parts that snap back. Be extremely careful when cutting small parts of the tree. Pliable material can get caught in the saw chain and fly towards you or throw you off balance.
- Watch out for tree parts that snap back. This is especially true for bent or loaded branches. Avoid coming into contact with the branch or the saw when the tension of the wood gives way.
- Keep your work area clear. Clear the path of branches so as not to trip over them.
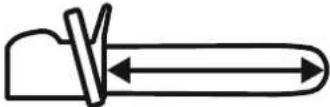
Limbing (Fig. J)
- Limbing means cutting off the branches of the felled tree.
- Leave the larger branches under the felled tree and use them as a prop while you continue working.
- Start at the base of the felled tree and work your way up to the top. Remove smaller tree parts with a cut in the direction of growth (arrows Fig. J).
- When doing so, always make sure to leave the tree between you and the saw.
- Remove larger, supporting branches using the methods described in the section "Trunk division without supports".
• Always cut branches that are under tension from the bottom upwards to avoid jamming the saw. - Always remove small, free-hanging tree parts with a top cut. An undercut could cause them to fall into or jam the saw.
Bucking (Fig. I)
Caution! Only buck branches at or below shoulder height. Never cut branches above shoulder height. Leave such work to a professional.
- For the first cut (Pos. 1), cut 1/3 into the lower part of the branch.
- Then cut all the way through the branch with the second cut (Pos. 2). The third cut (Pos. 3) is a top cut, with which you separate the branch to within 2.5 to 5 cm of the trunk.
Sawing on slopes (Fig. K)
Always stand above the tree trunk when sawing on slopes (Fig. K). In order to maintain full control at the moment of "cutting all the way through", reduce the pressing force towards the end of the cut, without loosening your firm grip of the handles of the chain-saw.
Caution! The saw chain must not come into contact with the floor.
After completing the cut, wait for the saw chain to stop before removing the electric chainsaw. Always switch off the electric chainsaw's motor before switching from tree to tree.
11. Transport
- To transport the product, disconnect the it from the power supply and set it up in the new position you want to use it in.
- The product must be secured against tipping and slipping during transport in vehicles in order to prevent damage and injuries.
• Always use the guide rail cover when transporting. - Switch off the chainsaw before any transport, even over short distances. Secure the machine against tipping over during transport (including in vehicles) to prevent fuel loss, damage or injury.
- Carry the device only by the front handle. In doing so, the guide rail points backwards, away from your body.
12. Maintenance
If it is necessary to replace the connection cable, this must be done by the manufacturer or their representative to avoid safety hazards.
Warning! Always disconnect the device from the power supply before carrying out any work on the electric chainsaw!
- Always keep the ventilation slots on the motor housing clean and free. Only the maintenance work described in these operating instructions may be carried out by the user. All other maintenance tasks must be carried out by our customer service.
- The saw must not be modified in any way, because then the safety of the device is no longer guaranteed.
- If, despite careful care and maintenance, the electric chainsaw does not work properly, please have it repaired by a specialist workshop.
Topping up chain lubricating oil
Clean the oil tank cap (14) before opening it so that no dirt can get into the tank. When working with the saw, check the contents of the oil tank at the oil level indicator (15). Then seal the cap (14) well again and wipe off any spilled oil.
Sharpening the saw chain
Your saw chain (4) is quickly and professionally re-sharpened at a specialist dealer. You can also obtain chain sharpening fixtures from specialist dealers with which you can sharpen your saw chain (4) yourself.
Please observe the corresponding operating instructions. Take care of your equipment with care. Keep your tools sharp and clean so that you can work well and safely.
Follow the maintenance instructions and the instructions for tool changes.
Service information
With this product, it is necessary to note that the following parts are subject to natural or usage-related wear, or that the following parts are required as consumables.
Wearing parts*: Saw chain, guide rail, chain oil, carbon brushes, claw stop
* may not be included in the scope of delivery!
Spare parts and accessories can be obtained from our Service Centre. To do this, scan the QR code on the front page.
13. Storage
Store the product and its accessories in a dark, dry and frost-free place that is inaccessible to children.
The optimum storage temperature lies between 5°C and 30 °C.
Store the product in its original packaging.
Cover the product to protect it from dust or moisture.
Store the operating manual with the product.
- Secure the chain guard before every transport and storage.
- Store the device in a dry place and out of reach of children.
- When the device is not in use, store it in such a way that it cannot be activated by an unauthorised person.
Warning!
Do not store the device unprotected outside or in a damp environment.
Stow the device using the suspension (Fig. N)
The device has a hanging groove (K).
- Screw a screw to your desired storage location.
- Ensure that the screw has been fitted tightly and properly.
- Now hang the electric chainsaw with the chain guard on using the suspension groove (K) on the screw.
- Make sure that the screw slips neatly into the groove.
14. Electrical connection
The electrical motor installed is connected and ready for operation. The connection complies with the applicable VDE and DIN provisions. If it is necessary to replace the connection cable, this must be done by the manufacturer or their representative to avoid safety hazards. The customer's mains connection as well as the extension cable used must also comply with these regulations.
- The product fulfils the requirements of EN 61000-3-11 and is subject to special connection requirements. This means that use at any freely selectable connection points is not permitted.
- Given unfavourable conditions in the power supply the product can cause the voltage to fluctuate temporarily.
- The product is only intended for use at connection points that
a) do not exceed a maximum permissible mains impedance "Z" (Zmax. = 0.292 Ω), or
b) have a mains constant current carrying capacity of at least 100 A per phase. - As the user, you are required to ensure, in consultation with your electric power company if necessary, that the connection point at which you wish to operate the product meets one of the two requirements, a) or b), named above.
Important information
In the event of overloading, the motor will switch itself off. After a cool-down period (time varies) the motor can be switched back on again.
Damaged electrical connection cable
The insulation on electrical connection cables is often damaged.
This may have the following causes:
- Pressure points, where connection cables are passed through windows or doors.
- Kinks where the connection cable has been improperly fastened or routed.
- Places where the connection cables have been cut due to being driven over.
- Insulation damage due to being ripped out of the wall outlet.
- Cracks due to the insulation ageing.
Such damaged electrical connection cables must not be used and are life-threatening due to the insulation damage.
Check the electrical connection cables for damage regularly. Ensure that the connection cables are disconnected from electrical power when checking for damage.
Electrical connection cables must comply with the applicable VDE and DIN provisions.
Only use connection cables with designation H0 5V V-F.
The printing of the type designation on the connection cable is mandatory.
AC motor
- The mains voltage must be 230-240 V\~.
- Extension cables up to 25 m in length must have a cross-section of 1.5 square millimetres, over 25 in length at least 2.5 square millimetres.
Connection type Y
If it is necessary to replace the mains connection cable, this must be done by the manufacturer or their representative to avoid safety hazards.
Connections and repair work on the electrical equipment may only be carried out by electricians.
Please provide the following information in the event of any enquiries:
- Type of current for the motor
• Machine data - type plate - Motor data - type plate
15. Disposal and recycling
Notes for packaging


The packaging materials are recyclable. Please dispose of packaging in an environmentally friendly manner.
Notes on the electrical and electronic equipment act [ElektroG]
![SCHEPPACH CSE 2200 - Notes on the electrical and electronic equipment act [ElektroG] - 1](/content/2026/03/565147/images/3c87d2dbf7f4cbd1c61cc2872d58acdab3c76791bad49cdb9ab4404fbca7576a.jpg)
Electrical and electronic appliances do not belong in household waste, but should be collected and disposed of separately.
- Used batteries or rechargeable batteries that are not installed permanently in the old appliance must be removed non-destructively before disposal. Their disposal is regulated by the battery act.
- Owners or users of electrical and electronic devices are legally obliged to return them after use.
- The end user is responsible for deleting their personal data from the old device being disposed of!
- The symbol of the crossed-out dustbin means that waste electrical and electronic equipment must not be disposed of with household waste.
- Waste electrical and electronic equipment can be handed in free of charge at the following places:
-
Public disposal or collection points (e.g. municipal works yards).
-
Points of sale of electrical appliances (stationary and online), provided that dealers are obliged to take them back or offer to do so voluntarily.
- Up to three waste electrical devices per type of device, with an edge length of no more than 25 centimetres, can be returned free of charge to the manufacturer without prior purchase of a new device from the manufacturer or taken to another authorised collection point in your vicinity.
-
For additional take-back conditions of the manufacturers and distributors, please contact the respective customer service.
-
In the case of delivery of a new electrical device by the manufacturer to a private household, the latter may arrange for the free collection of the old electrical device upon request from the end-user. Get in contact with the manufacturer's customer service.
- These statements only apply to devices installed and sold in the countries of the European Union and which are subject to the European Directive 2012/19/EU. Different provisions may apply to the disposal of electrical and electronic appliances in countries outside the European Union.
Contact your local refuse disposal authority for more details of how to dispose of your worn-out electrical devices.
Fuels and oils
- Before disposing of the unit, the fuel tank and the engine oil tank must be emptied!
- Fuel and motor oil do not belong in household waste or drains, but must be collected or disposed of separately!
- Empty oil and fuel tanks must be disposed of in an environmentally friendly manner.
16. Troubleshooting
The following table shows fault symptoms and describes remedial measures in the event of your product failing to work properly. If you cannot localise and rectify the problem with this, please contact your service workshop.
| Fault Possible cause Remedy | ||
| Engine does not run | No power | Checking the power supply socket, cable and plugCable damaged: Must be repaired by a specialist company.Makeshift repairs (insulating tape, etc.) are strictly prohibitedSwitch damaged: Must be repaired by a specialist company |
| Chain brake See section “Chain brake” and “Release chain brake” | ||
| Carbon brushes worn Have carbon brushes changed by a specialist company | ||
| Chain does not move Chain brake Check chain brake, and release if necessary | ||
| Inadequate cutting performance | Chain bluntChain tension incorrectChain does not lie correctly in the guide | Sharpen the chainTension the chain correctlyAttach the chain correctly |
| Sawing difficultChain jumps off the blade | Chain tension Tension the chain correctly | |
| Saw chain runs hot Chain lubrication | Check the oil level and top up if necessaryCheck lubrication of the chain | |
Günzburger Straße 69
D-89335 Ichenhausen
Cher client,
EU Declaration of Conformity
Standard references:
EN 62841-1:2015/A11:2022, EN 62841-4-1:2020; EN IEC 55014-1:2021;
EN IEC 55014-2:2021; EN IEC 61000-3-2:2019/A1:2021; EN IEC 61000-3-11:2019
This declaration of conformity is issued under the sole responsibility of the manufacturer.
Apparent defects must be notified within 8 days from the receipt of the goods. Otherwise, the buyeris rights of claim due to such defects are invalidated. We guarantee for our machines in case of proper treatment for the time of the statutory warranty period from delivery in such a way that we replace any machine part free of charge which provably becomes unusable due to faulty material
or defects of fabrication within such period of time. With respect to parts not manufactured by us we only warrant insofar as we are entitled to warranty claims against the upstream suppliers. The costs for the installation of the new parts shall be borne by the buyer. The cancellation of sale or the reduction of purchase price as well as any other claims for damages shall be excluded.
Garantie FR
- Verehrter Kunde,
- Explanation of the symbols on the product
- ATTENTION!
- Note:
- Table of contents: Page:
- Introduction
- Manufacturer:
- Dear Customer,
- Device description (Fig. 1 - 4)
- Scope of delivery
- Proper use
- Safety instructions
- Work area safety
- Electrical safety
- Personal safety
- Power tool use and care
- Service
- Vibration
- Safety functions of the electric chainsaw
- General chainsaw safety warnings
- Causes and avoidance of kick-back
- Attention: kick-back!
- Further safety instructions
- Technical data
- Subject to technical changes!
- Wear hearing protection.
- Warning:
- Unpacking
- Attachment and operation
- Warning!
- Assembly
- Attaching the guide rail and chain (Fig. 1, 2, 3)
- Tensioning the saw chain
- Commissioning
- ⚠ Attention!
- Switching on
- Switching off
- Working instructions
- Transport of the electric chainsaw
- Extension cable
- Lubrication of the chain
- Chain lubricant
- Blade
- Chain wheel
- Chain guard
- Chain brake
- Releasing the chain brake (Fig. 5)
- Electric chainsaw protection
- Note for practical use
- Kick-back
- Tips for sawing in practice Important information
- Felling trees - only with appropriate training
- The following conditions can influence the direction of fall of a tree:
- Keep an escape route clear (Fig. A)
- Felling of large trees - only with appropriate training (from 15 cm diameter)
- Undercutting and felling of the tree (Fig. B - C)
- Sawing a felled tree (trunk division)
- Important information
- Different cuts for trunk division (Fig. D)
- Top cut (Fig. E, Pos. 1)
- Undercut (Fig. E, Pos. 2)
- Trunk division without nozzles (Fig. F)
- Trunk division resting on one side (Fig. G)
- Trunk division resting on both sides (Fig. H)
- Limbing and bucking
- Limbing (Fig. J)
- Bucking (Fig. I)
- Sawing on slopes (Fig. K)
- Transport
- Maintenance
- Topping up chain lubricating oil
- Sharpening the saw chain
- Service information
- Storage
- Stow the device using the suspension (Fig. N)
- Electrical connection
- Damaged electrical connection cable
- AC motor
- Connection type Y
- Please provide the following information in the event of any enquiries:
- Disposal and recycling
- Notes for packaging
- Notes on the electrical and electronic equipment act [ElektroG]
- Contact your local refuse disposal authority for more details of how to dispose of your worn-out electrical devices.
- Fuels and oils
- Troubleshooting
- Cher client,
- EU Declaration of Conformity
- Standard references:
- Garantie FR
Brand : SCHEPPACH
Model : CSE 2200
Category : Electric chainsaw