ECVD 2001 - Iron ESSENTIELB - Free user manual and instructions
Find the device manual for free ECVD 2001 ESSENTIELB in PDF.
| Product type | Steam iron (steam station) |
| Brand | ESSENTIELB |
| Model | ECVD 2001 |
| Power | 2000 - 2400 W |
| Power supply | 220 - 240 V ~ 50/60 Hz |
| Pressure | 6 bars |
| Continuous steam rate | 120 g/min |
| Steam boost rate | 200 g/min |
| Tank capacity | 1.8 L removable |
| Soleplate coating | Ceramic |
| Vertical steaming | Yes |
| Self-cleaning | Yes |
| Iron lock | Yes |
| Auto shut-off | After 10 minutes of inactivity |
| Temperature setting | 3 positions (Synthetic/Silk, Wool, Cotton/Linen) |
| Steam levels | 2 (Eco and High) |
| Power consumption in off mode | 0.35 W |
| Box contents | Steam station, iron, instruction manual |
Frequently Asked Questions - ECVD 2001 ESSENTIELB
User questions about ECVD 2001 ESSENTIELB
0 question about this device. Answer the ones you know or ask your own.
Ask a new question about this device
Download the instructions for your Iron in PDF format for free! Find your manual ECVD 2001 - ESSENTIELB and take your electronic device back in hand. On this page are published all the documents necessary for the use of your device. ECVD 2001 by ESSENTIELB.
USER MANUAL ECVD 2001 ESSENTIELB
natural_image
Blue and white steam iron with coiled cord, no visible text or symbols on bodyNotice d'utilisation / User guide / Bedienungsanleitung / Gebruiksaanwijzing

text_image
Technical diagram of a steam iron with numbered parts for identification and assembly reference.| FR EN DE NL | ||||
| 1 | Bouton de déverrouillage du réservoir d'eau | Water tank release button | Entriegelungsknopf für den Wassertank | Ontgrendelingsknop waterreservoir |
| 2 | Poignée du réservoir d'eau | Handle of the water tank | Griff des Wassertanks | Handgroop van het waterreservoir |
| 3 | Réservoir d'eau amovible | Removable water tank | Abnehmbarer Wassertank | Uitneembaar waterreservoir |
| 4 | Orifi ce de remplissage du réservoir | Tank fi lling hole | Einfüllöffnung des Wassertanks | Vulopening van het reservoir |
| 5 | Crochet pour le rangement du cordon vapeur | Hook for storing the steam cord | Haken für die Kabel-aufwicklung | Haakje voor het opbergen van het stroomsnoer |
| 6 | Base Base Sockel Voet | |||
| 7 | Panneau de commande | Control panel Bedienfeld | Bedieningspaneel | |
| 8 | Repose-fer Iron rest Ablage | Strijkijzerhouder | ||
| 9 | Verrouillage du fer Iron lock | Entriegelung des Bügeleisens | Vergrendeling van het strijkijzer | |
| 10 | Déverrouillage du fer Iron unlock | Verriegelung des Bügeleisens | Ontgrendeling van het strijkijzer | |
| 11 | Thermoslat (réglage de la température) | Thermostat (setting the temperature) | Thermostat (Einstellung der Temperatur) | Thermostaat (temperatuurregeling) |
| 12 | Bouton activateur de vapeur | Steam release button | Aktivierungsknopf für den Dampf | Stoomknop |
| 13 | Poignée Handle | Griff | Handgreep | |
| 14 | Voyant de régulation du thermostat | Thermostat regulation indicator | Regierleuchte des Thermostats | Reguleringslampje van de thermostaat |
| 15 | Semelle | Sole plate | Sohle | Strijkzool |
| 16 | For | Iron | Bügeloisen | Strijkijzer |
text_image
LINEN - COTTON LIN - COTON LNX MIN WOOL LNG SILK SILK HILMSnatural_image
Diagram showing a device being processed from a left-side view, with no visible text or symbols.
natural_image
Line drawing of a mechanical device with a lid and handle, showing a folded top component (no text or symbols)Bouton marche/arrêt
natural_image
Technical line drawing of a mechanical component with a magnified inset showing internal structure (no text or symbols)natural_image
Line drawing of a hand steaming an iron with steam rising, alongside fewer smoke plumes below (no text or symbols)Thank you for purchasing an Essential to brand product. We pay special attention
to the RELIABILITY, EASE OF USE and DESIGN of our products
We hope that you will be completely satisfied with this steam generator iron.
your product
Contents of the box
• 1 steam generator iron
• 1 user guide
Technical features
• Power: 2,000 W - 2,400 W
• Voltage: 220 - 240 V\~ 50-60 Hz
• Steam output: 120 g/min
• Steam output in boost mode:
200 g/min
- Pressure: 6 bar
• 1.8 litre removable water tank
• Vertical steaming
• Self-cleaning feature
- Simplifi ed settings
• Iron with ceramic coated sole plate
• 2 steam output levels: low, high
• Iron temperature adjustment
- Cable tidy
• Iron lock on the base for transport
• Automatic standby mode after
10 minutes of non-use
| Product Information for power consumption and maximum time to reach applicable low power mode | |
| Power consumption in off mode | 0.35 W |
| Power consumption in standby | NA |
| The maximum time needed to automatically reach the applicable low power mode or condition | 10^7 |
| Power consumption in network standby if all wired network ports are connected and all wireless network ports are activated | NA |
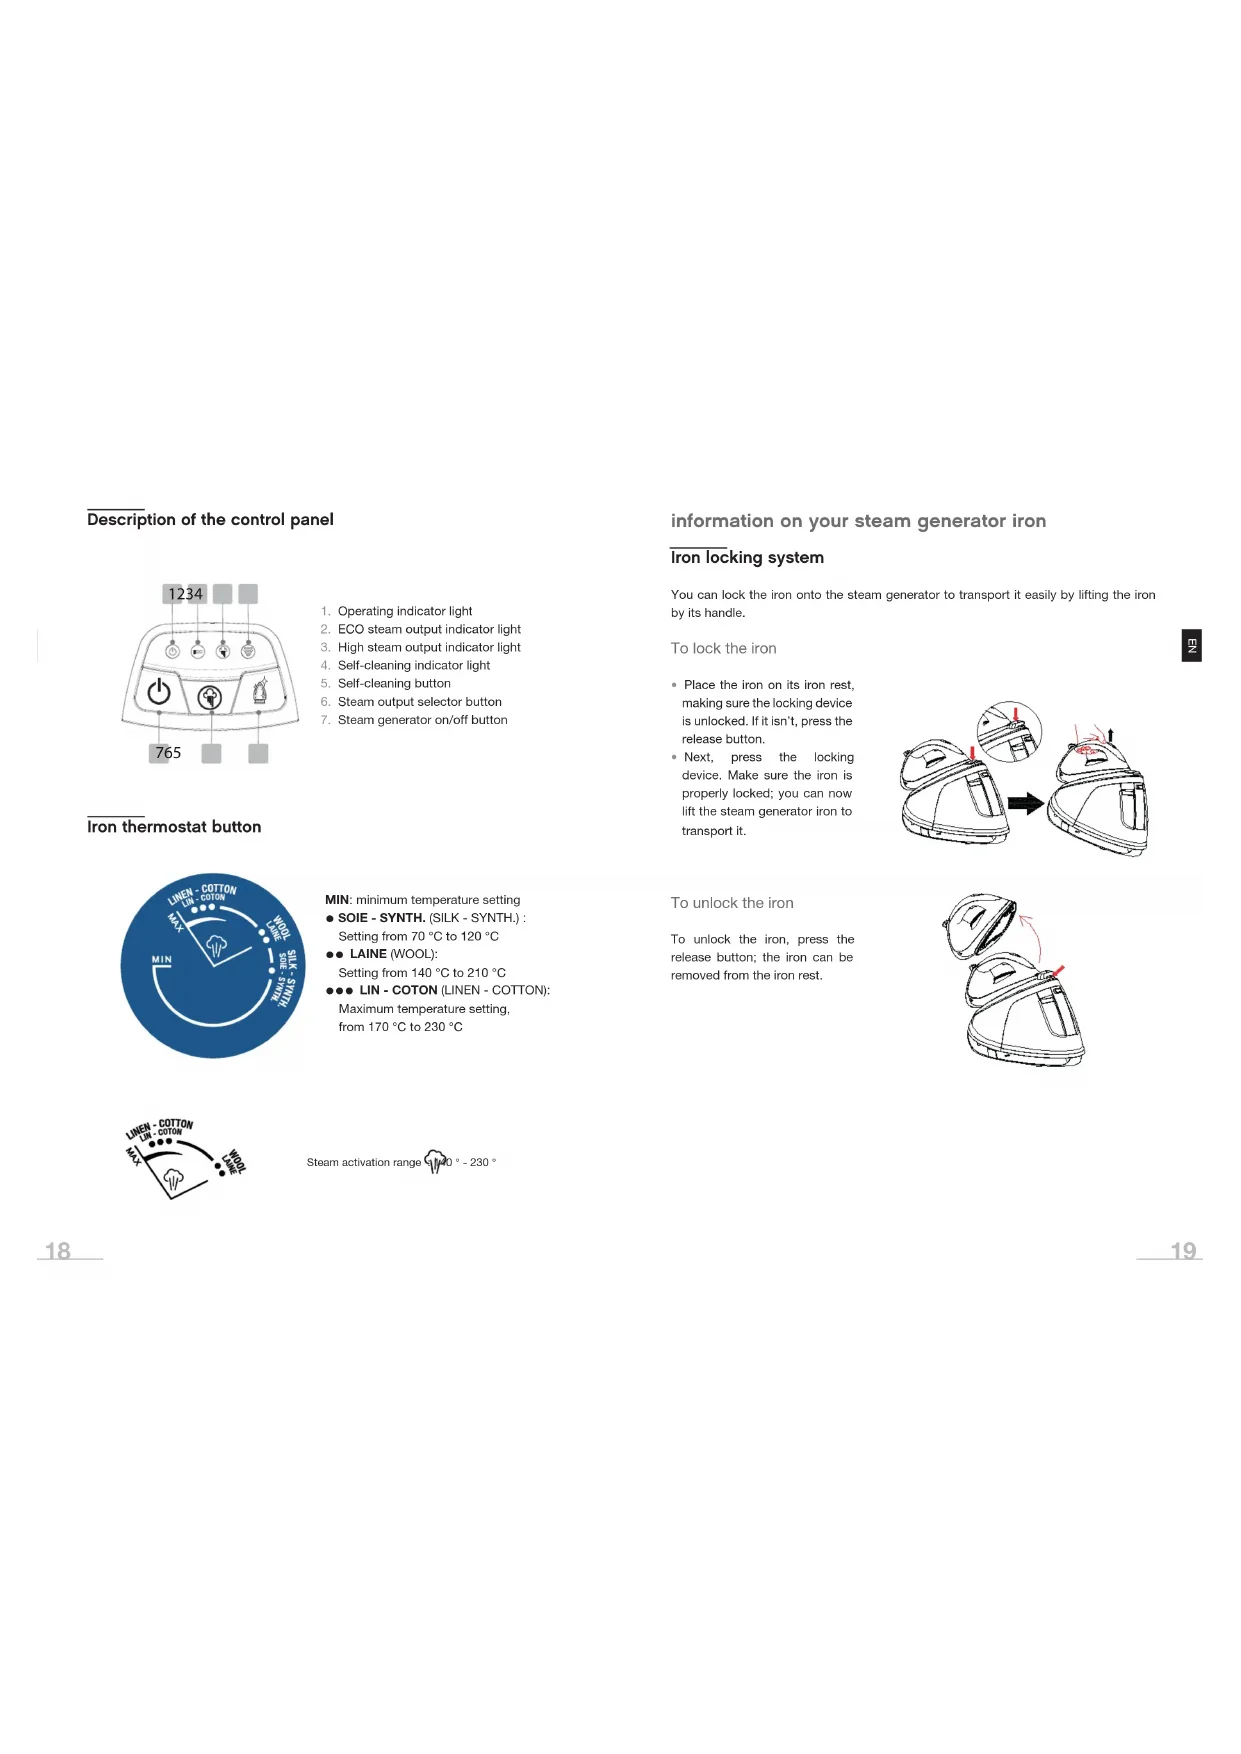
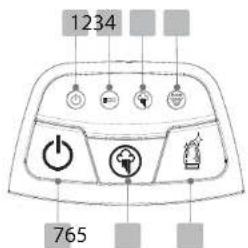
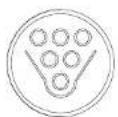
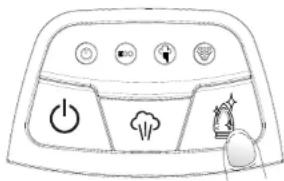
Description of the control panel
text_image
1234 765- Operating indicator light
- ECO steam output indicator light
- High steam output indicator light
- Self-cleaning indicator light
- Self-cleaning button
- Steam output selector button
- Steam generator on/off button
Iron thermostat button
text_image
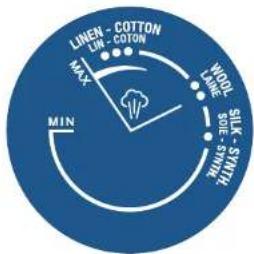
LINEN - COTTON LIN - COTON KNC MIN WOOL LARGE SILK - SMTTLA MINT SWEARMIN: minimum temperature setting
● SOIE - SYNTH. (SILK - SYNTH.) : Setting from 70 °C to 120 °C
● LAINE (WOOL):
Setting from 140 °C to 210 °C
●●● LIN - COTON (LINEN - COTTON):
Maximum temperature setting,
from 170 °C to 230 °C

Steam activation range 1140° - 230°
information on your steam generator iron
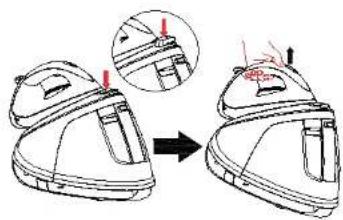
Iron locking system
You can lock the iron onto the steam generator to transport it easily by lifting the iron by its handle.
To lock the iron
- Place the iron on its iron rest, making sure the locking device is unlocked. If it isn't, press the release button.
- Next, press the locking device. Make sure the iron is properly locked; you can now lift the steam generator iron to transport it.
natural_image
Diagram showing a device being processed from a base to a side, with an inset close-up highlighting the process (no text or symbols present)To unlock the iron
To unlock the iron, press the release button; the iron can be removed from the iron rest.

natural_image
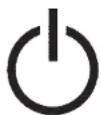
Line drawing of a mechanical device with a folded top and internal components, showing a red arrow indicating rotation (no text or symbols)ON/OFF button

- To switch on the steam generator iron, press the on/off button; the operating indicator light comes on.
- To switch it off, press and hold the on/off button for 2 seconds.
Iron thermostat indicator light
When the iron heats up, the thermostat indicator light is on. The light goes out again when the iron reaches the selected temperature. The indicator light switches on and off during use; it regulates the selected temperature. This is normal.
Self-cleaning
To extend the life of your steam generator iron and limit the formation of limescale, you must undertake the self-cleaning of the device when the symbol appears.
Please refer to the "Self-cleaning" paragraph in the "CLEANING" section at the end of the manual.
Steam output selection

When the indicator light stops flashing, press the steam output adjustment button to select the desired output:
- Low/Eco:

• High:

before initial use
- Before first use, carefully remove the protective films and all the bracing elements as well as the sticker from the sole plate.
- Place the steam generator iron on a flat and stable surface.
- Place the iron on its iron rest.
- Fully unwind the AC power cord and steam cord.
- Plug the power cord into a mains outlet; a beep is heard.
- Switch on the appliance and set the iron thermostat knob to the "MAX" position; heat the iron for a few minutes in order to remove any manufacturing residue from the sole plate.
NOTES:
- When you switch on the steam generator iron, you may hear a pumping noise. This is normal. It shows that water is being pumped through the system.
- When the sole plate is heating up, steam may automatically escape from it. This is normal.
use
Filling the water tank
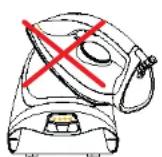
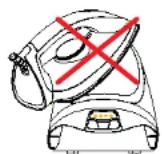
- Never immerse the steam generator iron in water or other liquids.
- Never add perfume, vinegar, starch, descaler or other products to the tank.
Fill the tank when using the appliance for the first time and when empty.
To do this, press the tank release button while pushing the tank against the generator, until you hear a "click".
Then, remove the tank by grabbing its handle.
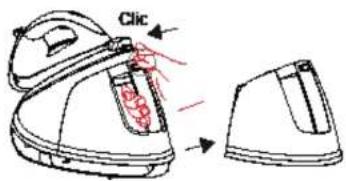
text_image
Clicb
What water should I use for ironing?
We recommend a half-and-half mixture of tap water and demineralised water. The proportion of demineralised water should be increased in hard water areas.
Never use demineralised water on its own as it could seriously damage your appliance.
Fill the tank with tap water via the filler hole by placing it under a tap.

natural_image
Technical line drawing of a mechanical component with a magnified inset showing a red tool (no text or symbols)Warning! Do not overfi ll beyond the "MAX" level mark. Tank capacity: 1.8 litres.
Next, put the tank back in place and make sure it is in the correct position.
Iron temperature adjustment
Set the recommended ironing temperature by turning the thermostat knob on the iron.
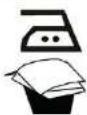
Check the washing labels on the clothes and follow the manufacturer's ironing instructions, often indicated by symbols similar to the ones below:

Temperature setting

- Acetate
• Elastane - Polyamide
- Polypropylene
- Polyester
- Nylon
- Polyester
- Cellulose
- Silk
• Viscose
• Wool
- Cotton
-
Linen
-
Sort the items to be ironed according to the type of fabric. This will enable you to reduce the frequency of temperature settings for different garments. The iron heats up quickly and cools down more slowly. That's why we advise you to start by ironing the most delicate fabrics.
- Test a small area on the back or inside of the garment if you are unsure of the type of fabric. Start with a low temperature and gradually increase it.
- Apply lighter pressure to heat-sensitive fabrics and always keep the iron moving.
- To better iron delicate fabrics such as silk, wool, velvet, etc. and prevent gloss marks, use a damp cloth.
- Never iron zip fasteners, buttons or transfers; only iron around them.
- If the fabric is made of different fibres, always select the temperature required by the most delicate fibre, i.e. the lowest temperature. If, for example, the fabric is composed of 60% polyester and 40% cotton, it must be ironed at the temperature indicated for polyester, i.e.: “●”.
- The symbol 📄 on the washing label means that the garment should not be ironed.

Never touch the iron sole plate when the iron is hot: risk of burns!
Dry ironing
The appliance can be used for dry ironing. To do this, unroll the power cord and the steam cord, place the steam generator iron on a flat and stable surface, plug the appliance into an earthed wall socket, and then:
- Press the ⏻ button to switch on the steam generator iron. The operating indicator light is on.
- Turn the iron thermostat knob to the recommended ironing temperature. Select "●", "●●" or "●●●" depending on the recommendations on the clothing label. (Please refer to the "Setting the iron temperature" paragraph).
- The thermostat indicator comes on. It goes out again when the desired temperature is reached. The iron is now ready for use.
NOTE: Do not press the steam trigger if you wish to iron without steam.
Steam ironing
- Place the steam generator iron on a flat and stable surface; fill the tank with tap water (Please refer to the "Filling the water tank" paragraph).
- Plug the power cord into an earthed mains outlet.
- Press the ⏻ button to switch on the steam generator iron. The operating indicator light is on.
- Turn the iron thermostat knob to the desired position: “●”, “●●” or “●●●” depending on the recommendations on the clothing label. The thermostat indicator light comes on. It goes out again when the desired temperature is reached.

Steam is not available if the steam indicator light is fl ashing. If you use it outside the “●●” or “●●●” modes, water may come out of the soleplate.
- Press the button to choose the desired steam output. A beep indicates that the setting has been taken into account and the corresponding output indicator light comes on:
• Low:

• High:

The defined setting by default is ECO.
- Press the steam release button to release the steam and release it when you no longer need steam.
- Press the steam release button twice for targeted steam diffusion, in particular to remove a crease or smooth out a particularly crumpled area.


Vertical steaming
This function enables you to smooth out delicate fabrics, curtains or other hanging fabrics. Refer to the "Steam ironing" paragraph on the previous page.
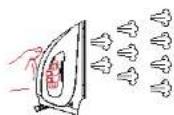
• If you iron a garment, hang it on a hanger.
- Gently stretch out the fabric, then press and release the steam button repeatedly while moving the iron up and down. Make sure you keep the iron far enough away from the garment for the material you are steaming (synthetic materials, silk, velvet, wool, etc.).

WARNING: BURN RISK! Do not apply steam directly to clothing or fabrics worn by people. The steam temperature is very high.
Automatic standby mode
The appliance has an automatic standby function should it not be used for a period of time:
- If steam is not used for a period of 10 minutes, the power cuts out and the appliance shuts down automatically. Press the button ⏻ (on/off) to start the steam generator iron.
Switching off the steam generator iron
- At the end of use, set the iron thermostat button to the "MIN" position.
- Press and hold the ⏻ button (on/off) for 2 seconds to switch off the steam generator iron.
- Unplug the AC power cord from the electrical outlet.
- Place the iron on its iron rest and lock it (refer to the "Iron locking system" paragraph). Leave the steam generator iron to cool down completely before storing it in a safe place. Wrap the power and steam cords around the steam generator iron to store them.

Make sure the iron is correctly positioned on its holder!

cleaning and maintenance

Before any cleaning or maintenance, make sure that your steam generator iron is unplugged from the power outlet and that the iron sole plate is cold.
Cleaning the iron
Never immerse the iron in water or run it under the tap.
- Clean the iron with a soft, slightly damp cloth.
- Use a damp cloth and a non-abrasive cleaner to remove any deposits from the sole plate or its holes.
- Never use sharp or pointed objects to remove deposits from the sole plate.
- Never use abrasive products, vinegar or descaling agents to clean the iron.
Emptying the water tank
Empty the water tank AFTER EACH USE.
Cleaning the steam generator
If necessary, clean the plastic parts of the steam generator iron using a soft, slightly damp cloth.
Self-cleaning
To extend the life of your steam generator iron and limit the formation of limescale, you must undertake self-cleaning when the 📋 indicator light comes on.
Note: This operation can be carried out more frequently, without waiting for the indicator light to come on. For example, if your water has a high limescale content or if you notice traces of limescale on the iron.
- Fill the tank.
- Stand above a heat-resistant container of at least 1 litre.
- Set the thermostat to the "MAX" position.
- Hold the iron horizontally by placing it above the container, so that any droplets can fall inside it.
- Press the 📁 button for 2 seconds; it starts flashing. Once you hear a beep, self-cleaning is underway: keep holding the iron horizontally, making sure the steam jets are not pointed at yourself or anyone else, as intense steam will be emitted: you may burn yourself. The 🌐 indicator light flashes throughout the self-cleaning process.
- After 2 minutes, self-cleaning is complete.
- Empty the water from the tank.
text_image
Diagram of a front panel with control buttons and icons, including power, cloud, and cleaning tools.
Do not point the steam jets at yourself or anyone else, as steam jets are burning hot.
frequently asked questions
Why does the iron smoke and produce a slight odour when it is used for the first time?
This is completely normal. Certain parts of the iron are lightly greased at the factory. It will stop very quickly.
Why are dirt particles coming out of my new iron's sole plate?
This happens with new irons and is quite normal. These particles are not dangerous and will stop appearing after a few uses. Hold the iron over an old cloth and press the steam release button when you start using your machine to avoid staining your clothes.
Why are dirt particles coming out of the iron when I'm ironing?
Impurities and chemical particles found in water may have been deposited on the sole plate. Clean the sole plate. If necessary, carry out the self-cleaning of the generator.
Drops of water flow from the sole plate. Why?
The iron soleplate is not hot enough to produce steam. This is normal. Make sure the button is in the steam activation area. Hold the iron over an old cloth and press the steam release button. The cloth absorbs the drops of water. After several seconds, the steam emission returns to normal.
Why does the sole plate get dirty?
Impurities and chemicals present in the water or on your clothes may have been deposited on the sole plate. These residues can come, for example, from your detergent or fabric softener. Clean the sole plate with a damp cloth.
Or, you may have set the temperature too high. Clean the sole plate with a damp cloth. Select the recommended ironing temperature.
What should I do if water is leaking from the steam generator iron's body?
There may be a limescale build-up inside your product or abrasive products may have been inserted into the appliance. If so, this can cause abnormal leakage. First of all, perform the self-cleaning procedure. If this does not solve the problem, contact your store's customer service department.
Is it normal that the steam generator iron heats up when in use?
Don't put your hands on areas that display the ⚠ symbol!
While other parts of the appliance may be slightly warm, they are not too hot to touch. If you feel the steam generator iron is excessively hot, unplug the appliance from the mains, let it cool down on a heat-resistant surface and contact your store's customer service department.
text_image
LINEN - COTTON LIN - COTON LNX WOOL LNG SILK SILMS MINnatural_image
Diagram showing a device being processed from a front view, with no visible text or symbols.
natural_image
Line drawing of a mechanical device with a lid and handle, showing a curved arrow indicating rotation (no text or symbols)Ein-/Aus-Schalter

natural_image
Technical line drawing of a mechanical component with a magnified inset showing a red section (no text or symbols)natural_image
Illustration of a hand using an iron to clean air with multiple cloud-shaped objects below (no text or symbols)Vertikales Glätten
text_image
Diagram of a front panel with control buttons and icons, including power, alarm, cloud, and refresh symbols.natural_image
Diagram showing a device being adjusted from front to side, with an inset close-up highlighting the component (no text or symbols present)natural_image
Line drawing of a mechanical device with a folded top and handle, showing a red arrow indicating rotation (no text or symbols)Aan/uit-knop
natural_image
Technical line drawing of a mechanical component with a magnified inset showing a red-handled detail (no text or symbols)text_image
Diagram of a front panel with labeled buttons including power, climate, and fire protection symbols
All information, designs, drawings and pictures in this document are the property of SOURCING & CREATION. SOURCING & CREATION reserves all rights to its brands, designs and information. Any copy and reproduction through any means shall be deemed and considered as counterfeiting.
Protection of the environment
This symbol attached to the product means that it is an appliance whose disposal is subject to the directive on waste from electrical and electronic equipment (WEEE). This appliance may not in any way be treated as household waste and must be subject to a specific type of removal for this type of waste. Recycling and
recovery systems are available in your area (waste removal) and by distributors. By taking your appliance at its end of life to a recycling facility, you will contribute to environmental conservation and prevent any harm to your health.

Umweltschutz
\* Tested in our laboratories
Warranty valid from the date of purchase (receipt as proof of purchase). This warranty does not cover defects or damage caused by improper set up, incorrect use, or normal wear and tear of this product.
\* In unseren Labors getestet
SERVICE RELATION CLIENTS / Customer Relations Department / Kundenservice / Klantenafdeling
Avenue de la Motte CS 80137
59811 Lesquin cedex contact@sc-ub.com
FABRIQUÉ EN R.P.C. / Made in China / Hergestellt in VR China / Gefabriceerd in VRC.
SOURCING & CREATION
Avenue de la Motte 59810 Lesquin - FRANCE