EMEG253n - Microwaves ESSENTIELB - Free user manual and instructions
Find the device manual for free EMEG253n ESSENTIELB in PDF.
| Product type | Microwave oven |
| Brand | ESSENTIELB |
| Model | EMEG253n |
| Power supply | 230 V – 50 Hz |
| Microwave power (nominal) | 1450 W |
| Microwave power (output) | 900 W |
| Grill power | 1000 W |
| Capacity | 25 litres |
| Dimensions (W x D x H) | 59,5 x 40,1 x 38,8 cm |
| Net weight | 19,5 kg |
| Turntable diameter | 31,5 cm |
| Frequency | 2450 MHz |
| Timer | 95 minutes |
| Microwave power levels | 5 (P100, P80, P50, P30, P10) |
| Defrost functions | 2 (by weight and by time) |
| Automatic programs | 8 (A1 to A8) |
| Cooking modes | Microwave, grill, combination (C-1, C-2) |
| Child lock | Yes |
| Interior light | Yes |
| End-of-cooking audible signal | Yes |
| Installation type | Built-in |
| Exterior material | Painted metal |
| Package contents | Oven, glass turntable, raising platform, fixing kit, installation template, manual |
Frequently Asked Questions - EMEG253n ESSENTIELB
User questions about EMEG253n ESSENTIELB
0 question about this device. Answer the ones you know or ask your own.
Ask a new question about this device
Download the instructions for your Microwaves in PDF format for free! Find your manual EMEG253n - ESSENTIELB and take your electronic device back in hand. On this page are published all the documents necessary for the use of your device. EMEG253n by ESSENTIELB.
USER MANUAL EMEG253n ESSENTIELB
Four micro-ondes encastrable / Built-in microwave oven / Einbaumikrowellenofen / Inbouwmagnetron
EMEG253n
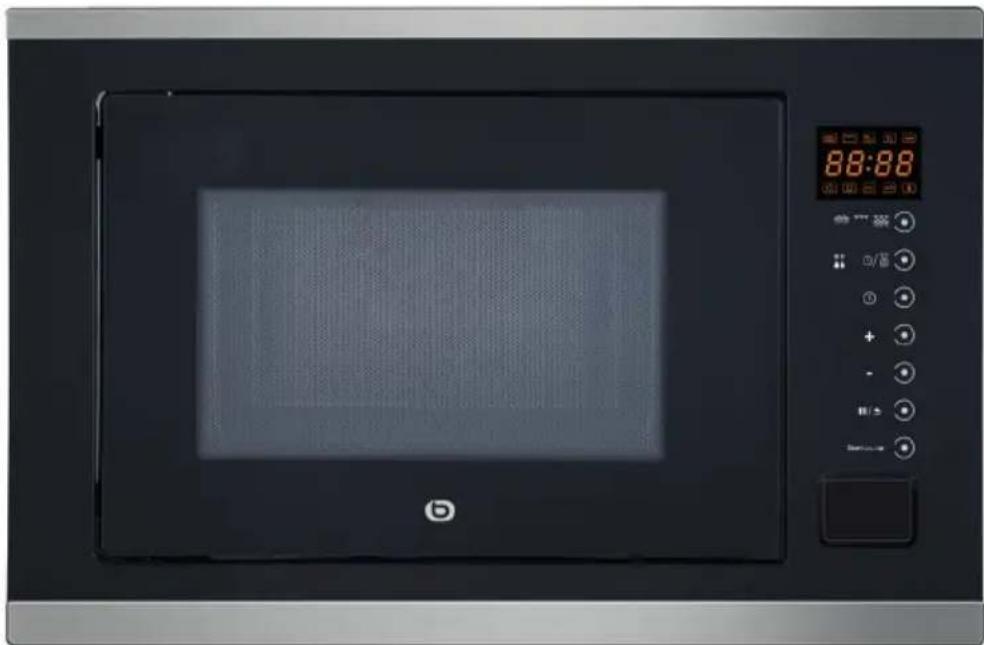
natural_image
Front view of a modern microwave oven with digital display and control buttons (no visible text or symbols on the main body)Notice d'utilisation / User guide / Bedienungsanleitung / Gebruiksaanwijzing

text_image
Diagram of a microwave oven with numbered parts and an inset showing internal components| FR EN DE NL | ||||
| 1 | Porte Door Tür Deur | |||
| 2 | Système de verrouillage de la porte | Door safety locking mechanism | Sicherheits verriegelung der Tür | Beveiligend vergrendelings systeem van het deurtje |
| 3 | Hublot Window Sichtfenster | Raampje | ||
| 4 | Plateau tournant en verre | Turntable glass plate Drehteller aus Glas Glazen draaiplateau | ||
| 5 | Anneau du plateau tournant | Turntable ring Drehtellerring Ring van het draaiplateau | ||
| 6 | Axe du plateau tournant | Turntable axis | Achse des Drehtellers | As van het draaiplateau |
| 7 | Bandeau de commandes | Control panel | Bedienfeld | Bedieningspaneel |
| 8 | Plaque mica du guide d'ondes | Mica plate wave guide | Glimmerscheibe des Wellenleiters | Mica plaat van de golfgeleider |

text_image
1 2 3 4 5 6 7 8 9text_image
Diagram showing a microwave oven with warning sign and mitten, indicating cooking or cleaning steps| Affi chage Micro-ondes | Gril | |
| C-1 | 55% | 45% |
| C-2 | 36% | 64% |
Minuteur
You have just acquired an Essentiel b brand product and we thank you for doing so. We pay particular attention to the RELIABILITY, EASE-OF-USE and DESIGN of our products.
We hope this microwave oven will give you complete satisfaction.
contents
your product 22
Packaging contents 22
Technical characteristics 22
Unpacking the oven 23
Earthing 23
installation (built-in) 24
Recommended installation example 25
Installation procedure 26
First use 28
Utensil guide 28
Using the height booster 29
use 30
Setting the clock 30
Microwave cooking 30
Grill or cooking combined 31
Timer 31
Cooking in several modes 32
Defrosting by weight 32
Defrosting by time 32
Automatic programmes 32
Rapid cooking 33
Function check 34
Child lock function 34
Specifications 34
cleaning and maintenance 35
Cleaning the inside of the microwave 35
Cleaning the outside of the oven 36
troubleshooting guide 36
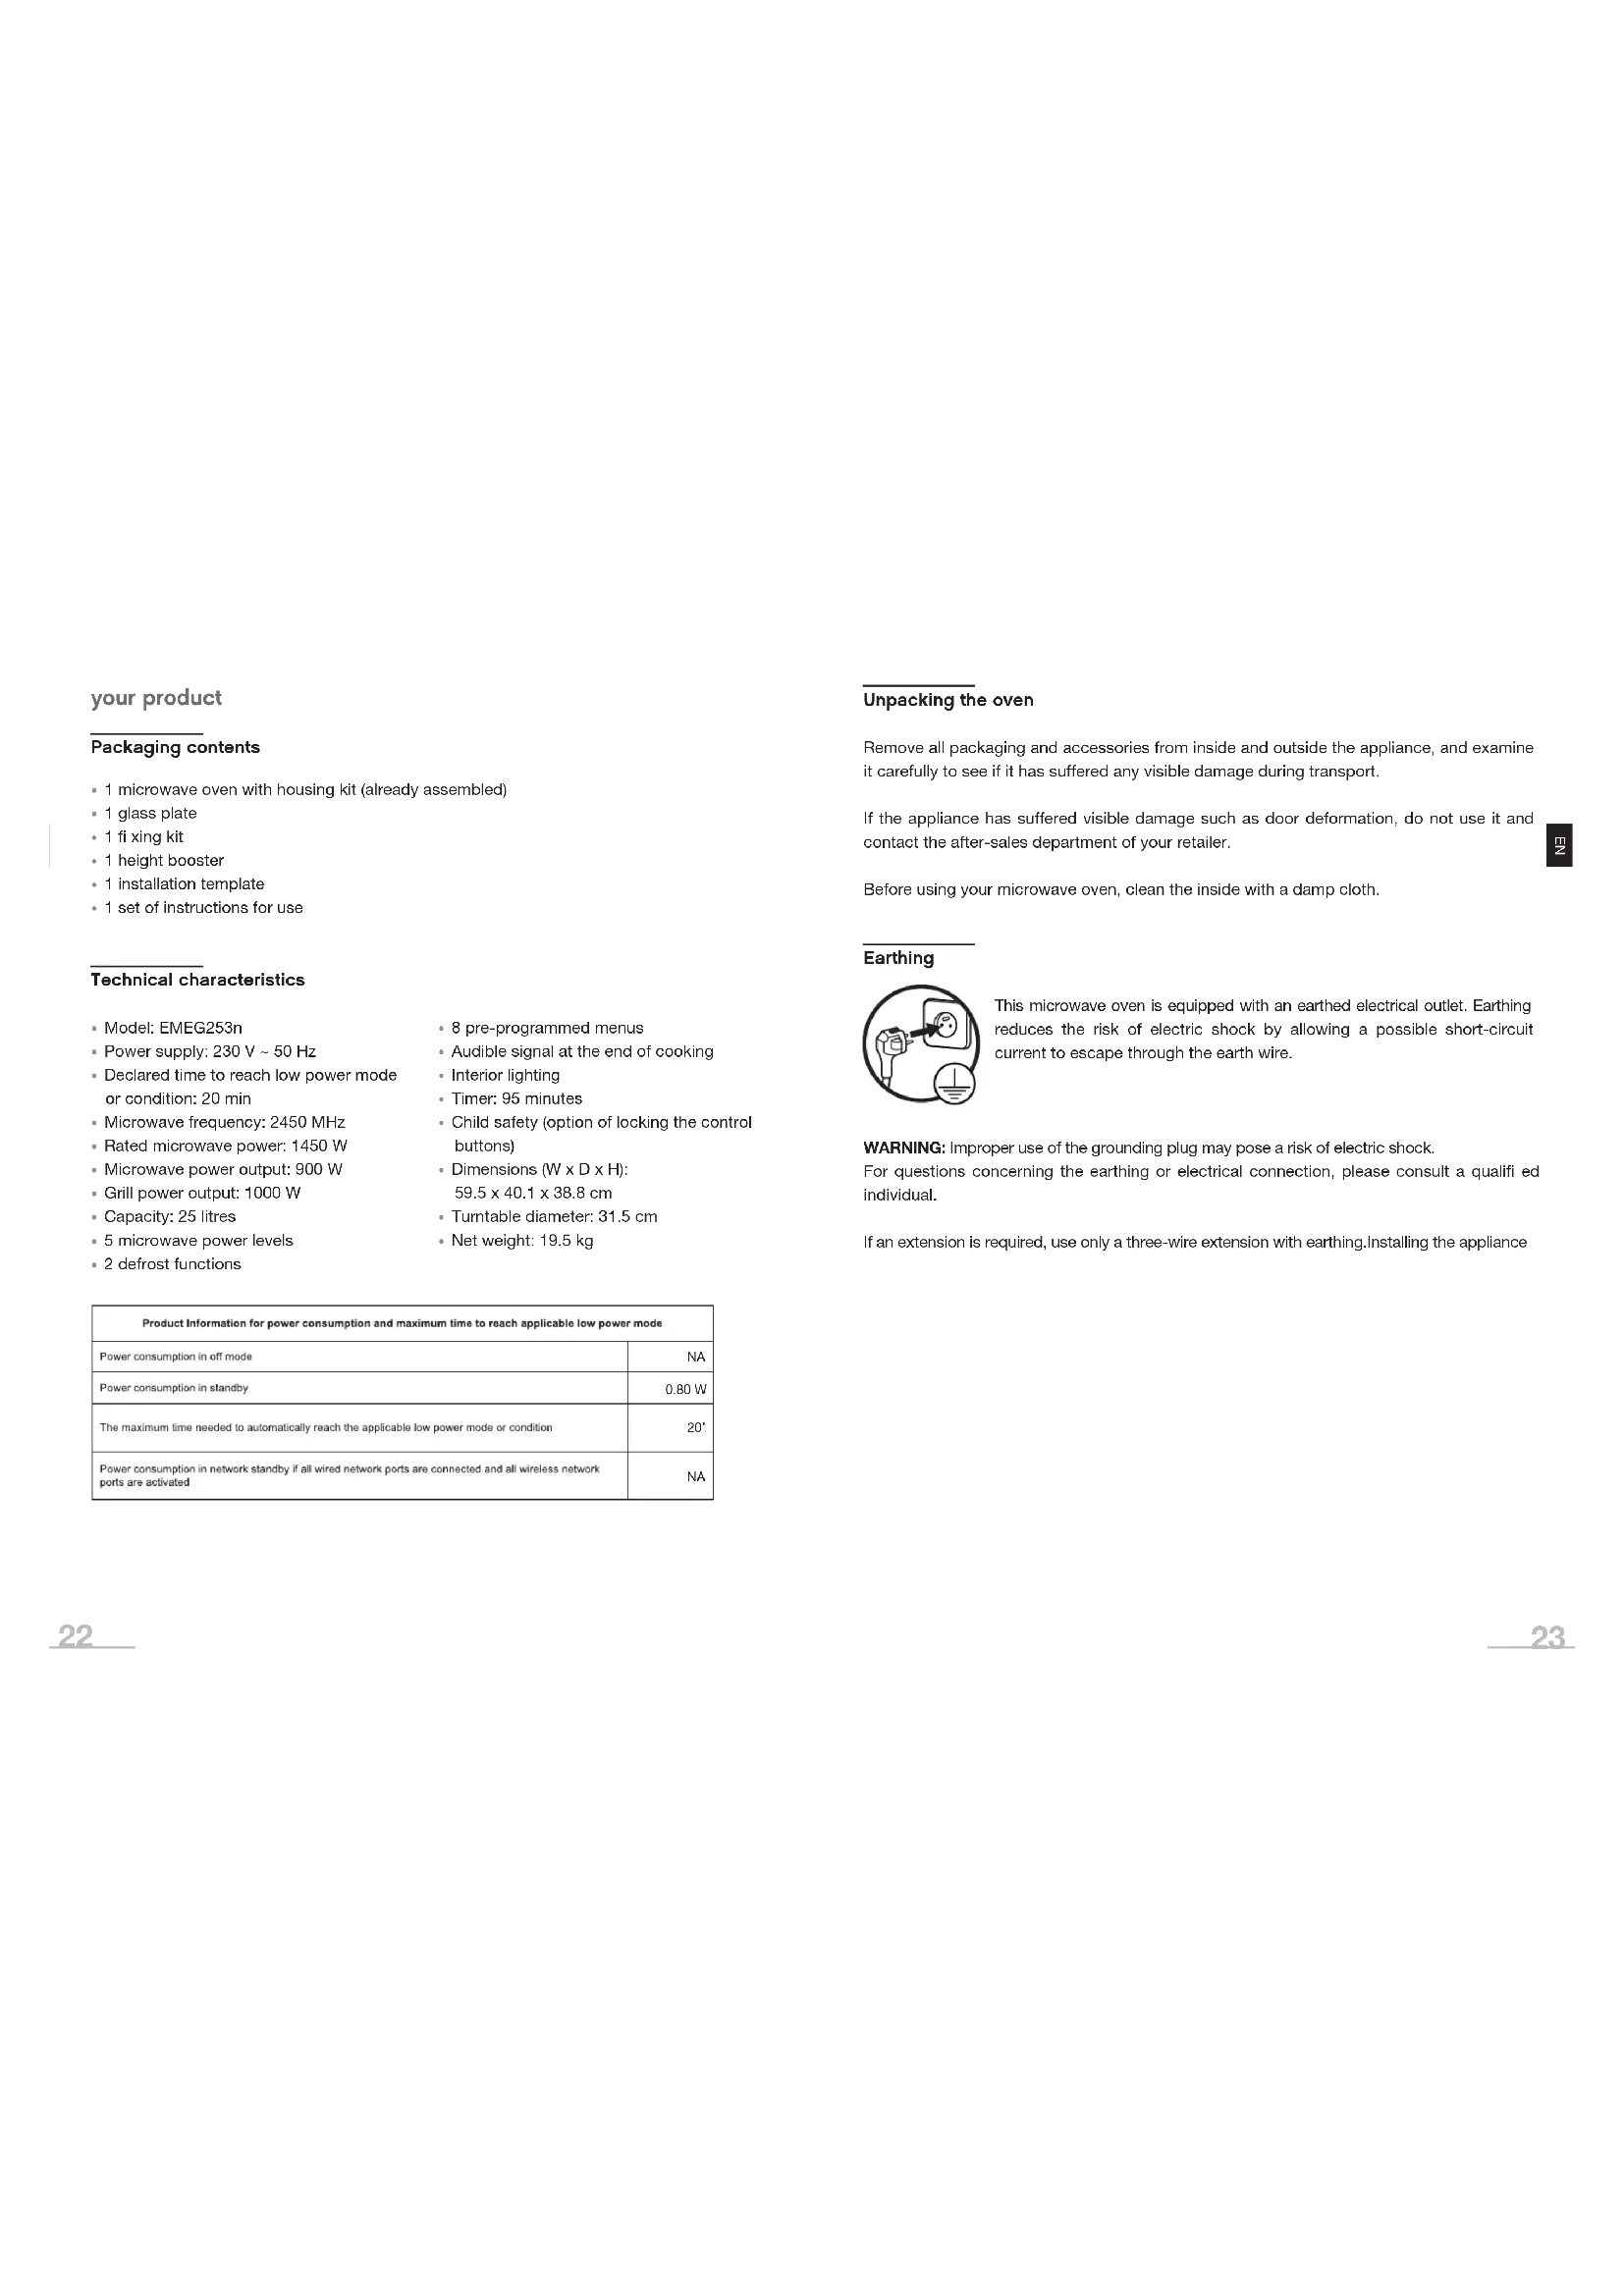
your product
Packaging contents
- 1 microwave oven with housing kit (already assembled)
- 1 glass plate
- 1 fixing kit
- 1 height booster
- 1 installation template
- 1 set of instructions for use
Technical characteristics
- Model: EMEG253n
• Power supply: 230 V \~ 50 Hz - Declared time to reach low power mode or condition: 20 min
- Microwave frequency: 2450 MHz
- Rated microwave power: 1450 W
- Microwave power output: 900 W
- Grill power output: 1000 W
- Capacity: 25 litres
- 5 microwave power levels
-
2 defrost functions
-
8 pre-programmed menus
• Audible signal at the end of cooking - Interior lighting
- Timer: 95 minutes
- Child safety (option of locking the control buttons)
• Dimensions (W x D x H):
59.5 x 40.1 x 38.8 cm
• Turntable diameter: 31.5 cm - Net weight: 19.5 kg
| Product Information for power consumption and maximum time to reach applicable low power mode | |
| Power consumption in off mode | NA |
| Power consumption in standby | 0.80 W |
| The maximum time needed to automatically reach the applicable low power mode or condition | 20' |
| Power consumption in network standby if all wired network ports are connected and all wireless network ports are activated | NA |
Unpacking the oven
Remove all packaging and accessories from inside and outside the appliance, and examine it carefully to see if it has suffered any visible damage during transport.
If the appliance has suffered visible damage such as door deformation, do not use it and contact the after-sales department of your retailer.
Before using your microwave oven, clean the inside with a damp cloth.
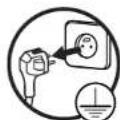
Earthing

This microwave oven is equipped with an earthed electrical outlet. Earthing reduces the risk of electric shock by allowing a possible short-circuit current to escape through the earth wire.
WARNING: Improper use of the grounding plug may pose a risk of electric shock.
For questions concerning the earthing or electrical connection, please consult a qualified individual.
If an extension is required, use only a three-wire extension with earthing. Installing the appliance
installation (built-in)
- The appliance must be installed in accordance with national electrical installation rules.
- Do not install your microwave oven on a hob or any appliance that produces heat. This may damage your oven and the warranty will not apply in this case.
- Do not install this microwave oven outside or in very humid or excessively hot rooms.
- Neither should you place this microwave oven near a radio or television set, as the magnetic field from the oven may create interference and noise.
- Do not place anything on top of the microwave oven.
- Before plugging in your appliance, make sure the electrical voltage in your home matches that on the microwave oven nameplate and that the power cord plug is the right kind for the outlet.
- Plug your microwave oven into a grounded wall outlet.
- WARNING! You must not remove the mica plate (wave outlet) which is screwed into the oven cavity to protect the magnetron.
Recommended installation example

Before using your microwave oven, you must install it correctly in its built-in recess, following the instructions below.
In a column above an oven
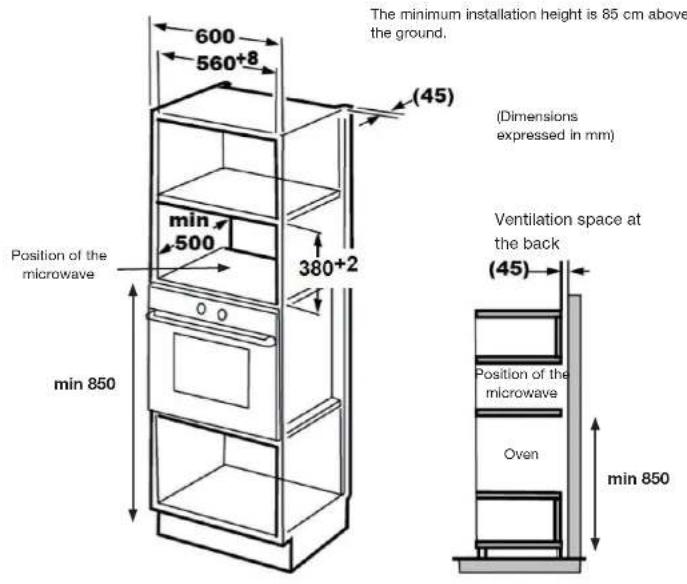
text_image
The minimum installation height is 85 cm above the ground. 600 560+8 (45) (Dimensions expressed in mm) min 500 380+2 Position of the microwave 0 0 min 850 Ventilation space at the back (45) Position of the microwave Oven min 850Installation procedure
- Two people are recommended for installing the microwave oven in the built-in recess (for connecting the oven).
- Make sure the power cord isn't pinched or kinked, and that the ventilation openings aren't blocked.
- Read the instructions provided on the template. Place the mounting template in the built-in recess, cut as indicated and position the "FRONT FACE" side on the front edge of the recess. Be sure to centre it.
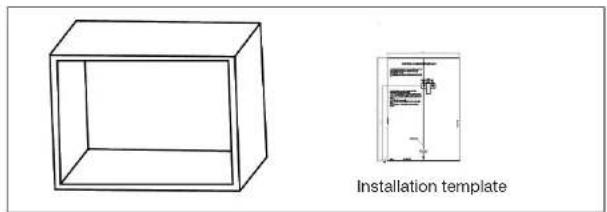
natural_image
Technical line drawing of a 3D cube and its corresponding installation template diagram (no text or symbols)- Mark points "a" using the template.
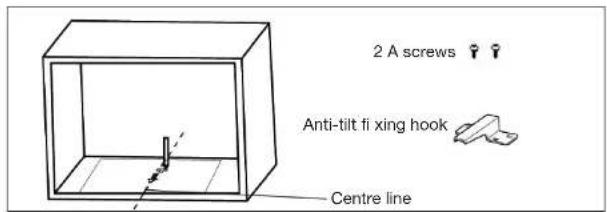
text_image
2 A screws Anti-tilt fi xing hook Centre line- Remove the template and screw the fixing hook with the 2 A screws.
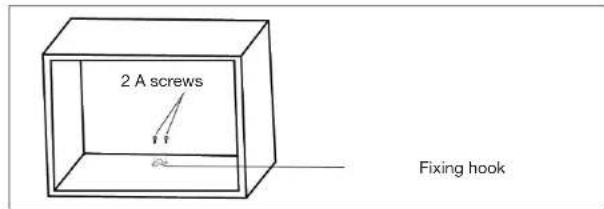
text_image
2 A screws Fixing hook- Install the oven in the built-in recess. Make sure the back of the oven fits nicely onto the fixing hook. Make sure the power cord isn't pinched or kinked.
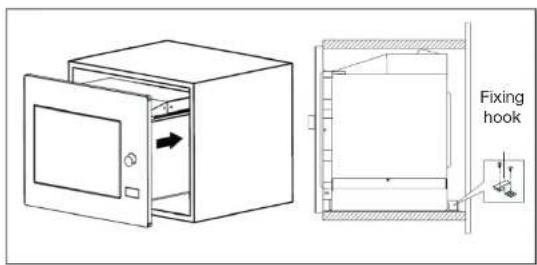
text_image
Technical diagram showing a door open and a side-view view of a fixing hook with labeled components.- Open the door and screw the B screw into the hole. Cover the hole with the cap.

text_image
1 B screw Installation holeFirst use
As the cavity of the microwave oven or the heating elements may contain grease or certain manufacturing residues, it is common for a slight odour to be released (or even a little smoke) during first use. This is normal and will stop after several uses. Ventilate your room by opening the doors and windows to dispel odours.
Utensil guide
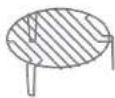
Glass turntable plate
- Never place the glass plate upside down. It is designed to fit perfectly on the drive coupler.
- The glass plate and turntable ring must always be in position in the microwave oven when in use.
- Handle the plate carefully to avoid breaking it.
- If the glass plate is cracked or broken or if the turntable ring is damaged, do not use the microwave oven and contact your store's after-sales service.
- Always place the food and containers on the glass plate for cooking. Make sure the dish is properly centred in the middle of the glass plate to prevent it from knocking against the walls or door.

flowchart
graph TD
    A["Top Circular Component"] --> B["A"]
    B --> C["B"]
    C --> D["C"]
    D --> E["D"]
    style A fill:#f9f,stroke:#333
    style B fill:#ccf,stroke:#333
    style C fill:#cfc,stroke:#333
    style D fill:#fcc,stroke:#333
Other utensils (not provided)
- Generally, ceramic, glass and heat-resistant plastic containers are suitable for microwave cooking. Check that the container is labelled "Safe for use in microwave ovens".

text_image
Safety warning symbols and icons for a microwave oven, including crossed-out and open outlets with text labels.- It is advisable to cover food with a steam cover or plastic film to:
- prevent excessive evaporation (mainly during very long cooking times);
- reduce cooking times;
- avoid drying out the food;
- preserve the taste.
- The cover must have small openings and plastic films must be pierced with a few holes so that the pressure doesn't build up. Not all types of plastic film are microwave-safe. See package directions.
Using the height booster
Place the height booster on the turntable. It allows heat to circulate properly around the food. You can also use it to heat two dishes simultaneously.
- The height booster can be used in Grill mode and with the combined
functions "C-1" and "C-2" (microwave and grill). It should never be used in microwave mode alone.
use
Setting the clock
- When the microwave is on, the LED display will show "0:00", and the alarm sounds once.
- Press twice to select the clock function: the hour digits will begin to flash.
- Press for to set the hour digits, in a range from 0 to 23.
- Press the minute digits start flashing.
- Press or to set the minute digits, in a range from 0 to 59.
- Press Ⓛ to finish setting the clock. The ":" will blink, and the time lights up.

Note: The clock function will not work if the clock isn't set. During the clock setting process, if you press III / 5, the oven will automatically return to the previous mode.
Microwave cooking
- Press ≈ ≈ ≈ once, and the LED display will show "P 1 0 0".
- Press ≈ ≈ ≈ several times or press + or - to choose the desired power, and "P100", "P80", "P50", "P30" or "P10" will be displayed each time you press it.
- Then press "Start/+30 sec/OK" to confirm, and press + or - to set the cooking time from 0:05 to 95:00. Press "Start/+30 sec/OK" again to start cooking.

Note: the steps for setting the cooking time are as follows
Grill or combined cooking
- Press once, the LED display will show "P100".
- Press 🐘 🐘 🐘 repeatedly or press + or — to choose grill or combination mode, and "G", "C-1" or "C-2" will be displayed each time you press it.
- Then press "Start/+30 sec/OK" to confirm, and press for to set the cooking time from 0:05 to 95:00. Press "Start/+30 sec/OK" again to start cooking.

Note: If half the grill time has passed, the oven will ring twice, which is normal. To obtain a better grilling result, you should turn the food over, close the door, and press "Start/+30 sec/OK" again to continue cooking. If you do nothing, the oven will continue cooking.
| Display | Microwave | Grill |
| C-1 | 55% | 45% |
| C-2 | 36% | 64% |
Timer
- Press once, and the LED display will show 00:00.
- Press + to enter the desired time. (The maximum cooking time is 95 minutes.)
- Press "Start/+30 sec/OK" to confirm the setting.
- When the time is reached, the timer light goes out. The alarm sounds 5 times. If the clock has been set (24-hour system), the LED display will show the current time.
Cooking in several modes
- A maximum of two cooking modes can be selected. In this configuration, if one of the modes is defrost, defrosting should automatically be done first. When the first part is over, the alarm sounds before the second part begins.
Defrost by weight
- Press ♦♦/and the oven will display "dEF1".
- Press for to select the food weight from 100 to 2000 g.
- Press "Start/+30 sec/OK" to start defrosting.
Defrost by time
- Press ^** twice and the oven will display "dEF2".
- Press + to select the defrost time. The maximum duration is 95 minutes.
- Press "Start/+30 sec/OK" to start defrosting.
Automatic programmes
- Press + to activate the Auto menu, then press + or - to choose the menu, and function "A1" to "A8" will be displayed.
- Press "Start/+30 sec/OK" to confirm.
- Press + to choose the default weight from the menu table.
- Press "Start/+30 sec/OK" to start cooking.
| Menu Weight Display | ||
| A1 PIZZA | 200 g 200 | |
| 400 g 400 | ||
| A2 MEAT | 250 g 250 | |
| 350 g 350 | ||
| 450 g 450 | ||
| A3 VEGETABLE | 200 g 200 | |
| 300 g 300 | ||
| 400 g 400 | ||
| A4 PASTA | 50 g (with 450 ml cold water) 50 | |
| 100 g (with 800 ml cold water) 100 | ||
| A5 POTATO | 200 g 200 | |
| 400 g 400 | ||
| 600 g 600 | ||
| A6 FISH | 250 g 250 | |
| 350 g 350 | ||
| 450 g 450 | ||
| A7 BEVERAGE | 1 tasse (120 ml) 1 | |
| 2 tasses (240 ml) | 2 | |
| 3 tasses (360 ml) | 3 | |
| A8 POPCORN | 50 g | 50 |
| 100 g 100 | ||
Rapid cooking
- When stopped, press the "Start/+30 sec/OK" button to cook at 100% power for 30 seconds. Each press of the same button increases the time by 30 seconds. The maximum cooking time is 95 minutes.
- In microwave, grill, combined cooking or defrosting by time mode, press the "Start/+30 sec/OK" button to increase the cooking time by 30 seconds. Each press of the same button increases the time by 30 seconds. The maximum cooking time is 95 minutes.
Function check
- In microwave, grill, combination or convection mode, press the power used
will be displayed for 3 seconds. After 3 seconds, the oven will return to the previous mode. - In cooking mode, press Ⓛ to check the time, and the time will be displayed for 3 seconds.
Child lock function
- Locking: When stopped, press 14/2 seconds, there will be a long beep indicating that the child lock has been activated, and the time will be displayed if it has been set, otherwise, the LED display will show ....
- Unlocking: In locked mode, press 11b/2 seconds, and there will be a long beep indicating that the lock has been deactivated.
Specifications
- You must press "Start/+30 sec/OK" to continue cooking if the door is opened during cooking;
- Once the cooking programme is set, if you don't press "Start/+30 sec/OK" for 1 minute, the time will be displayed, and the setting will be cancelled.
- The alarm sounds each time you press the button. If you don't press the button correctly, there will be no response.
- The alarm will sound fi ve times to let you know that cooking is complete.
cleaning and maintenance
IMPORTANT: Unplug the power cord from the electrical outlet before cleaning and, if possible, leave the door open to disable the oven.
- Clean the oven regularly and remove any food deposits: if the appliance is not kept in a good state of cleanliness, its surface could deteriorate and inexorably affect the life of the appliance and lead to a dangerous situation.
Cleaning the inside of the microwave
- Food spills and splashes inside the oven should be cleaned daily with a soft sponge and warm, soapy water.
- Also clean the door seals. Rinse with clean water and dry thoroughly with a soft cloth.
- Do not use abrasive detergents or scouring sponges for cleaning as this may scratch the coatings or the door.
- Regularly check the cleanliness of the mica plate (wave outlet) located on the right side of the oven cavity.
- Warning: excessive accumulation of food residue on the mica plate can cause electric arcs inside the cavity. Encrusted splashes could overheat, smoke or start a fire.
- Never remove the mica plate (waveguide).
- You can clean the glass turntable, drive coupler and turntable plate ring once they have cooled down with a soft sponge and hot soapy water. Rinse them with clean water and dry them thoroughly with a soft cloth.
- Cleaning tip: for easy cleaning of the interior surfaces of the oven, place half a lemon in a bowl of water and heat at 100% microwave power for 2 minutes. Then wipe the inside of the oven with a soft, dry cloth.
Cleaning the outside of the oven
- The outside of the microwave oven is made of painted metal. Clean it with a soft cloth slightly moistened with warm soapy water and then with clean water. Then dry thoroughly with a clean, dry cloth.
- Be careful not to get water inside the appliance through the ventilation openings.
- Clean the control panel carefully. Wipe it with a soft, slightly damp cloth (with water only). Do not use chemicals. Avoid excess water.
troubleshooting guide
CAUTION: to prevent any danger, it's imperative, in the event of a problem, to contact the after-sales department of your retailer or a qualified electrician approved for this type of repair.
| Normal operation | |
| Microwave oven interfering with your television reception. | Television and radio reception may be interfered with while the microwave oven is running. This interference is similar to that generated by small electrical appliances such as blenders, vacuum cleaners and electric fans. This is normal. |
| Oven light dim. During microwave cooking at low power, the oven light may dim. This is normal. | |
| Steam builds up on the door and hot air escapes from the vents. | During cooking, steam is released from the food. This generally escapes through the vents, but a small amount accumulates on cold surfaces like the door of the oven. This is normal. |
| Accidental use of the oven without food inside. | Using the oven when it's empty will not damage it if it's only for a short period. But this is not recommended. |
| Problems Possible causes | Solutions | |
| The oven no longer works. | The power cord is not properly plugged in. | Unplug the appliance, wait for 10 seconds and plug it back in. |
| Fuse blown or circuit breaker tripped. | Replace the fuse or reset the circuit breaker. | |
| Problem with the electrical outlet. | Try the outlet by plugging in other electrical appliances. | |
| The oven does not heat. The door is not closed properly. | Close the door properly. | |
| The glass turntable plate makes a noise when the microwave oven is on. | The surface, on which the wheels of the turntable roller ring rest, and the bottom of the oven are dirty. | Read the paragraph on "Cleaning & Maintenance" to clean dirty surfaces. |
In any case, in the event of a malfunction, unplug the device from the socket and contact the after-sales service of your retailer. Do not repair the appliance yourself.
text_image
Illustration of a microwave oven with warning sign and mitten, indicating cooking or cleaning stepstext_image
Safety warning symbols and food safety icons including crossed-out kitchen, cooking pot, fork, and microwave ovenAll information, designs, drawings and pictures in this document are the property of SOURCING & CREATION. SOURCING & CREATION reserves all rights to its brands, designs and information. Any copy and reproduction through any means shall be deemed and considered as counterfeiting.
Protection of the environment
This symbol attached to the product means that it is an appliance whose disposal is subject to the directive on waste from electrical and electronic equipment (WEEE). This appliance may not in any way be treated as household waste and must be subject to a specific type of removal for this type of waste. Recycling and
recovery systems are available in your area (waste removal) and by distributors. By taking your appliance at its end of life to a recycling facility, you will contribute to environmental conservation and prevent any harm to your health.

Umweltschutz
\* Tested in our laboratories
Warranty valid from the date of purchase (receipt as proof of purchase). This warranty does not cover defects or damage caused by improper set up, incorrect use, or normal wear and tear of this product.
\* In unseren Labors getestet
Customer Relations Department / Kundenservice / Klantenafdeling
Avenue de la Motte CS 80137
59811 Lesquin cedex contact@sc-ub.com
Art. 8009438
Ref. EMEG253n
FABRIQUÉ EN R.P.C. / Made in China /