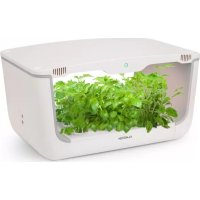
GrowIt Farm - Smart Home Klarstein - Free user manual and instructions
Find the device manual for free GrowIt Farm Klarstein in PDF.


User questions about GrowIt Farm Klarstein
0 question about this device. Answer the ones you know or ask your own.
Ask a new question about this device
Download the instructions for your Smart Home in PDF format for free! Find your manual GrowIt Farm - Klarstein and take your electronic device back in hand. On this page are published all the documents necessary for the use of your device. GrowIt Farm by Klarstein.
USER MANUAL GrowIt Farm Klarstein
Congratulations on purchasing this equipment. Please read this manual carefully and take care of the following hints to avoid damages. Any failure caused by ignoring the items and cautions mentioned in the instruction manual is not covered by our warranty and any liability. Scan the QR code to get access to the latest user manual and other information about the product

CONTENTS
Safety Instructions 28
Assemble 29
Disassemble 32
Mounting the Combi-Accessories 34
Planting Accessories 36
Start and Indicator Lights 37
Preparation 38
Seeding 40
Cultivation 42
Frequently Asked Questions 47
Hints on Disposal 49
TECHNICAL DATA
| Item number | 10033115, 10033119, 10033120, 10033121, 1003122 |
| 10033123, 10033124, 10033125, 10033126 | |
| Power supply 220-240 V ~ 50/60 Hz | |
SAFETY INSTRUCTIONS
Special Instructions
- This product is not designed for use by persons (including children) who have reduced physical, sensory or mental capacities or persons with no experience or knowledge, unless they are instructed and supervised in the use of the appliance by a person responsible for their safety. Children should be supervised to ensure that they do not play with the appliance. Cleaning and maintenance operations must not be performed by children without supervision.
- The appliance is not designed for commercial use. It is intended for use in domestic households.
- If the supply cord is damaged, it must be replaced by the manufacturer or its service agent or a similarly qualified person in order to avoid the hazard.
- This product has no user-serviceable parts. Do not attempt to repair this product yourself. Only qualified service personnel should perform servicing.
- Do not expose the device to direct sunlight or install it near heat sources such as radiators, heat registers, stoves or other heat generating devices.
Always make sure the product is turned off before plugging it into a wall outlet. - If the power cord or plug is damaged, it must be replaced by the manufacturer, and authorized service center or a similarly qualified person.
- The device is not suitable for the lighting of living rooms.
ASSEMBLE
Box contents
| 1 | 5 | A | B | C |
| 2 | 6 | |||
| 3 | 7 | |||
| 4 | 8 | |||
| 1 | Top roof | |||
| 2 | Left panel and right panel with water pump | |||
| 3 | Flume and tweezer | |||
| 4 | Power supply and supporting coucolumn (x4) | |||
| 5 | Planting bed A, B, C | |||
| 6 | Measuring cup and planting hole cap | |||
| 7 | Water inlet and planting basket | |||
| 8 | Seed box and sponge | |||
Assembly
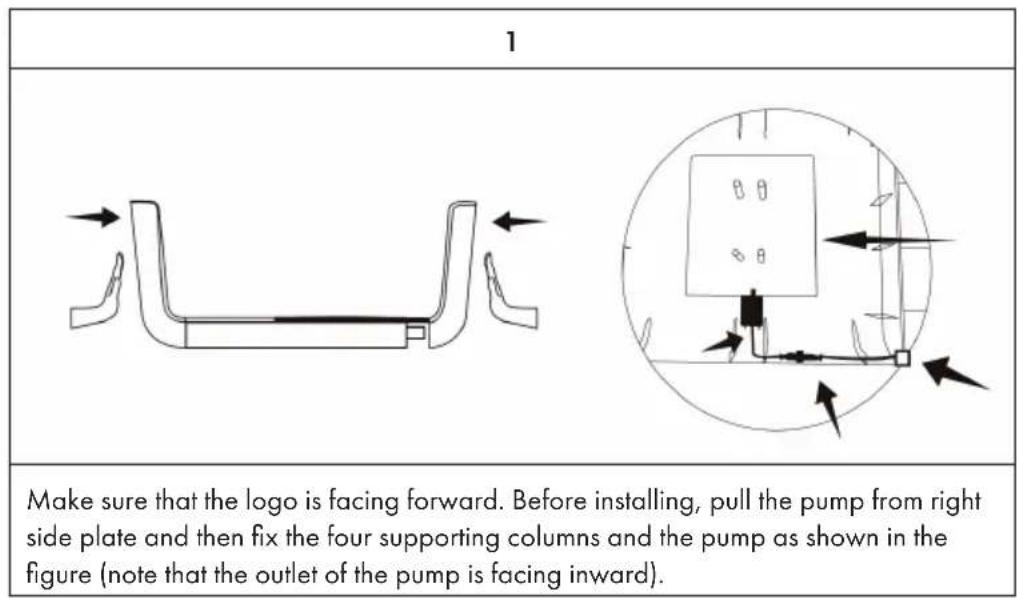
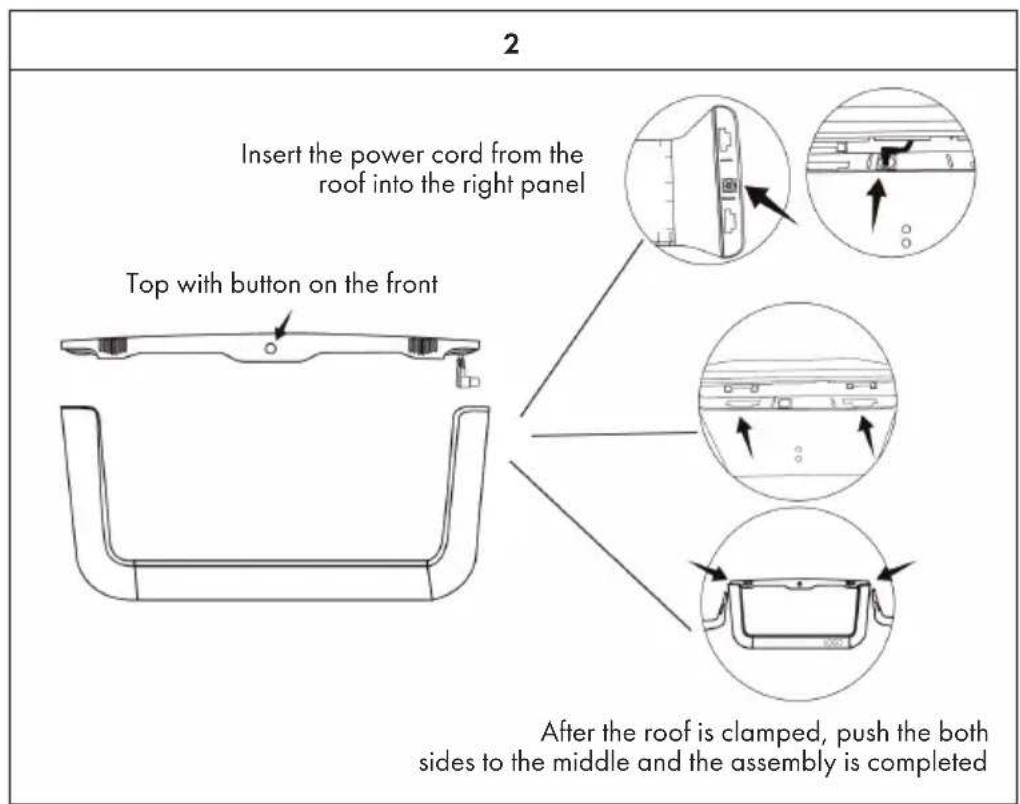
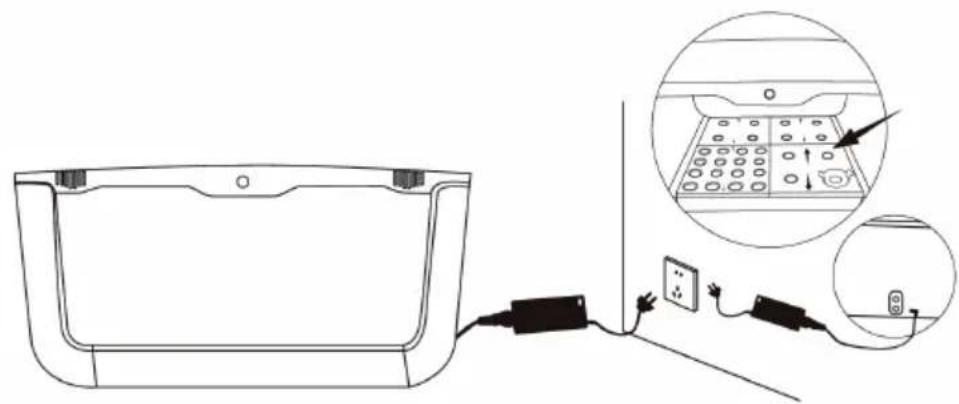
3
Install the planting bed as shown. Plug power supply into the bottom bole on the right side of plate.
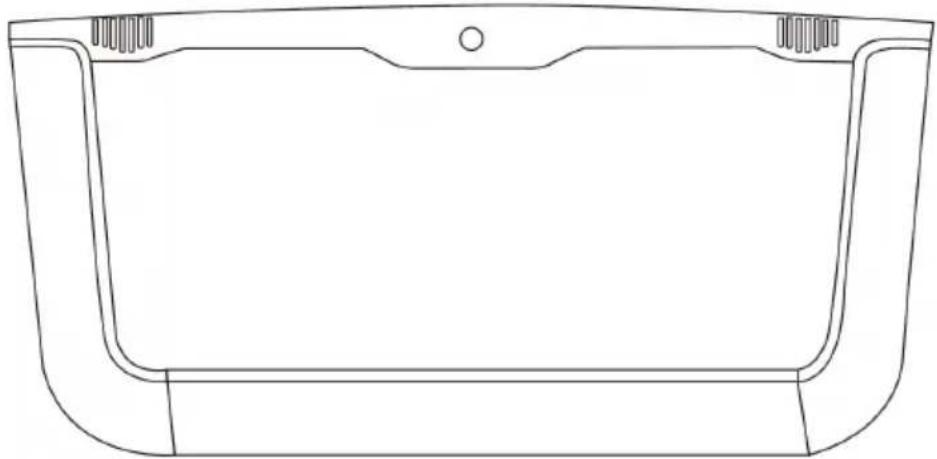
EN
DISASSEMBLE
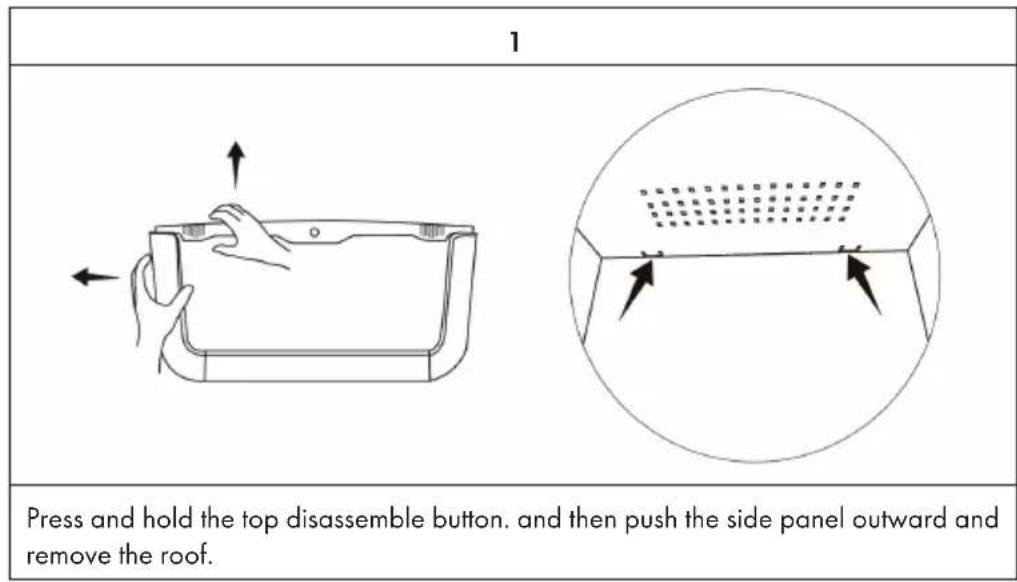
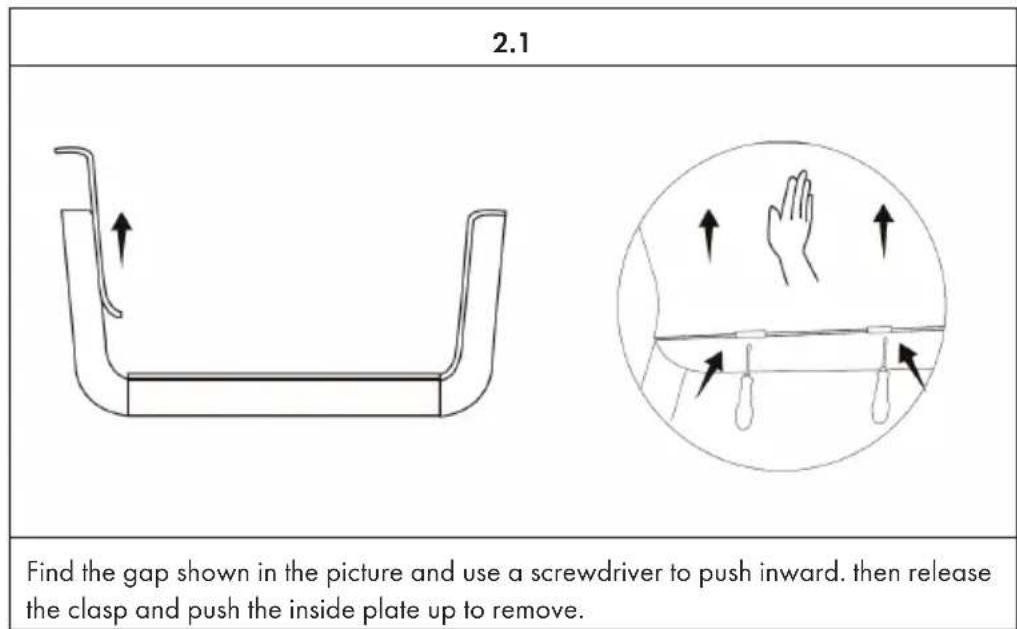
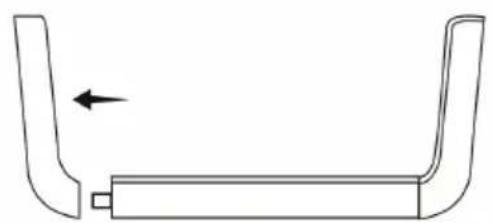
2.2
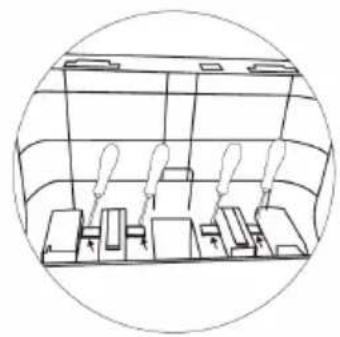
Release the clasp in turn and disassemble the outer plate
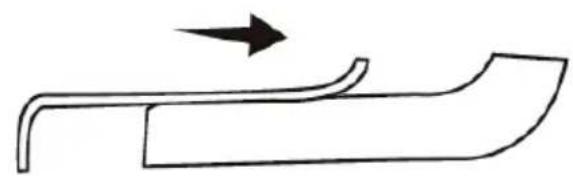
3
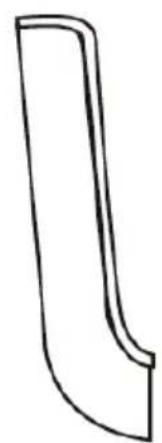
Push the inside plate along the slide patch until the buckle is stuck and the side plate is restored.
MOUNTING THE COMBI-ACCESSORIES
Note: The combination accessory is NOT included and can be purchased separately.
| Combination accessory 2 | |
| Connecting plate | |
| Connecting wire | |
| Power supply (combination) | |
| 1 | |
| + |
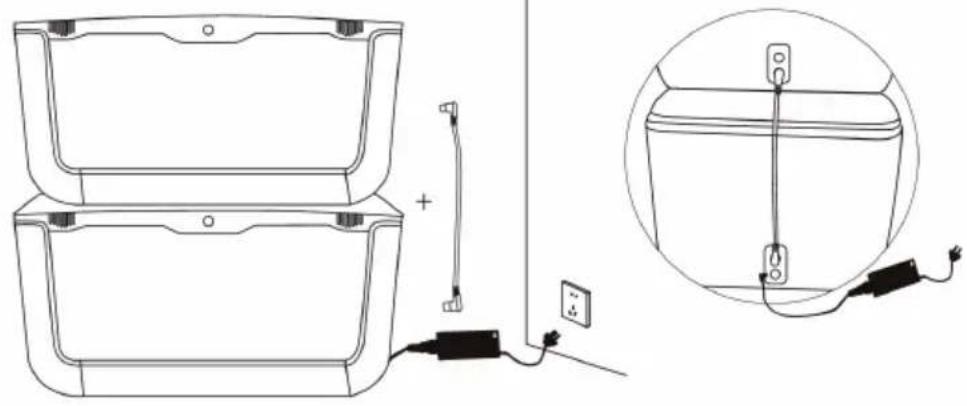
3
Please connect the power supply (combination version) and the connect cable as showing in the figure(up to four machines).
Note: Install a second or third box in the same way.
PLANTING ACCESSORIES
| Conteiner Power supply Planting bed | A Planting bed B | ||
| A | |||
| Planting bed C Seeding box Sponge Concentration A | |||
| B | |||
| Concentration B Planting baskets Tweezer Pump | |||
| Measuring cup Shading hat | |||
START AND INDICATOR LIGHTS
| 1 | 2 |
| Press the button once, it's on when the light is green. | Press the button again, it's off when the light is off. |
Indicators
| 1 | 2 |
| Off - machine switched off Green - machine switched on | |
| 3 | |
| Green and blue light alternatively flashing: water shortage, need to add water and diluted nutrition | |
PREPARATION
Required accessories
| Note: No machine and nutrition concentration is needed during this period. | ||
| Seeds Bid sponge | Tweezer | |
| Seeding box Clear water | ||
Way of proceeding
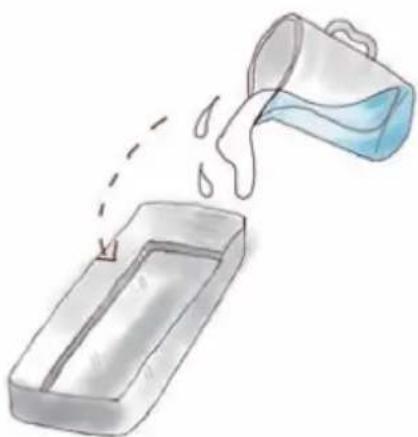
Put some clear water in the seeding box, place the sponge in the water with the dents side up until it's fully soaked and sink to the bottom, keep adding water until it reaches the middle of the water line.
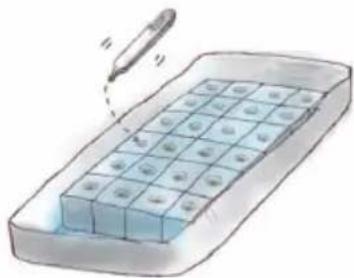
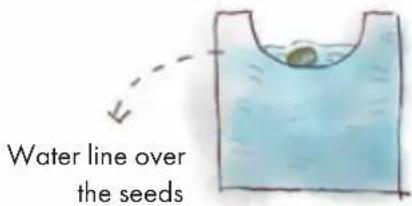
Place 1 seed in each of the dent of the sponge gently with tweezer, keep the seeds slightly below the water line.
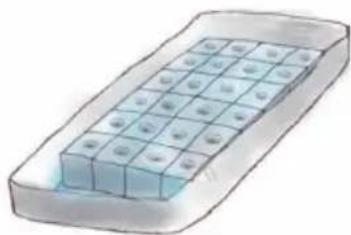
Place the box in the shade, wait for 12-24 hours for the seeds to sprout.
SEEDING
| The seeds should have grown little white needles on the top. | |
| 1.5cm | |
| Install the planting machine and connect with electricity, after machine self-detection, light 1 light panel and place the seeding box on top of it, keep the lighting for 5-7 days until the roots of seeds grow out of the sponge for about 1.5 cm. | |
Water outlet
The easiest way to empty the water tank is to drain it in the sink. If this is not possible, you can use the pump which is used to ensure the automatic water-circulation within the water tank to drain it, following 3 simple steps:
- Connect the water pump outlet with a proper pipe with an inside diameter of 8 mm.
- Press the button for 3-5 seconds when the machine is on, after the button alternatively flashes blue and green, the pump will start draining through the pipe.
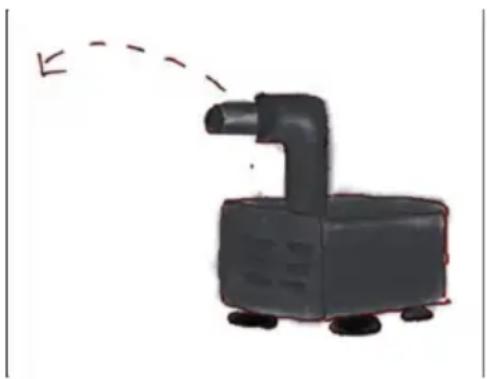
- Draining will automatically stop when the water is below the safety water line or you can press the button manually, the remaining water can be wiped out by tissues.
Important notes on operation
The device has intelligent lighting system, will automatically start a cycle of 14 hours of lighting and resume after 10 hours of suspension, the lighting setup is as below:
a) For early birds
To boost the growth of vegetables, recommend to setup the activating time between 05:00-09:00 in the morning. During these hours, plug the container or re-plug the container after 5 seconds of plug off, when the light panel is up, the machine will record this time as the activating time and automatically start the cycle. For example: set up the machine at 06:00, then the machine will automatically light up at 06:00 every morning after that for 14 hours and light off at 20:00 until 06:00 the next morning.
b) For late owls
Between 20:00-22:00, press the button for 3-5 seconds until the panel flashes once and the button turns green while it's still connected with electricity but switched off, the machine will record this time as the deactivating time. For example, set up 20:00 as the deactivating time, after 10 hours, the panel will automatically light up at 06:00 the other morning for 14 hours, then light off again at 20:00 and keep the cycle.
Note: The little white needles are the roots for vegetables, drought will cause perishing and overwatering will cause overgrowing and decrease of quality. v recommend to maintain the water line at the half of the sponge.
CULTIVATION
Required accessories
We advise to use the nutrition concentrations that are available for your homegarden. You can, of course, use other nutrition concentrations.
| A | B | C | D |
| Tweezer | |||
| Type A nutrition concentration | Type B nutrition concentration | 8 liters of clear water | Planting Basket |
Remove the planting bed and open the water inlet
| 1 | |
| Put supplements as below sequence to empty container: • 40 ml of type A nutrition concentration • 4 liters of clear water (half of the water line) • 40 ml of type B nutrition concentration • 4 liters of clear water (reach the highest water line) | Water inlet |
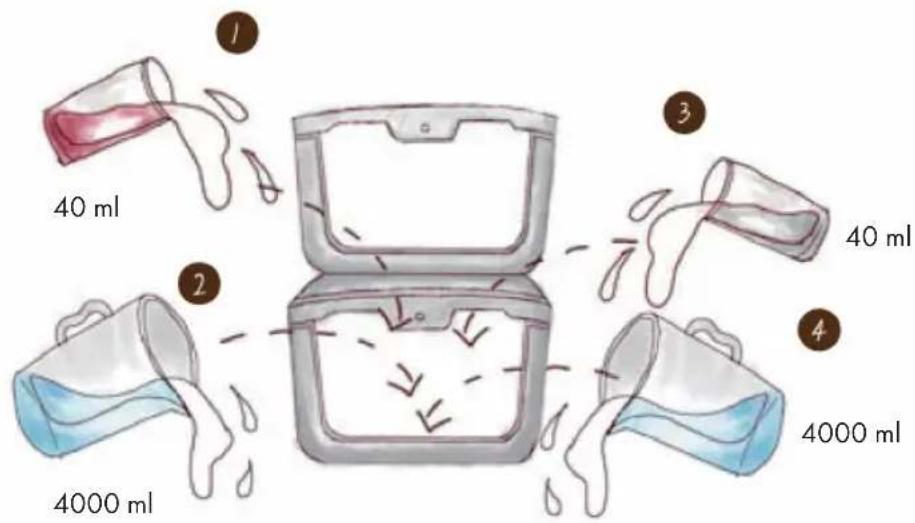
2
With nutrition concentration residue in the container from last time, concentrations supplements need to be blended as below sequence first, in the proportion of:
1 Fill with Type A nutrient concentrate
2 Fill in half of the clear water
3 Fill in Type B nutrient concentrate
4 Put half of the clear water from the left through the water inlet into the tank
Notes on the concentrates
- To avoid direct contact of two types of nutrition concentration which will cause sediment at the bottom, please strictly follow the blending sequence: type A nutrition concentration > half of clear water > type B nutrition concentration > half of clear water.
Proportion of blending: A : B : WATER = 1 : 1 : 200. - High density of nutrition will burn the roots of vegetables, low density will affect the growth.
| Gently cut the big sponge to small pieces with the cutting lines to make sure one piece of sponge only hold 1 plant,remove the weak and overgrown plants together with their sponge. | |
| weak overgrown |
Note: The small plants in the sponge at this moment should already have grown 2-3 leaves and the roots should have grown 1.5cm out of the sponge.
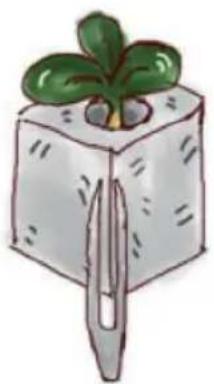
4
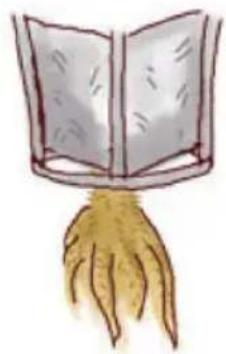
Put the small pieces of sponge inside the immobilizing baskets with tweezer, make sure the sponge is tight to the basket bottom and roots can spread out vertically.
Note: Try not to squeeze all the water from the sponge and keep the intact of the roots.
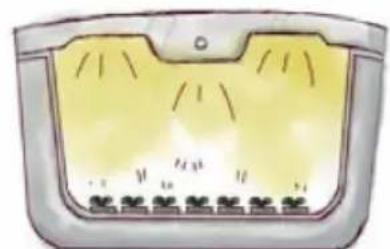
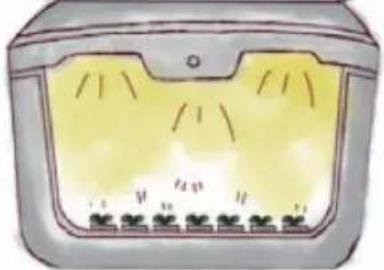
Place the immobilizing baskets in the hole of planting bed, make sure the roots are soaked in the water and turn on the lighting cycle until fully ripe.
5
Hints on cultivation
| 1 | 2 |
| One immobilizing basket should dock with one hole; undocked planting hole should be covered with shading hat to avoid algae growing in the light. | The green button will slowly flash when the nutrition concentration is in shortage with the growth of vegetables, please check with the water line of concentration and supplement accordingly. |
| 3 | 4 |
| remove | |
| During harvesting, please try not to leave broken roots inside the sink, remove the roots when cooking, and keep the basket for next planting cycle. | Recommend to clean the planting sink every 3 months, drain out the entire concentration residue and clear the sediments and broken roots. |
Frequently Asked Questions
Are there chemicals in the nutrient concentration? Are herbs and vegetables as nutritious as plants that traditionally grow in the wild?
The process of hydroponics has existed since 1929, and has been used and developed constantly in agriculture since then. The nutrient concentrates that you get with from Klarstein contain all the necessary minerals for plants, including macroelements of nitrogen, phosphorus, potassium, calcium, magnesium, sulfur and microelements of iron, manganese, zinc, copper, boron and more. This rich combination of active ingredients contains all the important elements for the natural growth process of plants.
Why do plants grow faster than in traditional soil?
The growth of plants is 100% natural. The faster growth is due to the composition of the nutrient solution. Most plants can only absorb ionic elements. In natural soil, these ionic elements must first be dissolved from organic elements and transported to the root, which can then absorb and process them further. In the nutrient solution rom Klarstein, these ionic elements are contained directly without the need for any further processing. Therefore, herbs and vegetables grow faster in your homegarden than in traditional soil.
Does growing vegetables in the process of hydroponics attract insects?
Hydropnic vegetable farming is insect-free as it does not use any common soil that allows insects to deposit eggs. The device should always be kept in a clean environment and periodically cleaned of dust and fallen leaves.
Will LED light produce ultraviolet radiation? Will it be harmful to human bodies?
Our lighting panel won't produce ultraviolet radiation because it's not necessary for plant growth.
Should your homegarden be placed in the balcony? Do the vegetables need natural sunlight?
The device can be placed in any environment just with electricity connection and water, such as living room, kitchen or even basement, because the machine itself will produce a friendly growing environment for vegetables. But don't put it in the open balcony for water proof reason and too much sunlight and inclement weather will do harm to the plants. Also don't recommend closed balcony to place the machine, because the rapid temperature increase in the sunlight will harm their growth too.
Can vegetables at different growing phases be planted together? Why small plants beside the big ones are always undergrown?
The more ripe, the more developed the roots will be, the more powerful they can take the nutrition, and the bigger the leaves will grow and the stronger they absorb from the lighting, that's why the smaller plants can't absorb enough nutrition when planted with bigger ones, and the leaves from the bigger ones will also interfere with the lighting for the smaller plants. How to plan for the planting area and arrange for the timing for different vegetables needs to be discovered and learned by users step by step.
Why nutrition concentration A and B can't be added at the same time to the sink? How long is the expiry time for the concentration after diluted?
Concentrated nutrition liquid are with high density, mixture of two will cause reaction of each other and produce non-dissolvable sediment which can't be absorbed by the vegetables. Diluted concentration can be stored for half a month, but for better effect, recommend to dilute only when it needs to be refilled. When the plants are small, nutrition can be added every 2 weeks, with the growing of vegetables, the frequency will increase to every 3-5 days, and the machine will remind you when it's in shortage.
How to deal with the algae?
Algae will sometimes grow from the nutrition concentration after lighting, you can clean up the tank with mop after full drainage, or sterilize with disinfectants.
HINTS ON DISPOSAL
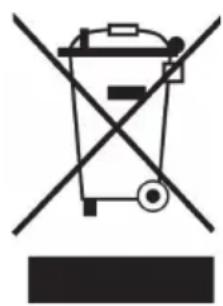
According to the European waste regulation 2012/19/EU this symbol on the product or on its packaging indicates that this product may not be treated as household waste. Instead it should be taken to the appropriate collection point for the recycling of electrical and electronic equipment. By ensuring this product is disposed of correctly, you will help prevent potential negative consequences for the environment and human health, which could otherwise be caused by inappropriate waste handling of this product. For more detailed information about recycling of this product, please contact your local council or your household waste disposal service.
DECLARATION OF CONFORMITY
CE
Producer:
Chal-Tec GmbH, Wallstraße 16, 10179 Berlin, Germany.
This product is conform to the following European Directives:
2014/30/EU (EMC)
2014/35/EU (LVD)
2011/65/EU (RoHS)