The Generalist - Pull-up bar Capital Sports - Free user manual and instructions
Find the device manual for free The Generalist Capital Sports in PDF.

User questions about The Generalist Capital Sports
0 question about this device. Answer the ones you know or ask your own.
Ask a new question about this device
Download the instructions for your Pull-up bar in PDF format for free! Find your manual The Generalist - Capital Sports and take your electronic device back in hand. On this page are published all the documents necessary for the use of your device. The Generalist by Capital Sports.
USER MANUAL The Generalist Capital Sports
Congratulations on the purchase of your device. Read the following instructions carefully and follow them to prevent possible damage. We accept no liability for damage caused by disregard of the instructions or improper use. Scan the QR code for access to the most up-to-date manual and other information about the product.

CONTENT
Packing Content 13
Assembly 13
Pull-Up Training Overview 15
Care and Maintenance 17
MANUFACTURER
- This device is for physical training with pull-ups. It is intended solely for this purpose and may only be used for this purpose. It may only be used in the manner described in this manual.
-
Repairs to the unit should only be carried out by an authorised specialist workshop.
-
Modifications of or changes to the product affect product safety.
- Attention: risk of injury. Incorrect assembly may result in dangerous malfunction.
- We accept no liability for consequential damages. Technical changes and errors reserved.
- The warranty will be invalid if the device is designed or modified.
General safety instructions
- Read these operating instructions carefully before setting up and using the device. Safe and effective use of the device can only be achieved if the device is properly set up, maintained and used. Make sure that all persons using this device are informed about the warnings and safety instructions.
- Before training on this device, seek medical attention and check for physical or health conditions that may prevent the safe and efficient use of this device. If you are taking any medication that affects your blood pressure, heart rate or cholesterol level, it is important to consult a physician before you start exercising.
- Pay attention to the signals of your body. Wrong or excessive exercise can be harmful. Stop exercising immediately if you notice any of the following symptoms: chest pain or tightness, irregular heartbeat, extreme shortness of breath, signs of light-headedness, dizziness or nausea. If you notice any of these symptoms, you should consult a doctor before continuing.
- This device is not intended to be used by persons (including children) with limited physical, sensory or mental capabilities or with a lack of experience and / or knowledge, unless they are supervised by a person responsible for their safety or have received instructions from a person responsible for their safety on how to use the device. Children should be supervised to ensure that they do not play with the device.
- Before each workout, make sure that all screws and fasteners are properly tightened.
- The safety of the device can only be guaranteed if the device is regularly maintained and examined for any damage or wear and tear.
- Only use the device as intended. If you discover any defective components during setup or inspection, or if you notice any unusual noises on the device during exercise, stop exercising immediately. Do not use the device again until after the problem has been identified and solved.
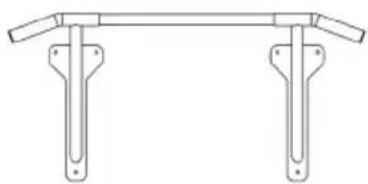
PACKING CONTENT
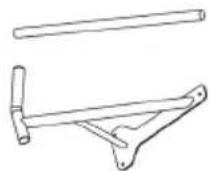
1x
Wooden bar
Wallmount left and right
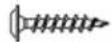
Wood screw
4x
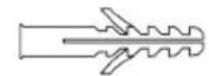
Wallmount dowel
6x
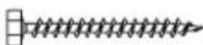
Wallmount screw
6x
6x

Washer
ASSEMBLY
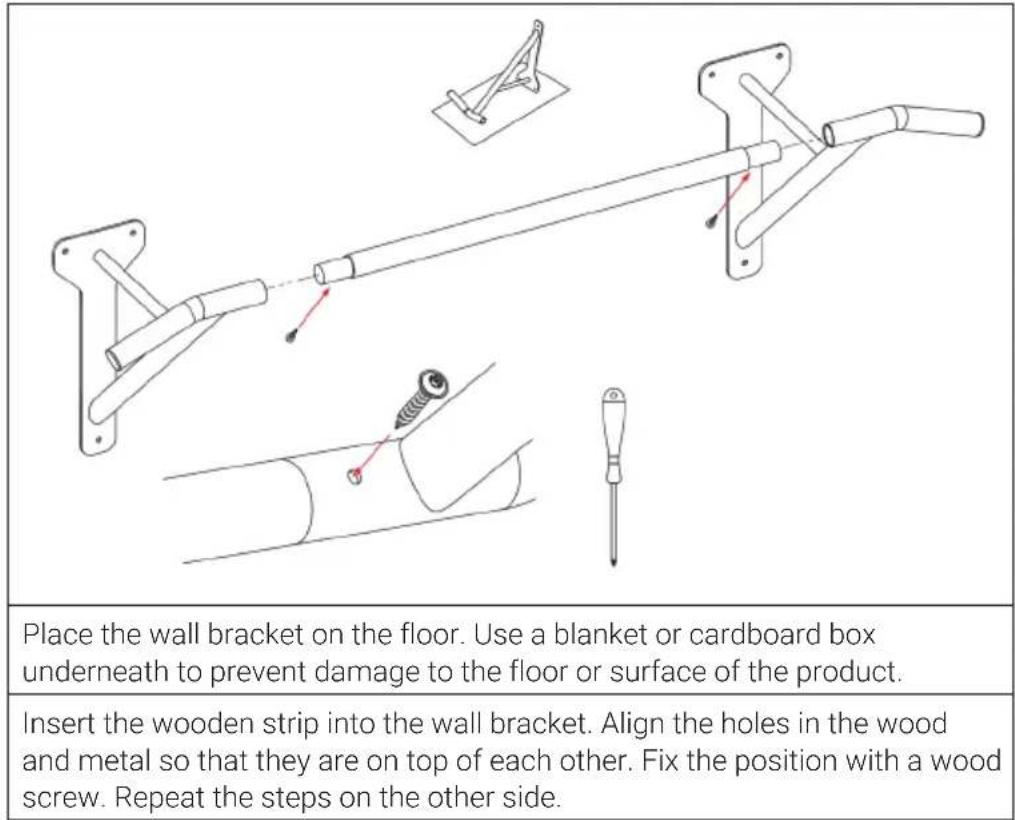
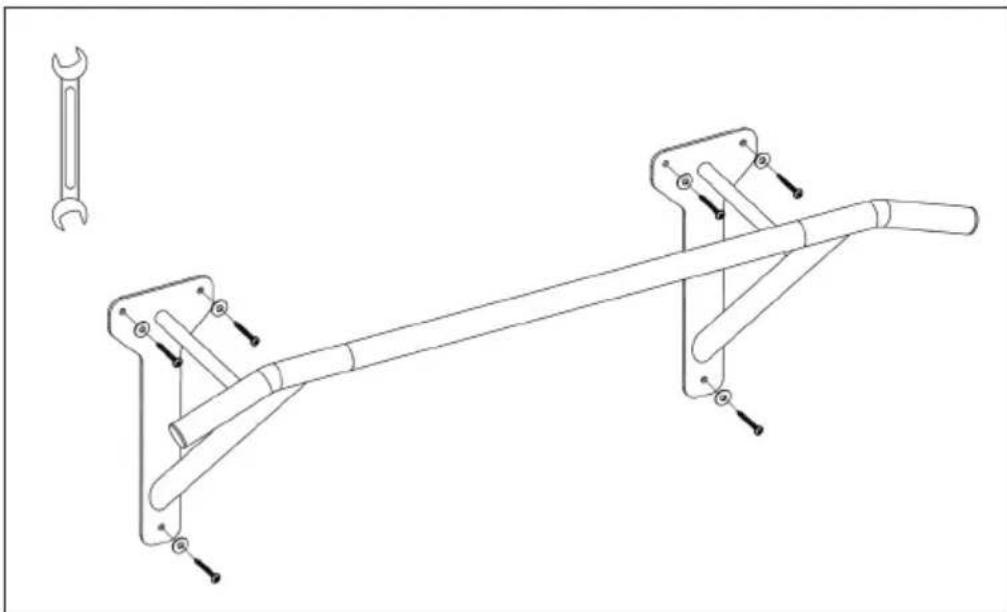
Mark the places on the wall by holding the pole against the wall and marking the holes with a pen. Drill the holes in the wall and insert the dowel. Then fix the wall bracket with washers and wall screws.
Executing pull-ups
- Basic position: shoulder-width grip
- Handle variations:
1 Undergrip / neck grip (supination)>Vertically extending muscle fibers are used.
2 Overgrip / instep grip (pronation) > Upper part of the latissimus: strengthens the broad back by training the oblique muscle fibres (of which there are fewer, making execution more difficult).
3 Hammer grip / parallel grip (neutral hand position)> Trains long fibres (large part of the latissimus, like the undergrip).
4 Monkey grip (thumb parallel to the other fingers, as opposed to the closed grip where the hand completely surrounds the pole)> Provides more gripping power, but more dangerous because of risk of slipping.
5 With arm loops> Protects joints and maximise latissimus.
- Grip width:
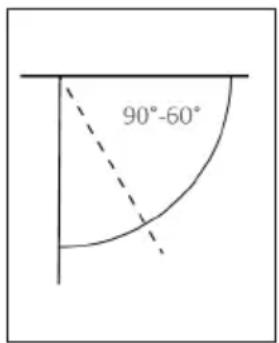
Between 0-130 cm. The wider the grip, the harder it is and the less movement amplitude there will be. Use a narrower grip in the lower grip or parallel grip as it is more comfortable. Use a wider grip with crossover grip, because otherwise it would not be anatomically possible. Too wide of a grip will reduce the training effect, as the movement amplitude is not fully utilised. The angle between the rod and the forearm should be between 90^ - 60^ in a hanging position.
7 Gripping the pole: The pole should be enclosed with your fingers if possible. Place the bar at the base of the finger without touching the palm. The skin should not be trapped between hand and pole.
8 Grip power training: dead hang, towel pull-ups, farmer's walk + static hold, gripper.

Common mistakes:
Stretching your arms unnecessarily stresses the joints. Avoid swinging as well as shoulder or head movements. Always finish exercises completely. The chin should not be over the bar. Let yourself down in a controlled manner, do not let yourself fall. Do not forget to breathe.
Training plans
- PLAN 1: Full body plan with dead weight
1 Pull-ups for upper back and biceps (even without additional weights or many repetitions effective + variations to make more challenging)
2 Squats for the legs, buttocks and lower back. In addition, the use of variations with intermediate jumps, lunge steps or a longer hold at extreme points is recommended.
3 Push-ups (alternative: dips) for triceps, shoulder and chest. Incorporate the trunk and back for stabilisation. Variations would be archer pushups, one-arm push-ups or the changing of the distances of the hands to each other, or moving the hand position further below or further in front of the body.
4 Pike pushups for shoulders (if these are too easy, then try handstand rests. Be sure to tighten your stomach muscles to prevent a hollow back).
5 Leg raises on the pull-up bar for the trunk and abdomen. Hanging on the chin-up bar, bring your feet to the bar with your legs straight. For training of the lateral trunk, carry out the 'windshield wiper' by moving the feet from left to right and vice versa.
6 Skin the cat for the lower back: while hanging from the pole, move your feet towards the pole and move between your arms until your legs are facing down. Then execute the process backwards.
Circuit training: The exercises are performed one after the other in the order listed below, with a 30-second break in between. Once a full run-through is completed, take a two-minute break. Each exercise should run for 45 seconds, no matter how many repetitions are made. There are a total of three rounds. Do the training three times a week in the following order: squats, pull-ups, pushups, leg raises, pike pushups, skin the cat.
- PLAN 2: Plan for normal pull-ups (3x per week)
| Beginner Intermediate | ||||||||||
| Day 1 1 | 2 1 2 1 | 3 4 3 | 3 5 | |||||||
| Day 2 2 | 3 2 2 3 | 4 5 4 | 3 5 | |||||||
| Day 3 2 | 3 2 2 4 | 5 6 4 | 3 6 | |||||||
1 Maximise pull-ups: muscle memory adapts quickly to pull-ups, and training success stagnates after 6-8 weeks.
2 Variations: varying tempo, training lats on the lat pull, forming forearms (grip strength), using tension (permanent body control and overall amplitude), circulating grip techniques.
3 Alternative variations to the pull-up: staggered pull-ups, with a cross grip, lying down, with hanging fingers, one-arm pull-ups (second arm can help by grasping the pull arm). The closer the supporting arm grips to the shoulder, the less weight it will take off the pulling arm.
CARE AND MAINTENANCE
Note: As with any mechanical equipment that has moving components, the screws on this product may also loosen due to frequent use. We therefore recommend that you check them regularly and, if necessary, tighten them with a suitable key. Clean your training device regularly with a damp cloth to clean the surfaces of sweat and dust.
- Clean the unit regularly with a clean cloth to maintain a clean appearance.
- Regularly check that screws and nuts are properly fixed.
- Store the device in a clean and dry environment out of the reach of children.