
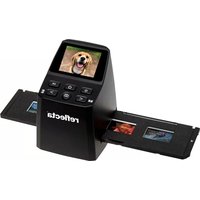
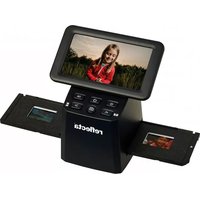
x10Scan - Scanner Reflecta - Free user manual and instructions
Find the device manual for free x10Scan Reflecta in PDF.
| Product Type | Digital Film Scanner |
| Brand | Reflecta |
| Model | x10Scan |
| Sensor | 14MP CMOS 1/2.3" |
| Resolution | 14 MP (capture), 3.5" LCD display |
| Display | 3.5-inch Color LCD |
| Lens | F/No. 3.5, 5 elements, fixed focus |
| Compatible Film Formats | 50x50 mm slides, 135 color/B&W negatives, 110 and 126 negatives (optional) |
| Color Balance | Automatic |
| Exposure Adjustment | Automatic and manual (EV +/- 2.0) |
| Color Adjustment | Manual RGB, default color restoration |
| Power Supply | Via computer (USB port) or 5V/1A power adapter |
| Connectivity | USB 2.0 (Micro-USB), TV output (TV cable included) |
| Storage Media | SD/SDHC card up to 32 GB (not XDHC) |
| TV System | NTSC and PAL (selectable) |
| Dimensions (H x W x D) | 101 x 123 x 96 mm |
| Weight | Approx. 500 g (estimated) |
| Minimum PC Configuration | Pentium P4 1.6 GHz, 512 MB RAM, 500 MB disk, USB 2.0, Windows XP/Vista/7/8/10 |
| Minimum Mac Configuration | Power PC G5 or Intel Core Duo, 768 MB RAM, 500 MB disk, USB 2.0, Mac OS 10.5+ |
| Care and Cleaning | Wipe with a soft, dry cloth. Clean the glass with the provided brush. Keep films and holders clean. |
| Safety | Do not open the housing, avoid water, do not use on aircraft, turn off if smoke/odor, repair only by authorized center. |
| Spare Parts and Repairability | Optional 110/126 negative carriers. Cables and brush included. Repair only by authorized center. |
| General Information | Manufactured by reflecta GmbH, Germany. WEEE recycling symbols. |
Frequently Asked Questions - x10Scan Reflecta
User questions about x10Scan Reflecta
0 question about this device. Answer the ones you know or ask your own.
Ask a new question about this device
Download the instructions for your Scanner in PDF format for free! Find your manual x10Scan - Reflecta and take your electronic device back in hand. On this page are published all the documents necessary for the use of your device. x10Scan by Reflecta.
USER MANUAL x10Scan Reflecta
Standard Accessories 5
Part Names 6
- Start Using Your Digital Film Scanner 8
- Place Slide / Film Into The Holder 11
- Image Brightness and Color Adjustment 14
6.Playback and Delete Mode 15 - Watching the images on a TV screen. 16
- Downloading the images from Card to Computer....17
- Appendix. 18
Specifications. 18
Icon & Indicators. 19
System Requirements 20
Welcome
Thank you for purchasing a reflecta x10- Scan. Please take a moment to read through this manual.
1. Precaution
Before using the scanner, please ensure that you read and understand the safety precautions described below. Always ensure that the scanner is operated correctly.
Never operate the scanner inside of an aircraft or anywhere else where operation of such devices is restricted. Improper use creates the risk of serious accident.
Do not try to open the case x10-Scan or attempt to modify the device in any way.
High-voltage internal components create the risk of electric shock when exposed. Maintenance and repairs should be performed only by authorized service providers.
Keep the scanner away from water and other liquids. Do not use it with wet hands.
Keep the scanner and its accessories out of the reach of children and animals to prevent accidents or damage to the scanner.
If you notice smoke or a strange odor coming from the device, turn the power off immediately. Take the scanner
to the nearest authorized service center for repairing. Never attempt to repair reflecta x10- Scan on your own.
Use only the recommended power accessories. Use of power sources not expressly recommended for reflectax7-Scan may lead to overheating, distortion of the equipment, fire, electrical shock or other hazards.
The scanner may become slightly warm during use. This does not indicate malfunction.
If the exterior of the scanner needs cleaning, wipe it with a soft, dry cloth.
2. Preparation
Standard Accessories
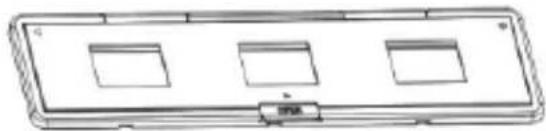
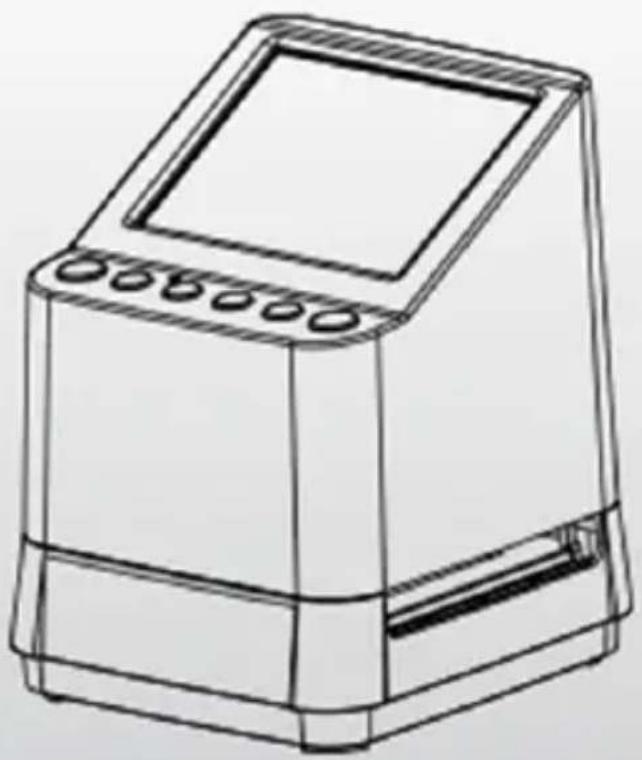
Digital Film Scanner

User's Manual
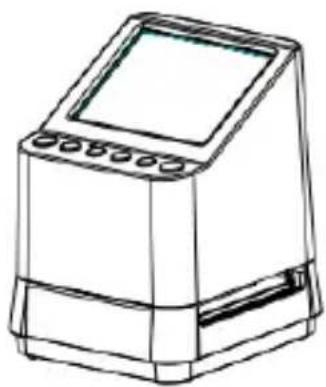
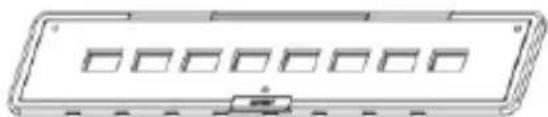
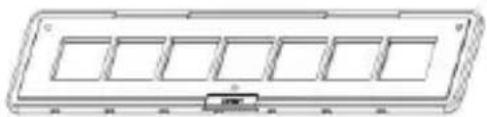
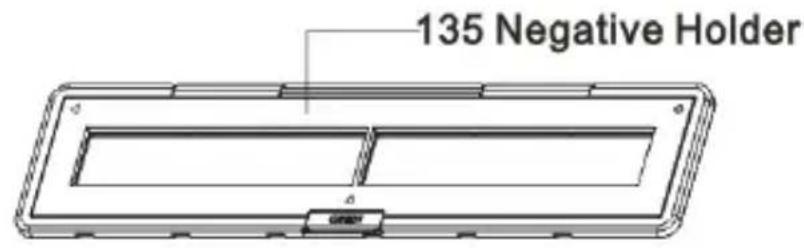
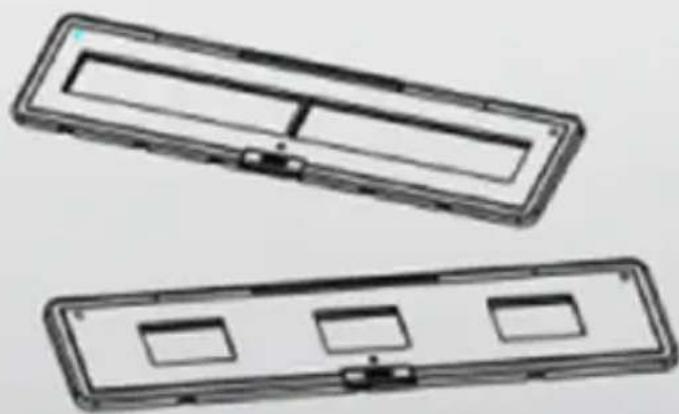
135 Negative Holder
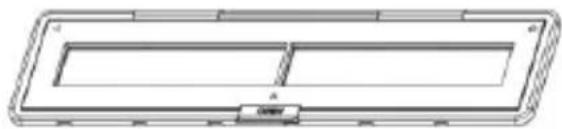
135 Slide Holder
110 Negative Holder (Optional)
126 Negative Holder (Optional)

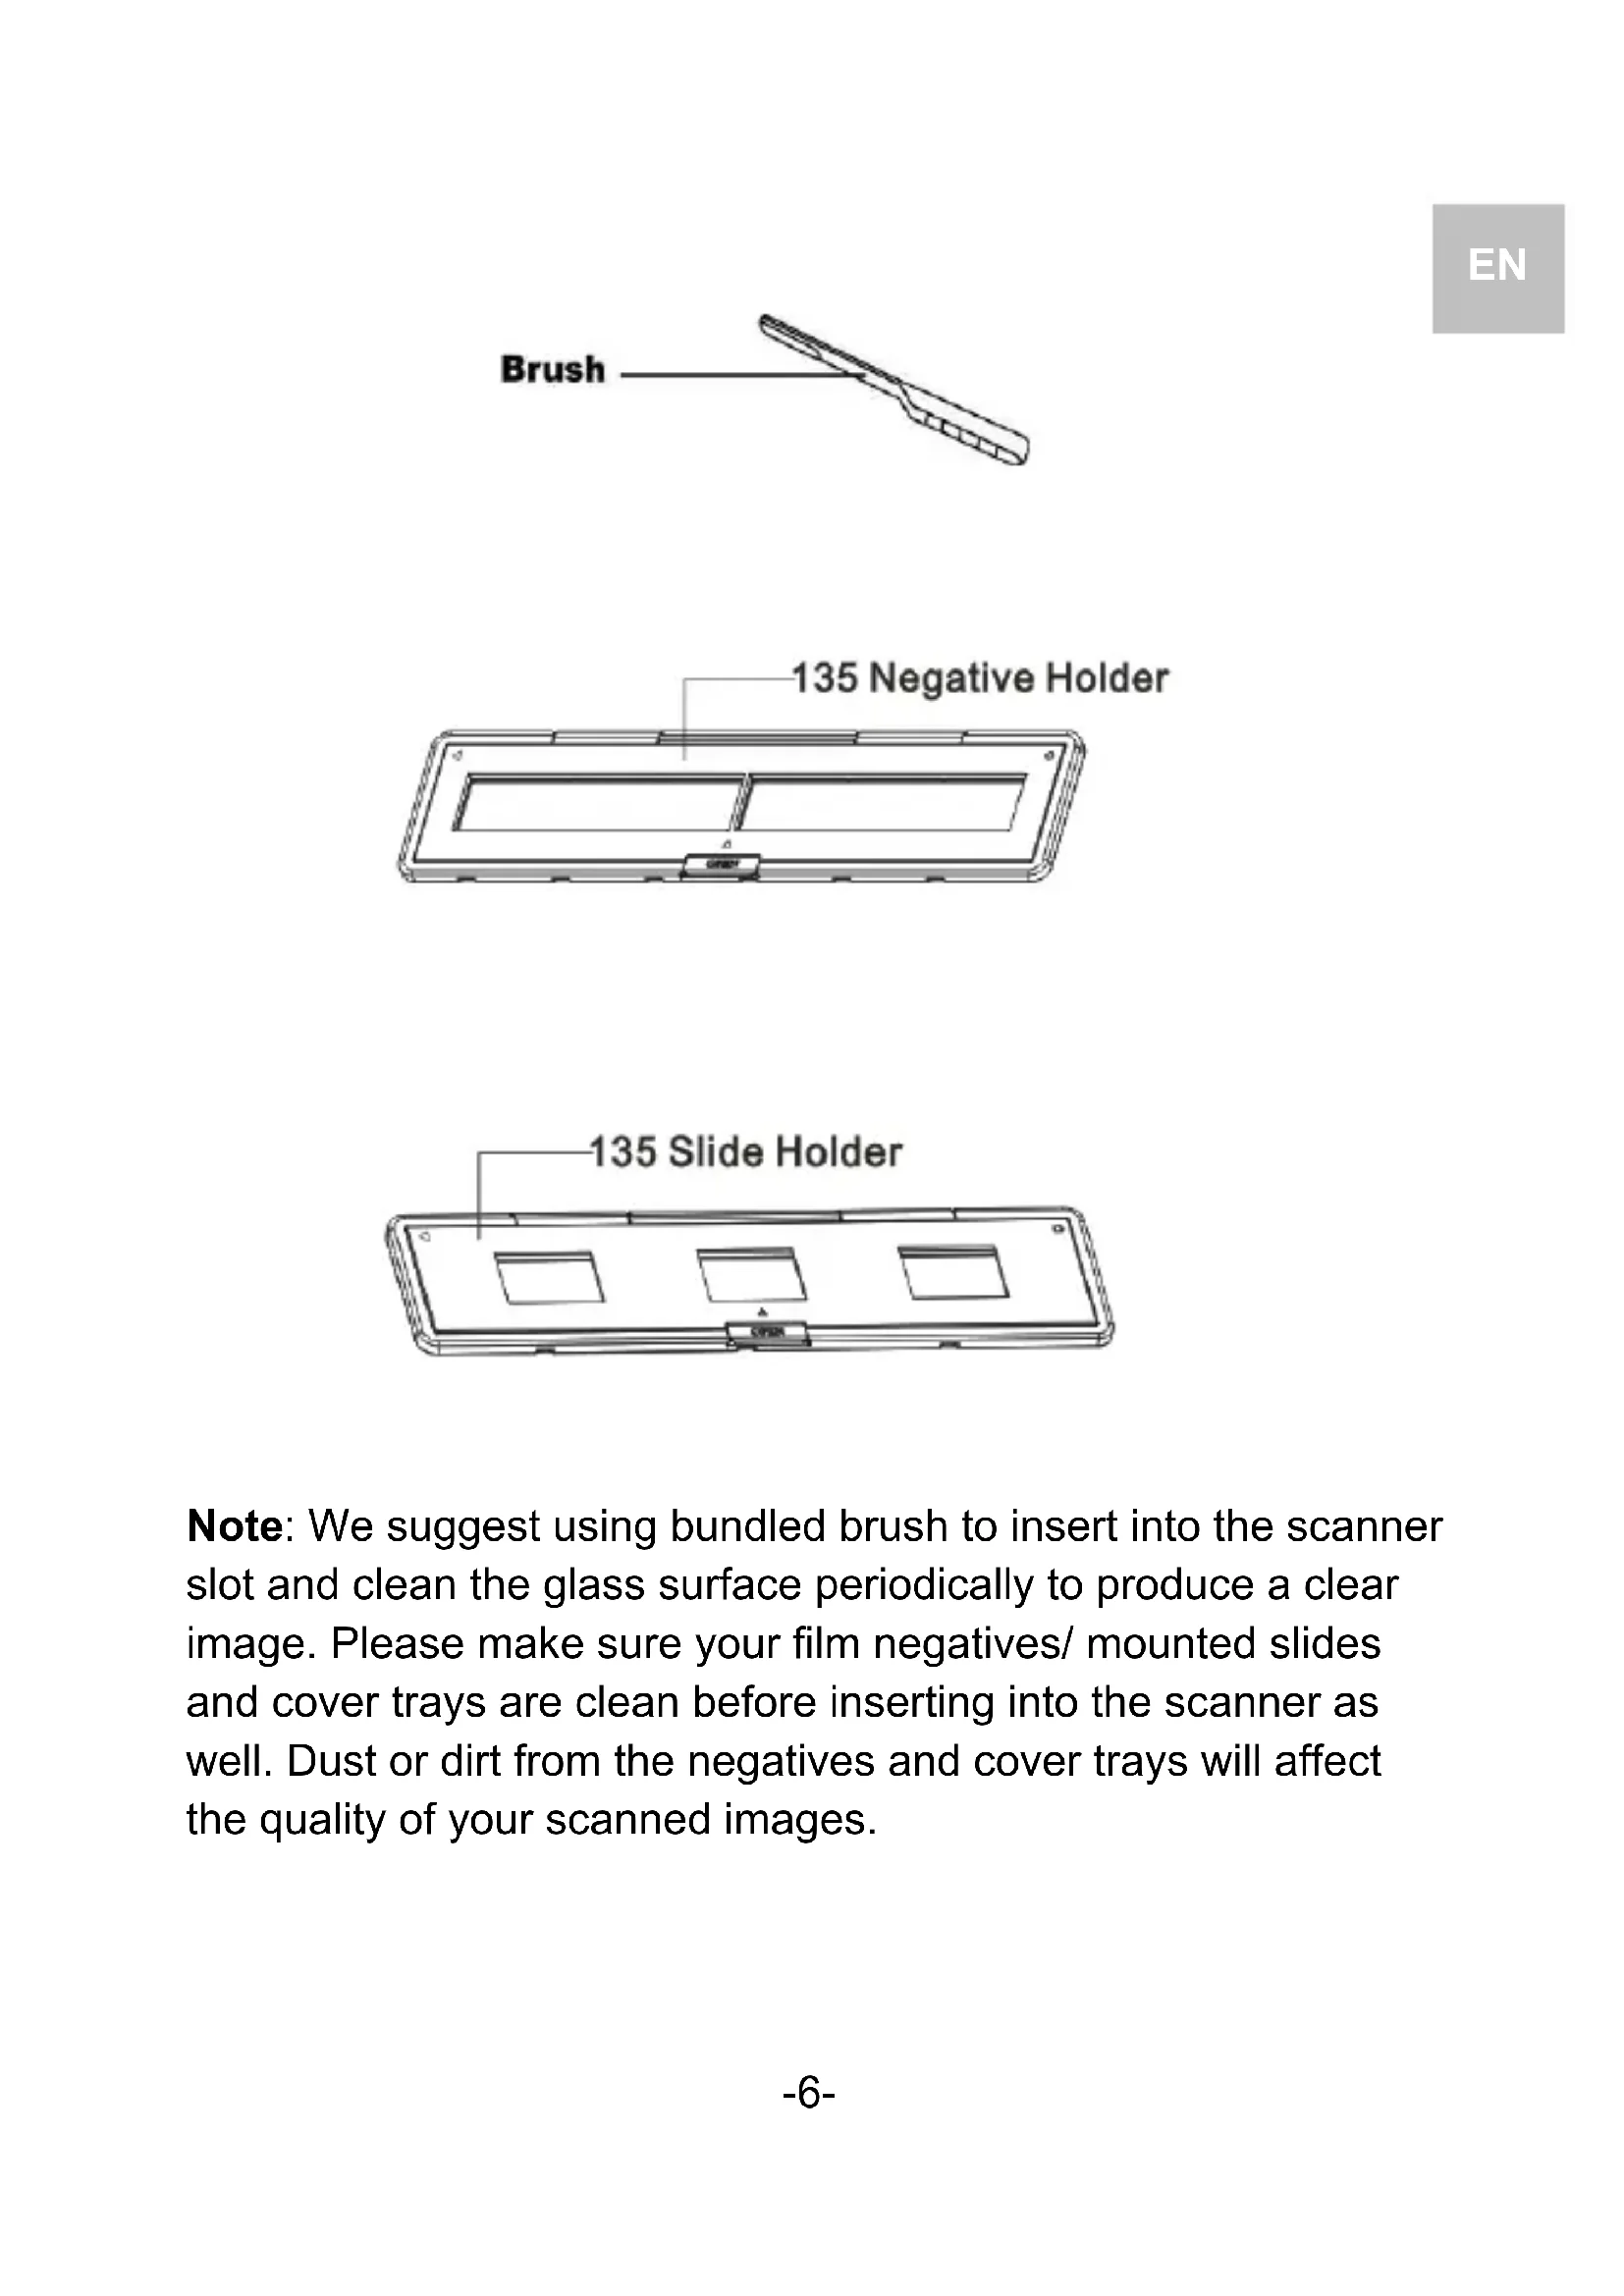
Clean Brush

Adaptor

USB Cable
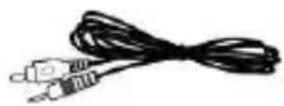
TV Cable
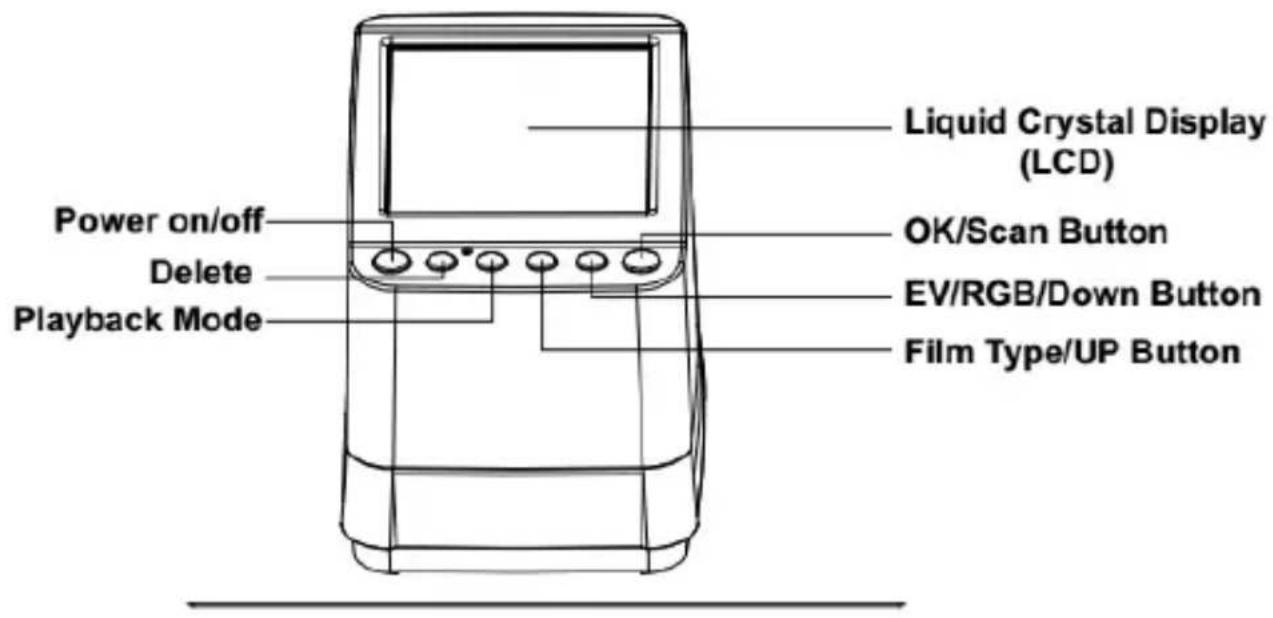
Part Names
EN
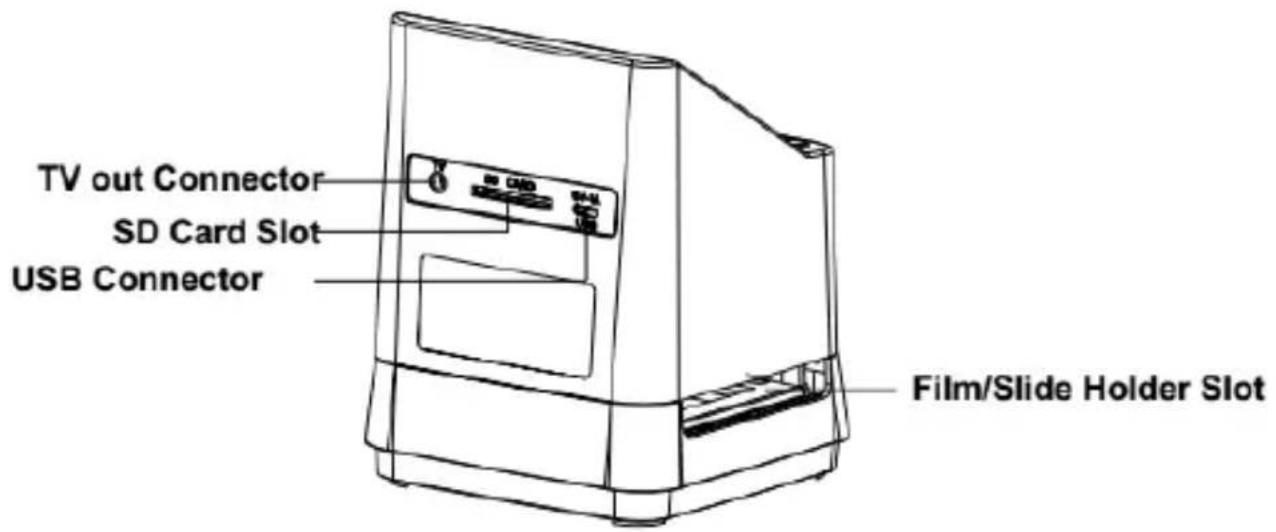


Note: We suggest using bundled brush to insert into the scanner slot and clean the glass surface periodically to produce a clear image. Please make sure your film negatives/ mounted slides and cover trays are clean before inserting into the scanner as well. Dust or dirt from the negatives and cover trays will affect the quality of your scanned images.
3. Start Using Your Digital Film Scanner
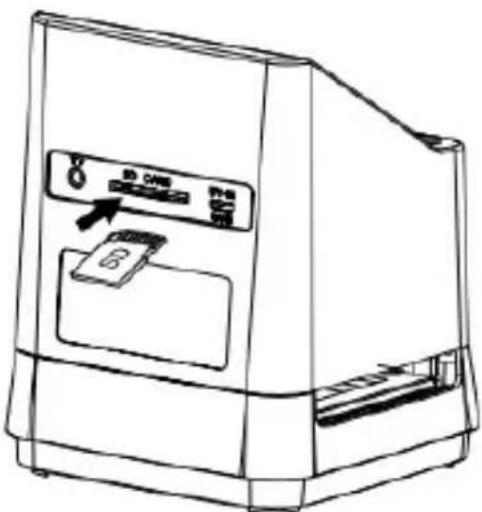
1. Insert the SD Card into the scanner.
Insert the SD card into the SD Card Slot located at the back of the scanner, make sure that the golden pins on the card are facing downward. The card will be locked automatically if it is inserted properly.
Note:
Only accept SD and SDHC card (Maximum 32 GB). Card with XDHC class is not compatible.
2. Connect the electric power to your scanner.
Connect the micro USB cable terminal to the micro USB Connector of the scanner. Do not force the connection if the connector is in the wrong direction, turn the direction to the opposite side and try again.
Connect the other larger USB terminal to the power adaptor or the USB port of your computer, Any of both devices will supply the power needed by the scanner.
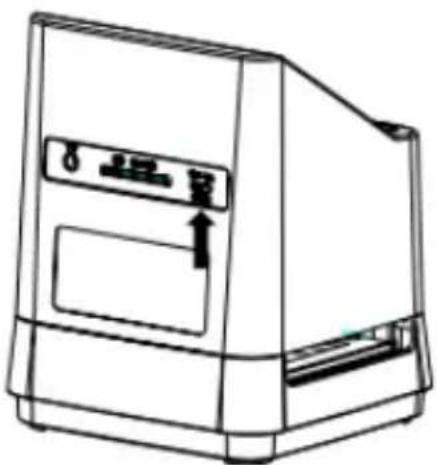
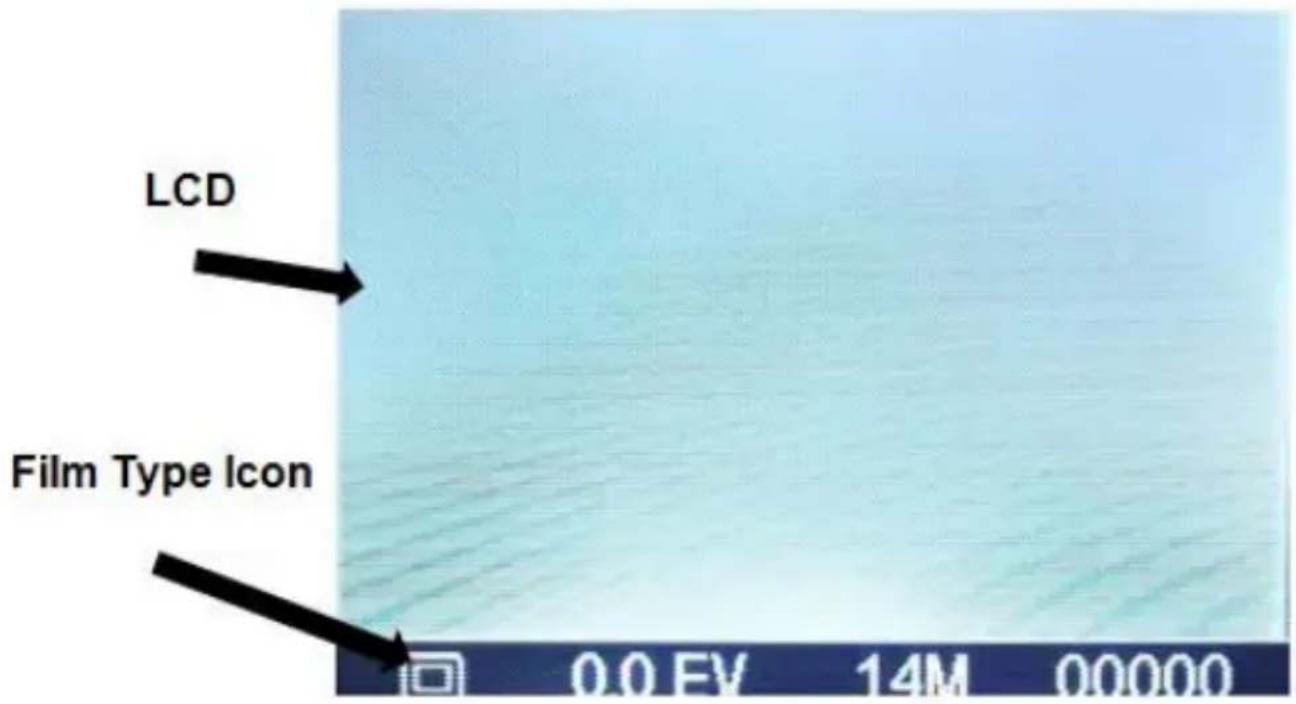
Press the Power Button of your scanner to turn it on. You will see a pop up screen on the LCD, Select “NO” by pressing the OK() Button, The film type is preset at Transparent Slide Film, You may select the setting for other type of film from the Film Type Button.

Film Type Icons:
(Shown on Lower Left Corner of LCD)
EN
135 positive (slide)

135 negative

135 black & white

110 negative

126 negative

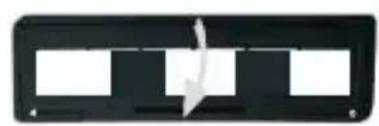
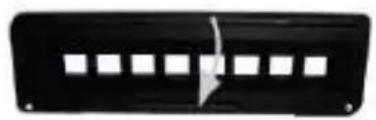
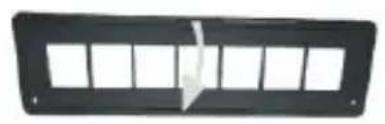
4. Place Film / Slide Into The Holder
- Keep the glossy surface in the upward direction. Open the negative/ positive slide holder as Illustrated.
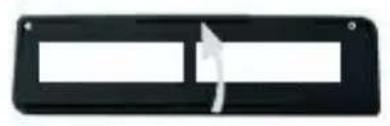
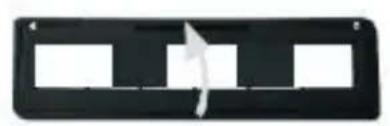
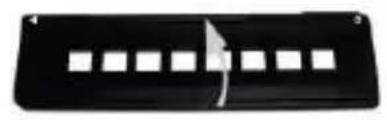
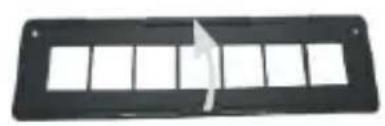
- Put a 135 positive slide/ negative film/ 110 negative/126 negative into holder as shown.

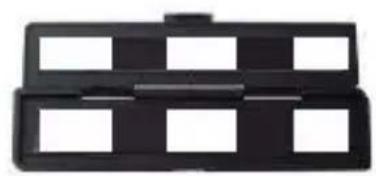
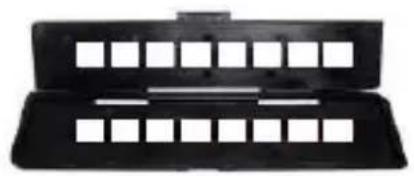
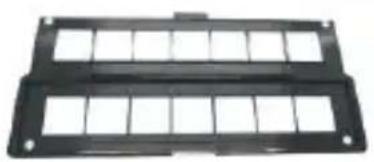
- Close the holder and please make sure the holder close properly.

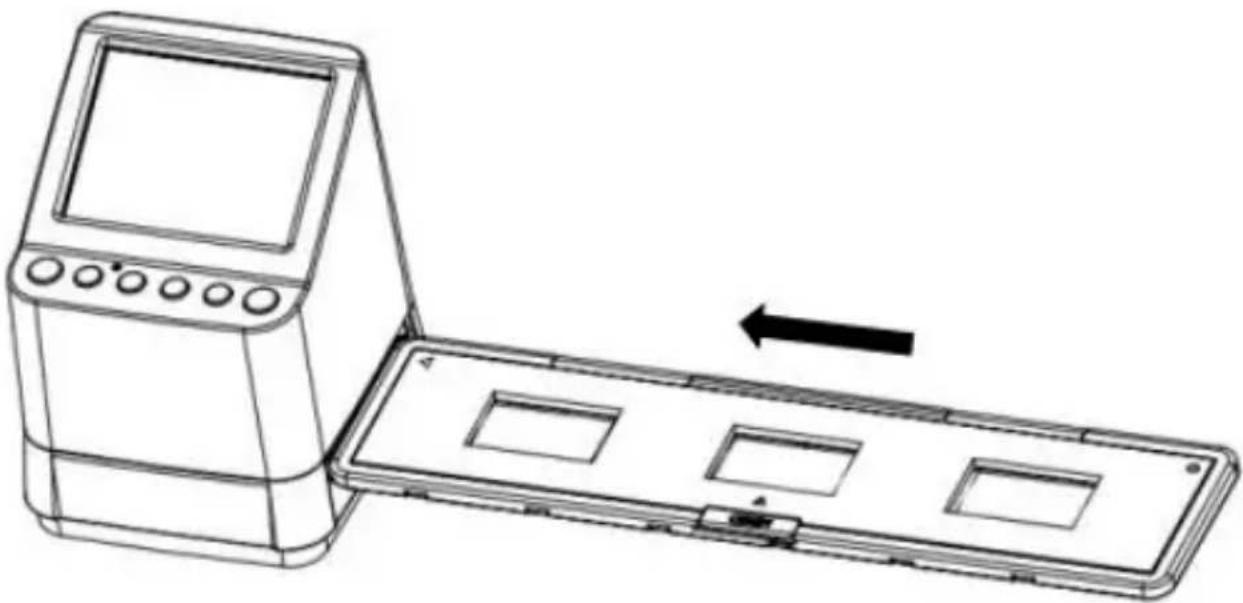
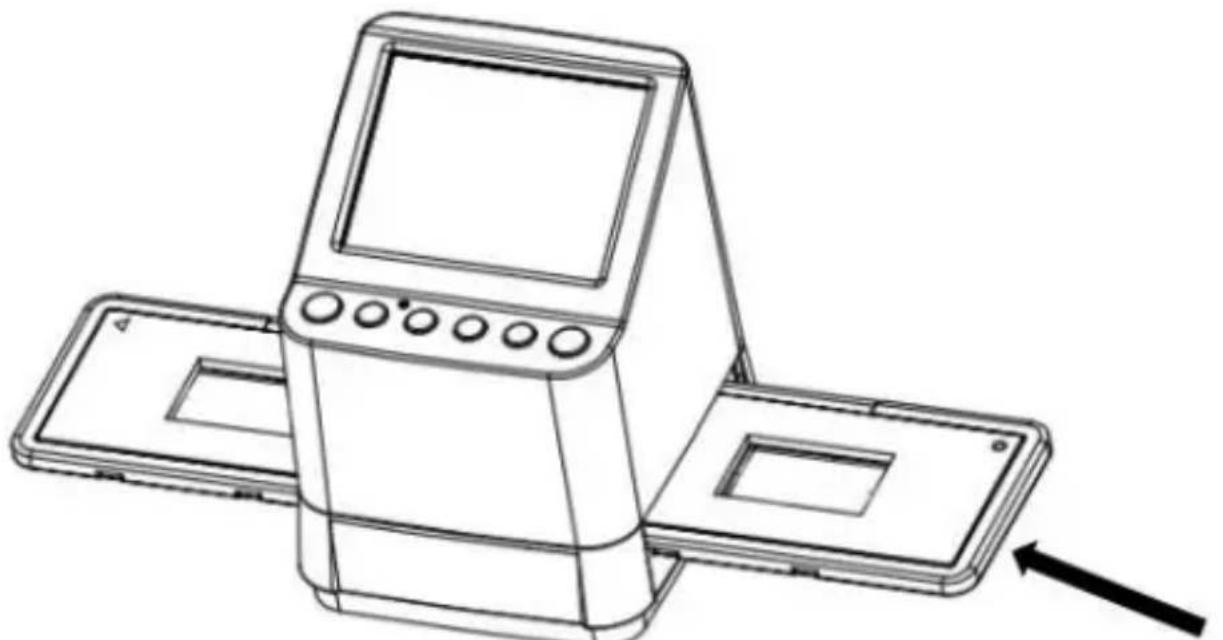
5. Place Slide / Film Holder Into The Scanner
The Scanner supports 50X50mm transparent slide, 135 B&W, and 135/110/126 negative film.
- Scanning 50X50mm Transparent (Positive) Slide: Insert the 135 Slide Holder into the scanner Film/Slide Holder Slot according to the triangular mark on the scanner and the holder, as shown in below diagram. You may keep the slide in position by referring the image shown in the LCD screen. Press the Film Type Button to select the proper type of film for scanning. Press the OK/( button to scan image, the image is saved into the SD Card automatically.
2. Scanning type 135, 110 and 126 negative films:
EN
Insert the 135 (110/126) negative holder into the scanner's holder slot according to the triangular mark on the scanner and the holder, as shown in below diagram. Turn on the power of the scanner, select the type of film to be scanned by pressing the Film Type Button. You may keep the film image in position by referring the image shown in the LCD screen. Press the Film Type Button to select the proper type of film for scanning. Press the OK/( ) button to scan image, the image is saved into the SD Card automatically.
Note: 110 and 126 Film Holders are optional parts, not
Insert 135 Slide Holder
included in the scope of delivery.
6. Image Brightness and Color Adjustment
The brightness and color of the image are preset automatically. Normally additional adjustment is not needed. Some film brightn ORGB and color fade out and needs adjustment. Press ( ) Button and you will see the following icons display on the LCD screen for adjustment.
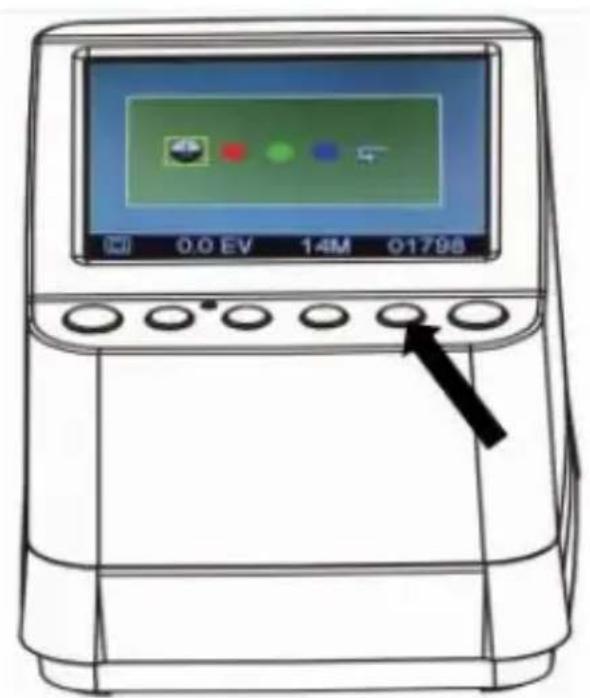
Press (Playback) Button to select one of the items you want to adjust then press the OK/() Button to confirm your selection. You may now see a scale on the right hand side of the LCD screen, Press the and Button to add or reduce the value of the adjustment. Press OK/() Button to confirm your adjustment. Press the OK/() Button once more to scan the adjusted picture. You may select the recover icon () to reset the adjusted colors to its original default setting.
7. Playback and Delete mode
EN
You may watch the previous captured images by Pressing the (Playback) Button then and Button for image selection. Press the Button twice will set the captured images in a slide show mode.
To delete a captured image, under the Playback mode, press the Delete Button ( ) once will allow you to delete the selected image to delete. Press the delete Button twice will allow you to delete all the captured images.
Press the Delete Button 3 times will allow you to format the SD Card. If there is no image in the SD Card you are not able to enter the Playback/Delete or Format mode.
NOTE:
Formatting your SD Card will delete all the files in your card. Please save your file (if any) in into your computer before card formatting.
8. Watching the images on a TV screen
EN
Connect your scanner and TV set by the TV Cable. Set your TV to video mode, turn on the power of the scanner and press the Playback) Button, select the TV system of the country you locate, then press the OK/() Button to confirm the system you select. You are now allowing to watch your image on the TV screen.
You may also connect the scanner to TV set via USB setting, to watch up to a 4K/2K image quality, depending on the maximum resolution of your TV set.
For proper USB connection of your TV set please refer to the instruction manual of your TV set, and treat your USB and scanner connection as a Card Reader.
9. Downloading the images from Card to Computer
EN
Connect the Scanner to the computer via the micro USB cable. Turn on the power of your computer and scanner, you will see a pop up icon on the Scanner LCD screen as shown below.
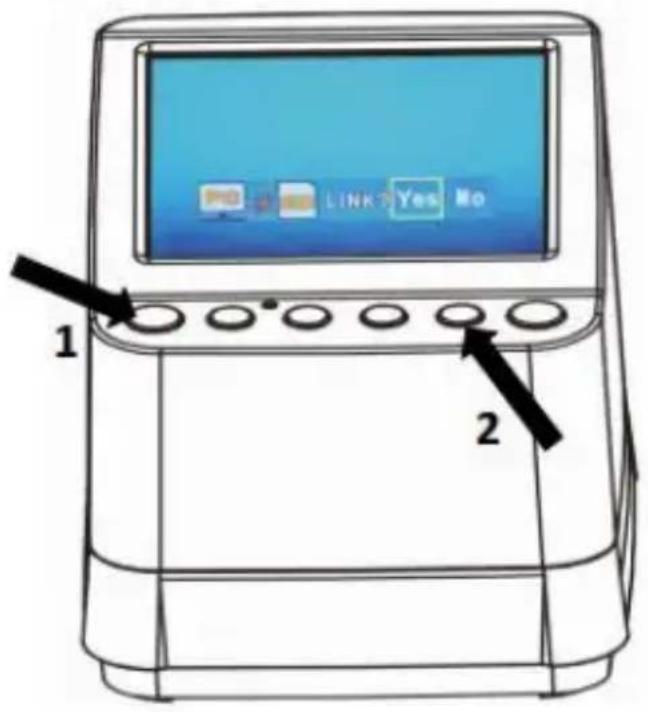
Press the OR Button to set the yellow frame to "YES", it means you select to link the Card to the computer, then press the OK/() Button to confirm the linkage. You may download the images from your card to any folder of the computer.
10. Appendix
EN
Specifications
| Image Sensor | 1/2.3” 14 Mega CMOS Sensor, |
| Preview and Review | 3.5” Color LCD Display |
| Lens Specification | F/No. 3.5, 5 elements lens |
| Color Balance | Automatic |
| Exposure Control | Automatic & Manual adjustment |
| Support Film Size | 135 Negative & Slide (3:2) |
| Auto Cropping | 110 Negative (4:3) (optional) |
| 126 Negative (1:1) (optional) | |
| Support Film Type | 135 Slide |
| Auto Converting | Color Negative Film (135 ,110 & 126) |
| Black & White Negative Film | |
| Focusing | Fixed Focus |
| EV adjustment | Yes, + - 2.0 EV |
| RGB Color adjustment | Yes |
| PC Interface | USB 2.0 |
| Image Format | 135 Negative 3:2 Ratio |
| 110 Negative 4:3 Ratio | |
| 126 Negative, 1:1 Ratio | |
| Light Source | White LED Panel |
| Power Source | From computer · USB port, 5V/1A Power adaptor |
| USB Connector | Micro USB 2.0 |
| TV System | NTSC and PAL |
| Dimension | 101 (H) x 96 (W) x 123 (L) mm |
Specifications are subjected to change without prior notice.
Icons & Indicators
EN
| Brightness | Delete? | Delete One | |
| Selected Color | All Delete all? | Delete All | |
| Default Color | Format? | Format SD Card | |
| Adjusted Value | Yes | Yes | |
| 135 Slide | No | No | |
| 135 Negative Film | X | Card Error | |
| B/W | B/W 135 Negative Film | 0% | Card Full |
| 110 | 110 Negative Film | Card Lock | |
| 126 | 126 Negative Film | Playback Mode | |
| PC=SD LINK? | PC-SD-Card Selection | Slide Show | |
| PC=SD | PC-SD Card Link-connected | Wait | |
| TV=SD WTSC PAL | TV System Selection | ||
| +0.0EV | EV Compensation | ||
| 0888 | Available number take in SD card | ||
PC System Requirements
- Pentium® P4 1.6GHz or equivalent AMD Athlon
Free USB2.0 port - 512MB RAM
- 500MB free hard disk space
- 1024 × 768 pixel color monitor
- CD-ROM drive
- Windows® XP Service Pack II / Vista™, 32/64 bits Windows 7/Windows 8 / Windows 10
Mac System Requirements
- Power PC G5 or Intel Core Duo processor recommended
Free USB2.0 port
768MB RAM - 500MB free hard disk space
- 1024 × 768 color monitor
- CD-ROM drive
Mac 10.5 and up
This symbol on the product or in the instructions means that your electrical and electronic equipment should be disposed at the end of its life separately from your household waste. There are separate collection systems for recycling in the EU. For more information, please contact the local authority or your retailer where you purchased the product.
reflecta GmbH
Merkurstraße 8
72184 Eutingen
Germany
www(reflecta.de
Manual del usuario
reflecta
x10-Scan
Índice
ES
- Précautions 1
- Preparation 3
Accessoires standard 3
Description des pieces 4

- Welcome
- Precaution
- Preparation
- Standard Accessories
- Part Names
- Start Using Your Digital Film Scanner
- Insert the SD Card into the scanner.
- Note:
- Connect the electric power to your scanner.
- Film Type Icons:
- (Shown on Lower Left Corner of LCD)
- Place Film / Slide Into The Holder
- Place Slide / Film Holder Into The Scanner
- Scanning type 135, 110 and 126 negative films:
- Image Brightness and Color Adjustment
- Playback and Delete mode
- Watching the images on a TV screen
- Downloading the images from Card to Computer
- Appendix
- Icons & Indicators
- PC System Requirements
- Mac System Requirements
- Manual del usuario
- reflecta
- x10-Scan
- Índice
Brand : Reflecta
Model : x10Scan
Category : Scanner