Infinity Track 4.0 - Treadmills Capital Sports - Free user manual and instructions
Find the device manual for free Infinity Track 4.0 Capital Sports in PDF.
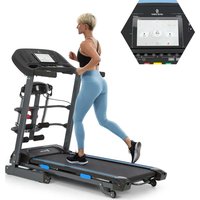
| Product Type | Treadmill |
| Brand | Capital Sports |
| Model | Infinity Track 4.0 |
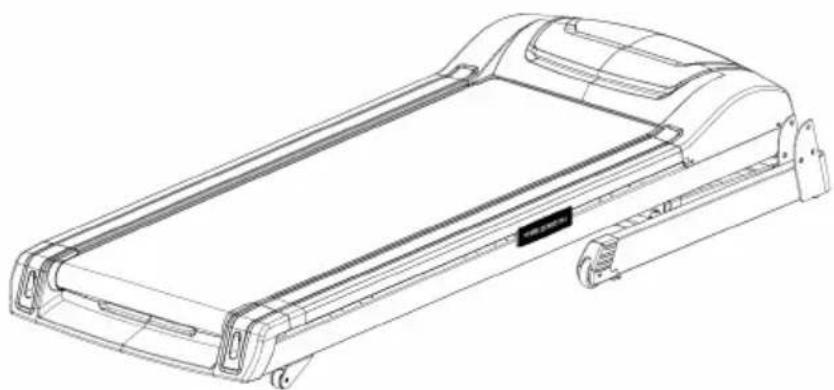
| Dimensions (L x H x D) | 82 x 162 x 175 cm |
| Net weight | 90 kg |
| Power supply | 220-240 V ~ 50/60 Hz |
| Maximum user weight | 110 kg |
| Maximum speed | 16 km/h |
| Maximum incline | 12 % |
| Number of programs | 36 preset (P1-P36), 3 customizable (U1-U3), HRC program, body fat measurement |
| Display | LED: time, speed, distance, calories, heart rate, incline |
| Connectivity | Bluetooth™ for KINOMAP app |
| Special features | Safety key, fan, speed/incline quick access keys, heart rate grips |
| Heart rate measurement range | 50-200 bpm (via grips) |
| Duration adjustment range | 5 to 99 minutes |
| Calorie adjustment range | 20 to 9990 kcal |
| Distance adjustment range | 1.0 to 99.0 km |
| Age adjustment range (HRC) | 15 to 80 years |
| Foldable and transportable | Yes, with locking cylinder and transport wheels |
| Lubrication | Recommended after 500 hours or 1 year, then every 3 months |
| Belt tension adjustment | Allen screw at the rear (clockwise to increase, counterclockwise to decrease) |
| Running belt centering | Via left/right adjustment screws at the rear |
| Cleaning | Damp cloth and mild detergent, do not use solvents |
| Weekly maintenance | Check tightness of screws and condition of moving parts |
| Protection class | Household use only |
Frequently Asked Questions - Infinity Track 4.0 Capital Sports
User questions about Infinity Track 4.0 Capital Sports
0 question about this device. Answer the ones you know or ask your own.
Ask a new question about this device
Download the instructions for your Treadmills in PDF format for free! Find your manual Infinity Track 4.0 - Capital Sports and take your electronic device back in hand. On this page are published all the documents necessary for the use of your device. Infinity Track 4.0 by Capital Sports.
USER MANUAL Infinity Track 4.0 Capital Sports
text_image
QR code image containing encoded data, no visible human-readable textINHALTSVERZEICHNIS
natural_image
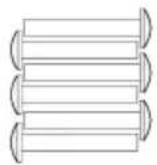
Three technical line drawings of electronic devices: a flat case, a handheld device with a keypad, and a coiled device (no text or symbols present)natural_image
Four line drawings of different types of medical or surgical instruments, no text or symbols presentPfosten
Handpuls-Griffe
Sicherheitsschlüssel
Silikonöl

Anleitung
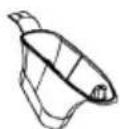
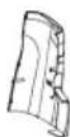
Griffabdeckung
natural_image
Simple line drawing of a stylized object resembling a tool or device with a handle (no text or symbols)Kreuzschlitzschlüssel

T-Schüssel

Inbusschlüssel
ZUSAMMENBAU
1
natural_image
Technical line drawing of a treadmill component (no text or symbols)natural_image
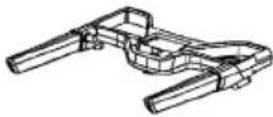
Technical line drawing of a treadmill with attached lever arms and a close-up view of the tray (no text or symbols)2. Cardio-Trainingsphase
natural_image
Woman performing a seated stretch exercise (no text or symbols visible)text_image
Zylinder TransportradLaufband aufklappen
natural_image
Close-up of a hand holding a small object, possibly a device or tool, in a dark indoor setting (no visible text or symbols)TRAINING PER KINOMAP APP
text_image
Kinomap Anmelden Home Playlists Alle Videos Karte Kaufen Auswertung Geräte Einlösen 11:32 Kinomap SIGN IN Username or email Password Sign in Connect with Facebook Connect with STRAYA Sign in with Google LOG IN WITH UNDER ARMOUR Create accountAktivierungscode
text_image
Kinemap cednct Home Featured PROFILES MANAGEMENT Manage profiles Current profile details Preview Data Subscribe Activity History
text_image
Kinomap Bike Power Sensors - Power sensors Primary: connected - 283 KM/H WATT RPM BPM 90 -- Additional sensors 72 bpm -pm wattTraining
Videoauswahl
text_image
Quiet ride in Central Park Pick your settings Select your training mode and if you wish to resume a previous activity, or start a new chat. DISCOVERY CHALLENGE Challenge selected: the video plays at your speed. NEW TRAINING PREVIOUS TRAINING EXIT STARTtext_image
Quiet ride in Central Park 0.00 f 0.0 Start pedalingtext_image
Pick your settings Select your training mode and if you wish to resume a previous activity, or start a new one. DISCOVERY CHALLENGE Challenge selected: the video plays at your speed. NEW TRAINING PREVIOUS TRAINING EXIT STARTTrainingsanzeige
text_image
Quiet ride in Central Park 0.00 m/02s 283 watts 15.3 mph 8 m -rpm 90 rpm Your training is starting Elevation 30 20 10 2000 4000 6000 8000 HD PAUSE Lemon's WEST SIDE MANHAT M.N. New York, Historical Society Swaberry Fields MAP RANKING ©2018 Google - Map data ©2158 Googlenatural_image
Black-and-white landscape photo of a winding mountain road through forested slopes under cloudy skies (no text or symbols visible)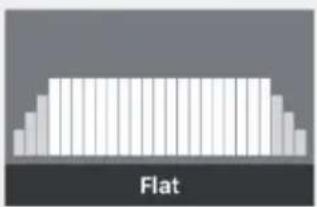
natural_image
Simple diagram of a flat rectangular shape with vertical bars, labeled 'Flat' at the base (no other text or symbols)
text_image
Valley Trail
text_image
Rolling Hills
text_image
In the Mountains
text_image
The Alpine Pass
text_image
The Interval
text_image
Tour d'Egypt
bar
| Category | Value | |---|---| | Bar 1 | 20 | | Bar 2 | 35 | | Bar 3 | 60 | | Bar 4 | 85 | | Bar 5 | 70 | | Bar 6 | 90 | | Bar 7 | 65 | | Bar 8 | 75 | | Bar 9 | 80 | | Bar 10 | 70 | | Bar 11 | 60 | | Bar 12 | 55 | | Bar 13 | 45 | | Bar 14 | 35 | | Bar 15 | 25 | | Bar 16 | 20 | Change label below the bars is 'Change'.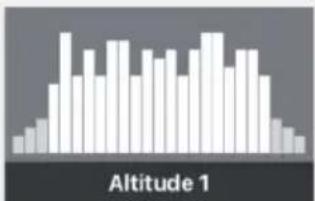
bar
| Altitude | Value | |---|---| | 1 | 0.5 | | 2 | 0.8 | | 3 | 1.2 | | 4 | 1.5 | | 5 | 1.8 | | 6 | 2.0 | | 7 | 2.2 | | 8 | 2.5 | | 9 | 2.8 | | 10 | 3.0 | | 11 | 3.2 | | 12 | 3.5 | | 13 | 3.8 | | 14 | 4.0 | | 15 | 4.2 | | 16 | 4.5 | | 17 | 4.8 | | 18 | 5.0 | | 19 | 5.2 | | 20 | 5.5 | | 21 | 5.8 | | 22 | 6.0 | | 23 | 6.2 | | 24 | 6.5 | | 25 | 6.8 | | 26 | 7.0 | | 27 | 7.2 | | 28 | 7.5 | | 29 | 7.8 | | 30 | 8.0 | | 31 | 8.2 | | 32 | 8.5 | | 33 | 8.8 | | 34 | 9.0 | | 35 | 9.2 | | 36 | 9.5 | | 37 | 9.8 | | 38 | 10.0 | | 39 | 10.2 | | 40 | 10.5 | | 41 | 10.8 | | 42 | 11.0 | | 43 | 11.2 | | 44 | 11.5 | | 45 | 11.8 | | 46 | 12.0 | | 47 | 12.2 | | 48 | 12.5 | | 49 | 12.8 | | 50 | 13.0 | | 51 | 13.2 | | 52 | 13.5 | | 53 | 13.8 | | 54 | 14.0 | | 55 | 14.2 | | 56 | 14.5 | | 57 | 14.8 | | 58 | 15.0 | | 59 | 15.2 | | 60 | 15.5 | | 61 | 15.8 | | 62 | 16.0 | | 63 | 16.2 | | 64 | 16.5 | | 65 | 16.8 | | 66 | 17.0 | | 67 | 17.2 | | 68 | 17.5 | | 69 | 17.8 | | 70 | 18.0 | | 71 | 18.2 | | 72 | 18.5 | | 73 | 18.8 | | 74 | 19.0 | | 75 | 19.2 | | 76 | 19.5 | | 77 | 19.8 | | 78 | 20.0 | | 79 | 20.2 | | 80 | 20.5 | | 81 | 20.8 | | 82 | 21.0 | | 83 | 21.2 | | 84 | 21.5 | | 85 | 21.8 | | 86 | 22.0 | | 87 | 22.2 | | 88 | 22.5 | | 89 | 22.8 | | 90 | 23.0 | | 91 | 23.2 | | 92 | 23.5 | | 93 | 23.8 | | 94 | 24.0 | | 95 | 24.2 | | 96 | 24.5 | | 97 | 24.8 | | 98 | 25.0 | | 99 | 25.2 | | Altitude: The chart displays a bar chart with values ranging from approximately -0.5 to +0.5, and labels are explicitly provided in the top left corner as 'Altitude: Altitude_1'.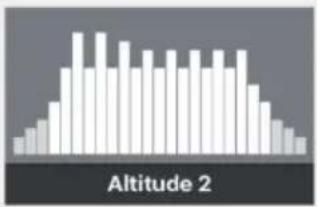
bar
| Altitude | Value | |---|---| | 1 | 0.5 | | 2 | 0.7 | | 3 | 0.9 | | 4 | 1.1 | | 5 | 1.3 | | 6 | 1.5 | | 7 | 1.7 | | 8 | 1.9 | | 9 | 2.1 | | 10 | 2.3 | | 11 | 2.5 | | 12 | 2.7 | | 13 | 2.9 | | 14 | 3.1 | | 15 | 3.3 | | 16 | 3.5 | | 17 | 3.7 | | 18 | 3.9 | | 19 | 4.1 | | 20 | 4.3 | | 21 | 4.5 | | 22 | 4.7 | | 23 | 4.9 | | 24 | 5.1 | | 25 | 5.3 | | 26 | 5.5 | | 27 | 5.7 | | 28 | 5.9 | | 29 | 6.1 | | 30 | 6.3 | | 31 | 6.5 | | 32 | 6.7 | | 33 | 6.9 | | 34 | 7.1 | | 35 | 7.3 | | 36 | 7.5 | | 37 | 7.7 | | 38 | 7.9 | | 39 | 8.1 | | 40 | 8.3 | | 41 | 8.5 | | 42 | 8.7 | | 43 | 8.9 | | 44 | 9.1 | | 45 | 9.3 | | 46 | 9.5 | | 47 | 9.7 | | 48 | 9.9 | | 49 | 10.1 | | 50 | 10.3 | | 51 | 10.5 | | 52 | 10.7 | | 53 | 10.9 | | 54 | 11.1 | | 55 | 11.3 | | 56 | 11.5 | | 57 | 11.7 | | 58 | 11.9 | | 59 | 12.1 | | 60 | 12.3 | | 61 | 12.5 | | 62 | 12.7 | | 63 | 12.9 | | 64 | 13.1 | | 65 | 13.3 | | 66 | 13.5 | | 67 | 13.7 | | 68 | 13.9 | | 69 | 14.1 | | 70 | 14.3 | | 71 | 14.5 | | 72 | 14.7 | | 73 | 14.9 | | 74 | 15.1 | | 75 | 15.3 | | 76 | 15.5 | | 77 | 15.7 | | 78 | 15.9 | | 79 | 16.1 | | 80 | 16.3 | | 81 | 16.5 | | 82 | 16.7 | | 83 | 16.9 | | 84 | 17.1 | | 85 | 17.3 | | 86 | 17.5 | | 87 | 17.7 | | 88 | 17.9 | | 89 | 18.1 | | 90 | 18.3 | | 91 | 18.5 | | 92 | 18.7 | | 93 | 18.9 | | 94 | 19.1 | | 95 | 19.3 | | 96 | 19.5 | | 97 | 19.7 | | 98 | 19.9 | | 99 | nan |
bar
| Interval | Value | |---|---| | 1 | 0.5 | | 2 | 0.7 | | 3 | 0.9 | | 4 | 1.1 | | 5 | 1.3 | | 6 | 1.5 | | 7 | 1.7 | | 8 | 1.9 | | 9 | 2.1 | | 10 | 2.3 | | 11 | 2.5 | | 12 | 2.7 | | 13 | 2.9 | | 14 | 3.1 | | 15 | 3.3 | | 16 | 3.5 | | 17 | 3.7 | | 18 | 3.9 | | 19 | 4.1 | | 20 | 4.3 | | 21 | 4.5 | | 22 | 4.7 | | 23 | 4.9 | | 24 | 5.1 | | 25 | 5.3 | | 26 | 5.5 | | 27 | 5.7 | | 28 | 5.9 | | 29 | 6.1 | | 30 | 6.3 | | 31 | 6.5 | | 32 | 6.7 | | 33 | 6.9 | | 34 | 7.1 | | 35 | 7.3 | | 36 | 7.5 | | 37 | 7.7 | | 38 | 7.9 | | 39 | 8.1 | | 40 | 8.3 | | 41 | 8.5 | | 42 | 8.7 | | 43 | 8.9 | | 44 | 9.1 | | 45 | 9.3 | | 46 | 9.5 | | 47 | 9.7 | | 48 | 9.9 | | 49 | 10.1 | | 50 | 10.3 | | 51 | 10.5 | | 52 | 10.7 | | 53 | 10.9 | | 54 | 11.1 | | 55 | 11.3 | | 56 | 11.5 | | 57 | 11.7 | | 58 | 11.9 | | 59 | 12.1 | | 60 | 12.3 | | 61 | 12.5 | | 62 | 12.7 | | 63 | 12.9 | | 64 | 13.1 | | 65 | 13.3 | | 66 | 13.5 | | 67 | 13.7 | | 68 | 13.9 | | 69 | 14.1 | | 70 | 14.3 | | 71 | 14.5 | | 72 | 14.7 | | 73 | 14.9 | | 74 | 15.1 | | 75 | 15.3 | | 76 | 15.5 | | 77 | 15.7 | | 78 | 15.9 | | 79 | 16.1 | | 80 | 16.3 | | 81 | 16.5 | | 82 | 16.7 | | 83 | 16.9 | | 84 | 17.1 | | 85 | 17.3 | | 86 | 17.5 | | 87 | 17.7 | | 88 | 17.9 | | 89 | 18.1 | | 90 | 18.3 | | 91 | 18.5 | | 92 | 18.7 | | 93 | 18.9 | | 94 | 19.1 | | 95 | 19.3 | | 96 | 19.5 | | 97 | 19.7 | | 98 | 19.9 | | 99 | nan |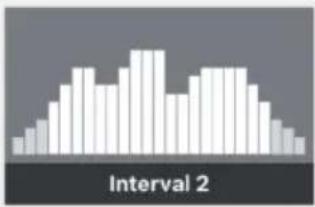
bar
| Interval | Value | |---|---| | 1 | 0.5 | | 2 | 1.2 | | 3 | 2.1 | | 4 | 2.8 | | 5 | 3.5 | | 6 | 4.2 | | 7 | 4.9 | | 8 | 5.6 | | 9 | 6.3 | | 10 | 7.0 | | 11 | 7.7 | | 12 | 8.4 | | 13 | 9.1 | | 14 | 9.8 | | 15 | 10.5 | | 16 | 11.2 | | 17 | 11.9 | | 18 | 12.6 | | 19 | 13.3 | | 20 | 14.0 | | 21 | 14.7 | | 22 | 15.4 | | 23 | 16.1 | | 24 | 16.8 | | 25 | 17.5 | | 26 | 18.2 | | 27 | 18.9 | | 28 | 19.6 | | 29 | 20.3 | | 30 | 21.0 | | 31 | 21.7 | | 32 | 22.4 | | 33 | 23.1 | | 34 | 23.8 | | 35 | 24.5 | | 36 | 25.2 | | 37 | 25.9 | | 38 | 26.6 | | 39 | 27.3 | | 40 | 28.0 | | 41 | 28.7 | | 42 | 29.4 | | 43 | 30.1 | | 44 | 30.8 | | 45 | 31.5 | | 46 | 32.2 | | 47 | 32.9 | | 48 | 33.6 | | 49 | 34.3 | | 50 | 35.0 | | 51 | 35.7 | | 52 | 36.4 | | 53 | 37.1 | | 54 | 37.8 | | 55 | 38.5 | | 56 | 39.2 | | 57 | 39.9 | | 58 | 40.6 | | 59 | 41.3 | | 60 | 42.0 | | 61 | 42.7 | | 62 | 43.4 | | 63 | 44.1 | | 64 | 44.8 | | 65 | 45.5 | | 66 | 46.2 | | 67 | 46.9 | | 68 | 47.6 | | 69 | 48.3 | | 70 | 49.0 | | 71 | 49.7 | | 72 | 50.4 | | 73 | 51.1 | | 74 | 51.8 | | 75 | 52.5 | | 76 | 53.2 | | 77 | 53.9 | | 78 | 54.6 | | 79 | 55.3 | | 80 | 56.0 | | 81 | 56.7 | | 82 | 57.4 | | 83 | 58.1 | | 84 | 58.8 | | 85 | 59.5 | | 86 | 60.2 | | 87 | 60.9 | | 88 | 61.6 | | 89 | 62.3 | | 90 | 63.0 | | Note: The actual values may vary due to the random nature of the data generation, as they are not explicitly provided in the code (e.g., this is a simplified representation). The code does not include the original data points used for comparison.text_image
Activity History - 408 Profile Training 01/03/2018 at 11:05 a.m. 00:00:32 93 m 1 sessions 3.5 kJ K 1 # 56 Profile Training 01/03/2018 at 11:00 a.m. 00:00:37 132 m 1 sessions 2.2 kJ K 2 # 59 Quiet ride in Central Park 28/02/2018 at 2:49 p.m. 00:00:24 71 m 1 sessions Challenge K 1 # 59 Semi Marathon Meaux 2014 - Allure 4mn/KM 28/02/2018 at 11:26 a.m. 00:01:31 392 m 1 sessions Challenge K 36 # 395 Rocheserviere => Saint Fulgent 26/02/2018 at 10:48 a.m. 01:14:21 48.832 KM 1 sessions Challenge K 1754 # 282 Profile Training 23/02/2018 at 12:46 p.m. 00:01:25 143 m 1 sessions 0.6 kJ K 0 # 7Suche
natural_image
Symbol of a trash bin crossed with a diagonal line, no text or numbers presentUnit 6 Riverside Business Centre
Brighton Road
Shoreham-by-Sea
BN43 6RE
United Kingdom
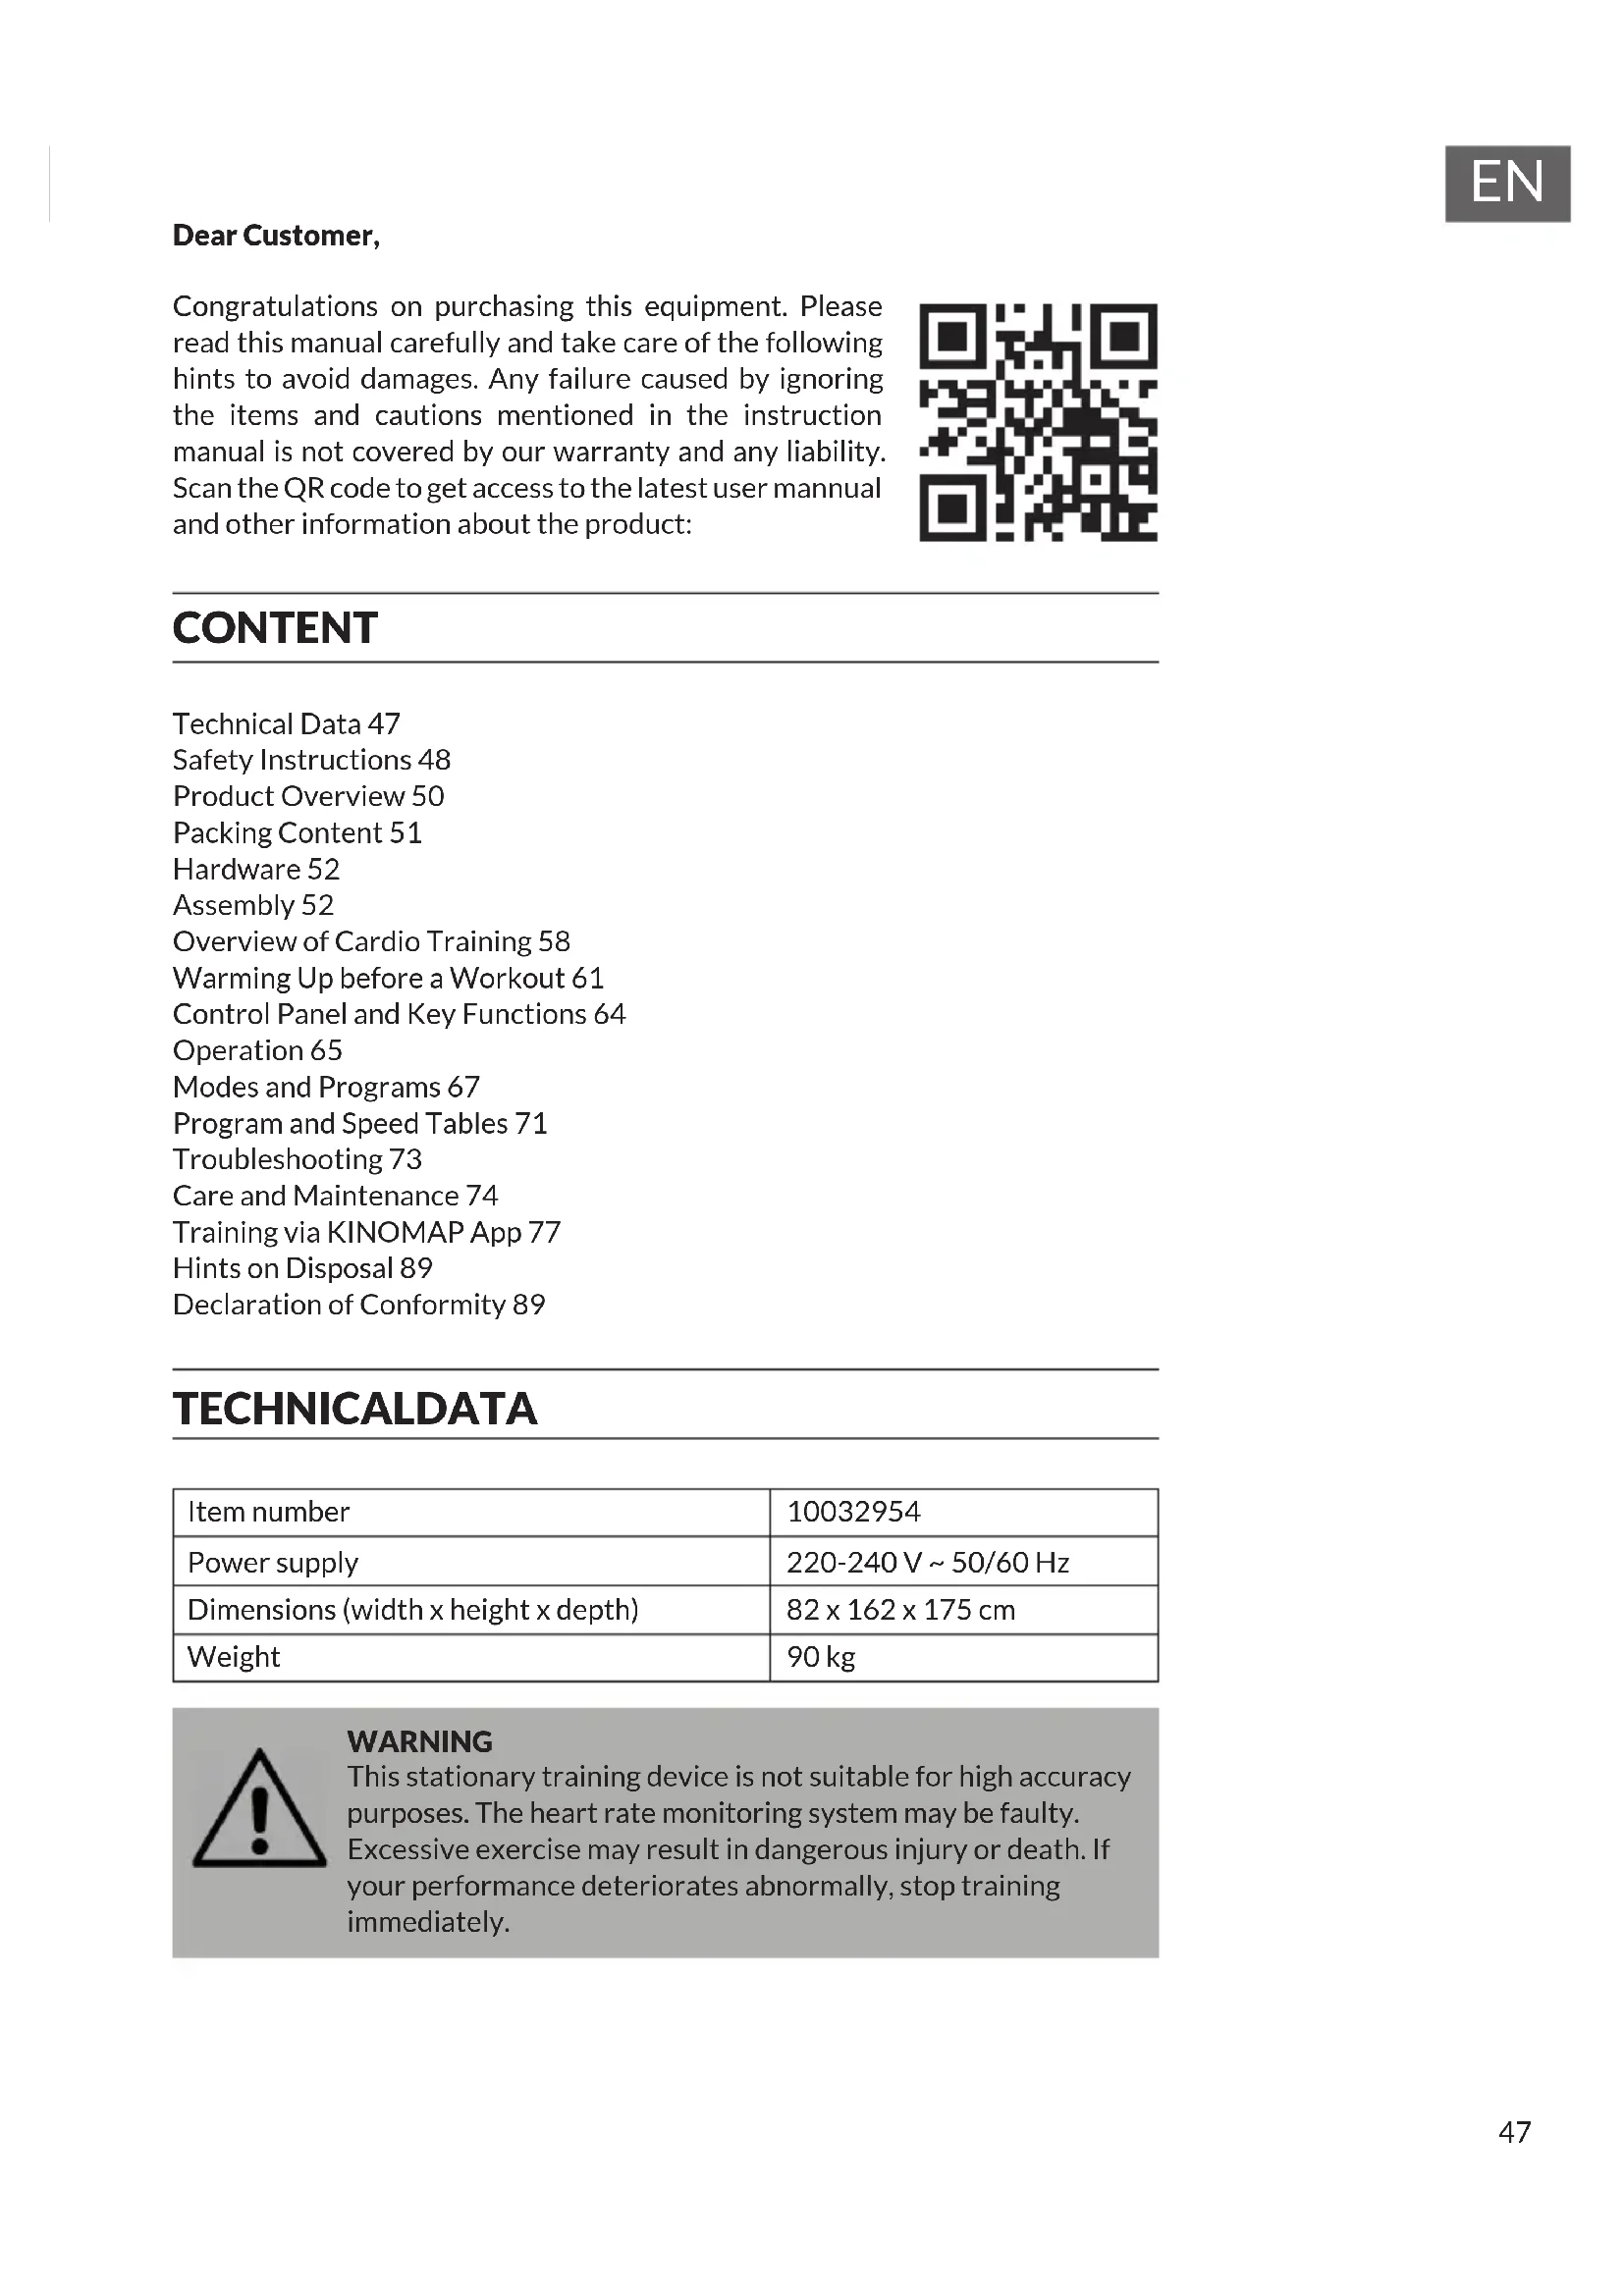
Congratulations on purchasing this equipment. Please read this manual carefully and take care of the following hints to avoid damages. Any failure caused by ignoring the items and cautions mentioned in the instruction manual is not covered by our warranty and any liability. Scan the QR code to get access to the latest user manual and other information about the product:

text_image
QR code image containing encoded data, no visible human-readable textCONTENT
Technical Data 47
Safety Instructions 48
Product Overview 50
Packing Content 51
Hardware 52
Assembly 52
Overview of Cardio Training 58
Warming Up before a Workout 61
Control Panel and Key Functions 64
Operation 65
Modes and Programs 67
Program and Speed Tables 71
Troubleshooting 73
Care and Maintenance 74
Training via KINOMAP App 77
Hints on Disposal 89
Declaration of Conformity 89
TECHNICALDATA
| Item number | 10032954 |
| Power supply | 220-240 V ~ 50/60 Hz |
| Dimensions (width x height x depth) | 82 x 162 x 175 cm |
| Weight | 90 kg |

WARNING
This stationary training device is not suitable for high accuracy purposes. The heart rate monitoring system may be faulty.
Excessive exercise may result in dangerous injury or death. If your performance deteriorates abnormally, stop training immediately.
SAFETY INSTRUCTIONS
Before operating this unit, please read this manual carefully to ensure optimum performance and safety. This is manual should be kept available for future reference. For product improvement, the company reserves the right to change the design and specification at any time without prior notice. Pictures are for reference use only and may differ from the actual product.
- Please keep this manual in a safe place for your reference when necessary.
- Please do not assembly or use this equipment until you read this manual thoroughly & carefully. The safety and efficiency only can be achieved when the equipment is assembled, maintained and used properly. It is your responsibility to ensure that all the users are informed of all the warnings and precautions.
- For totally safe use, a stable, leveled surface is required. Protect your floor with a mat. Do not use the equipment in a damp areas such as swimming pool sauna, etc. For safety space, the equipment must have at least 0.6 meter of free space all around it.
- Before starting any exercise program you must consult your doctor to determine if you have any physical or health conditions that could create a risk to your health and safety, or prevent you from using the equipment properly. Your doctor's advice is essential if you are taking medication that affects your heart rate, blood pressure or cholesterol level.
- Be aware of your body's signals. Incorrect or excessive exercise can damage your health. Stop exercising if you experienced any of the following symptoms: pain, tightness in your chest, irregular heartbeat, extreme shortness of breath, feeling light headed, dizzy or nauseous. If you do experience any of these conditions you must consult your doctor before continuing with your exercise program.
- Do not workout immediately after meals.
- Keep children and pets away from the equipment, the equipment must be assembled and used by adults only.
- The equipment is designed for home use only.
- The equipment is not suitable for therapeutic use, may only be used for exercises indicated in the training instructions
- Wearing proper clothing and athletic shoes while using the equipment, Avoid wearing loose clothing that may get caught in the equipment or that may restrict or prevent movements.
- Keep your back straight while exercising.
- Before using the equipment, check the handle bar, seat, and the nuts & bolts are securely tightened.
- For adjustable parts, bear the maximum position in your mind, do not exceed the mark „stop“, otherwise will cause risk.
- Always use the equipment as indicated. If you find any defective components while assembling or checking the equipment, or if you hear any unusual noises coming from the equipment during use, stop immediately. Do not use the equipment until the problem has been solved.
- Care must be taken when lifting or moving the equipment so as not to injure your back. always use proper lifting techniques and/or seek assistance if necessary.
- All moveable accessories(e.g. pedal, handlebar, saddle...etc.) require weekly maintenance. Check them before use every time. If anything broken or loose, please fix them immediately. You may continue using them only after they return to good conditions.
- Pay attention to the absence of a free wheel system which will cause serious risk.
- Keep power cord away from heat sources.
- Do not insert or drop any object into any opening.
- Unplug exercise bike before moving or cleaning it. To clean, wipe surfaces down with mild detergents and a slightly damp cloth only; never use solvents.
- Do not use the exercise bike in any location that is not temperature controlled, such as, but not limited to, garages, porches, pool rooms, bathrooms, car ports or outdoors.
- Use the bike only as described in this manual.
- Incorrect repair and structural modifications(e.g. removal or replacement of original parts) may endanger the safety of the user.
- The rotating disk flywheel will get hot during the operation.
- Lock the equipment when stop using.
- This product is not designed for use by persons (including children) who have reduced physical, sensory or mental capacities or persons with no experience or knowledge, unless they are instructed and supervised in the use of the appliance by a person responsible for their safety.
- Children should be supervised to ensure that they do not play with the appliance.
- Before use, check the voltage on the device badge. Only connect the device to sockets that correspond to the voltage of the device.
Note: Maximum weight of the user is 110 kg.
PRODUCT OVERVIEW
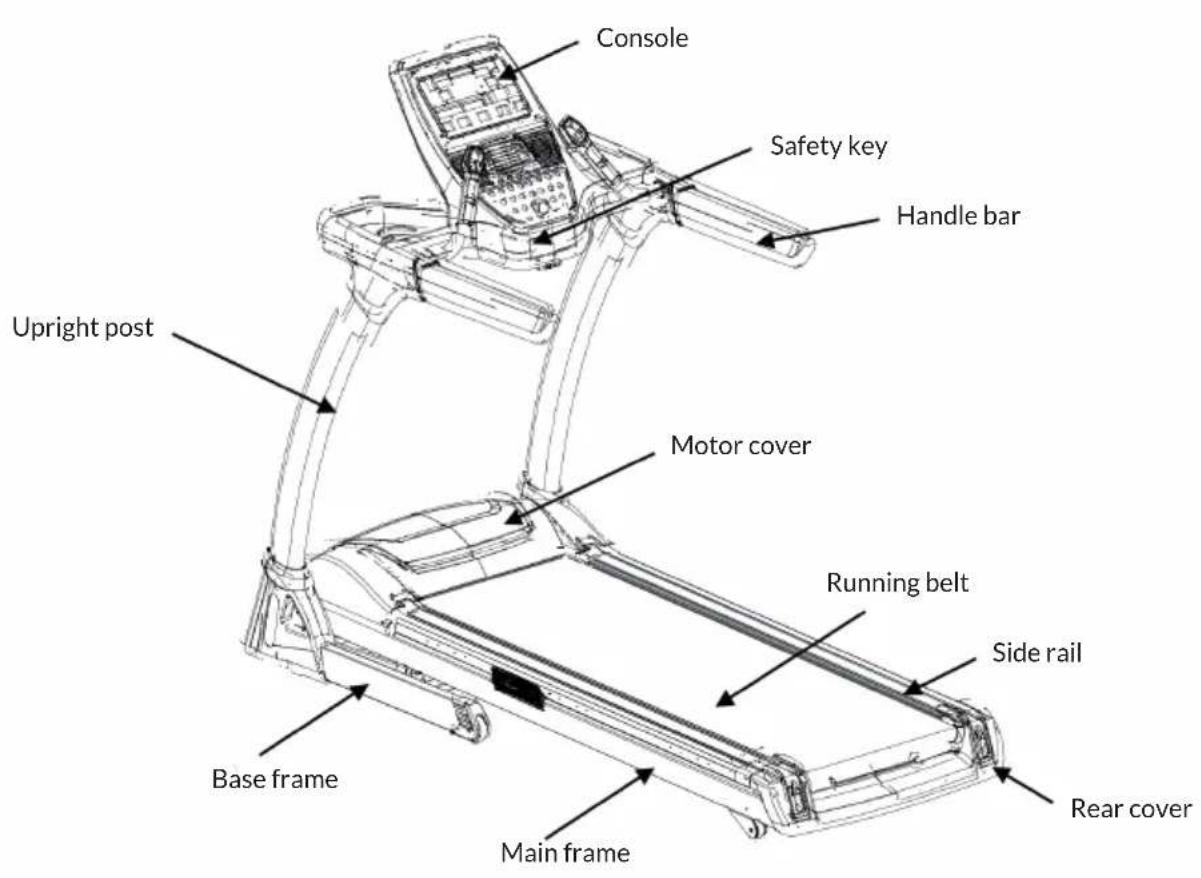
text_image
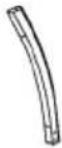
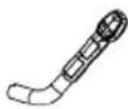
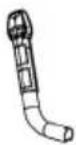
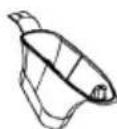
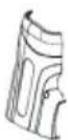
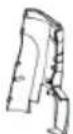
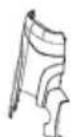
Console Safety key Handle bar Upright post Motor cover Running belt Side rail Rear cover Base frame Main framePACKING CONTENT

natural_image
Three technical line drawings of electronic devices: a flat case, a handheld device with a keypad, and a coiled device (no text or symbols present)Main body Console Console base set

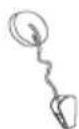
Hardware
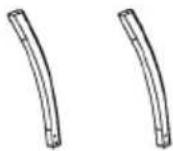
Upright post
Handle pulse bar
Safety key

Silicoe oil

Manual
Handle bar cover
Bottom frame cover (2 set)
iPad holder

Bottle holder
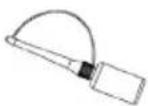
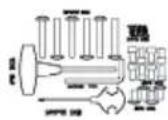
HARDWARE
Allen screw M8*55*20
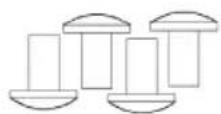
Allen screw M8*15
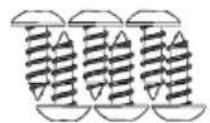
Screw ST4*16

Cylinder full thread screw M8*15
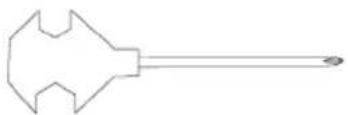
natural_image
Simple line drawing of a stylized object resembling a tool or device with a handle (no text or symbols)Cross opening wrench

T wrench

Allen wrench
ASSEMBLY
1

natural_image
Technical line drawing of a treadmill frame with no visible text or symbolsTake out the machine MAIN BODY from box and put it on the flat floor.
2
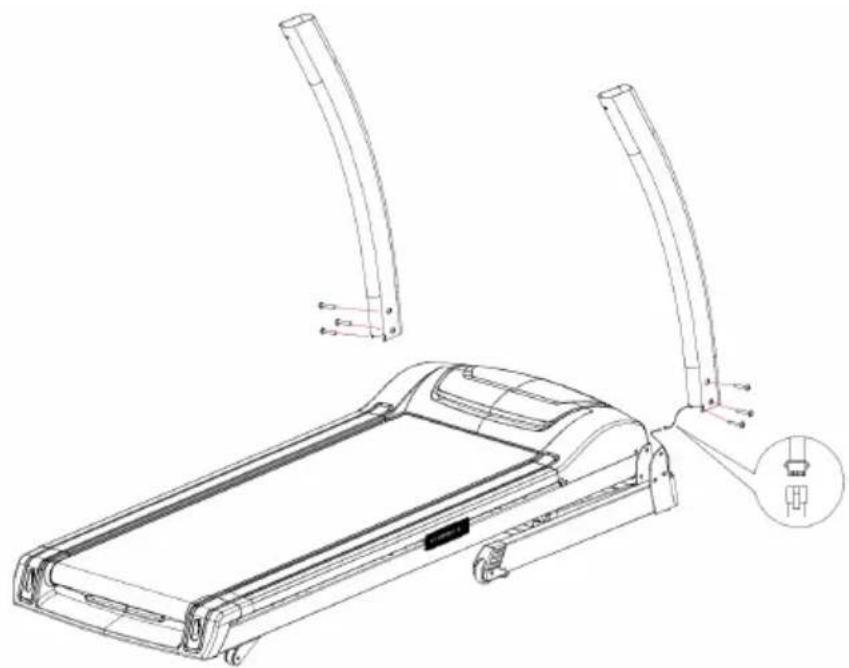
natural_image
Technical line drawing of a treadmill with attached lever arms and a close-up view of the tray (no text or symbols)Connect the communication wire of right upright post, then insert the right upright post into right bottom frame, lock it with 3 pcs Allen C.K.S. half thread screw M8*55*20. Lock the left upright post in same way (no need to connect wire).
| 3 |
| Put the Handle bar covers in each upright post, connect the console communication wire, then lock the console base set and upright post with 4 pcs Allen C.K.S. half thread screw M8*15. Lock he Handle bar covers and console base set with 4 pcs Philips C.K.S. self-tapping screw ST4*16. |
4
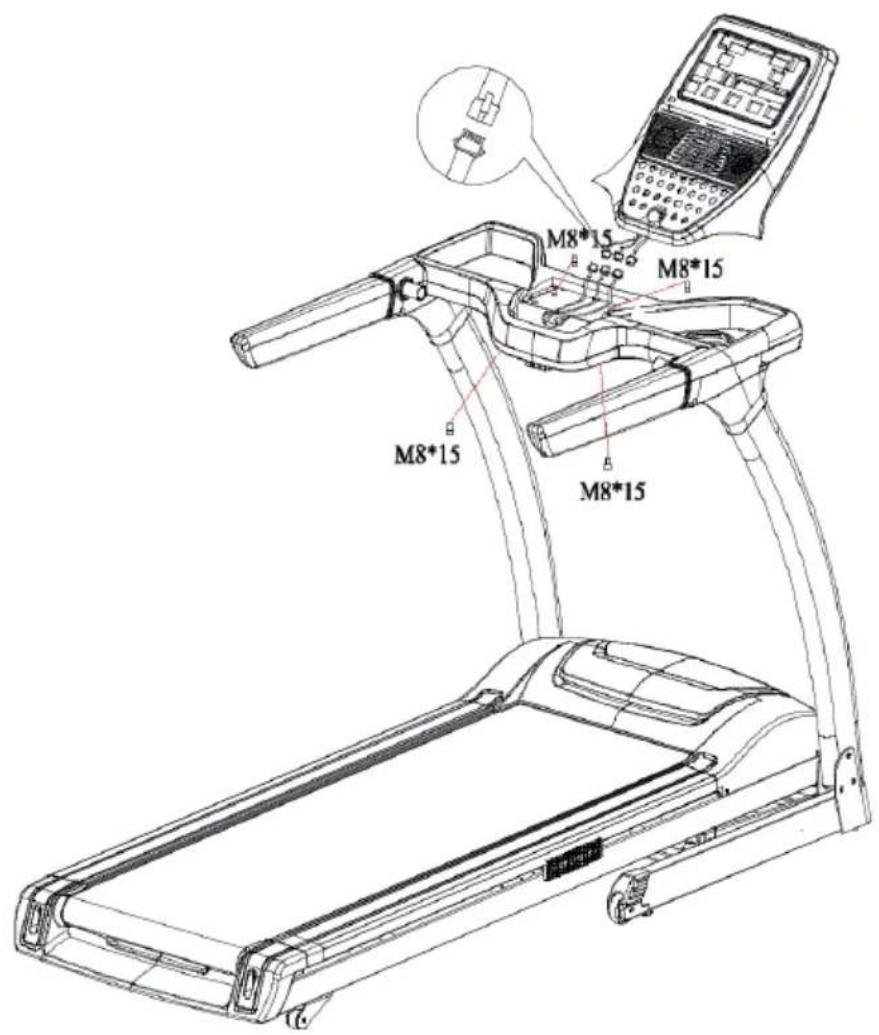
text_image
M8*15 M8*15 M8*15 M8*15Connect the communication wiring of console base set and console, lock them with 4 pcs Allen cylinder full thread screw M8*15.
| 5 |
| Connect the wiring of quick button speed and Hand pulse set and quick button Incline and Hand pulse set (50) to the console base set, then lock them on the console base set with 4 pcs Allen cylinder full thread screw M8*15. |
6

text_image
ST4*16 ST4*16Attach Bottom frame covers onto the upright post, then lock them with 2 pcs Philips C.K.S. self-tapping screw ST4*16. Put the bottle holder to the hole on the right side of console base set. Assembly finished.
Regular cardio training stimulates the cardiovascular (heart and blood vessels) and respiratory system. It improves your general health and helps you to burn fat. It is the recommended workout if you want to lose weight. When exercising, glucose is burned off first, then the fat stored in the body.
Intensive cardio training (e.g. circuit training, training with high resistance and long duration training) requires a greater amount of effort and also trains the muscular system and your endurance. As a rule, the more regular you train, the more effective the training is (even with short training sessions of 20 minutes).
During the Training
The level of resistance used during the workout determines the training intensity and the associated results.
An optimal training session includes (1) a warm-up phase, (2) an intensive cardio training phase and finally (3) a cool down phase. If you want to progress or burn calories, you should go through these 3 phases as well as exercise for at least 20-30 minutes on the ergometer.
1. Warm-up Phase
Always start your training session with a low resistance level. A warm-up phase of 5-10 minutes is important because your muscles need to be warmed up. During the warm-up phase, you should give your circulatory system and muscles time to prepare for the subsequent workout. As a beginner, you can train for the first 3 minutes at the easiest level and then gradually increase the level to where you feel most comfortable.
2. Cardio Training Phase
After about 10 minutes, you can then begin the cardio training phase. When using the interval training program, the computer controls the resistance depending on the type of interval chosen and thus simulates changing intensities.
The cardio training phase is considered aerobic or anaerobic training depending on the energy expenditure. These two types of training are defined as follows:
Aerobic Training Zone
While you are in this zone, you are improving your cardiovascular system and burning fat.
Despite an increased heart rate, deeper breathing and light sweating, the body is not in a very stressed state, breathing is not significantly accelerated—you could still talk to someone without going out of breath—and you feel that you could sustain the physical exertion for a long time. It's similar to when you briskly walk uphill.
The muscles and heart work more intensely than when the body is at rest and can get most of their energy needs met via aerobic energy production, which utilizes oxygen to facilitate energy production. At the same time, the anaerobic production of energy is also active, but only to a small extent. The lactic acid produced in this process can be broken down to produce energy. Most of your training should be aerobic training.
If you continue to increase the intensity, you will eventually come to the threshold where aerobic energy production is no longer able to increase its output. At this point, there is a shift towards anaerobic energy production being used to a greater extent. You are now doing anaerobic training.
Anaerobic Training
When in this zone, you are improving your performance and speed. When you increase the intensity while in this zone, the training becomes much more strenuous because of the rising lactate level in the body; you start sweating more; your breathing gets faster; and after some time depending on your fitness level, your muscles tire and you feel totally exhausted and that you can no longer continue at this level of intensity.
3. Cool-down Phase
At the end of the cardio training phase, you begin the cool-down phase, which should last for at least 5 minutes. Here, you use low levels of resistance.
The recovery or cool-down phase is also helpful with regard to preventing possible muscle soreness. It is also advisable to do active recuperation after an intensive training session, such as a hot bath, a sauna session or a massage.
Training Progress
Each month you can make the training more challenging by extending the duration of the cardio training phase, by using a higher level of resistance within that phase or by doing a more demanding interval training.
Eating and Drinking
- Drink before, during and after training.
- Drink at least 2 sips of water (10 to 20 cl) every 10-15 minutes during a training session.
- If your workout lasts for more than 1 hour, you should drink a sports drink to protect the body from dehydration while training.
- For optimal cardio training, suitable nutrition before and after any physical activity is very important.
Before training, it is best to eat carbohydrates, such as those found in rice and pasta, as they provide the body with an important source of energy.
After training, you need to refuel with proteins, such as those found in eggs, yoghurt and dried fruits. Even if you want to lose weight, it is absolutely necessary to eat after training in order for your body to recuperate.
WARMING UP BEFORE A WORKOUT
Perform the movements before each workout to mobilize your joints and activate your muscles.
Should a movement be uncomfortable or painful, skip this movement and consult your doctor or fitness instructor about suitable warm-up movements.
Each movement should be repeated (right and left) so that you can start the cardio training relaxed.
Take about 5 minutes to do the following CapitalSports training routine:
| 1 | |
 |  |
| Nod the head slowly, then alternating turn the head to look to the right to left. Then mobilize the shoulders by making a circular motion with them. | |
| 2 | 3 |
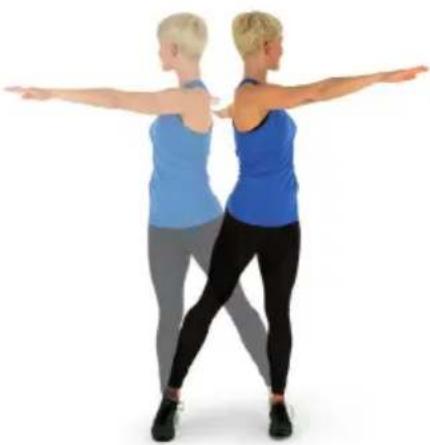 |  |
| Turn the hips while the arms are stretched. The feet are not firmly fixed to the ground; the ankles follow the body's rotation. | Bend at the hip with one arm stretched upward. Stay in this position for a few seconds on each side. |
| 4 | |
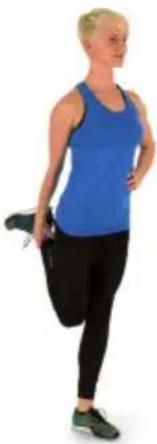 |  |
| Stand on one leg and hold the instep of the other leg with your hand. While in this position, mobilize your ankle so as to stretch the thigh slightly. If necessary, hold on to something to keep your balance. Then Stand on one leg and draw a circle in both directions (clockwise and counterclockwise) with the ankle. | |
| 5 | 6 |
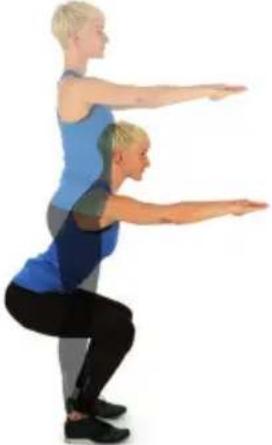 | 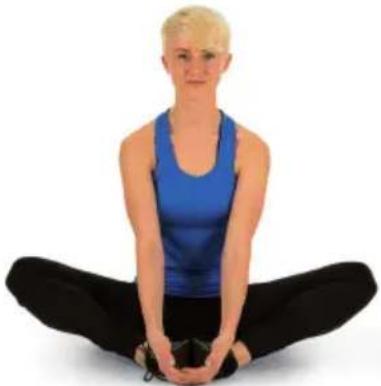 |
| When squatting, place your feet about shoulder-width apart and lower your hips while keeping your arms straight. Try to also keep your back straight. | Sit with your legs bent so that the soles of your feet touch. Slightly flap the knees by moving the knees up and down while keeping the feet on the floor. Hold your ankles and keep your back straight. |
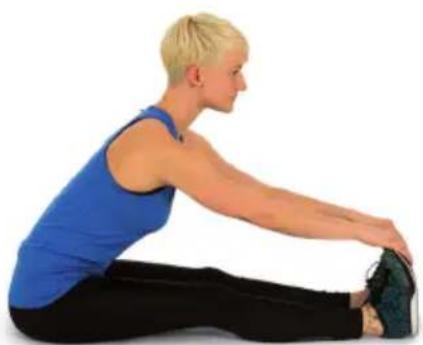
natural_image
Woman performing a seated forward stretch exercise (no text or symbols visible)While seated, stretch forward towards your toes. Try to keep the legs and back straight and reach for the tips of your toes.
7
CONTROL PANEL AND KEY FUNCTIONS
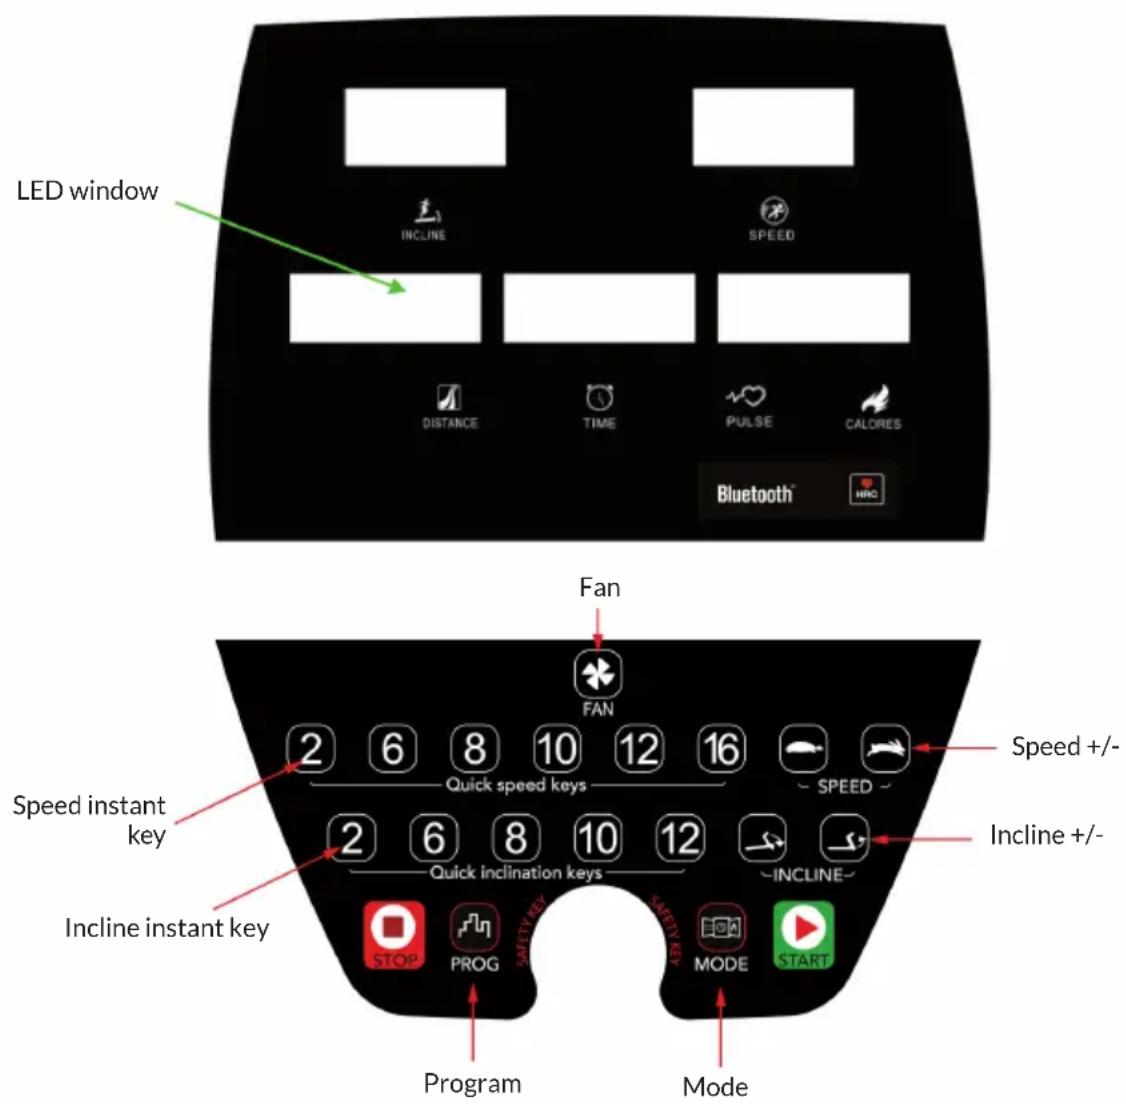
text_image
LED window INCLINE SPEED DISTANCE TIME PULSE CALORES Bluetooth® HRC Fan Speed instant key Incline instant key 2 6 8 10 12 16 Quick speed keys Speed +/- 2 6 8 10 12 Quick inclination keys INCLINE~ STOP PROG SAFETY KEY MODE START Program ModeOPERATION
Getting Started
- Plug the plug into the power outlet and turn on the power switch. All LED indicators light up briefly and you hear a beep. The device checks whether the security key is connected.
- Place the security key on the console's security switch and attach the lanyard to your clothing.
- The device now constantly monitors the status. If an error situation is detected, the treadmill. The screen displays a walker message accompanied by a beep.
- If the screen displays an error message, press the STOP key and the system clears the error message.
Program button
With the treadmill stopped, press the PROG button to select one of the following programs: P1-P36 > U1-U3 > FAT.
Mode button
With the treadmill stopped, press the button to select the desired mode. You can select one of the following options:
- Time count down (The entered time is counted down)
- Calories count down (the calories entered are counted down)
- Distance count down (The entered distance is counted down)
Start button
With the treadmill stopped, press the button to start the machine. Press the button while the belt is running to stop the treadmill.
Stop button
- Press „STOP“ key will stop the treadmill slowly when running.
- Computer display error information, press STOP key to clean.
- Press STOP key quickly in 2 time will emergency stop the treadmill.
Button
Use the button to increase the speed while running. Use the button to increase the parameters under the body fat determination.
Button
Use the button to increase the speed while running. Use the button to increase the parameters under the body fat determination.
Quick speed button
When the treadmill is running, accelerate directly by pressing the 2 km/h, 6 km/h, 8 km/h, 10 km/h, 12 km/h or 16 km/h button.
Changing the angle of inclination
| Increase the incline | |
| Decrease the incline |
Quick incline button
Increase the incline directly by pressing the quick incline key 2%, 6%, 8%, 10% or 12%.
Fan
Press the Fan button to turn the fan on or off.
Changing speed from miles to kilometers
-
Pull out the safety key, press the MODE and PROGRAM keys at the same time. If the speed show 0.6, the speed is in MPH.
-
Pull out the safety key, press the MODE and PROGRAM keys at the same time. If the speed show 1.0, the speed is in KMH
MODES AND PROGRAMS
Note: In any state, pull-out safety locks, window displays:"E7" and sound buzzer "DI-DI-DI". Then put well the safety lock, all show that the full light for 2 seconds, then go to manual start mode.
Quickstart
- Put the safety key on the correct position and peg safety key cord with your clothes then tum on the power, the LED window light is shining for 2 seconds. When it sound „beee“, the treadmill enter in to the manual program.
- Press „Start“ key, time window countdown 5 - 4 - 3 - 2 - 1 and sound beee every decrease and start running at 11 km/h and incline 0%.
- When the machine is running, you can stop the machine by pressing „STOP“ key.
Manul Mode
In manual mode 3 values can be set: Time, distance or calories. However, only one of these values can be set at a time. If the entered value is counted down to 0, the treadmill stops automatically.
- Time Countdown: Press MODE, the time window (TIME) flashes and the initial value is 30:00. Press the Speed +/- button to adjust the value. The adjustable range is between 5:00-99:00 minutes.
- Distance countdown: Press MODE twice. The distance window (DISTANCE) flashes and the initial value is 1 km. Press the Speed +/- button to adjust the value. The adjustable range is between 1.0 km - 99.0 km.
- Calorie Countdown: Press MODE 3 times. The calorie window (CALORIES) flashes and the initial value is 50 kcal. Press the Speed +/- button to adjust the value. The adjustable range is between 20-9990 calories.
Finally, press START. After 5 seconds the device starts at 1 km/h. Adjust the speed with the Speed +/- button. Use the arrow keys to adjust the slope. If the entered value is counted down to 0, the treadmill stops automatically.
HRC Function (Optional)
- Press the PROG until HRC is displayed.
- Then press MODE to confirm to advance to the next setting.
- Use the speed +/- button to set the following parameters:
Age: 15-80 years, default is 25 years.
Standard heart rate: (220 years - current age) x 0.6
Target heart rate: 80-180 bpm
Default time: 30 minutes by default
In HRC mode, the pulse is measured and displayed every 30 seconds.
- When the user's heart rate is lower than the target heart rate 30 beats/min, the speed is increased 2.0 km/h.
- When the user's heart rate is lower than the target heart rate 6-29 beats/min, the speed is increased 1.0 km/h.
- When the user's heart rate is higher than the target heart rate 30 beats/min, the speed is decreased 2.0 km/h.
- When the user's heart rate is higher than the target heart rate 6-29 beats/min, the speed is decreased 1.0 km/h.
- When the user's heart rate is higher or lower than the target heart rate 0-5 beats/min, the speed won't change.
According to the following situation, the treadmill will be slow down to the lowest speed in 20 seconds, and then stop after running 15 seconds in the lowest speed and sound per second:
- The heart rate cannot be checked.
- The heart rate reduces the speed but the device is already at the lowest speed level.
- The heart rate is higher than (220 years - user age).
Note: If the lowest speed level is reached, the HRC function cannot reduce the speed further and the treadmill stops. The inclination is not controlled by heart rate, but can be adjusted manually.
Preset Programs
- P1-P36 are preset programs. Only the time can be set here. Press the speed +/- button to change the value. The time can be set between 5-99 minutes. The default setting is 30:00 minutes. Press the „MODE“ button to return to the default settings.
- When you have set everything, press START. The display starts a 5-second countdown and then emits 5 tones. The treadmill starts slowly and then continuously increases the speed until the preset or entered speed is reached.
- While running, press the speed +/- button or one of the speed buttons to set the desired speed.
- While running, press the arrow keys to set the desired incline.
Note: In the P1-P36 programs, speed and gradient are divided into 12 segments. Each segment lasts the same length. The adjusted speed is only available in the current segment. 3 seconds before the program moves to the next segment, a 3-fold signal tone sounds. When the 12 segments are finished, the motor stops and a signal sounds.
- When running, press the START button to stop the treadmill. Press START again to continue running. The recording data is retained.
- Press the STOP button while running, the treadmill stops slowly and returns to its initial state.
Measuring body fat percentage
When the treadmill is stopped, press the „PROG“ button until FAT appears. Then press MODE to set the parameter.
- F1 (Gender): select 1 (male) or 2 (female). If window shows 1, male is selected. The default setting is male.
- F2 (Age): Can be set between 1-99 years. The default is 25 years.
- F3 (size): Adjustable between 100-220 cm (39-87 inch). The default is 170 cm (67 inch).
- F4 (Weight): Adjustable between 20-150 kg (44-330 pounds). Default is 154 pounds (70 kg).
- F5 (body fat analysis): Place both hands on the handlebars, wait 8 seconds and the window will show the BMI:
| < 18 under weight | |
| 18-24 normal weight | |
| 25-28 over weight | |
| >29 obesity |
User Program
Press the PROGRAM key until U1 - U2 - U3 appears. Press MODE and Speed +/- to adjust the training time. The time can be set between 5:00-99:00 minutes. Then press START to start the workout.
Press the MODE button to adjust the speed and incline of each segment. Adjust the speed and incline with the Speed +/- button. Then press MODE to skip to the next segment. When you have edited the last segment, the entry is automatically saved. Press MODE again to enter the training time. Then press START to start the workout.
Hand pulse function
When the treadmill is on, hold on to the hand pulse handles. The heart rate window shows your heart rate value within a range of the 50-200 beats/minute (bpm).
PROGRAM AND SPEED TABLES
| Program | Segment | |||||||||||||||
| 1 2 3 | 4 5 6 7 | 8 9 10 | 11 12 | |||||||||||||
| P1 | Speed 1.0 3.0 3.0 7.0 | 7.0 | 5.0 | 5.0 | 7.0 | 5.0 | 5.0 | |||||||||
| Incline 2 2 6 6 8 8 | 6 | 4 | 4 | 6 | ||||||||||||
| P2 | Speed 2.0 3.0 3.0 6.0 | 5.0 | 5.0 | 8.0 | 5.0 | 5.0 | 6.0 | 8.0 | 8.0 | |||||||
| Incline 3 3 9 9 9 2 | 2 | 8 | 4 | 1 | 1 | |||||||||||
| P3 | Speed 2.0 3.0 5.0 5.0 | 7.0 | 7.0 | 8.0 | 5.0 | 5.0 | 6.0 | 8.0 | 8.0 | |||||||
| Incline 1 2 3 4 5 5 | 7 | 4 | 4 | 4 | ||||||||||||
| P4 | Speed 2.0 2.0 3.0 5.0 | 5.0 | 5.0 | 8.0 | 8.0 | 8.0 | 8.0 | 5.0 | 5.0 | |||||||
| Incline 3 3 6 6 6 9 | 9 | 9 | 9 | 9 | 6 | |||||||||||
| P5 | Speed 3.0 4.0 5.0 6.0 | 7.0 | 8.0 | 9.0 | 10.0 | 10.0 | 0 | 10.0 | 9.0 | 8.0 | ||||||
| Incline 2 2 4 4 8 8 | 6 | 6 | 6 | 8 | 7 | |||||||||||
| P6 | Speed 3.0 4.0 5.0 5.0 | 6.0 | 6.0 | 7.0 | 7.0 | 7.0 | 9.0 | 9.0 | 10.0 | |||||||
| Incline 1 8 8 8 8 8 | 7 | 7 | 7 | 7 | 5 | |||||||||||
| P7 | Speed 3.0 4.0 9.0 4.0 | 11.0 | 4.0 | 10.0 | 4.0 | 9.0 | 0 | 4.0 | 8.0 | 4.0 | ||||||
| Incline 1 1 4 4 4 6 | 6 | 6 | 8 | 8 | 10 | |||||||||||
| P8 | Speed 3.0 5.0 8.0 3.0 | 5.0 | 7.0 | 9.0 | 3.0 | 5.0 | 7.0 | 10.0 | 3.0 | |||||||
| Incline 3 3 8 8 3 3 | 7 | 3 | 3 | 6 | 6 | |||||||||||
| P9 | Speed 3.0 7.0 9.0 4.0 | 7.0 | 10.0 | 4.0 | 7.0 | 11.0 | 0 | 5.0 | 7.0 | 12.0 | ||||||
| Incline 3 6 6 3 7 7 | 3 | 8 | 8 | 3 | 9 | 9 | ||||||||||
| P10 | Speed 3.0 5.0 6.0 6.0 | 6.0 | 9.0 | 10.0 | 6.0 | 6.0 | 9.0 | 10.0 | 6.0 | |||||||
| Incline 2 7 7 7 5 5 | 5 | 8 | 8 | 8 | 8 | |||||||||||
| P11 | Speed 4.0 5.0 7.0 9.0 | 10.0 | 11.0 | 9.0 | 6.0 | 8.0 | 0 | 9.0 | 10.0 | 10.0 | ||||||
| Incline 1 6 6 6 3 3 | 3 | 7 | 4 | 4 | 4 | |||||||||||
| P12 | Speed 4.0 6.0 10.0 | 10.0 | 7.0 | 10.0 | 10.0 | 10.0 | 0 | 7.0 | 7.0 | 10.0 | 10.0 | |||||
| Incline 3 8 8 6 9 9 | 5 | 5 | 8 | 8 | 4 | |||||||||||
| P13 | Speed 4.0 12.0 4.0 | 12.0 | 4.0 | 12.0 | 4.0 | 12.0 | 4.0 | 12.0 | 4.0 | 12.0 | ||||||
| Incline 4 8 10 12 4 | 8 | 10 | 12 | 4 | 8 | 10 | 12 | |||||||||
| P14 | Speed 2.0 3.0 3.0 6.0 | 9.0 | 11.0 | 3.0 | 6.0 | 9.0 | 11.0 | 3.0 | 6.0 | |||||||
| Incline 5 9 11 12 5 | 9 | 11 | 12 | 5 | 9 | 11 | 12 | |||||||||
| P15 | Speed 4.0 6.0 11.0 | 11.0 | 9.0 | 6.0 | 11.0 | 11.0 | 9.0 | 6.0 | 11.0 | 11.0 | ||||||
| Incline 2 3 4 5 6 8 | 7 | 8 | 8 | 7 | 6 | |||||||||||
| Program | Segment | ||||||||||||
| 1 2 3 | 4 5 6 7 | 8 9 10 | 11 12 | ||||||||||
| P16 | Speed 2.0 4.0 4.0 12.0 4.0 | 12.0 4.0 | 12.0 4.0 | 12.0 | 4.0 12.0 | 4.0 12.0 | |||||||
| Incline 2 4 5 6 2 4 5 6 2 4 | 5 6 2 4 | 5 6 | |||||||||||
| P17 | Speed 2.0 2.0 2.0 4.0 | 6.0 6 | 0 9.0 | 11.0 11.0 | 0 2.0 4.0 | 6.0 | |||||||
| Incline 2 4 6 8 10 12 12 12 | 12 12 12 | 12 12 | 12 10 | ||||||||||
| P18 | Speed 3.0 6.0 3.0 6.0 | 6.0 3 | 0 6.0 | 6.0 3.0 | 6.0 6.0 | 3.0 | |||||||
| Incline 2 6 8 2 6 8 2 6 8 2 | 6 8 2 | 6 8 | |||||||||||
| P19 | Speed 4.0 12.0 4.0 | 12.0 4.0 | 12.0 4.0 | 12.0 | 4.0 12.0 | 4.0 12.0 | 4.0 12.0 | ||||||
| Incline 10 8 6 4 10 | 8 6 4 | 10 8 6 | 4 | ||||||||||
| P20 | Speed 5.0 13.0 5.0 | 13.0 5.0 | 13.0 5.0 | 13.0 | 5.0 13.0 | 5.0 13.0 | 5.0 13.0 | ||||||
| Incline 12 8 2 12 8 | 2 12 8 | 2 12 8 | 2 | ||||||||||
| P21 | Speed 2.0 6.0 2.0 6.0 | 11.0 | 2.0 6.0 | 11.0 2.0 | 0 6.0 | 11.0 2.0 | |||||||
| Incline 12 9 3 12 9 | 3 12 9 | 3 12 9 | 3 | ||||||||||
| P22 | Speed 4.0 6.0 11.0 | 6.0 2.0 | 11.0 6.0 | 2.0 11.0 | 6.0 | 2.0 11.0 | |||||||
| Incline 2 4 10 2 4 10 | 2 6 1 | 2 6 8 | 12 | ||||||||||
| P23 | Speed 4.0 6.0 11.0 | 6.0 6.0 | 2.0 11.0 | 6.0 6.0 | 2.0 11.0 | 6.0 | |||||||
| Incline 2 3 4 5 6 6 | 7 8 10 | 11 12 | 12 | ||||||||||
| P24 | Speed 4.0 6.0 11.0 | 6.0 4.0 | 11.0 6.0 | 4.0 11.0 | 6.0 | 4.0 11.0 | |||||||
| Incline 4 4 5 6 7 8 | 10 10 | 12 12 | 12 12 | ||||||||||
| P25 | Speed 5.0 13.0 5.0 | 13.0 5.0 | 13.0 5.0 | 13.0 | 5.0 13.0 | 5.0 13.0 | 5.0 13.0 | ||||||
| Incline 5 9 11 12 5 | 9 11 12 | 5 9 11 | 12 | ||||||||||
| P26 | Speed 3.0 4.0 4.0 7.0 | 10.0 | 12.0 4.0 | 7.0 10.0 | 12.0 | 4.0 7.0 | |||||||
| Incline 6 10 12 12 6 | 10 11 | 12 6 | 10 12 | 12 | |||||||||
| P27 | Speed 5.0 7.0 12.0 | 12.0 10 | 0 7.0 | 12.0 12.0 | 10.0 | 7.0 12.0 | 12.0 | ||||||
| Incline 3 4 5 6 7 9 | 8 9 9 | 8 7 | |||||||||||
| P28 | Speed 3.0 5.0 5.0 | 13.0 5.0 | 13.0 5.0 | 13.0 | 5.0 13.0 | 5.0 13.0 | |||||||
| Incline 3 5 6 7 3 5 | 6 7 3 5 | 6 7 | |||||||||||
| P29 | Speed 3.0 3.0 3.0 5.0 | 7.0 7 | 0 10.0 | 12.0 12.0 | 3.0 | 5.0 7.0 | |||||||
| Incline 3 5 7 9 11 | 12 12 | 12 12 | 12 11 | ||||||||||
| P30 | Speed 4.0 7.0 4.0 7.0 | 7.0 4.0 | 7.0 7.0 | 4.0 | 7.0 7.0 | 4.0 | |||||||
| Incline 3 7 9 3 7 9 | 3 7 9 3 | 7 9 | |||||||||||
| P31 | Speed 5.0 13.0 5.0 | 13.0 5.0 | 13.0 5.0 | 13.0 | 5.0 13.0 | 5.0 13.0 | 13.0 | ||||||
| Incline 11 9 7 5 11 | 9 7 5 | 11 9 7 | 5 | ||||||||||
| P32 | Speed 6.0 14.0 6.0 14.0 6.0 | 14.0 6.0 | 14.0 6.0 | 14.0 | 6.0 14.0 | 6.0 14.0 | 14.0 | ||||||
| Incline 12 9 3 12 9 3 | 12 9 | 3 12 9 | 3 | ||||||||||
| P33 | Speed 3.0 7.0 3.0 7.0 | 12.0 3.0 | 7.0 | 12.0 3.0 | 7.0 | 12.0 | 7.0 | ||||||
| Incline 12 10 4 12 10 | 4 12 | 10 4 | 12 10 4 | ||||||||||
| P34 | Speed 5.0 7.0 12.0 7.0 | 3.0 1 | 2.0 7.0 | 3.0 | 12.0 | 7.0 | 3.0 | 12.0 | |||||
| Incline 3 5 11 3 5 11 | 3 7 12 | 7 9 12 | |||||||||||
| P35 | Speed 5.0 7.0 12.0 7.0 | 7.0 3.0 | 12.0 | 7.0 | 7.0 | 3.0 | 12.0 | 7.0 | |||||
| Incline 3 4 5 6 7 7 8 | 9 11 | 12 12 | 12 | ||||||||||
| P36 | Speed 5.0 7.0 12.0 7.0 | 5.0 1 | 2.0 7.0 | 5.0 | 12.0 | 7.0 | 5.0 | 12.0 | |||||
| Incline 5 5 6 7 8 9 11 | 11 12 | 12 12 | 12 | ||||||||||
TROUBLESHOOTING
| Problem Possible Cause Suggested Solution | ||
| Treadmill doesn't work. Disconnect of power or the power is turn off | Connet the power, and turn on the switch. | |
| Safety key is not put well. | ||
| Treadmill stop suddenly. Safety key fall off. Put the safety key well. | ||
| Error code E1 | Problems with the cables, the console or the control panel. | Contact a specialist company. |
| Error code E2 | Probleme mit dem Motor. | Contact a specialist company. |
| Error code E3 | Problems with the speed sensor, or the cable. | Contact a specialist company. |
| Error code E5 | Controller defective | Contact a specialist company. |
| motor defective | ||
| Problem Mögliche Ursache | Lösungsansatz | |
| Error code E7 Console does | not detect the safety key signal. | Check the safety key . |
| No pule measurement. Hand | pulse wire is not connect well or wire defected. | Connect the wire well or change the wire. |
| Console circuitry defected. | Change the console. | |
CARE AND MAINTENANCE
Folding the treadmill
- Restore the incline to flat (0) position.
- Unplug from power point before folding.
- Lift deck until it's parallel to the upright post and cylinder locks into position.
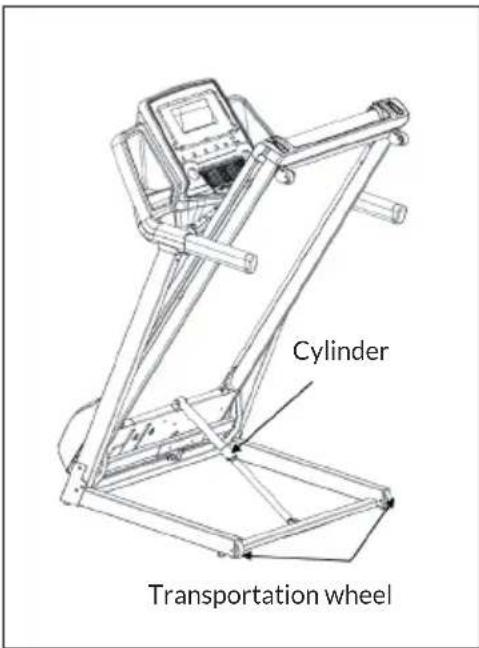
text_image
Cylinder Transportation wheelUnfolding the treadmill
- Place one hand on handle bar, use the other to push top of the running deck forward.
- Press one foot on the middle section of the cylinder to disengage the locking mechanism.
- Allow deck to begin slowly dropping before releasing hands.
Moving the treadmill
The treadmill can be moved around in house safely in its fold-up position by using the transport wheels. Firmly hold onto handle bars with both hands, pull the treadmill towards you, then portable on wheels, drag or push slowly.
Adjusting the belt tension
If the running belt feels as though it is slipping or hesitating when you plant you foot during a run, the tension on the running belt may have to be increased.
To increase the running belt tension:
- Place 8mm wrench on the left belt tension bolt. Turn the wrench clockwise 1/4 turn to draw the rear roller and increase the belt tension.
- Repeat STEP 1 for the right belt tension bolt. You must be sure to turn both bolts the same number of turns, so the rear roller will stay square relative to the frame.
- Repeat STEP 1 and STEP 2 until the slipping is eliminated.
- Be careful not to tighten the running belt tension too much as you can create Excessive pressure on the front and rear roller bearings. An excessively tightened running belt may damage the roller bearings that would result in bearing noise from the front and rear rollers.
To decrease the running belt tension:
To reduce the tension on the treadmill, turn both screws counterclockwise the same number of times.
Centring the running belt
When you run, you may push off harder with one foot than with another. The severity of the deflection depends on the amount of force4 that one foot exerts in the relation to the other. This deflection can cause the belt to move off-centre. This deflection is normal and the running belt will centre when no body is on the running belt. If the running belt remains consistently off-centre, you will need to centre the running belt manually.
Start the treadmill without anyone on the running belt, press FAST-key until speed reached 6 km/h. Observe whether the running belt is toward the right or left side of the deck.
If the running belt is toward the left side:
Turn the left adjustment screw clockwise 1/4 turn with a spanner and the right adjustment screw counterclockwise 1/4 turn.
If the running belt is toward the right side:
Turn the right adjustment screw clockwise 1/4 turn with a spanner and the left adjustment screw counterclockwise 1/4 turn.
- If toward the left side of the deck, using wrench, turn the left adjustment bolt clockwise 1/4 turn and the left adjustment bolt counter clockwise 1/4.
- If toward the right side of the deck, turn the right adjustment bolt clockwise 1/4 turn and the left adjustment bolt counter clockwise 1/4.
- If the belt is still not centre, repeat the above step until the running belt is on centre.
Lubrication
The treadmill is factory-lubricated. However, it is recommended to check the lubrication of the treadmill regularly, to ensure an optimal operation of the treadmill. It is usually not necessary to lubricate the treadmill in the first year or the first 500 hours of operation.
After every 3 months of operation, lift the sides of the treadmill and feel the surface of the belt, as far as possible. If traces of silicon spray are found, lubrication is not necessary. In case of a dry surface refer to the following instructions:
Application of lubricant on the belt:
- Position the tape so that the seam is in the middle of the plate.
- Place the dispenser cap on the lubricant container.
- Start lubrication at the front end of the belt. Lubricate in the direction of the rear end. Repeat this process on the other side of the tape. Grease each side for approx. 4 seconds.
- Wait 1 minute for the silicone spray to spread before starting the unit.

natural_image
Close-up of a hand holding a small white object, possibly a device or tool, against a dark background (no visible text or symbols)TRAINING VIA KINOMAP APP
With the Kinomap app you can run, drive or row more than 100,000 km around the world with the help of real-life videos that are updated daily by the users themselves. Try to follow their pace under the same conditions as seen in the video. Use the KINOMAP portal and choose your own video to train to. Improve your fitness by using your own interval in the resistance or in the power mode.

text_image
KYou can connect your compatible devices directly. Alternatively, you can use the camera that provides you with an optical pedal, step or stroke sensor. Join our multiplayer training sessions and try to be the first to finish.
Create an Account
If you want to use Kinomap, you must first connect to your Kinomap account. If you have successfully registered, you can start training. If you do not sign out, you will still be logged in the next time you start the app. If you do not as yet have a Kinomap account, please sign in to get a free account.

text_image
Kinomap Anmelden Home Playlists Alle Videos Karte Kaufen Auswertung Geräte Einlösen 11:32 K Kinomap SIGN IN Username or email Password Sign in Connect with Facebook Connect with STRAYA Sign in with Google LOG IN WITH UNDER ARMOUR Create accountActivation Code
- The standard version is free and provides you with access to a number of free videos and interval training (not currently available on all devices).
- A subscription is required later on to gain access to all eligible content, including thousands of videos, a multiplayer mode and more.
- After the first login, the app will ask you for an activation code. If you have one, enter it in to activate your subscription to the app.
- You can also go to „Add Activation Code“ at a later time.
Enter Activation Code
Note: You can subscribe to the service on a monthly basis or as an annual subscription, which will provide you with access to advanced features. Go to „Subscribe Settings“.
After the activation, you will see your subscription at „My subscription“:
Connecting to the Training Machine
How to connect the device with the KINOMAP app:
1 Go to the „Equipment“ menu.
2 Add new devices with the + button
3 Select your device type from the list (ergometer for the CapitalSports Infinity Track 4.0).
4 Select the brand CapitalSports.
5 Select the model Infinity Track 4.0.
6 If the device has been detected, touch the window to confirm.
7 Now press SAVE. Your device has now been added.
Note: Even if your fitness device does not have a BT connection, you can still train with Kinomap.
Data Preview
The "Data Preview" feature lets you instantly see the data sent by the device. This feature is especially useful if you have trouble committing when you start a new activity. In accordance with the configuration, the app will receive some values.

text_image
Kinemap cednct Home Featured PROFILES MANAGEMENT Manage profiles Current profile details Preview Data Subscribe Activity History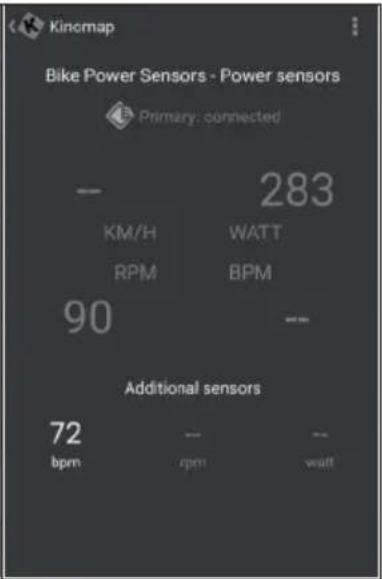
text_image
Kinomap Bike Power Sensors - Power sensors Primary: connected - 283 KM/H WATT RPM BPM 90 -- Additional sensors 72 bpm -pm wattTraining
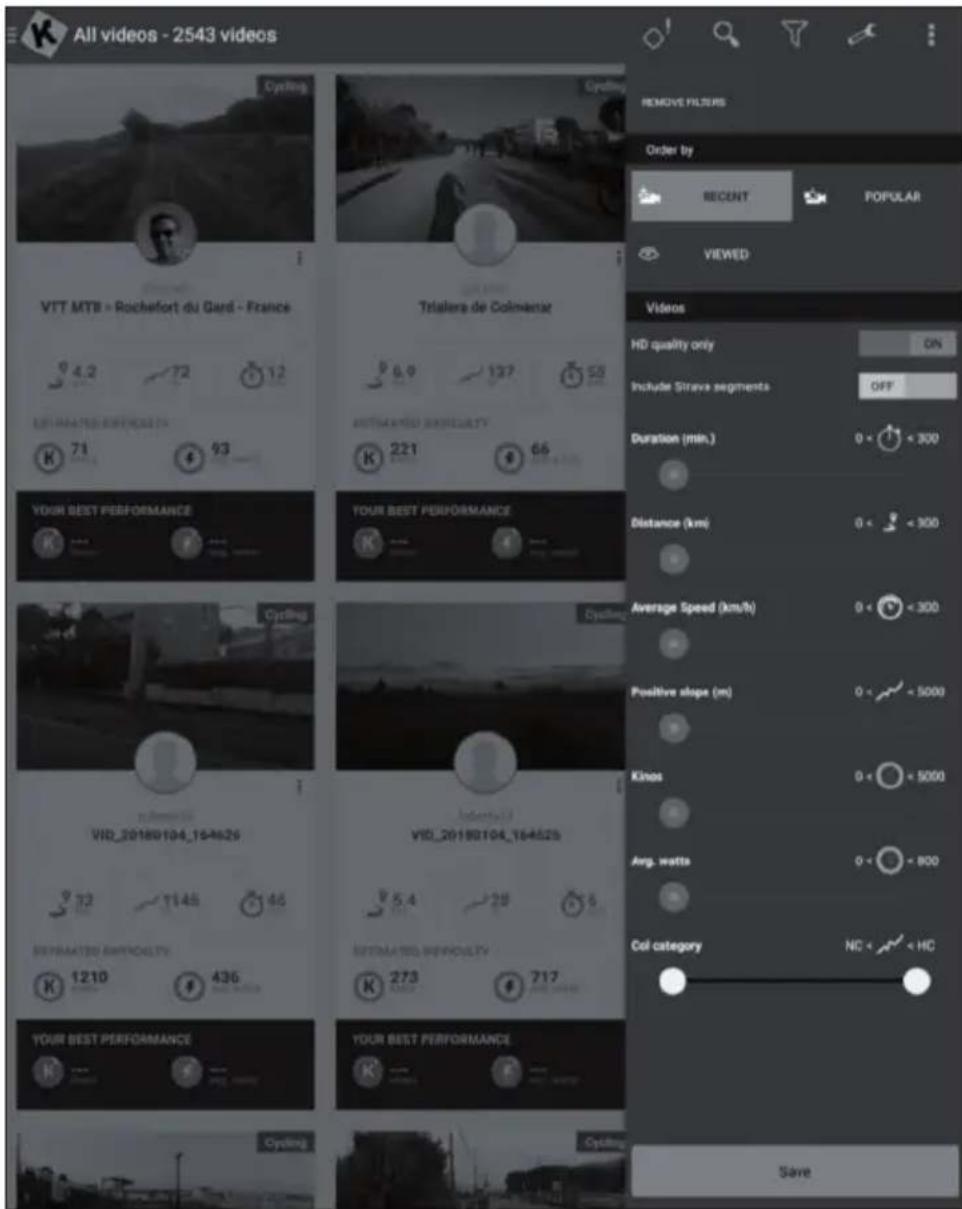
Video Selection
- There are several lists of videos from which you can select the desired video.
- There is a filter function to ensure that you find the videos you wish to train to (featured, popular, most viewed, most recent, duration, distance, incline, among others).
- For each video, the following relevant information is available: name, contributor (who posted the video), country, duration, distance, average of positive slope and average speed.
text_image
All videos - 2543 videos Cycling VTT MTB > Rochefort du Gard - France Trialera de Colmenaz 221 66 YOUR BEST PERFORMANCE TOUR BEST PERFORMANCE VID_20180104_16-4626 VID_20180104_16-4626 AUTOMATED BIMPOULTY 273 717 YOUR BEST PERFORMANCE YOUR BEST PERFORMANCE Cycling Cycling Remove FILTERS Order by RECENT POPULAR VIEWED Videos HD quality only ON Include Strava segments OFF Duration (min.) 0 < 1 < 300 Distance (km) 0 < 1 < 300 Average Speed (km/h) 0 < 1 < 300 Positive slope (in) 0 < 1 < 5000 Kinos 0 < 1 < 5000 Avg. watts 0 < 1 < 800 Col category ND < HC SavePlaylists
- There are also many playlists created by Kinomap or the users of Kinomap themselves.
- Each playlist has a specific theme, such as a 30-minute training session or visiting a country.
- You can track your progress on any playlist and any video.
- Currently, you cannot manage your playlists directly on the app.

text_image
Public playlists - 137 1% 1% 37 Kinomap 10 minutes Cycling Kinomap 30 minutes Ribet Allemagne 1% 1% 2% 32 polbelou ALPES mjakob Altmühltal Ribet Australia 1% 1% 12% 5 4 8 WhyteRob AWL Tour 2013 Ribet Benelux nicolasraybaud Bike OisansBeginning of Training

text_image
Options Start Segments (28) View profile 9.8 km 57 m 29 min ESTIMATED DIFFICULTY K 77 kbps 43 avg. wattsSelect the video you would like to train to.

text_image
Quiet ride in Central Park Pick your settings Select your training mode and if you wish to resume a previous activity, or start a new chat. DISCOVERY CHALLENGE Challenge selected: the video plays at your speed. NEW TRAINING PREVIOUS TRAINING EXIT STARTChoose the mode in which you would like to train.
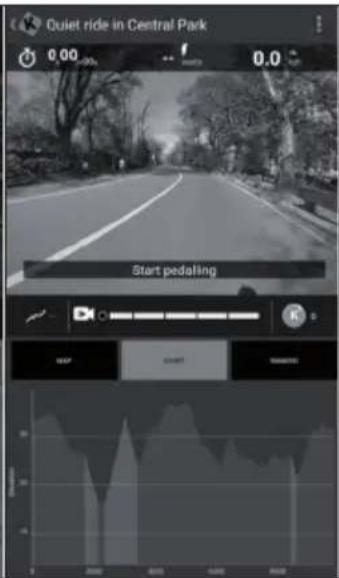
text_image
Quiet ride in Central Park 0.00 f 0.0 Start pedaling GET COUNT SAMSUNGJust start pedaling to start training.
Discovery and Challenge Mode
Challenge Mode: The video will be played at your speed so that you can achieve the same overall performance as the producer of the video. If you're not as fast, the video slows down the frame rate. If you perform better, the frame rate can be increased to twice the original speed. Use this mode to participate in challenges, such as indoor challenges, and to export a map complete with coordinates of your virtual ride to third-party sites, such as Strava.
Discovery Mode: The video plays at its original speed and pauses when your speed reaches 0. Whatever your performance, the frame rate will not change. But you will still see if you perform well by looking at the energy performance data. Note that the data that can be exported to third-party sites, such as Strava, is limited to watts and additional data like cadence and heart rate; however, coordinates and a map are not included.

text_image
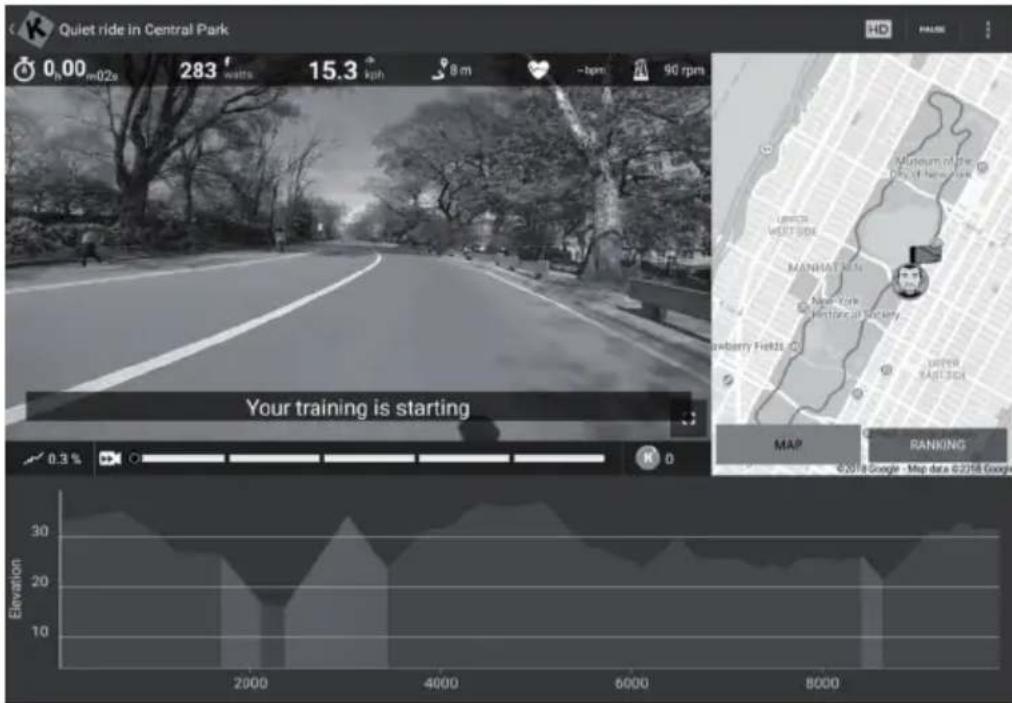
Pick your settings Select your training mode and if you wish to resume a previous activity, or start a new one. DISCOVERY CHALLENGE Challenge selected: the video plays at your speed. NEW TRAINING PREVIOUS TRAINING EXIT STARTTraining Display
At the top of the screen, the following relevant information is displayed:
- The duration
• The instantly produced power - The instant speed
- Your heart rate (only if you add an extra heart rate monitor belt or if your device has one already integrated)
• The instant pedal frequency - The distance
- Your position on the map is synchronized with the video.
text_image
Quiet ride in Central Park 0.00 m/02s 283 watts 15.3 mph 8 m -rpm 90 rpm Your training is starting Elevation 30 20 10 2000 4000 6000 8000 HD PAUSE Lemon West Side Museum of the City of New York MANHAT LN New York Historical Society Swaberry Fields MAP RANKING ©2018 Google - Map data ©2158 GoogleThe tab "Ranking List" is only available in the multiplayer mode.
• Abscissa: height in meters
- Ordinate: distance in the KM in the challenge mode.
• Duration: in seconds in the discovery mode.
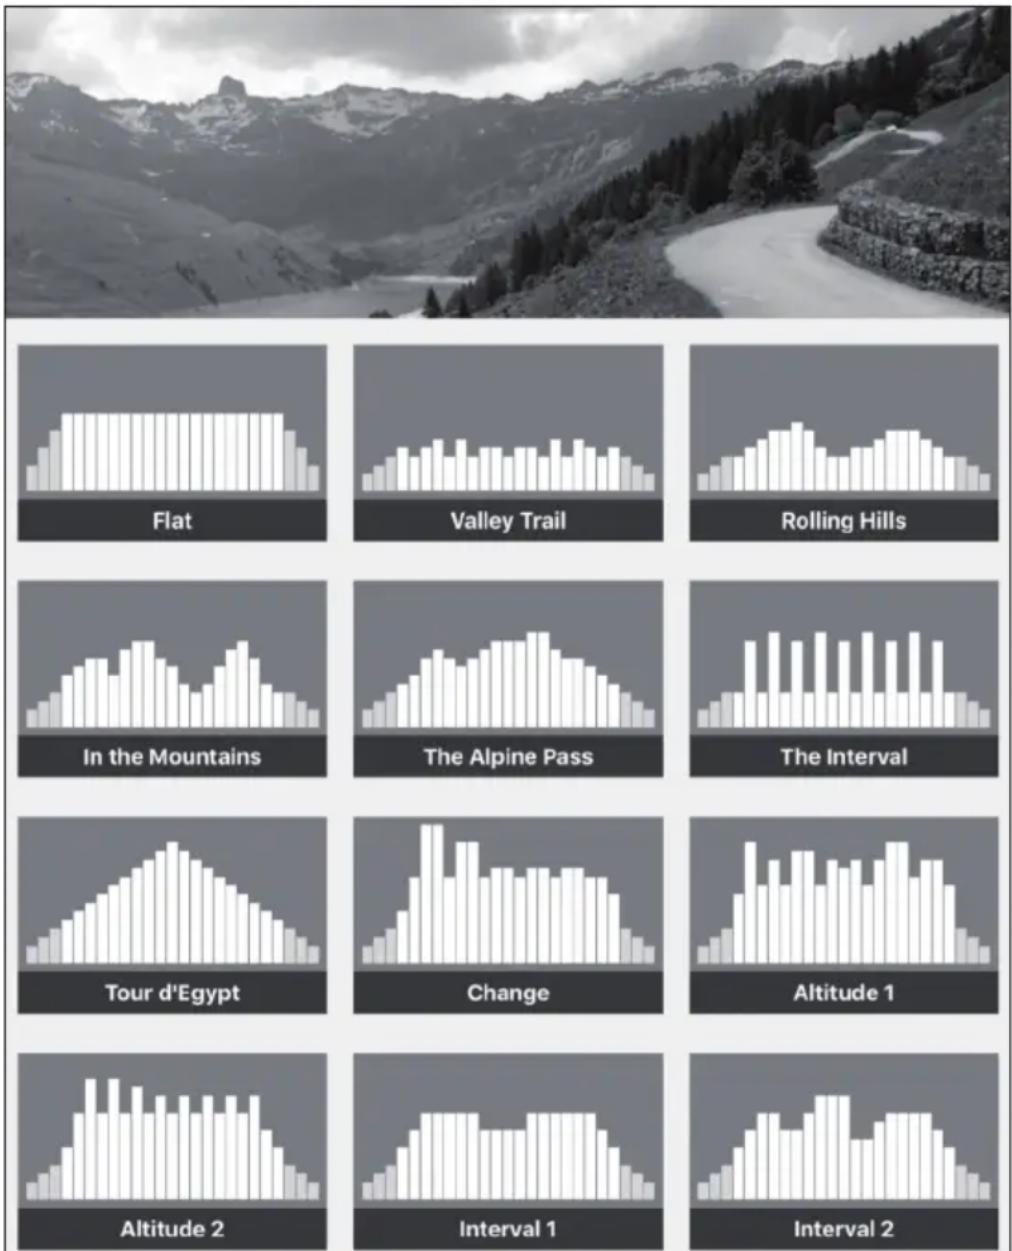
Setting the Resistance/Gears
On the screen you will find instructions on how to set the resistance according to the altitude profile when using a speed/cadence sensor or an optical sensor.
End of Training
If you want to pause or stop exercising, just stop pedaling or use the pause button in the corner. Click the "Resume Session" button to continue the training session. If you want to stop completely, simply confirm by tapping on "Save and Exit".
Profile Training
Profile training is a form of training that involves a series of low to high intensity training sessions with periods of rest or relief. Varying the intensity trains the heart muscle, provides cardiovascular training and improves a person's aerobic capacity and endurance.
Profile training is not yet available for all devices. You can easily check in the main menu: If you see the profile training menu, it means that the feature is available for your device. You can choose between two modes, depending on your device.
Resistance: You define the resistance level and we send this information to the exercise bike, regardless of the power produced.
Target Power: You define a target power, and the resistance automatically changes to generate it.
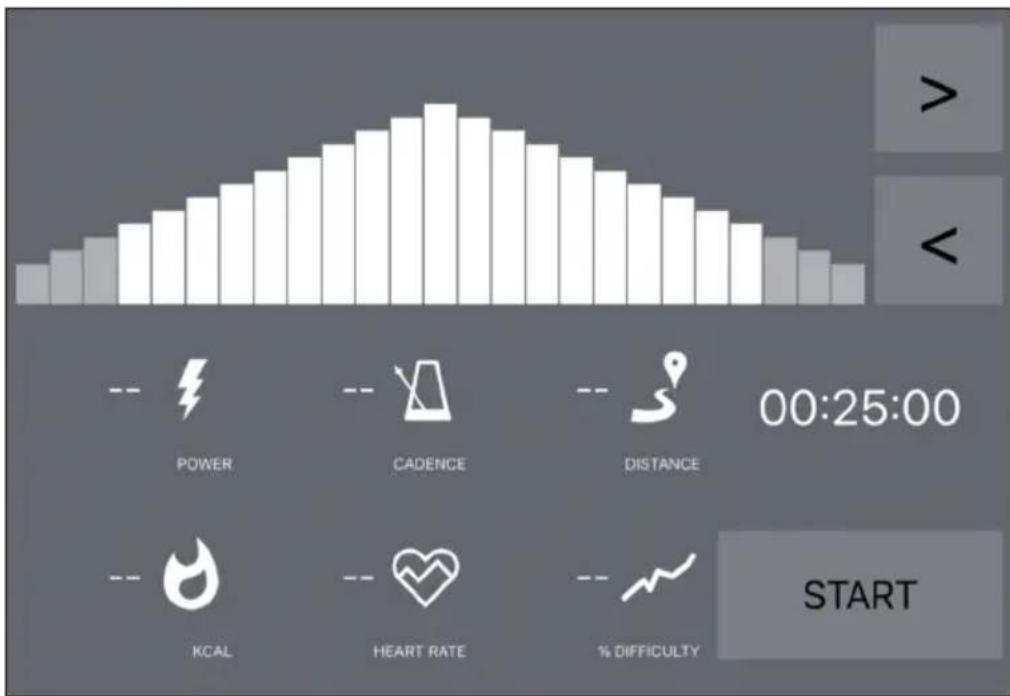
bar
| Metric | Value | | :--- | :--- | | POWER | - | | CADENCE | - | | DISTANCE | - | | KCAL | - | | HEART RATE | - | | % DIFFICULTY | - | | 00:25:00 START- If you see an orange line, it means that you are near your target.
- The other way around, the orange line means that you are moving away from your target. (increase or slow down the target power)
- You just have to choose the time (>>) for the countdown and then start training.
- Once the session is started, you can increase or decrease the target power or resistance according to the mode you have selected.
Evaluations
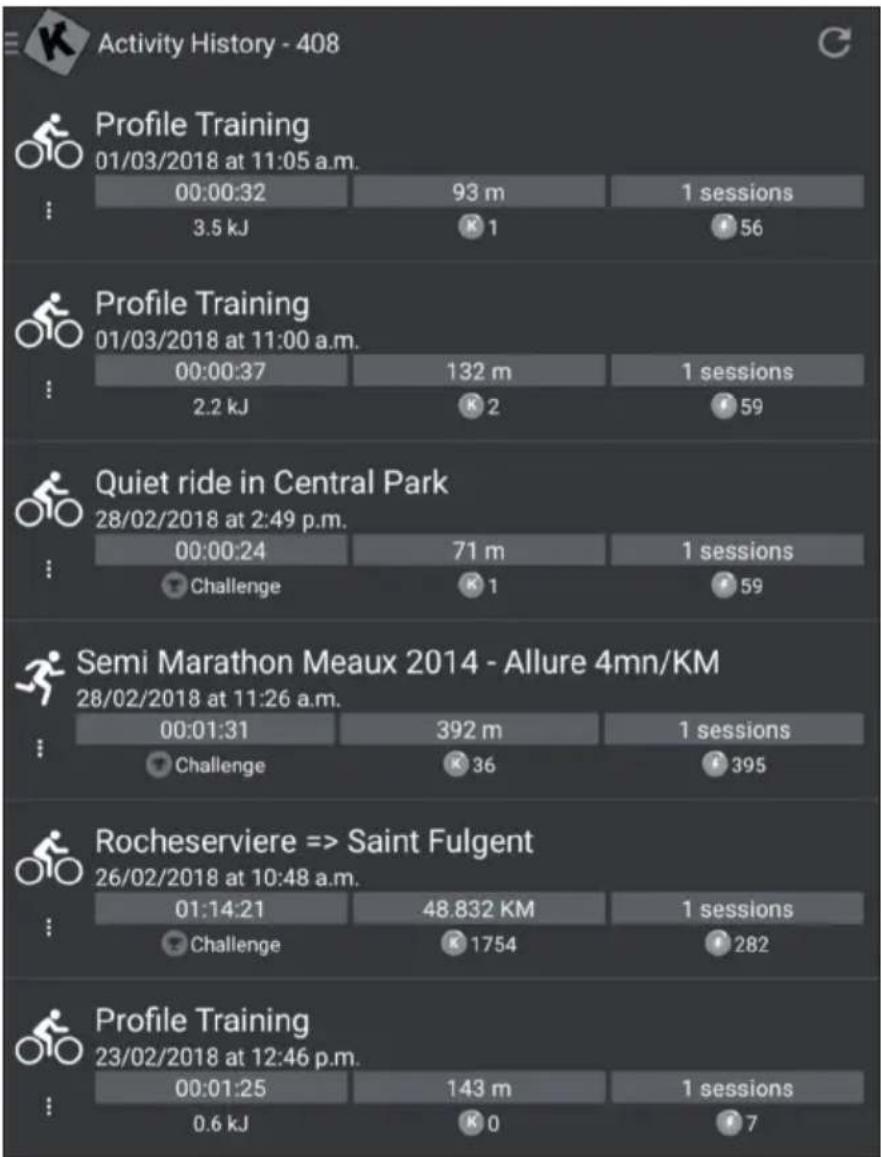
Activity History
- Open the main menu on the left side to find „Activity History“.
- You can see the history of your past workouts, including the name of the video you trained with, the date of the workout, the duration and the distance.
- Click on a specific training session to see all of the information.
- You can also visit http://www.kinomap.com/myactivities.
- Your activity history contains a map, a summary and a series of detailed graphs that show your current speed, power, cadence and heart rate. Note that the activity history can be automatically exported to various platforms, such as RunKeeper, Strava or Under Armor.
text_image
Activity History - 408 Profile Training 01/03/2018 at 11:05 a.m. 00:00:32 93 m 1 sessions 3.5 kJ 1 56 Profile Training 01/03/2018 at 11:00 a.m. 00:00:37 132 m 1 sessions 2.2 kJ 2 59 Quiet ride in Central Park 28/02/2018 at 2:49 p.m. 00:00:24 71 m 1 sessions Challenge 1 59 Semi Marathon Meaux 2014 - Allure 4mn/KM 28/02/2018 at 11:26 a.m. 00:01:31 392 m 1 sessions Challenge 36 395 Rocheserviere => Saint Fulgent 26/02/2018 at 10:48 a.m. 01:14:21 48.832 KM 1 sessions Challenge 1754 282 Profile Training 23/02/2018 at 12:46 p.m. 00:01:25 143 m 1 sessions 0.6 kJ 0 7Search
This button is always available in the top right corner no matter which menu you are in for you to browse the available videos.
There are several ways to find the right video:
- You can search by clicking the Search button. Once you have entered at least 3 characters, an auto-complete search will be performed.
- You can also perform a geographic search. Choose „Map“ in the main menu.
- You can explore all available videos by clicking “Public Playlists” or “All Videos”.
Settings
User Settings
- Go to the Settings menu and input your user details, including your size, weight, birthday and sex.
• This information affects the speed calculation
External Display
Follow the instructions to view the display on your TV using Chromecast or Apple TV.
DISPOSAL CONSIDERATIONS

natural_image
Symbol of a trash bin crossed with a diagonal line, no text or labels presentIf there is a legal regulation for the disposal of electrical and electronic devices in your country, this symbol on the product or on the packaging indicates that this product must not be disposed of with household waste. Instead, it must be taken to a collection point for the recycling of electrical and electronic equipment. By disposing of it in accordance with the rules, you are protecting the environment and the health of your fellow human beings from negative consequences. For information about the recycling and disposal of this product, please contact your local authority or your household waste disposal service.
This product contains batteries. If there is a legal regulation for the disposal of batteries in your country, the batteries must not be disposed of with household waste. Find out about local regulations for disposing of batteries. By disposing of them in accordance with the rules, you are protecting the environment and the health of your fellow human beings from negative consequences.
DECLARATION OF CONFORMITY

text_image
CE UK CAManufacturer:
Chal-Tec GmbH, Wallstrasse 16, 10179 Berlin, Germany.
Importer for Great Britain:
Chal-Tec UK limited
Unit 6 Riverside Business Centre
Brighton Road
Shoreham-by-Sea
BN43 6RE
United Kingdom
The complete declaration of conformity of the manufacturer can be found at the following link: use.berlin/10032954
Estimado cliente:
text_image
QR code image containing encoded data, no visible human-readable textÍNDICE DE CONTENIDOS
natural_image
Line drawing of a rectangular electronic device with a curved top and side connectors (no text or symbols)Aparato principal
Consola
natural_image
Simple line drawing of a stylized object resembling a hammer or tool, with no text or symbols present.Llave de estrella
natural_image
Line drawing of a treadmill component with no text or symbolsnatural_image
Technical line drawing of a treadmill with attached lever arms and a close-up view of the tray (no text or symbols)natural_image
Close-up of a hand holding a small white object, partially visible through a dark panel (no text or symbols)ENTRENAMIENTO CON LA APP KINOMAP
text_image
Kinomap Anmelden Home Playlists Alle Videos Karte Kaufen Auswertung Geräte Einlösen 11:32 Kinomap SIGN IN Username or email Password Sign in Connect with Facebook Connect with STRAVA Sign in with Google LOG IN WITH UNDER ARMOUR Create accounttext_image
Kinomap CEDNCT Home FEATURED PROFILES MANAGEMENT Manage profiles Current profile details Preview data Subscribe Activity History Kinomap Bike Power Sensors - Power sensors Primary: connected - 283 KM/H WATT RPM BPM 90 Additional sensors 72 bpm rpm wattEntrenamiento
Selección de vídeo
text_image
Quiet ride in Central Park Pick your settings Select your training mode and if you wish to resume a previous activity, or start a new chat. DISCOVERY CHALLENGE Challenge selected: the video plays at your speed. NEW TRAINING PREVIOUS TRAINING EXIT STARTtext_image
Quiet ride in Central Park 0.00 f 0.0 Start pedaling GET COUNT SUPPORTStext_image
Pick your settings Select your training mode and if you wish to resume a previous activity, or start a new one. DISCOVERY CHALLENGE Challenge selected: the video plays at your speed. NEW TRAINING PREVIOUS TRAINING EXIT STARTtext_image
Quiet ride in Central Park 0.00 m/02s 283 watts 15.3 mph 8 m -rpm 90 rpm Your training is starting Elevation 30 20 10 2000 4000 6000 8000 HD PAUSE Lemon West Side Museum of the City of New York MANHAT LN New York Historical Society Swaberry Fields MAP RANKING ©2018 Google - Map data ©2158 Googlenatural_image
Black-and-white landscape photo of a winding river through a mountain valley with snow-capped peaks and forested slopes (no text or symbols visible)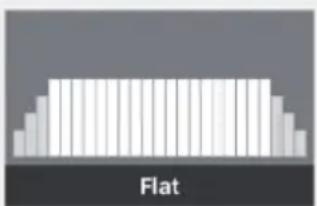
natural_image
Simple diagram of a flat rectangular shape with vertical bars, labeled 'Flat' at the base (no other text or symbols)
text_image
Valley Trail
text_image
Rolling Hills
text_image
In the Mountains
text_image
The Alpine Pass
text_image
The Interval
text_image
Tour d'Egypt
bar
| Category | Value | |---|---| | Bar 1 | 20 | | Bar 2 | 35 | | Bar 3 | 60 | | Bar 4 | 85 | | Bar 5 | 70 | | Bar 6 | 90 | | Bar 7 | 65 | | Bar 8 | 75 | | Bar 9 | 80 | | Bar 10 | 70 | | Bar 11 | 75 | | Bar 12 | 80 | | Bar 13 | 70 | | Bar 14 | 65 | | Bar 15 | 70 | | Bar 16 | 75 | | Bar 17 | 80 | | Bar 18 | 70 | | Bar 19 | 65 | | Bar 20 | 70 | | Bar 21 | 75 | | Bar 22 | 80 | | Bar 23 | 70 | | Bar 24 | 65 | | Bar 25 | 70 | | Bar 26 | 75 | | Bar 27 | 80 | | Bar 28 | 70 | | Bar 29 | 65 | | Bar 30 | 70 | | Bar 31 | 75 | | Bar 32 | 80 | | Bar 33 | 70 | | Bar 34 | 65 | | Bar 35 | 70 | | Bar 36 | 75 | | Bar 37 | 80 | | Bar 38 | 70 | | Bar 39 | 65 | | Bar 40 | 70 | | Bar 41 | 75 | | Bar 42 | 80 | | Bar 43 | 70 | | Bar 44 | 65 | | Bar 45 | 70 | | Bar 46 | 75 | | Bar 47 | 80 | | Bar 48 | 70 | | Bar 49 | 65 | | Bar 50 | 70 | | Bar 51 | 75 | | Bar 52 | 80 | | Bar 53 | 70 | | Bar 54 | 65 | | Bar 55 | 70 | | Bar 56 | 75 | | Bar 57 | 80 | | Bar 58 | 70 | | Bar 59 | 65 | | Bar 60 | 70 | | Bar 61 | 75 | | Bar 62 | 80 | | Bar 63 | 70 | | Bar 64 | 65 | | Bar 65 | 70 | | Bar 66 | 75 | | Bar 67 | 80 | | Bar 68 | 70 | | Bar 69 | 65 | | Bar 70 | 70 | | Bar 71 | 75 | | Bar 72 | 80 | | Bar 73 | 70 | | Bar 74 | 65 | | Bar 75 | 70 | | Bar 76 | 75 | | Bar 77 | 80 | | Bar 78 | 70 | | Bar 79 | 65 | | Bar 80 | 70 | | Bar 81 | 75 | | Bar 82 | 80 | | Bar 83 | 70 | | Bar 84 | 65 | | Bar 85 | 70 | | Bar 86 | 75 | | Bar 87 | 80 | | Bar 88 | 70 | | Bar 89 | 65 | | Bar 90 | 70 | | Bar 91 | 75 | | Bar 92 | 80 | | Bar 93 | 70 | | Bar 94 | 65 | | Bar 95 | 70 | | Bar 96 | 75 | | Bar 97 | 80 | | Bar 98 | 70 | | Bar 99 | 65 | | Change (Bar)
bar
| Category | Value | |---|---| | Bar 1 | 20 | | Bar 2 | 35 | | Bar 3 | 48 | | Bar 4 | 52 | | Bar 5 | 60 | | Bar 6 | 55 | | Bar 7 | 65 | | Bar 8 | 70 | | Bar 9 | 68 | | Bar 10 | 75 | | Bar 11 | 80 | | Bar 12 | 72 | | Bar 13 | 60 | | Bar 14 | 50 | | Bar 15 | 40 | | Bar 16 | 30 | | Bar 17 | 25 | | Bar 18 | 20 | | Bar 19 | 15 | | Bar 20 | 10 | | Bar 21 | 5 | | Bar 22 | 3 | | Bar 23 | 2 | Altitude 1
bar
| Altitude | Value | |---|---| | 1 | 0.5 | | 2 | 1.2 | | 3 | 2.8 | | 4 | 4.5 | | 5 | 6.1 | | 6 | 5.9 | | 7 | 4.7 | | 8 | 3.3 | | 9 | 2.1 | | 10 | 1.5 | | 11 | 0.8 | | 12 | 0.3 | | 13 | 0.6 | | 14 | 1.1 | | 15 | 2.3 | | 16 | 3.7 | | 17 | 5.2 | | 18 | 6.8 | | 19 | 7.5 | | 20 | 6.3 | | 21 | 4.9 | | 22 | 3.6 | | 23 | 2.4 | | 24 | 1.8 | | 25 | 1.2 | | 26 | 0.7 | | 27 | 0.4 | | 28 | 0.5 | | 29 | 0.9 | | 30 | 1.6 | | 31 | 2.5 | | 32 | 3.8 | | 33 | 5.1 | | 34 | 6.4 | | 35 | 7.9 | | 36 | 8.6 | | 37 | 7.2 | | 38 | 5.7 | | 39 | 4.3 | | 40 | 3.1 | | 41 | 2.0 | | 42 | 1.4 | | 43 | 0.9 | | 44 | 0.5 | | 45 | 0.3 | | 46 | 0.7 | | 47 | 1.2 | | 48 | 2.1 | | 49 | 3.3 | | 50 | 4.6 | | 51 | 5.8 | | 52 | 7.0 | | 53 | 8.2 | | 54 | 7.6 | | 55 | 6.1 | | 56 | 4.8 | | 57 | 3.5 | | 58 | 2.7 | | 59 | 1.9 | | 60 | 1.3 | | 61 | 0.8 | | 62 | 0.5 | | 63 | 0.7 | | 64 | 1.1 | | 65 | 2.0 | | 66 | 3.2 | | 67 | 4.4 | | 68 | 5.6 | | 69 | 6.8 | | 70 | 7.9 | | 71 | 7.3 | | 72 | 5.9 | | 73 | 4.6 | | 74 | 3.3 | | 75 | 2.2 | | 76 | 1.5 | | 77 | 0.9 | | 78 | 0.6 | | 79 | 0.4 | | 80 | 0.5 | | 81 | 0.8 | | 82 | 1.6 | | 83 | 2.8 | | 84 | 4.0 | | 85 | 5.2 | | 86 | 6.4 | | 87 | 7.6 | | 88 | 8.8 | | 89 | 8.2 | | 90 | 6.7 | | 91 | 5.3 | | 92 | 4.0 | | 93 | 2.9 | | 94 | 2.1 | | 95 | 1.4 | | 96 | 0.8 | | 97 | 0.5 | | 98 | -0.2 | | 99 | -0.6 | | Note: The data is presented in a table format with three columns: Altitude, Value, and Altitude_2 (not explicitly labeled). The values are estimated based on the formula `np.exp(-x)`.
bar
| Interval | Value | |---|---| | 1 | 0.5 | | 2 | 0.7 | | 3 | 0.9 | | 4 | 1.1 | | 5 | 1.3 | | 6 | 1.5 | | 7 | 1.7 | | 8 | 1.9 | | 9 | 2.1 | | 10 | 2.3 | | 11 | 2.5 | | 12 | 2.7 | | 13 | 2.9 | | 14 | 3.1 | | 15 | 3.3 | | 16 | 3.5 | | 17 | 3.7 | | 18 | 3.9 | | 19 | 4.1 | | 20 | 4.3 | | 21 | 4.5 | | 22 | 4.7 | | 23 | 4.9 | | 24 | 5.1 | | 25 | 5.3 | | 26 | 5.5 | | 27 | 5.7 | | 28 | 5.9 | | 29 | 6.1 | | 30 | 6.3 | | 31 | 6.5 | | 32 | 6.7 | | 33 | 6.9 | | 34 | 7.1 | | 35 | 7.3 | | 36 | 7.5 | | 37 | 7.7 | | 38 | 7.9 | | 39 | 8.1 | | 40 | 8.3 | | 41 | 8.5 | | 42 | 8.7 | | 43 | 8.9 | | 44 | 9.1 | | 45 | 9.3 | | 46 | 9.5 | | 47 | 9.7 | | 48 | 9.9 | | 49 | 10.1 | | 50 | 10.3 | | 51 | 10.5 | | 52 | 10.7 | | 53 | 10.9 | | 54 | 11.1 | | 55 | 11.3 | | 56 | 11.5 | | 57 | 11.7 | | 58 | 11.9 | | 59 | 12.1 | | 60 | 12.3 | | 61 | 12.5 | | 62 | 12.7 | | 63 | 12.9 | | 64 | 13.1 | | 65 | 13.3 | | 66 | 13.5 | | 67 | 13.7 | | 68 | 13.9 | | 69 | 14.1 | | 70 | 14.3 | | 71 | 14.5 | | 72 | 14.7 | | 73 | 14.9 | | 74 | 15.1 | | 75 | 15.3 | | 76 | 15.5 | | 77 | 15.7 | | 78 | 15.9 | | 79 | 16.1 | | 80 | 16.3 | | 81 | 16.5 | | 82 | 16.7 | | 83 | 16.9 | | 84 | 17.1 | | 85 | 17.3 | | 86 | 17.5 | | 87 | 17.7 | | 88 | 17.9 | | 89 | 18.1 | | 90 | nanolimits for comparison between intervals in interval [0,0]. The chart displays a single bar series representing the value of the interval on each bar.
bar
| Interval | Value | |---|---| | 1 | 0.5 | | 2 | 1.2 | | 3 | 2.1 | | 4 | 3.5 | | 5 | 4.8 | | 6 | 5.9 | | 7 | 6.7 | | 8 | 7.2 | | 9 | 6.1 | | 10 | 4.9 | | 11 | 3.8 | | 12 | 2.5 | | 13 | 1.8 | | 14 | 1.2 | | 15 | 0.9 | | 16 | 0.6 | | 17 | 0.4 | | 18 | 0.3 | | 19 | 0.5 | | 20 | 0.7 | | 21 | 1.0 | | 22 | 1.5 | | 23 | 2.2 | | 24 | 3.1 | | 25 | 4.3 | | 26 | 5.6 | | 27 | 6.8 | | 28 | 7.9 | | 29 | 8.5 | | 30 | 7.8 | | 31 | 6.5 | | 32 | 5.2 | | 33 | 4.1 | | 34 | 3.0 | | 35 | 2.0 | | 36 | 1.5 | | 37 | 1.0 | | 38 | 0.8 | | 39 | 0.6 | | 40 | 0.5 | | 41 | 0.4 | | 42 | 0.3 | | 43 | 0.2 | | 44 | 0.1 | | 45 | 0.05 | | 46 | 0.03 | | 47 | 0.02 | | 48 | 0.01 | | 49 | 0.01 | | 50 | 0.01 | | 51 | 0.02 | | 52 | 0.03 | | 53 | 0.05 | | 54 | 0.1 | | 55 | 0.2 | | 56 | 0.3 | | 57 | 0.4 | | 58 | 0.6 | | 59 | 0.8 | | 60 | 1.1 | | 61 | 1.5 | | 62 | 2.0 | | 63 | 2.5 | | 64 | 3.0 | | 65 | 3.5 | | 66 | 4.0 | | 67 | 4.5 | | 68 | 5.0 | | 69 | 5.5 | | 70 | 6.0 | | 71 | 6.5 | | 72 | 7.0 | | 73 | 7.5 | | 74 | 8.0 | | 75 | 8.5 | | 76 | 9.0 | | 77 | 9.5 | | 78 | 10.0 | | 79 | 9.5 | | 80 | 9.0 | | 81 | 8.5 | | 82 | 8.0 | | 83 | 7.5 | | 84 | 7.0 | | 85 | 6.5 | | 86 | 6.0 | | 87 | 5.5 | | 88 | 5.0 | | 89 | 4.5 | | 90 | 4.0 | | 91 | 3.5 | | 92 | 3.0 | | 93 | 2.5 | | 94 | 2.0 | | 95 | 1.5 | | 96 | 1.0 | | 97 | 0.8 | | 98 | 0.6 | | 99 | 0.4 | | Note: The actual values may vary due to the random nature of the data generation process, so they are not explicitly provided in the code image. The code does not output a valid chart for this specific data series (e.g., bar chart). The actual data series cannot be extracted from the code image in the original table but can be converted into a single data series using the formula `np_formula` and `np_`.text_image
Activity History - 408 Profile Training 01/03/2018 at 11:05 a.m. 00:00:32 93 m 1 sessions 3.5 kJ K 1 56 Profile Training 01/03/2018 at 11:00 a.m. 00:00:37 132 m 1 sessions 2.2 kJ K 2 59 Quiet ride in Central Park 28/02/2018 at 2:49 p.m. 00:00:24 71 m 1 sessions Challenge K 1 59 Semi Marathon Meaux 2014 - Allure 4mn/KM 28/02/2018 at 11:26 a.m. 00:01:31 392 m 1 sessions Challenge K 36 395 Rocheserviere => Saint Fulgent 26/02/2018 at 10:48 a.m. 01:14:21 48.832 KM 1 sessions Challenge K 1754 282 Profile Training 23/02/2018 at 12:46 p.m. 00:01:25 143 m 1 sessions 0.6 kJ K 0 7Búsqueda
natural_image
Symbol of a trash bin crossed with a diagonal line, no text or numbers presentUnit 6 Riverside Business Centre
Brighton Road
Shoreham-by-Sea
BN43 6RE
United Kingdom
text_image
QR code image containing encoded data, no visible human-readable textSOMMAIRE
natural_image
Line drawing of a rectangular electronic device with a curved top and side connectors (no text or symbols)Appareil principal

Console Pied de console
Petits éléments
Montant
natural_image
Simple line drawing of a stylized object resembling a horn or tool, with no text or symbols present.Clé cruciforme
Clé en T

Clé Allen
ASSEMBLAGE
1

natural_image
Technical line drawing of a treadmill frame with no visible text or symbolsnatural_image
Technical line drawing of a treadmill with attached lever arms and a close-up view of the tray (no text or symbols)natural_image
Person performing a seated stretch exercise (no text or symbols visible)natural_image
Close-up of a hand holding a small white object, possibly a device or tool, inside a dark vehicle (no visible text or symbols)ENTRAINEMENT AVEC L'APPLI KINOMAP
text_image
Kinomap Anmelden Home Playlists Alle Videos Karte Kaufen Auswertung Geräte Einlösen 11:32 Kinomap SIGN IN Username or email Password Sign in Connect with Facebook Connect with STRAVA Sign in with Google LOG IN WITH UNDER ARMOUR Create accountCode d'activation
text_image
Kinomap CEDNCT Home Features PROFILES MANAGEMENT Manage profiles Current profile details Preview data Subscribe Activity History Kinomap Bike Power Sensors - Power sensors Primary: connected - 283 KM/H WATT RPM BPM 90 Additional sensors 72 bpm rpm wattEntrainement
Choix d'une vidéo
text_image
Quiet ride in Central Park Pick your settings Select your training mode and if you wish to resume a previous activity, or start a new chat. DISCOVERY CHALLENGE Challenge selected: the video plays at your speed. NEW TRAINING PREVIOUS TRAINING EXIT STARTtext_image
Quiet ride in Central Park 0.00 f 0.0 Start pedalingtext_image
Pick your settings Select your training mode and if you wish to resume a previous activity, or start a new one. DISCOVERY CHALLENGE Challenge selected: the video plays at your speed. NEW TRAINING PREVIOUS TRAINING EXIT STARTtext_image
Quiet ride in Central Park 0.00 m/02s 283 watts 15.3 mph 8 m -rpm 90 rpm Your training is starting Elevation 30 20 10 2000 4000 6000 8000 HD PAUSE Lemon West Side Museum of the City of New York MANHAT LN New York Historical Society Swaberry Fields MAP RANKING ©2018 Google - Map data ©2158 Googlenatural_image
Black-and-white landscape photo of a snow-covered mountain range with forested slopes and a winding river (no text or symbols visible)
natural_image
Simple diagram of a flat rectangular shape with vertical bars, labeled 'Flat' at the base (no other text or symbols)
text_image
Valley Trail
text_image
Rolling Hills
text_image
In the Mountains
text_image
The Alpine Pass
text_image
The Interval
text_image
Tour d'Egypt
bar
| Category | Value | |---|---| | Bar 1 | 20 | | Bar 2 | 35 | | Bar 3 | 60 | | Bar 4 | 85 | | Bar 5 | 70 | | Bar 6 | 90 | | Bar 7 | 65 | | Bar 8 | 75 | | Bar 9 | 80 | | Bar 10 | 70 | | Bar 11 | 85 | | Bar 12 | 75 | | Bar 13 | 95 | | Bar 14 | 80 | | Bar 15 | 70 | | Bar 16 | 80 | | Bar 17 | 75 | | Bar 18 | 85 | | Bar 19 | 70 | | Bar 20 | 90 | | Bar 21 | 60 | | Bar 22 | 75 | | Bar 23 | 80 | | Bar 24 | 70 | | Bar 25 | 85 | | Bar 26 | 75 | | Bar 27 | 90 | | Bar 28 | 65 | | Bar 29 | 70 | | Bar 30 | 80 | | Bar 31 | 60 | | Bar 32 | 95 | | Bar 33 | 55 | | Bar 34 | 80 | | Bar 35 | 70 | | Bar 36 | 85 | | Bar 37 | 65 | | Bar 38 | 90 | | Bar 39 | 50 | | Bar 40 | 85 | | Bar 41 | 60 | | Bar 42 | 95 | | Bar 43 | 45 | | Bar 44 | 80 | | Bar 45 | 70 | | Bar 46 | 85 | | Bar 47 | 60 | | Bar 48 | 90 | | Bar 49 | 40 | | Bar 50 | 85 | | Bar 51 | 70 | | Bar 52 | 80 | | Bar 53 | 75 | | Bar 54 | 95 | | Bar 55 | 60 | | Bar 56 | 85 | | Bar 57 | 70 | | Bar 58 | 80 | | Bar 59 | 75 | | Bar 60 | 90 | | Bar 61 | 50 | | Bar 62 | 80 | | Bar 63 | 70 | | Bar 64 | 85 | | Bar 65 | 65 | | Bar 66 | 95 | | Bar 67 | 45 | | Bar 68 | 80 | | Bar 69 | 70 | | Bar 70 | 85 | | Bar 71 | 60 | | Bar 72 | 90 | | Bar 73 | 40 | | Bar 74 | 85 | | Bar 75 | 70 | | Bar 76 | 80 | | Bar 77 | 75 | | Bar 78 | 95 | | Bar 79 | 55 | | Bar 80 | 80 | | Bar 81 | 70 | | Bar 82 | 85 | | Bar 83 | 60 | | Bar 84 | 90 | | Bar 85 | 40 | | Bar 86 | 85 | | Bar 87 | 70 | | Bar 88 | 80 | | Bar 89 | 75 | | Bar 90 | 95 | | Bar 91 | 50 | | Bar 92 | 80 | | Bar 93 | 70 | | Bar 94 | 85 | | Bar 95 | 60 | | Bar 96 | 90 | | Bar 97 | 40 | | Bar 98 | 85 | | Bar 99 | 70 | | Bar100 | -10 |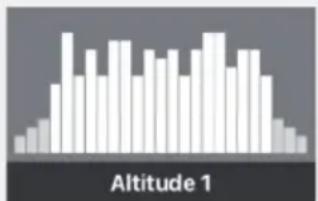
bar
| Category | Value | |---|---| | Bar 1 | 20 | | Bar 2 | 35 | | Bar 3 | 48 | | Bar 4 | 52 | | Bar 5 | 60 | | Bar 6 | 55 | | Bar 7 | 65 | | Bar 8 | 70 | | Bar 9 | 68 | | Bar 10 | 75 | | Bar 11 | 80 | | Bar 12 | 72 | | Bar 13 | 60 | | Bar 14 | 50 | | Bar 15 | 40 | | Bar 16 | 30 | | Bar 17 | 25 | | Bar 18 | 20 | | Bar 19 | 15 | | Bar 20 | 10 | | Bar 21 | 5 | | Bar 22 | 3 | | Bar 23 | 2 | Altitude 1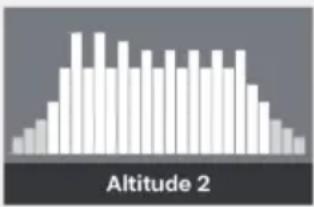

bar
| Interval | Value | |---|---| | 1 | 0.5 | | 2 | 0.7 | | 3 | 0.9 | | 4 | 1.1 | | 5 | 1.3 | | 6 | 1.5 | | 7 | 1.7 | | 8 | 1.9 | | 9 | 2.1 | | 10 | 2.3 | | 11 | 2.5 | | 12 | 2.7 | | 13 | 2.9 | | 14 | 3.1 | | 15 | 3.3 | | 16 | 3.5 | | 17 | 3.7 | | 18 | 3.9 | | 19 | 4.1 | | 20 | 4.3 | | 21 | 4.5 | | 22 | 4.7 | | 23 | 4.9 | | 24 | 5.1 | | 25 | 5.3 | | 26 | 5.5 | | 27 | 5.7 | | 28 | 5.9 | | 29 | 6.1 | | 30 | 6.3 | | 31 | 6.5 | | 32 | 6.7 | | 33 | 6.9 | | 34 | 7.1 | | 35 | 7.3 | | 36 | 7.5 | | 37 | 7.7 | | 38 | 7.9 | | 39 | 8.1 | | 40 | 8.3 | | 41 | 8.5 | | 42 | 8.7 | | 43 | 8.9 | | 44 | 9.1 | | 45 | 9.3 | | 46 | 9.5 | | 47 | 9.7 | | 48 | 9.9 | | 49 | 10.1 | | 50 | 10.3 | | 51 | 10.5 | | 52 | 10.7 | | 53 | 10.9 | | 54 | 11.1 | | 55 | 11.3 | | 56 | 11.5 | | 57 | 11.7 | | 58 | 11.9 | | 59 | 12.1 | | 60 | 12.3 | | 61 | 12.5 | | 62 | 12.7 | | 63 | 12.9 | | 64 | 13.1 | | 65 | 13.3 | | 66 | 13.5 | | 67 | 13.7 | | 68 | 13.9 | | 69 | 14.1 | | 70 | 14.3 | | 71 | 14.5 | | 72 | 14.7 | | 73 | 14.9 | | 74 | 15.1 | | 75 | 15.3 | | 76 | 15.5 | | 77 | 15.7 | | 78 | 15.9 | | 79 | 16.1 | | 80 | 16.3 | | 81 | 16.5 | | 82 | 16.7 | | 83 | 16.9 | | 84 | 17.1 | | 85 | 17.3 | | 86 | 17.5 | | 87 | 17.7 | | 88 | 17.9 | | 89 | 18.1 | | 90 | 18.3 | | 91 | 18.5 | | 92 | 18.7 | | 93 | 18.9 | | 94 | 19.1 | | 95 | 19.3 | | 96 | 19.5 | | 97 | 19.7 | | 98 | 19.9 | | 99 | nan |
bar
| Interval | Value | |---|---| | 1 | 0.5 | | 2 | 1.2 | | 3 | 2.1 | | 4 | 3.5 | | 5 | 4.8 | | 6 | 5.9 | | 7 | 6.7 | | 8 | 7.2 | | 9 | 6.1 | | 10 | 4.9 | | 11 | 3.8 | | 12 | 2.5 | | 13 | 1.8 | | 14 | 1.2 | | 15 | 0.9 | | 16 | 0.6 | | 17 | 0.4 | | 18 | 0.3 | | 19 | 0.5 | | 20 | 0.7 | | 21 | 1.0 | | 22 | 1.5 | | 23 | 2.2 | | 24 | 3.1 | | 25 | 4.3 | | 26 | 5.6 | | 27 | 6.8 | | 28 | 7.5 | | 29 | 6.3 | | 30 | 5.1 | | 31 | 3.9 | | 32 | 2.7 | | 33 | 1.9 | | 34 | 1.3 | | 35 | 0.8 | | 36 | 0.5 | | 37 | 0.4 | | 38 | 0.6 | | 39 | 0.9 | | 40 | 1.4 | | 41 | 2.3 | | 42 | 3.6 | | 43 | 4.9 | | 44 | 6.2 | | 45 | 7.1 | | 46 | 6.5 | | 47 | 5.3 | | 48 | 4.1 | | 49 | 2.9 | | 50 | 1.7 | | 51 | 0.9 | | 52 | 0.6 | | 53 | 0.5 | | 54 | 0.7 | | 55 | 1.1 | | 56 | 1.8 | | 57 | 2.6 | | 58 | 3.7 | | 59 | 4.8 | | 60 | 5.9 | | 61 | 6.8 | | 62 | 6.2 | | 63 | 5.1 | | 64 | 3.8 | | 65 | 2.5 | | 66 | 1.7 | | 67 | 1.1 | | 68 | 0.7 | | 69 | 0.5 | | 70 | 0.4 | | 71 | 0.6 | | 72 | 0.9 | | 73 | 1.5 | | 74 | 2.3 | | 75 | 3.2 | | 76 | 4.4 | | 77 | 5.6 | | 78 | 6.8 | | 79 | 7.5 | | 80 | 6.3 | | 81 | 5.1 | | 82 | 3.9 | | 83 | 2.7 | | 84 | 1.9 | | 85 | 1.3 | | 86 | 0.8 | | 87 | 0.5 | | 88 | 0.4 | | 89 | 0.6 | | 90 | 0.9 | | 91 | 1.6 | | 92 | 2.4 | | 93 | 3.3 | | 94 | 4.5 | | 95 | 5.7 | | 96 | 6.9 | | 97 | 7.8 | | 98 | 6.5 | | 99 | 5.3 | | Total: Interval: Interval_2 Total: Interval_2text_image
Activity History - 408 Profile Training 01/03/2018 at 11:05 a.m. 00:00:32 93 m 1 sessions 3.5 kJ K 1 56 Profile Training 01/03/2018 at 11:00 a.m. 00:00:37 132 m 1 sessions 2.2 kJ K 2 59 Quiet ride in Central Park 28/02/2018 at 2:49 p.m. 00:00:24 71 m 1 sessions Challenge K 1 59 Semi Marathon Meaux 2014 - Allure 4mn/KM 28/02/2018 at 11:26 a.m. 00:01:31 392 m 1 sessions Challenge K 36 395 Rocheserviere => Saint Fulgent 26/02/2018 at 10:48 a.m. 01:14:21 48.832 KM 1 sessions Challenge K 1754 282 Profile Training 23/02/2018 at 12:46 p.m. 00:01:25 143 m 1 sessions 0.6 kJ K 0 7Recherche
natural_image
Symbol of a trash bin crossed with a diagonal line, no text or numbers presentDÉCLARATION DE CONFORMITÉ

text_image
CE UK CAFabricant :
Chal-Tec GmbH, Wallstraße 16, 10179 Berlin, Allemagne.
Unit 6 Riverside Business Centre
Brighton Road
Shoreham-by-Sea
BN43 6RE
United Kingdom
text_image
QR code image containing encoded data, no visible human-readable textINDICE
natural_image
Line drawing of a rectangular electronic device with a curved top and side connectors (no text or symbols)natural_image
Simple line drawing of a stylized object resembling a tool or device with a handle (no text or symbols)Cacciavite a croce

Chiave a T
Chiave a brugola
MONTAGGIO
1

natural_image
Technical line drawing of a treadmill frame with no visible text or symbolsnatural_image
Technical line drawing of a treadmill with attached lever arms and a close-up view of the tray (no text or symbols)MODALITÀ E PROGRAMMI
natural_image
Close-up of a hand holding a small white object against a dark background (no visible text or symbols)text_image
Kinomap Anmelden Home Playlists Alle Videos Karte Kaufen Auswertung Geräte Einlösen 11:32 Kinomap SIGN IN Username or email Password Sign in Connect with Facebook Connect with STRAVA Sign in with Google LOG IN WITH UNDER ARMOUR Create accounttext_image
Kinemap cednct Home Featured PROFILES MANAGEMENT Manage profiles Current profile details Preview Data Subscribe Activity History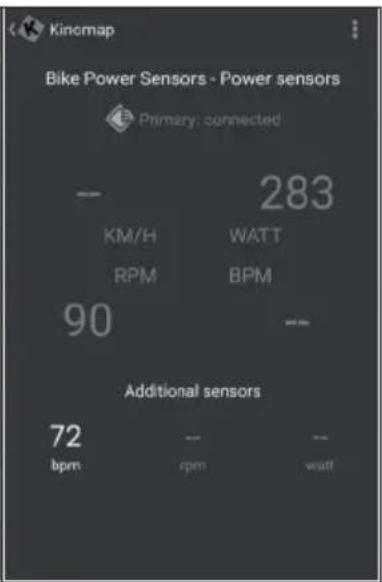
text_image
Kincmap Bike Power Sensors - Power sensors Primary: connected - 283 KM/H WATT RPM BPM 90 -- Additional sensors 72 bpm -pm wattAllenamento
Selezione video
text_image
Quiet ride in Central Park Pick your settings Select your training mode and if you wish to resume a previous activity, or start a new chat. DISCOVERY CHALLENGE Challenge selected: the video plays at your speed. NEW TRAINING PREVIOUS TRAINING EXIT STARTtext_image
Quiet ride in Central Park 0.00 f 0.0 Start pedaling GET COUNT SAMSUNGtext_image
Pick your settings Select your training mode and if you wish to resume a previous activity, or start a new one. DISCOVERY CHALLENGE Challenge selected: the video plays at your speed. NEW TRAINING PREVIOUS TRAINING EXIT STARTDisplay allenamento
text_image
Quiet ride in Central Park 0.00 m/02s 283 watts 15.3 mph 8 m -rpm 90 rpm Your training is starting Elevation 30 20 10 2000 4000 6000 8000 HD PAUSE Lemon West Side Museum of the City of New York MANHAT LN New York Historical Society Swaberry Fields MAP RANKING ©2018 Google - Map data ©2158 GoogleIl tab „Ranking List“ è disponibile solo in modalità multiplayer.
natural_image
Black-and-white landscape photo of a snow-covered mountain range with forested slopes and a winding river (no text or symbols visible)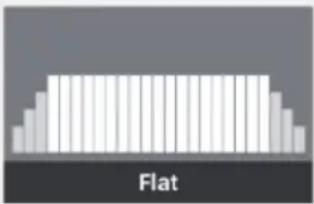
natural_image
Simple diagram of a flat rectangular shape with vertical bars, labeled 'Flat' at the base (no other text or symbols)
text_image
Valley Trail
text_image
Rolling Hills
text_image
In the Mountains
text_image
The Alpine Pass
text_image
The Interval
text_image
Tour d'Egypt
bar
| Category | Value | |---|---| | Bar 1 | 20 | | Bar 2 | 35 | | Bar 3 | 60 | | Bar 4 | 85 | | Bar 5 | 70 | | Bar 6 | 90 | | Bar 7 | 65 | | Bar 8 | 75 | | Bar 9 | 80 | | Bar 10 | 70 | | Bar 11 | 75 | | Bar 12 | 80 | | Bar 13 | 70 | | Bar 14 | 75 | | Bar 15 | 80 | | Bar 16 | 70 | | Bar 17 | 75 | | Bar 18 | 80 | | Bar 19 | 70 | | Bar 20 | 65 | | Bar 21 | 60 | | Bar 22 | 55 | | Bar 23 | 50 | | Bar 24 | 45 | | Bar 25 | 40 | | Bar 26 | 35 | | Bar 27 | 30 | | Bar 28 | 25 | | Bar 29 | 20 | | Bar 30 | 15 | | Bar 31 | 10 | | Bar 32 | 5 | | Bar 33 | 0 | | Bar 34 | 5 | | Bar 35 | 10 | | Bar 36 | 15 | | Bar 37 | 20 | | Bar 38 | 25 | | Bar 39 | 30 | | Bar 40 | 35 | | Bar 41 | 40 | | Bar 42 | 45 | | Bar 43 | 50 | | Bar 44 | 55 | | Bar 45 | 60 | | Bar 46 | 65 | | Bar 47 | 70 | | Bar 48 | 75 | | Bar 49 | 80 | | Bar 50 | 85 | | Bar 51 | 90 | | Bar 52 | 95 | | Bar 53 | 100 | | Bar 54 | 95 | | Bar 55 | 90 | | Bar 56 | 85 | | Bar 57 | 80 | | Bar 58 | 75 | | Bar 59 | 70 | | Bar 60 | 65 | | Bar 61 | 60 | | Bar 62 | 55 | | Bar 63 | 50 | | Bar 64 | 45 | | Bar 65 | 40 | | Bar 66 | 35 | | Bar 67 | 30 | | Bar 68 | 25 | | Bar 69 | 20 | | Bar 70 | 15 | | Bar 71 | 10 | | Bar 72 | 5 | | Bar 73 | 0 | | Bar 74 | 5 | | Bar 75 | 10 | | Bar 76 | 15 | | Bar 77 | 20 | | Bar 78 | 25 | | Bar 79 | 30 | | Bar 80 | 35 | | Bar 81 | 40 | | Bar 82 | 45 | | Bar 83 | 50 | | Bar 84 | 55 | | Bar 85 | 60 | | Bar 86 | 65 | | Bar 87 | 70 | | Bar 88 | 75 | | Bar 89 | 80 | | Bar 90 | 85 | | Bar 91 | 90 | | Bar 92 | 95 | | Bar 93 | 100 | | Bar 94 | nan | | Change (bar) - Top: ~10; Change (bar) - Bottom: ~1. (Bar for top). (Bar for bottom). (Value appears as a duplicate of the bar labels, so actual values are not explicitly labeled).)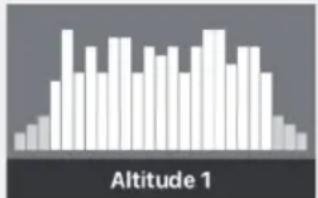
bar
| Category | Value | |---|---| | Bar 1 | 20 | | Bar 2 | 35 | | Bar 3 | 60 | | Bar 4 | 75 | | Bar 5 | 80 | | Bar 6 | 70 | | Bar 7 | 65 | | Bar 8 | 70 | | Bar 9 | 85 | | Bar 10 | 90 | | Bar 11 | 75 | | Bar 12 | 60 | | Bar 13 | 50 | | Bar 14 | 40 | | Bar 15 | 30 | | Bar 16 | 25 | | Bar 17 | 20 | Altitude 1

bar
| Interval | Value | |---|---| | 1 | 0.5 | | 2 | 0.7 | | 3 | 0.9 | | 4 | 1.1 | | 5 | 1.3 | | 6 | 1.5 | | 7 | 1.7 | | 8 | 1.9 | | 9 | 2.1 | | 10 | 2.3 | | 11 | 2.5 | | 12 | 2.7 | | 13 | 2.9 | | 14 | 3.1 | | 15 | 3.3 | | 16 | 3.5 | | 17 | 3.7 | | 18 | 3.9 | | 19 | 4.1 | | 20 | 4.3 | | 21 | 4.5 | | 22 | 4.7 | | 23 | 4.9 | | 24 | 5.1 | | 25 | 5.3 | | 26 | 5.5 | | 27 | 5.7 | | 28 | 5.9 | | 29 | 6.1 | | 30 | 6.3 | | 31 | 6.5 | | 32 | 6.7 | | 33 | 6.9 | | 34 | 7.1 | | 35 | 7.3 | | 36 | 7.5 | | 37 | 7.7 | | 38 | 7.9 | | 39 | 8.1 | | 40 | 8.3 | | 41 | 8.5 | | 42 | 8.7 | | 43 | 8.9 | | 44 | 9.1 | | 45 | 9.3 | | 46 | 9.5 | | 47 | 9.7 | | 48 | 9.9 | | 49 | 10.1 | | 50 | 10.3 | | 51 | 10.5 | | 52 | 10.7 | | 53 | 10.9 | | 54 | 11.1 | | 55 | 11.3 | | 56 | 11.5 | | 57 | 11.7 | | 58 | 11.9 | | 59 | 12.1 | | 60 | 12.3 | | 61 | 12.5 | | 62 | 12.7 | | 63 | 12.9 | | 64 | 13.1 | | 65 | 13.3 | | 66 | 13.5 | | 67 | 13.7 | | 68 | 13.9 | | 69 | 14.1 | | 70 | 14.3 | | 71 | 14.5 | | 72 | 14.7 | | 73 | 14.9 | | 74 | 15.1 | | 75 | 15.3 | | 76 | 15.5 | | 77 | 15.7 | | 78 | 15.9 | | 79 | 16.1 | | 80 | 16.3 | | 81 | 16.5 | | 82 | 16.7 | | 83 | 16.9 | | 84 | 17.1 | | 85 | 17.3 | | 86 | 17.5 | | 87 | 17.7 | | 88 | 17.9 | | 89 | 18.1 | | 90 | nanolimits for comparison between intervals in interval [0,0]. The chart displays a single bar series representing the value of the bar series (likely a cumulative or scaled metric). The label 'Interval' appears below the bars, indicating it is part of the data series.
bar
| Interval | Value | |---|---| | 1 | 0.5 | | 2 | 1.2 | | 3 | 2.1 | | 4 | 3.5 | | 5 | 4.8 | | 6 | 5.9 | | 7 | 6.7 | | 8 | 7.2 | | 9 | 6.5 | | 10 | 5.8 | | 11 | 4.9 | | 12 | 3.7 | | 13 | 2.8 | | 14 | 1.9 | | 15 | 1.2 | | 16 | 0.8 | | 17 | 0.5 | | 18 | 0.3 | | 19 | 0.2 | | 20 | 0.4 | | 21 | 0.7 | | 22 | 1.1 | | 23 | 1.6 | | 24 | 2.2 | | 25 | 2.9 | | 26 | 3.6 | | 27 | 4.3 | | 28 | 5.0 | | 29 | 5.7 | | 30 | 6.4 | | 31 | 7.1 | | 32 | 7.8 | | 33 | 8.5 | | 34 | 9.2 | | 35 | 9.9 | | 36 | 10.6 | | 37 | 11.3 | | 38 | 12.0 | | 39 | 12.7 | | 40 | 13.4 | | 41 | 14.1 | | 42 | 14.8 | | 43 | 15.5 | | 44 | 16.2 | | 45 | 16.9 | | 46 | 17.6 | | 47 | 18.3 | | 48 | 19.0 | | 49 | 19.7 | | 50 | 20.4 | | 51 | 21.1 | | 52 | 21.8 | | 53 | 22.5 | | 54 | 23.2 | | 55 | 23.9 | | 56 | 24.6 | | 57 | 25.3 | | 58 | 26.0 | | 59 | 26.7 | | 60 | 27.4 | | 61 | 28.1 | | 62 | 28.8 | | 63 | 29.5 | | 64 | 30.2 | | 65 | 30.9 | | 66 | 31.6 | | 67 | 32.3 | | 68 | 33.0 | | 69 | 33.7 | | 70 | 34.4 | | 71 | 35.1 | | 72 | 35.8 | | 73 | 36.5 | | 74 | 37.2 | | 75 | 37.9 | | 76 | 38.6 | | 77 | 39.3 | | 78 | 40.0 | | 79 | 40.7 | | 80 | 41.4 | | 81 | 42.1 | | 82 | 42.8 | | 83 | 43.5 | | 84 | 44.2 | | 85 | 44.9 | | 86 | 45.6 | | 87 | 46.3 | | 88 | 47.0 | | 89 | 47.7 | | 90 | 48.4 | | 91 | 49.1 | | 92 | 49.8 | | 93 | 50.5 | | 94 | 51.2 | | 95 | 51.9 | | 96 | 52.6 | | 97 | 53.3 | | 98 | 54.0 | | 99 | 54.7 | | Note: The actual values may vary due to the random nature of the data generation and sampling process (e.g., time, sample size, or condition). The provided values are just an example from the code execution.other
| Metric | 01/03/2018 at 11:05 a.m. | 00:00:32 (kJ) | 93 m | 1 sessions | | :--- | :--- | :--- | :--- | :--- | | Profile Training | 3.5 kJ | 1 | 1 | 56 | | Profile Training | 2.2 kJ | 2 | 2 | 59 | | Quiet ride in Central Park | 28/02/2018 at 2:49 p.m. | 00:00:24 Challenge | 71 m | 1 sessions | | Semi Marathon Meaux 2014 - Allure 4mn/KM | 28/02/2018 at 11:26 a.m. | 00:01:31 Challenge | 392 m | 1 sessions | | Rocheserviere => Saint Fulgent | 26/02/2018 at 10:48 a.m. | 01:14:21 Challenge | 48.832 KM | 1 sessions | | Profile Training | 23/02/2018 at 12:46 p.m. | 00:01:25 0.6 kJ | 143 m | 1 sessions | | Profile Training (K = K) | 0.6 kJ | 0 | 0 | 7 | Risks indicate specific values.Ricerca
natural_image
Symbol of a trash bin crossed with a diagonal line, no text or numbers presentUnit 6 Riverside Business Centre
Brighton Road
Shoreham-by-Sea
BN43 6RE
United Kingdom