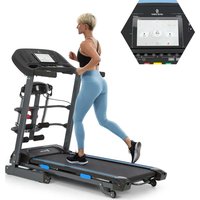
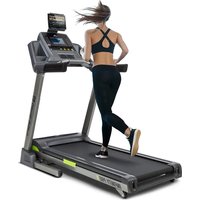
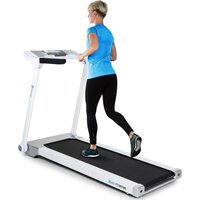
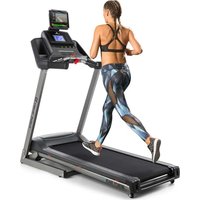
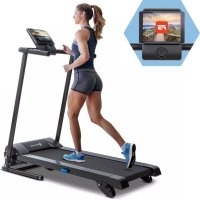
Pacemaker F120 - Treadmills Capital Sports - Free user manual and instructions
Find the device manual for free Pacemaker F120 Capital Sports in PDF.
User questions about Pacemaker F120 Capital Sports
0 question about this device. Answer the ones you know or ask your own.
Ask a new question about this device
Download the instructions for your Treadmills in PDF format for free! Find your manual Pacemaker F120 - Capital Sports and take your electronic device back in hand. On this page are published all the documents necessary for the use of your device. Pacemaker F120 by Capital Sports.
USER MANUAL Pacemaker F120 Capital Sports
2. Cardio-Trainingsphase
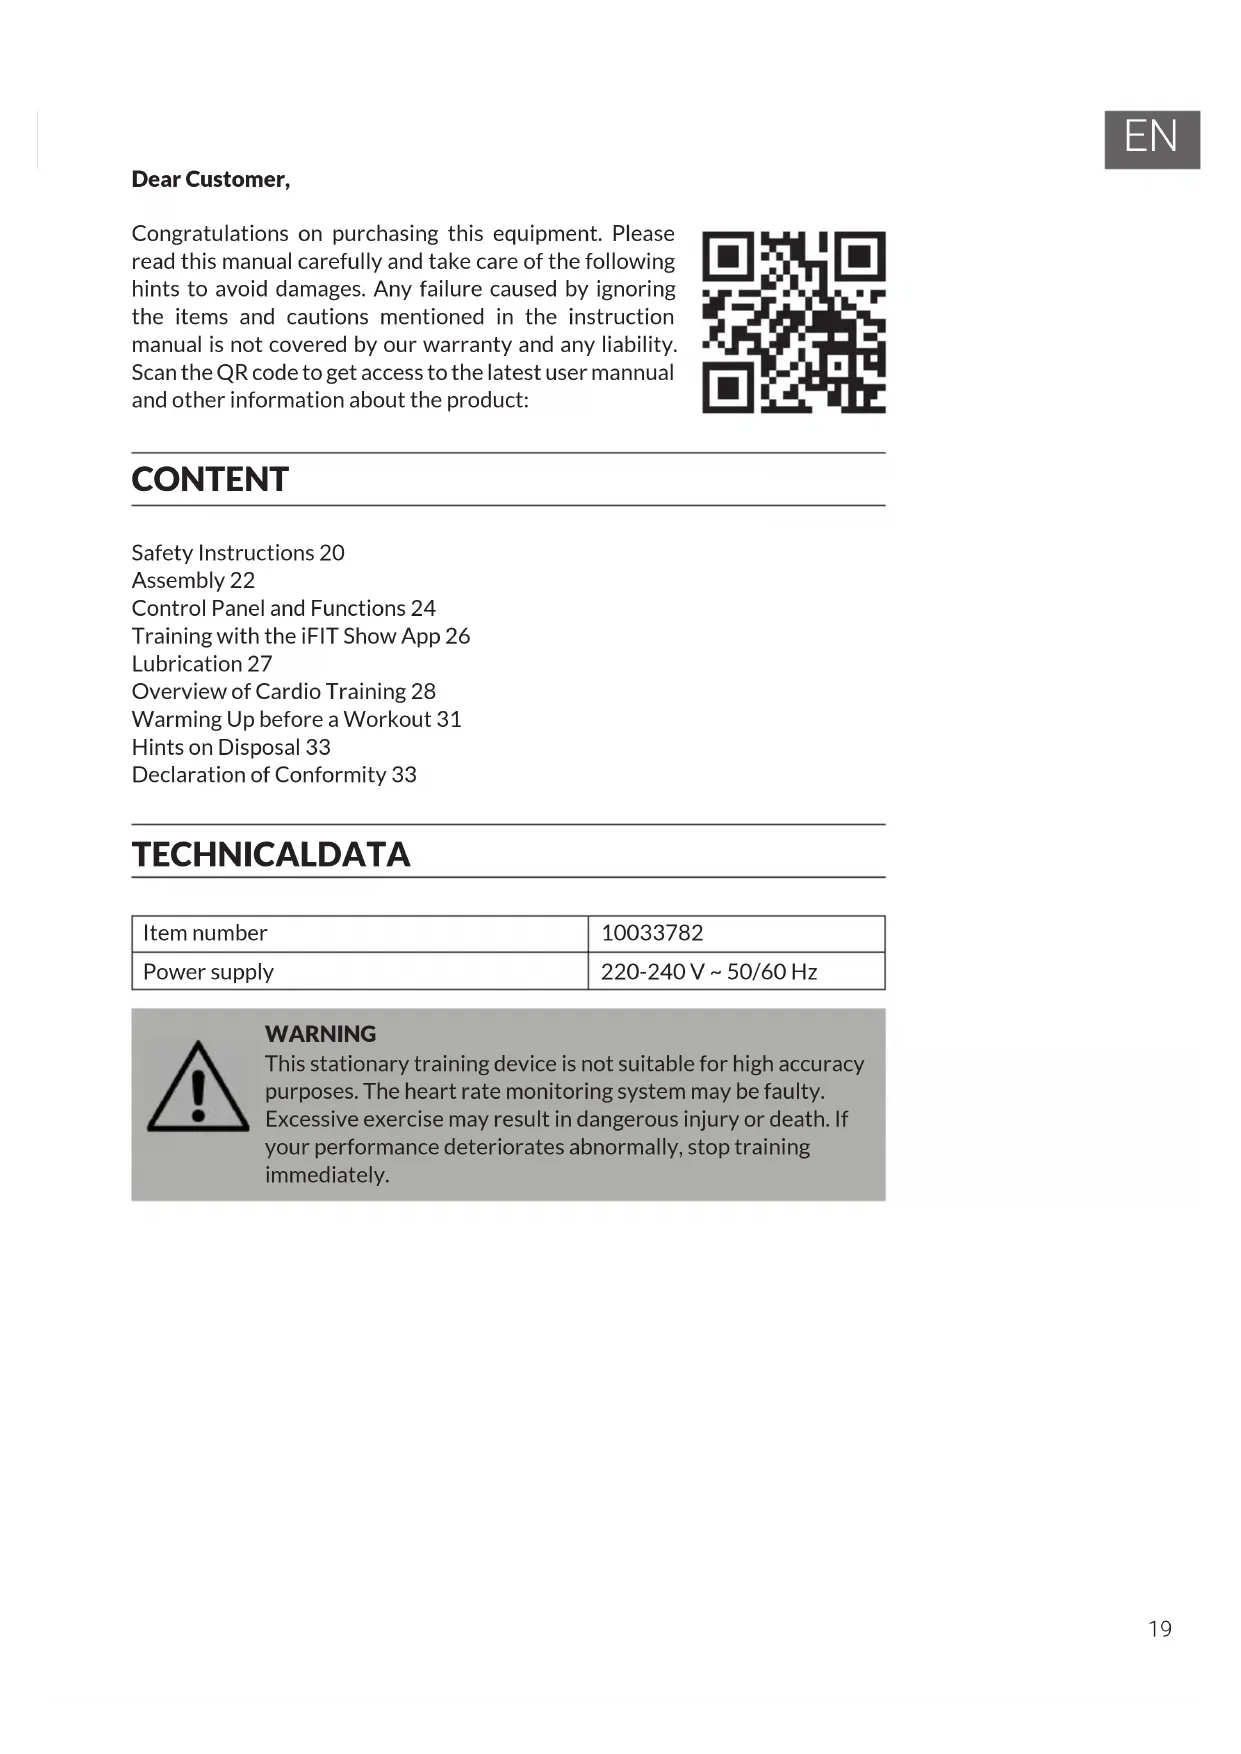
Congratulations on purchasing this equipment. Please read this manual carefully and take care of the following hints to avoid damages. Any failure caused by ignoring the items and cautions mentioned in the instruction manual is not covered by our warranty and any liability. Scan the QR code to get access to the latest user manual and other information about the product:

CONTENT
Safety Instructions 20
Assembly 22
Control Panel and Functions 24
Training with the iFIT Show App 26
Lubrication 27
Overview of Cardio Training 28
Warming Up before a Workout 31
Hints on Disposal 33
Declaration of Conformity 33
TECHNICALDATA
| Item number | 10033782 |
| Power supply | 220-240 V ~ 50/60 Hz |

WARNING
This stationary training device is not suitable for high accuracy purposes. The heart rate monitoring system may be faulty.
Excessive exercise may result in dangerous injury or death. If your performance deteriorates abnormally, stop training immediately.
SAFETY INSTRUCTIONS
Before operating this unit, please read this manual carefully to ensure optimum performance and safety. This is manual should be kept available for future reference. For product improvement, the company reserves the right to change the design and specification at any time without prior notice. Pictures are for reference use only and may differ from the actual product.
- Please keep this manual in a safe place for your reference when necessary.
- Please do not assembly or use this equipment until you read this manual thoroughly & carefully. The safety and efficiency only can be achieved when the equipment is assembled, maintained and used properly. It is your responsibility to ensure that all the users are informed of all the warnings and precautions.
- For totally safe use, a stable, leveled surface is required. Protect your floor with a mat. Do not use the equipment in a damp areas such as swimming pool sauna, etc. For safety space, the equipment must have at least 0.6 meter of free space all around it.
- Before starting any exercise program you must consult your doctor to determine if you have any physical or health conditions that could create a risk to your health and safety, or prevent you from using the equipment properly. Your doctor's advice is essential if you are taking medication that affects your heart rate, blood pressure or cholesterol level.
- Be aware of your body's signals. Incorrect or excessive exercise can damage your health. Stop exercising if you experienced any of the following symptoms: pain, tightness in your chest, irregular heartbeat, extreme shortness of breath, feeling light headed, dizzy or nauseous. If you do experience any of these conditions you must consult your doctor before continuing with your exercise program.
- Do not workout immediately after meals.
- Keep children and pets away from the equipment, the equipment must be assembled and used by adults only.
- The equipment is designed for home use only.
- The equipment is not suitable for therapeutic use, may only be used for exercises indicated in the training instructions
- Wearing proper clothing and athletic shoes while using the equipment, Avoid wearing loose clothing that may get caught in the equipment or that may restrict or prevent movements.
-
Keep your back straight while exercising.
-
Before using the equipment, check the handle bar, seat, and the nuts & bolts are securely tightened.
- For adjustable parts, bear the maximum position in your mind, do not exceed the mark "stop", otherwise will cause risk.
- Always use the equipment as indicated. If you find any defective components while assembling or checking the equipment, or if you hear any unusual noises coming from the equipment during use, stop immediately. Do not use the equipment until the problem has been solved.
- Care must be taken when lifting or moving the equipment so as not to injure your back. always use proper lifting techniques and /or seek assistance if necessary.
- All moveable accessories (e.g. pedal, handlebar, saddle...etc.) require weekly maintenance. Check them before use every time. If anything broken or loose, please fix them immediately. You may continue using them only after they return to good conditions.
- Pay attention to the absence of a free wheel system which will cause serious risk.
- Keep power cord away from heat sources.
- Do not insert or drop any object into any opening.
- Unplug exercise bike before moving or cleaning it. To clean, wipe surfaces down with mild detergents and a slightly damp cloth only; never use solvents.
- Do not use the exercise bike in any location that is not temperature controlled, such as, but not limited to, garages, porches, pool rooms, bathrooms, car ports or outdoors.
- Use the bike only as described in this manual.
- Incorrect repair and structural modifications (e.g. removal or replacement of original parts) may endanger the safety of the user.
- The rotating disk flywheel will get hot during the operation.
- Lock the equipment when stop using.
- This product is not designed for use by persons (including children) who have reduced physical, sensory or mental capacities or persons with no experience or knowledge, unless they are instructed and supervised in the use of the appliance by a person responsible for their safety.
- Children should be supervised to ensure that they do not play with the appliance.
- Before use, check the voltage on the device badge. Only connect the device to sockets that correspond to the voltage of the device.
Note: Maximum weight of the user is 110kg
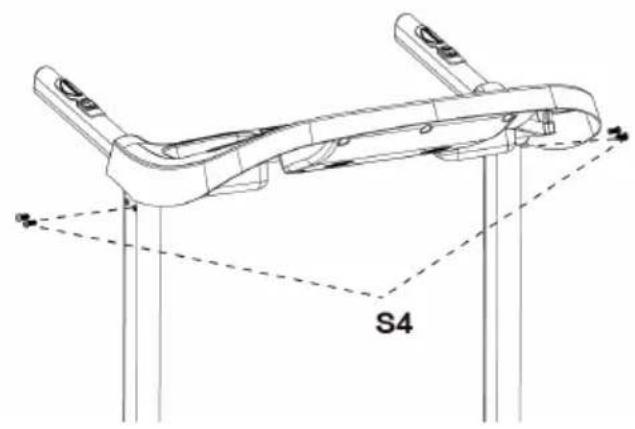
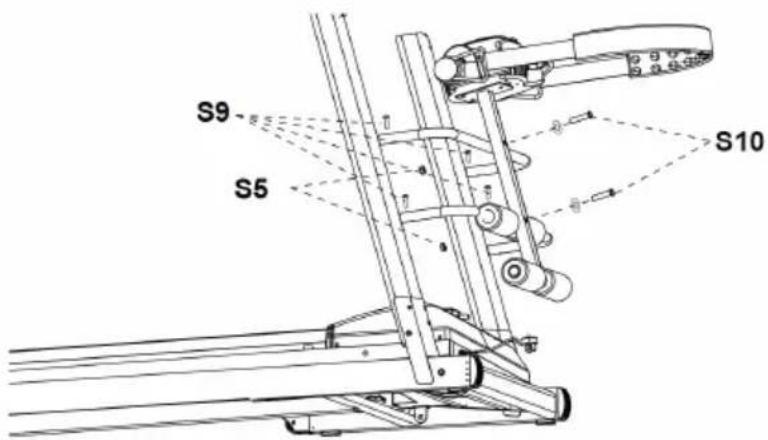
ASSEMBLY
single parts
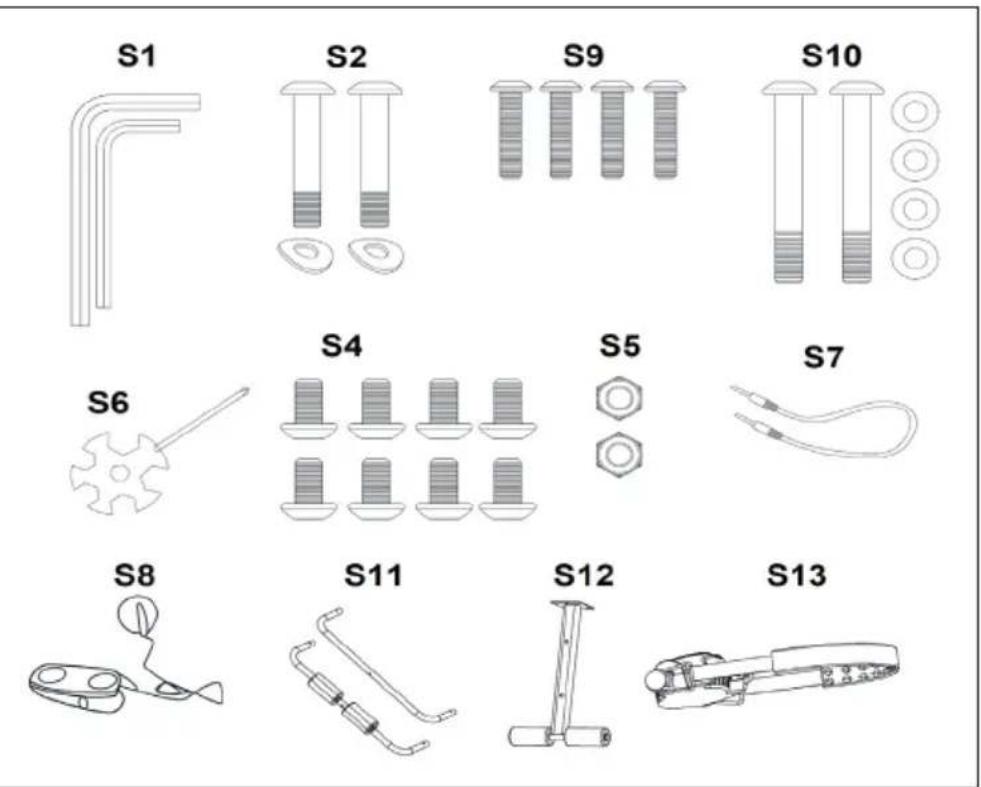
Assembly
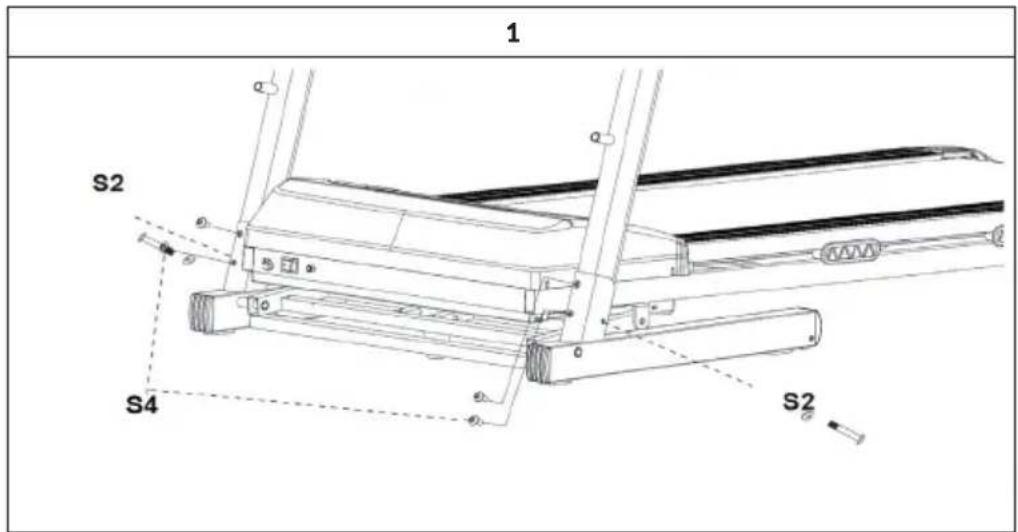
2
3
Fold down/open the device

- Turn off the treadmill at the main switch and unplug the treadmill from the wall outlet.
- Lift the treadmill deck toward the control panel. You should feel the treadmill's gas spring system engage.
- To lower the treadmill again, press the foot into the gas spring system (see picture) to release the lock. The treadmill deck can now be lowered to the ground.
Move device
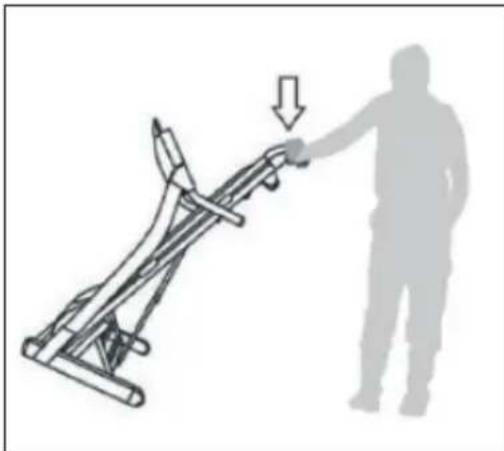
After closing, the treadmill can be moved by tilting it towards you on the transport rollers. Make sure the power cord is disconnected from the treadmill before moving it.
CONTROL PANEL AND FUNCTIONS
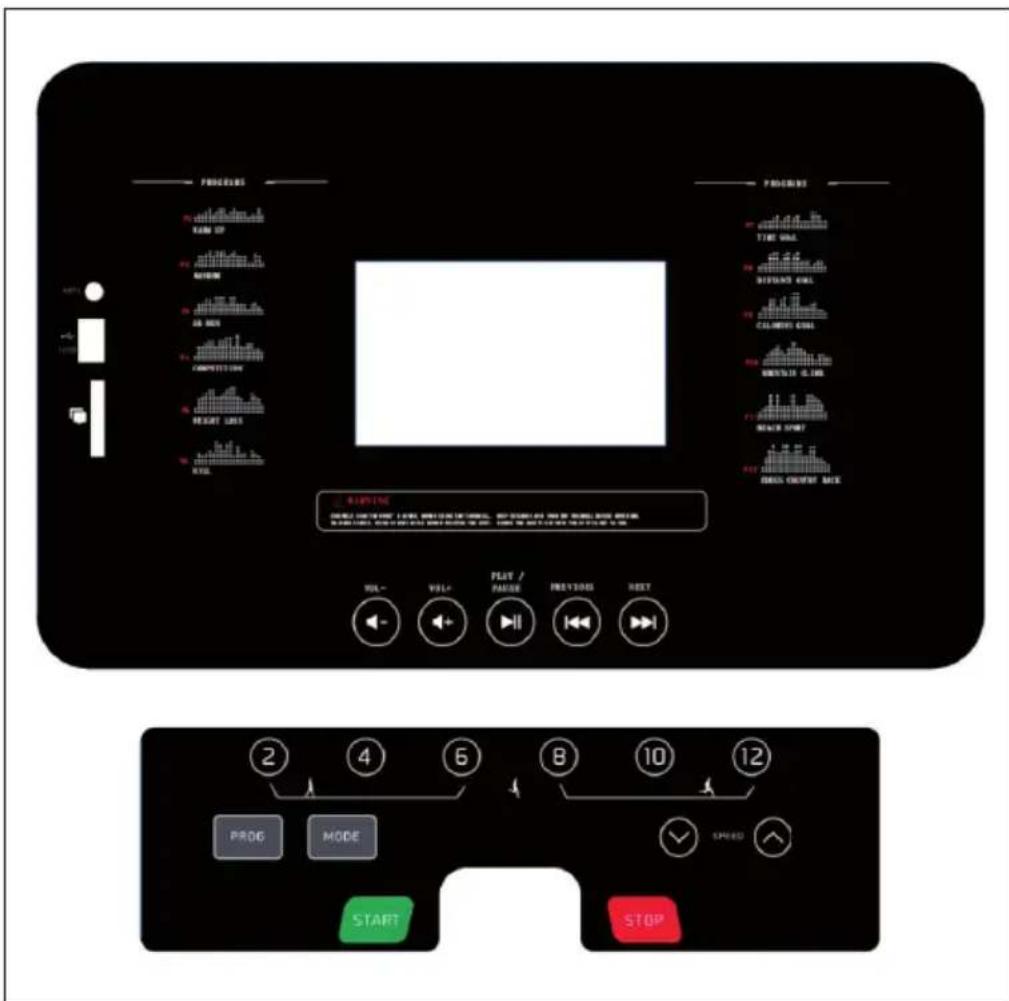
Display indications
| TIME | Without set target time: The time is counted up from 00:00 to a maximum of 99:00 hours in 1-minute increments. With set target time: The time is counted down from the preset value in 1-minute increments. The adjustable time is between 5:00 and 99:00 minutes. |
| SPEED | Displays the current training speed from 1.0 to 12.0 km/h maximum. |
| DISTANCE | Without target distance set: The distance is counted upwards from 0.00 to a maximum of 99.5 km in 0.1 km increments. With target distance set: The distance is counted down from the preset value in 0.5 km increments. The adjustable distance is between 0.5 and 99.5 km. |
| CALORIES | Without target calories set: Calories are counted from 0 to a maximum of 995 in 1 kcal increments upwards. With target calories set: The calories are counted down from the preset value in 5 kcal steps. The adjustable calories are between 10 and 995 kcal. |
| PULSE | Hold the hand sensor firmly and the console recognizes your pulse signal. While the device is measuring your heart rate, the heart symbol on the console flashes. |
Key functions
- MODE: To confirm all settings and enter the training mode.
- SPEED+: Selects the training mode and sets the function value up.
- SPEED-: Selects the training mode and sets the function value down.
- START/STOP: Starts or stops the workout.
Turning on the machine
Insert the plug into the socket. Make sure that the magnetic security key (S8) is in the correct position and inserted correctly into the console.
Speed buttons
You can start the workout by pressing one of the speed buttons. There are 6 speed buttons for quick start (2, 4, 6, 8, 10, 10, 12 km/h).
Program mode
This treadmill console has 12 preset training programs to choose from (see picture).
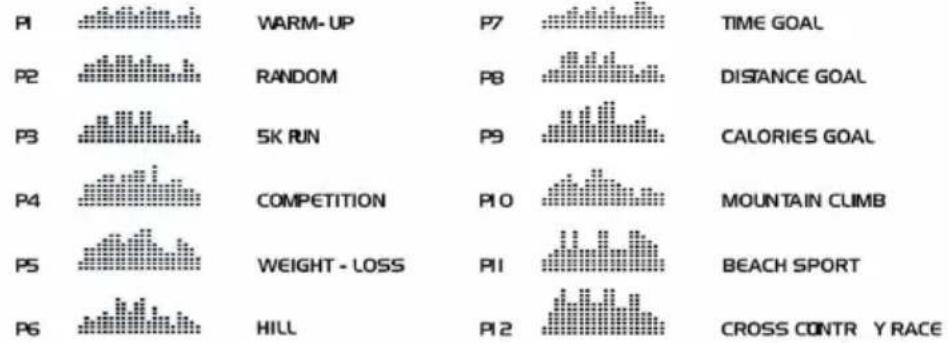
If you want to start one of the programs, use the PROG button to select the desired program (P1 to P12). Press the START button to confirm and start the program.
TRAINING WITH THE IFIT SHOW APP
iFitShow is a specialized app for treadmills, exercise bikes and fitness equipment. The app offers special maps, goals and competitions, as well as street and other modes. It also includes a pedometer and data recording functions. The collected data can be shared on the Internet or used together with other sports apps.

You can find the app on the Google Play Store and iTunes.


LUBRICATION
Lubrication of the treadmill ensures excellent performance and prolongs the treadmill's life. To maintain treadmill performance, please add some lubricant to each tube. Apply the lubricant for the first time after the first 25 operating hours (after approximately 2-3 months) and repeat every 50 operating hours (approximately every 5-8 months).
How to check the belt for correct lubrication
Raise one side of the treadmill and grab the underside of the belt. If the surface is smooth when touched, no further lubrication is required. If the surface is dry on contact, apply some lubricant.
How to apply lubricant
Raise one side of the moving belt. Add some lubricant to the tubes on the side of the belt.
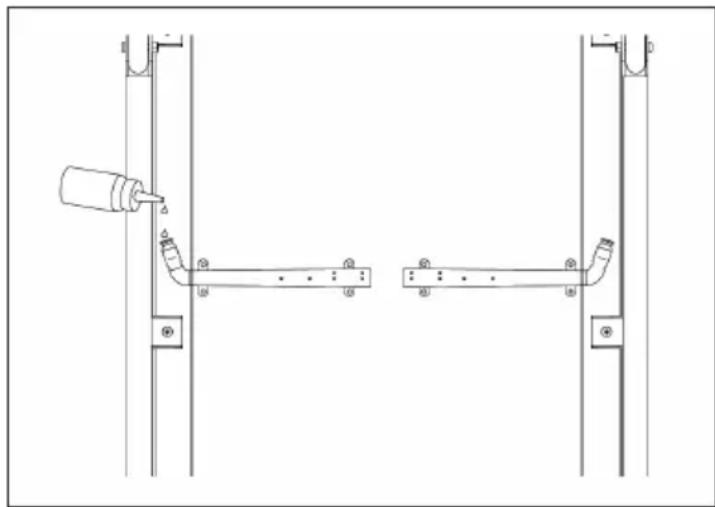
Note: Do not lubricate the running deck excessively. Wipe off excess or overflowed lubricant immediately.
Regular cardio training stimulates the cardiovascular (heart and blood vessels) and respiratory system. It improves your general health and helps you to burn fat. It is the recommended workout if you want to lose weight. When exercising, glucose is burned off first, then the fat stored in the body.
Intensive cardio training (e.g. circuit training, training with high resistance and long duration training) requires a greater amount of effort and also trains the muscular system and your endurance. As a rule, the more regular you train, the more effective the training is (even with short training sessions of 20 minutes).
During the Training
The level of resistance used during the workout determines the training intensity and the associated results.
An optimal training session includes (1) a warm-up phase, (2) an intensive cardio training phase and finally (3) a cool down phase. If you want to progress or burn calories, you should go through these 3 phases as well as exercise for at least 20-30 minutes on the ergometer.
1. Warm-up Phase
Always start your training session with a low resistance level. A warm-up phase of 5-10 minutes is important because your muscles need to be warmed up. During the warm-up phase, you should give your circulatory system and muscles time to prepare for the subsequent workout. As a beginner, you can train for the first 3 minutes at the easiest level and then gradually increase the level to where you feel most comfortable.
2. Cardio Training Phase
After about 10 minutes, you can then begin the cardio training phase. When using the interval training program, the computer controls the resistance depending on the type of interval chosen and thus simulates changing intensities.
The cardio training phase is considered aerobic or anaerobic training depending on the energy expenditure. These two types of training are defined as follows:
Aerobic Training Zone
While you are in this zone, you are improving your cardiovascular system and burning fat.
Despite an increased heart rate, deeper breathing and light sweating, the body is not in a very stressed state, breathing is not significantly accelerated—you could still talk to someone without going out of breath—and you feel that you could sustain the physical exertion for a long time. It's similar to when you briskly walk uphill.
The muscles and heart work more intensely than when the body is at rest and can get most of their energy needs met via aerobic energy production, which utilizes oxygen to facilitate energy production. At the same time, the anaerobic production of energy is also active, but only to a small extent. The lactic acid produced in this process can be broken down to produce energy. Most of your training should be aerobic training.
If you continue to increase the intensity, you will eventually come to the threshold where aerobic energy production is no longer able to increase its output. At this point, there is a shift towards anaerobic energy production being used to a greater extent. You are now doing anaerobic training.
Anaerobic Training
When in this zone, you are improving your performance and speed. When you increase the intensity while in this zone, the training becomes much more strenuous because of the rising lactate level in the body; you start sweating more; your breathing gets faster; and after some time depending on your fitness level, your muscles tire and you feel totally exhausted and that you can no longer continue at this level of intensity.
3. Cool-down Phase
At the end of the cardio training phase, you begin the cool-down phase, which should last for at least 5 minutes. Here, you use low levels of resistance. The recovery or cool-down phase is also helpful with regard to preventing possible muscle soreness. It is also advisable to do active recuperation after an intensive training session, such as a hot bath, a sauna session or a massage.
Training Progress
Each month you can make the training more challenging by extending the duration of the cardio training phase, by using a higher level of resistance within that phase or by doing a more demanding interval training.
Eating and Drinking
- Drink before, during and after training.
- Drink at least 2 sips of water (10 to 20 cl) every 10-15 minutes during a training session.
- If your workout lasts for more than 1 hour, you should drink a sports drink to protect the body from dehydration while training.
- For optimal cardio training, suitable nutrition before and after any physical activity is very important.
Before training, it is best to eat carbohydrates, such as those found in rice and pasta, as they provide the body with an important source of energy.
After training, you need to refuel with proteins, such as those found in eggs, yoghurt and dried fruits. Even if you want to lose weight, it is absolutely necessary to eat after training in order for your body to recuperate.
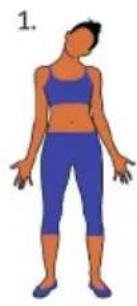
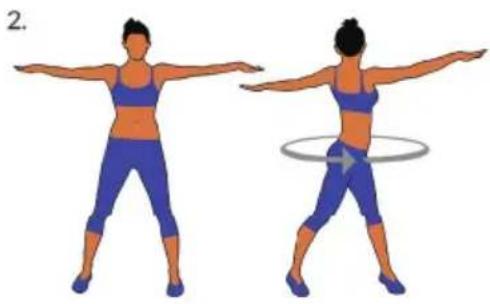
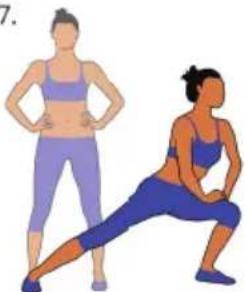
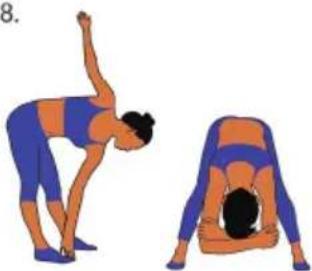
WARMING UP BEFORE A WORKOUT

4.
5.
7.
8.
Perform the movements before each workout to mobilize your joints and activate your muscles.
Should a movement be uncomfortable or painful, skip this movement and consult your doctor or fitness instructor about suitable warm-up movements.
Each movement should be repeated (right and left) so that you can start the cardio training relaxed.
Take about 5 minutes to do the following CapitalSports training routine:
- Tilt the head sideways, slowly alternating from right to left. Then mobilize your shoulders (circular movements and shrugging the shoulders).
- Turn the hips while the arms are stretched out. The feet are not firmly fixed to the ground (the ankles follow the body's rotation).
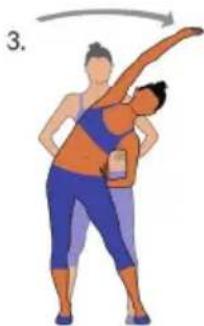
- Bend to the side and raise one arm straight up. Stay in this position for several seconds on each side.
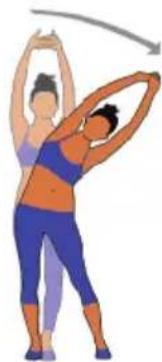
- Bend to the side and raise both arms above your head with palms together. Again, remain on each side for several seconds. The exercise is now a bit more intense with the second arm joining.
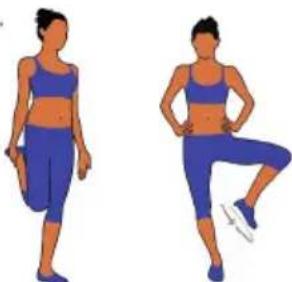
- Stand on one leg and hold the instep of the other foot with your hand. Mobilize it so as to stretch the thigh lightly. If necessary, hold onto something to keep your balance. Stand on one leg and trace a circle with your foot in the air in both directions (counter clockwise and clockwise).
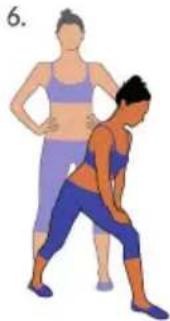
- Put one leg forward and with your arms support the weight of your upper body on your thigh. Position your legs so as to provide a stretch for the rear leg's calf muscles.
- Repeat the previous exercise with more distance between your feet. The stretch will now be more intense.
- Bend forward while keeping your legs straight and alternatingly touch each hand to the opposite foot. Finally, let yourself hang down and relax.
HINTS ON DISPOSAL
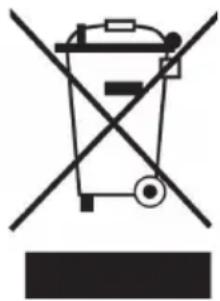
According to the European waste regulation 2012/19/EU this symbol on the product or on its packaging indicates that this product may not be treated as household waste. Instead it should be taken to the appropriate collection point for the recycling of electrical and electronic equipment. By ensuring this product is disposed of correctly, you will help prevent potential negative consequences for the environment and human health, which could otherwise be caused by inappropriate waste handling of this product. For more detailed information about recycling of this product, please contact your local council or your household waste disposal service.
DECLARATION OF CONFORMITY
Producer:
CE
Chal-Tec GmbH, Wallstraße 16, 10179 Berlin, Germany.
This product is conform to the following European Directives:
2014/35/EU (LVD)
2011/65/EU (RoHS)
2014/30/EU (EMC)
Estimado cliente:
Chal-Tec GmbH, Wallstraße 16, 10179 Berlin, Germany.