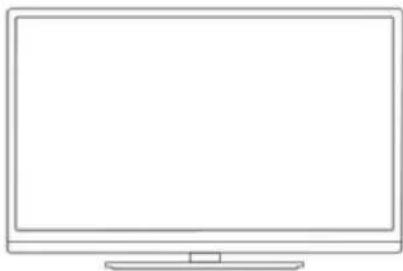
Areal Bar 360 - Soundbar Auna - Free user manual and instructions
Find the device manual for free Areal Bar 360 Auna in PDF.

User questions about Areal Bar 360 Auna
0 question about this device. Answer the ones you know or ask your own.
Ask a new question about this device
Download the instructions for your Soundbar in PDF format for free! Find your manual Areal Bar 360 - Auna and take your electronic device back in hand. On this page are published all the documents necessary for the use of your device. Areal Bar 360 by Auna.
USER MANUAL Areal Bar 360 Auna
Congratulations on purchasing this product. Please read and follow these instructions, in order to avoid damaging the item. We do not cover any damages that may arise from improper use of the item or the disregard of the safety instructions.
Important Safety Advice
- Read all instructions before using.
- To protect against a fire, electric shock or personal injury, do not immerse cord, electric plugs or device in water or other liquids.
- Do not expose the appliance to extreme temperatures. The appliance shall be used in moderate climates.
- The use of attachments that are not recommended by the appliance manufacturer may result in fire, electric shock or personal injury.
- Do not open the unit by removing any cover parts. Do not attempt to repair the unit. Any repairs or servicing should be done by qualified personell only.
- Only qualified persons may perform technical work on the product. The product may not be opened or changed. The components cannot be serviced by the user. The manufacturer is not responsible for any radio or TV interference caused by unauthorized modifications.
The appliance is not a toy. Do not let children play with it. Never let children insert foreign objects into the appliance. - Never clean the surface of the device with solvents, paint thinners, cleansers or other chemical products. Instead, use a soft, dry cloth or soft brush.
- This appliance is to be used with 12V car power supply.
- Save these instructions.
Small objects
Keep small objects (i.e. screws, mounting material, memory cards etc.) and packaging out of the range of children. Do not let Children play with foil. Choking hazard!
Transporting the device
Please keep the original packaging. To gain sufficient protection of the device while shipment or transportation, make sure to put it back in its original packaging.
Cleaning the surface
Do not use any volatile liquids, detergents or the like. Use a clean dry cloth.
Technical Data
Item#0030837
General
Power supply AC 100-240V ~ 50-60Hz
Power consumption 45W (standby: <0.5W)
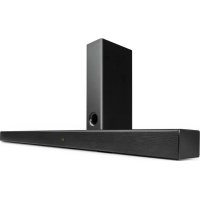
Dimensions (WxDxH) & weight 392 x 84 x 55 mm & approx. 2.0 kgs
Speakers
Full range speaker s 4x: 2^ / 15W / 4 Ohm
Output power 2 × 20W
Frequency response 30Hz - 20KHz
BT
Range 10m
Transmission frequency 2.402~2.480GHz
Protocol A2DP1.2
Scope of delivery
Soundbar, AC cord, RC, user manual, audio cable
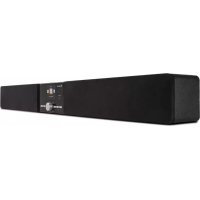
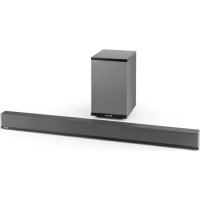
Overview / Controls
Right/left:

Front:

Rear:
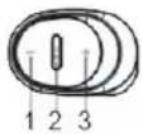
/ (on/standby / input selection)
1+3Volume+/-
2
3 + 1 Volume +/-
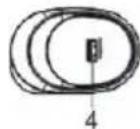
4 USB socket
5 Display
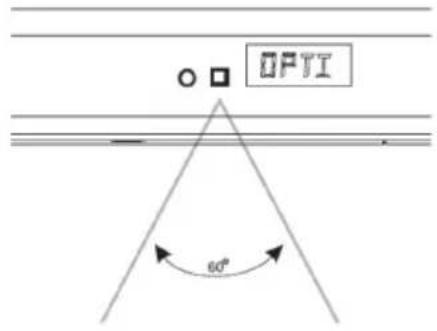
6 IR sensor
7 HDMI IN 1
8HDMIN2
9 HMDIOUT (ARC)
10 Optical IN
11 Coax IN
12 3.5 mm audio IN
13 AC IN
Remote Control
The Remote Control has a pre-installed lithium CR2032 battery. If the remote control does not work properly, replace the battery. Use batteries of high quality only. Batteries of low quality might leak and cause damage. Note: Remove the battery, if the remote control is not to be used for a longer period of time, as it might be damaged by leaking batteries. Do not use any batteries other than those specified.
Replacing the battery:
| 1 On / standby | |
| 2 + 4 Volume +/- | |
| 3 + 5 | / (BT) |
| 6 | (BT: Play/Pause / Pairing) (If the soundbar is already paired, and you want to pair it to another device, hold play/pause for 3 seconds to disconnect.) |
| 7 | Input selection (MODE) |
| 8 | BASS/TREB: Set the bass and treble. Use + / - to adjust. |
| 9 | MUSIC sound preset |
| 10 | MOVIE sound preset |
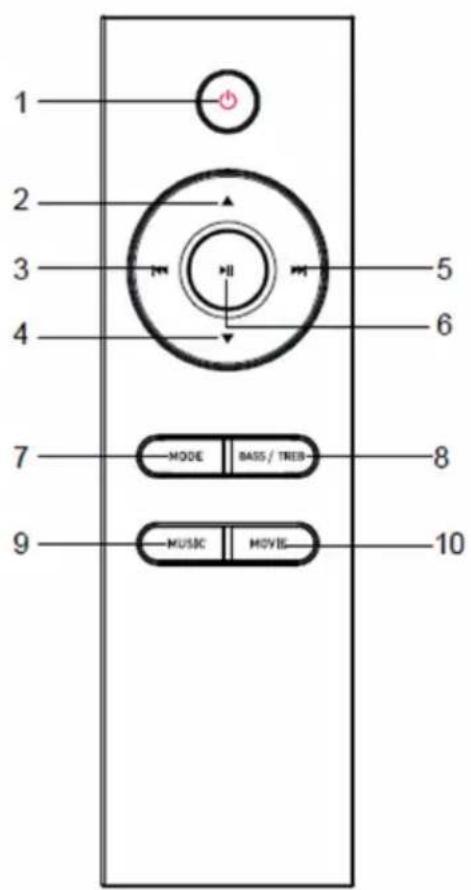
- The IR sensor has a reception angle of 60^ . Please mind that the lighting conditions might affect the infra red signal.
Connections and Operation
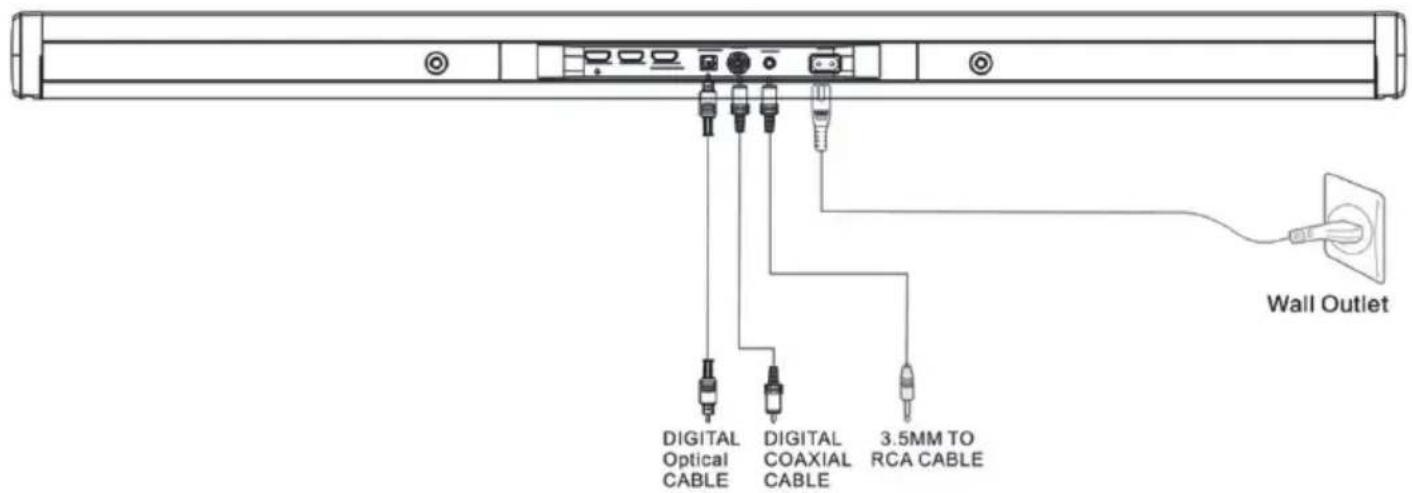
Audio connections: Connect the audio outputs of your TV, your BluRay player or gaming console to the audio inputs of this soundbar, using the optical input, the coaxial input, or the 3.5mm analogue input with the fitting cables. Please see the diagram on p. 14 below.
- HDMI: Connect the HDMI OUTs of your TV, console, or BluRay player with the HDMI IN 1 or HDMI IN 2 of this soundbar. If the soundbar lies within the signal path from your BluRay player/gaming console to your TV, you can use the HDMI OUT to patch the audio signal through to the TV.
The HDMI OUT of this soundbar supports ARC (audio return channel). So, with an ARC HDMI cable and an ARC supporting TV, you can reduce the amount of cable connections by one. Please see your TV device's user manual for further information.
AC IN: Connect the soundbar to a household mains socket, using the supplied AC cord.
Operation
- On/standby: Switch the soundbar on by pressing. Hold for standby.
Input source: Press (front panel) or MODE (remote control) repeatedly, to select the desired input channel. The display shows which channel is currently selected:
| Selected channel Display shows |
| HDMI IN-1 HD-1 |
| HDMI IN-2 HD-2 |
| ACR (HDMI OUT) ARC |
| BT bT |
| Optischer Eingang OPT |
| Koaxialer Eingang COX |
| Aux-Eingang (3,5mm) AUX |
| USB USb |
Adjust volume: Press + / - (front panel) or the arrow buttons (remote control) to adjust the volume.
- BT: Press MODE / to select BT mode. Activate BT on your mobile device and pair with the AREAL BAR 360 which should appear among the found BT devices within range. Type in "0000" if prompted to enter a password. On successfully established BT connection, the BT LED stops flashing and a confirmation ("connected") will be heard.
This soundbar can not be used for hands-free phone calls. On incoming calls, the music being streamed from the smartphone will be interrupted until ending (or declining) the call.
You can use the buttons / and for navigating through your mobile media library.
- USB: Insert USB drives containing music files (MP3/Wav) into the USB socket. Playback starts automatically after a few seconds. Use to operate the music playback.
Please note: The USB port (power output: 5V) can be used to charge smartphones, tablets, MP3 players or other small electronic devices (except for any Apple products).
Wall Mounting
The wall mounting is simple, but should nevertheless be performed by experienced craftsmen when in doubt. Wrong mounting can lead to damages on the device or injuries. Please pay attention for possible water or electricity lines when drilling.
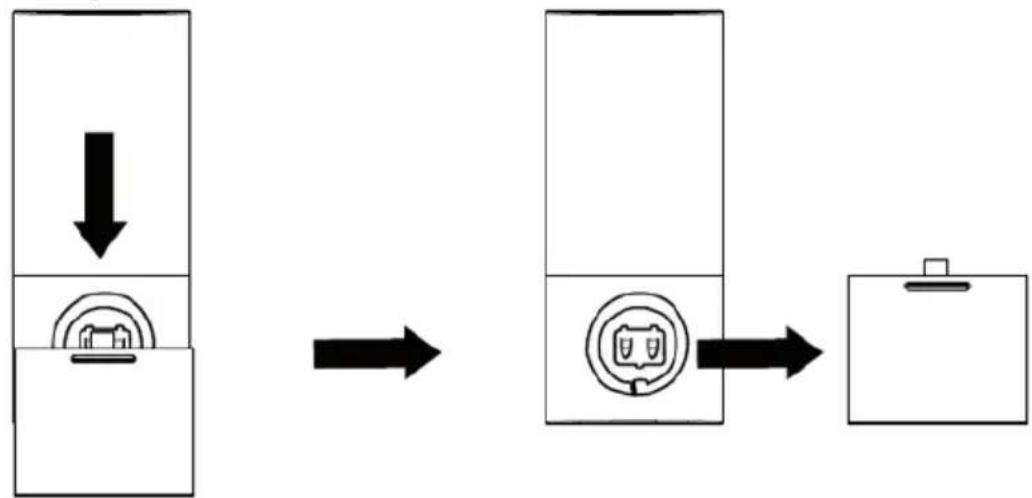
Step 1: Attach the brackets ("S") to the sound bar, using the supplied short screws:
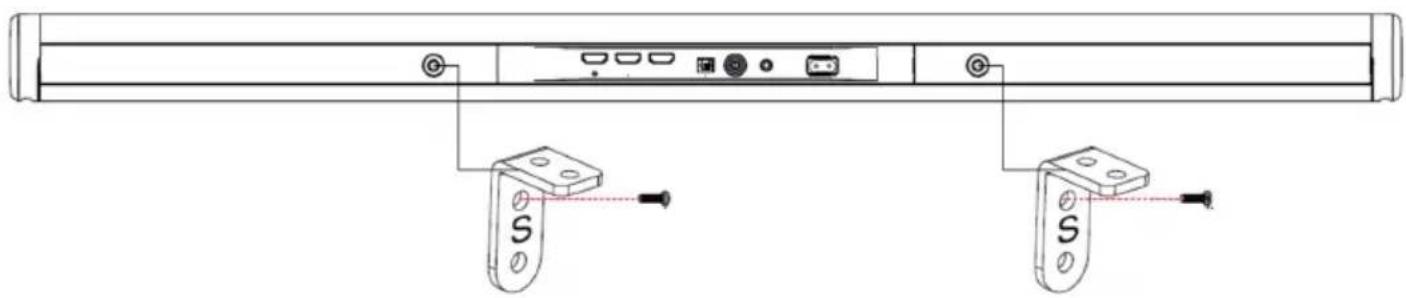
①
Step 2: Make drill hole marks on the wall for the anchors. Make sure the marks are level before drilling. Use a 6mm bit and power drill (not supplied) to drill holes on the marks. Insert the included plastic anchors into the holes and push in until they are flush with the wall. Secure the supplied Metallic Brackets (marked "W") to the wall by screwing the included flat head screws into the anchors and tighten until the screw head is fully inserted and flush with the metallic bracket. Note: The distance between the brackets should be 350~mm .

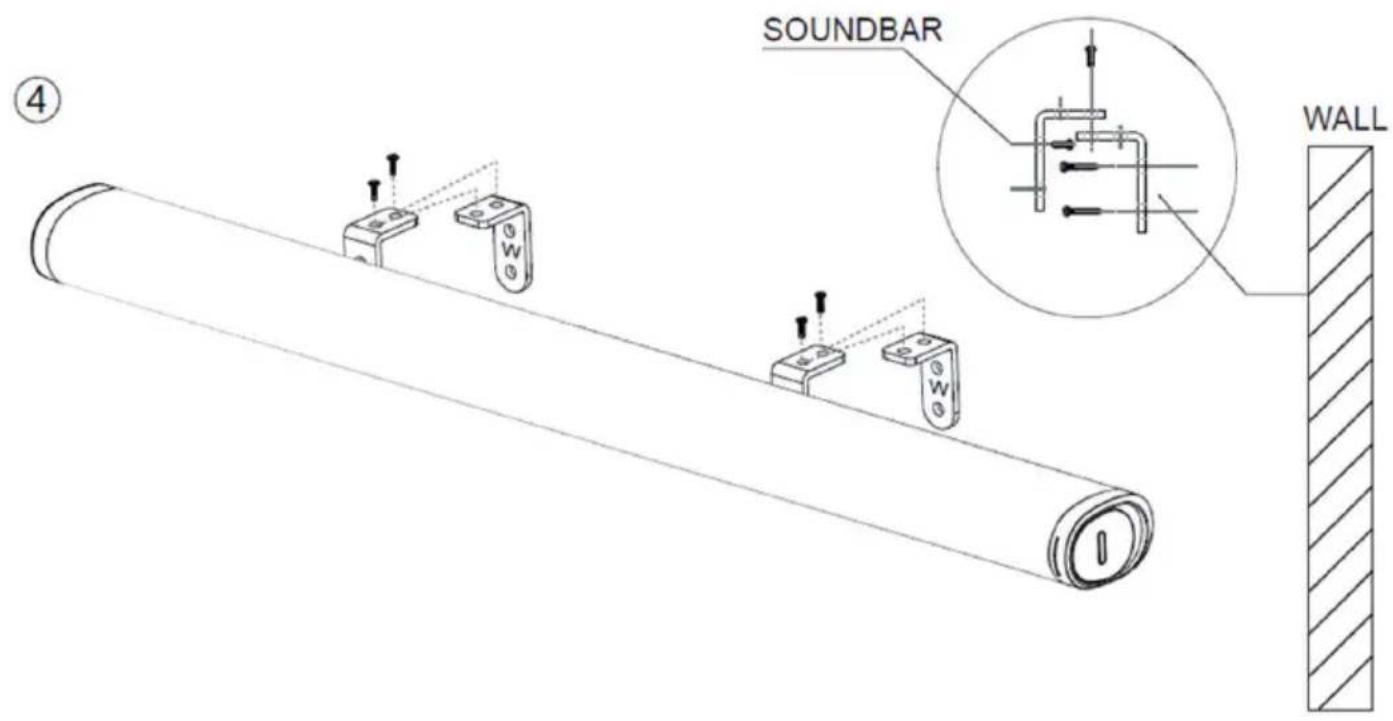
Step 3: Place the sound bar onto the brackets and fix with the supplied short screws (see below):
Environment Concerns
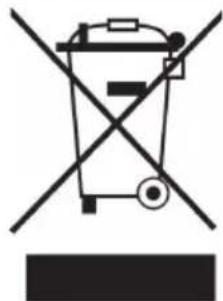
According to the European waste regulation 2002/96/EG this symbol on the product or on its packaging indicates that this product may not be treated as household waste. Instead it should be taken to the appropriate collection point for the recycling of electrical and electronic equipment. By ensuring this product is disposed of correctly, you will hep prevent potential negative consequences for the environment and human health, which could otherwise be caused by inappropriate waste handling of this product. For more detailed information about recycling of this product, please contact your local council or your household waste disposal service.
Declaration of Conformity

Producer: Chal-Tec GmbH, Wallstraße 16, 10179 Berlin, Germany
This product is conform to the following European directives:
2011/65/EU (RoHS)
2014/53/EU (RED)