
Duke DAB - Radio Auna - Free user manual and instructions
Find the device manual for free Duke DAB Auna in PDF.
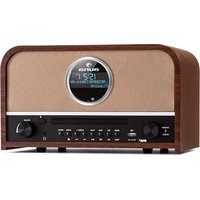
| Product type | Radio alarm clock with cassette player, DAB+, FM, Bluetooth, USB/SD |
| Brand | Auna |
| Model | Duke DAB |
| Article numbers | 10035374, 10035375 |
| Power supply | 220-240 V ~ 50/60 Hz |
| Power consumption | 30 W (estimated) |
| Dimensions (W x H x D) | 30 x 15 x 20 cm (estimated) |
| Weight | 2 kg (estimated) |
| Radio | DAB+ and FM (bands III and II) |
| Cassette player | Yes, playback and recording |
| USB/SD devices | USB port and SD/MMC card reader, MP3 and WMA playback |
| Bluetooth | Yes, version unspecified, name "DUKE-DAB" |
| Headphone jack | 3.5 mm jack |
| Speakers | 2 stereo speakers (estimated) |
| Display | Backlit LCD screen |
| Functions | Alarm (2 wake-up times), sleep timer, time setting, station presets, recording (FM/DAB/cassette/micro to USB/SD), auto scan |
| Antenna | DAB/FM telescopic antenna + FM wire antenna |
| Backup power | Battery compartment (batteries not included) |
| Care | Clean with a dry, soft cloth. Do not use liquids. Avoid humidity and excessive heat. |
| Safety | Do not expose to water or splashes. Do not obstruct ventilation openings. Unplug during prolonged non-use. Keep out of reach of children under 8 without supervision. |
| Spare parts and repairability | No spare parts supplied. Repairs must be carried out by a qualified professional. |
| General information | Complies with European directives 2011/65/EU (RoHS) and 2014/53/EU (RED). Recycle according to WEEE directive. |
Frequently Asked Questions - Duke DAB Auna
User questions about Duke DAB Auna
0 question about this device. Answer the ones you know or ask your own.
Ask a new question about this device
Download the instructions for your Radio in PDF format for free! Find your manual Duke DAB - Auna and take your electronic device back in hand. On this page are published all the documents necessary for the use of your device. Duke DAB by Auna.
USER MANUAL Duke DAB Auna
INHALT
Technische Daten 3
FM radio stations menu
natural_image
Symbol of a trash bin with crossed lines indicating no waste, and a solid black rectangle below (no text or labels)Congratulations on purchasing this equipment. Please read this manual carefully and take care of the following hints to avoid damages. Any failure caused by ignoring the items and cautions mentioned in the instruction manual is not covered by our warranty and any liability. Scan the QR code to get access to the latest user manual and other information about the product:

Safety Instructions 18
Product Overview 19
Getting Started 20
Listening to DAB Radio 23
Cassette Functions 25
USB/SD Functions 26
BT Function 28
Playback via Headphones 29
Hints on Disposal 29
Declaration of Conformity 29
TECHNICAL DATA
| Item number 10035374, 10035375 | |
| Power supply 220-240 V ~ 50/60 Hz |
t
SAFETY INSTRUCTIONS
- Observe all notes listed in the operating instructions.
- Do not use the unit near water or in a humid environment.
- Make sure that no liquid is spilled over the unit and the unit openings.
- Move the unit carefully to avoid damaging it.
- Do not block the device outputs.
- Do not place the unit near heat sources (e.g. heating). Do not expose the device to direct sunlight.
- Plug the power plug of the unit into the power outlet in the manner intended.
- The device is equipped with overload protection. Should this need to be replaced, contact customer service or a similarly qualified person.
- Unplug the unit from the wall outlet if it will not be used for a long period of time.
- Do not attempt to service or repair the unit yourself. In this case, the warranty expires.
- The mains plug is used to disconnect the device from the mains after it has been switched off. Make sure that the mains plug is always freely accessible.
- Do not expose the device to splash water or place objects filled with liquid, such as vases, on the device.
- Do not expose the batteries to extreme heat such as sunlight or fire.
- Do not obstruct the ventilation of the unit by blocking the ventilation openings with objects such as newspapers, tablecloths, curtains, etc..
- Ensure that a minimum distance of 5 mm to all sides of the unit is maintained.
- Do not place sources of open flame ignition, such as lit candles, on the unit.
- Dispose of used batteries in an environmentally friendly manner.
- Use the device only in temperate climate, not in tropical climate.
This device may be only used by children 8 years old or older and persons with limited physical, sensory and mental capabilities and / or lack of experience and knowledge, provided that they have been instructed in use of the device by a responsible person who understands the associated risks.
PRODUCT OVERVIEW
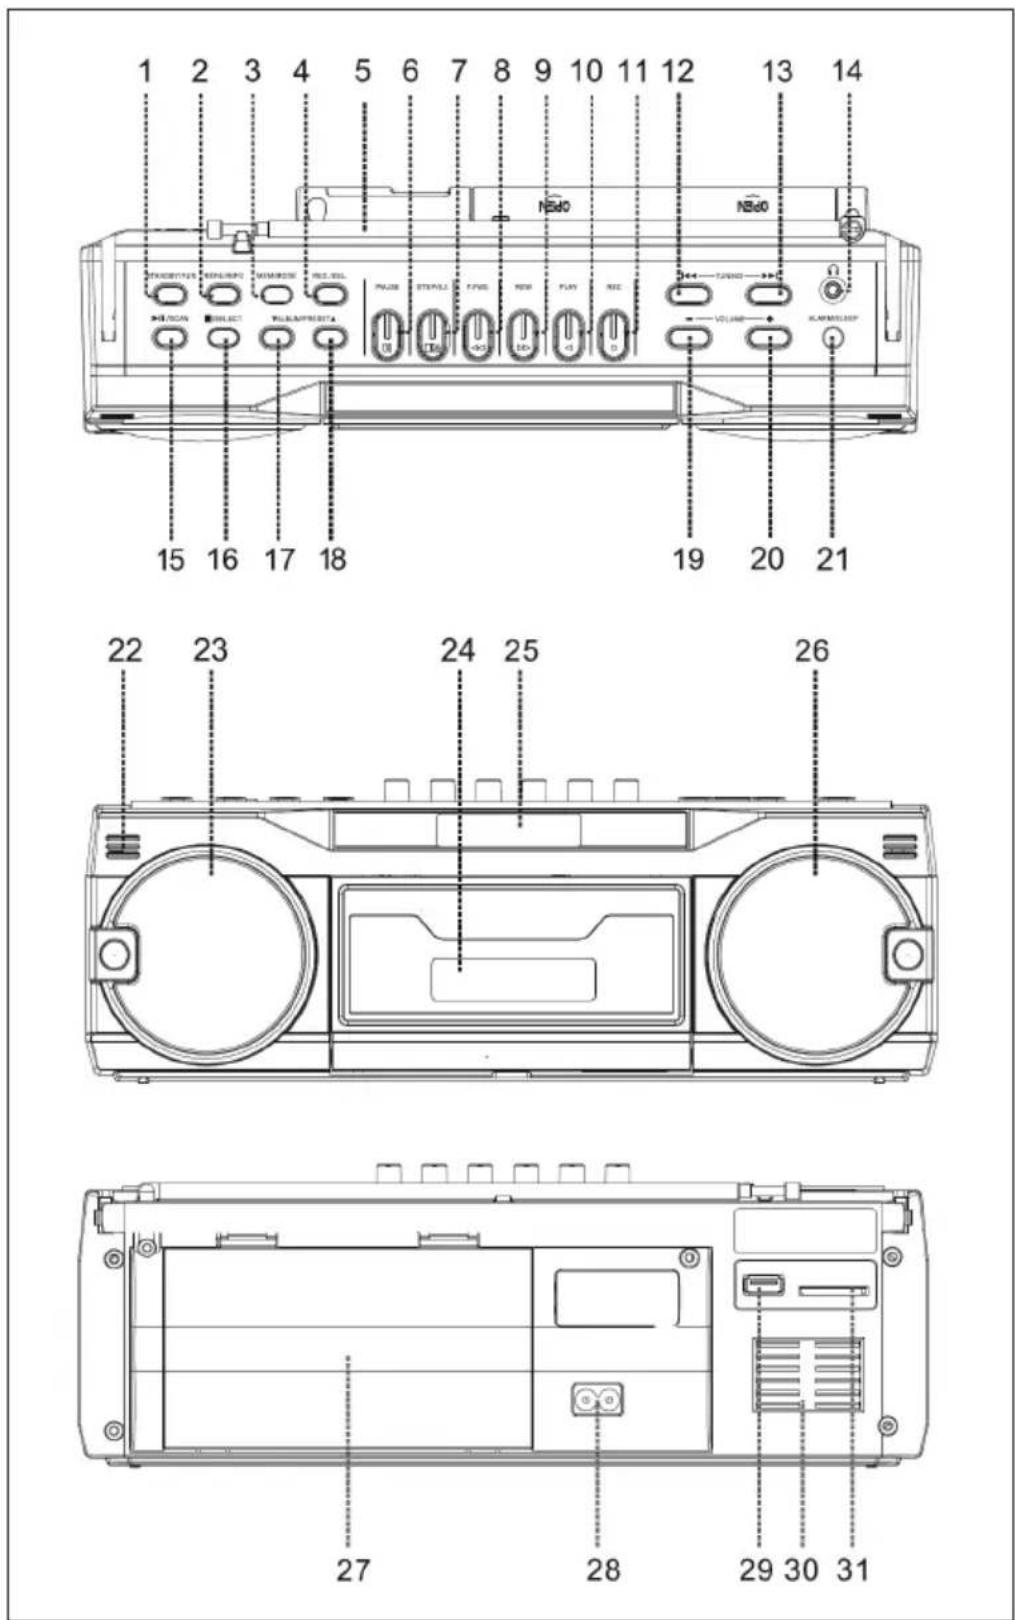
1 Standby / FUN (=function)
2 Menu / Info
3 Mem / Mode
4 Rec / del
5 Telescopic antenna
Cassette Recorder
6 Pause
7 Stop/eject
8 Fast forward
9 Rewind
10 Play
11 Record
12 Tuning/Skip down
13 Tuning/Skip up
14 Earphone jack
15 Play/pause/Scan
16 Stop/Select
17 Album / preset down
18 Album/Preset up
19 Volume -
20 Volume +
21 Alarm/Sleep
22 Built-in micro-
phone
23 Speaker
24 Cassette door
25 LCD display
26 Speaker
27 Battery compartment door
28 AC power cord jack
29 USB slot
30 Ventilation
31 SD/MMC Card
Slot
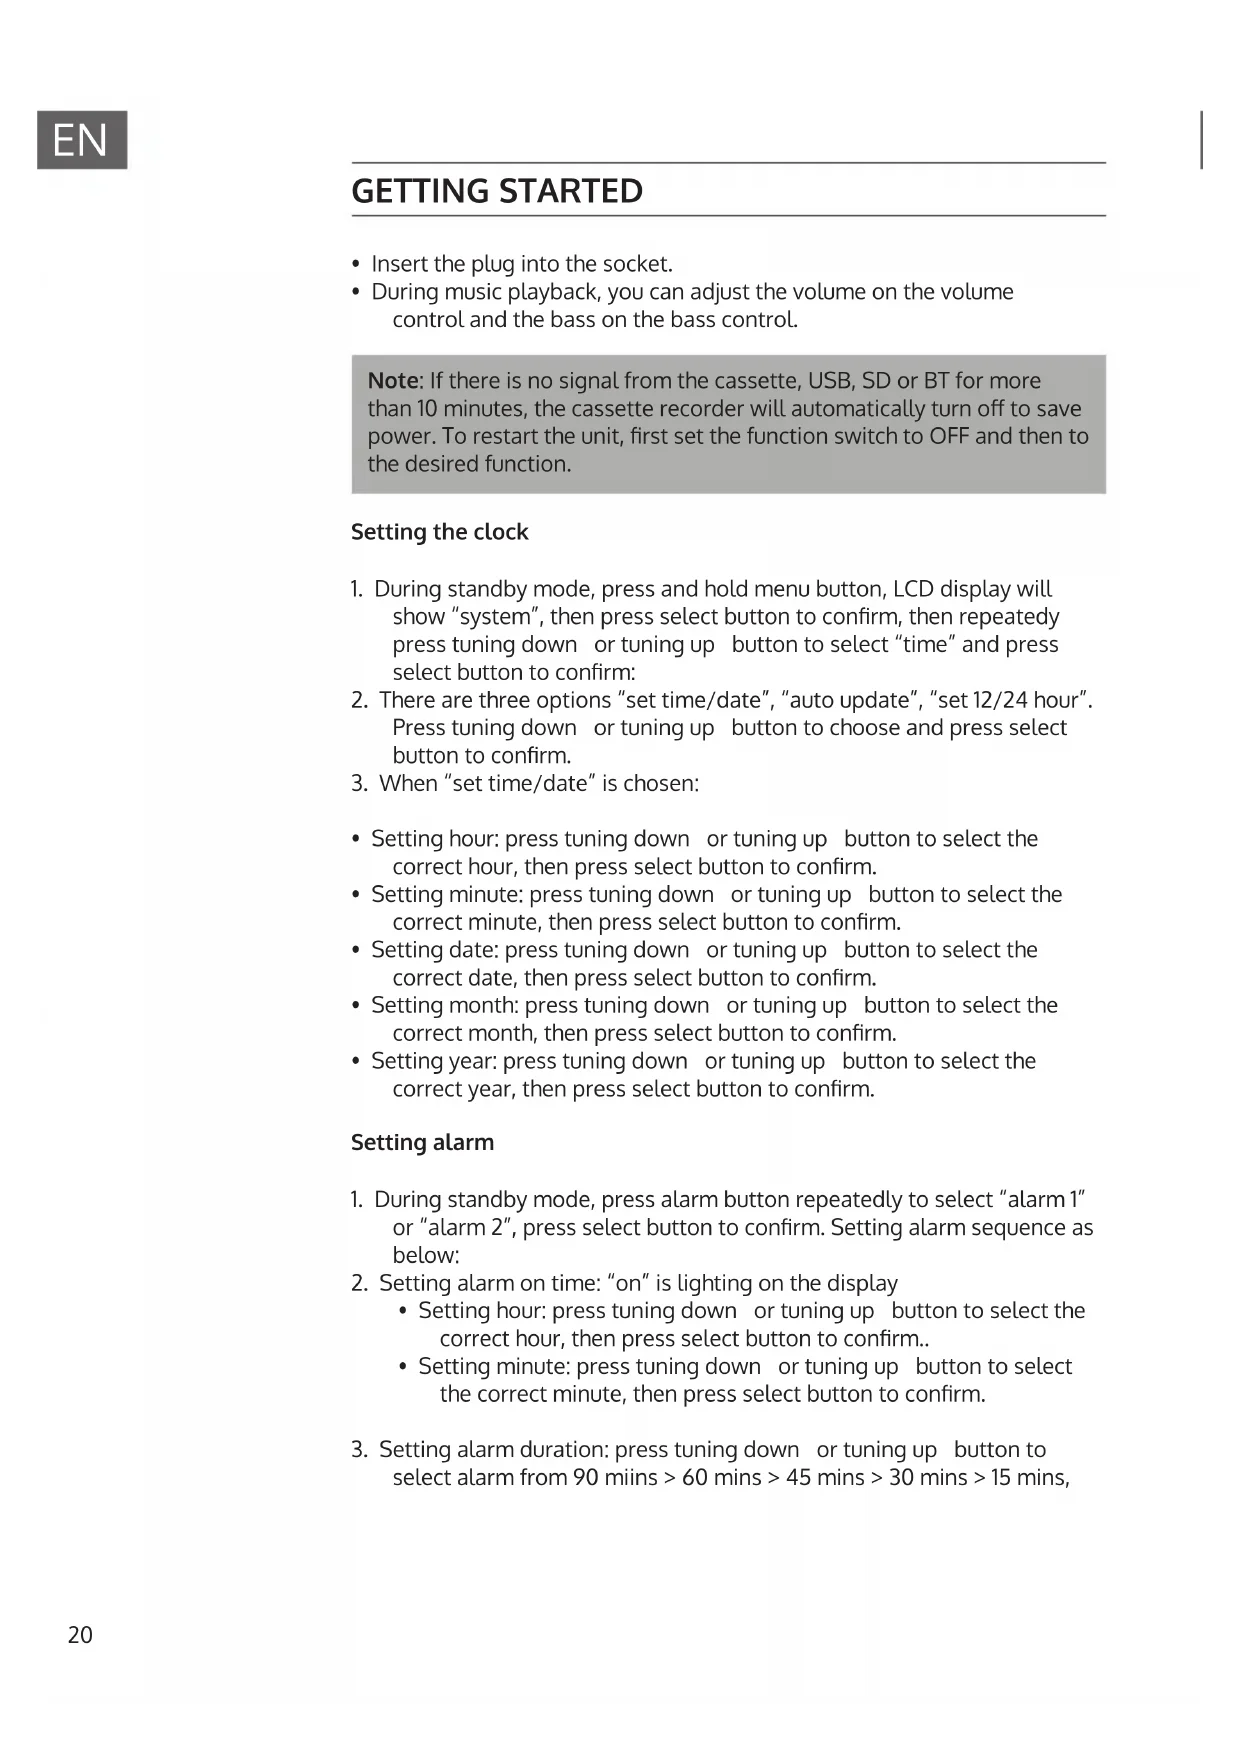
GETTING STARTED
- Insert the plug into the socket.
- During music playback, you can adjust the volume on the volume control and the bass on the bass control.
Note: If there is no signal from the cassette, USB, SD or BT for more than 10 minutes, the cassette recorder will automatically turn off to save power. To restart the unit, first set the function switch to OFF and then to the desired function.
Setting the clock
- During standby mode, press and hold menu button, LCD display will show "system", then press select button to confirm, then repeatedly press tuning down or tuning up button to select "time" and press select button to confirm:
- There are three options "set time/date", "auto update", "set 12/24 hour". Press tuning down or tuning up button to choose and press select button to confirm.
- When "set time/date" is chosen:
- Setting hour: press tuning down or tuning up button to select the correct hour, then press select button to confirm.
- Setting minute: press tuning down or tuning up button to select the correct minute, then press select button to confirm.
- Setting date: press tuning down or tuning up button to select the correct date, then press select button to confirm.
- Setting month: press tuning down or tuning up button to select the correct month, then press select button to confirm.
- Setting year: press tuning down or tuning up button to select the correct year, then press select button to confirm.
Setting alarm
- During standby mode, press alarm button repeatedly to select "alarm 1" or "alarm 2", press select button to confirm. Setting alarm sequence as below:
- Setting alarm on time: "on" is lighting on the display
- Setting hour: press tuning down or tuning up button to select the correct hour, then press select button to confirm..
- Setting minute: press tuning down or tuning up button to select the correct minute, then press select button to confirm.
- Setting alarm duration: press tuning down or tuning up button to select alarm from 90 miins > 60 mins > 45 mins > 30 mins > 15 mins,
then press select button to confirm.
- Setting alarm source: press tuning down or tuning up button to select alarm source DAB > FM > USB > SD card, then press select button to confirm. If "DAB" or "FM" is selected for alarm source, then selected preset station if available.
- Setting alarm daily > once > weekends > weekdays, then press select button to confirm. Setting alarm "once" needs to set alarm date.
- Setting alarm volume: press tuning down or tuning up button to select alarm volume, then press select button to confirm.
- Then press tuning down or tuning up button to select "alarm on", alarm setting is saved, "clock" icon will stay on LCD display. If "alarm off" is selected, alarm setting will be cancelled.
- "Clock" icon is flashing when alarm is in active. Press alarm button, alarm will be off.
Timer function
-
When the unit is switched on, press sleep button repeatedly to choose the sleep time minutes from 15>30>45>60>90>off, then press select button to confirm.
-
Sleep time setting is stored when the "s" icon lights up on the display. Next to "s", there is a digits counting down to the sleep time.
-
When the sleep time minutes is over, unit will be switched to standby mode automatically.
LISTENING TO FM RADIO
FM radio tuning
- Press fun button repeatedly to select "FM" mode.
- Tune to the required station by pressing and holding tuning down or tuning up button for 1-2 seconds, and then release.
- The unit will start seeking automatically and stop when a radio station is found.
Manual preset FM radio stations
- When the desired radio station is found, press mode button, LCD display shows "preset store".
- Press tuning down or tuning up button to select the program number for storing the desired radio station.
- Press select button to confirm, LCD will show "stored".
- Repeat step 2 & 3 until all desired radio stations is being found and stored
- Press preset up or preset down to choose the preset radio stations.
- The number of stations can be found and stored is depended on the
reception of different area and countries.
Auto preset FM radio stations
- During FM radio mode, press the scan button, the unit will automatically scan the radio frequency. When the clear signal is found, it will automatically store the radio station, starting from program number 1 (p1).
- Auto scanning in process, LCD display is showing "auto-scanning". When it is completed, LCD shows "auto end"
- Press preset up or preset down to choose the preset radio stations.
- The number of stations can be found and stored is depended on the reception of different area and countries.
FM radio stations information
During FM radio mode, press the info button repeatedly, LCD will show the FM radio stations information (if available), including "radio text", "program type", "frequency", "stereo/mono", "time", "date".
FM radio stations menu
During FM radio mode, press and hold the menu button, then press tuning down or tuning up button repeatedly, LCD display will show:
Scan setting: press select button, then press tuning down or tuning up button repeatedly to select "all stations" and "strong stations only". Press select button to confirm. This is the setting for the sensitivity of auto-scanning. The selected option will show "*" at the right side of LCD.
Audio setting: press select button, then press tuning down or tuning up button repeatedly to select "stereo allowed" and "forced mono". Press select button to confirm. The selected option will show "* at the right side of LCD.
System: press select button, then press tuning down or tuning up button repeatedly to select below. Press select button to confirm. The selected option will show "*" at the right side of LCD.
- "Language" is the language select of the operation interface.
- "Factory reset" is the selection to back to the factory default setting
- "Sw version" for checking software version
- "Time" for setting time
- "Backlight" for setting backlight level
- On level: select from "high", "medium" and "low", then press select button to confirm.
- Dim level: select from "high", "medium" and "low", then press select button to confirm.
- Time out: select second from 10 > 20 > 30 > 45 > 60 > 90 > 120 > 180
FM radio encoding
- Press fun button repeatedly to select "FM" mode
- Insert memory device (only desired device USB drive, SD or mmc card)
- Press the REC button, it will take 3-5 seconds to read memory device. "Recording" will be available on the LCD display durnig encoding.
- To finish encoding, press REC button and LCD display will show "play recording". The recorded track will be played just after recording finished, then will show "end recording" and return to "FM" mode.
Hints for better reception
FM: the receiver has a built-in FM wire antenna hanging at the rear cabinet.
This wire should be totally unraveled and extended for best reception.
LISTENING TO DAB RADIO
- Press fun button repeatedly to select DAB mode, press scan button, unit will scan DAB stations automatically.
- Press info button repeatedly to check playing station data, including:
• DLS (display will show "playing" if no DLS)
- Signal strength
- Program type (display will show "no pty" if it is not provided)
- Ensemble name (station name)
• Frequency and channel (eg. 5a 174.928 mHz)
- Signal error
- Birate and audio status (eg. 192kbps / DAB+)
• Time (time from station)
• Date (date from station)
-
Press tuning down or tuning up button repeatedly, LCD display will show station name in short form. Press select button to confirm if desired DAB statio is found. If select button is not pressed, unit will automatically switch to the station after 3 seconds.
-
The number of stations can be found and stored is depended on the reception of different area and countries.
-
Preset DAB stations: press and hold MEMbutton, display will show "preset store", tuning down or tuning up button repeatedly to select the program number for storage, then press select button to confirm (display will show "empty" if the program number has not been stored yet), display will show "stored". Press preset up and preset down button to recall stored station.
DAB radio setting
During DAB radio mode, press and hold the menu button, LCD will show "full scan", then press tuning down or tuning up button repeatedly to select below:
Full scan: press select button to confirm, unit will automatically scan those available DAB stations.
Manual tune: press select button to confirm, then press tuning down or tuning up button to select DAB radio frequency manually, press select button again to confirm if desired frequency is found.
DRC: press select button to confirm, press tuning down or tuning up button repeatedly to select "off", "low" and "hgih", then press select button again to confirm. The selected option will show "* at the right side of LCD.
Prune: press select button to confirm, press tuning down or tuning up button repeatedly to select "yes" and "no", then press select button again to confirm. This is used to cancel all invalid stations after full scan.
TA: press select button to confirm. Press tuning down or tuning up button repeatedly to select "on" and "off", then press select button again to confirm.
System: press select button to confirm, then press tuning down or tuning up button repeatedly to select "language", "factory reset", "sw version", "time" and "backlight". Press select button to confirm. The selected option will show "*" at the right side of LCD.
- "Language" is the language select of the operation interface.
- "Factory reset" is the selection to back to the factory default setting
- "SW version" for checking software version
- "Time" for setting time
- "Backlight" for setting backlight level
- On level: select from "high", "medium" and "low", then press select button to confirm.
- Dim level: select from "high", "medium" and "low", then press select button to confirm.
- Time out: select second from 10 > 20 > 30 > 45 > 60 > 90 > 120 > 180
Hints for better reception: DAB : put out the telescopic antenna to enhance radio reception if necessary.
DAB radio encoding
- Press fun button repeatedly to select "DAB" mode
- Insert memory device (only desired device USB drive, SD or mmc card)
- Press the REC button, it will take 3-5 seconds to read memory device.
"Recording" will be available on the LCD display during encoding.
- To finish encoding, press REC button and LCD display will show "play recording". The recorded track will be played just after recording finished, then will show "end recording" and return to "DAB" mode.
Remark:-
- The recording speed is 1:1 and according to the actual playing time of FM or FM-ST radio
- The recording format is preset at – mp3 bit rate : 128 kbps
- During DAB radio encoding, radio frequency is fixed and cannot be tuned.
CASSETTE FUNCTIONS
Key functions
| Stop / Eject: Press this button to stop the cassette. Press the button again to open the cassette door. |
| Fast Forward: Press this button to fast forward. |
| Rewind: Press this button to fast rewind. |
| Playback: Press this button to play the cassette. |
| Pause: Press this button to stop playback temporarily. Press the button again to resume playback. |
| Recording: Press this button together with the Play button to start recording. You can record from Radio, BT, built-in microphone, USB and SD to cassette. |
Playing a Cassette
- Set the function switch to TAPE.
- Insert a cassette.
- Press the Play button on the tape deck to start playback.
- Use the Pause button to temporarily stop playback.
- To stop playback, press the Stop/Eject button.
Recording a Cassette
From Radio, BT, USB, SD:
- Set the function switch to the desired mode (Radio, BT, USB, SD).
- Press the [Play & Record] buttons simultaneously. The signal from the desired mode is now recorded to tape.
From the built-in microphone:
- Set the function switch to TAPE.
- Press the [Play & Record] buttons simultaneously. Everything you speak into the microphone will now be recorded on tape.
USB/SD FUNCTIONS
The device can detect and read MP3 and WMA files located on a USB/SD memory.
Note: Be sure to insert the stick or card correctly into the unit to avoid damage.
Set the function switch to MUSIC and then insert the USB/SD memory into the appropriate slot.
- USB Playback: The LED light flashes red.
• SD Playback: The LED light flashes green.
General key functions
Play/Pause: Press this button to temporarily stop playback. Press the button again to resume playback.
Previous/Next Track: During playback, press either button to skip to the previous or next track. Press and hold to fast forward/rewind.
Recording
The unit can record from radio, cassette and built-in microphone to USB/SD. First insert the USB/SD memory into the corresponding slot.
From Radio:
- Set the function switch to RADIO.
- Press the RECORD button. During recording, the LED flashes rapidly.
- To stop recording, press the RECORD button again.
- Set the function switch to MUSIC to listen to the recording.
From Cassette:
- Set the function switch to TAPE.
- Press the RECORD button. During recording, the LED will blink rapidly.
- To stop recording, press the RECORD button again.
- Set the function switch to MUSIC to listen to the recording.
From Built-in microphone:
- Set the function switch to MUSIC.
- Press RECORD and speak into the microphone. During recording, the LED flashes rapidly.
- If you want to stop recording, press RECORD again.
- The unit will play back the recording automatically.
Note: During USB recording, the LED light flashes red. During SD recording, the LED light flashes green.
USB/SD mode button
- As long as a USB/SD memory is connected, press the USB/SD Mode button to switch between USB, SD and BT playback.
- Press and hold the button during USB/SD playback to quickly play a single track. The LED light blinks rapidly.
Note: If you connect the system to an MP3 player via the USB slot, some MP3 players may not play back via the USB slot due to differences in the MP3 encoding format. This is not a system malfunction. There are many USB device manufacturers and encoding formats. Therefore, there is no guarantee that all brands of USB/SD devices will support it.
Removing USB/SD Memory
To remove the USB/SD memory, first set the function switch to RADIO or TAPE, then remove the USB/SD memory from the corresponding slot.
BT FUNCTION
- This unit has BT function, which can connect and play music from your BT device (such as mobile phone).
- Press fun button repeatedly to select "BT" on LCD display, then "not connected" will be flashing, it means the unit is ready for connection with your BT device.
- Switch on the BT function of your BT device, and select "DUKE-DAB" BT equipment for connection.
- After your BT device is connected with the unit, "connected" will stay on LCD display, then start to playback your device.
To play music through headphones, connect headphones with a 3.5 mm jack plug to the headphone jack.
HINTS ON DISPOSAL

natural_image
Symbol of a trash bin with crossed lines indicating no waste or restriction, and a solid black rectangle below (no text or labels)According to the European waste regulation 2012/19/EU this symbol on the product or on its packaging indicates that this product may not be treated as household waste. Instead it should be taken to the appropriate collection point for the recycling of electrical and electronic equipment. By ensuring this product is disposed of correctly, you will help prevent potential negative consequences for the environment and human health, which could otherwise be caused by inappropriate waste handling of this product. For more detailed information about recycling of this product, please contact your local council or your household waste disposal service.
DECLARATION OF CONFORMITY

Producer:
Chal-Tec GmbH, Wallstraße 16, 10179 Berlin, Germany.
This product is conform to the following European Directives:
2011/65/EU (RoHS)
2014/53/EU (RED)
The complete declaration of conformity of the manufacturer can be found at the following link: https://use.berlin/10035374
Cher client,
INHALT
Fiche technique 31
natural_image
Symbol of a trash bin with crossed lines indicating no waste or discharge, and a solid black rectangle below (no text or labels)DÉCLARATION DE CONFORMITÉ

Fabricant :
Chal-Tec GmbH, Wallstraße 16, 10179 Berlin, Allemagne.
INHALT
Datos técnicos 45
natural_image
Symbol of a trash bin with crossed lines indicating no waste, and a solid black rectangle below (no text or labels)INHALT
Dati tecnici 59
natural_image
Symbol of a trash bin with crossed lines indicating no waste or discharge, and a solid black rectangle below (no text or labels)natural_image
Abstract white logo design on dark background, resembling stylized letter 'S' or wave form (no text or symbols)


- INHALT
- FM radio stations menu
- SAFETY INSTRUCTIONS
- PRODUCT OVERVIEW
- Cassette Recorder
- GETTING STARTED
- Setting the clock
- Setting alarm
- Timer function
- LISTENING TO FM RADIO
- FM radio tuning
- Manual preset FM radio stations
- Auto preset FM radio stations
- FM radio stations information
- FM radio encoding
- Hints for better reception
- LISTENING TO DAB RADIO
- DAB radio setting
- DAB radio encoding
- Remark:-
- CASSETTE FUNCTIONS
- Key functions
- Playing a Cassette
- Recording a Cassette
- USB/SD FUNCTIONS
- General key functions
- Recording
- From Radio:
- From Cassette:
- From Built-in microphone:
- USB/SD mode button
- Removing USB/SD Memory
- BT FUNCTION
- HINTS ON DISPOSAL
- DECLARATION OF CONFORMITY
- Producer:
- DÉCLARATION DE CONFORMITÉ
Brand : Auna
Model : Duke DAB
Category : Radio