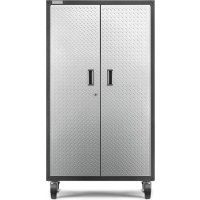
GARS774XEG - Wardrobe Gladiator - Free user manual and instructions
Find the device manual for free GARS774XEG Gladiator in PDF.
Download the instructions for your Wardrobe in PDF format for free! Find your manual GARS774XEG - Gladiator and take your electronic device back in hand. On this page are published all the documents necessary for the use of your device. GARS774XEG by Gladiator.
USER MANUAL GARS774XEG Gladiator
SHELVING Assembly Instructions
- SÉCURITÉ DU RAYONNAGE EN ACIER p. 12
- PIÈCES p. 12
- INSTRUCTIONS D’ASSEMBLAGE p. 14
- Spécifications d’utilisation du rayonnage p. 14
- Déballage p. 14
- Assemblage cadres latéraux/rails de support p. 14
- Assemblage des profilés de renfort p. 14
- Terminer l’assemblage p. 15
- GARANTIE p. 15
RACK SHELVING SAFETY
This storage rack unit must be placed on a level surface. NOTES: ■ Do not stand or climb on the unit.■ Do not overload. ■ Evenly distribute the weight on each shelf, and keep the heaviest loads on the bottom shelf. You can be killed or seriously injured if you don't immediately You can be killed or seriously injured if you don'tfollow All safety messages will tell you what the potential hazard is, tell you how to reduce the chance of injury, and tell you what can happen if the instructions are not followed. Your safety and the safety of others are very important. We have provided many important safety messages in this manual and on your appliance. Always read and obey all safety messages.This is the safety alert symbol.This symbol alerts you to potential hazards that can kill or hurt you and others.All safety messages will follow the safety alert symbol and either the word “DANGER” or “WARNING.”These words mean:follow instructions.instructions. DANGER WARNING3 PARTS
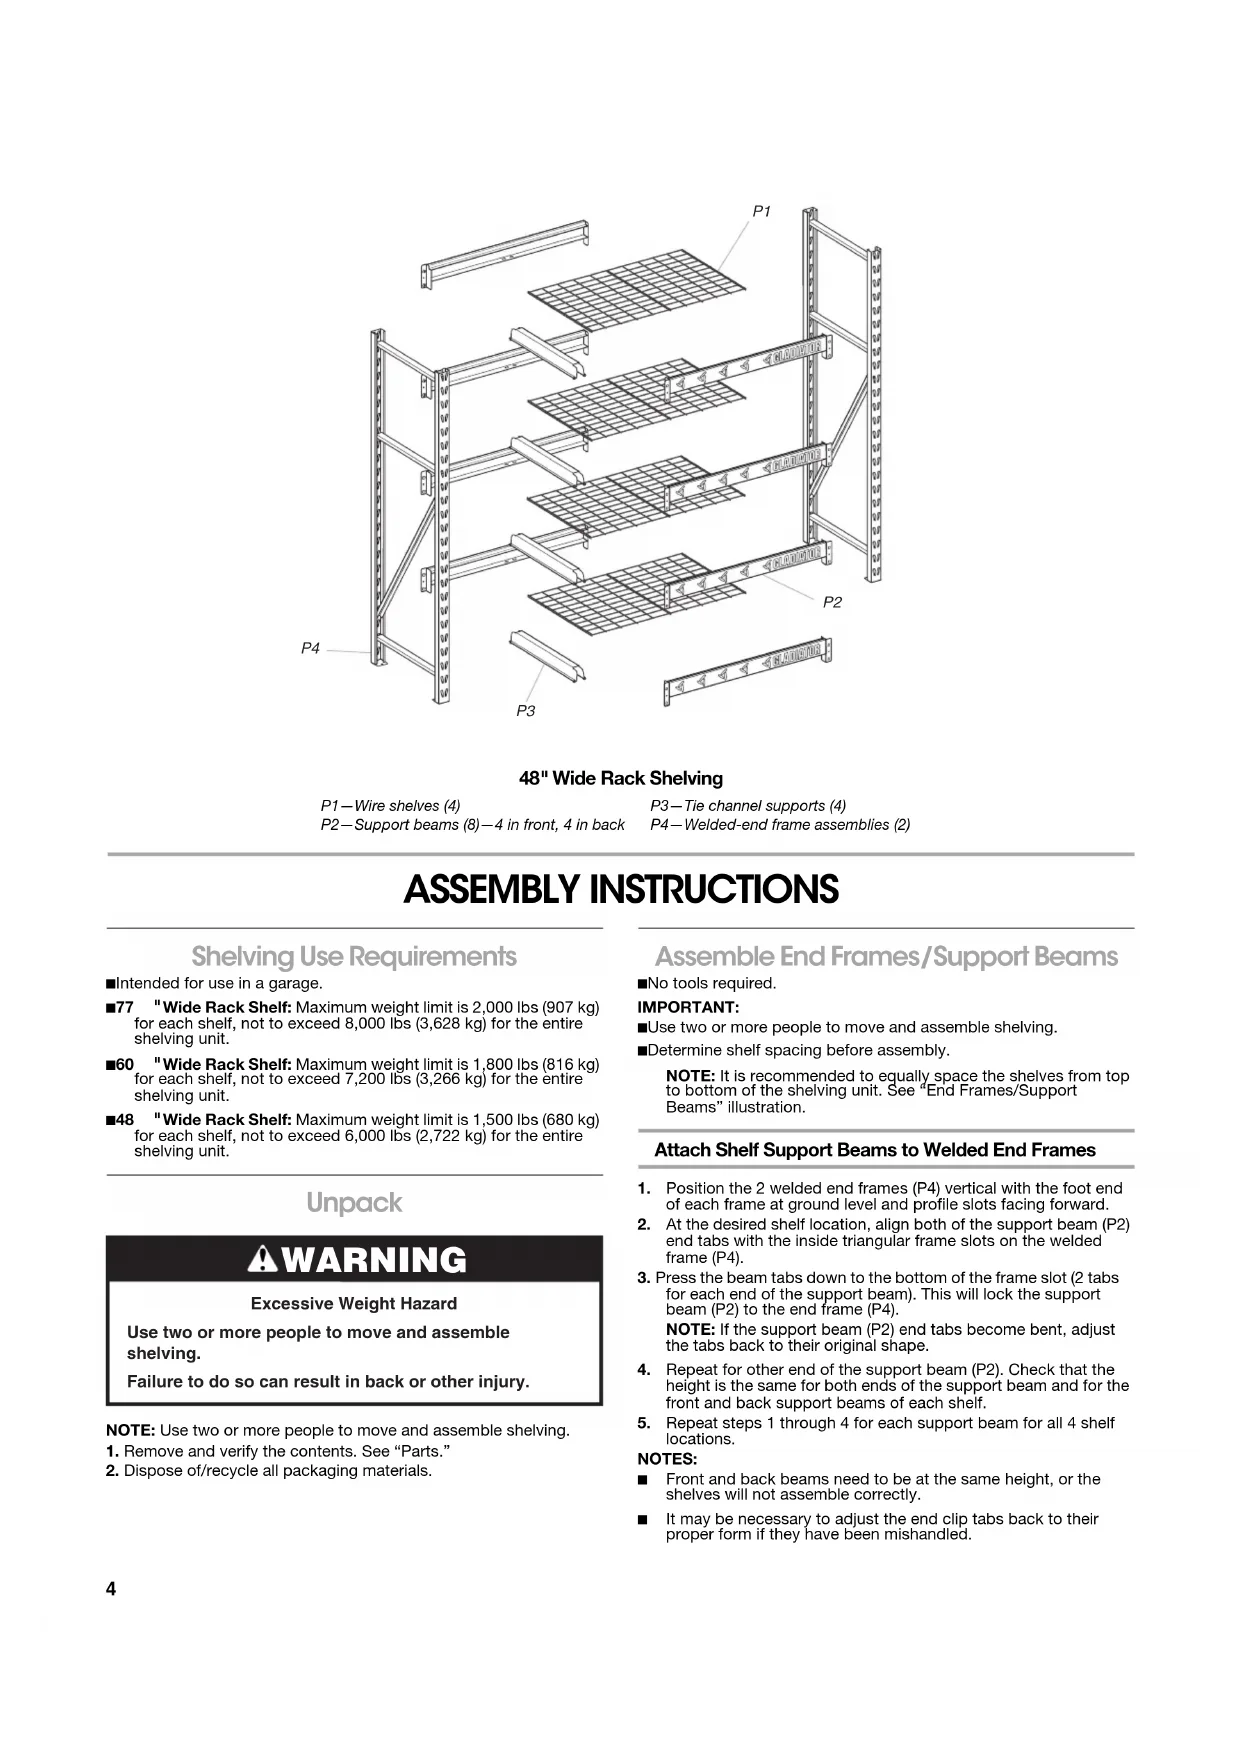
Wide Rack Shelving ASSEMBLY INSTRUCTIONS Shelving Use Requirements ■ Intended for use in a garage.■ 77" Wide Rack Shelf: Maximum weight limit is 2,000 lbs (907 kg) for each shelf, not to exceed 8,000 lbs (3,628 kg) for the entire shelving unit.■ 60" Wide Rack Shelf: Maximum weight limit is 1,800 lbs (816 kg) for each shelf, not to exceed 7,200 lbs (3,266 kg) for the entire shelving unit.■ 48" Wide Rack Shelf: Maximum weight limit is 1,500 lbs (680 kg) for each shelf, not to exceed 6,000 lbs (2,722 kg) for the entire shelving unit. Unpack NOTE: Use two or more people to move and assemble shelving.1. Remove and verify the contents. See “Parts.”2. Dispose of/recycle all packaging materials. Assemble End Frames/Support Beams ■ No tools required.IMPORTANT: ■ Use two or more people to move and assemble shelving. ■ Determine shelf spacing before assembly.NOTE: It is recommended to equally space the shelves from top to bottom of the shelving unit. See “End Frames/Support Beams” illustration. Attach Shelf Support Beams to Welded End Frames
1. Position the 2 welded end frames (P4) vertical with the foot end
of each frame at ground level and profile slots facing forward.
2. At the desired shelf location, align both of the support beam (P2)
end tabs with the inside triangular frame slots on the welded frame (P4).3. Press the beam tabs down to the bottom of the frame slot (2 tabs for each end of the support beam). This will lock the support beam (P2) to the end frame (P4).NOTE: If the support beam (P2) end tabs become bent, adjust the tabs back to their original shape.
4. Repeat for other end of the support beam (P2). Check that the
height is the same for both ends of the support beam and for the front and back support beams of each shelf.
5. Repeat steps 1 through 4 for each support beam for all 4 shelf
locations.NOTES: ■ Front and back beams need to be at the same height, or the shelves will not assemble correctly. ■ It may be necessary to adjust the end clip tabs back to their proper form if they have been mishandled.P1—Wire shelves (4) P2—Support beams (8)—4 in front, 4 in back P3—Tie channel supports (4)P4—Welded-end frame assemblies (2)
WARNING Excessive Weight Hazard Use two or more people to move and assemble shelving. Failure to do so can result in back or other injury.5 Support Beam Orientation End Frames/Support Beams Assemble Tie Channel Supports This shelving unit is equipped with 1, 2, or 3 tie channel supports (P3) for each shelf. NOTES: ■ The tie channel supports (P3) provide load support and structural integrity. ■ All tie channel supports (P3) must be assembled as shown in “Tie Channel Support Assembly” illustration.
1. Rotate the tie channel support (P3) into the front and back
support beam (P2), aligning the tie channel rivet heads with the matching large diameter hole of the support beam keyhole.
2. To insert the rivet head on the other side of the tie channel
support (P3), apply pressure to both sides of the tie channel support (P3), squeezing the sides toward each other. Insert the rivet head into the matching larger hole of the support beam keyhole on the front and back support beam (P2). Release pressure. Tie Channel Rotated into Front and Back Support Beam Rivet Inserted into Keyhole
3. Check that the rivets are held behind the smaller hole of the
support beam keyholes.
4. Repeat steps 1 and 2 for each tie channel support.
Tie Channel Support Assembly Complete Assembly
1. Verify that all beams and tie channel supports are properly
assembled and tightened.
2. Place wire shelf (P1) on top of the tie channel supports (P3) for
3. Move shelving unit to final location.
P2—Support beams (8) P4—Welded end frames (2) A. P3—Tie channel support B. Rivet head C. Support beam lower flange with keyhole6 GLADIATOR
For the life of the product, when the Gladiator
GarageWorks brand of Whirlpool Corporation or Whirlpool Canada, LP (hereafter “Gladiator”) product is used and maintained according to the instructions attached to or furnished with the product, Gladiator, at its sole option, will replace the defective product or provide factory specified replacement parts to correct defects in materials or workmanship. YOUR SOLE AND EXCLUSIVE REMEDY UNDER THIS LIMITED WARRANTY SHALL BE PRODUCT OR PART REPLACEMENT AS PROVIDED HEREIN. This limited warranty is valid only in the United States or Canada and applies only when the product is used in the country in which it was purchased. This limited warranty is effective from the date of the original consumer purchase. Proof of original purchase date is required to obtain replacement parts or product under this limited warranty.
ITEMS EXCLUDED FROM WARRANTY
This limited warranty does not cover:
1. Service calls to correct the installation of any Gladiator
products or to instruct you on how to use or install them. 2. Damage resulting from improper handling or shipping of products, or products damaged by accident, misuse, abuse, fire, flood, improper installation, acts of God, neglect, corrosion, modification or mishandling.
3. Shipping or freight fees to deliver replacement products or to return defective products.
4. Repairs or replacement when your product is used in other than normal, single-family household use, such as a commercial environment or handled in any way inconsistent with the installation instructions included with the product. 5. Cosmetic damage including scratches, dings, dents or cracks that do not affect the structural or functional capability of the product.
6. Replacement parts or product for Gladiator
products used or installed outside the United States or Canada.
7. Travel or transportation expenses for customers who reside in remote areas.
8. Any labor costs during the limited warranty period.
9. Damage resulting from improper loading beyond the specified maximum weight capacity outlined in the assembly instructions provided with the product, including overloading of hooks, baskets, shelves, cabinets, and other Gladiator
accessories used with the product.
10. Surfaces damaged due to chemical interaction resulting in corrosion of paint or metal.
The cost of repair or replacement under these excluded circumstances shall be borne by the customer.
DISCLAIMER OF IMPLIED WARRANTIES
IMPLIED WARRANTIES, INCLUDING ANY IMPLIED WARRANTY OF MERCHANTABILITY OR IMPLIED WARRANTY OF FITNESS FOR A PARTICULAR PURPOSE, ARE LIMITED TO ONE YEAR OR THE SHORTEST PERIOD ALLOWED BY LAW. Some states and provinces do not allow limitations on the duration of implied warranties of merchantability or fitness, so this limitation may not apply to you. This warranty gives you specific legal rights, and you also may have other rights that vary from state to state or province to province. LIMITATION OF REMEDIES; EXCLUSION OF INCIDENTAL AND CONSEQUENTIAL DAMAGES YOUR SOLE AND EXCLUSIVE REMEDY UNDER THIS LIMITED WARRANTY SHALL BE PRODUCT REPAIR OR REPLACEMENT AT OUR DESCRETION AS PROVIDED HEREIN. GLADIATOR SHALL NOT BE RESPONSIBLE FOR INCIDENTAL OR CONSEQUENTIAL DAMAGES. Some states and provinces do not allow the exclusion or limitation of incidental or consequential damages, so these limitations may not apply to you. This warranty gives you specific legal rights, and you also may have other rights that vary from state to state or province to province. Outside the 50 United States and Canada, this warranty does not apply. Contact your authorized Gladiator
GarageWorks dealer to determine if another warranty applies. If you need service, call the Gladiator
GarageWorks Customer eXperience Center, 1-866-342-4089 (toll-free), from anywhere in the U.S.A. In Canada, contact your Whirlpool Canada LP designated service company or call 1-800-807-6777. In the United States, Gladiator
GarageWorks means Whirlpool Corporation, Benton Harbor, Michigan 49022. In Canada, Gladiator
GarageWorks means Whirlpool Canada LP, Mississauga, ON L5N 3A7. 1/13 Keep this book and your sales slip together for future reference. You must provide proof of purchase or installation date for in-warranty service. Write down the following information about your Gladiator
product to better help you obtain assistance or service if you ever need it. You will need to know your complete model number and serial number. You can find this information on the model and serial label located on the back of the product. Dealer name____________________________________________________ Address ________________________________________________________ Phone number__________________________________________________ Model number __________________________________________________ Serial number __________________________________________________ Purchase date __________________________________________________7