Capricciosa - Pizza oven Klarstein - Free user manual and instructions
Find the device manual for free Capricciosa Klarstein in PDF.
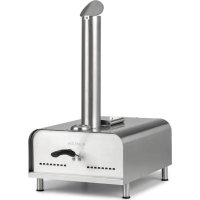
| Product type | Electric pizza oven |
| Brand | Klarstein |
| Model | Capricciosa |
| Article number | 10032597 |
| Power supply | 220-240 V ~ 50/60 Hz |
| Power | 1200-1500 W |
| Included accessories | 6 spatulas, dough cutter |
| Main parts | Lid, cooking plate, base, indicator light |
| Typical cooking time | 5 to 7 minutes |
| Recommended preheating | 15 minutes before use |
| Cleaning | Do not immerse the base; rinse lid and plate with warm water; do not put in dishwasher |
| Safety | Supervision required; do not use by children under 8 without supervision; do not touch hot surfaces |
| Intended use | Household only, indoors |
| Recycling | Do not dispose of with household waste; take to collection point |
| Manufacturer | Chal-Tec GmbH, Berlin, Germany |
Frequently Asked Questions - Capricciosa Klarstein
User questions about Capricciosa Klarstein
0 question about this device. Answer the ones you know or ask your own.
Ask a new question about this device
Download the instructions for your Pizza oven in PDF format for free! Find your manual Capricciosa - Klarstein and take your electronic device back in hand. On this page are published all the documents necessary for the use of your device. Capricciosa by Klarstein.
USER MANUAL Capricciosa Klarstein
Unit 6 Riverside Business Centre
Brighton Road
Shoreham-by-Sea
BN436RE
United Kingdom
Dear Customer,
Congratulations on purchasing this device. Please read the following instructions carefully and follow them to prevent possible damages. We assume no liability for damage caused by disregard of the instructions and improper use. Scan the QR code to get access to the latest user manual and more product information.

CONTENTS
Safety Instructions 10
Parts Description 11
Commissioning and Operation 12
Recepe 13
Cleaning and Care 14
Disposal Considerations 14
Manufacturer & Importer (UK) 14
TECHNICAL DATA
| Item number 10032597 | |
| Power supply 220-240 V ~ 50/60 Hz | |
| Power 1200-1500 W |
SAFETY INSTRUCTIONS
Before use make sure to read all of the below instructions in order to avoid injury or damage, and to get the best results from the appliance. Make sure to keep this manual in a safe place. If you give or transfer this appliance to someone else make sure to also include this manual.
In case of damage caused by user failing to follow the instructions in this manual the warranty will be void. The manufacturer/importer accepts no liability for damages caused by failure to follow the manual, a negligent use or use not in accordance with the requirements of this manual.
- This appliance can be used by children aged from 8 years and above and persons with reduced physical, sensory or mental capabilities or lack of experience and knowledge if they have been given supervision or instruction concerning use of the appliance in a safe way and understand the hazards involved.
Children shall not play with the appliance. - Cleaning and user maintenance shall not be made by children unless they are older than 8 years and supervised.
- Keep the appliance and its cord out of reach of children less than 8 years.
- If the supply cord is damaged, it must be replaced by the manufacturer, its service agent or similarly qualified persons in order to avoid a hazard.
- Regarding the instructions for cleaning the surfaces which come in contact with food, please refer to the paragraph "CLEANING AND CARE" of the manual.
- This appliance is not intended to be operated by means of an external timer or separate remote-control system.
- Before inserting the plug into the mains socket, please check that the voltage and frequency comply with the specifications on the rating label.
Always plug the appliance into an earthed plug socket. - Disconnect the mains plug from the socket when the appliance is not in use and before cleaning.
- Ensure that the mains cable is not hung over sharp edges and keep it away from hot objects and open flames.
- Do not immerse the appliance or the mains plug in water or other liquids. There is danger to life due to electric shock!
- To remove the plug from the plug socket, pull the plug. Do not pull the power cord.
- Do not touch the appliance if it falls into water. Remove the plug from its socket, and send it to an authorized service centre for repair.
- Do not plug or unplug the appliance from the electrical outlet with a wet hand.
- Never attempt to open the housing of the appliance, or to repair the appliance yourself. This could cause electric shock.
- Never leave the appliance unattended during use.
- This appliance is neither suitable for commercial use nor for use in the open air.
- Do not use the appliance for other than intended use.
- Do not wind the cord around the appliance and do not bend it.
- Place the appliance on a stable, level surface from which it cannot fall off.
- If you use products with non-stick surfaces, please make sure no birds are in the same room and that the room can be completely closed off and well-ventilated.
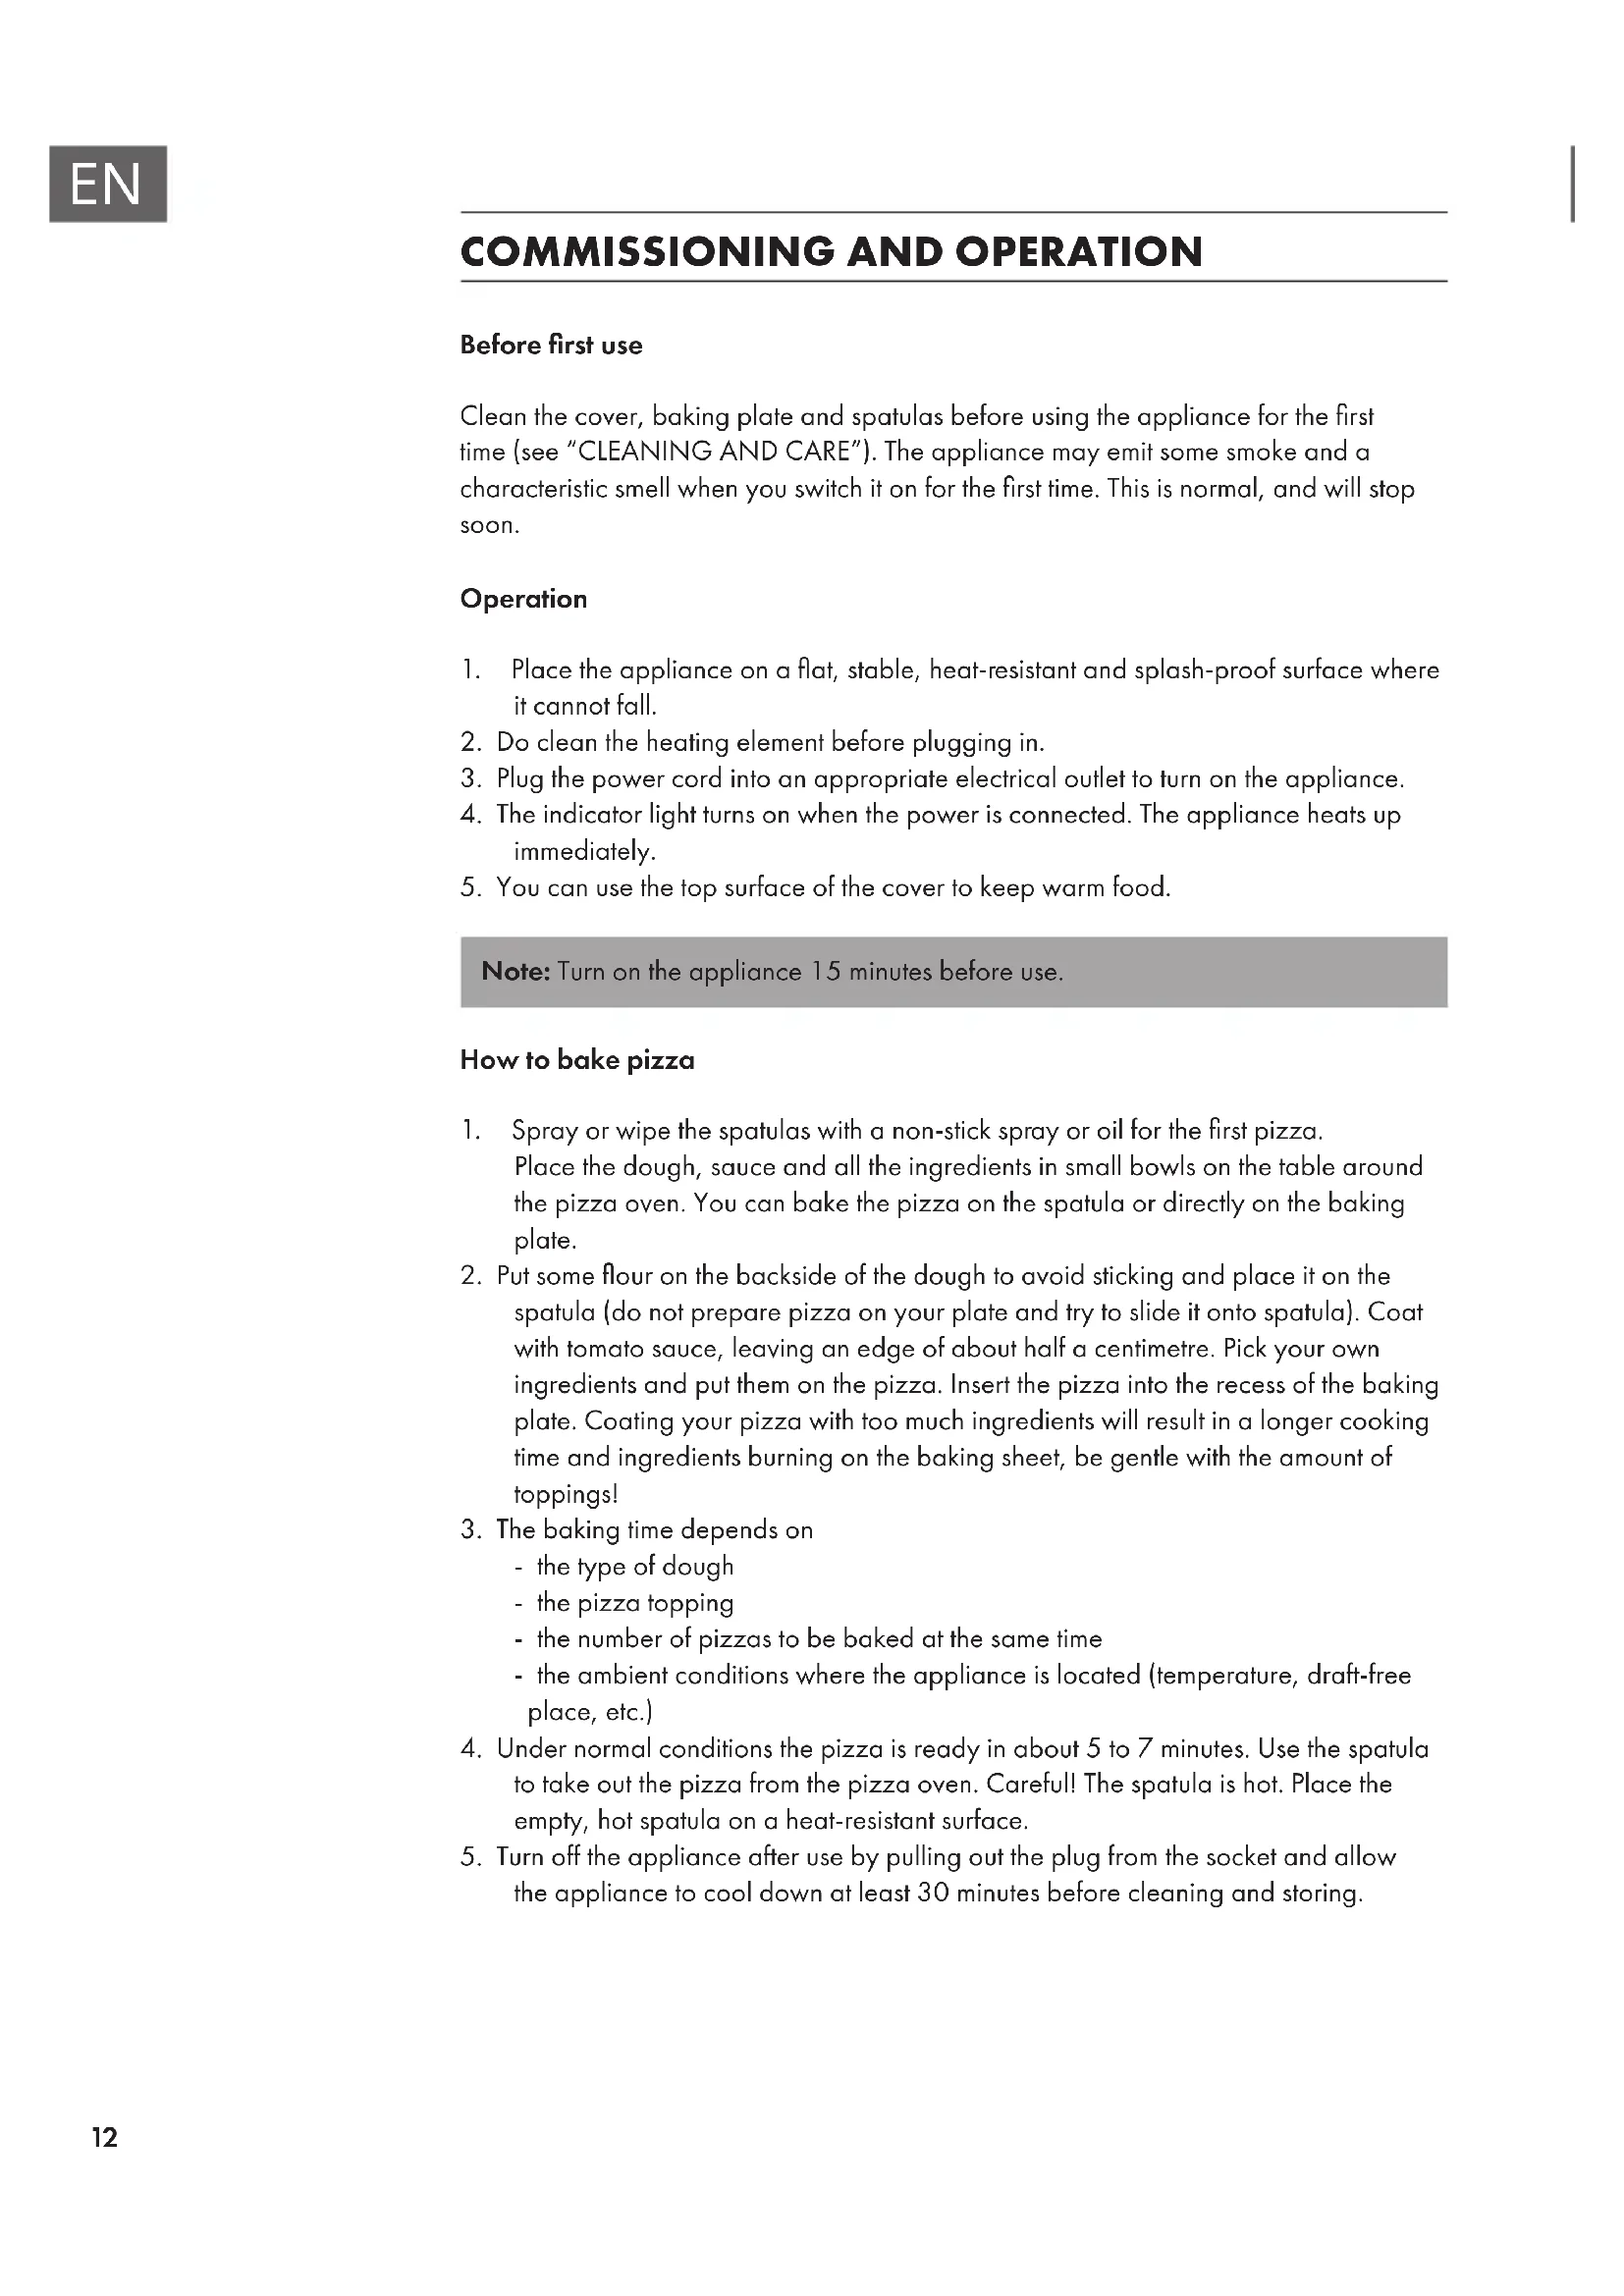
1 Cover
2 Baking plate
3 Base
4 Indicator light
5 Spatula (6 pieces)
6 Dough cutter
COMMISSIONING AND OPERATION
Before first use
Clean the cover, baking plate and spatulas before using the appliance for the first time (see "CLEANING AND CARE"). The appliance may emit some smoke and a characteristic smell when you switch it on for the first time. This is normal, and will stop soon.
Operation
- Place the appliance on a flat, stable, heat-resistant and splash-proof surface where it cannot fall.
- Do clean the heating element before plugging in.
- Plug the power cord into an appropriate electrical outlet to turn on the appliance.
- The indicator light turns on when the power is connected. The appliance heats up immediately.
- You can use the top surface of the cover to keep warm food.
Note: Turn on the appliance 15 minutes before use.
How to bake pizza
- Spray or wipe the spatulas with a non-stick spray or oil for the first pizza. Place the dough, sauce and all the ingredients in small bowls on the table around the pizza oven. You can bake the pizza on the spatula or directly on the baking plate.
- Put some flour on the backside of the dough to avoid sticking and place it on the spatula (do not prepare pizza on your plate and try to slide it onto spatula). Coat with tomato sauce, leaving an edge of about half a centimetre. Pick your own ingredients and put them on the pizza. Insert the pizza into the recess of the baking plate. Coating your pizza with too much ingredients will result in a longer cooking time and ingredients burning on the baking sheet, be gentle with the amount of toppings!
-
The baking time depends on
-
the type of dough
- the pizza topping
- the number of pizzas to be baked at the same time
-
the ambient conditions where the appliance is located (temperature, draft-free place, etc.)
-
Under normal conditions the pizza is ready in about 5 to 7 minutes. Use the spatula to take out the pizza from the pizza oven. Careful! The spatula is hot. Place the empty, hot spatula on a heat-resistant surface.
- Turn off the appliance after use by pulling out the plug from the socket and allow the appliance to cool down at least 30 minutes before cleaning and storing.
RECEPE
Ingredients
Pizza dough (for 4 people)
500 gr. white flour
1 tsp salt
4 tsp olive oil
20 gr. fresh yeast or 1 satchel of dried yeast
250 ml lukewarm water
Preparation
Combine the flour, salt and oil in a bowl. If using fresh yeast, dissolve it in the water and mix until smooth, then combine with the flour. If using dried yeast, mix it directly with the flour and then add the oil and water. When all the ingredients are mixed, knead the dough well by hand and continually pull and stretch it. You could also use a mixer with dough hooks or a food processor. Form the dough into a ball and leave covered for 45 minutes in a warm place until it has risen to double the size. Sprinkle the dough with a bit of flour; roll it out to 3mm thickness. Turn the dough around a few times and sprinkle with flour in order to prevent sticking; form pizzas with the cutting ring. Put the rounds on a plate with grease-proof paper and lots of white flour between them to avoid sticking. While the dough is rising you can prepare the remaining ingredients.
Tomato sauce
1 can peeled tomatoes
1 small can tomato paste
Salt, pepper, oregano
2 tbsp. olive oil
2 pressed cloves of garlic
Finely chop the peeled tomatoes and mix them with the other ingredients.
Possible toppings
Mozzarella, grated parmesan cheese, grated Gouda cheese, basil, arugula, olives, mushrooms, anchovies, capers, pineapple, artichoke hearts, bell peppers, onions, tomatoes, ham, salami, smoked salmon, shrimp, canned tuna.
CLEANING AND CARE
- Allow the hot appliance to cool down at least 30 minutes before cleaning and storing.
- Rinse the cover, baking plate and pizza spatulas with warm water and a soft cloth. Don't put any parts in the dishwasher.
- Never submerge the base in water. The surface can be cleaned by using a moist cloth.
- Always use the original box to store the appliance and its accessories to avoid damage.
DISPOSAL CONSIDERATIONS
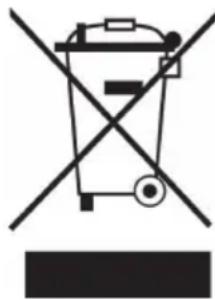
If there is a legal regulation for the disposal of electrical and electronic devices in your country, this symbol on the product or on the packaging indicates that this product must not be disposed of with household waste. Instead, it must be taken to a collection point for the recycling of electrical and electronic equipment. By disposing of it in accordance with the rules, you are protecting the environment and the health of your fellow human beings from negative consequences. For information about the recycling and disposal of this product, please contact your local authority or your household waste disposal service.
MANUFACTURER & IMPORTER (UK)
Manufacturer:
Chal-Tec GmbH, Wallstrasse 16, 10179 Berlin, Germany.
Importer for Great Britain:
Chal-Tec UK limited
Unit 6 Riverside Business Centre
Brighton Road
Shoreham-by-Sea
BN436RE
United Kingdom
Estimado cliente,
Unit 6 Riverside Business Centre
Brighton Road
Shoreham-by-Sea
BN436RE
United Kingdom
Chere cliente, cher client,
Unit 6 Riverside Business Centre
Brighton Road
Shoreham-by-Sea
BN436RE
United Kingdom
Gentile cliente,
PRODUTTORE IMPORTATORE (UK)
Produtto:
Chal-Tec GmbH, Wallstraße 16, 10179 Berlin, Germania.
Unit 6 Riverside Business Centre
Brighton Road
Shoreham-by-Sea
BN436RE
United Kingdom
Geachte klant,
INSTRUCTIES VOOR AFVOER

Unit 6 Riverside Business Centre
Brighton Road
Shoreham-by-Sea
BN436RE
United Kingdom
Kara kund,
Enhet 6 Riverside Business Centre
Brighton Road
Shoreham-by-Sea
BN436RE
Storbritannien


KLARSTEIN