Sound Maître - Radio Auna - Free user manual and instructions
Find the device manual for free Sound Maître Auna in PDF.
User questions about Sound Maître Auna
0 question about this device. Answer the ones you know or ask your own.
Ask a new question about this device
Download the instructions for your Radio in PDF format for free! Find your manual Sound Maître - Auna and take your electronic device back in hand. On this page are published all the documents necessary for the use of your device. Sound Maître by Auna.
USER MANUAL Sound Maître Auna
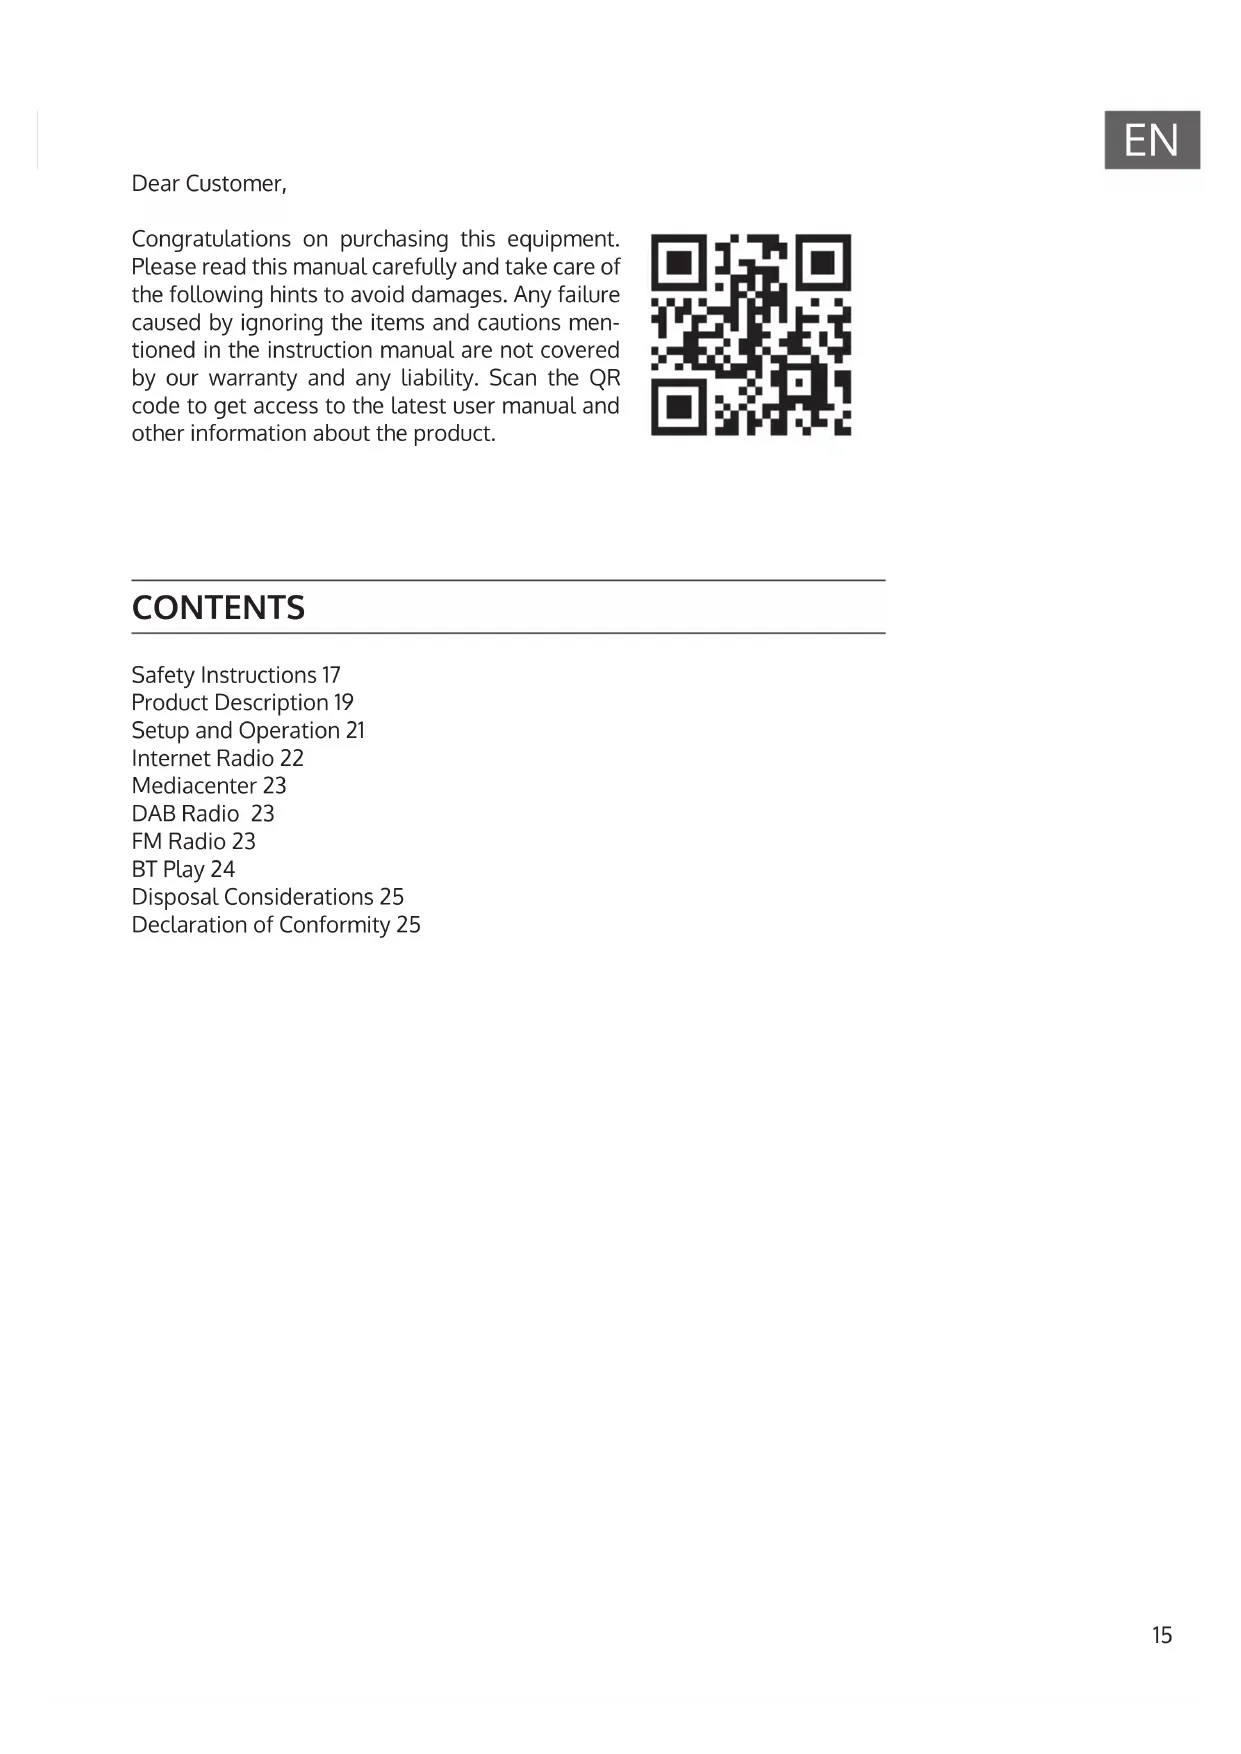
Congratulations on purchasing this equipment. Please read this manual carefully and take care of the following hints to avoid damages. Any failure caused by ignoring the items and cautions mentioned in the instruction manual are not covered by our warranty and any liability. Scan the QR code to get access to the latest user manual and other information about the product.

CONTENTS
Safety Instructions 17
Product Description 19
Setup and Operation 21
Internet Radio 22
Mediacenter 23
DAB Radio 23
FM Radio 23
BT Play 24
Disposal Considerations 25
Declaration of Conformity 25
EXPLANATION OF THE WARNING SYMBOLS
| CAUTION RISK OF ELECTRIC SHOCK DO NOT OPEN | A |
| CAUTION: TO REDUCE THE RISK OF ELECTRIC SHOCK AND SERIOUS PERSONAL INJURY, DO NOT REMOVE ANY COVER. NO USER-SERVICABLE PARTS INSIDE. REFER SERVICING TO QUALIFIED SERVICE PERSONNEL ONLY. | |
| WARNING. TO REDUCE THE RISK OF FIRE OR ELECTRICAL SHOCK, DO NOT EXPOSE THIS PRODUCT TO WATER, RAIN OR MOISTURE. | |
| 3 | Triangle with lightning plus explanation as follows: DANGEROUS VOLTAGE: The lightning flash with arrowhead symbol within the equilateral triangle is intended to alert the user to the presence of uninsulated dangerous voltage within the product's enclosure that may be of sufficient magnitude to constitute a risk of electric shock to persons. |
| 4 | Triangle with exclamation point plus explanation as follows: ATTENTION: The exclamation point within the equilateral triangle is intended to alert the user to the presence of important operating and maintenance (servicing) instructions in the literature accompanying this product. |
SAFETY INSTRUCTIONS
Read these instructions. All uses guidelines must be read before using the device. Keep the instructions for future use.
- Children over the age of 8 and persons with reduced physical, sensory or mental capabilities or those with a lack of experience and knowledge may only use the device if they are instructed on how to do so by a person responsible for their safety, or if they are supervised and understand the hazards associated with the use of the device.
- Attention, use and security guidelines must be respected.
- The device must not be used near water or be put in contact with moisture.
- Make sure has no liquid is spilled on device and device openings.
- Move device carefully, avoid shocks.
- Do not block the breakdown of the device outputs.
- Do not place the device near from a heat source (e.g. radiator). Do not expose it to the Sun.
- Plug the device as indicate on this information form.
- This device has a connection with overload protection. Replacement should only be done bt an experienced technician or the device manufacturer.
- For cleaning the device, please follow the recommendations of the notice.
- The power cord should be unplugged when not using for a long period of time.
Device shall be repaired by a qualified person when:
a. the power cord is damaged,
b. objects have fallen into the apparatus or a liquid has been spilled into device,
c. device was exposes to the rain,
d. device does not work correctly without notable exterior change,
e. device is broken.
- The user shall not try to maintain device beyond that which is described in this information form.
- The apparatus shall not be exposed to dripping or splashing and that no objects filled with liquids, such as vases, shall be placed on apparatus.
-
To be completely disconnect the power input, the mains plug of apparatus shall be disconnected from the mains, as the disconnect devices is the mains plug of apparatus.
-
The mains plug of apparatus should not be obstructed OR should be easily accessed during intended use.
- Battery shall not be exposed to excessive heat such as sunshine, fire or the like.
- Excessive sound pressure form earphones and headphones can cause hearing loss.
- Minimum distance (8 cm) around the apparatus for sufficient ventilations.
- The ventilation should not be impeded by covering the ventilation opening with items such as newspaper, table-cloths, curtain etc.
- No naked flame sources such as lighted candles should be placed on the apparatus.
- Attention should be drawn to the environmental aspects of battery disposal.
- The use of apparatus in moderate climates.
- Danger of explosion if battery is incorrectly replaced.
- Replace only with the same or equivalent type.
- The main plug shall remain readily operable.
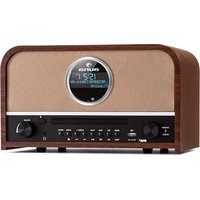
PRODUCT DESCRIPTION
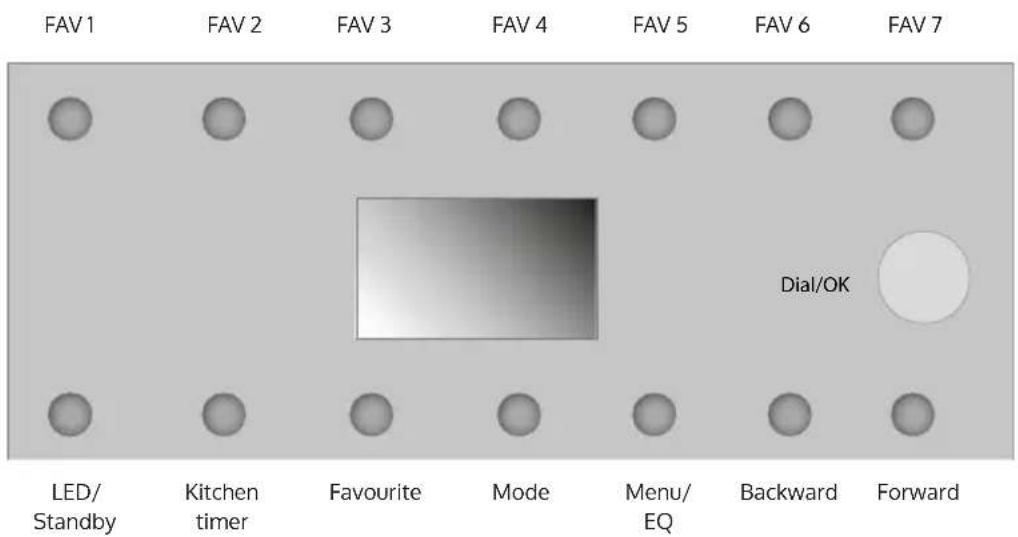
Control panel
| Button Function | |
| 1 LED / Standby Press and hold this key to switch the unit on and off. Press this key briefly to activate/deactivate the backlight. | |
| 2 Kitchen timer Press to display Kitchen timer 1 and 2. | |
| 3 Favourite In the network/DAB/FM radio mode, short press to pop up the save station list. When playing a radio station, long press to save the station. | |
| 4 Mode Press to go to main menu page. | |
| 5 Menu/EQ Press to enter main menu with My Favourite highlighted. During playback, long press to pop up EQ menu. | |
| 6 Backward Press to return to previous menu. Press to go to the item on the left (configuration). | |
| 7 Forward Press this key to open the Favorites list. Press and hold this key to add a radio station. | |
| 8 Dial / OK Turn to adjust volume during playback; turn to navigate in a list. OK – short-press to select the highlighted item; short-press to stop playing a station; when playing FM radio, long-press to enter manual tuning mode. (Forward/Backward) | |
Setup network
1. WPS button
[ [Configuration] > [Network] > [Wi-Fi Network] > [Add/Remove AP] > [Add AP (WPS button)] ]
- Press and hold the "OK" button to select.
- Invoke the WPS function of the target Wi-Fi router (see the user manual of the target Wi-Fi router).
- The radio and the Wi-Fi router will exchange security information to complete the association process. If the configuration is not done within one minute, the radio will exit the process and the user is required to repeat the process again.
- Always place the radio within 2 meters of the Wi-Fi router to ensure smooth and fast association.
2. Wi-Fi password entry
- When the radio is used the first time (or moved to a new premise), after the "Boot up and connect to www.skytune.net" message, a prompt to configure network will pop up. Choose [Yes] by turning the rotary knob and press "Select". Select [Add/Remove AP], then [Add AP (Scan)] to scan the air for available Wi-Fi AP. A list of APs with reasonable signal strength will be shown.
- Choose the target Wi-Fi AP and enter the password (if any).
- To enter the password: Dial to choose the character for the first character position, press "OK" to enter and move to the next character position and dial to choose thenext character and press "OK" again. Repeat until the last character has been entered and then long press "OK" to confirm the password entry.
- If the password entry is correct, the radio will show "Associating" and then "Associaton complete". The radio will automatically connect to the AP just associated. The radio will then obtain the necessary network parameter for Interent connection (with DHCP).
INTERNET RADIO
The radio is powered by Skytune Internet radio portal, allowing users to listen to over 22,000 free-to-listen radio stations across the globe.
Skytune provides Internet radio lists according to Skytune:
- Skytune ranked Most Popular stations (Globally or according to country/state in question) Skytune
- Local: the Skytune server will send the list of radio for the country the radio is in according to the IP address of the Internet radio). For example, a radio with IP address from France will be presented with the France stations when Local is pressed.
- Region: Continent/Country/State
- Station Genre: Talks-based or Music-based and under each are a large number of genres for the users to choose.
Favourite stations
- The radio provides meomory storage of up to 198 for users' convenience. 99 stations can be stored in the user's favourite list and 99 stations of the station history.
- When playing a station, Long press of "Favourite" button will add the station at the end of the favourite list.
- The stored stations can be recalled by the press of Favourite, from which users can choose to Lsiten with easeThe stored stations can be recalled by the press of Favourite, from which users can choose to Lsiten with ease.
- When the Favourite list is on, press "Forward" to pop up the edit window to [Delete], [Move up], [Move down] the position of the highlighted station.
- Seven (7) presets
- When playing radio, long press to store the radio as one of the 7 presets (Internet radio, DAB or FM radio). Press to play the stored preset station.
MEDIA CENTER
UpnP/DLNA streaming of music in the local network
You can stream music from the Networked device which supports UPnP function to the radio to play. For instance, most of the latest computer laptop supports UPnP, and you can stream music from Windows Media Player application on the computer and listen on your radio.
Note: Please make sure your computer or NAS is on the same Wi-Fi network as the Radio and that it is configured to allow access by the Internet radio before you start using this function and that you have shared music files ready.
In the Main menu, choose [Media Center] > [UpnP]. The music files will be presented according to the media server design. Invoke the playback of the highlighted file with Select.
DAB RADIO
- 5.1 Go to [Configuration] > [DAB Setup] > [DAB Preset Scan] to scan for available DAB radio broadcasts.
- 5.2 The scanned DAB radio list will be available when DAB Radio is invoked.
FM RADIO
- Go to [Configuration] > [FM Setup] > [FM Preset Scan] to scan for available FM radio broadcasts.
- The scanned FM radio list will be available when FM Radio is invoked. 6.3 In case of necessity, user can manually tune the reception frequency in 100 Khz steps. When FM radio is playing, long press of Select until "TUNING" appears in the lower right hand corner. Press "Forward" and "Backward" to increase/decrease the reception frequency in 100 kHz steps.
BT PLAY
Scroll to BT in Main Menu and press "OK" to select. The display will show:
BT
XXX-YYYY-aaaa
Where XXX-YYYY is the module name, aaaa is the last 4 characters of the BT MAC address.
Launch the Bluetooth function of the smart device and scan for available devices for pairing. Pair with BT speaker with the above details. Once paired, the "Not connected" message will be replaced with the BT ID of the smart device..
HINTS ON DISPOSAL

According to the European waste regulation 2012/19/EU this symbol on the product or on its packaging indicates that this product may not be treated as household waste. Instead it should be taken to the appropriate collection point for the recycling of electrical and electronic equipment. By ensuring this product is disposed of correctly, you will help prevent potential negative consequences for the environment and human health, which could otherwise be caused by inappropriate waste handling of this product. For more detailed information about recycling of this product, please contact your local council or your household waste disposal service.
DECLARATION OF CONFORMITY

Producer:
Chal-Tec GmbH, Wallstraße 16, 10179 Berlin, Germany.
The complete declaration of conformity of the manufacturer can be found at the following link: https://use.berlin/10035312
Chere cliente, cher client,
Not connected (non collegato)
INSTRUCTIES VOOR AFVOER